dale hollow fishing guides

Dale Hollow Fishing Guides: A Comprehensive Overview (Updated 02/07/2026)

Dale Hollow Lake offers exceptional recreational opportunities‚ including world-class fishing. Utilizing a knowledgeable guide maximizes your angling success and enjoyment on this pristine waterway.

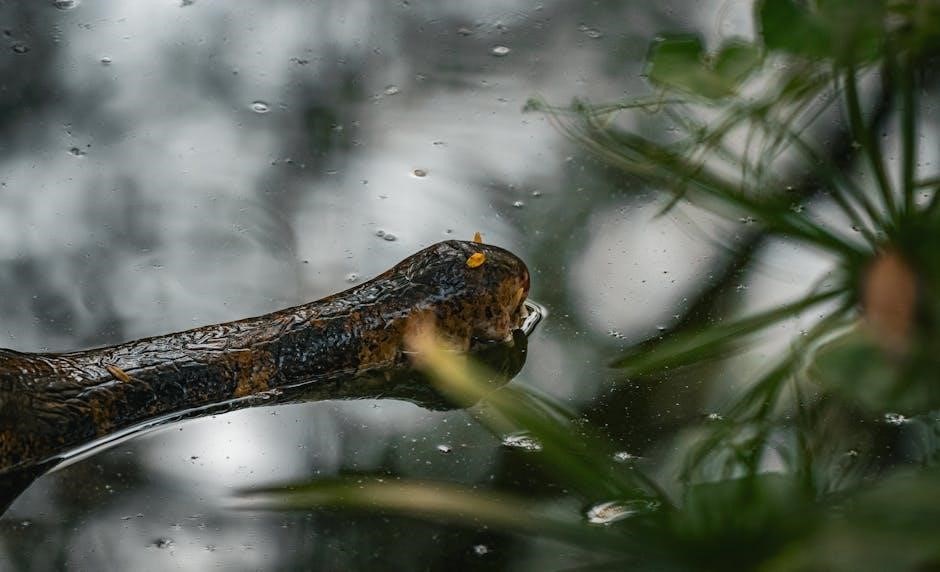
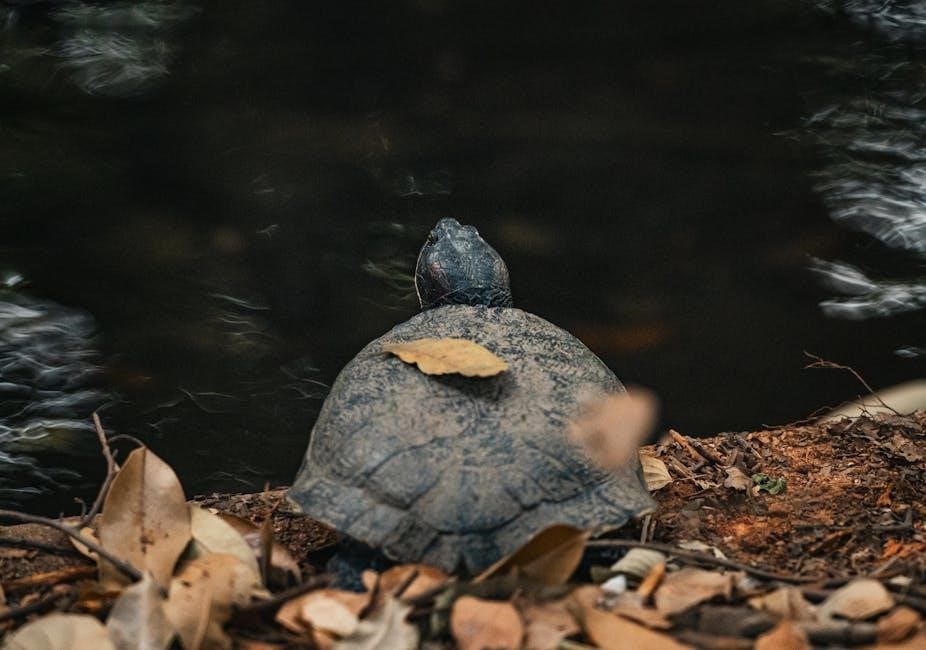
Dale Hollow Lake‚ straddling Tennessee and Kentucky‚ is renowned for its clear waters and stunning natural beauty. This 27‚700-acre reservoir‚ created by the U.S. Army Corps of Engineers‚ is a haven for outdoor enthusiasts‚ particularly anglers. The lake’s pristine condition supports a thriving ecosystem‚ making it a premier destination for recreational activities like boating‚ skiing‚ and‚ most notably‚ fishing.

Its appeal extends beyond aesthetics; Dale Hollow consistently ranks among the top bass fishing lakes in the nation. The lake’s depth and structure create ideal habitats for various fish species‚ attracting anglers seeking both quantity and quality. Whether you’re a seasoned pro or a beginner‚ Dale Hollow offers an unforgettable fishing experience.

Why Hire a Dale Hollow Fishing Guide?

Navigating Dale Hollow Lake and consistently locating fish requires local expertise. A skilled guide possesses intimate knowledge of the lake’s structure‚ seasonal patterns‚ and productive fishing spots. They eliminate guesswork‚ maximizing your time on the water and increasing your chances of a successful catch.

Guides provide valuable insights into effective techniques and lure selection‚ tailored to current conditions. They also handle all the logistics – boat‚ equipment‚ and safety – allowing you to focus solely on fishing. Hiring a guide is an investment in an enhanced and rewarding angling adventure.

Top Fish Species in Dale Hollow Lake

Dale Hollow Lake is renowned for its diverse and thriving fish populations‚ attracting anglers seeking a variety of species. The lake is particularly famous for its exceptional Smallmouth Bass‚ often reaching impressive sizes. Largemouth Bass also provide thrilling sport‚ inhabiting the coves and weed beds.

For a unique challenge‚ Lake Trout thrive in the deeper‚ cooler waters. Crappie and various sunfish species offer excellent opportunities for family-friendly fishing. A guide can expertly target each species‚ utilizing specialized techniques and knowledge of their habitats.

Smallmouth Bass Fishing

Dale Hollow Lake is a premier destination for Smallmouth Bass‚ celebrated for their aggressive strikes and fighting spirit. Guides specialize in locating these fish‚ focusing on rocky structures‚ ledges‚ and submerged timber. Effective techniques include jig fishing‚ tube baits‚ and crankbaits‚ adapting to seasonal patterns.

Experienced guides understand the nuances of Smallmouth behavior‚ adjusting strategies based on water clarity and depth. They can pinpoint prime locations‚ maximizing your chances of landing a trophy bass in this beautiful lake environment.

Largemouth Bass Fishing

Dale Hollow Lake also boasts a healthy population of Largemouth Bass‚ often found in coves‚ creek arms‚ and around aquatic vegetation. Guides employ various techniques to target these fish‚ including flipping and pitching into cover‚ utilizing spinnerbaits‚ and employing topwater lures during optimal conditions.

Understanding Largemouth Bass behavior is key‚ and guides leverage their expertise to locate productive areas. They adapt to seasonal changes‚ focusing on spawning areas in the spring and deeper structure during warmer months‚ ensuring a rewarding fishing experience.

Lake Trout Fishing

Dale Hollow Lake is renowned for its exceptional Lake Trout fishery‚ a cold-water species thriving in the lake’s depths. Experienced guides specialize in locating these trout using advanced sonar technology and downrigging techniques. Targeting specific temperature zones and oxygen levels is crucial for success.

Guides understand Lake Trout migratory patterns and preferred habitats‚ adjusting strategies based on seasonal changes. They often employ a variety of lures and baits‚ ensuring anglers have the best chance of landing these prized fish‚ creating a memorable angling adventure.

Choosing the Right Dale Hollow Fishing Guide

Selecting a Dale Hollow fishing guide requires careful consideration. Prioritize guides with extensive local knowledge and proven experience on the lake. Verify their credentials‚ ensuring they possess necessary licenses and certifications.

Evaluate the types of fishing trips offered – do they align with your target species and preferred techniques? Inquire about the guide’s boat and equipment‚ confirming it’s well-maintained and suitable for your needs; Reading online reviews and seeking recommendations from fellow anglers can provide valuable insights.

Guide Experience and Qualifications

Experienced Dale Hollow guides possess an intimate understanding of the lake’s structure‚ seasonal fish patterns‚ and effective techniques. Look for guides with years of dedicated experience specifically on Dale Hollow‚ not just general fishing backgrounds.

Confirm they hold valid Tennessee or Kentucky fishing licenses‚ and potentially a US Coast Guard captain’s license demonstrating boating safety knowledge. Don’t hesitate to ask about their success rates targeting your desired species and their familiarity with various fishing methods. A qualified guide enhances both safety and angling outcomes.

Types of Fishing Trips Offered

Dale Hollow guides typically offer diverse trip options catering to different angler preferences and skill levels. Common choices include half-day and full-day bass fishing excursions‚ focusing on smallmouth or largemouth. Specialized lake trout trips‚ often employing downrigging techniques‚ are also popular.

Some guides provide multi-species outings‚ targeting a combination of fish. Consider whether you prefer a shared charter (more affordable) or a private charter (exclusive access). Inquire about customized trips tailored to specific techniques or target fish.

Guide Boat and Equipment

Dale Hollow fishing guides invest in reliable and well-maintained boats equipped for serious angling. Expect modern bass boats or multi-species vessels featuring advanced fish finders‚ GPS navigation‚ and comfortable seating. Most guides supply all necessary fishing equipment‚ including rods‚ reels‚ tackle‚ and safety gear.

However‚ confirming what’s included is crucial. Some may require you to bring specific lures or personal items. High-quality life jackets are standard. Ensure the boat is appropriately sized for the number of anglers and offers ample space for casting and maneuvering.

Popular Fishing Techniques Used by Guides

Dale Hollow guides expertly employ diverse techniques to target various species. Jig fishing is highly effective for bass‚ particularly around structure. Downrigging proves successful for landing deep-dwelling lake trout‚ precisely presenting lures at desired depths. Crankbaiting covers water quickly‚ attracting aggressive strikes from bass and other predators.

Guides adapt strategies based on seasonal patterns and fish behavior. They also utilize techniques like Carolina rigging‚ drop-shotting‚ and topwater fishing‚ ensuring anglers experience consistent action and maximize their catch potential.

Jig Fishing for Bass

Jig fishing is a cornerstone technique for Dale Hollow bass‚ favored by experienced guides. They skillfully present jigs near submerged timber‚ rocky points‚ and ledges where bass ambush prey. Varying jig weights and colors is crucial‚ matching forage and water clarity.

Guides often employ dragging‚ hopping‚ or swimming jig presentations. Trailer selection—craws‚ chunks‚ or grubs—further enhances attraction. Mastering jig fishing unlocks consistent bass action‚ especially for smallmouth and largemouth‚ throughout the seasons.

Downrigging for Lake Trout

Downrigging is a highly effective method employed by Dale Hollow guides targeting the lake’s impressive lake trout population. This technique allows precise lure presentation at specific depths‚ crucial in the lake’s thermoclines. Guides utilize downrigger weights and planer boards to spread lines and cover more water.

Typically‚ they troll spoons or crankbaits‚ adjusting speed and depth based on trout location. Understanding the lake’s structure and trout behavior is key. Downrigging consistently delivers strikes‚ especially during summer months when trout seek cooler‚ deeper waters.

Crankbaiting Strategies

Dale Hollow fishing guides frequently employ crankbaiting as a productive bass fishing technique. Selecting the right crankbait – size‚ color‚ and diving depth – is paramount‚ matching the forage base and water clarity. Guides often target submerged structure like timber and rock piles‚ slowly retrieving the lure to entice strikes.

Varying retrieve speeds and incorporating pauses can trigger reaction bites. They’ll also adjust based on seasonal patterns; shallower running baits in spring‚ deeper divers in summer. Effective crankbaiting requires understanding bass location and presentation.

Best Times to Fish Dale Hollow Lake

Dale Hollow fishing guides consistently recommend spring and fall for peak fishing activity. Spring offers pre-spawn and spawning bass‚ while fall brings aggressive feeding before winter. Summer fishing focuses on deeper‚ cooler water‚ requiring specialized techniques.

Optimal weather includes stable conditions with partly cloudy skies. Avoid fishing immediately after significant weather fronts. Guides monitor water temperature closely‚ as it dictates bass behavior. Early morning and late evening often yield the best results‚ capitalizing on lower light levels.

Seasonal Fishing Patterns

Dale Hollow fishing guides observe distinct patterns throughout the year. Spring initiates pre-spawn staging‚ followed by shallow water spawning bass. Summer pushes fish deeper seeking cooler temperatures‚ favoring downrigging and Carolina rigs. Fall triggers a feeding frenzy as bass prepare for winter‚ creating excellent crankbait opportunities.

Winter fishing slows‚ concentrating bass near structure. Guides adapt tactics‚ utilizing jigs and slow presentations. Lake trout become more accessible in colder months. Understanding these shifts is crucial for success‚ and experienced guides excel at pattern recognition.

Optimal Weather Conditions

Dale Hollow fishing guides prioritize weather monitoring for client success. Overcast days with light wind often stimulate bass activity‚ reducing glare and encouraging feeding. Stable weather patterns are preferable‚ avoiding rapid pressure changes. Pre-frontal conditions‚ before a cold front‚ can be highly productive.

Moderate temperatures‚ between 60-80°F‚ generally enhance fishing. However‚ skilled guides adapt to all conditions. They understand how rain‚ sunshine‚ and wind influence fish location and behavior‚ adjusting strategies accordingly for a rewarding experience.

Cost of Hiring a Dale Hollow Fishing Guide

Dale Hollow fishing guide pricing varies based on trip duration‚ guide experience‚ and services included. Expect daily rates typically ranging from $400 to $700 for a half-day or full-day excursion‚ accommodating 1-3 anglers. Multi-day packages are often available at negotiated rates.

Included services generally cover boat‚ tackle‚ and the guide’s expertise. Potential extras include fishing licenses (often purchased separately)‚ live bait‚ and fish cleaning. Gratuity for exceptional service is customary and appreciated by your Dale Hollow guide.

Daily Rate Structures

Dale Hollow fishing guides commonly offer tiered daily rates. A half-day trip (4-6 hours) typically ranges from $400-$550‚ ideal for targeting a specific species or technique. Full-day trips (8-10 hours) generally cost $550-$700‚ providing more time for exploration and varied fishing strategies.

Some guides offer weekday discounts or package deals for multiple days. Always confirm what’s included in the rate – fuel‚ tackle‚ and bait policies vary. Expect additional costs for non-resident fishing licenses and any special requests.

Included Services and Potential Extras

Standard inclusions with a Dale Hollow fishing guide typically encompass a fully equipped boat‚ all necessary fishing tackle (rods‚ reels‚ lures)‚ and safety equipment. Most guides provide bottled water and snacks‚ ensuring a comfortable day on the lake. They also handle boat operation and cleaning of your catch.

Potential extras may include fish filleting services (often for an additional fee)‚ live bait (if preferred)‚ and transportation to/from your lodging. Confirm these details when booking to avoid surprises and maximize your fishing experience.

Top Rated Dale Hollow Fishing Guide Services

Selecting a guide service requires careful consideration. While specific rankings fluctuate‚ several consistently receive positive feedback. Dale Hollow Fishing Adventures specializes in smallmouth bass‚ offering tailored trips for all skill levels. They emphasize a personalized approach and local expertise.

Sunset Basin Guides is another highly-rated option‚ known for their versatility in targeting multiple species‚ including lake trout. They provide modern equipment and experienced captains. Researching recent reviews and comparing offerings is crucial for finding the best fit.

Dale Hollow Fishing Adventures ⎯ Overview & Specialties

Dale Hollow Fishing Adventures‚ led by Captain Jim Reynolds‚ focuses on providing premier smallmouth bass fishing experiences. They cater to both novice and seasoned anglers‚ offering half-day‚ full-day‚ and multi-day excursions. Their specialty lies in utilizing proven techniques like jig fishing and crankbaiting to locate and land trophy bass.

The service prides itself on personalized attention‚ ensuring each client receives tailored instruction and a memorable outing. They supply all necessary tackle and equipment‚ and Captain Reynolds’ extensive knowledge of Dale Hollow’s structure is invaluable.

Hooked Up Fishing ⸺ Overview & Specialties

Hooked Up Fishing‚ captained by veteran angler Mark Thompson‚ distinguishes itself through versatility‚ expertly targeting smallmouth‚ largemouth bass‚ and lake trout. They offer a range of trip options‚ including focused bass trips‚ multi-species adventures‚ and downrigging excursions for trophy lake trout. Hooked Up Fishing emphasizes a family-friendly atmosphere.

Their service provides top-of-the-line equipment and a spacious‚ comfortable boat. Captain Thompson’s commitment to client satisfaction and his deep understanding of Dale Hollow’s seasonal patterns ensure consistently successful trips.

Dale Hollow Lake Fishing Regulations & Licensing

Anglers fishing Dale Hollow Lake must possess valid fishing licenses from either Tennessee or Kentucky‚ depending on the portion of the lake fished. Reciprocal agreements exist‚ but verifying current regulations is crucial. Size and creel limits vary by species and are subject to change; consult the respective state’s wildlife resources agency website for the most up-to-date information.

Guides typically ensure clients are aware of these regulations‚ but personal responsibility remains paramount. Ignoring limits or fishing without a license can result in substantial fines and legal repercussions.

Tennessee and Kentucky Fishing Licenses

Fishing Dale Hollow Lake necessitates a valid license from Tennessee if angling from the Tennessee side‚ or Kentucky for the Kentucky side. Non-resident licenses are readily available online or at local retailers in both states. Tennessee offers various license types‚ including annual and short-term options‚ while Kentucky’s licenses cater to diverse angling needs.

Guides often advise clients on obtaining the correct license. Always carry your license while fishing and be prepared to present it to a wildlife officer upon request to avoid potential penalties.

Size and Creel Limits

Dale Hollow Lake enforces specific size and creel limits to ensure sustainable fish populations. Smallmouth Bass typically have a minimum length requirement‚ and a daily creel limit restricts the number you can keep. Largemouth Bass regulations may differ‚ so checking current guidelines is crucial.

Lake Trout limits are particularly important due to their slower growth rates. Guides stay updated on these regulations and will advise you on legal catches‚ promoting responsible angling practices and conservation efforts on the lake.

Essential Gear to Bring on Your Fishing Trip

Successful fishing on Dale Hollow Lake requires appropriate gear. Medium-light to medium-action rods paired with spinning or baitcasting reels are versatile choices. Pack a variety of fishing line – fluorocarbon for clear water‚ and braided line for sensitivity.

Essential lures include crankbaits‚ jigs‚ plastic worms‚ and topwater baits. Don’t forget essential accessories like pliers‚ line cutters‚ a tackle box‚ and appropriate clothing. Guides often provide some tackle‚ but having your own ensures preparedness.

Recommended Rods and Reels

For bass fishing‚ a 6’6” to 7’3” medium-light to medium action rod offers excellent versatility. Spinning reels in the 2500-3000 size range are ideal for lighter presentations‚ while baitcasting reels with a 6.4:1 gear ratio suit heavier lures.

Lake trout anglers benefit from medium-heavy action rods‚ 7’ to 8’ in length‚ paired with larger baitcasting reels. Quality brands like Shimano‚ Daiwa‚ and Abu Garcia are highly recommended for durability and performance on Dale Hollow Lake.

Appropriate Fishing Line and Lures

For bass‚ fluorocarbon line (10-17lb test) provides excellent invisibility. Monofilament is a budget-friendly option. Lure selection includes crankbaits‚ jigs‚ plastic worms‚ and topwater baits. Lake trout require heavier tackle; braided line (30-50lb test) is preferred.

Effective lures for trout include spoons‚ flutter spoons‚ and deep-diving crankbaits. Matching the hatch with local baitfish patterns increases success. Consider varying colors and sizes to adapt to changing conditions on Dale Hollow Lake.

Safety Considerations When Fishing Dale Hollow Lake

Boating safety is paramount; always wear life jackets‚ especially during unpredictable weather. Check the forecast before heading out‚ as conditions can change rapidly. Be aware of hazards like submerged timber and steep drop-offs. Carry a marine radio for communication in emergencies.

Inform someone of your fishing plans and expected return time. Practice safe boat operation‚ maintaining a safe speed and distance from other vessels. Weather awareness is crucial; seek shelter immediately during thunderstorms.

Boating Safety Tips

Always wear a properly fitted life jacket – it’s the law and could save your life. Maintain situational awareness‚ scanning for other boats‚ swimmers‚ and obstacles. Operate at a safe speed‚ especially in congested areas or near shorelines. Carry required safety equipment‚ including a fire extinguisher‚ flares‚ and a first-aid kit.

Never boat under the influence of alcohol or drugs. Ensure your boat is properly registered and equipped with navigation lights. Be mindful of weather conditions and seek shelter promptly if a storm approaches.

Weather Awareness

Dale Hollow Lake’s weather can change rapidly; Check the forecast before heading out and monitor conditions throughout your trip. Be prepared for sudden thunderstorms‚ especially during summer afternoons. Pay attention to wind speed and direction‚ as strong winds can create hazardous waves.

Understand the signs of approaching storms‚ such as darkening skies and increasing wind. Have a plan for seeking shelter if a storm develops. Lightning is a serious threat; head to shore immediately if you hear thunder.

Accommodations Near Dale Hollow Lake

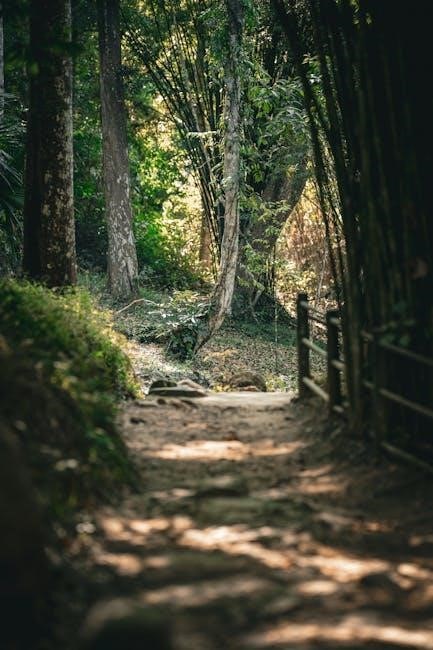
Planning a fishing trip requires comfortable lodging. Numerous hotels and resorts are conveniently located near Dale Hollow Lake‚ offering various amenities and price points. Consider options in Celina‚ Tennessee‚ or Monticello‚ Kentucky‚ for easy lake access.

Cabin rentals provide a more secluded and rustic experience. Many cabins offer lake views‚ private docks‚ and fully equipped kitchens. Booking in advance is highly recommended‚ especially during peak fishing seasons. Explore online platforms for a wide selection of lodging choices.

Hotels and Resorts

Several hotels and resorts cater to anglers visiting Dale Hollow Lake. These establishments typically offer convenient amenities like on-site dining‚ comfortable rooms‚ and sometimes‚ even boat launch facilities. Options in Celina‚ Tennessee‚ provide quick access to the lake’s western shores‚ while Monticello‚ Kentucky‚ serves the eastern side.

Consider resorts offering package deals that include guided fishing trips or boat rentals. Checking online reviews can help you select a hotel or resort that best suits your needs and budget. Early reservations are crucial‚ particularly during popular fishing seasons.

Cabin Rentals

Dale Hollow Lake boasts a wide array of cabin rentals‚ providing a more secluded and immersive experience for fishing enthusiasts. These cabins range from rustic‚ cozy retreats to luxurious‚ fully-equipped homes‚ often with stunning lake views. Many rentals offer direct lake access‚ private docks‚ and fish cleaning stations – ideal for anglers.

Websites specializing in vacation rentals showcase numerous options around Celina and Monticello. Consider cabins with kitchen facilities to prepare your catch of the day! Booking well in advance is highly recommended‚ especially during peak fishing seasons‚ to secure your preferred cabin.

bailey and love 28 edition pdf

Bailey and Love 28th Edition PDF: A Comprehensive Overview (Updated 02/07/2026)

The 28th edition of Bailey & Love’s Short Practice of Surgery is a globally recognized surgical resource‚ readily available as a PDF
from legitimate sources like medical-amboss․com‚ offering comprehensive surgical knowledge for professionals and students alike․

What is Bailey and Love’s Short Practice of Surgery?

Bailey & Love’s Short Practice of Surgery stands as the world’s most widely read general surgical textbook‚ a cornerstone for medical students‚ surgical trainees‚ and practicing surgeons globally․ First published in 1932‚ nearly a century ago‚ it has undergone continuous evolution through 28 editions‚ maintaining its relevance and authority in the field․

The book provides a concise yet comprehensive overview of all surgical specialties‚ covering fundamental principles‚ diagnostic approaches‚ and modern surgical techniques․ It’s renowned for its clear‚ accessible writing style and logical organization‚ making complex surgical concepts understandable․ The 28th edition builds upon this legacy‚ incorporating the latest advancements in surgical practice‚ evidence-based medicine‚ and technological innovations․

As a PDF‚ the 28th edition offers convenient access to this wealth of surgical knowledge‚ enabling users to study and reference the material efficiently․ It remains a vital resource for anyone involved in surgical care․

Historical Significance and Evolution of the Textbook

Bailey & Love’s journey began in 1932‚ initially conceived as a concise guide for surgical examinations․ Over nearly a century‚ it transformed from a compact handbook into the comprehensive‚ globally respected textbook it is today․ Each successive edition has reflected advancements in surgical knowledge and practice‚ adapting to evolving medical landscapes․

Early editions focused on core surgical principles‚ while later versions incorporated new techniques‚ technologies‚ and subspecialties․ The transition to a PDF format in the 28th edition represents a significant evolution‚ enhancing accessibility and portability for modern learners․

Throughout its history‚ the book has maintained its commitment to clarity and conciseness‚ making it a favored resource for generations of surgeons․ The 28th edition continues this tradition‚ solidifying its place as a cornerstone of surgical education and practice․

The 28th Edition: Key Updates and Changes

The 28th edition of Bailey & Love’s Short Practice of Surgery presents a thoroughly revised and updated compilation of surgical knowledge․ Key changes include expanded coverage of minimally invasive surgery‚ robotic surgery‚ and advanced imaging techniques․ New chapters address emerging fields like surgical oncology and transplant surgery‚ reflecting current clinical priorities․

Significant updates have been made to sections on trauma management‚ critical care‚ and perioperative medicine‚ incorporating the latest evidence-based guidelines․ The PDF version benefits from enhanced searchability and interactive features‚ improving the learning experience․

Furthermore‚ the 28th edition features revised illustrations‚ diagrams‚ and tables‚ providing clearer visual aids for complex surgical concepts․ This edition maintains the book’s hallmark clarity while embracing modern advancements․

Accessing the Bailey and Love 28th Edition PDF

Obtaining the Bailey & Love 28th edition PDF requires caution; legitimate sources include medical-amboss;com‚ while unauthorized downloads pose risks and may be illegal․

Legitimate Sources for PDF Download

Securing a genuine PDF copy of Bailey & Love’s 28th Edition necessitates utilizing authorized platforms to ensure quality and legality․ Currently‚ medical-amboss․com stands as a verified source offering the textbook in PDF format․ Purchasing directly from the publisher or reputable medical ebook retailers guarantees access to the complete‚ unaltered content‚ free from potential malware or copyright infringements associated with unofficial downloads․

Beware of websites promising “free” downloads‚ as these often harbor viruses or incomplete versions․ Subscribing to online medical libraries or educational platforms that have licensing agreements with the publisher is another reliable avenue․ Always verify the source’s credibility before providing any personal or financial information․ Prioritizing legitimate channels safeguards your digital security and supports the authors and publishers who dedicate their efforts to creating valuable medical resources․

Risks Associated with Unauthorized Downloads

Downloading the Bailey & Love 28th Edition PDF from unofficial sources presents significant risks․ These downloads frequently contain malware‚ viruses‚ and spyware‚ compromising your device’s security and potentially leading to identity theft․ Illegally obtained PDFs may also be incomplete‚ contain errors‚ or lack crucial illustrations‚ hindering effective learning and potentially impacting patient care if used clinically․

Furthermore‚ accessing copyrighted material without authorization is a legal violation‚ carrying potential fines and penalties․ Supporting unauthorized distribution undermines the authors’ and publishers’ efforts‚ discouraging future updates and improvements to this vital surgical resource․ Prioritizing legitimate sources‚ even if they require a purchase‚ ensures access to a safe‚ complete‚ and legally obtained copy‚ protecting both your digital wellbeing and the integrity of medical education․

Cost and Availability of the Official PDF

The official Bailey & Love 28th Edition PDF is available for purchase through authorized platforms‚ such as medical-amboss․com and potentially directly from the publisher․ Pricing varies depending on the vendor and any bundled resources‚ but expect a significant investment reflecting the textbook’s comprehensive content and established reputation․ While a free‚ legal PDF download isn’t readily available‚ legitimate retailers occasionally offer promotional discounts or subscription models․

Purchasing directly from the publisher or a trusted distributor guarantees access to the complete‚ updated‚ and legally compliant version of the textbook․ This ensures you receive a high-quality resource free from malware or inaccuracies․ Consider exploring institutional access options through medical schools or libraries‚ which may provide cost-effective access for students and professionals․

Content and Structure of the 28th Edition

The 28th edition meticulously covers core surgical specialties‚ organized into detailed chapters and sections‚ enhanced by numerous illustrations‚ diagrams‚ and tables for optimal understanding․

Core Surgical Specialties Covered

Bailey & Love’s 28th edition provides extensive coverage across the entire spectrum of general surgery‚ establishing itself as a foundational text for surgical education and practice․ Key areas include gastrointestinal surgery‚ encompassing the esophagus‚ stomach‚ small intestine‚ colon‚ and rectum‚ with detailed discussions on both benign and malignant conditions․ Hepatobiliary and pancreatic surgery receive significant attention‚ alongside endocrine surgery focusing on the thyroid‚ parathyroid‚ and adrenal glands․

Vascular surgery is thoroughly addressed‚ covering arterial and venous diseases‚ while urology‚ cardiothoracic surgery‚ and neurosurgery are also represented‚ offering a broad overview of these specialties․ Trauma management‚ burns‚ and plastic surgery are integrated‚ reflecting the multidisciplinary nature of modern surgical care․ Pediatric surgery receives dedicated coverage‚ acknowledging the unique challenges in this field․ The textbook also incorporates emerging areas like minimally invasive surgery and surgical oncology‚ ensuring its relevance in contemporary practice․

Organization of Chapters and Sections

The 28th edition of Bailey & Love maintains a logical and systematic organization‚ beginning with fundamental surgical principles and progressing to specific organ system-based chapters․ Each chapter follows a consistent structure‚ typically including an introduction‚ anatomy‚ pathology‚ clinical presentation‚ diagnostic evaluation‚ and management strategies․ Sections are further subdivided into concise subsections‚ enhancing readability and facilitating targeted information retrieval․

The textbook employs a clear hierarchical approach‚ allowing readers to quickly navigate to relevant content․ Key points are often summarized in bulleted lists and tables‚ aiding comprehension and retention․ Appendices provide valuable supplementary material‚ such as surgical instruments and commonly used scoring systems․ This structured format‚ combined with a comprehensive index‚ makes the PDF version of Bailey & Love an exceptionally user-friendly resource for both learning and clinical reference․

Use of Illustrations‚ Diagrams‚ and Tables

The 28th edition of Bailey & Love significantly enhances understanding through a wealth of visual aids․ High-quality illustrations vividly depict anatomical structures‚ surgical techniques‚ and pathological conditions․ Detailed diagrams clarify complex physiological processes and surgical approaches‚ while comprehensive tables summarize essential data‚ such as diagnostic criteria and treatment algorithms․

These visual elements are strategically integrated throughout the text‚ complementing the written content and reinforcing key concepts․ The PDF format preserves the clarity and detail of these images‚ allowing for easy zooming and examination․ The effective use of illustrations‚ diagrams‚ and tables transforms Bailey & Love from a purely textual resource into a dynamic and engaging learning tool‚ crucial for mastering surgical principles․

Bailey and Love for NEET Preparation

While comprehensive‚ some sources question Bailey & Love’s direct suitability for NEET’s MCQ format; other surgical textbooks might be more focused for exam-specific preparation․

Suitability for MCQ-Based Exams

Determining Bailey & Love’s effectiveness for NEET’s multiple-choice question (MCQ) format requires nuanced consideration․ The textbook excels in providing a detailed‚ comprehensive understanding of surgical principles‚ but its depth can be a double-edged sword for exam-focused study․

Some students and educators suggest that the extensive detail within Bailey & Love may not directly translate to efficiently answering the concise‚ application-based questions typical of the NEET exam․ The book’s strength lies in its thoroughness‚ potentially leading to information overload when rapid recall is crucial․

Conversely‚ a strong foundational understanding gained from Bailey & Love can be invaluable for tackling complex MCQs that require a deeper grasp of surgical concepts․ It’s often recommended to supplement Bailey & Love with more targeted‚ MCQ-focused review materials specifically designed for NEET preparation to maximize exam performance․

Comparison with Other Surgical Textbooks for NEET

When preparing for NEET‚ comparing Bailey & Love with alternatives is crucial․ Several textbooks cater specifically to the exam’s MCQ format‚ often prioritizing concise summaries and rapid revision․ Compared to these‚ Bailey & Love offers significantly more detailed explanations and a broader scope of surgical knowledge․

Textbooks like SRB’s Surgical Recall or API’s Short Textbook of Surgery are frequently favored for their focused approach and emphasis on high-yield information directly relevant to NEET․ These resources streamline content‚ making them ideal for last-minute review․

However‚ Bailey & Love’s comprehensive nature builds a stronger conceptual foundation‚ beneficial for understanding the why behind surgical procedures‚ potentially aiding in tackling challenging‚ application-based questions․ Ultimately‚ the optimal strategy often involves integrating Bailey & Love with more targeted NEET-specific resources․

Effective Study Strategies Using Bailey and Love

Maximizing learning from the Bailey & Love 28th Edition PDF requires strategic approaches․ Avoid rote memorization; instead‚ focus on understanding the underlying principles of surgical diseases and their management․ Utilize the book’s illustrations and diagrams to visualize complex anatomical structures and surgical techniques․

Implement spaced repetition – revisit chapters at increasing intervals to reinforce retention․ Create concise notes summarizing key concepts and operative procedures․ Actively test yourself with MCQs‚ supplementing Bailey & Love with dedicated NEET question banks․

Prioritize chapters based on NEET syllabus weightage․ Don’t attempt to cover the entire textbook in one go; break it down into manageable sections․ Collaborate with peers for discussion and clarification of challenging topics‚ enhancing comprehension and recall․

Bailey and Love Beyond the Textbook

Beyond the PDF‚ explore ‘Thesurgerytimes’ and community forums for case discussions and updates‚ complementing Bailey & Love’s core knowledge with real-world surgical insights․

Associated Online Resources and Platforms

Numerous online platforms extend the learning experience beyond the Bailey & Love 28th Edition PDF․ Medical-amboss․com provides access to the official digital version‚ ensuring authenticity and up-to-date content․ ‘Thesurgerytimes’ serves as a valuable companion‚ offering supplementary materials and insights from practicing surgeons․

Furthermore‚ active community forums and discussion boards dedicated to surgery allow for collaborative learning and problem-solving․ These platforms facilitate the exchange of knowledge‚ case studies‚ and perspectives on surgical techniques․ ResearchGate hosts scholarly articles referencing Bailey & Love‚ showcasing its impact on surgical research and practice․

Students and professionals can leverage these resources to deepen their understanding‚ stay current with advancements‚ and connect with peers in the surgical field․ Utilizing these platforms alongside the textbook enhances the overall learning process and promotes continuous professional development․

The Role of ‘Thesurgerytimes’ and Similar Websites

‘Thesurgerytimes’ and comparable websites play a crucial supporting role alongside the Bailey & Love 28th Edition PDF․ They often provide access to supplementary materials‚ including case studies‚ surgical videos‚ and updates on evolving surgical practices․ These resources complement the textbook’s foundational knowledge‚ offering a dynamic learning experience․

These platforms frequently host discussions and forums where surgeons and students can exchange ideas‚ ask questions‚ and share experiences related to the content within Bailey & Love․ They can also offer downloadable resources‚ such as practice questions and quick reference guides‚ aiding in exam preparation and clinical application․

Essentially‚ these websites act as a bridge between the theoretical knowledge presented in the textbook and the practical realities of surgical practice‚ fostering a more comprehensive and engaging learning journey․

Community Forums and Discussions

Online community forums dedicated to surgical learning are invaluable resources for those utilizing the Bailey & Love 28th Edition PDF․ These platforms facilitate peer-to-peer learning‚ allowing students and professionals to discuss challenging concepts‚ share study strategies‚ and clarify ambiguities found within the textbook․

Discussions often revolve around specific chapters‚ surgical techniques‚ or case studies‚ providing diverse perspectives and enriching understanding․ Users frequently share insights on effective exam preparation‚ particularly for MCQ-based tests like NEET‚ and debate the textbook’s strengths and weaknesses․

These forums create a collaborative learning environment‚ extending the learning experience beyond the confines of the textbook and fostering a sense of community among those navigating the complexities of surgical knowledge․

Baileys Irish Cream and Related Content (Contextual Information)

Despite the name similarity‚ Baileys Irish Cream is unrelated to the surgical textbook‚ Bailey & Love․ It’s a delightful blend of Irish whiskey and cream!

Baileys Irish Cream: Product Overview

Baileys Original Irish Cream is a celebrated alcoholic beverage‚ a harmonious fusion of fine Irish whiskey‚ rich Irish dairy cream‚ and delectable chocolate and vanilla essences․ This unique combination results in a luxuriously smooth and utterly delicious experience‚ enjoyed globally․

It’s incredibly versatile – savored neat over ice‚ expertly incorporated into cocktails for an added layer of indulgence‚ drizzled generously over desserts like ice cream‚ or even creatively baked into tempting treats such as Baileys-infused cakes․

Ramp;A Bailey & Co‚ the creators of this iconic cream liqueur‚ emphasize responsible drinking and adherence to legal purchase ages․ It’s important to note this product is entirely separate from the medical textbook‚ Bailey & Love’s Short Practice of Surgery․

Baileys Recipes and Usage Ideas

Beyond simple enjoyment over ice‚ Baileys Irish Cream lends itself to a world of culinary creativity․ Consider a decadent Baileys mint chocolate milkshake – a creamy‚ minty delight perfect for St․ Patrick’s Day or any celebration․ Its smooth texture and distinctive flavor profile elevate any beverage or dessert․

Explore recipes for Baileys-infused cheesecakes‚ brownies‚ or even coffee cocktails․ Drizzle it over fresh fruit‚ incorporate it into chocolate mousse‚ or use it to create a luscious glaze for pastries․

Remember‚ this delightful liqueur is unrelated to the medical resource‚ Bailey & Love’s Short Practice of Surgery 28th Edition․ While both offer richness – one in flavor‚ the other in surgical knowledge – they exist in entirely separate realms․

Ramp;A Bailey & Co: Company Information

R&A Bailey & Co․ is the esteemed producer of Baileys Irish Cream‚ a globally beloved liqueur celebrated for its unique blend of Irish whiskey‚ cream‚ and chocolate-vanilla flavors․ Established with a commitment to quality and innovation‚ the company has cultivated a rich heritage in the spirits industry․

However‚ it’s crucial to distinguish between R&A Bailey & Co․ and the authorship of “Bailey & Love’s Short Practice of Surgery․” The latter is a renowned surgical textbook‚ with its 28th edition being a vital resource for medical professionals and students․

R&A Bailey & Co․ focuses on crafting premium beverages‚ while the authors of Bailey & Love dedicate themselves to advancing surgical knowledge․ Both represent excellence in their respective fields‚ but operate independently․

style lessons in clarity and grace pdf

Style: Lessons in Clarity and Grace, available as a downloadable PDF, is a widely-used resource for improving writing skills, with editions dating back to 2022.

Numerous formats, including eBooks and rental options, cater to diverse learning preferences, offering accessible instruction in effective communication techniques.

Overview of the Book’s Purpose

Style: Lessons in Clarity and Grace, often accessed as a PDF, fundamentally aims to equip writers with the tools to produce prose that is not merely grammatically correct, but genuinely clear and graceful. The book moves beyond superficial stylistic concerns, focusing instead on the underlying principles of effective communication.

Its core purpose is to demonstrate how readers process information and how writers can leverage this understanding to enhance comprehension. The PDF resource emphasizes constructing sentences and paragraphs that minimize cognitive load for the audience. It provides practical guidance on structuring arguments logically, ensuring cohesion, and strategically placing information for maximum impact. The book’s enduring relevance stems from its focus on timeless principles applicable across diverse writing contexts, from academic papers to professional reports.

Authorship: Joseph M. Williams and Joseph Bizup

Style: Lessons in Clarity and Grace initially stemmed from the work of Joseph M. Williams, a highly respected professor at the University of Chicago, renowned for his dedication to improving writing instruction. Following Williams’ passing, Joseph Bizup took on the crucial role of revising and updating the text, ensuring its continued relevance.

Bizup’s contributions have been instrumental in maintaining the book’s clarity and adapting it to evolving communication landscapes. The collaborative authorship represents a commitment to pedagogical excellence, blending established principles with contemporary insights. The PDF versions available today often acknowledge both authors, recognizing their combined expertise. Their work emphasizes a reader-focused approach, shaping the book into a practical guide for writers seeking to master the art of clear and effective prose.

Target Audience: Students and Professionals

The Style: Lessons in Clarity and Grace PDF resource is designed for a broad audience, primarily targeting students across various disciplines who aim to enhance their academic writing skills. However, its principles extend far beyond the classroom, proving invaluable for professionals in any field requiring clear and concise communication.

Whether drafting reports, emails, or presentations, individuals seeking to improve their professional image and impact will benefit from the book’s guidance. The accessible nature of the downloadable PDF format makes it convenient for self-study and practical application. It caters to those needing to refine their writing for clarity, coherence, and overall effectiveness, regardless of their current skill level.

Core Principles of Clear Writing

Style: Lessons in Clarity and Grace, often accessed as a PDF, prioritizes reader understanding through concise prose and logical organization, fostering effective communication.

Emphasis on Clarity over Ornamentation

Style: Lessons in Clarity and Grace, readily available as a PDF resource, fundamentally advocates for prioritizing clear communication above stylistic flourishes. The book argues that effective writing isn’t about impressing readers with complex vocabulary or elaborate sentence structures, but rather ensuring the message is easily understood.

This principle, central to the PDF’s teachings, encourages writers to strip away unnecessary words and phrases, focusing instead on conveying information directly and efficiently. The authors champion a prose style that is transparent, allowing the reader to effortlessly grasp the intended meaning without being distracted by ornate language.

The downloadable PDF emphasizes that clarity isn’t a constraint on creativity, but a foundation for it, enabling ideas to resonate more powerfully with the audience. It’s about making the complex simple, not the simple complex.

The Importance of Reader-Based Prose

The Style: Lessons in Clarity and Grace PDF strongly emphasizes a reader-centered approach to writing. This core tenet shifts the focus from what the writer wants to say, to how the reader will understand it. The book argues that effective prose anticipates the reader’s knowledge, expectations, and potential difficulties.

This principle, detailed within the downloadable PDF, encourages writers to actively consider their audience throughout the writing process. It’s about structuring information logically, providing sufficient context, and using language that is accessible and engaging for the intended readership.

The authors advocate for proactively addressing potential points of confusion, ensuring the reader can follow the argument without undue effort. Ultimately, reader-based prose prioritizes comprehension and impact over self-expression.

Understanding Cohesion and Coherence

The Style: Lessons in Clarity and Grace PDF dedicates significant attention to the intertwined concepts of cohesion and coherence, vital for clear communication. Cohesion refers to the grammatical and lexical links within a text – how sentences connect through pronouns, transitions, and repetition.

However, the PDF clarifies that cohesion alone isn’t enough. Coherence, the logical connection of ideas, is equally crucial. A coherent text presents information in a sensible order, with clear relationships between points.

The resource emphasizes that strong writing achieves both: sentences flow smoothly (cohesion) and the overall argument makes logical sense (coherence). Mastering these elements, as detailed in the downloadable PDF, dramatically improves readability and ensures the reader effortlessly follows the writer’s train of thought.

Key Concepts Explained in the PDF

The Style: Lessons in Clarity and Grace PDF thoroughly explains core principles like the Principle of Least Effort, stress placement, and thematic progression for impactful writing.

Principle of Least Effort

Style: Lessons in Clarity and Grace emphasizes the “Principle of Least Effort,” a cornerstone of reader comprehension. This principle, detailed within the PDF resource, asserts that readers unconsciously favor interpretations requiring the least mental effort.

Authors, therefore, should structure sentences and paragraphs to facilitate easy processing. This involves placing familiar information earlier in a sentence – the “known” before the “new” – and ensuring logical connections between ideas. The PDF illustrates how complex sentences can hinder readability, advocating for concise phrasing and active voice.

By minimizing cognitive load, writers enable readers to focus on the content’s meaning, rather than struggling with its presentation. Mastering this principle, as outlined in the downloadable PDF, is crucial for achieving clarity and grace in writing.

Stress: Placing New Information Effectively

The Style: Lessons in Clarity and Grace PDF deeply explores “Stress,” a technique for guiding the reader’s attention. This involves strategically positioning new or important information towards the end of a sentence – the “stressed” position – where it receives the most emphasis.

The PDF explains that readers naturally assign greater weight to information appearing later in a clause. By reserving this position for crucial details, writers can ensure those details are noticed and remembered. Conversely, familiar or less significant information should occupy the initial, “unstressed” position.

Effective use of stress, as demonstrated in the resource, transforms sentences from bland statements into focused arguments, enhancing clarity and impact. This principle is vital for persuasive and informative writing.

Theme: Connecting Ideas Logically

The Style: Lessons in Clarity and Grace PDF emphasizes “Theme” as the crucial element connecting ideas within a sentence and across paragraphs. Theme isn’t the topic itself, but rather what the writer says about the topic – the controlling idea.

The resource details how to establish a clear thematic progression, ensuring each sentence builds logically upon the previous one. This involves using pronouns and repeated keywords to create cohesive connections, guiding the reader through the argument.

The PDF stresses that a strong theme provides a unifying force, preventing writing from becoming a disjointed series of statements. Mastering thematic construction, as outlined, is key to achieving coherence and persuasive power.

Navigating the “Style” PDF Resource

Style: Lessons in Clarity and Grace PDFs are readily available for download, with various editions and formats—including eBooks and rentals—offered online.

Accessing and Downloading the PDF

Style: Lessons in Clarity and Grace PDF versions are discoverable through various online platforms and educational resource websites. Searching directly for “Style lessons in clarity and grace pdf” yields results pointing to downloadable files, often associated with university course materials or textbook supplements.

Several sources offer the 13th Edition eBook, while rental editions are also frequently available. Be mindful of copyright restrictions and ensure downloads originate from legitimate sources to avoid potential issues. The ISBNs 0135171830 and 9780135171837 can aid in identifying the correct edition.

Some platforms allow instant PDF downloads, while others may require account creation or a purchase. Checking university library databases is also a viable option for accessing the PDF legally and conveniently.

Different Editions and Formats (eBook, Rental)

Style: Lessons in Clarity and Grace exists in multiple editions, with the 13th Edition being a prominent version currently available. Formats extend beyond the traditional print copy, encompassing convenient eBook options for digital reading and portability. Rental editions provide a cost-effective alternative for temporary access, suitable for course durations.

The PDF format itself is widely circulated, often as a supplemental material or a digital copy of purchased editions. Revel platforms also offer instant PDF downloads alongside interactive learning tools. Older editions, like the Twelfth Edition, remain valuable resources, though content may vary slightly.

Premium clarity editions are also marketed, emphasizing enhanced readability and accessibility. When choosing, consider your learning style and budget, weighing the benefits of ownership versus rental or digital access.

Utilizing the PDF for Self-Study and Practice

The Style: Lessons in Clarity and Grace PDF is exceptionally suited for independent learning. Actively marking quotations within the PDF, as suggested, enhances comprehension and retention. Utilize the search function to quickly locate specific concepts like ‘stress’ or ‘theme’ for focused review.

Practice involves applying the book’s principles to your own writing. Regularly compare your work to the examples provided within the PDF, identifying areas for improvement in sentence structure and paragraph organization.

Downloadable supplements often accompany the PDF, offering additional exercises and resources. Consistent engagement with the material, combined with deliberate practice, will yield significant gains in writing clarity and grace.

Applying the Lessons: Practical Techniques

Style: Lessons in Clarity and Grace’s PDF emphasizes revising for conciseness and coherence, focusing on sentence variety and logical paragraph development for impactful writing.

Sentence Structure and Variety

Style: Lessons in Clarity and Grace, readily available as a PDF download, stresses the importance of moving from old to new information within sentences to enhance readability.

The resource advocates for varying sentence length and structure to avoid monotony and maintain reader engagement. Effective writing, according to the text, isn’t about complex phrasing, but about strategically placing emphasis.

Readers learn to identify and eliminate unnecessary words and phrases, streamlining their prose. The PDF guides users in constructing sentences that clearly convey their intended meaning, avoiding ambiguity and promoting precision. Mastering these techniques, as outlined in the downloadable material, leads to more compelling and understandable communication.

Ultimately, the goal is to create prose that feels effortless for the reader to follow.

Paragraph Development and Organization

The Style: Lessons in Clarity and Grace PDF emphasizes that paragraphs should function as miniature essays, each with a clear topic and supporting evidence.

Effective paragraphing, as detailed in the resource, relies on establishing a central theme and developing it logically through coherent sentences. The text advocates for using topic sentences to signal the main idea and guide the reader.

Transitions are crucial for connecting ideas between sentences and paragraphs, creating a smooth flow of thought. The downloadable PDF provides guidance on crafting these transitions effectively.

Readers learn to avoid rambling or disjointed paragraphs by focusing on a single, well-defined purpose for each section of their writing. This structured approach enhances clarity and improves overall comprehension.

Revision Strategies for Improved Clarity

The Style: Lessons in Clarity and Grace PDF strongly advocates for rigorous revision as a core component of effective writing. It suggests readers actively mark quotations and lengthy passages for later review, aiding comprehension.

A key strategy involves identifying and eliminating unnecessary words or phrases that clutter sentences and obscure meaning. The resource encourages writers to prioritize conciseness and precision in their language.

Furthermore, the PDF emphasizes the importance of reading work aloud to identify awkward phrasing or unclear connections between ideas.

By systematically applying these revision techniques, writers can significantly enhance the clarity and impact of their prose, aligning with the book’s central principles.

The Book’s Legacy and Continued Relevance

Style: Lessons in Clarity and Grace remains impactful in writing instruction, with its PDF version ensuring continued accessibility and modern application across diverse fields.

Impact on Writing Instruction

Style: Lessons in Clarity and Grace has profoundly shaped writing pedagogy since its initial publication. The book’s emphasis on reader-centered prose and principles of clarity revolutionized how writing was taught in universities and professional settings.

Its accessible approach, readily available through the downloadable PDF format, allowed instructors to easily integrate its concepts into their curricula. The book moved beyond prescriptive rules, focusing instead on the why behind effective writing, fostering critical thinking about rhetorical choices.

The PDF’s portability and searchability further enhanced its utility, becoming a staple resource for students and educators alike. Generations of writers have benefited from its guidance, solidifying its place as a cornerstone of composition studies.

Modern Applications in Various Fields

The principles outlined in Style: Lessons in Clarity and Grace, conveniently accessible via PDF download, extend far beyond academic writing. In professional contexts, the book’s lessons are invaluable for crafting clear reports, persuasive proposals, and effective communications.

Fields like law, medicine, and technology increasingly prioritize concise and unambiguous language, making the book’s guidance essential. The emphasis on stress and theme helps professionals structure complex information logically, ensuring their message resonates with diverse audiences.

Even in digital content creation, where brevity is key, the book’s principles remain relevant, promoting impactful and easily digestible writing. The PDF format ensures continued accessibility and application across evolving communication landscapes.

martha white cornbread mix instructions

Martha White Cornbread Mix Instructions: A Comprehensive Guide

Martha White’s legacy spans decades, offering convenient, quality mixes; her 99 published books demonstrate a commitment to accessible home cooking and lifestyle enrichment.

Understanding Martha White’s Legacy

Martha White represents more than just a cornbread mix; it embodies a tradition of Southern baking and home-cooked goodness spanning generations. The brand’s enduring appeal stems from its simplicity and consistent results, offering a reliable foundation for creating comforting, flavorful cornbread.

Rooted in a history of providing quality ingredients, Martha White has become synonymous with Southern culinary heritage. This legacy is further amplified by Martha Stewart’s influence, an entrepreneur and author of 99 lifestyle books, who champions accessible home cooking. Her dedication to detailed instructions and quality ingredients aligns perfectly with the Martha White brand ethos.

The brand’s continued success is a testament to its ability to adapt while maintaining its core values. From its humble beginnings to its current position as a kitchen staple, Martha White continues to inspire home bakers to create delicious memories, one batch of cornbread at a time.

The History of Martha White and the Mix

Martha White’s story began not with a baking empire, but with a radio program in 1948. The “Martha White Kitchens” show featured recipes and cooking demonstrations, quickly gaining a devoted following across the South. This radio presence cleverly promoted the Martha White brand of flour and, crucially, its now-iconic cornbread mix.

Initially, the mix offered convenience to home bakers, providing a pre-portioned blend of ingredients for consistently delicious results. As Martha Stewart rose to prominence, publishing her first book, Entertaining, in 1982, the brand continued to evolve, benefiting from a growing interest in home cooking and quality ingredients.

Over the decades, Martha White has remained a steadfast presence in Southern kitchens, adapting to changing tastes while upholding its commitment to tradition. With 99 published books to her name, Martha Stewart embodies the spirit of accessible, rewarding home baking that Martha White represents.

Why Choose Martha White Cornbread Mix?

Martha White Cornbread Mix offers a unique blend of convenience and quality, delivering consistently delicious results with minimal effort. Unlike some mixes, Martha White strikes a balance – it’s not overly sweet, allowing the natural corn flavor to shine through, a preference for many Southern cooks.

The mix’s enduring popularity stems from its reliability; bakers can trust it to produce a tender, flavorful cornbread every time. It’s a versatile base, easily customized with additions like corn kernels, jalapeños, or cheddar cheese, as demonstrated in creative recipes.

Furthermore, Martha White benefits from the association with Martha Stewart’s dedication to quality and accessible home cooking, evidenced by her 99 published books. Choosing Martha White isn’t just selecting a mix; it’s embracing a tradition of Southern hospitality and culinary excellence.

Basic Cornbread Recipe with Martha White Mix

Martha White mix simplifies cornbread baking; combining it with buttermilk and a touch of baking powder yields a classic, homemade Southern cornbread easily.

Ingredients for Classic Cornbread

Crafting classic cornbread with Martha White mix requires just a few essential ingredients, readily available in most kitchens. You’ll need 2 cups of Martha White Cornbread Mix, the foundation of this Southern staple, providing a consistent texture and flavor base. Complement this with 1 cup of buttermilk, contributing a delightful tang and moisture that elevates the cornbread beyond the ordinary.

A teaspoon of baking powder is crucial for achieving a light and fluffy crumb, ensuring the cornbread rises beautifully during baking. While the base recipe is wonderfully simple, feel free to explore additions! Consider incorporating ½ cup of fresh or frozen corn kernels for added texture and sweetness, or a tablespoon of minced fresh basil to introduce a subtle herbaceous note. These optional ingredients enhance the classic flavor profile, allowing for personalized variations.

Ultimately, the beauty of Martha White cornbread lies in its simplicity and adaptability, making it a perfect canvas for culinary creativity.

Step-by-Step Baking Instructions

Begin by preheating your oven to a consistent temperature – typically around 400°F (200°C) – ensuring even baking. In a large mixing bowl, combine the 2 cups of Martha White Cornbread Mix, 1 cup of buttermilk, and 1 teaspoon of baking powder. Gently stir the ingredients together until just combined; avoid overmixing, as this can result in a tough cornbread.

If you’re adding optional ingredients like corn kernels or basil, now is the time to incorporate them, distributing them evenly throughout the batter. Grease a baking pan – an 8-inch square pan is traditional – or line it with parchment paper to prevent sticking. Pour the batter into the prepared pan, spreading it evenly to ensure uniform thickness.

Place the pan in the preheated oven and bake until golden brown and a toothpick inserted into the center comes out clean. This typically takes around 20-25 minutes, but baking times may vary depending on your oven.

Baking Time and Temperature

Generally, a baking temperature of 400°F (200°C) is recommended for Martha White Cornbread Mix, promoting a golden-brown crust and a fluffy interior. However, slight adjustments may be necessary based on your oven’s calibration. The typical baking time falls within the 20 to 25-minute range, but it’s crucial to monitor the cornbread’s progress visually.

To accurately assess doneness, insert a wooden toothpick into the center of the cornbread. If it emerges clean, with no wet batter clinging to it, the cornbread is ready. If the toothpick comes out with moist crumbs, continue baking for another 2-3 minutes and retest.

Keep in mind that variations in pan material and size can also influence baking time. Darker pans tend to bake faster, while glass pans may require a slightly longer baking duration. Always prioritize checking for doneness over strictly adhering to a set time.

Variations on the Classic Recipe

Enhance your Martha White cornbread by incorporating fresh corn kernels, experimenting with buttermilk versus milk, or adjusting sugar levels for sweet or savory profiles.

Adding Corn Kernels for Texture

To elevate the texture of your Martha White cornbread, consider the delightful addition of corn kernels. A simple yet impactful modification, incorporating either fresh or frozen corn introduces a pleasant burst of sweetness and a satisfying chewiness to each bite. The provided information suggests adding approximately one-half cup of corn kernels to a batch of Martha White’s Cornbread and Muffin Mix.

This addition doesn’t require any significant adjustments to the core recipe; simply fold the kernels into the batter alongside the wet ingredients before transferring it to your prepared baking pan. The kernels complement the inherent flavor of the cornbread, creating a more robust and visually appealing final product. Feel free to experiment with the quantity of corn to achieve your desired level of texture and sweetness. This technique transforms a classic recipe into something truly special, offering a delightful twist on a beloved comfort food.

Using Different Liquids: Milk vs. Buttermilk

The choice between milk and buttermilk significantly impacts the final texture and flavor of your Martha White cornbread. While the mix is versatile, buttermilk is traditionally favored for its subtle tang and ability to create a more tender crumb. Buttermilk’s acidity reacts with the baking powder in the mix, resulting in a lighter, fluffier cornbread.

However, milk can be used as a substitute if buttermilk isn’t available. Using milk will yield a slightly less tangy and potentially denser cornbread. To partially mimic the effect of buttermilk when using milk, consider adding a tablespoon of lemon juice or vinegar to one cup of milk and letting it sit for five to ten minutes before incorporating it into the batter. The provided recipe specifically highlights buttermilk as a key ingredient for a classic, homemade flavor. Experimenting with both liquids allows you to tailor the cornbread to your personal preference.

Sweet vs. Savory Cornbread – Adjusting Sugar

Martha White Cornbread Mix offers a foundation for both sweet and savory variations, and adjusting the sugar content is key to achieving your desired outcome. Traditionally, Southern cornbread leans towards the savory side, with minimal sugar added – often none at all. This complements rich, flavorful dishes like chili or collard greens.

However, many enjoy a slightly sweeter cornbread, especially for breakfast or alongside lighter meals. To increase sweetness, gradually add sugar to the mix, starting with a tablespoon or two. Taste the batter before baking and adjust accordingly. Remember that the mix already contains some sugar, so adding too much can result in an overly sweet cornbread. For savory cornbread, consider omitting any additional sugar and perhaps incorporating ingredients like jalapeños or cheddar cheese to enhance the savory profile. Ultimately, the level of sweetness is a matter of personal preference.

Troubleshooting Common Issues

Addressing common baking challenges ensures perfect results; dryness, density, or improper rising can often be corrected with simple adjustments to ingredients or technique.

Cornbread is Too Dry

If your Martha White cornbread emerges from the oven too dry, several factors might be at play. Often, the issue stems from an imbalance of wet to dry ingredients. Ensure precise measurement of buttermilk – using slightly more than the recipe calls for can introduce crucial moisture. Consider adding a tablespoon of melted butter or shortening directly to the mix for enhanced richness and hydration.

Overbaking is another frequent culprit. Reduce baking time by a few minutes and check for doneness using a toothpick; it should come out with a few moist crumbs attached, not completely clean. The oven temperature could also be too high, causing rapid moisture evaporation. Lowering the temperature by 25 degrees Fahrenheit might help. Finally, remember that humidity levels can affect baking, so slight adjustments may be necessary depending on your environment.

Cornbread is Too Dense

Dense cornbread, despite using Martha White mix, usually indicates an issue with the leavening agent or mixing technique. Double-check the expiration date of your baking powder; old baking powder loses its potency, hindering rise. Ensure you’re using the correct amount – the recipe typically calls for one teaspoon.

Overmixing the batter develops the gluten, resulting in a tough, dense texture. Gently combine the wet and dry ingredients until just moistened; a few lumps are perfectly acceptable. Avoid vigorous stirring. Also, ensure the buttermilk isn’t overly cold, as this can inhibit the baking powder’s activation. Finally, confirm your baking powder hasn’t been exposed to moisture before adding it to the mix, as this can also reduce its effectiveness and lead to a heavy cornbread.

Cornbread Doesn’t Rise Properly

Insufficient rise in Martha White cornbread often stems from issues with the baking powder or oven temperature. Verify your baking powder is fresh; it’s the primary leavening agent. If it’s expired, replace it. Ensure you’re measuring accurately – one teaspoon is crucial for proper lift. Also, avoid overmixing the batter, as this develops gluten and inhibits rising.

Oven temperature plays a vital role. An oven that’s not hot enough won’t activate the baking powder effectively. Use an oven thermometer to confirm accuracy. Avoid opening the oven door frequently during baking, as this releases heat and can cause the cornbread to collapse. Finally, ensure the buttermilk isn’t excessively cold, as this can slow down the chemical reaction needed for a good rise.

Beyond Basic Cornbread: Creative Recipes

Elevate your Martha White mix with jalapeño cheddar, honey butter, or convenient muffins – delightful variations for every palate and occasion, expanding culinary horizons.

Jalapeño Cheddar Cornbread

For a spicy and savory twist on classic cornbread, incorporating jalapeños and cheddar cheese into your Martha White mix is a fantastic choice. Begin with the basic cornbread recipe, utilizing 2 cups of Martha White Cornbread Mix and 1 cup of buttermilk as a foundation. To this, add ½ cup of shredded cheddar cheese – a sharp cheddar provides the most robust flavor, but a medium cheddar works well too.

Next, finely dice 2-3 jalapeños, removing the seeds and membranes for a milder heat, or leaving them intact for a significant kick. Gently fold the jalapeños and cheddar into the batter, ensuring even distribution. Pour the mixture into a greased 8×8 inch baking pan. Bake according to the standard instructions, typically around 20-25 minutes at 400°F (200°C), or until a toothpick inserted into the center comes out clean. This jalapeño cheddar cornbread pairs wonderfully with chili, soups, or as a standalone side dish, offering a delightful balance of flavors and textures.

Honey Butter Cornbread

Elevate your Martha White cornbread with a luscious honey butter topping, creating a sweet and comforting treat. Start by preparing the basic cornbread recipe using 2 cups of Martha White mix and 1 cup of buttermilk. Once baked and slightly cooled, it’s time to craft the honey butter. In a small bowl, combine ½ cup of softened butter with 2-3 tablespoons of honey – adjust the honey to your desired sweetness level.

A pinch of salt enhances the flavors. Whip the butter and honey together until light and fluffy. Generously spread the honey butter over the warm cornbread, allowing it to melt slightly into the crevices. This Honey Butter Cornbread is exceptional served alongside roasted chicken, barbecue, or simply enjoyed on its own. The combination of the slightly savory cornbread and the sweet, creamy honey butter is truly irresistible, offering a delightful experience for your taste buds.

Cornbread Muffins – A Convenient Option

For a quicker and portion-controlled treat, transform Martha White cornbread mix into delightful muffins! Using the standard recipe – 2 cups of mix and 1 cup of buttermilk – simply pour the batter into a greased or lined muffin tin. This yields approximately 12 standard-sized muffins, perfect for individual servings or a convenient side dish.

Baking time will be reduced; typically, muffins require 18-20 minutes at 375°F (190°C), but always check for a golden-brown color and a clean toothpick inserted into the center. Cornbread muffins are ideal for breakfast, brunch, or as a grab-and-go snack. Feel free to add mix-ins like blueberries, chocolate chips, or chopped jalapeños for a customized flavor. They’re a fantastic way to enjoy the classic Martha White taste in a more portable and convenient format, making them a family favorite.

Martha White Mix and Dietary Considerations

While traditionally not gluten-free, alternatives exist; adjustments can be made for allergies, ensuring broader accessibility to enjoy Martha White’s classic cornbread flavors.

Gluten-Free Options and Alternatives

Traditionally, Martha White Cornbread Mix contains wheat flour, making it unsuitable for those with gluten sensitivities or celiac disease. However, dedicated gluten-free bakers have successfully adapted the recipe using alternative flours. A popular approach involves substituting a gluten-free all-purpose flour blend, ensuring it contains xanthan gum for binding.

Experimentation is key, as different blends yield varying textures. Some bakers recommend a combination of rice flour, tapioca starch, and potato starch for a result closest to the original. It’s crucial to check the ingredient list of any substitute flour to confirm it’s certified gluten-free and doesn’t contain hidden wheat components.

Furthermore, consider using a gluten-free baking powder to ensure complete avoidance of gluten. While Martha White doesn’t currently offer a dedicated gluten-free version of their classic mix, these substitutions allow individuals with dietary restrictions to still enjoy a homemade cornbread experience inspired by the brand’s legacy.

Adjusting for Allergies

For individuals with allergies, carefully reviewing the Martha White Cornbread Mix ingredient list is paramount. Common allergens like wheat, soy, and dairy may be present. When adapting for allergies, substitutions are essential. For wheat allergies, utilize a certified gluten-free flour blend, as previously discussed, ensuring it’s free from other allergens.

Dairy allergies necessitate replacing buttermilk with a plant-based alternative, such as almond milk or soy milk (if soy isn’t an issue). Adding a teaspoon of lemon juice or vinegar to the plant-based milk can mimic buttermilk’s acidity, aiding in the rise. Egg allergies require a suitable egg replacer, like applesauce or a commercial egg replacement product.

Always double-check the labels of all substitute ingredients to confirm they are processed in an allergen-free facility, preventing cross-contamination. Thoroughly cleaning baking equipment is also vital to minimize allergic reactions, ensuring a safe and enjoyable cornbread experience for everyone.

Tips for Perfect Cornbread Every Time

Proper mixing is key—avoid overmixing, which develops gluten and results in tough cornbread; choose a well-seasoned cast iron or glass pan for optimal baking.

Proper Mixing Techniques

Achieving the perfect cornbread texture hinges on employing the correct mixing techniques when utilizing Martha White mix. The goal is to combine ingredients just until moistened, avoiding overmixing at all costs. Overmixing develops the gluten in the flour, leading to a dense and tough final product – precisely what we want to avoid!

Begin by gently whisking together the dry ingredients – the Martha White mix and any added baking powder. In a separate bowl, combine the wet ingredients – buttermilk (or milk), eggs, and melted butter. Gradually add the wet ingredients to the dry, stirring with a wooden spoon or spatula.

Mix only until the batter just comes together; a few lumps are perfectly acceptable, even desirable. Resist the urge to beat or stir vigorously. Remember, a slightly imperfect batter translates to a tender, fluffy cornbread. Embrace the rustic charm and avoid striving for absolute smoothness. This gentle approach ensures a delightful cornbread experience every time.

Choosing the Right Baking Pan

Selecting the appropriate baking pan significantly impacts the texture and appearance of your Martha White cornbread. Cast iron skillets are a classic choice, imparting a beautifully browned, crispy crust and even heat distribution. An 8-inch or 9-inch skillet is ideal for a traditional, thick-cut cornbread.

However, other options work well too! A standard 8×8 inch square baking pan yields a more uniform, cake-like cornbread. For muffins, utilize a standard muffin tin, ensuring each cup is adequately filled – about two-thirds full – to prevent overflow.

Regardless of your choice, greasing the pan thoroughly is crucial. Butter, shortening, or cooking spray all work effectively. For cast iron, seasoning it well beforehand is key. Preheating the pan in the oven alongside the oven itself can further enhance the crust’s crispness. Consider the pan’s material and size to achieve your desired cornbread outcome.

Storing Leftover Cornbread

Properly storing leftover Martha White cornbread maintains its flavor and prevents it from becoming stale. At room temperature, wrap the cornbread tightly in plastic wrap or place it in an airtight container. It will generally stay fresh for up to three days, though the texture may slightly dry out over time.

For longer storage, refrigeration is recommended. Again, ensure it’s well-wrapped to prevent absorption of other flavors. Refrigerated cornbread can last for up to a week. To restore some of its original texture, briefly reheat slices in a toaster oven or microwave.

Freezing is also a viable option. Wrap individual slices or the entire loaf securely in plastic wrap, then place it in a freezer-safe bag. Frozen cornbread can be stored for up to two months. Thaw overnight in the refrigerator before reheating.

Martha Stewart’s Influence on the Mix

Martha Stewart, a lifestyle icon with 99 books, elevated home cooking, including cornbread, through her accessible recipes and dedication to quality ingredients.

Martha Stewart’s Books and Recipes Featuring Cornbread

Martha Stewart’s extensive bibliography, currently at 99 published books and counting, frequently showcases cornbread as a versatile and comforting staple. Her 1982 publication, Entertaining, likely included variations, establishing her reputation for refined yet approachable home cooking. Throughout her career, she’s consistently demonstrated how to elevate simple dishes like cornbread into something special.

While specific recipes tied directly to Martha White mix aren’t explicitly detailed in the provided text, her broader approach to baking and utilizing quality ingredients aligns perfectly with the mix’s purpose. Her books emphasize fresh components and thoughtful techniques, encouraging cooks of all levels to create memorable meals. Expect to find recipes for accompanying dishes – chili, stews, or roasted meats – that pair beautifully with a classic cornbread, reflecting her holistic approach to dining and entertaining. Her upcoming 100th book may contain even more inspiration!

The Evolution of the Mix Over Time

Martha White Cornbread Mix boasts a rich history, evolving alongside American culinary preferences while maintaining its core promise of convenient, quality baking. Initially, the mix likely reflected regional Southern traditions, emphasizing a slightly coarser texture and a balance between sweet and savory flavors. Over the decades, adjustments were made to cater to broader tastes, potentially including variations in sweetness levels and ingredient sourcing.

Martha Stewart’s involvement and the growth of Martha Stewart Living Omnimedia likely influenced the mix’s packaging, marketing, and recipe development, emphasizing a lifestyle approach to cooking. While the core formula has remained consistent, subtle refinements may have occurred to enhance ease of use and appeal to modern bakers. The addition of recipe suggestions, like incorporating corn kernels and basil, demonstrates a commitment to innovation and inspiring creativity in the kitchen, ensuring the mix remains relevant for generations.

rowenta iron instruction manual

Rowenta Iron Instruction Manual: A Comprehensive Guide

This guide provides detailed instructions for various Rowenta iron models, assisting users in locating manuals and troubleshooting common issues.
It emphasizes the importance of the model number for accurate information retrieval,
whether through Rowenta’s official website search function or third-party parts suppliers.

Understanding Your Rowenta Iron

Rowenta irons are renowned for their innovative steam technology and durable construction, offering a range of features designed to simplify garment care. Before use, familiarize yourself with the specific functionalities of your model, as features vary between steam irons, steam generator irons, and handheld steamers.

Understanding the key features and components – such as the water tank, soleplate, and temperature control settings – is crucial for optimal performance. The soleplate material impacts gliding and fabric protection, while precise temperature control prevents damage to delicate materials.

Steam settings allow for customized ironing based on fabric type, and knowing how to adjust these settings ensures effective wrinkle removal. Always prioritize safety features, and refer to the user manual for detailed guidance on operation and maintenance. Identifying your specific model number is the first step to accessing tailored support and troubleshooting information.

Identifying Your Rowenta Iron Model Number

Locating your Rowenta iron’s model number is essential for accessing the correct user manual, troubleshooting guides, and replacement parts. The model number serves as a unique identifier for your specific appliance, ensuring compatibility and accurate information.

This number is typically found on the product itself, often on a sticker or imprinted directly onto the housing. Common locations include the bottom of the iron, inside the water tank compartment, or on the power cord label.

When searching for information online, entering the complete model number into Rowenta’s website search function or a parts supplier’s database will yield the most relevant results. If you’re unable to find the number on the iron, consult your purchase receipt or original packaging; Knowing your model streamlines the process of finding support and maintaining your Rowenta iron.

Locating the Model Number on Your Rowenta Product

Finding the model number on your Rowenta product is a crucial first step for accessing support and resources. Typically, this identifier is printed on a sticker or directly molded into the appliance’s plastic casing. Begin by carefully inspecting the underside of the iron itself; this is a frequent location.

Another common place to check is within the water tank compartment – lift the lid and look for a label. Don’t overlook the power cord; sometimes the sticker is affixed there. If you still haven’t found it, examine the original packaging or your purchase receipt, as the model number is usually listed on these documents.

Having this number readily available will significantly simplify your search for manuals, FAQs, and replacement parts on Rowenta’s official website or other online retailers.

Accessing Rowenta Iron Manuals Online

Rowenta makes accessing iron manuals remarkably convenient through its official website and various online resources. A primary method is directly visiting Rowenta’s support section, where a comprehensive database of user manuals is available for download. This allows you to quickly obtain a digital copy of your specific model’s instructions.

Alternatively, several third-party websites specialize in appliance manuals and parts, often hosting Rowenta documentation. Utilizing a web search engine with your model number and “user manual” will yield numerous results. Remember to verify the source’s credibility before downloading any files.

These online resources provide detailed guidance on operation, maintenance, and troubleshooting, ensuring you can maximize the lifespan and performance of your Rowenta iron.

Rowenta’s Official Website for Manuals and FAQs

Rowenta’s official website, rowenta.com, serves as the primary hub for accessing iron manuals and a wealth of frequently asked questions (FAQs). The site is structured to facilitate easy navigation, allowing users to quickly locate support resources for their specific model. A dedicated support section houses downloadable PDF versions of user guides, ensuring compatibility across devices.

Beyond manuals, the FAQs address common concerns regarding operation, maintenance, and troubleshooting. Users can often resolve issues independently by consulting these readily available answers. The website also provides options to contact Rowenta’s customer support team directly for personalized assistance.

Choosing your product range or entering your model number into the search engine streamlines the process, delivering tailored information efficiently.

Using the Search Function on Rowenta’s Website

Rowenta’s website features a robust search function designed to pinpoint specific iron documentation quickly. Located prominently on the site, the search bar accepts either the model number or keywords related to your Rowenta product. Entering the full model number – crucial for accuracy – yields the most precise results, directing you to the correct manual and support materials.

If you’re unsure of the exact model number, utilizing keywords like “steam iron,” “steam generator,” or “handheld steamer” can narrow down the options. The search results page displays a list of relevant products and documents.

Remember to carefully review the search results to ensure you select the manual corresponding to your specific Rowenta appliance. This ensures you receive accurate instructions and troubleshooting guidance.

Popular Rowenta Iron Models

Rowenta offers a diverse range of iron models catering to various needs, from basic steaming to advanced fabric care. Popular choices include the Rowenta DR8865 3in1 Handheld Steamer Iron, known for its versatility. Many consumers favor Rowenta steam iron models for their consistent performance and efficient wrinkle removal.

For those seeking powerful steaming, Rowenta Steam Generator Irons are highly regarded, offering high pressure and large water capacities. The brand also provides convenient Handheld Steamer Iron options for quick touch-ups and travel.

Finding the right manual often begins with identifying your specific model number. Rowenta’s website allows you to browse models or directly search using your product’s unique identifier, ensuring you access the correct instructions and support.

Rowenta Steam Iron Models

Rowenta steam irons are celebrated for their advanced features and reliable performance, offering a variety of options to suit different ironing needs. These models typically include adjustable steam settings, allowing users to customize the steam output based on fabric type. Many feature stainless steel soleplates for smooth gliding and even heat distribution.

Popular Rowenta steam iron models often incorporate anti-calc systems to prevent mineral buildup, extending the lifespan of the appliance. Precise temperature control is another common feature, ensuring optimal results for delicate or durable fabrics.

To find the specific instruction manual for your Rowenta steam iron, locating the model number is crucial. You can then utilize Rowenta’s official website search function or explore online resources for detailed guidance and troubleshooting tips.

Rowenta Steam Generator Iron Models

Rowenta steam generator irons represent a premium ironing experience, delivering powerful and consistent steam for professional-quality results. These systems utilize a separate boiler to generate high-pressure steam, offering faster heating times and superior wrinkle removal compared to traditional steam irons.

Key features often include a large water tank capacity, reducing the need for frequent refills, and various steam settings tailored to different fabric types. Many models also boast automatic shut-off features for enhanced safety and anti-calc programs to maintain optimal performance.

Accessing the correct instruction manual for your specific Rowenta steam generator iron requires identifying the model number. Rowenta’s website provides a comprehensive search tool and FAQs to assist users in finding relevant documentation and troubleshooting guidance.

Rowenta Handheld Steamer Iron Models

Rowenta handheld steamer irons offer a convenient and portable solution for quick wrinkle removal, ideal for travel or touch-ups. These compact devices heat up rapidly and deliver targeted steam to smooth out creases in garments, upholstery, and more.

Models like the DR8865 3in1 combine steaming, ironing, and fabric refreshing capabilities. Understanding your specific model number is crucial for accessing the correct user manual, which details operation, safety precautions, and maintenance procedures.

Rowenta’s official website provides access to manuals and FAQs, allowing users to easily find information related to their handheld steamer. Proper care, including regular descaling, ensures optimal performance and extends the lifespan of the appliance. Finding parts is also simplified with a search by model number.

Key Features and Components

Rowenta irons boast features like adjustable temperature controls, steam settings, and varying soleplate types.
Essential components include the water tank and safety features, requiring regular maintenance and cleaning for optimal performance.

Water Tank: Filling and Maintenance

The water tank is a crucial component of your Rowenta iron, enabling steam functionality. Always unplug the iron and allow it to cool completely before handling the water tank. Filling instructions typically involve removing the tank (if detachable) or opening the fill cap, and using distilled or demineralized water to prevent scale buildup.

Regular maintenance is vital. Avoid overfilling, as this can cause leakage. Periodically, the tank may require cleaning to remove mineral deposits. Rowenta recommends descaling procedures (detailed in a separate section) to maintain optimal steam production. Inspect the tank for cracks or damage; a damaged tank should be replaced. Using tap water can lead to scale, reducing the iron’s efficiency and lifespan. Always refer to your specific model’s manual for detailed instructions regarding water tank capacity and cleaning procedures. Proper water tank care ensures consistent and reliable performance from your Rowenta steam iron.

Soleplate: Types and Cleaning

The soleplate, the metal surface of your Rowenta iron, comes in various types, including stainless steel and ceramic-coated. Each material offers different gliding properties and requires specific care. Stainless steel is durable but can stick to certain fabrics, while ceramic offers smoother gliding but is more susceptible to scratches.

Regular cleaning is essential to maintain soleplate performance. Always unplug and cool the iron before cleaning. For minor residue, a damp cloth is sufficient. For stubborn deposits, Rowenta recommends using a soleplate cleaner or a paste of baking soda and water. Avoid abrasive cleaners, as they can damage the coating. Never use metal scouring pads. Gently wipe the soleplate in a back-and-forth motion. Inspect the soleplate regularly for scratches or buildup. A clean soleplate ensures smooth gliding and prevents staining of your clothes, prolonging the life of your Rowenta iron.

Temperature Control Settings

Rowenta irons feature adjustable temperature control settings, crucial for ironing different fabric types effectively and safely. These settings are typically indicated by dots, numbers, or fabric symbols on the control dial. Lower settings are for delicate fabrics like silk and synthetics, preventing scorching. Medium settings suit wool and polyester blends, while higher settings are ideal for linen and cotton.

Always refer to the garment’s care label for recommended ironing temperatures. Start with a lower temperature and gradually increase it if needed. Before ironing a new fabric, test a small, inconspicuous area. Rowenta’s advanced temperature control systems ensure consistent heat distribution, minimizing the risk of damage. Understanding these settings protects your clothes and maximizes ironing efficiency. Incorrect temperature settings can lead to fabric damage or ineffective wrinkle removal.

Steam Settings and Adjustment

Rowenta irons offer adjustable steam settings to cater to various fabric types and ironing needs. These settings typically range from ‘no steam’ to ‘maximum steam’. Delicate fabrics require minimal or no steam to prevent watermarks or damage. Medium steam levels are suitable for everyday fabrics like cotton blends and synthetics. Maximum steam is ideal for heavier fabrics like linen and denim, effectively removing stubborn wrinkles.

Adjusting the steam output is usually done via a dedicated steam control button or dial. Ensure the water tank is filled with distilled or demineralized water for optimal performance and to prevent scale buildup. Rowenta’s steam technology penetrates fabric fibers, relaxing them for easier wrinkle removal. Experiment with different steam levels to find the optimal setting for each garment, always checking the care label first.

Safety Features of Rowenta Irons

Rowenta irons are engineered with multiple safety features to ensure user protection and prevent accidents. A key feature is the automatic shut-off function, which activates if the iron is left unattended in a horizontal or vertical position for a specified period, minimizing fire risk. Many models also include overheat protection, preventing the iron from reaching dangerously high temperatures.

The handles are designed for comfortable and secure grip, often incorporating ergonomic designs and heat-resistant materials. Rowenta prioritizes electrical safety, with features like grounded power cords and robust internal components. Always inspect the cord for damage before each use; It’s crucial to follow all safety guidelines outlined in the instruction manual to operate the iron safely and effectively, preventing potential hazards.

Troubleshooting Common Issues

This section addresses frequent problems like heating failures, leaks, and steam malfunctions, offering solutions and guidance for identifying error codes on Rowenta irons.

Iron Not Heating Up

If your Rowenta iron isn’t heating, several factors could be at play; First, ensure the iron is properly plugged into a functioning electrical outlet. A simple test is to plug another appliance into the same outlet to verify power.

Next, check the temperature control dial; it must be set to an appropriate temperature for the fabric you intend to iron. Some models feature a power indicator light – verify this light illuminates when the iron is switched on. If the light doesn’t come on, it could indicate an internal issue.

Consider the iron’s safety features. Many Rowenta irons have an automatic shut-off function that activates after a period of inactivity. Gently move the iron to see if this reactivates it. If these steps don’t resolve the issue, there might be a problem with the internal heating element or thermostat, requiring professional repair or replacement.

Always consult your specific model’s manual for detailed troubleshooting steps and safety precautions.

Water Leaking from the Iron

Water leakage from your Rowenta iron can be concerning, but often has a straightforward solution. First, ensure you haven’t overfilled the water tank; exceeding the maximum fill line can cause leaks during operation. Check the tank for any cracks or damage that might be contributing to the problem.

Verify the iron is set to the appropriate steam setting for your fabric. Using a high steam setting on a fabric that doesn’t require it can lead to excess moisture and leakage; Also, ensure the temperature is high enough to generate steam effectively; insufficient heat can cause water to condense and leak.

Regular descaling is crucial. Mineral buildup can obstruct steam pathways and cause leaks. Refer to your model’s manual for descaling instructions. If leakage persists after these checks, there might be an internal issue with the seals or steam chamber, requiring professional attention.

Always unplug the iron before inspecting or cleaning it.

Steam Not Producing

If your Rowenta iron isn’t producing steam, several factors could be at play. First, confirm the water tank is adequately filled – a low water level will prevent steam generation. Ensure the steam setting is activated; some models have a dedicated steam button or dial. Verify the temperature is set high enough for steam to be produced; lower settings may only provide dry ironing.

Mineral buildup is a common culprit. Descale your iron regularly, following the instructions in your user manual. A clogged steam vent can also restrict steam flow; carefully inspect and clean the vents with a soft cloth.

Check for any blockages in the water pathways. Some models have a self-clean function that can help clear obstructions. If the issue persists, consult the troubleshooting section of your manual or contact Rowenta customer support for assistance. Always unplug the iron before any inspection or cleaning.

Error Codes and Their Meanings

Rowenta irons, particularly steam generator models, may display error codes to indicate specific issues. These codes help pinpoint the problem, simplifying troubleshooting. While specific codes vary by model, common errors relate to water levels, pump malfunctions, or temperature sensor failures.

Consult your iron’s instruction manual for a complete list of error codes and their corresponding solutions. For example, a flashing light might indicate low water, requiring you to refill the tank. Other codes could signal a descaling need or a more serious internal problem.

If you encounter an unfamiliar error code, refer to the Rowenta website’s FAQ section or contact their customer support. Do not attempt to disassemble the iron to resolve the issue yourself, as this could void the warranty and pose a safety risk. Always note the exact error code when seeking assistance.

Maintenance and Care

Regular cleaning and descaling are crucial for optimal Rowenta iron performance and longevity. Proper care prevents mineral buildup and ensures consistent steam output, extending the appliance’s lifespan.

Cleaning Your Rowenta Iron

Maintaining a clean iron is essential for optimal performance and preventing damage to fabrics. Always unplug the iron and allow it to cool completely before cleaning. The soleplate should be wiped down after each use with a soft, damp cloth to remove any residue. For stubborn stains or buildup, a specialized iron cleaner can be used, following the product’s instructions carefully.

Avoid abrasive cleaners or scouring pads, as these can scratch the soleplate. The exterior of the iron can be cleaned with a slightly damp cloth and mild detergent. Ensure no water enters the iron’s internal components. Regularly check the water tank for mineral deposits and clean as needed, as detailed in the descaling section. Proper cleaning not only extends the life of your Rowenta iron but also ensures consistently excellent ironing results, protecting your clothes from unwanted marks or discoloration.

Descaling Your Rowenta Iron

Regular descaling is crucial for maintaining your Rowenta iron’s steam performance and longevity. Mineral buildup from water can clog steam vents and reduce heating efficiency. Rowenta recommends using their specific descaling solution, available for purchase, or a mixture of distilled water and white vinegar.

Follow these steps: Fill the water tank with the descaling solution, set the iron to the highest steam setting, and heat until all the liquid has been expelled. Repeat this process several times, then rinse the tank thoroughly with clean distilled water, repeating until no scent of the descaling solution remains. Avoid using tap water for rinsing, as it will reintroduce minerals. Descaling frequency depends on water hardness and usage, but generally, every 1-3 months is recommended for optimal performance.

servsafe coursebook 7th edition pdf free download

ServSafe Coursebook 7th Edition: A Comprehensive Guide

Practicetestgeeks.com offers a valuable resource, providing the 7th edition in PDF format alongside supplementary materials, aiding study for certification without purchase costs.

The ServSafe 7th Edition Coursebook stands as a cornerstone resource for anyone involved in the food service industry, aiming to achieve comprehensive food safety knowledge. Published in 2017 by the National Restaurant Association Solutions, LLC, this edition is meticulously designed to prepare individuals for the ServSafe Food Protection Manager Certification Exam.

Recognizing the financial constraints some learners face, access to the 7th edition has become more accessible through online platforms. Notably, practicetestgeeks.com provides a PDF version of the coursebook, coupled with additional study resources. This offers a cost-effective alternative to purchasing the physical copy, particularly beneficial for those preparing for the exam independently.

The coursebook’s content is aligned with essential food safety principles, covering critical areas like foodborne illnesses, personal hygiene, and time/temperature control. It’s a definitive guide, ensuring readers are well-equipped to promote food safety adherence within their establishments and beyond.

What is the ServSafe Manager Coursebook?

The ServSafe Manager Coursebook, specifically the 7th Edition, is the definitive preparation tool for aspiring and current food service managers. It’s designed to deliver a thorough understanding of food safety principles, equipping professionals to prevent foodborne illnesses and maintain a safe environment for consumers. Published by the National Restaurant Association Solutions, LLC, it’s a widely recognized and respected resource.

This edition focuses on practical application, going beyond theoretical knowledge to ensure readers can implement effective food safety practices. Recognizing the need for accessible learning, resources like practicetestgeeks.com offer a PDF version of the 7th Edition, alongside supplementary materials.

This provides a valuable, cost-effective alternative to purchasing the physical textbook, allowing individuals to study at their own pace and prepare for the ServSafe Food Protection Manager Certification Exam without significant financial burden. It’s a comprehensive guide to responsible food handling.

Publication Details and Key Information

The ServSafe Manager Coursebook, 7th Edition, was initially published in 2017 by the National Restaurant Association Solutions, LLC, located in Chicago, Illinois. It falls under the categories of food handling, food service sanitation, employee health & hygiene, and food service management. The book is available through various channels, including Amazon.com (ISBN: 978-0134764238).

Notably, the content is aligned with the standards required for food safety professionals. Recognizing potential financial barriers to access, online platforms like practicetestgeeks.com provide a readily available PDF version of the 7th Edition. This digital resource, coupled with additional study materials, offers a convenient and affordable pathway to certification preparation.

The Internet Archive also lists the book, indicating its accessibility in various formats, including print disabled versions. This widespread availability underscores its importance within the food service industry.

Content and Structure of the 7th Edition

The 7th edition comprehensively prepares readers for the ServSafe Food Protection Manager Certification Exam, focusing on crucial adherence to food safety protocols.

Chapter Overview: Core Concepts

The initial chapters of the ServSafe 7th Edition Coursebook lay a foundational understanding of essential food safety principles. These core concepts are paramount for anyone involved in food handling and preparation. The material meticulously details the significance of providing safe food, outlining key learning objectives designed to equip individuals with the knowledge to identify potential hazards.

Specifically, the coursebook emphasizes the ability to recognize factors contributing to foodborne illnesses and the proactive measures needed to prevent them. This includes understanding contamination sources, the importance of personal hygiene, and the critical role of time and temperature control in maintaining food safety. The Practicetestgeeks.com resource, offering the 7th edition PDF, allows focused study on these fundamental concepts.

Furthermore, the chapter introduces the framework for a robust food safety management system, stressing the importance of consistent application of these core principles in all aspects of food service operations. Mastering these concepts is the first step towards achieving ServSafe certification and ensuring a safe dining experience for customers.

Chapter Overview: Common Foodborne Illnesses

A crucial section of the ServSafe 7th Edition Coursebook dedicates itself to detailing common foodborne illnesses, their causes, and preventative measures. This chapter provides an in-depth look at various pathogens – bacteria, viruses, parasites, and fungi – that can contaminate food and lead to illness. Understanding these threats is vital for any food service professional.

The coursebook meticulously outlines the symptoms associated with each illness, incubation periods, and the foods most commonly linked to outbreaks. It emphasizes the importance of recognizing these signs to prevent further spread and ensure prompt medical attention when necessary. Resources like the Practicetestgeeks.com PDF of the 7th edition facilitate focused study of these critical details.

Moreover, the chapter stresses the role of proper food handling practices in minimizing the risk of contamination and protecting public health. This includes thorough cooking, appropriate cooling methods, and diligent cleaning and sanitizing procedures. A firm grasp of these illnesses and their prevention is essential for ServSafe certification.

Chapter Overview: Personal Hygiene

A cornerstone of food safety, the Personal Hygiene chapter within the ServSafe 7th Edition Coursebook, meticulously details practices to prevent contamination from food handlers; It emphasizes the critical role of individual cleanliness in safeguarding public health, covering topics like handwashing, proper attire, and reporting illnesses.

The coursebook stresses the importance of frequent and thorough handwashing, outlining the correct procedure and identifying key moments when it’s essential – before, during, and after food preparation, after using the restroom, and after handling raw meat. Accessing the Practicetestgeeks.com PDF version of the 7th edition allows for convenient review of these procedures.

Furthermore, it addresses policies regarding employee health, including guidelines for excluding or restricting sick employees from working with food. Proper use of gloves, hair restraints, and clean clothing are also highlighted as vital components of maintaining a hygienic food handling environment. Mastering these principles is crucial for certification.

Chapter Overview: Time and Temperature Control

Central to preventing foodborne illness, the Time and Temperature Control chapter in the ServSafe 7th Edition Coursebook comprehensively covers safe food handling temperatures and methods. It details the “temperature danger zone” – between 41°F and 135°F (5°C and 57°C) – where bacteria multiply rapidly, and emphasizes the importance of keeping food outside this range.

The coursebook explains proper cooking temperatures for various foods, cooling procedures to quickly move food through the danger zone, and safe reheating guidelines. It also covers the use of thermometers, stressing the importance of calibration and accurate temperature measurement. Utilizing the Practicetestgeeks.com PDF resource provides easy access to these critical temperature charts.

Moreover, it addresses time as a public health control, outlining how long TCS (Time/Temperature Control for Safety) foods can be safely held at specific temperatures. Understanding these principles is paramount for passing the ServSafe certification exam and ensuring food safety in practice.

Benefits of Using the 7th Edition Coursebook

Accessing the 7th edition via resources like Practicetestgeeks.com offers cost-effective preparation for the ServSafe Food Protection Manager Certification Exam, promoting food safety.

Preparation for the ServSafe Food Protection Manager Certification Exam

The ServSafe Coursebook 7th Edition is explicitly designed to “completely prepare readers” for the rigorous ServSafe Food Protection Manager Certification Exam. This is a core benefit, ensuring individuals gain the necessary knowledge to pass and demonstrate competency in food safety practices. Resources offering the 7th edition, such as Practicetestgeeks.com, provide accessible study materials, including the PDF version, allowing candidates to familiarize themselves with the exam content without the immediate financial burden of purchasing the physical book.

The coursebook’s comprehensive coverage of essential topics – from foodborne illnesses to personal hygiene and time/temperature control – directly aligns with the exam’s scope. Utilizing freely available resources, like the PDF, allows for focused study and repeated review of critical concepts. This focused preparation increases confidence and the likelihood of success on the certification exam, ultimately benefiting both the individual and the food service establishment they represent.

Furthermore, mastering the material within the 7th edition demonstrates a commitment to upholding high food safety standards, a crucial aspect of responsible food service management.

Promoting Food Safety Adherence

Beyond exam preparation, the ServSafe 7th Edition Coursebook actively “promotes adherence” to vital food safety practices within food service operations. Access to the coursebook, even through resources like the PDF available on Practicetestgeeks.com, fosters a culture of safety awareness among staff. Understanding the principles outlined – encompassing hygiene, temperature control, and prevention of cross-contamination – translates directly into safer food handling procedures.

The coursebook’s detailed explanations and practical examples empower employees to make informed decisions, minimizing the risk of foodborne illness outbreaks. Utilizing readily available resources, such as the free PDF, allows wider dissemination of this crucial knowledge, particularly benefiting smaller establishments or individuals facing financial constraints. This widespread understanding contributes to a more consistent and reliable application of food safety protocols.

Ultimately, consistent adherence to these practices protects public health and safeguards the reputation of the food service business.

Understanding the 2022 FDA Food Code Alignment

While the ServSafe 7th Edition predates the full implementation of the 2022 FDA Food Code, it lays a foundational understanding of food safety principles that remain relevant. Resources like the PDF version found on Practicetestgeeks.com allow access to this core knowledge. The 9th Edition is specifically aligned with the 2022 Code, building upon the concepts introduced in earlier versions.

The 7th Edition’s content addresses many of the same critical areas emphasized in the updated Code, including personal hygiene, time and temperature control, and prevention of cross-contamination. Studying the 7th Edition provides a strong base for understanding the rationale behind the newer regulations. It’s important to note that professionals should supplement this knowledge with information regarding the specific changes introduced in the 2022 FDA Food Code.

Therefore, utilizing the 7th Edition PDF as a starting point, coupled with updates on the latest Code, ensures comprehensive food safety compliance.

Accessing the ServSafe 7th Edition

Practicetestgeeks.com provides a readily available PDF version of the 7th edition, offering a convenient and accessible study resource for those preparing for certification.

Purchasing Options: Amazon and Other Retailers

While seeking a free download of the ServSafe Manager Coursebook 7th Edition is a viable option through resources like Practicetestgeeks.com, traditional purchasing routes remain available for those preferring a physical copy or official materials.

Amazon.com currently lists the ServSafe Coursebook (7th Edition) – ISBN 9780134764238 – published by the National Restaurant Association. Availability and pricing can fluctuate, so checking Amazon directly is recommended. Beyond Amazon, other online booksellers, such as Barnes & Noble, may also carry the 7th edition, though stock levels may vary.

It’s important to note that the 9th edition is now available, aligned with the 2022 FDA Food Code. However, the 7th edition remains a useful resource, particularly if accessing the free PDF version. Consider your specific needs and exam requirements when deciding between editions.

Purchasing directly ensures you receive an official copy, supporting the National Restaurant Association and potentially including access to supplementary online resources.

Free Download Resources and Availability

For individuals facing financial constraints or seeking immediate access, several online platforms offer the ServSafe Manager Coursebook 7th Edition as a free PDF download. A prominent resource identified through online discussions, specifically on Reddit’s r/KitchenConfidential, is Practicetestgeeks.com. This website provides not only the complete 7th edition textbook in PDF format but also supplementary study materials designed to aid in preparation for the ServSafe Food Protection Manager Certification Exam.

However, users should exercise caution when downloading from unofficial sources, ensuring the file is virus-free and legitimate. While Practicetestgeeks.com appears reputable based on user feedback, verifying the file’s integrity is always advisable.

It’s crucial to remember that while a free PDF offers convenient access, it may lack the features of a purchased textbook, such as interactive elements or official updates. The availability of these free resources can change, so regular checks are recommended.

Practicetestgeeks.com as a Resource

Practicetestgeeks.com emerges as a frequently cited and valuable online resource for accessing the ServSafe Manager Coursebook 7th Edition. Discussions on platforms like Reddit’s r/KitchenConfidential highlight its utility for individuals needing study materials without the expense of purchasing the physical textbook. The site offers a free PDF download of the complete 7th edition coursebook, enabling convenient and accessible preparation for the ServSafe certification exam.

Beyond the textbook itself, Practicetestgeeks.com also provides additional resources intended to enhance the learning experience and improve exam readiness. These supplementary materials can be particularly beneficial for self-study, offering practice questions and potentially other learning aids.

Users appreciate the site’s accessibility and the opportunity to obtain the necessary study materials at no cost. However, it’s always prudent to verify the legitimacy and safety of downloaded files from any online source.

ServSafe Allergen Training & Additional Resources

Practicetestgeeks.com provides the 7th edition ServSafe coursebook PDF, complementing allergen training and broader food safety resources for comprehensive learning.

ServSafe Allergen Training Overview

ServSafe Allergen Training is a crucial component of comprehensive food safety education, going beyond basic handling practices. While the core 7th edition ServSafe Coursebook provides a foundational understanding, dedicated allergen training addresses the specific risks and responsibilities associated with food allergies.

This specialized training equips food service professionals with the knowledge to identify common allergens, understand cross-contact prevention, and effectively communicate allergen information to customers. Resources like Practicetestgeeks.com, offering the 7th edition PDF, can supplement this training by reinforcing core concepts.

Understanding allergen awareness is paramount in today’s food service landscape, driven by increasing prevalence of food allergies and stringent regulations. Proper training minimizes the risk of allergic reactions, protecting both customers and the establishment. The 7th edition materials, accessible through various platforms, serve as a valuable starting point for mastering allergen control.

Massachusetts Restaurant Product Availability (7th Edition)

For Massachusetts restaurants seeking the 7th Edition ServSafe Manager Book, availability is specifically noted as a textbook-only product, without an accompanying exam. This is offered through specialized restaurant supply channels catering to the state’s requirements.

While official purchase options exist, resourceful individuals may explore alternative access points. Websites like Practicetestgeeks.com provide the 7th edition ServSafe Coursebook in PDF format, offering a cost-effective study solution. However, it’s crucial to verify if this resource meets the specific requirements for Massachusetts certification.

Restaurants should confirm with local regulatory bodies regarding acceptable study materials and exam procedures. The availability of the 7th edition may be limited as the industry transitions towards newer editions aligned with the 2022 FDA Food Code. Utilizing accessible resources alongside official materials can aid in comprehensive preparation.

Key Learning Objectives: Providing Safe Food

The ServSafe 7th Edition coursebook prioritizes equipping individuals with the knowledge to consistently deliver safe food. Core objectives focus on identifying potential hazards – biological, chemical, and physical – and implementing preventative measures throughout the food handling process.

Students learn to recognize common foodborne illnesses, understand their causes, and apply effective control strategies. Mastering time and temperature control is central, alongside proper personal hygiene practices for all food service personnel.

Resources like Practicetestgeeks.com, offering the 7th edition in PDF format, can aid in grasping these objectives. However, remember the primary goal: to confidently identify key steps in ensuring food safety, from purchasing to service, and adhering to the latest FDA Food Code guidelines. Successful completion demonstrates a commitment to protecting public health.

taco kit instructions

Taco Kit Instructions: A Comprehensive Guide

Embark on a flavorful journey! This guide unlocks the secrets to a fantastic taco night, from understanding kit components to exploring exciting variations.

Discover how to elevate your experience with fresh toppings, authentic ingredients, and helpful tips for a truly memorable meal.

Understanding Your Taco Kit Components

Most taco kits, like those from Gran Luchito or Costco, aim for convenience, offering a complete meal solution. Typically, you’ll find pre-cooked protein – often chicken – alongside tortillas, either corn or flour. Essential elements include a seasoning packet to impart authentic Mexican flavor, and toppings such as shredded cheese and fresh salsa.

Some kits, like the Costco version, include lime crema and slaw for added zest and texture. However, understanding each component’s role is key. The seasoning packet is concentrated, so use it judiciously. Tortillas require warming for optimal pliability and flavor. Pre-cooked chicken benefits from a quick skillet reheat for enhanced taste and texture, as suggested for the Costco kit.

Ultimately, recognizing these components allows for customization and a more enjoyable taco experience.

Identifying the Included Ingredients

Carefully inspect your taco kit’s contents. Common ingredients include pre-cooked chicken, or potentially arrachera (flank steak) requiring preparation. Look for tortillas – distinguish between corn and flour, as heating methods differ; A crucial element is the taco seasoning packet; check the expiration date and note its sodium content.

Expect to find shredded cheese, often a blend, and a salsa, varying in heat level. Premium kits, like Gran Luchito’s, may include lime crema and slaw. Be aware of any potential allergens listed on the packaging. Identifying each ingredient allows for informed decisions about additions or substitutions.

Knowing what’s included prevents mid-meal surprises and ensures a tailored taco experience, accommodating dietary needs and preferences.

Decoding the Seasoning Packet

The taco seasoning packet is a flavor powerhouse, but understanding its composition is key. Typically, it contains chili powder, cumin, paprika, garlic powder, onion powder, oregano, and salt – often a significant amount of salt. Check the ingredient list for potential allergens or unwanted additives.

Consider adjusting the amount used based on your preference; start with less and add more to taste. For a healthier option, explore making your own seasoning blend to control sodium and ingredients. Remember, the packet is designed for the protein quantity specified on the kit.

Experimenting with additional spices like cayenne pepper can elevate the heat, while smoked paprika adds depth.

Preparing the Protein (If Applicable)

Many taco kits include protein, often pre-cooked chicken or beef (arrachera). If using pre-cooked chicken, a quick skillet reheat is sufficient to restore warmth and texture. Arrachera, a flank steak, benefits from marinating to tenderize; vinegar and pineapple juice are excellent choices.

Marinate for at least 30 minutes, or longer for enhanced flavor. Cooking arrachera requires a hot skillet or grill to achieve a desirable sear. Avoid overcooking, as it can become tough. Ensure the internal temperature reaches a safe level before serving.

Proper protein preparation is crucial for a satisfying taco experience, enhancing both taste and texture.

Cooking Pre-Cooked Chicken

Pre-cooked chicken in taco kits is convenient, but often benefits from a quick reheat to improve texture and flavor. The ideal method is a skillet over medium heat. Add a splash of water or broth to prevent drying, and cover for even heating.

Cook for approximately 5-7 minutes, stirring occasionally, until heated through. Alternatively, you can microwave the chicken, but be mindful of potential rubberiness. For enhanced flavor, consider adding a dash of taco seasoning during reheating.

A quick sear in the skillet can also add a pleasant texture. Ensure the chicken reaches an internal temperature of 165°F (74°C) for food safety.

Marinating and Cooking Beef (Arrachera)

Arrachera, or flank steak, delivers incredible taco flavor when properly prepared. Tenderizing is key; a meat mallet gently breaks down fibers. Marinate for at least 30 minutes – a blend of vinegar, pineapple juice, salt, and pepper works wonders.

For cooking, a hot skillet or grill is ideal. Sear the arrachera quickly on both sides to achieve a flavorful crust, then reduce heat to medium. Cook to your desired doneness, typically medium-rare to medium for optimal tenderness.

Rest the meat for 10 minutes before thinly slicing against the grain. This ensures juicy, tender beef perfect for filling your tacos. Don’t overcook, or it will become tough!

Warming the Tortillas

Warming tortillas is crucial for pliability and flavor release. Corn tortillas benefit from a light steam or quick pass over an open gas flame, creating a slightly charred, authentic taste. Flour tortillas can be warmed in a dry skillet, microwave (wrapped in a damp paper towel), or oven.

The goal is to make them warm and pliable without becoming brittle. Avoid overheating, which leads to cracking. A traditional method involves using a comal, a flat griddle, for even heating.

Properly warmed tortillas enhance the entire taco experience, providing a soft, comforting base for your delicious fillings. Experiment with different methods to find your preference!

Corn vs. Flour Tortillas: Heating Methods

Corn tortillas require a slightly different approach than flour; Direct heat can make them brittle, so steaming or a quick char over a flame is ideal. Wrap a stack in a damp paper towel and microwave for 30 seconds, or heat individually on a dry skillet for 15-20 seconds per side.

Flour tortillas are more forgiving. A dry skillet over medium heat works beautifully, flipping frequently until warmed through. Microwaving (damp paper towel) is quick, but can make them chewy. Oven warming (wrapped in foil) keeps a larger batch warm simultaneously.

Ultimately, the best method depends on your preference and time constraints. Remember, a warm tortilla is a happy tortilla!

Reheating Tortillas on a Comal/Griddle

Using a comal or griddle offers the most authentic and flavorful tortilla reheating experience. Heat the surface over medium-high heat – you want it hot, but not smoking. No oil is needed! Place tortillas directly onto the hot surface, flipping every 10-15 seconds.

This rapid heating creates small, desirable char spots and puffs up the tortillas beautifully. Continue flipping until pliable and warmed through, usually 30-60 seconds total. Keep a close eye to prevent burning, especially with thinner corn tortillas.

A comal distributes heat evenly, ensuring consistent warming. It’s the preferred method for achieving that perfect taco texture!

Assembling Your Tacos: A Step-by-Step Approach

Begin with a warmed tortilla – corn or flour, your preference! Add a generous portion of your prepared protein; pre-cooked chicken or flavorful beef works wonderfully. Next, layer on the included slaw and cheese, distributing evenly for balanced bites.

Drizzle with the provided lime crema for a tangy kick and a touch of richness. Spoon on the fresh salsa, adjusting the amount to your desired spice level. Don’t overfill – a manageable taco is a happy taco!

Finally, garnish with any additional toppings you enjoy. Fold the tortilla carefully and enjoy immediately for the best experience!

Enhancing Flavor with Toppings

Elevate your taco experience beyond the kit’s inclusions! Fresh salsa options abound – pico de gallo, salsa verde, or a fiery habanero blend. Consider adding diced avocado for creamy richness, or chopped cilantro for a vibrant, herbaceous note.

For the Lime Crema, whisk together Mexican crema (or sour cream) with fresh lime juice and a pinch of salt. Use it generously! Other fantastic additions include pickled onions for tang, or crumbled queso fresco for a salty bite.

Don’t be afraid to experiment – the possibilities are endless! A well-stocked topping bar transforms a simple meal into a fiesta.

Fresh Salsa Options

Beyond the kit’s salsa, explore a world of fresh, vibrant flavors! Pico de gallo, a classic combination of diced tomatoes, onions, cilantro, and jalapeños, offers a bright, zesty kick. Salsa verde, made with tomatillos, provides a tangy, slightly tart counterpoint.

For those who crave heat, a habanero salsa delivers intense spice. Alternatively, a roasted corn salsa adds sweetness and texture. Consider a mango salsa for a tropical twist, or a pineapple salsa for a sweet and spicy combination.

Homemade salsas are best, but high-quality store-bought options also work wonderfully. Experiment with different chili peppers to customize the heat level to your preference!

Lime Crema Preparation & Use

Elevate your tacos with a zesty lime crema! Start with a base of Mexican crema (or sour cream as a substitute). Whisk in fresh lime juice – begin with one tablespoon per half cup of crema, adjusting to taste. Add a pinch of salt and a dash of garlic powder for extra depth.

For a smoother consistency, blend the ingredients. Lime crema’s tangy coolness beautifully balances the richness of the protein and the spice of the salsa. Drizzle generously over your assembled tacos, or serve it as a dipping sauce.

Experiment by adding a touch of cilantro or a pinch of chili powder for a personalized flavor profile. It’s a simple addition that makes a huge difference!

Vegetarian Taco Kit Adaptations

Transform your taco kit into a vibrant vegetarian feast! Skip the meat entirely, or substitute with plant-based protein like seasoned black beans, lentils, or crumbled tofu. Roasted sweet potatoes or cauliflower florets also make excellent fillings, adding texture and flavor.

Load up on veggies! Add sautéed mushrooms, bell peppers, onions, or zucchini to the mix. Consider incorporating roasted corn for a touch of sweetness. Don’t forget the toppings – avocado, pico de gallo, and a generous squeeze of lime are essential.

A veggie taco bar allows everyone to customize their perfect bite. Embrace the versatility and enjoy a delicious, meat-free taco night!

Creating a Taco Bar Experience

Elevate your taco night into a festive taco bar! Arrange all taco kit components – tortillas, protein, toppings – in separate serving dishes. Offer a variety of salsas, from mild to spicy, and include fresh options like pico de gallo.

Don’t forget the extras! Provide shredded lettuce, diced tomatoes, onions, cilantro, and a selection of cheeses. Lime wedges and sour cream are essential accompaniments. Consider adding sides like Mexican rice and refried beans for a complete meal.

Encourage guests to customize their tacos to their liking. A well-stocked taco bar fosters fun and allows everyone to create their perfect taco!

Tips for a Better Taco Night

For optimal texture, tenderize beef (arrachera) with a meat hammer before marinating. Marinate in vinegar and pineapple juice for enhanced flavor and tenderness. Adding chopped vegetables – lettuce, tomatoes, onions – provides a satisfying crunch and fresh taste.

Warm tortillas properly; a comal or griddle yields the best results. Heating chicken in a skillet revitalizes its flavor. Don’t overload tacos – a moderate filling allows for better flavor balance.

Spice things up with a variety of salsas and toppings. Remember, a little lime juice brightens all the flavors! Enjoy the process and embrace the customizable nature of taco night.

Tenderizing Meat for Optimal Texture

Achieving incredibly tender meat is crucial for a superior taco experience. Specifically with cuts like arrachera (flank steak), mechanical tenderization is highly recommended. Utilize a meat hammer to gently break down the muscle fibers, creating a more yielding texture.

Beyond physical tenderizing, marinades play a vital role. A combination of acidic ingredients, like vinegar, and enzymatic fruits, such as pineapple juice, work wonders. These components help to denature proteins, resulting in a noticeably softer bite.

Allow sufficient marinating time – at least 30 minutes, but longer is better – for optimal results. Season generously with salt and pepper to enhance the natural flavors of the beef.

Adding Veggies for Extra Crunch & Flavor

Elevate your taco night with a vibrant array of fresh vegetables! Beyond the standard lettuce and tomato, consider incorporating options for added texture and nutritional value. Finely shredded slaw, often included in kits, provides a delightful crunch.

Explore other possibilities like diced onions, bell peppers, or even radishes for a peppery kick. For a unique twist, try incorporating roasted or grilled vegetables like cauliflower rice or corn. These additions introduce smoky flavors and satisfying textures.

Don’t underestimate the power of a well-stocked veggie bar – it caters to diverse preferences and encourages healthy eating!

Troubleshooting Common Taco Kit Issues

Encountering problems with your taco kit? Don’t worry, solutions are often simple! If the protein seems bland, remember the seasoning packet is key – ensure it’s thoroughly mixed. For tough meat, tenderizing with a meat hammer, as suggested for arrachera, can dramatically improve texture.

Tortillas tearing? Gentle warming is crucial; avoid overheating. If the lime crema is too thick, add a splash of water to reach desired consistency. Remember, pre-grated cheese can sometimes clump, so separate strands before sprinkling.

Ultimately, a little experimentation and adjustment can transform a potentially frustrating experience into a delicious taco feast!

Storage and Leftover Handling

Proper storage ensures freshness and safety. Leftover cooked protein should be refrigerated in an airtight container within two hours, lasting up to three to four days. Similarly, store salsa, crema, and any fresh toppings separately to maintain their quality.

Tortillas are best stored at room temperature in a sealed bag, or refrigerated for longer preservation. Reheating may be necessary, but avoid prolonged exposure to air, which can make them stale. Discard any ingredients showing signs of spoilage.

Remember, prioritizing food safety is paramount for a worry-free taco experience!

Exploring Different Taco Styles

Beyond the classic, a world of taco styles awaits! Consider venturing into regional Mexican variations – from the flavorful chorizo tacos with lime crema, to the simplicity of arrachera (flank steak) tacos. Experiment with different proteins like fish or shrimp for a coastal twist.

Explore taco salads for a lighter option, or a cheesy taco casserole for sharing. Don’t limit yourself to corn or flour tortillas; each offers a unique texture and taste. Authentic Mexican cuisine boasts incredible diversity, so embrace the possibilities!

Tacos are a canvas for culinary creativity – enjoy the journey!

Gran Luchito Taco Kits: A Brand Overview

Gran Luchito is an authentic Mexican food brand dedicated to challenging preconceptions about Mexican cuisine in the UK. Their Taco Recipe Kits represent a first for the brand, offering a convenient and flavorful way to experience genuine Mexican tastes.

These kits aim to deliver layers of flavor and crunch, moving beyond typical expectations. Focusing on quality ingredients and authentic recipes, Gran Luchito provides everything needed for a vibrant taco night. Expect seasoned pork chorizo, tangy lime crema, and fresh toppings within their offerings.

The brand champions a more nuanced understanding of Mexican food, making it accessible and enjoyable for everyone.

Chorizo Taco Recipe Variations

Spice up your taco night with flavorful chorizo! Consider seasoned pork chorizo as a base, paired with a tangy lime crema for a zesty kick. Fresh toppings are essential – think vibrant salsas and crisp vegetables to balance the richness.

For a unique twist, serve your chorizo tacos with smoked corn, adding a subtle smoky flavor. Alternatively, explore fried cauliflower rice as a lighter, yet satisfying, side. Black beans also complement chorizo beautifully, providing a hearty texture and earthy taste.

Don’t be afraid to experiment with different salsas and toppings to create your perfect chorizo taco experience!

Costco Taco Kit Specific Instructions

The Costco taco kit offers a convenient all-in-one solution for a quick and delicious meal. It typically includes pre-cooked chicken, slaw, cheese, lime crema, salsa, and tortillas – minimizing prep time. However, to truly enhance the flavors, it’s recommended to heat the pre-cooked chicken in a skillet.

This simple step revitalizes the chicken, adding a desirable texture and warmth. Ensure the chicken is heated thoroughly before assembling your tacos. Don’t overlook the included lime crema and salsa; they are key components to the kit’s overall flavor profile.

Utilize all the provided ingredients for a complete and satisfying taco experience!

Mexican Food Trends & Taco Evolution

Historically, Mexican cuisine in many regions lacked authentic representation, often limited to basic offerings. However, increased migration has dramatically expanded the availability and diversity of Mexican food, moving beyond “yellow box” staples. This evolution has fueled a demand for more authentic flavors and experiences.

Tacos, once a relatively simple street food, have undergone a significant transformation, with regional variations and gourmet interpretations gaining popularity. The rise of taco kits reflects this trend, offering a convenient entry point to explore Mexican flavors.

Consumers now seek layers of flavor, crunch, and fun, driving innovation in taco recipes and presentations.

Beyond the Kit: Authentic Mexican Ingredients

While taco kits provide convenience, venturing beyond unlocks truly authentic flavors. Consider sourcing arrachera (flank steak) for a superior protein, tenderizing it with a meat mallet and marinating in a vibrant blend of vinegar, pineapple juice, salt, and pepper.

Explore fresh salsas instead of relying solely on jarred options, experimenting with different chili peppers and ingredients. Authentic tortillas, ideally warmed on a comal, elevate the entire experience.

Don’t hesitate to incorporate smoked corn or fried cauliflower rice for added texture and complexity, moving beyond standard kit components.

Final Thoughts & Taco Enjoyment

Ultimately, taco night is about fun, flavor, and sharing with loved ones. Whether you’re utilizing a convenient kit or crafting tacos from scratch with authentic ingredients, the possibilities are endless.

Remember to personalize your experience – experiment with toppings, explore different protein options, and don’t be afraid to get creative! From simple weeknight meals to elaborate taco bars, embrace the versatility of this beloved dish.

Gran Luchito and Costco kits offer excellent starting points, but the true magic happens when you infuse your own culinary flair. Enjoy the journey and savor every delicious bite!

nissan altima 2009 owners manual

Nissan Altima 2009 Owners Manual: Article Plan

This detailed plan outlines comprehensive coverage for the 2009 Nissan Altima, including sections on vehicle specifics, operation, maintenance, and troubleshooting procedures.

Welcome to the 2009 Nissan Altima Owner’s Manual! This guide provides essential information for safe and enjoyable vehicle operation. It details features, controls, maintenance, and troubleshooting, ensuring you maximize your Altima experience. Understanding this manual is crucial for proper vehicle care and longevity.

The 2009 Altima, available in various trims including base and hybrid models, represents Nissan’s commitment to reliability and innovation. This manual covers all engine types. Accessing a downloadable PDF version (approximately 274.7 Mb) offers convenient offline reference. Regularly consulting this manual will help you maintain optimal performance and address potential issues promptly. Furthermore, supplemental service manuals are available for more in-depth repairs.

Vehicle Identification

Locating your vehicle’s unique identifiers is essential for service, warranty claims, and accurate parts ordering. The Vehicle Identification Number (VIN) is a 17-character code providing crucial information about your 2009 Nissan Altima.

You’ll find the VIN on the driver’s side dashboard, visible through the windshield, and on your vehicle registration and insurance documents. Additionally, it’s often located on the driver’s side doorjamb. Nissan utilizes this number to track vehicle history and specifications. Knowing your Altima’s model year (2009) and engine type (including hybrid if applicable) is also vital when seeking assistance or replacement parts. Referencing the owner’s manual alongside the VIN ensures accurate identification.

Contacting Nissan

For assistance with your 2009 Nissan Altima, several avenues are available. Nissan’s customer service can be reached via phone for general inquiries, warranty support, or roadside assistance. Their official website, NissanUSA.com, provides a wealth of information, including FAQs, owner’s manuals (available as PDFs), and service locator tools.

To locate the nearest authorized Nissan dealership for maintenance or repairs, utilize the dealer locator on the website. For specific technical support or to access Nissan Service Manuals, explore online forums and resources dedicated to Nissan vehicles. Remember to have your Vehicle Identification Number (VIN) readily available when contacting Nissan or a dealership to expedite the process and ensure accurate support.

Safety Precautions

Prioritizing safety is paramount when operating your 2009 Nissan Altima. Always wear seatbelts, ensuring proper fit for all occupants. Familiarize yourself with the airbag system; improper positioning can increase injury risk during deployment. Never drive under the influence of alcohol or drugs, and avoid distracted driving – focus solely on the road.

Regularly inspect tires for proper inflation and tread depth. Understand the function of all dashboard warning lights and address any illuminated indicators promptly. Keep children secured in appropriate child restraint systems. Be aware of your surroundings and practice defensive driving techniques. Review the complete safety section in your owner’s manual for detailed instructions and warnings.

Understanding Your Vehicle

Familiarizing yourself with your 2009 Nissan Altima is crucial for optimal operation and maintenance. This section details key features, including the engine, transmission (potentially a CVT – Continuously Variable Transmission), and available trim levels. Learn to identify and interpret all dashboard symbols and indicators, understanding their significance for vehicle health and safety.

Locate essential components like the battery, fluid reservoirs, and spare tire. Understand the function of various controls – lights, wipers, climate control, and audio system. Refer to the owner’s manual for detailed diagrams and explanations. Knowing your Altima’s capabilities and limitations ensures a safe and enjoyable driving experience.

Key Features of the 2009 Altima

The 2009 Nissan Altima boasts several notable features enhancing both comfort and performance. Engine options included a 2.5L four-cylinder and a 3.5L V6, offering varied power outputs. Many models featured Nissan’s Xtronic CVT (Continuously Variable Transmission) for smooth, efficient operation. Available trims ranged from the base model to the sporty SE and luxurious SL.

Standard features often included air conditioning, power windows and locks, and a CD player. Higher trims added options like leather seats, a sunroof, and a premium audio system. Safety features were also prominent, with available ABS brakes and multiple airbags. Understanding these features maximizes your Altima experience.

Dashboard Symbols and Indicators

The 2009 Altima’s dashboard utilizes a series of symbols to communicate vital vehicle information. The check engine light indicates potential engine issues requiring diagnosis. The ABS light signals a problem with the anti-lock braking system. A flashing “low fuel” indicator prompts immediate refueling. The battery warning light signifies charging system concerns.

Other crucial indicators include the oil pressure light, temperature gauge, and brake warning light. Familiarizing yourself with these symbols is essential for safe operation. Refer to the owner’s manual for detailed explanations of each indicator and recommended actions when illuminated. Ignoring these warnings could lead to more significant vehicle damage.

Operation

Proper operation of your 2009 Nissan Altima ensures a safe and enjoyable driving experience. This section details procedures for starting, stopping, and driving the vehicle. Always ensure the parking brake is engaged before starting the engine. Familiarize yourself with the location of all controls – lights, wipers, and climate controls – before driving.

Smooth acceleration and braking are key to efficient driving. Understand the function of the CVT transmission for optimal performance. Regularly check mirrors and blind spots. Adhering to posted speed limits and traffic laws is paramount. Consult the owner’s manual for specific operational details and safety recommendations.

Starting and Stopping the Engine

To start your 2009 Nissan Altima, ensure the gear selector is in ‘Park’ or ‘Neutral’. Fully depress the brake pedal and turn the ignition key to the ‘Start’ position, releasing it once the engine engages. Avoid prolonged cranking. For a smooth stop, gently apply the brake pedal, gradually increasing pressure as needed.

Before turning off the engine, shift into ‘Park’ and engage the parking brake. Turn the ignition key to the ‘Off’ position. Never turn off the engine while driving. Familiarize yourself with the emergency stop procedure. Refer to the owner’s manual for detailed instructions and safety precautions regarding engine operation.

Driving Your Altima

Before driving your 2009 Nissan Altima, adjust the seat and mirrors for optimal visibility and comfort. Fasten your seatbelt and ensure all passengers are properly restrained. Familiarize yourself with the accelerator and brake pedal responsiveness. Steer smoothly and maintain a safe following distance.

The Altima’s handling characteristics are designed for comfortable and controlled driving. Be mindful of road conditions and adjust your speed accordingly. Utilize turn signals well in advance of lane changes or turns. Practice defensive driving techniques and always obey traffic laws. Refer to the owner’s manual for specific driving tips and safety recommendations.

Fuel and Refueling

Your 2009 Nissan Altima typically requires unleaded gasoline with an octane rating of 87. Always check the fuel filler door for the recommended fuel type. When refueling, ensure the vehicle is on a level surface and the engine is turned off. Carefully remove the fuel cap and insert the nozzle fully into the filler neck.

Avoid overfilling the fuel tank, as this can damage the evaporative emissions control system; After refueling, securely replace the fuel cap and tighten it until it clicks. Be aware of potential static electricity during refueling, especially in cold weather. Consult the owner’s manual for fuel capacity details and related safety precautions.

Maintenance

Regular maintenance is crucial for ensuring the longevity and optimal performance of your 2009 Nissan Altima. This includes adhering to the recommended maintenance schedule outlined in the owner’s manual. Key areas to focus on are fluid checks (engine oil, coolant, brake fluid, power steering fluid) and replacements at specified intervals.

Tire maintenance, including proper inflation and rotation, is also vital for safety and fuel efficiency. Additionally, inspect belts, hoses, and filters regularly. Following the schedule helps prevent costly repairs and maintains the vehicle’s value. Refer to the manual for specific intervals and procedures for each maintenance item.

Recommended Maintenance Schedule

The 2009 Nissan Altima’s maintenance schedule is interval-based, typically expressed in mileage or time, whichever comes first. Essential services at 7,500 miles/6 months include oil and filter changes, tire rotation, and a multi-point inspection. At 15,000 miles/12 months, add air filter replacement and cabin air filter inspection.

More extensive services are due at 30,000 miles/24 months, such as brake fluid replacement, drive belt inspection, and coolant inspection. The CVT transmission requires specific fluid checks and potential replacement at higher mileage intervals. Always consult your owner’s manual for the precise schedule tailored to your driving conditions.

Fluid Checks and Replacements

Regularly checking and replacing fluids is crucial for the 2009 Nissan Altima’s longevity. Key fluids include engine oil (essential for lubrication), coolant (prevents overheating), brake fluid (ensures braking performance), power steering fluid, and transmission fluid (specifically important for the CVT).

Inspect fluid levels monthly and top off as needed. Follow the recommended replacement intervals outlined in the owner’s manual – typically, engine oil every 7,500 miles, coolant every 30,000 miles, and brake fluid every two years. The CVT transmission fluid requires careful monitoring and replacement according to Nissan’s specifications to avoid damage.

Tire Information and Maintenance

Maintaining proper tire condition is vital for safety and performance of your 2009 Nissan Altima. Refer to the sticker on the driver’s side doorjamb for the recommended tire pressure – typically around 32 PSI. Check tire pressure monthly when tires are cold.

Regularly inspect tires for wear and damage, including cuts, bulges, and uneven tread wear. Rotate tires every 6,000-8,000 miles to ensure even wear. The 2009 Altima uses specific tire sizes; consult the owner’s manual for details. Proper alignment is also crucial for extending tire life and maintaining optimal handling.

Lights and Electrical Systems

Your 2009 Nissan Altima’s lighting system includes interior and exterior lights, all crucial for visibility and safety. Headlights, taillights, brake lights, and turn signals should be checked regularly for proper function. Familiarize yourself with the headlight switch operation, including low and high beams.

The Altima also features windshield wipers and washers; ensure adequate washer fluid levels. The electrical system powers various components, including the audio system and climate control. If you experience electrical issues, consult a qualified technician. Replacing fuses is a simple DIY task, but always use the correct amperage fuse.

Interior and Exterior Lighting

The 2009 Nissan Altima features a comprehensive lighting system for both safety and convenience. Exterior lights include headlights (low & high beam), taillights, brake lights, turn signals, and parking lights. Interior lights encompass dome lights, map lights, and reading lights, all controlled via switches or automatic settings.

Understanding the headlight switch operation is vital – it controls parking lights, headlights, and auto-on functionality. Regularly inspect all bulbs for proper function and replace any that are burnt out. Dim or flickering lights indicate potential electrical issues requiring professional attention. Proper lighting ensures optimal visibility during all driving conditions.

Windshield Wipers and Washers

Maintaining clear visibility is crucial for safe driving, and the 2009 Nissan Altima’s windshield wipers and washers are key components. The wiper system offers multiple speed settings, controlled by a stalk on the steering column, including intermittent, low, and high. The washer fluid is activated by a separate button, spraying fluid to clean the windshield.

Regularly inspect wiper blades for wear and tear, replacing them when they streak or chatter. Ensure the washer fluid reservoir is adequately filled with appropriate windshield washer fluid, especially during colder months to prevent freezing. Proper operation of these systems significantly enhances driving safety in inclement weather.

Audio System Operation

The 2009 Nissan Altima’s audio system provides entertainment and information during your drive. The system typically features an AM/FM radio, a CD player, and potentially an auxiliary input jack for connecting external devices like MP3 players. Controls are conveniently located on the dashboard, allowing for easy access to volume, tuning, and source selection.

Explore the system’s settings to adjust sound equalization and customize your listening experience. Some models may include steering wheel-mounted audio controls for added convenience. Familiarize yourself with the system’s features to fully enjoy its capabilities while maintaining focus on the road. Proper use enhances driving comfort and enjoyment.

Climate Control System

The 2009 Nissan Altima’s climate control system ensures passenger comfort by regulating temperature and airflow within the vehicle. It typically features manual or automatic temperature control, allowing you to set a desired cabin temperature. Controls for fan speed, vent selection (floor, dash, defrost), and air conditioning are readily accessible on the dashboard.

Understanding the recirculation mode is crucial; it recirculates interior air, useful for quickly cooling or warming the cabin. Proper use of the climate control system optimizes comfort and fuel efficiency. Regularly check and maintain the system for optimal performance, ensuring a pleasant driving experience in all weather conditions.

Seating and Safety Features

The 2009 Nissan Altima prioritizes occupant safety and comfort with a range of features. Seat adjustments allow drivers and passengers to find optimal positioning for a secure driving experience. Proper safety belt usage is paramount; always ensure belts are correctly fastened before commencing travel.

The Altima incorporates an advanced airbag system, including front and side airbags, designed to provide crucial protection in the event of a collision. Understanding the airbag system’s operation and limitations is vital. Familiarize yourself with child safety seat installation guidelines for securing younger passengers. Regularly inspect seats and safety belts for any signs of wear or damage.

Seat Adjustments and Safety Belts

Proper seat adjustment is crucial for comfortable and safe driving. The 2009 Altima’s seats offer manual adjustments for position, recline, and lumbar support, allowing drivers to personalize their seating. Always adjust the seat before driving, ensuring full pedal reach and steering wheel control.

Safety belts are your primary restraint system. Ensure all occupants are properly secured with the correct belt positioning – across the shoulder and lap. Never allow passengers to sit with belts twisted or loosened. Regularly inspect belts for damage and replace if necessary. The Altima features three-point safety belts in all seating positions, maximizing protection during a collision.

Airbag System Information

The 2009 Nissan Altima is equipped with an advanced airbag system designed to supplement seat belts in certain collision scenarios. This system includes front and side-impact airbags for both front occupants, and side curtain airbags protecting front and rear passengers. Airbags deploy rapidly and with significant force, so proper seating position is vital.

Never place rear-facing child seats in front of active airbags, as deployment could cause severe injury. The airbag warning light on the dashboard indicates system status; if it remains illuminated, have the system inspected immediately. Regular maintenance isn’t typically required, but any damage to the system necessitates professional repair.

Troubleshooting

This section addresses common issues owners of a 2009 Nissan Altima might encounter. Frequent problems include difficulty starting, unusual noises, and warning light illumination. Check the battery connections and fuel level if the engine won’t start. For odd sounds, investigate potential fluid leaks or loose components.

Consult the dashboard symbol guide to understand warning light meanings. If a light persists, professional diagnosis is recommended. Minor issues like blown fuses can often be resolved by the owner, but complex problems require a qualified technician. Always prioritize safety and avoid attempting repairs beyond your skill level.

Common Issues and Solutions

Owners of the 2009 Nissan Altima frequently report issues with the Continuously Variable Transmission (CVT). Symptoms include shuddering, hesitation, or a lack of power. Fluid changes are crucial for CVT health; follow the recommended maintenance schedule. Another common problem is the failure of the output speed sensor, requiring replacement;

Electrical issues, such as malfunctioning lights or the audio system, can often be traced to blown fuses. Check the fuse box diagram in the owner’s manual. Engine misfires may indicate faulty spark plugs or ignition coils. Addressing these promptly prevents further damage. For persistent problems, seek professional diagnosis and repair.

Emergency Procedures

In the event of a breakdown, safely pull over to the side of the road, activate hazard lights, and ensure all occupants exit the vehicle on the side away from traffic. If possible, place warning triangles to alert approaching drivers. For a flat tire, consult the owner’s manual for proper jacking and tire change procedures.

Should the engine overheat, safely stop and allow it to cool before attempting to check coolant levels. In case of a collision, assess injuries and call emergency services immediately. Familiarize yourself with the location of the spare tire, jack, and first-aid kit. Always prioritize safety and follow local emergency protocols.

Specifications

The 2009 Nissan Altima offered several engine options, including a 2.5L four-cylinder producing 175 hp and a 3.5L V6 generating 270 hp. Transmission choices included a six-speed manual or a Continuously Variable Transmission (CVT). Fuel capacity is 18.5 gallons, and dimensions vary slightly based on trim level.

Wheelbase measures 109.3 inches, with a length of 189.1 inches. Curb weight ranges from approximately 3,200 to 3,500 lbs. The Altima’s suspension features an independent strut front and a multi-link rear. Detailed specifications for specific trims and options are available within the complete owner’s manual, providing precise data for informed vehicle understanding.

Warranty Information

The 2009 Nissan Altima originally came with a standard 3-year/36,000-mile bumper-to-bumper warranty, covering defects in materials or workmanship. Additionally, a 5-year/60,000-mile powertrain warranty protected the engine, transmission, and drive components. Emission control components were covered for 8 years/80,000 miles, adhering to federal regulations.

However, these warranties are subject to time and mileage limitations and may have transferred with subsequent ownership. It’s crucial to review the original warranty documentation for specific terms and conditions. Nissan also offered extended warranty options at the time of purchase. Current warranty status should be verified through a Nissan dealership or by referencing the vehicle’s service history.

CVT Transmission Information

The 2009 Nissan Altima utilizes a Continuously Variable Transmission (CVT), offering seamless gear ratios for improved fuel efficiency and smooth acceleration. Unlike traditional automatic transmissions, a CVT doesn’t have fixed gears; instead, it uses a belt and pulley system. Regular maintenance is vital for CVT longevity, including fluid checks and replacements.

Nissan recommends specific CVT fluid (NS-2 or NS-3) – using incorrect fluid can cause damage. Symptoms of CVT issues include shuddering, slipping, or unusual noises. The 2007-2011 Altima, Juke, Rogue, and Sentra models had documented CVT output speed sensor service needs. Proper operation involves avoiding harsh acceleration and ensuring timely fluid services as outlined in the maintenance schedule.

Hybrid System Overview (If Applicable)

For 2009 Nissan Altima Hybrid models, a combined gasoline engine and electric motor system delivers enhanced fuel economy. The hybrid system automatically switches between engine, motor, or a combination, optimizing performance and efficiency. Key components include the high-voltage battery, electric motor/generator, and power control module.

Service Manuals specifically cover the 2007-2009 Altima Hybrid, detailing procedures for the hybrid system. Regular inspections of the hybrid system are crucial, including battery health and cooling system functionality. Understanding the system’s operation aids in recognizing potential issues. Proper maintenance, as outlined in the owner’s manual, ensures optimal hybrid system performance and longevity.

Nissan Service Manuals Availability

Comprehensive service manuals for the 2009 Nissan Altima, including hybrid models, are available through various channels. Digital PDF versions can be found online, offering detailed repair procedures and technical specifications. Nissan also provides official service manuals, often accessible via subscription services or authorized dealerships.

Resources like online forums and automotive repair websites may offer access to scanned or reproduced manuals. However, verifying the accuracy and completeness of these sources is crucial. The 2007-2009 Altima Hybrid has dedicated service documentation. Investing in an official manual ensures reliable information for both DIY repairs and professional maintenance, maximizing vehicle lifespan.

Additional Resources

Beyond the owner’s manual, several resources support 2009 Nissan Altima owners. Nissan’s official website provides access to frequently asked questions, warranty details, and service locator tools. Online automotive forums dedicated to Nissan vehicles offer a platform for sharing experiences and troubleshooting advice. Websites specializing in auto repair provide diagrams, repair guides, and parts information.

Mobile applications like Nissan Drivers Guide offer interactive owner’s manuals and support. For technical service bulletins and recall information, the National Highway Traffic Safety Administration (NHTSA) website is invaluable. Remember to cross-reference information from multiple sources to ensure accuracy and safety when performing any maintenance or repairs on your Altima.

brownie art and design badge requirements pdf

Embark on a creative journey! This badge explores artistic expression, design principles, and project application, culminating in a documented PDF showcasing Brownie’s artistic achievements.

Overview of the Badge

The Brownie Art & Design Badge is a fantastic opportunity for young artists to delve into the world of visual creativity. This badge isn’t just about making pretty pictures; it’s about understanding how and why art looks the way it does. Brownies will explore fundamental art principles like color theory, shape, texture, and balance, learning to apply these concepts to their own designs.

A key component of earning this badge involves creating a finished artwork and documenting the entire process. This documentation will be compiled into a PDF, demonstrating their artistic journey from initial sketches to the final product. The PDF requirement encourages organization, reflection, and the ability to present their work effectively – valuable skills beyond the art room!

Badge Requirements at a Glance (PDF Focus)

To earn the Brownie Art & Design Badge, several key steps must be completed, with a strong emphasis on creating a comprehensive PDF portfolio. Brownies will first explore different color palettes, experimenting with combinations and understanding their impact. Next, they’ll sketch out design ideas, brainstorming and visualizing their artistic concepts. The core requirement is producing a finished artwork, showcasing their skills and creativity.

The final, and crucial, step is assembling a PDF. This PDF must include photos of the artwork, a description of the process, and evidence of exploration of art principles. Formatting guidelines will ensure a clear and presentable document for leaders to review, demonstrating the Brownie’s understanding and artistic growth.

Understanding Art & Design Principles

Dive into the fundamentals! Explore color, shape, texture, and design elements – essential building blocks for creative expression and successful badge completion.

Color Theory for Brownie Artists

Unlocking the Power of Hues! Color profoundly impacts art, evoking emotions and creating visual interest. Brownies will learn about primary colors (red, yellow, blue) and how mixing them creates secondary colors (orange, green, purple).

Understanding warm colors (reds, oranges, yellows) – energetic and exciting – versus cool colors (blues, greens, purples) – calming and serene – is key. Exploring color palettes, like complementary (opposite colors) or analogous (neighboring colors), will enhance their designs.

For the badge PDF, Brownies should document their color explorations, perhaps creating color wheels or mood boards. This demonstrates their grasp of color theory and its application to their artwork, fulfilling a core requirement.

Shape and Form in Brownie Designs

Building Blocks of Art! Shapes are two-dimensional (circles, squares, triangles) while form adds depth, creating three-dimensional illusions (spheres, cubes, pyramids). Brownies will explore how different shapes and forms communicate different feelings and ideas within their artwork.

Understanding positive and negative space is crucial – the shapes are the positive space, while the area around them is negative. Experimenting with overlapping shapes and varying sizes will add complexity and visual appeal to their designs.

For the badge PDF documentation, Brownies should include sketches demonstrating their understanding of shape and form, and how they used these elements in their finished artwork, showcasing a key design principle.

Texture and Pattern Exploration

Adding Depth and Interest! Texture refers to how something feels or looks like it feels – smooth, rough, bumpy, etc. Patterns are repeating elements, creating visual rhythm. Brownies will investigate how texture and pattern enhance their art.

They can create implied texture through drawing or painting techniques, mimicking real-world surfaces. Experimenting with different materials (fabric scraps, leaves, sand) in collage adds actual texture. Patterns can be found in nature or created abstractly.

For the badge PDF, Brownies should document their texture and pattern explorations, including examples of both implied and actual textures, and explain how patterns contribute to their overall design, demonstrating artistic skill.

Brownie Art Techniques

Unleash creativity! Brownies will master fundamental techniques – drawing, painting, and collage – building skills for artistic expression and PDF documentation.

Drawing Techniques for Beginners

Foundational Skills: Introduce Brownies to basic drawing through simple shapes and lines. Start with light sketching, encouraging observation of objects before attempting to draw them. Practice techniques like shading with pencils to create depth and form. Explore different pencil grades (HB, 2B, 4B) to understand tonal variations.

Guided Practice: Provide step-by-step drawing exercises, focusing on animals, plants, or Brownie-related themes. Emphasize that mistakes are learning opportunities! Encourage experimentation with different drawing tools like crayons or colored pencils. For the badge PDF, have Brownies include sketches demonstrating their practice of these techniques, noting what they learned during each exercise. This showcases their progress and understanding.

Painting with Different Mediums

Exploring Paint: Introduce Brownies to watercolor, tempera, and acrylic paints, highlighting their unique properties. Demonstrate basic brushstrokes and color mixing techniques. Watercolor encourages transparency and layering, while tempera is great for bold colors. Acrylics offer versatility and opacity.

Hands-on Exploration: Let Brownies experiment with each medium on different surfaces (paper, cardboard). Encourage them to create abstract paintings or simple landscapes. For the badge PDF documentation, require photos of their painted samples, alongside brief descriptions of their experiences with each paint type. This demonstrates their understanding of different mediums and their creative choices, fulfilling a key badge requirement.

Collage and Mixed Media Art

Beyond Paint: Introduce collage as a fantastic way to create art using various materials – paper scraps, fabric, yarn, buttons, and natural elements. Mixed media expands this, combining collage with painting, drawing, or other techniques. This fosters creativity and resourcefulness.

Badge Documentation: For the badge PDF, Brownies should create a mixed media artwork demonstrating their understanding of texture and design. Include photos of the artwork’s creation process, showcasing material selection and layering. A short artist statement explaining their choices and inspiration is crucial. This fulfills the PDF requirement of documenting the art process and showcasing creative application, directly contributing to badge completion.

Design Principles for Brownies

Essential Elements: Learn balance, emphasis, and repetition to create visually appealing designs, documented within the badge PDF showcasing thoughtful artistic choices and understanding.

Balance and Symmetry in Design

Understanding Visual Weight: Explore how elements within a design create balance – either symmetrical, mirroring each side, or asymmetrical, achieving equilibrium through varied placement. Brownies will learn to distribute colors, shapes, and textures to avoid a design feeling “heavy” on one side.

This concept is crucial for creating visually pleasing artwork, and will be a key component documented in their badge PDF. They’ll experiment with arranging elements to demonstrate understanding of these principles; Consider how repeating patterns or strategically placed focal points contribute to a sense of harmony. The PDF submission will require examples showcasing both symmetrical and asymmetrical balance, with explanations of their design choices.

Creating Emphasis and Focal Points

Drawing the Eye: Brownies will discover how to guide a viewer’s gaze using techniques like contrasting colors, size variations, and unique shapes. A focal point is the first thing the eye notices in a design – it’s the star of the show! Learning to create this emphasis is vital for effective communication through art.

For their badge PDF, Brownies will demonstrate this skill by creating artwork with a clear focal point. They’ll need to explain why they chose that element and how they made it stand out. Documentation within the PDF should include sketches showing initial ideas and the final artwork, highlighting the focal point and the techniques used to achieve it. This showcases understanding of design principles.

Using Repetition and Rhythm

Patterns and Flow: Repetition involves reusing elements – colors, shapes, lines – to create visual consistency. Rhythm builds upon repetition, adding a sense of movement or flow. Think of it like a beat in music! Brownies will learn how these elements contribute to a harmonious and engaging design.

For their badge PDF submission, Brownies will create artwork demonstrating repetition and rhythm. The PDF must include a written explanation of the chosen repeating elements and how they contribute to the overall rhythm of the piece. Photos of the artwork, alongside initial sketches, will illustrate the design process. This demonstrates their ability to apply these principles and document their creative choices effectively within the required PDF format.

Applying Art & Design to Brownie Projects

Practical Creativity! Brownies will utilize learned principles to design meeting decorations, themed artwork, and even contribute art for community service initiatives, documented in their PDF.

Designing Brownie Meeting Decorations

Transforming Spaces with Art! Brownies can apply their newfound art and design skills to create vibrant and engaging decorations for troop meetings. This involves brainstorming themes, sketching initial ideas, and selecting appropriate color palettes – all elements crucial for the badge’s PDF documentation.

Consider designing banners, table centerpieces, or even themed backdrops. Encourage the use of shapes, patterns, and textures explored during the badge work. Remember to emphasize balance and focal points in their designs. The finished decorations, along with sketches and color studies, should be photographed and included within the final PDF submission, demonstrating the Brownies’ understanding of design principles and their practical application. This showcases a complete artistic process!

Creating Brownie-Themed Artwork

Personalized Artistic Expressions! Brownies can design artwork specifically celebrating their troop and the Brownie experience. This could include paintings, drawings, collages, or mixed media pieces reflecting Brownie values, activities, or even the troop’s unique identity.

Encourage individual creativity while reinforcing learned art techniques. The artwork should demonstrate an understanding of color theory, shape, and texture. For the badge’s PDF requirement, Brownies should document their artistic process – from initial sketches and color choices to the finished piece. High-quality photographs of the artwork, alongside process documentation, are essential for a comprehensive PDF submission. This showcases their artistic journey and skill development!

Brownie Art for Community Service

Art with a Purpose! Brownies can extend their artistic talents to benefit their community. Consider creating artwork for local nursing homes, hospitals, or shelters – brightening spaces and lifting spirits. Alternatively, design posters promoting positive messages or environmental awareness.

This activity reinforces the Brownie commitment to helping others. For the badge’s PDF documentation, include photos of the artwork in situ (displayed in the community location, with permission) alongside process shots. Detail the community need addressed and the Brownies’ collaborative efforts. This demonstrates not only artistic skill but also civic responsibility, fulfilling a key component of the badge requirements and PDF submission.

Specific Badge Requirement Breakdown

Detailed Steps! This section dissects each requirement, offering guidance for completion and ensuring all elements are documented thoroughly within the final PDF portfolio.

Requirement 1: Exploring Color Palettes

Dive into the world of color! For this requirement, Brownies will experiment with diverse color palettes, learning how different hues evoke various feelings and create distinct moods. They’ll create color wheels and explore complementary, analogous, and triadic color schemes.

The PDF documentation should include swatches of each palette explored, alongside descriptions of the emotions or themes each palette represents. Brownies should also sketch small designs utilizing each palette, demonstrating their understanding of color application. Encourage experimentation with mixing colors to create new shades and tones. This foundational step builds a crucial understanding for future design projects, preparing them for more complex artistic endeavors.

Requirement 2: Sketching Design Ideas

Bring ideas to life on paper! This requirement focuses on developing sketching skills as a vital part of the design process. Brownies will generate multiple sketches for a chosen art project, exploring different compositions, layouts, and perspectives. Emphasis should be placed on quick, exploratory sketches rather than polished drawings.

The PDF must showcase a minimum of three distinct sketch variations for their final artwork. Include brief annotations explaining the thought process behind each sketch – what they liked, disliked, and how they envisioned the final piece. This demonstrates problem-solving and iterative design thinking. Encourage experimentation with different drawing tools and techniques to broaden their artistic vocabulary.

Requirement 3: Creating a Finished Artwork

Transform sketches into reality! This final requirement challenges Brownies to create a completed artwork based on their chosen sketch. They can utilize any art medium explored during the badge work – drawing, painting, collage, or mixed media. The focus is on applying learned art and design principles to produce a visually appealing and thoughtfully executed piece.

The PDF submission must include a high-quality photograph of the finished artwork. Alongside the image, a short artist statement (3-5 sentences) explaining their creative choices, the techniques used, and what they learned throughout the process is essential. This demonstrates reflection and artistic ownership. Ensure the artwork clearly reflects the design ideas initially sketched.

Resources for Brownie Art & Design

Unlock creativity! Explore online tutorials, recommended art supplies, and inspirational sources to enhance the Brownie’s artistic journey and PDF documentation.

Online Art Tutorials for Kids

Boost artistic skills with accessible online resources! Numerous websites and platforms offer free art tutorials specifically designed for children, perfectly complementing the Brownie Art & Design badge requirements. These tutorials cover a wide range of techniques, from basic drawing and painting to more complex collage and mixed media projects.

YouTube channels like Art for Kids Hub provide step-by-step instructions for creating adorable characters and scenes. Websites such as Deep Space Sparkle offer lesson plans and inspiration for various art projects. Utilizing these resources will help Brownies develop their skills and confidently complete the badge’s creative challenges, enriching their final PDF submission with diverse artwork.

Recommended Art Supplies

Gather essential tools for artistic exploration! To successfully complete the Brownie Art & Design badge and create a compelling PDF portfolio, a basic art supply kit is recommended. This includes washable paints (watercolor and acrylic), various paintbrushes, colored pencils, crayons, and markers.

Don’t forget construction paper, drawing paper, scissors, glue sticks, and collage materials like magazines, fabric scraps, and yarn. For more advanced techniques, consider adding modeling clay or oil pastels. Documenting these supplies used within the PDF alongside artwork demonstrates resourcefulness and thoughtful project planning, fulfilling badge requirements effectively.

Finding Inspiration for Brownie Art

Spark creativity with diverse sources! Inspiration for Brownie art projects can be found everywhere, enriching the PDF documentation of their design process. Encourage exploration of nature, observing colors, shapes, and textures. Museums, art books, and online galleries offer a wealth of ideas.

Brownies can also draw inspiration from their favorite stories, songs, or hobbies. Brainstorming sessions and mood boards are excellent ways to gather visual references. Documenting these inspirational sources within the PDF – sketches, photos, or descriptions – demonstrates thoughtful design choices and fulfills badge requirements related to artistic exploration.

Presenting and Sharing Brownie Art

Showcase creativity! Displaying artwork and sharing the process with the troop, documented in the PDF, fulfills badge requirements and celebrates artistic achievements.

Displaying Brownie Artwork

Creating an Exhibition: Once the Brownies have completed their artwork, thoughtfully displaying it is key to celebrating their efforts and fulfilling badge requirements. Consider a troop “art show” where each Brownie can present their piece and explain their design choices. This fosters confidence and communication skills.

Presentation Matters: Simple displays work wonderfully! Use bulletin boards, tables draped with colorful cloths, or even clotheslines with clothespins. Ensure each artwork is clearly labeled with the Brownie’s name and a brief description of the inspiration or techniques used. This information will also be vital for inclusion in the final PDF documentation.

PDF Integration: Photograph the displayed artwork to include in the badge requirement PDF. These images provide visual evidence of the completed projects and the troop’s artistic journey.

Sharing Art with the Troop

Peer Appreciation & Feedback: A crucial element of the badge is encouraging Brownies to share their artwork with each other. Facilitate a “gallery walk” where each Brownie presents their piece, explaining their process and inspiration. This builds confidence and provides valuable peer feedback.

Constructive Criticism: Guide the girls in offering positive and constructive comments. Focus on what they admire about the artwork and suggest ideas for future exploration. This fosters a supportive and collaborative artistic environment.

PDF Documentation: Capture this sharing experience! Include photos of the Brownies presenting their work and receiving feedback in the badge requirement PDF. Written reflections from the girls about what they learned from sharing can also be added.

Documenting the Art Process (for PDF)

Visual Diary: The PDF requires a clear record of the artistic journey. Encourage Brownies to photograph each stage of their artwork – from initial sketches and color palette explorations to the finished piece; These images are vital for demonstrating completion of badge requirements.

Written Reflections: Alongside the photos, include short written descriptions. What challenges did they face? What did they learn about color, shape, or texture? How did their design evolve? These reflections showcase understanding.

Process Over Product: Emphasize that the process is as important as the final product. The PDF should tell a story of experimentation, learning, and creative problem-solving, fulfilling the badge’s educational goals.

PDF Creation & Submission Details

Final Step: Brownies will compile their documented artwork and reflections into a single PDF file, adhering to specified formatting guidelines for leader submission.

Formatting Requirements for the PDF

Document Setup: Your Brownie’s final art project documentation must be submitted as a PDF file. Please ensure the document is formatted for easy viewing – a standard 8.5 x 11 inch page size is preferred. Utilize a clear, readable font, such as Arial or Times New Roman, at a size of 12 points.

Page Layout: Each requirement should have a dedicated page or section within the PDF. Include a title page with the Brownie’s name and troop number. Number all pages sequentially.

File Size: Keep the PDF file size reasonable for easy email transmission – ideally under 10MB. Avoid excessively high-resolution images that inflate the file size unnecessarily.

Naming Convention: Save the PDF file using the following format: “BrownieName_TroopNumber_ArtBadge.pdf”.

Including Photos of Artwork in the PDF

Visual Documentation: High-quality photographs of each completed artwork are essential for demonstrating the Brownie’s progress and understanding of the badge requirements. Ensure photos are well-lit and clearly showcase the artwork’s details, colors, and textures.

Image Resolution: While high resolution is desirable, balance it with file size considerations. A resolution of 300 DPI is recommended for print quality, but 150 DPI is sufficient for digital viewing.

Photo Placement: Strategically place photos within the PDF, aligning them with the corresponding requirement descriptions. Include captions identifying the artwork and briefly explaining the techniques used.

Photo Editing: Basic photo editing (cropping, brightness adjustment) is permitted to enhance clarity, but avoid altering the artwork’s appearance.

Submitting the PDF to Leaders

Final Step: Once the PDF is meticulously formatted and includes all required elements – artwork photos, requirement completion details, and a clear presentation – it’s time for submission to the Brownie troop leaders.

Submission Method: Leaders will specify the preferred submission method, which may include email attachment, a designated online platform (like Google Classroom), or a shared drive. Confirm the correct method beforehand.

File Naming: Use a clear and consistent file naming convention, such as “BrownieName_ArtBadge_Date”. This aids in organization and efficient tracking of submissions.

Confirmation: After submitting, confirm with the leaders that the PDF was received successfully. This ensures no submissions are lost.

amana ptac manual pdf

Amana PTAC Manual PDF: A Comprehensive Guide

Amana PTAC manuals, often in PDF format, provide essential guidance for technicians and users alike, detailing installation, operation, and troubleshooting procedures for these versatile systems.

Amana’s Packaged Terminal Air Conditioners (PTAC) are self-contained heating and cooling solutions, frequently utilized in hospitality and residential settings. These systems offer independent climate control for individual rooms, proving ideal for spaces like hotel rooms, apartments, and additions. PTAC units integrate all components—compressor, condenser, evaporator, and controls—into a single unit, simplifying installation.

Understanding the specifics of your Amana PTAC model, often found within the manual, is crucial for optimal performance and longevity. Accessing the correct PDF manual ensures proper operation and maintenance, maximizing efficiency and minimizing potential issues.

What is a PTAC Unit?

A PTAC (Packaged Terminal Air Conditioner) is a self-contained air conditioning and heating system designed for through-wall installation. Unlike central HVAC systems, PTAC units operate independently, offering localized temperature control. They are commonly found in hotels, motels, apartments, and smaller buildings.

Each PTAC unit houses all essential components—compressor, condenser, evaporator, and fan—within a single cabinet. The Amana PTAC manual PDF details these components and their functions. Proper understanding, guided by the manual, is key to efficient operation and maintenance.

Understanding Amana PTAC Models

Amana offers diverse PTAC models, including the CB-DGSX13 and DigiAIR series, each with unique features detailed in their respective manuals.

Common Amana PTAC Series

Amana manufactures several PTAC series catering to varied needs. The CB-DGSX13 series is a popular choice, frequently documented in available PDF manuals, offering reliable heating and cooling. DigiAIR systems represent a more advanced offering, integrating digital controls and often requiring specific manuals for programming and troubleshooting.

Understanding these series is crucial for selecting the correct manual. Older models may have limited online resources, while newer DigiAIR units benefit from comprehensive digital documentation. Consulting the Amana website or third-party databases is essential for locating the appropriate PDF guide for your specific unit.

Amana CB-DGSX13 Series Overview

The Amana CB-DGSX13 series is a widely used PTAC model, and its manuals, typically available as PDF downloads, detail its features and maintenance. These units are known for their dependable performance in both heating and cooling applications. PDF documentation covers installation procedures, electrical connections, and troubleshooting steps specific to this series.

Locating the correct CB-DGSX13 manual is vital for proper operation. The manual provides insights into error codes, component locations, and recommended maintenance schedules, ensuring optimal efficiency and longevity of the unit; Always refer to the official Amana resources for accurate information.

DigiAIR Amana PTAC Systems

DigiAIR Amana PTAC systems represent a technologically advanced line, and their corresponding manuals, often found as PDF files, are crucial for technicians. These manuals detail the digital control features, programming options, and advanced troubleshooting procedures unique to DigiAIR units.

The PDF documentation explains how to utilize the digital thermostats, set energy-saving modes, and interpret specific error codes. Qualified HVAC professionals rely on these manuals for installation, repair, and maintenance, ensuring optimal performance and efficient operation of these sophisticated PTAC systems.

Accessing Amana PTAC Manuals

Amana PTAC manuals in PDF format are readily available through the official Amana website and various third-party databases for convenient access.

Finding the Correct PDF Manual

Locating the precise Amana PTAC manual PDF requires identifying your unit’s specific model number, often found on the unit’s data plate. This number is crucial for downloading the correct documentation, ensuring accurate installation and maintenance instructions. Amana offers a wide range of PTAC series, including the CB-DGSX13 and DigiAIR systems, each with its own dedicated manual.

Incorrect manuals can lead to improper procedures, potentially damaging the unit or voiding the warranty. Always double-check the model number before downloading or referencing any PDF document. Utilizing the correct manual guarantees optimal performance and longevity of your Amana PTAC system.

Official Amana Website Resources

Amana’s official website serves as the primary hub for accessing authentic PTAC manual PDFs. Navigate to the support or resources section, typically featuring a dedicated area for HVAC professionals and product documentation. Utilize the search function, inputting your specific model number to pinpoint the corresponding PDF manual.

Amana frequently updates its online resources, ensuring the latest versions of manuals are readily available. Direct access through the official site guarantees accuracy and avoids potentially outdated or incorrect information found on third-party platforms. Registration may be required to access certain documents.

Third-Party Manual Databases

While Amana’s official website is preferred, several third-party databases host PTAC manual PDFs. Websites specializing in appliance and HVAC documentation often compile manuals from various manufacturers, including Amana; However, exercise caution when utilizing these resources, verifying the manual’s applicability to your specific model.

ManualsLib and similar platforms may contain user-uploaded documents; confirm the source’s reliability and the manual’s completeness. Always cross-reference information with Amana’s official documentation whenever possible to ensure accuracy and avoid potential errors.

Key Components & Functionality

Amana PTAC units utilize a compressor, fan motors, and a control board to deliver efficient heating and cooling, as detailed in their manuals.

Compressor and Refrigerant Cycle

Amana PTAC systems rely on a hermetically sealed refrigerant cycle, with the compressor serving as its heart. The manuals explain how the compressor circulates refrigerant, absorbing heat from the indoor air and releasing it outdoors during cooling. Conversely, the cycle reverses for heating, extracting heat from the outside air.

Understanding this cycle, as outlined in the PDF documentation, is crucial for troubleshooting performance issues. Proper refrigerant charge levels, detailed in the Amana PTAC manual, are vital for optimal efficiency and unit longevity. Technicians use these guides to diagnose leaks or compressor failures.

Fan Motors and Airflow

Amana PTAC manuals detail the function of both indoor and outdoor fan motors, critical for effective airflow. The PDF guides explain how these motors circulate air across the cooling/heating coils, distributing conditioned air throughout the space. Proper fan speed control, as described in the documentation, impacts comfort and energy efficiency.

Troubleshooting sections within the Amana PTAC manual address common fan motor issues, like failure or reduced airflow. Technicians utilize these resources to diagnose problems, referencing wiring diagrams and component locations for efficient repairs and optimal system performance.

Control Boards and Thermostats

Amana PTAC manuals, frequently available as PDF downloads, dedicate significant sections to control boards and thermostats. These documents outline the functionality of digital controls, programming options, and remote control capabilities. Understanding the control board’s role in managing temperature, fan speed, and operational modes is crucial.

The manuals provide detailed diagrams and troubleshooting steps for addressing issues with the thermostat or control board. Technicians rely on these resources to diagnose error codes, interpret system status, and ensure accurate temperature regulation within Amana PTAC units.

Installation & Setup

Amana PTAC manuals (PDF format) detail professional installation, including electrical connections and physical mounting, ensuring proper unit securing and operational efficiency.

Professional Installation Requirements

Amana PTAC manual PDFs emphasize that installation should only be performed by qualified, professionally trained HVAC technicians. These manuals detail specific requirements, including adherence to local codes and regulations, proper refrigerant handling procedures, and ensuring correct electrical connections.

Incorrect installation can void warranties and lead to inefficient operation or safety hazards. The PDF guides stress the importance of verifying adequate structural support for the unit’s weight and ensuring proper airflow around the PTAC system for optimal performance.

Electrical Connections

Amana PTAC manual PDFs provide detailed electrical connection diagrams and specifications. They strongly advise that all wiring must comply with local and national electrical codes, and be performed by a licensed electrician. The PDF guides specify correct voltage, amperage, and fuse/breaker sizing to prevent overheating and potential fire hazards.

Proper grounding is critical for safety, and the manuals illustrate appropriate grounding methods. PTAC units often require dedicated circuits; the PDF documentation clarifies these requirements, ensuring stable and safe operation of the heating and cooling system.

Physical Mounting and Securing

Amana PTAC manual PDFs emphasize the importance of secure physical mounting to prevent vibration, noise, and potential safety hazards. Detailed diagrams illustrate proper sleeve installation and unit support requirements, specifying appropriate mounting hardware and techniques.

The PDF guides outline clearances needed around the unit for airflow and servicing. They also address wall structural integrity, ensuring the wall can support the PTAC’s weight. Following these instructions, found within the manual, guarantees stable and long-lasting installation.

Operation & Maintenance

Amana PTAC manual PDFs detail routine maintenance like filter cleaning, coil care, and operational instructions for optimal performance and longevity of the unit.

Basic Operating Instructions

Amana PTAC manual PDFs comprehensively explain the unit’s controls, covering power on/off procedures, mode selection (cool, heat, fan only, auto), and temperature adjustment.
These manuals illustrate how to utilize the thermostat effectively, setting desired room temperatures and fan speeds.
They also detail the function of any digital displays or remote control features.
Understanding these basic operations, as outlined in the PDF, ensures comfortable and efficient use of your Amana PTAC system, maximizing its benefits.

Filter Cleaning and Replacement

Amana PTAC manual PDFs emphasize regular filter maintenance for optimal performance. They detail how to locate, remove, and clean or replace the air filters, typically recommending cleaning monthly and replacement every 3-6 months, depending on usage.
The PDF guides illustrate proper filter orientation during reinstallation.

Neglecting filter maintenance reduces airflow, lowers efficiency, and potentially damages the unit. Following the manual’s instructions ensures clean air and prolongs the PTAC’s lifespan.

Coil Cleaning Procedures

Amana PTAC manual PDFs provide detailed coil cleaning instructions, crucial for maintaining efficiency. They advise disconnecting power before cleaning, using a specialized coil cleaner (not harsh chemicals), and gently brushing the evaporator and condenser coils to remove dust and debris.
The PDF guides often include diagrams illustrating coil locations.
Regular cleaning—typically annually—improves heat transfer, lowers energy consumption, and prevents system strain, extending the PTAC unit’s operational life.

Troubleshooting Common Issues

Amana PTAC manual PDFs detail solutions for typical problems like cooling/heating failures and error codes, assisting technicians in diagnosing and resolving unit malfunctions efficiently.

Unit Not Cooling or Heating

Amana PTAC manual PDFs offer systematic troubleshooting steps when a unit fails to cool or heat. Manuals emphasize checking the thermostat settings, air filters for blockage, and the outdoor coil for debris accumulation.

Further investigation, guided by the PDF, includes verifying proper voltage supply, compressor functionality, and refrigerant levels. Error code interpretation, detailed within the manual, pinpoints specific component failures; Technicians should consult wiring diagrams and safety precautions before attempting repairs, ensuring a safe and effective resolution to restore optimal performance.

Error Codes and Their Meanings

Amana PTAC manual PDFs dedicate sections to deciphering error codes displayed on the unit’s control panel. These codes, unique to Amana systems, signal specific malfunctions, ranging from sensor failures to compressor issues.

The manual provides a comprehensive table translating each code into a plain-language description of the problem and potential solutions. Technicians rely on this information for efficient diagnostics, avoiding unnecessary component replacement. Accurate interpretation, as detailed in the PDF, is crucial for effective repair and restoring system functionality.

Fan Malfunctions

Amana PTAC manual PDFs address fan-related issues, a common source of problems. These manuals detail troubleshooting steps for scenarios like a fan not running, operating at incorrect speeds, or producing unusual noises.

The PDF guides technicians through checking fan motor windings, capacitor functionality, and airflow obstructions. It emphasizes safety precautions when accessing and inspecting fan components. Proper diagnosis, using the manual’s guidance, ensures correct repair or replacement, restoring optimal airflow and cooling/heating performance within the Amana PTAC unit.

Safety Precautions

Amana PTAC manual PDFs strongly emphasize electrical safety, refrigerant handling protocols, and general warnings for qualified HVAC technicians during installation and service.

Electrical Safety Guidelines

Amana PTAC manual PDFs consistently prioritize electrical safety, advising only qualified technicians perform electrical connections. Manuals stress disconnecting power before any maintenance, verifying proper grounding, and adhering to national and local electrical codes.

They warn against damaged power cords and the necessity of using appropriately sized circuit breakers. PDF documents detail voltage requirements and emphasize the dangers of working with live electrical components, potentially causing severe injury or death. Always consult a licensed electrician if unsure.

Refrigerant Handling

Amana PTAC manual PDFs strongly emphasize proper refrigerant handling procedures, adhering to EPA regulations. Manuals detail the specific refrigerant type used in each model and caution against releasing it into the atmosphere.

They instruct only certified technicians to service refrigerant circuits, requiring specialized tools and recovery equipment. PDF documents outline safe charging and recovery methods, stressing the environmental impact of refrigerant leaks and the legal consequences of improper disposal. Always follow established industry best practices.

General Safety Warnings

Amana PTAC manual PDFs prominently feature general safety warnings, prioritizing user and technician well-being. Manuals caution against operating damaged units and emphasize the need for professional repair.

They highlight electrical hazards, advising disconnection of power before servicing. PDF documents warn against modifying the unit or using non-approved parts, potentially voiding warranties and creating safety risks. Always heed these warnings to prevent injury or equipment damage, ensuring safe operation and longevity.

Advanced Features & Settings

Amana PTAC manual PDFs detail digital control programming, energy-saving modes, and remote functionality, maximizing comfort and efficiency through customizable settings.

Digital Controls and Programming

Amana PTAC manual PDFs thoroughly explain the intricacies of the digital control systems found in many models, like the DigiAIR series. These manuals detail how to navigate the interface, adjust temperature settings, and program schedules for optimal comfort and energy conservation.

Users can learn to customize fan speeds, set timers, and utilize various modes, such as auto or sleep, directly from the unit or via remote control. The PDF guides often include step-by-step instructions and visual aids to simplify the programming process, ensuring users can fully leverage the advanced capabilities of their Amana PTAC system.

Energy Saving Modes

Amana PTAC manual PDFs dedicate sections to explaining the energy-saving features integrated into their units. These modes, often accessible through the digital controls, are designed to reduce power consumption without significantly compromising comfort.

The manuals detail how to activate features like “Eco Mode” or programmable schedules, allowing users to optimize energy usage based on occupancy and preferences. PDF guides illustrate how these settings impact performance and provide tips for maximizing savings, aligning with environmentally conscious operation of the Amana PTAC system.

Remote Control Functionality

Amana PTAC manual PDFs thoroughly explain the capabilities of the remote controls included with DigiAIR and other models. These guides detail button functions, ranging from temperature adjustment and fan speed control to mode selection and timer settings.

The PDF documentation often includes diagrams illustrating the remote’s layout and troubleshooting tips for common issues like unresponsive buttons or pairing problems. Users can learn to fully utilize the remote for convenient, long-distance operation of their Amana PTAC unit, enhancing comfort and control.

Warranty Information

Amana PTAC manual PDFs outline standard and extended warranty coverage details, registration processes, and claim procedures for your packaged terminal air conditioner.

Standard Warranty Coverage

Amana PTAC manual PDFs clearly define the standard warranty terms, typically covering parts and labor for a specified period from the date of original purchase. These documents detail what components are protected against defects in materials and workmanship.

Coverage usually includes the sealed refrigeration system, compressor, and essential functional parts. However, the manuals also outline exclusions, such as damage from improper installation, misuse, or lack of regular maintenance. Carefully reviewing the PDF is crucial to understanding your rights and responsibilities under the warranty.

Extended Warranty Options

Amana PTAC manual PDFs often highlight the availability of extended warranty plans, offering peace of mind beyond the standard coverage period. These plans, typically purchased separately, can extend protection for parts and labor against potential failures;

The manuals may detail different tiers of extended warranties, varying in duration and the scope of coverage. Information regarding enrollment procedures, costs, and claim processes is usually included. Reviewing the PDF will help determine if an extended warranty aligns with your needs and budget, safeguarding against unexpected repair expenses.

Registration Process

Amana PTAC manual PDFs frequently emphasize the importance of product registration to activate warranty coverage and receive important updates. The manual will typically outline the registration process, often directing users to the official Amana website.

Registration usually requires providing the model number, serial number, and proof of purchase. Online registration is common, but some manuals may include a mail-in registration form. Prompt registration ensures seamless warranty claims and access to crucial product information and potential recall notices.

Amana PTAC Applications

Amana PTAC units, detailed in their manuals, are ideal for diverse settings—from residential spaces to hotels and motels—offering adaptable climate control solutions.

Residential Use Cases

Amana PTAC systems, as explained in their comprehensive manuals, present excellent heating and cooling options for additions, converted garages, or rooms lacking central ductwork. They’re particularly useful for supplemental climate control, offering targeted comfort without extensive installation. PDF guides detail proper sizing for bedrooms, living areas, and home offices.

These units provide independent temperature control, ideal for family members with differing preferences. The Amana brand’s commitment to quality, highlighted in documentation, ensures reliable performance. Proper installation, guided by the manual, maximizes efficiency and longevity within a residential environment.

Commercial Use Cases (Hotels, Motels)

Amana PTAC units, detailed in their manuals, are a mainstay in hospitality, particularly hotels and motels, offering individual room climate control. PDF guides emphasize ease of maintenance, crucial for property managers. The systems’ robust design, as described in documentation, withstands heavy use.

Amana’s focus on reliability, highlighted in the manual, minimizes downtime and guest complaints. Installation flexibility suits various building structures. Proper operation, guided by the manual, contributes to energy efficiency and cost savings for commercial establishments, ensuring guest comfort and operational effectiveness.

Specific Building Types

Amana PTAC systems, comprehensively covered in their manuals, suit diverse building types beyond hotels. PDF documentation details applications in assisted living facilities, offering individualized comfort. They’re also ideal for multi-family residences, schools, and smaller office spaces where central HVAC is impractical or costly.

The manual highlights adaptability for sunrooms, additions, and converted spaces. Installation guides within the PDF cater to varying structural requirements. Amana’s units provide targeted heating and cooling, enhancing occupant comfort and energy efficiency in these specific building environments, as outlined in the provided resources;

Resources and Support

Amana provides extensive PTAC support, including customer service contacts and HVAC technician resources; manuals in PDF format are readily available online.

Amana Customer Support Contact Information

Amana’s commitment extends beyond providing PTAC units and manuals; they offer robust customer support for assistance. While direct contact information wasn’t explicitly detailed in the provided snippets, accessing support often begins with navigating the official Amana website.

There, you can typically find FAQs, troubleshooting guides, and potentially a contact form or phone number for dedicated HVAC support. Additionally, exploring online HVAC technician forums and communities can yield valuable insights and peer-to-peer assistance regarding Amana PTAC systems and PDF documentation.

HVAC Technician Resources

Amana PTAC service relies heavily on qualified HVAC technicians. Accessing detailed manuals, including PDF versions like the CB-DGSX13 series documentation, is crucial for effective repairs and maintenance. Online forums and communities dedicated to HVAC professionals often host discussions and shared knowledge regarding Amana units.

These platforms can provide valuable troubleshooting tips and insights into common issues. Furthermore, Amana may offer specialized training or resources for technicians working with their PTAC systems, ensuring proper installation and adherence to safety guidelines outlined in the official documentation.

Online Forums and Communities

Numerous online forums and communities cater to HVAC professionals and DIY enthusiasts seeking information on Amana PTAC systems. These platforms frequently host discussions about troubleshooting, repair procedures, and accessing manuals, often including links to PDF downloads.

Users share experiences, ask questions, and offer solutions related to specific Amana models, like the DigiAIR series. While valuable, information should be verified against official Amana documentation to ensure accuracy and safety when working with these units.