
Miro Humidifier Manual: A Comprehensive Guide
Welcome! This manual provides essential guidance for Miro humidifier models – NR07, MH7000, and MIRO-SR/GR/BR – ensuring optimal performance and longevity.
Miro America Inc. offers innovative humidifiers designed to enhance indoor air quality and promote well-being. These devices cater to diverse needs, ranging from compact models like the NR07 Series to advanced options such as the MH7000 with UV sanitization. Miro humidifiers are built for both functionality and ease of use, aiming to transform living spaces into healthier environments.
Whether you’re a remote worker, part of a hybrid team, or simply seeking improved air quality, Miro provides solutions. The brand emphasizes collaborative innovation, mirroring its broader AI workspace platform. Miro humidifiers utilize modern technology to deliver consistent and reliable performance. This manual will guide you through setup, operation, maintenance, and troubleshooting, ensuring a seamless experience with your Miro humidifier.
Understanding Your Miro Humidifier Model
Miro offers a range of humidifiers, each designed with specific features. The NR07 Series is a foundational model, known for its simplicity and efficiency. The MH7000 represents a technological leap, incorporating UV sanitization for enhanced air purity and a modular, washable design. Finally, the MIRO-SR/GR/BR models are low-power devices, potentially suited for smaller spaces or specific wireless applications.
Identifying your specific model is crucial for accessing the correct support and utilizing its unique capabilities. Refer to the product packaging or the unit itself to locate the model number. Understanding these distinctions allows you to maximize the benefits of your Miro humidifier, whether it’s streamlining your workspace or improving your home environment, aligning with Miro’s collaborative spirit.
Safety Precautions and Warnings
Prioritize safety when operating your Miro humidifier. Always unplug the unit before cleaning or filling. Never immerse the base in water, as this poses an electrical hazard. Use only clean, cool water in the tank to prevent mineral buildup and maintain optimal performance. Avoid using harsh chemicals or abrasive cleaners, which can damage the unit.
Keep the humidifier out of reach of children and pets. Do not operate the humidifier if the cord or plug is damaged. Ensure proper ventilation and avoid placing the unit near flammable materials. Miro America Inc. disclaims responsibility for damage resulting from misuse. Adhering to these precautions ensures safe and reliable operation, protecting both users and the device itself.

Setting Up Your Miro Humidifier
Begin with ease! This section details unboxing, cleaning, and water filling for your Miro humidifier, preparing it for efficient and healthy operation.
Unboxing and Component Checklist
Carefully unpack your new Miro humidifier! Ensure you have all listed components before proceeding. The box should contain the humidifier unit itself, the water tank (detachable for easy filling and cleaning), and the power adapter. Depending on the model – NR07, MH7000, or MIRO-SR/GR/BR – you may also find a cleaning brush, a user manual (this document!), and potentially a filter (if your model utilizes one).
Inspect each item for any shipping damage. If damage is present, do not operate the humidifier and contact Miro America Inc. immediately (see Warranty Information section). Retain the original packaging for potential returns or warranty claims. A quick visual check against the included diagrams in this manual will confirm all parts are present, guaranteeing a smooth setup process.
Initial Cleaning and Preparation
Before first use, thorough cleaning is essential! Use a mild detergent and lukewarm water to gently wash the water tank and humidifier base. Avoid abrasive cleaners, as they can damage the surfaces. Rinse both components completely, ensuring no soap residue remains. Pay close attention to the internal areas of the water tank, where mineral buildup can occur over time.
Wipe down the exterior of the humidifier with a damp cloth. Allow all parts to air dry completely before reassembling. This initial cleaning removes any manufacturing residue and prepares the unit for optimal performance. Proper preparation contributes to a healthier and more efficient humidifying experience with your Miro NR07, MH7000, or MIRO-SR/GR/BR model.
Water Tank Filling Instructions
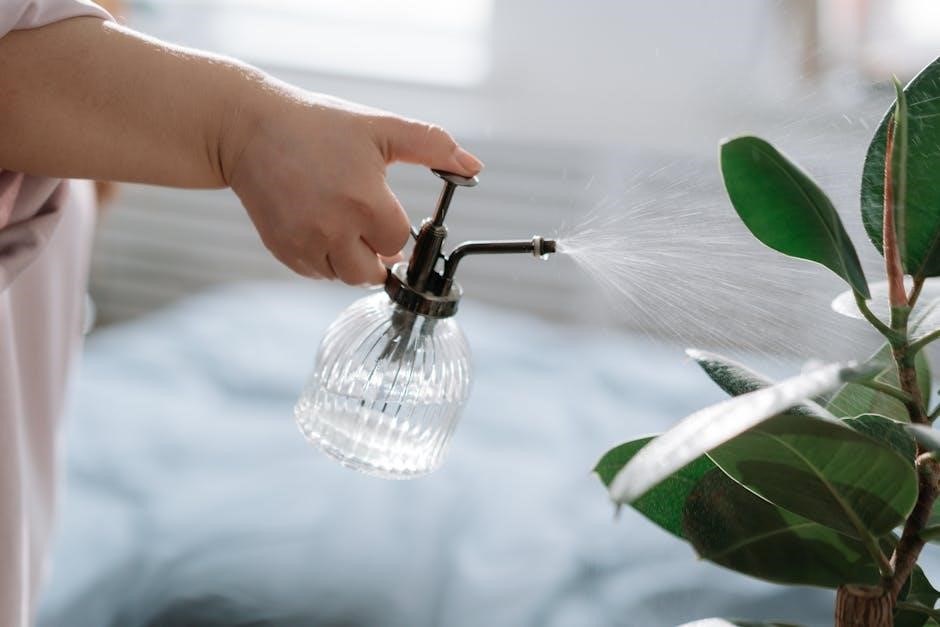
Always disconnect the humidifier from the power outlet before filling! Carefully remove the water tank from the base. Locate the water tank opening, typically on the top or side; Fill the tank with cool, distilled or purified water to avoid mineral buildup and ensure optimal performance. Do not overfill past the maximum fill line indicated inside the tank.
Using tap water is discouraged, but if necessary, use filtered water and clean the tank more frequently. Securely replace the water tank onto the humidifier base, ensuring it is properly seated. Improper seating can lead to leaks. For models like the Miro NR07, MH7000, and MIRO-SR/GR/BR, confirm a snug fit before powering on.

Operating Your Miro Humidifier
Powering on your Miro humidifier is simple! Adjust mist levels and utilize timer settings for customized comfort, including a convenient night mode function.
Powering On and Off
Initiating Operation: To power on your Miro humidifier, locate the power button – typically situated on the base or control panel. A single press will activate the unit, initiating mist production. An indicator light will illuminate, confirming power status.
Adjusting Power States: Subsequent presses of the power button cycle through operational modes. Some models feature a standby mode, conserving energy while maintaining settings. Refer to your specific model’s diagram for precise button locations.
Safe Shutdown: To power off, press and hold the power button for approximately two seconds. The indicator light will extinguish, signifying complete shutdown. Always disconnect the humidifier from the power source during extended periods of non-use or before performing maintenance.
Important Note: Ensure the water tank is adequately filled before powering on to prevent damage to the unit.
Mist Level Adjustment

Controlling Output: Miro humidifiers offer adjustable mist levels to customize humidity output based on room size and personal preference. Typically, a dedicated button or dial controls these settings. Options generally include low, medium, and high mist output.
Selecting a Level: Pressing the mist level button cycles through available settings. An indicator light or display screen will show the currently selected level. Start with a lower setting and increase as needed to achieve desired humidity.
Automatic Mode: Some advanced models feature an automatic mode, intelligently adjusting mist output based on ambient humidity levels. This optimizes efficiency and maintains consistent comfort.
Considerations: Higher mist levels consume more water and energy. Monitor room humidity with a hygrometer to prevent over-humidification, which can lead to condensation.
Timer Settings and Usage
Convenient Operation: Miro humidifiers often include a built-in timer for automated operation, allowing you to set a specific runtime. This feature conserves energy and ensures the humidifier operates only when needed.
Setting the Timer: Locate the timer button, often indicated by a clock icon. Pressing this button typically cycles through available timer options – 2, 4, 6, or 8 hours, or a continuous run setting. Some models offer customizable timer durations.
Automatic Shut-Off: Once the set time elapses, the humidifier will automatically power off, providing safety and convenience. Ensure the water tank is adequately filled for the selected runtime.
Programming Tips: Utilize the timer for nighttime operation, ensuring a comfortable sleep environment without running the humidifier all night. Regularly check water levels when using the timer.
Night Mode Functionality
Enhanced Sleep Environment: Many Miro humidifier models feature a dedicated Night Mode, designed to create a peaceful and undisturbed sleep environment. This mode typically dims or turns off all indicator lights on the unit, minimizing visual distractions in a darkened room.
Reduced Operational Noise: Night Mode often adjusts the fan speed to its lowest setting, significantly reducing operational noise. This ensures quiet operation throughout the night, promoting restful sleep.
Activating Night Mode: Locate the Night Mode button, often symbolized by a moon icon. Pressing this button activates the mode. Some models may require holding the button for a few seconds.
Optimal Comfort: Enjoy consistent humidity levels with minimal disturbance, thanks to the thoughtfully designed Night Mode functionality of your Miro humidifier.

Maintenance and Cleaning
Regular upkeep is crucial! Consistent cleaning—daily, weekly, and disinfection—ensures optimal performance, prevents mold, and extends the lifespan of your Miro humidifier.
Daily Cleaning Procedures
To maintain peak performance and hygiene, implement these daily cleaning steps. Begin by disconnecting the humidifier from the power source. Empty any remaining water from the tank; do not allow water to stagnate. Gently wipe down the exterior surfaces with a soft, damp cloth to remove dust and fingerprints. Pay particular attention to the mist outlet, ensuring it remains free from mineral buildup.
Rinse the water tank thoroughly with clean, cool water after each use. Avoid using harsh chemicals or abrasive cleaners, as these can damage the plastic components. Inspect the tank for any signs of discoloration or scaling, addressing these promptly with a suitable cleaning solution (refer to the ‘Water Tank Disinfection’ section for details). A quick daily routine prevents long-term issues and ensures consistently fresh, clean mist.
Weekly Deep Cleaning
A thorough weekly cleaning is crucial for preventing bacterial growth and maintaining optimal humidifier function. Disconnect the unit and empty the water tank. Disassemble removable parts, including the water tank, tray, and any other detachable components. Wash these parts with a mild dish soap and warm water, using a soft brush to reach all crevices.
Rinse thoroughly to remove all soap residue. For hard-to-reach areas or stubborn mineral deposits, consider using a diluted white vinegar solution (1 part vinegar to 3 parts water). Allow all parts to air dry completely before reassembling. Wipe down the humidifier’s base and internal components with a damp cloth. This deep clean ensures hygienic operation and extends the lifespan of your Miro humidifier.
Water Tank Disinfection
Regular disinfection of the water tank is vital to eliminate potential bacteria and mold. After a thorough cleaning, prepare a disinfecting solution using white vinegar and water – a ratio of one part vinegar to ten parts water is recommended. Fill the water tank with this solution and let it sit for at least 30 minutes, ensuring the solution reaches all interior surfaces.
For tougher buildup, you can increase the vinegar concentration slightly. After soaking, empty the tank and rinse it meticulously with clean water until the vinegar smell is completely gone. Allow the tank to air dry fully before reassembling and using your Miro humidifier. This process helps maintain water quality and promotes a healthier environment.
Filter Replacement Guide (if applicable)
Certain Miro humidifier models, like the MH7000, may incorporate filters to enhance air purification. Check your specific model’s documentation to confirm filter presence and type. Replacement frequency depends on usage and water quality, but generally, every 3-6 months is advised.
To replace the filter, first, ensure the humidifier is powered off and unplugged. Locate the filter access panel, usually on the base or rear of the unit. Remove the old filter and discard it responsibly. Insert the new filter, ensuring it’s properly seated and aligned. Reassemble the access panel. Regularly replacing the filter maintains optimal humidifier performance and air quality, preventing dust and mineral buildup.
Troubleshooting Common Issues
Encountering problems? This section addresses frequent concerns like power failures, low mist, unusual noises, and water leaks for your Miro humidifier.
Humidifier Not Turning On
Problem: Your Miro humidifier fails to power on despite being plugged in. First, verify the power outlet is functioning correctly by testing it with another device. Ensure the power cord is securely connected to both the humidifier and the outlet.
Check the water tank: Some Miro models feature a safety shut-off that prevents operation without sufficient water. Confirm the tank is properly seated and filled to the minimum water level.
Inspect the power adapter: If the issue persists, examine the power adapter for any visible damage. A faulty adapter may need replacement. Finally, consult the warranty information for potential repair or replacement options if the unit remains unresponsive.
Low Mist Output
Problem: Your Miro humidifier is producing a significantly reduced amount of mist. Begin by checking the mist level setting; ensure it’s not set to the lowest output. Verify the water tank is adequately filled, as low water levels can restrict mist production.

Inspect the filter: If your model utilizes a filter, a clogged filter is a common cause of reduced mist. Replace the filter according to the Filter Replacement Guide.
Clean the transducer: Mineral buildup on the transducer can hinder performance. Refer to the Weekly Deep Cleaning section for cleaning instructions. Ensure proper ventilation around the unit isn’t obstructed, as this can affect mist dispersal.
Unusual Noises During Operation
Problem: Your Miro humidifier is emitting rattling, gurgling, or other atypical sounds during operation. First, ensure the unit is placed on a level surface; an uneven surface can cause vibrations and noise. Check the water tank for proper seating – it should be firmly and correctly positioned.
Inspect for obstructions: Examine the water tank and base for any foreign objects that may be causing the noise. Mineral buildup can also contribute; perform a Weekly Deep Cleaning to remove deposits.
Transducer check: If the noise seems to originate from the transducer, it may indicate a malfunction. Contact Miro America Inc. for assistance.
Water Leaks and Prevention
Issue: Discovering water leakage from your Miro humidifier can be concerning. Initially, verify the water tank is correctly seated and sealed onto the base. Inspect the tank for any cracks or damage; a compromised tank necessitates replacement.
Hose/Tube Check: If your model utilizes hoses or tubes, ensure they are securely connected and free from punctures. Overfilling the water tank is a common cause; adhere strictly to the Water Tank Filling Instructions.
Regular Cleaning: Mineral buildup can compromise seals. Implement the Weekly Deep Cleaning and Water Tank Disinfection procedures to maintain optimal sealing. If leaks persist, contact Miro America Inc. for support.
Advanced Features & Settings
Explore UV sanitization (MH7000), smart home integration possibilities, and the convenient aroma diffuser functionality available on select Miro humidifier models.
UV Sanitization Technology (MH7000 Model)
The Miro MH7000 incorporates advanced UV sanitization technology to help ensure the water released into the air is as clean as possible. This feature utilizes ultraviolet light to neutralize bacteria, viruses, and other microorganisms present in the water tank.
To activate the UV sanitization, simply ensure the unit is powered on and the function is enabled via the control panel. A dedicated indicator light will illuminate, confirming its operation. Regular use of the UV sanitization feature contributes to a healthier indoor environment.
Please note: While UV sanitization significantly reduces microbial presence, it does not eliminate all contaminants. Consistent cleaning and maintenance, as outlined in this manual, are still crucial for optimal performance and hygiene.
Smart Home Integration (if applicable)
Certain Miro humidifier models, specifically those designed for modern convenience, offer seamless integration with popular smart home ecosystems. This allows for remote control and automation via compatible voice assistants like Amazon Alexa or Google Assistant.
To connect your Miro humidifier to your smart home network, download the Miro app (available on iOS and Android) and follow the on-screen instructions. The app will guide you through the pairing process and enable features such as voice control, scheduling, and monitoring humidity levels remotely.
Enjoy the benefits of a connected home! Adjust mist settings, turn the humidifier on or off, and create custom schedules – all with simple voice commands or through the intuitive Miro app interface.
Aroma Diffuser Functionality
Enhance your environment with the integrated aroma diffuser feature available on select Miro humidifier models. This allows you to add your favorite essential oils to create a soothing and fragrant atmosphere alongside humidified air.
To utilize this function, locate the designated aroma tray, typically found within the humidifier’s base. Add a few drops of your preferred essential oil directly to the tray’s absorbent pad. Ensure the pad is clean and replaced regularly for optimal performance.
Please note: Only use 100% pure essential oils. Synthetic fragrances may damage the unit. Avoid overfilling the aroma tray, as this could lead to oil leakage. Enjoy a revitalizing and aromatic experience!

Model Specific Information
Explore detailed specifications for your Miro humidifier! This section covers the NR07 Series, MH7000, and MIRO-SR/GR/BR models, outlining unique features and capabilities.
Miro NR07 Series Details
The Miro NR07 Series represents a foundational line of humidifiers, designed for reliable and efficient moisture distribution. Identified by model numbers NR07G and UPC 888894000128, these units are known for their simplicity and ease of use. They cater to smaller to medium-sized rooms, providing a comfortable humidity level.
While specific advanced features like UV sanitization aren’t present in this series, the NR07 prioritizes core functionality. Users can expect straightforward operation and consistent performance. Regular cleaning, as detailed in the maintenance section, is crucial for optimal lifespan. The NR07 series is a cost-effective solution for basic humidification needs, offering a dependable entry point into the Miro humidifier family.
Miro MH7000 Features
The Miro MH7000 stands as a technologically advanced humidifier, boasting a “UV & Tech” design. This model features a washable, modular construction, simplifying cleaning and maintenance. A key highlight is the integrated UV sanitization technology, actively reducing bacteria and germs within the water and mist, promoting healthier air quality.
Beyond sanitation, the MH7000 offers enhanced control and convenience. Expect features like adjustable mist levels, timer settings, and potentially smart home integration capabilities (refer to the Advanced Features section). Its design prioritizes both functionality and user experience, making it suitable for larger spaces and those seeking a premium humidification solution. The MH7000 represents Miro’s commitment to innovation in air quality.
Miro-SR/GR/BR Model Specifications
The MIRO-SR/GR/BR series represents Miro’s range of specific low-power wireless devices, designed for wireless data communication systems. These models – MIRO-NR07SR, MIRO-NR07GR, and MIRO-NR07BR – share core functionalities while potentially differing in connectivity protocols or regional specifications.
Detailed technical specifications, including power consumption, wireless range, and supported data rates, are crucial for integration into larger systems. These models are intended for use in applications requiring reliable, low-power wireless communication. Refer to the detailed product documentation for precise specifications relevant to your specific MIRO-SR/GR/BR variant. Understanding these details ensures optimal performance and compatibility within your intended application.
Warranty Information
Coverage & Claims: Miro America Inc. provides warranty coverage for defects; review included documentation for details and the claim submission process.
Coverage Details
Miro America Inc. warranty coverage extends to manufacturing defects in materials and workmanship under normal use. This warranty applies to the original purchaser and does not cover damage resulting from misuse, accidents, alterations, or unauthorized repairs. Specifically, the warranty period varies by model – consult your product documentation for precise terms.
The NR07 Series and MIRO-SR/GR/BR models have a standard one-year limited warranty. The MH7000, featuring UV sanitization technology, may have an extended warranty period. This warranty does not cover consumable parts like filters (if applicable), or damage caused by hard water. Proof of purchase is required for all warranty claims. Miro America Inc. reserves the right to repair or replace the defective product at its discretion.
Claim Process
To initiate a warranty claim, please contact Miro America Inc. customer support. You will need your proof of purchase (receipt or order confirmation), the model number of your Miro humidifier (NR07, MH7000, or MIRO-SR/GR/BR), and a detailed description of the defect. A customer service representative will provide a Return Merchandise Authorization (RMA) number and instructions for shipping the product.
Please note: Shipping costs for returning the product are the responsibility of the customer. Miro America Inc. is not responsible for lost or damaged shipments during the return process. Once the product is received and inspected, Miro America Inc. will determine if the claim is valid and will either repair or replace the product, or issue a refund.
Contacting Miro America Inc.
For any inquiries, warranty claims, or technical support regarding your Miro humidifier (models NR07, MH7000, or MIRO-SR/GR/BR), please reach out to Miro America Inc. directly. Currently, the primary method of contact is through their customer service email. Please allow 2-3 business days for a response, as volumes can vary.
Email: While a direct email address isn’t publicly listed, contacting through the official Miro website’s support portal is recommended. This ensures your request is properly routed. Please include your model number and a detailed description of your issue. Phone support is not currently available. Visit their website for the latest contact information and FAQs.