
Singer Sew Mate Instruction Manual: A Comprehensive Guide
This guide provides detailed instructions for various Singer Sew Mate models‚ including the 5400‚ Fashion Mate 360‚ and Heavy Duty 4452. Download PDF manuals and access support resources for optimal sewing.
The Singer Sew Mate represents a long-standing tradition of quality and innovation in home sewing. These machines‚ encompassing models like the 5400‚ Fashion Mate 360‚ and Heavy Duty 4452‚ are designed for a wide range of users‚ from beginners taking their first stitches to experienced sewists tackling complex projects.
This series offers a blend of user-friendly features and robust performance. Whether you’re interested in basic alterations‚ crafting‚ or heavy-duty tasks like denim work‚ a Singer Sew Mate model likely suits your needs. Understanding your specific model is crucial‚ as features and capabilities vary.
This manual aims to provide a comprehensive overview of the Singer Sew Mate‚ covering everything from initial setup and threading to advanced techniques and troubleshooting. Accessing the correct PDF manual for your model is the first step towards unlocking its full potential. Explore the resources available on the official Singer website for additional support and guidance.
Understanding Your Sewing Machine Model
Identifying your specific Singer Sew Mate model is paramount for accessing the correct resources and maximizing its capabilities. The series includes diverse options like the 5400‚ known for its versatility‚ the Fashion Mate 360‚ geared towards fashion sewing‚ and the Heavy Duty 4452‚ built for tougher materials.
Each model boasts a unique set of features‚ stitch options‚ and performance characteristics. The Heavy Duty 4452‚ for instance‚ features a metal frame and higher sewing speed‚ ideal for denim and canvas. Conversely‚ the Fashion Mate 360 prioritizes ease of use for garment construction.
Locate the model number‚ typically found on a sticker on the machine’s body. Utilize this number to download the corresponding PDF manual from the Singer website. Familiarize yourself with the specific stitch patterns‚ presser feet‚ and adjustments available on your machine to unlock its full potential and ensure optimal sewing results.
Key Features of the Singer Sew Mate
Singer Sew Mate machines are celebrated for their blend of affordability and functionality. Common features across models include a selection of built-in stitches – ranging from basic straight and zigzag to decorative options – catering to diverse sewing projects. The Heavy Duty 4452 stands out with 32 built-in stitches‚ while others offer a substantial variety as well.
Many models incorporate adjustable stitch length and width‚ providing customization for different fabrics and techniques. Automatic needle threading‚ present in some advanced versions‚ simplifies setup and saves time. A heavy-duty metal frame‚ particularly in the 4452‚ ensures durability and stability during demanding tasks.
User-friendly controls and clear stitch selection dials contribute to ease of operation. Furthermore‚ compatibility with a range of optional presser feet expands the machine’s versatility‚ enabling specialized techniques like buttonholes and zipper insertion. These features combine to make the Singer Sew Mate a reliable choice for both beginners and experienced sewists.
Stitch Selection and Functions
Singer Sew Mate machines offer a diverse range of stitches‚ selected via dials or electronic controls depending on the model. Essential stitches include the straight stitch‚ ideal for seams and general construction‚ and the zigzag stitch‚ used for finishing raw edges and creating stretchable seams.
Decorative stitches add embellishment to projects‚ while buttonhole stitches automate the process of creating professional-looking buttonholes. The Heavy Duty 4452 boasts 32 built-in stitches‚ providing extensive options for various applications. Stitch functions are often adjustable‚ allowing users to modify stitch length and width to suit fabric type and desired effect.
Understanding each stitch’s purpose is crucial for achieving optimal results. Refer to your machine’s manual for detailed explanations and recommended settings. Experimentation with different stitches and settings unlocks creative possibilities and enhances sewing projects. Proper stitch selection ensures both functionality and aesthetic appeal.
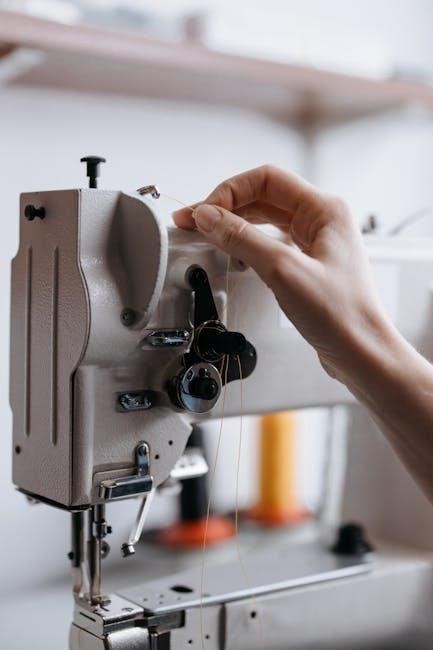
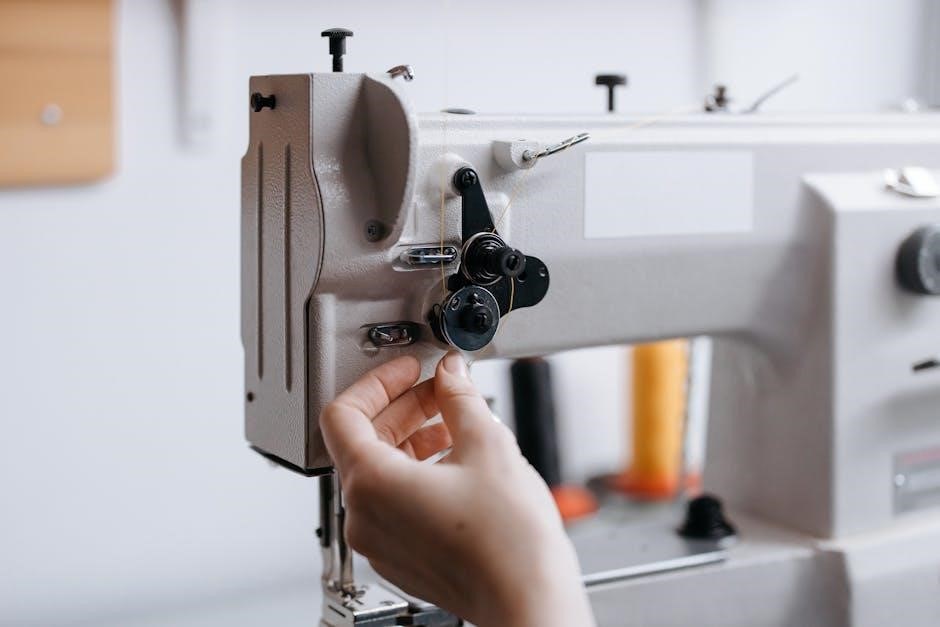
Threading the Singer Sew Mate
Correct threading is vital for proper sewing machine operation. Begin by raising the presser foot‚ which opens the tension discs. Guide the thread from the spool‚ through the thread guide‚ and around the tension discs‚ ensuring it seats correctly. Next‚ thread the take-up lever‚ then down through the needle clamp.
Always thread with the presser foot up to maintain proper tension. Different models may have slightly varying threading paths; consult your specific machine’s manual for a diagram. Ensure the thread is securely inserted into the needle’s eye‚ from front to back.
Incorrect threading leads to skipped stitches or thread breakage. Regularly re-thread the machine‚ especially when changing thread colors or experiencing sewing issues. A well-threaded machine ensures smooth‚ consistent stitching and prevents frustrating interruptions during your sewing projects.
Winding the Bobbin
Properly winding the bobbin is crucial for consistent stitch quality; Place the thread spool on the spool pin and guide the thread through the thread guide. Then‚ wrap the thread several times around the bobbin‚ ensuring a secure start. Engage the bobbin winding mechanism – typically by pushing the bobbin spindle to the right.
Press the foot pedal gently to begin winding. The machine will automatically stop when the bobbin is full. Disengage the winding mechanism and remove the bobbin. Ensure the bobbin is wound evenly to prevent uneven stitching.
Using the correct bobbin type for your Singer Sew Mate is essential. Refer to your manual for the appropriate bobbin class. A fully and evenly wound bobbin guarantees smooth and reliable sewing performance‚ avoiding tension issues and thread nests.
Bobbin Insertion and Removal
Correct bobbin placement is vital for proper stitch formation. Locate the bobbin case – it’s usually a sliding compartment beneath the needle plate. Open the compartment and insert the wound bobbin‚ ensuring the thread unwinds in the correct direction‚ as indicated in your manual. Guide the thread through the tension spring of the bobbin case.
To remove the bobbin‚ gently pull up on the release lever or button (specific to your model). Lift out the bobbin case and then remove the bobbin. Always ensure the machine is turned off before handling the bobbin.
A properly inserted bobbin and correctly threaded bobbin case contribute to balanced tension and prevent skipped stitches. Regularly check the bobbin thread level during sewing to maintain consistent results.
Needle Installation and Types

Selecting the correct needle is crucial for fabric type and stitch quality. Turn off and unplug the sewing machine before changing the needle. Loosen the needle clamp screw using the screwdriver (usually included with the machine). Insert a new needle with the flat side facing the back of the machine. Ensure the needle is pushed up fully into the clamp.
Tighten the clamp screw securely. Common needle types include universal‚ ballpoint‚ and stretch needles. Universal needles work for woven fabrics‚ ballpoint for knits‚ and stretch for lycra/spandex. Needle sizes range from 80/12 (fine) to 110/18 (heavy).
A dull or damaged needle can cause skipped stitches or fabric damage. Replace the needle regularly‚ especially when working with thick or abrasive materials.
Adjusting Stitch Length and Width
Stitch length determines the distance between stitches‚ impacting seam strength and appearance. Use shorter stitch lengths for delicate fabrics and curves‚ and longer lengths for basting or heavier materials. Locate the stitch length dial‚ typically marked with numbers indicating millimeters. Adjust the dial to your desired length‚ testing on scrap fabric first.
Stitch width controls the zigzag’s breadth‚ influencing decorative effects and seam finishing. The width dial‚ often adjacent to the length dial‚ allows adjustment. Wider stitches are ideal for stretch fabrics or decorative applications‚ while narrower settings are suitable for reinforcing seams.
Experiment with different settings to achieve the desired look. Refer to your machine’s manual for specific recommendations based on fabric and stitch type.
Tension Adjustment
Proper tension is crucial for balanced stitches; imbalances cause looping or puckering. Upper tension controls the thread from the spool‚ while lower tension manages the bobbin thread. Begin by threading the machine correctly‚ as incorrect threading is a common cause of tension issues.
If stitches loop on the underside‚ increase upper tension. Conversely‚ if looping occurs on the top‚ decrease upper tension. Adjust the tension dial in small increments‚ testing each change on scrap fabric. A balanced stitch will have even thread distribution on both sides.
Consider fabric type; heavier fabrics often require higher tension. Always re-thread both needles if adjustments don’t resolve the problem. Consult your manual for specific tension guidelines for different fabrics and stitches.
Presser Foot Selection and Usage
Selecting the correct presser foot is vital for achieving optimal sewing results. The Singer Sew Mate comes with various feet for different applications. A standard foot is ideal for straight and zigzag stitching on woven fabrics.

A zipper foot allows close stitching along zippers. A buttonhole foot automates buttonhole creation‚ ensuring consistent size and shape. For free-motion quilting or darning‚ utilize the open-toe foot. Ensure the foot is securely attached before starting to sew.
Lower the presser foot lever before beginning; this engages the feed dogs. Different fabrics may benefit from specific feet – a walking foot aids in feeding multiple layers evenly. Refer to your manual for a detailed guide to each foot’s function and proper usage.
Basic Sewing Techniques
Mastering basic techniques unlocks the full potential of your Singer Sew Mate. Begin with practicing straight stitching on scrap fabric‚ maintaining a consistent seam allowance. Zigzag stitching offers versatility for finishing raw edges and creating decorative effects.
Buttonhole sewing‚ often automated on newer models‚ requires proper buttonhole foot attachment and fabric stabilization. Always test stitch settings before sewing on your final project. Backstitching at the beginning and end of seams secures the stitches‚ preventing unraveling.
Proper fabric handling is crucial; guide the fabric gently‚ avoiding pulling or pushing. Consistent sewing speed contributes to even stitch quality. Regular practice builds confidence and skill‚ allowing you to tackle more complex projects with ease.
Straight Stitching
Straight stitching is the foundation of most sewing projects with your Singer Sew Mate. Select the straight stitch option on your machine‚ typically indicated by a straight line symbol. Ensure the stitch length is appropriate for your fabric – shorter for delicate fabrics‚ longer for heavier materials.
Begin by lowering the presser foot and gently guiding the fabric under the needle. Maintain a consistent speed and seam allowance using the edge of the presser foot as a guide. Backstitch at the beginning and end of the seam to secure the stitches.
Practice on scrap fabric to achieve even‚ consistent lines. Adjust the stitch length if needed to prevent puckering or loose stitches. Proper tension is vital for a balanced stitch; refer to the tension adjustment section if experiencing issues.
Zigzag Stitching
Zigzag stitching offers versatility beyond straight seams on your Singer Sew Mate. Select the zigzag stitch setting‚ identified by the zigzag symbol‚ and adjust the stitch width and length according to your project needs. Wider stitches are ideal for finishing raw edges‚ preventing fraying‚ while narrower stitches are suitable for decorative applications.
Test the stitch on scrap fabric to confirm the desired appearance. Use zigzag stitching to reinforce buttonholes‚ attach elastic‚ or create decorative embellishments. Guide the fabric smoothly under the presser foot‚ maintaining a consistent speed.
Experiment with different width and length combinations to achieve varied effects. Ensure proper tension for a balanced stitch; adjust as needed. Zigzag is also useful for sewing knits‚ allowing the fabric to stretch with the seam.
Buttonhole Sewing
Buttonhole sewing on your Singer Sew Mate requires utilizing the designated buttonhole foot and stitch settings. Consult your machine’s manual for the specific buttonhole stitch selection‚ as it varies between models like the 5400 and Fashion Mate 360. Attach the buttonhole foot securely.
Measure the button size and adjust the buttonhole length accordingly using the machine’s controls. Test the buttonhole on scrap fabric first to ensure proper sizing. Place the fabric under the presser foot and begin sewing‚ following the marked guidelines on the needle plate.
The machine will typically sew a series of stitches‚ then prompt you to stop and reposition the fabric. Complete the buttonhole by following the machine’s instructions‚ often involving turning the fabric and continuing to sew. Carefully cut open the buttonhole without damaging the stitches.
Maintaining Your Singer Sew Mate
Regular maintenance is crucial for the longevity and performance of your Singer Sew Mate. Cleaning the machine after each use prevents lint and dust buildup‚ which can cause malfunctions. Remove the needle plate and brush away debris from the bobbin area and feed dogs.
Oiling the machine‚ particularly the moving parts‚ ensures smooth operation. Refer to your manual for specific oiling points and use only sewing machine oil. Avoid over-oiling‚ as this can attract more lint. Inspect the bobbin case and surrounding areas for any signs of wear or damage.
Periodically check the needle for bends or dullness‚ replacing it as needed. A clean and well-oiled machine will consistently deliver high-quality stitches and prevent frustrating issues. Proper care extends the life of your investment.
Cleaning and Oiling
Consistent cleaning is vital for a smoothly functioning Singer Sew Mate. Begin by disconnecting the power and removing the needle. Use a brush to remove lint and thread scraps from the bobbin area‚ feed dogs‚ and around the needle plate. A small vacuum cleaner attachment can also be helpful for reaching tight spaces.
Oiling ensures moving parts operate efficiently. Apply a few drops of sewing machine oil to the designated oiling points – typically found in your manual. Focus on the bobbin race‚ hook‚ and any areas with visible movement. Avoid over-oiling‚ which attracts dust.
Wipe away excess oil with a clean cloth. Regular cleaning and oiling prevent jams‚ skipped stitches‚ and extend the machine’s lifespan. Always refer to your specific model’s manual for detailed instructions and recommended oil types.
Troubleshooting Common Issues
Encountering problems with your Singer Sew Mate is common‚ but often easily resolved. Thread breakage frequently stems from incorrect threading‚ a dull needle‚ or improper tension. Skipped stitches can indicate a bent needle‚ incorrect needle size for the fabric‚ or timing issues.
Fabric feeding problems might be caused by incorrect presser foot pressure‚ tangled bobbin thread‚ or lint buildup around the feed dogs. Always re-thread the machine and check the bobbin if issues arise. Ensure the needle is correctly inserted and of the appropriate type for your material.
Consult your manual for specific troubleshooting steps related to your model. Singer’s website also offers extensive support resources and FAQs. If problems persist‚ consider contacting Singer customer support for assistance.
Dealing with Thread Breakage
Thread breakage is a frequent issue‚ often easily addressed. First‚ re-thread the entire machine‚ ensuring the presser foot is up‚ allowing proper thread flow. Inspect the thread path for any snags or obstructions. A dull or bent needle is a common culprit; replace it with a new‚ appropriate needle for your fabric type.
Check the bobbin winding – uneven winding can cause breaks. Adjust the thread tension; too tight or too loose tension can strain the thread. Ensure you’re using quality thread compatible with your machine. Incorrect threading of the upper or lower thread is a primary cause.

Finally‚ clean the machine‚ removing lint and debris that can interfere with thread movement. Refer to your manual for specific diagrams and guidance. Persistent breakage may indicate a more significant mechanical issue.
Fixing Skipped Stitches
Skipped stitches can be frustrating‚ but often have simple solutions. Begin by replacing the needle – a bent or dull needle is a common cause. Ensure the needle is correctly inserted‚ with the flat side facing the correct direction (refer to your manual). Check the thread type; using the wrong thread for your fabric can lead to skipped stitches.
Verify proper threading of both the upper and bobbin threads. Adjust the needle plate; a damaged or incorrect plate can cause issues. Inspect the bobbin case and ensure it’s clean and functioning smoothly. Correct tension is crucial; too loose tension can result in skipped stitches;
Finally‚ try a different fabric or adjust the sewing speed. Slow down for thicker or more challenging materials. Consistent skipped stitches suggest a mechanical problem requiring professional attention.
Addressing Fabric Feeding Problems
Fabric feeding issues often stem from a few key areas. First‚ check the presser foot – ensure it’s lowered correctly‚ as the machine won’t feed fabric when raised. Verify the feed dogs are engaged; some machines have a setting to drop them for free-motion sewing. Clean the feed dogs thoroughly‚ removing any lint or thread buildup.
Inspect the presser foot pressure; too much or too little pressure can hinder feeding. Ensure you’re using the correct presser foot for your fabric type. Check the bobbin area for tangled thread or debris‚ as this can create drag. Adjust the tension – incorrect tension can cause uneven feeding.
Finally‚ try a different fabric or needle. Delicate fabrics may require a walking foot for better control. Persistent problems may indicate a need for professional servicing.
Singer Sew Mate 5400 Specifics
The Singer Sew Mate 5400 is a popular model boasting 60 built-in stitches‚ offering versatility for various projects. It features an automatic needle threader‚ simplifying setup‚ and a one-step buttonhole function for consistent results. This machine includes adjustable stitch length and width controls‚ allowing for customization.
Users can access a free downloadable manual (PDF format) online for detailed guidance. The 5400 is designed for both beginners and experienced sewists‚ providing a balance of ease-of-use and advanced features. It’s important to regularly clean the machine to maintain optimal performance.
Common issues‚ like thread breakage‚ are often resolved by re-threading the machine correctly. Remember to consult the manual for specific troubleshooting steps related to the 5400 model.
Fashion Mate 360 Model Details
The Singer Fashion Mate 360 is designed with the fashion-conscious sewist in mind‚ offering a range of stitches for garment construction and creative projects. This model features 30 built-in stitches‚ including decorative options‚ and provides adjustable stitch length and width. A key feature is its ease of use‚ making it suitable for beginners.
The instruction manual‚ available for free download as a PDF‚ details threading procedures‚ bobbin winding‚ and stitch selection. Users will find guidance on basic sewing techniques and troubleshooting common issues. Regular maintenance‚ such as cleaning‚ is crucial for optimal performance.
The Fashion Mate 360 is known for its reliability and ability to handle a variety of fabrics. Consult the manual for specific needle recommendations based on fabric type.
Heavy Duty 4452 Model Overview
The SINGER Heavy Duty 4452 is a robust sewing machine built for tackling tougher projects‚ from denim to upholstery. Featuring a heavy-duty metal frame and a powerful motor‚ it offers increased sewing speed and durability. This model boasts 32 built-in stitches‚ providing versatility for various applications.
The user manual (available as a PDF download) provides comprehensive instructions on machine setup‚ threading‚ and stitch selection. It details how to utilize the machine’s features for optimal performance‚ including adjusting tension and stitch length. Troubleshooting guides assist with common issues like thread breakage.
The 4452 is designed for both beginners and experienced sewists seeking a reliable‚ high-performance machine. Regular cleaning and oiling‚ as outlined in the manual‚ are essential for maintaining its longevity.
Finding Additional Resources & Manuals
Numerous online resources offer support for your Singer Sew Mate. The official SINGER website is a primary source‚ providing downloadable PDF manuals for various models‚ including the 5400 and Fashion Mate 360. These manuals cover everything from basic operation to advanced techniques and troubleshooting.
Manualsbase and other online repositories also host Singer manuals‚ offering alternative download options. For direct assistance‚ Singer’s customer support team is available to answer questions and provide guidance. Online forums and communities dedicated to sewing often feature helpful tips and advice from fellow Singer Sew Mate owners.
Remember to specify your exact model number when searching for manuals or contacting support to ensure you receive the most relevant information. Accessing these resources will enhance your sewing experience;
Where to Download Singer Manuals (PDF)
Locating PDF manuals for your Singer Sew Mate is straightforward. The official Singer website (singer.com) provides a dedicated section for manual downloads. Simply search by model number – such as Sew Mate 5400‚ Fashion Mate 360‚ or Heavy Duty 4452 – to find the corresponding PDF file.
Alternatively‚ websites like Manualsbase offer a collection of Singer sewing machine manuals‚ including older models. A quick online search for “Singer Sew Mate [model number] manual PDF” will also yield numerous results. Ensure the website is reputable before downloading to avoid potential security risks.
Downloaded PDFs allow offline access to instructions‚ making them convenient for use during sewing sessions. These digital manuals often include detailed diagrams and troubleshooting guides‚ enhancing your sewing experience.
Contacting Singer Customer Support
For personalized assistance with your Singer Sew Mate‚ reaching out to Singer’s customer support is a valuable option. The official Singer website (singer.com) provides various contact methods‚ including a comprehensive FAQ section addressing common issues. You can often find solutions to your problems quickly through self-help resources.
If further assistance is needed‚ Singer offers phone support and online chat options. These channels allow direct communication with trained technicians who can guide you through troubleshooting steps or provide specific instructions for your model – be it the 5400‚ Fashion Mate 360‚ or Heavy Duty 4452.
When contacting support‚ have your machine’s model number and serial number readily available. This information helps the representative quickly identify your machine and provide accurate assistance. Expert support ensures a smooth and enjoyable sewing experience.