Amana Dryer Instruction Manual: A Comprehensive Guide
Welcome! This manual provides essential guidance for your Amana dryer, covering model specifics, safety, operation, maintenance, and troubleshooting. Discover Amana’s 80+ years of innovation!
Understanding Your Amana Dryer Model
Identifying your specific Amana dryer model is crucial for accessing the correct support, parts, and instructions. Amana dryers come in various configurations, including front-load and top-load designs, each with unique features and operational nuances. Knowing your model number allows you to pinpoint precise details regarding drying cycles, control panel functions, and maintenance procedures.
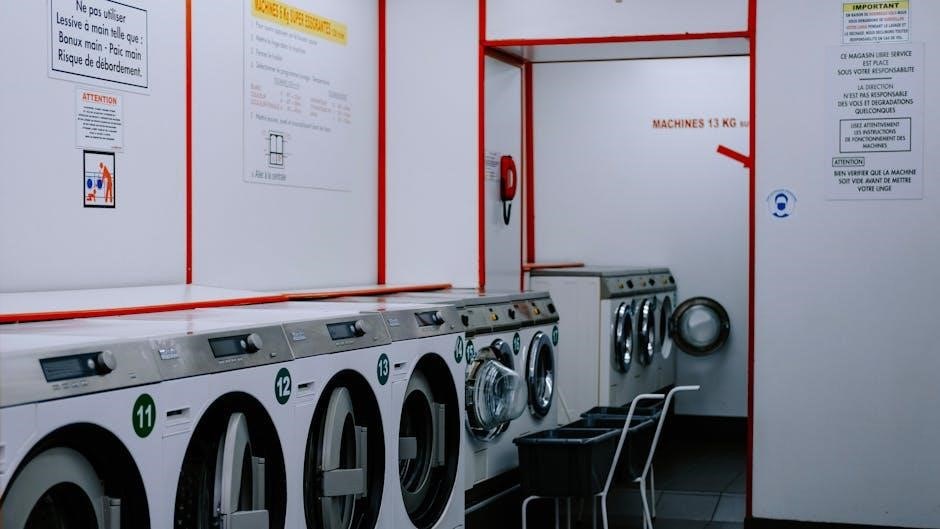
Locating the model number is straightforward. For front-load dryers, it’s typically found horizontally on the shroud, inside the dryer door opening. This label contains vital information, including the model number and serial number. The serial number is important for warranty claims and service requests. Keep this information readily available for future reference.
Amana offers a range of dryers designed to fit diverse laundry needs. From basic models offering essential drying cycles to more advanced units with moisture sensors and specialized programs, understanding your model’s capabilities ensures optimal performance and longevity. Refer to the model number to access detailed specifications and features specific to your appliance on the Amana website. This will help you maximize its efficiency and enjoy years of reliable service.
Locating the Model Number
Finding your Amana dryer’s model number is the first step towards accessing specific support and documentation. This unique identifier unlocks a wealth of information, from detailed manuals to compatible replacement parts. The model number is essential when contacting Amana customer support or ordering repairs.
For Amana front-load dryers, the model number is conveniently located horizontally on the dryer shroud, situated inside the door opening. Carefully inspect this area; the label is usually prominently displayed. The serial number will also be on this label, which is vital for warranty verification and service history.
If you have a top-load Amana dryer, the location may vary slightly. Typically, you’ll find the model and serial number on a label affixed to the dryer’s cabinet, often on the inside of the door or on the back panel. You may need to gently move the dryer to access the rear label. Record both the model and serial numbers in a safe place for future reference. Having this information readily available streamlines any service or support interactions.
Safety Precautions
Your safety is paramount when operating your Amana dryer. Before initial use, and periodically thereafter, carefully review these crucial safety precautions. Failure to adhere to these guidelines could result in fire, electric shock, or personal injury. Always disconnect the dryer from the power supply before performing any maintenance or cleaning.
Never dry items that have been soaked in flammable liquids, such as gasoline, cleaning solvents, or oil. These substances pose a significant fire hazard, even after being washed. Ensure the dryer vent is unobstructed and cleaned regularly to prevent lint buildup, a leading cause of dryer fires.
Do not overload the dryer, as this can impede proper airflow and increase drying time, potentially leading to overheating. Keep the surrounding area clear of combustible materials. Supervise children closely when they are near the dryer. Never allow them to play with the controls or climb inside. If the dryer malfunctions, immediately discontinue use and contact Amana customer support for assistance.
Dryer Control Panel Overview
Familiarizing yourself with the Amana dryer’s control panel is key to efficient operation. The panel typically features a cycle selector dial, allowing you to choose from a variety of pre-programmed drying cycles tailored to different fabric types and needs. Common cycles include Normal, Delicate, Timed Dry, and Wrinkle Prevent.

Temperature settings, often indicated as High, Medium, or Low heat, are crucial for protecting your garments. A ‘Sensor Dry’ option automatically detects moisture levels and adjusts drying time accordingly, preventing over-drying and saving energy. Additional features may include options for wrinkle reduction, end-of-cycle signal, and control lock.
Digital displays, present on some models, provide cycle progress information and remaining drying time. Buttons allow for customization of cycles and settings. Refer to your specific model’s diagram (often located inside the dryer door) for precise button and dial functions. Understanding these controls ensures optimal drying performance and garment care.
Understanding Drying Cycles
Amana dryers offer a range of drying cycles designed for various fabric types and drying needs. The ‘Normal’ cycle is ideal for everyday cotton and linen items, utilizing medium-high heat for efficient drying. ‘Delicate’ cycles employ low heat, protecting sensitive fabrics like lingerie, silk, and synthetics from damage.
‘Timed Dry’ allows you to manually set the drying time, useful for small loads or items requiring specific drying durations. ‘Permanent Press’ cycles use medium heat and a cool-down phase to minimize wrinkles in synthetic blends. A ‘Heavy Duty’ cycle provides high heat for bulky items like towels and jeans.
‘Sensor Dry’ cycles automatically detect moisture levels, stopping the dryer when clothes are dry, preventing over-drying and saving energy. Some models include specialized cycles like ‘Bulky/Sheets’ or ‘Sanitize’ for specific needs. Always consult the garment care label before selecting a cycle to ensure proper fabric care and prevent damage.
Temperature Settings Explained
Amana dryers provide adjustable temperature settings to accommodate diverse fabric types and prevent damage. ‘High’ heat is suitable for sturdy cottons and towels, offering rapid drying. ‘Medium’ heat is ideal for most everyday laundry, including synthetics and blends, balancing drying speed with fabric protection.
‘Low’ heat is recommended for delicate items like lingerie, silk, and heat-sensitive fabrics, minimizing shrinkage and preventing damage. ‘Air Dry’ or ‘No Heat’ utilizes room temperature air to fluff items or dry heat-sensitive materials. Understanding these settings is crucial for optimal garment care.
Sensor Dry cycles often automatically adjust temperature based on moisture levels, ensuring efficient drying without overheating. Always check garment care labels for specific temperature recommendations. Incorrect temperature settings can lead to shrinkage, fading, or damage to your clothes. Utilizing the correct setting extends the life of your garments and maintains their quality.
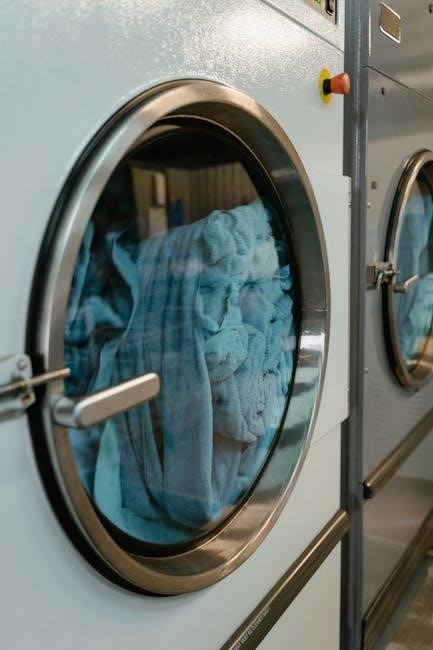
Loading and Unloading the Dryer
Proper loading is essential for efficient drying and preventing wrinkles. Avoid overloading the dryer; items need space to tumble freely for even heat distribution. Separate heavier items like towels from lighter ones like shirts to ensure all garments dry effectively. Distribute the load evenly around the drum to maintain balance.
Before unloading, ensure the dryer has completely stopped. Carefully remove items, shaking them out to minimize wrinkles. Check pockets for any forgotten objects – tissues, coins, or lighters can cause significant damage or pose a fire hazard. Promptly remove clothes to prevent mildew growth.
Clean the lint filter after each load to maintain optimal airflow and drying performance. A clogged filter restricts airflow, increasing drying time and potentially creating a fire risk. Regularly inspect the dryer vent for obstructions as well. Following these guidelines ensures safe and effective dryer operation, preserving your clothes and appliance.

Proper Lint Filter Maintenance
Maintaining a clean lint filter is paramount for dryer safety and performance. The lint filter captures fabric fibers released during drying, preventing them from accumulating in the vent system. Always clean the filter after each and every load – this simple step significantly reduces drying time and energy consumption.
To clean the filter, simply remove it from its housing (usually located inside the dryer door or on top of the dryer). Roll the lint off with your fingers or use a lint brush. Avoid using water or chemical cleaners, as these can damage the filter material. Inspect the filter regularly for tears or damage; a damaged filter allows lint to pass through, increasing fire risk.
Periodically, wash the lint filter with mild detergent and warm water to remove any buildup from fabric softeners or dryer sheets. Ensure the filter is completely dry before reinstalling. A clogged lint filter is a leading cause of dryer fires, so diligent maintenance is crucial for protecting your home and family.

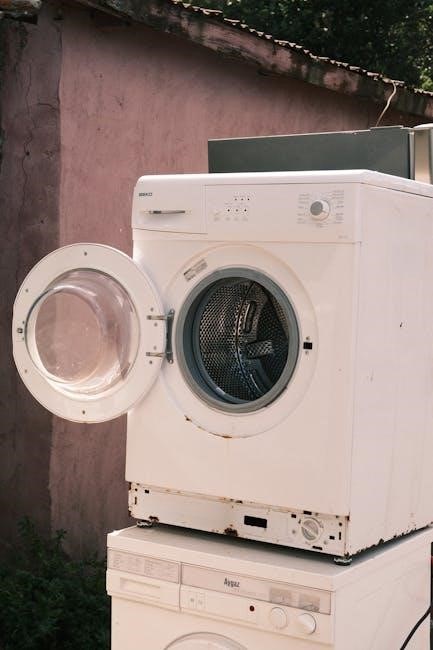
Cleaning the Dryer Drum
Regularly cleaning the dryer drum helps maintain optimal performance and prevents unpleasant odors. Over time, residue from detergents, fabric softeners, and transferred dyes can build up inside the drum. To clean, begin by unplugging the dryer to ensure safety. Prepare a solution of warm water and mild detergent – avoid abrasive cleaners, as they can damage the drum’s finish.
Dampen a soft cloth with the cleaning solution and wipe down the entire interior of the drum, paying attention to any visible residue. For stubborn stains, let the solution sit for a few minutes before wiping. After cleaning, use a separate damp cloth with clean water to rinse away any remaining detergent.
Leave the dryer door open to allow the drum to air dry completely before using it again. This prevents moisture buildup and potential mildew growth. Consider running an empty cycle on a low heat setting to further ensure dryness. Consistent drum cleaning contributes to efficient drying and prolongs the life of your Amana dryer.
Troubleshooting Common Issues: Dryer Won’t Start
If your Amana dryer fails to start, several potential issues could be the cause. First, verify the power supply – ensure the dryer is securely plugged into a functioning outlet. Check your home’s circuit breaker or fuse box to confirm the circuit hasn’t tripped or blown. A tripped breaker is a common culprit.
Next, examine the dryer door latch. The dryer won’t operate if the latch isn’t securely closed, activating the door switch. Ensure nothing obstructs the latch mechanism. Also, check the control panel for any error codes displayed, as these can provide valuable diagnostic information. Refer to the “Understanding Error Codes” section for details;
If these steps don’t resolve the issue, the problem might lie with the thermal fuse or the drive belt. These components require professional inspection and replacement. Do not attempt to repair these yourself. Contact Amana Customer Support for assistance or to schedule a service appointment. Safety first – always disconnect power before any inspection.
Troubleshooting Common Issues: Dryer Not Heating
If your Amana dryer isn’t producing heat, a few key areas need investigation. Begin by confirming proper venting. A clogged vent restricts airflow, causing overheating and triggering safety mechanisms that shut off the heating element. Ensure the vent is clear of lint and obstructions, both inside the dryer and externally.
Next, check the gas supply (for gas dryers). Verify the gas valve is fully open. For electric dryers, inspect the heating element and the thermal fuse. A blown thermal fuse is a common cause of no heat, often resulting from restricted airflow. These components require professional diagnosis and replacement.
Also, examine the igniter (gas dryers). A faulty igniter won’t light the burner. If you suspect an issue with the heating element, thermal fuse, or igniter, do not attempt self-repair. Contact Amana Customer Support or a qualified technician. Disconnect power before any inspection for safety. Refer to the warranty information for coverage details.
Troubleshooting Common Issues: Excessive Noise
Unusual noises from your Amana dryer can indicate several potential problems. A common culprit is foreign objects – coins, buttons, or small items – lodged in the dryer drum or lint filter housing. Thoroughly check these areas, disconnecting power first for safety;
Worn drum support rollers or glides can cause a rumbling or scraping sound, especially during rotation. These parts facilitate smooth drum movement and require replacement if damaged. A failing blower wheel often produces a whistling or squealing noise; Inspect the blower housing for obstructions as well.
The drive belt, if loose or worn, can slap against the dryer’s internal components, creating a slapping sound. Professional inspection is recommended for belt replacement or tension adjustment. If the noise persists after checking these areas, or if you’re uncomfortable disassembling the dryer, contact Amana Customer Support or a qualified appliance repair technician. Ignoring excessive noise can lead to further damage;
Understanding Error Codes
Amana dryers utilize error codes to diagnose internal malfunctions, displayed on the control panel. These codes provide valuable information for troubleshooting and often indicate specific component failures. While a comprehensive list varies by model, some common codes offer initial guidance.
An “E1” or “E2” code frequently signals a heating element issue, potentially a break in the circuit or a faulty element. “LE” indicates a moisture sensor problem, suggesting the dryer isn’t accurately detecting dryness. “OE” typically points to an over-heating situation, requiring immediate attention to prevent damage.
Consult your specific dryer’s manual for a complete error code directory. Record the exact code displayed before attempting any repairs. Disconnect the power before inspecting internal components. If you are uncomfortable interpreting or addressing error codes, contact Amana Customer Support or a certified appliance technician. Attempting repairs without proper knowledge can void your warranty and create safety hazards.
Amana Dryer Warranty Information
Your Amana dryer is protected by a limited warranty, safeguarding against manufacturing defects in materials and workmanship. The standard warranty typically covers parts and labor for one year from the original purchase date. However, specific coverage durations can vary based on the model and purchase location.
Extended warranties are often available for purchase, offering additional protection beyond the initial coverage period. These extended plans may cover components like the motor or electronic controls for several years. Carefully review your warranty documentation to understand the specific terms, conditions, and exclusions.
To make a warranty claim, retain your proof of purchase (receipt or invoice) and contact Amana Customer Support. Be prepared to provide the model number, serial number, and a detailed description of the issue. Warranty coverage is voided by misuse, improper installation, or unauthorized repairs; Registering your appliance online can streamline the claims process.
Amana Customer Support & Resources
Need assistance with your Amana dryer? Amana provides multiple avenues for support. Their dedicated customer service team is available to answer questions, troubleshoot issues, and facilitate warranty claims. You can reach them via phone, typically during standard business hours, or through their online support portal.
The Amana website (amana.com) is a valuable resource, offering a comprehensive FAQ section, downloadable manuals, and helpful how-to videos. You can also locate authorized service providers in your area for in-home repairs. For European dispute resolution, the European Commission provides an online platform: https://ec.europa.eu/consumers/odr.
Email support is also available; for example, joerg.ringelstein@amana-consulting.de can be contacted for specific inquiries. Don’t hesitate to utilize these resources to maximize your dryer’s performance and longevity. Amana is committed to providing excellent customer care and ensuring your satisfaction with their appliances.