living clean the journey continues pdf

Living Clean: The Journey Continues ‒ Article Plan (02/07/2026)

Today’s date is 02/07/2026. This plan details coverage of the “Living Clean” resource, including its PDF availability, and related recovery principles.

“Living Clean: The Journey Continues” represents a vital resource for individuals navigating recovery and seeking sustained well-being. As of today, February 7th, 2026, this guide, available as a PDF, offers practical tools and principles rooted in the Twelve Step program. The document, authored by AV Rastjagaev and G YeO, builds upon the foundational teachings of the “Big Book,” providing a contemporary perspective on maintaining a clean and healthy lifestyle.

This isn’t merely about abstinence; it’s a holistic approach encompassing physical, mental, and spiritual health. The open-access nature of the journal ensures widespread availability, allowing anyone to download, copy, and share its contents. Understanding “Living Clean” requires recognizing its commitment to lifelong practice and the importance of support networks, like Narcotics Anonymous World Services, in fostering lasting recovery. It’s a journey, not a destination.

The Core Message of “Living Clean: The Journey Continues”

The central tenet of “Living Clean: The Journey Continues”, accessible as a PDF, revolves around consistently applying the principles of the Twelve Steps to all facets of life. It emphasizes that recovery isn’t a singular event, but a continuous process of self-improvement and spiritual growth. The guide, authored by Rastjagaev and YeO, stresses the importance of honesty, humility, and service to others.

It advocates for a proactive approach to well-being, extending beyond simply avoiding addictive substances. This includes mindful attention to environmental factors – like EMF exposure detailed in SCENIHR reports – and lifestyle choices, such as selecting appropriate paint finishes (flat paint for older homes) to minimize potential health risks. The core message is a lifetime commitment to practicing these principles, as highlighted by Narcotics Anonymous World Services, fostering lasting serenity and purpose.

Availability and Accessing the PDF Version

The “Living Clean: The Journey Continues” guide is readily available as a downloadable PDF document. As an open-access journal resource, anyone can freely read, download, copy, and distribute the full text. A direct link to the PDF is provided through the NLM (National Library of Medicine) website: nlm.nih.gov/books/NBK304630/pdf/Bookshelf_NBK304630.pdf.

Narcotics Anonymous World Services also facilitates access to the PDF and related literature. Users can DOWNLOAD the book directly from their site. Support is available for those needing assistance accessing the materials; a “Lit Order Form” and “Meeting Update Form” are provided. Furthermore, a “Request Help Accessing Literature” option ensures inclusivity, making this vital recovery resource accessible to all seeking a path towards sustained well-being.

The Importance of Clean Water & Health

Clean water access is a global crisis; Charity Water estimates 663 million lack it, with disastrous short and long-term health effects.

Clean Water Access: A Global Crisis (Charity Water Statistics)

The lack of clean water represents a profound global crisis, impacting millions and hindering progress towards sustainable development. Charity Water’s statistics reveal a staggering reality: approximately 663 million people currently live without access to this fundamental resource. This isn’t merely an inconvenience; it’s a life-threatening situation with far-reaching consequences.

Communities without clean water face immense challenges, including preventable diseases, lost educational opportunities (particularly for girls who spend hours collecting water), and economic hardship. The cycle of poverty is often perpetuated by this lack of access. Charity Water’s work focuses on providing sustainable water solutions, empowering communities to thrive. Their data underscores the urgent need for continued investment and innovation in water sanitation and infrastructure projects worldwide, directly impacting health and well-being.

Short-Term Effects of Unclean Water

Consuming unclean water immediately triggers a range of debilitating short-term health effects. The most common are diarrheal diseases – including cholera, dysentery, and typhoid fever – leading to severe dehydration, especially dangerous for children and the elderly. These illnesses manifest rapidly, often within hours or days of ingestion.

Beyond diarrheal diseases, unclean water can cause skin infections, eye infections (like trachoma), and parasitic infestations. These conditions cause discomfort, pain, and can temporarily impair functionality. The body’s immediate response to contaminants often involves fever, nausea, vomiting, and abdominal cramps. These symptoms, while often resolving with treatment, significantly disrupt daily life and can quickly escalate into more serious complications if left unaddressed, highlighting the urgent need for clean water sources.

Long-Term Effects of Unclean Water

Prolonged exposure to unclean water results in chronic health problems and developmental issues, particularly in children; Repeated infections and parasitic infestations can lead to malnutrition, stunting growth, and impaired cognitive development. Chronic diarrhea damages the intestinal lining, reducing nutrient absorption and weakening the immune system.

Furthermore, long-term ingestion of chemical contaminants – often present in untreated water sources – can cause organ damage, neurological disorders, and even cancer. Fluoride exposure, for example, can lead to skeletal fluorosis. The cumulative effect of these health issues creates a cycle of poverty and ill-health, hindering educational attainment and economic productivity. Addressing this requires sustained access to safe water and sanitation, alongside comprehensive healthcare initiatives.

Health Risks & Environmental Factors

This section explores EMF exposure, socioeconomic impacts on health, and the crucial role of housing quality—including paint—in overall well-being.

Potential Health Risks of Electromagnetic Fields (EMF) Exposure

Understanding EMFs is vital for holistic health. The SCENIHR (Scientific Committee on Emerging and Newly Identified Health Risks) reports extensively research potential health risks associated with exposure to electromagnetic fields. These fields are produced by various sources, including power lines, mobile devices, and wireless technology.

While research is ongoing and conclusive evidence remains elusive, concerns exist regarding potential links between prolonged EMF exposure and certain health issues. These include neurological effects, increased cancer risk (though findings are inconsistent), and impacts on reproductive health.

Mitigating EMF exposure involves practical steps like maintaining distance from sources, utilizing shielding materials, and limiting prolonged use of wireless devices. Further investigation and awareness are crucial for safeguarding well-being in our increasingly technological world, aligning with the principles of “Living Clean.”

Living Costs & Socioeconomic Factors (Sweden Example)

Socioeconomic conditions significantly impact recovery journeys. Examining Sweden provides insight into how living costs affect access to resources supporting a “Living Clean” lifestyle. In Sweden, the annual cost of living for individuals living with children is approximately SEK 157,000 per person. For couples without children, this figure rises to SEK 219,000.

These expenses highlight the financial strain individuals and families face, potentially hindering their ability to prioritize health and well-being. Access to clean housing, nutritious food, and supportive therapies can be limited by economic constraints.

Understanding these factors is crucial when considering the broader context of recovery and the challenges individuals encounter while striving for a healthier, “clean” life. Addressing socioeconomic disparities is essential for fostering equitable access to resources.

The Role of Housing & Paint Quality in Health

The physical environment profoundly impacts well-being, particularly for those in recovery. Housing quality, including paint composition, plays a critical role in creating a supportive and healthy living space. Older homes often contain architectural blemishes, making flat paint an ideal choice for ceilings due to its excellent coverage.

However, paint quality matters. Choosing paints with low or zero Volatile Organic Compounds (VOCs) is essential to minimize exposure to harmful chemicals. This is especially important for individuals sensitive to environmental toxins or with compromised health.

Prioritizing healthy housing, including careful paint selection, contributes to a safer and more conducive environment for sustained recovery and overall wellness, aligning with the principles of “Living Clean.”

Practical Applications & Lifestyle Choices

Implementing “Living Clean” principles requires conscious choices regarding daily habits, home environments, and personal care—hair, makeup, and overall lifestyle.

Flat Paint vs. Matte Paint for Home Health

Choosing the right paint finish significantly impacts indoor air quality and overall health, aligning with the “Living Clean” philosophy. Flat paint, ideal for older homes with architectural imperfections, offers excellent coverage and a rich color, concealing blemishes effectively. However, its non-reflective surface presents maintenance challenges, requiring more frequent cleaning.

Conversely, matte paint provides a similar non-reflective finish but generally exhibits better washability. Considering the potential for off-gassing from paints, selecting low-VOC (Volatile Organic Compounds) options is crucial, regardless of the finish. For those prioritizing ease of cleaning and durability alongside a non-reflective aesthetic, matte paint may be preferable. Ultimately, both flat and matte paints contribute to a healthier indoor environment when chosen thoughtfully and paired with proper ventilation during and after application.

Cost of Painting & Home Maintenance (January 2026 Estimates)

Maintaining a healthy home environment, central to “Living Clean,” involves regular upkeep, including painting. As of January 2026, the basic cost to paint a wall ranges from $1.29 to $2.78 per square foot, though this figure fluctuates based on site conditions and chosen options. Utilizing a professional cost calculator, like the HOMEWYSE CALCULATOR, provides a more accurate estimate for specific projects.

Beyond paint, broader home maintenance costs are substantial. Sweden’s socioeconomic data reveals living expenses of approximately $15,700 annually per person for those living with children, and $21,900 for couples without. Prioritizing preventative maintenance, including regular painting with low-VOC paints, can mitigate long-term costs and contribute to a healthier living space, aligning with the principles of proactive well-being.

Hair, Makeup & Lifestyle Influences

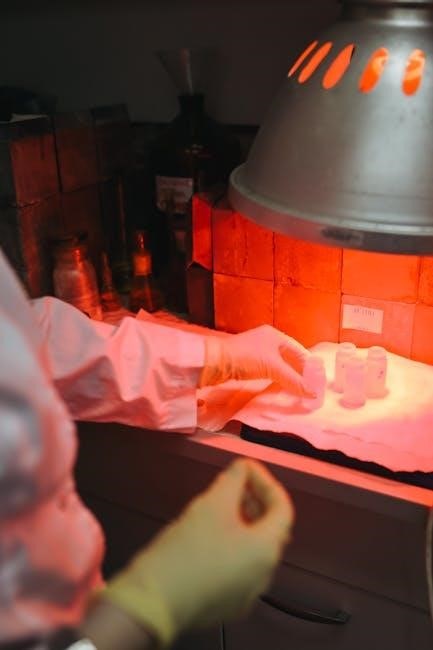
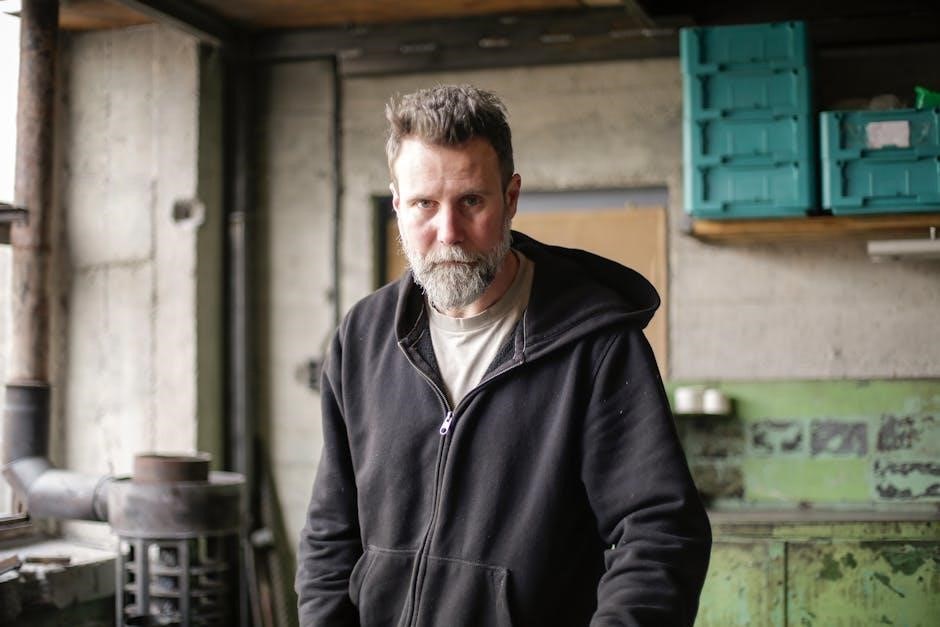
Personal presentation and lifestyle choices, while seemingly superficial, can significantly impact one’s sense of self and recovery journey, echoing the holistic approach of “Living Clean.” The project acknowledges contributions from Meka Bennett Reliford (hair & makeup) and Kelly Moore Clark (photography), featuring models Abigail Paulson and Chevy Navarro.

These aesthetic elements, alongside broader lifestyle factors, contribute to self-esteem and overall well-being. Conscious choices regarding personal care products – opting for those with minimal chemical exposure – align with the principle of minimizing harmful influences. A mindful lifestyle, prioritizing health and self-respect, complements the internal work of recovery, fostering a sense of wholeness and renewed vitality.

The Twelve Step Program & Recovery

“Living Clean” deeply connects with the Twelve Step Program, particularly through guidance found within the “Big Book,” emphasizing a lifetime commitment to practicing these principles.

The “Big Book” Guide & Its Connection to “Living Clean”

The foundational text of Narcotics Anonymous, often referred to as the “Big Book,” provides a crucial framework for understanding the principles underpinning “Living Clean: The Journey Continues.” The pamphlet explicitly states, “It Only Takes A Day To Learn How It Works and A Lifetime To Practice It!” mirroring the ongoing commitment required in recovery.

“Living Clean” expands upon the core tenets presented in the “Big Book,” offering practical application for maintaining sobriety and building a fulfilling life free from addiction. Both resources emphasize honesty, surrender, and seeking guidance from a higher power. The connection lies in the shared goal of achieving lasting freedom from the destructive patterns of substance abuse, fostering personal growth, and contributing positively to society.

Essentially, “Living Clean” serves as a companion guide, reinforcing the lessons of the “Big Book” and providing additional support for navigating the challenges of long-term recovery. It’s a testament to the enduring power of the Twelve Step principles.

Narcotics Anonymous World Services & Resources

Narcotics Anonymous World Services (NAWS) is the central hub for information, literature, and support related to the NA program, including resources directly connected to “Living Clean: The Journey Continues.” NAWS provides a wealth of materials designed to assist individuals in their recovery journey, fostering a global community of support.

Individuals can access vital resources through the NAWS website, including downloadable literature, meeting schedules, and contact information for local groups. Specifically, the pamphlet “Living Clean” is available through NAWS, alongside other helpful guides. Furthermore, NAWS offers Lit Order Forms and Meeting Update Forms to facilitate participation and connection within the NA fellowship.

For those seeking to DOWNLOAD the “Living Clean PDF”, NAWS is the primary source; Their commitment to accessibility ensures that these essential resources are readily available to anyone seeking recovery, regardless of location or circumstance.

Practicing the Principles: A Lifetime Commitment

“Living Clean: The Journey Continues” emphasizes that recovery isn’t a destination, but a continuous process of applying the Twelve Step principles to all aspects of life. It’s about integrating honesty, hope, faith, courage, and other core tenets into daily experiences, fostering lasting change.

The “Big Book” guide, foundational to the program, underscores this commitment, stating, “It only takes a day to learn how it works and a lifetime to practice it!” This highlights the ongoing effort required to maintain sobriety and build a fulfilling life free from addiction. Consistent self-assessment, amends-making, and service work are crucial.

Successfully navigating this journey requires dedication, humility, and a willingness to seek support from others within the Narcotics Anonymous fellowship. The principles aren’t merely suggestions; they are tools for sustained well-being, requiring consistent application for a truly “Living Clean” lifestyle.

Resources & Further Information

Access the “Living Clean PDF”, SCENIHR reports on EMF research, literature order forms, and meeting update forms for continued support.

SCENIHR Reports & EMF Research

Exploring potential health risks associated with Electromagnetic Fields (EMF) exposure is crucial for holistic well-being, aligning with the “Living Clean” philosophy. The Scientific Committee on Consumer Health and Emerging New Risks (SCENIHR) provides comprehensive reports detailing EMF research findings. These reports, accessible online, investigate the possible impacts of EMFs on human health, covering various frequencies and exposure levels.

Understanding these scientific assessments empowers individuals to make informed decisions regarding their environment and lifestyle. Further investigation into SCENIHR’s work offers valuable insights into mitigating potential risks. Accessing these resources supports a proactive approach to health, complementing the principles outlined in the “Living Clean” guide, and fostering a safer living space.

Accessing Literature & Support Forms

Narcotics Anonymous provides a wealth of literature to support individuals on their recovery journey, directly complementing the principles within “Living Clean: The Journey Continues.” Key resources, including the “Big Book” guide, are available for download and purchase. Support forms, such as Literature Order Forms and Meeting Update Forms, facilitate community engagement and access to vital resources.

These forms streamline communication and ensure the continued availability of support materials. Individuals can readily download this essential book and other helpful guides. Accessing these materials empowers members to deepen their understanding of the program and actively participate in their recovery process. Further assistance with accessing literature is readily available through designated channels.

Downloading the “Living Clean PDF”

“Living Clean: The Journey Continues” is readily accessible in a convenient PDF format, offering immediate access to its valuable insights and guidance. This digital version allows individuals to study the material at their own pace and refer to it frequently throughout their recovery process. The PDF version, approximately 5 MB in size and spanning 100 pages, is available for direct download.

This ensures that the principles of clean living are easily disseminated and readily available to those seeking support. The journal is an open-access resource, meaning anyone can read, copy, distribute, or link to the full text. Simply locate the download link on the official Narcotics Anonymous World Services website to begin your journey.

Acknowledgements & Credits (Meka Bennett Reliford, Kelly Moore Clark)

The creation of this impactful resource, “Living Clean: The Journey Continues,” involved the dedicated contributions of numerous individuals. We extend our sincere gratitude to Meka Bennett Reliford for her invaluable work with hair and makeup, enhancing the visual presentation and overall quality of the accompanying materials.

Furthermore, we acknowledge the exceptional photographic talent of Kelly Moore Clark, whose artistry beautifully captured the essence of the project. Special thanks are also due to The Pickett Family and Glenn Northcott for their generous support. Models Abigail Paulson and Chevy Navarro contributed significantly to the visual narrative.

Their collective efforts ensured a polished and inspiring final product, readily available in PDF format.

Theme & Platform Information (Colorlib, WordPress)

The digital presentation of information surrounding “Living Clean: The Journey Continues,” and access to the downloadable PDF version, is facilitated by a robust and visually appealing online platform. This website leverages the power of WordPress, a leading content management system known for its flexibility and user-friendliness.

Enhancing the aesthetic experience is the thoughtfully designed theme provided by Colorlib. Colorlib’s themes are celebrated for their modern layouts, responsive design, and ease of customization, ensuring optimal viewing across various devices.

This combination of WordPress’s functionality and Colorlib’s design expertise creates a seamless and engaging experience for those seeking information and support related to living a clean and healthy life.

methods in behavioral research 14th edition pdf

Methods in Behavioral Research’s 14th edition guides students, offering insights into smarter study techniques; however, a freely available PDF version remains elusive.

Overview of the Textbook

Methods in Behavioral Research, 14th Edition, serves as a comprehensive guide for students navigating the complexities of research design and implementation within the behavioral sciences. While a free PDF copy isn’t readily accessible due to copyright restrictions, the textbook itself is lauded for its detailed explanations of various methodologies. It covers everything from experimental designs – differentiating between true experiments and quasi-experiments – to non-experimental approaches like correlational and descriptive research.

The text emphasizes practical application, equipping students with the skills to critically evaluate research and formulate their own proposals. Resources like test banks and instructor materials supplement the core content, aiding both teaching and learning. Students actively seek access, as evidenced by online requests for a free PDF, highlighting its value in academic settings.

Significance of Behavioral Research Methods

Understanding behavioral research methods, as detailed in the 14th edition of this textbook, is crucial for interpreting and advancing knowledge in fields like psychology, sociology, and education. Despite the demand for a free PDF version, the textbook’s significance lies in its ability to equip researchers with the tools for rigorous investigation. It’s not simply about doing research, but about doing it ethically and validly.

The methods covered allow for the systematic collection and analysis of data, moving beyond anecdotal evidence. This edition likely addresses new technologies and evolving ethical guidelines, ensuring students are prepared for contemporary research challenges. Access, whether through purchase, library, or eBook, is vital for informed scientific inquiry.

Accessing the 14th Edition

Finding a free PDF of Methods in Behavioral Research’s 14th edition proves difficult; alternative access includes eBooks, library resources, and purchasing options.

Availability of the PDF Version

Currently, a readily accessible, legal free PDF version of Methods in Behavioral Research, 14th Edition, is not widely available online. Numerous students express seeking this PDF for free due to financial constraints, highlighting a common challenge in academic resource access. While older editions or books in the public domain sometimes appear as free PDF downloads, the latest edition remains protected by copyright.

Several online platforms mention the textbook, and some even allude to test banks available as PDF files, but a complete, authorized PDF of the core textbook itself is scarce. Worldcat indicates the edition exists but doesn’t offer a direct download. Therefore, relying on legitimate sources for access is crucial, avoiding potential legal and ethical issues associated with unauthorized downloads.

Legal and Ethical Considerations for Downloading

Downloading a PDF of Methods in Behavioral Research, 14th Edition from unauthorized sources carries significant legal and ethical implications. Copyright law protects this textbook, meaning distribution without the publisher’s permission is illegal. Accessing illegally copied materials supports copyright infringement and undermines the authors’ and publishers’ rights.

Ethically, utilizing pirated materials devalues the work of those involved in its creation and production. Students should prioritize legal access methods, such as purchasing the textbook, utilizing library resources, or exploring legitimate eBook options. Furthermore, downloading from untrusted sources risks exposure to malware and viruses. Respecting intellectual property rights and adhering to ethical academic practices are paramount for students and researchers alike.

Alternative Access Options (eBook, Library)

While a free PDF of Methods in Behavioral Research, 14th Edition is difficult to find legitimately, several alternative access options exist. Purchasing the eBook version provides a convenient and legal digital copy, often at a reduced price compared to the physical textbook. Platforms offering digital magazines and publications may also host interactive versions.

University and college libraries frequently stock physical copies of the textbook, allowing students to borrow them for study. Worldcat.org can help locate the book in nearby libraries. Exploring rental options for physical or digital copies can also be cost-effective. Utilizing these legal avenues ensures access to the material while respecting copyright laws and supporting the academic community.

Key Research Approaches Covered

The 14th edition details experimental, non-experimental, and descriptive research designs, crucial for behavioral studies, though a free PDF isn’t readily available.

Experimental Research Designs

The 14th edition of Methods in Behavioral Research thoroughly examines experimental designs, the cornerstone of establishing cause-and-effect relationships within behavioral science. It meticulously differentiates between true experiments – characterized by random assignment and manipulation of independent variables – and quasi-experiments, which lack full control over participant assignment;

Students will gain a comprehensive understanding of controlling extraneous variables, ensuring internal validity, and interpreting experimental results. While the textbook itself isn’t freely available as a PDF, the content details rigorous methodologies. The text likely covers topics like control groups, experimental conditions, and the importance of replication. Resources like test banks, though sometimes sought as free PDF downloads, are typically protected materials.

True Experiments vs. Quasi-Experiments

Methods in Behavioral Research (14th edition) dedicates significant attention to distinguishing true experiments from quasi-experiments, a crucial distinction for interpreting research findings. True experiments involve random assignment of participants to conditions, allowing for strong causal inferences. Conversely, quasi-experiments lack this randomization, often utilizing pre-existing groups or naturally occurring conditions.

The textbook likely details how limitations in control within quasi-experiments necessitate cautious interpretations. While a free PDF of the full text is difficult to find, understanding these design differences is paramount. Students seeking supplemental materials sometimes search for test banks in PDF format, but these are generally restricted resources. The 14th edition emphasizes the strengths and weaknesses of each approach, guiding researchers in selecting the most appropriate design for their research question.

Non-Experimental Research Designs

Methods in Behavioral Research (14th edition) thoroughly explores non-experimental designs, vital when manipulating variables is unethical or impractical. These approaches, unlike true experiments, focus on observing and describing existing relationships. The textbook likely covers correlational studies, examining associations between variables without establishing causation, and descriptive research methods, aiming to portray characteristics of a population or phenomenon.

Finding a free PDF of the complete 14th edition proves challenging, but students often seek supplemental resources like test banks, available as PDF files. The text emphasizes the importance of careful interpretation when using non-experimental designs, acknowledging their limitations in inferring causality. Understanding these designs is crucial for critically evaluating research, even without direct access to the full textbook.

Correlational Studies

Methods in Behavioral Research (14th edition) dedicates significant attention to correlational studies, a non-experimental approach examining the relationship between two or more variables. While a free PDF of the entire textbook is difficult to locate, understanding these studies is paramount. The textbook likely details how correlation doesn’t equal causation – a crucial distinction for interpreting research findings.

Students searching for resources sometimes encounter test banks in PDF format, offering practice questions related to correlational analysis. These studies measure the strength and direction of a relationship, expressed as a correlation coefficient. The 14th edition likely emphasizes the importance of considering third variables that might influence observed correlations, and the limitations of drawing causal conclusions.

Descriptive Research Methods

Methods in Behavioral Research (14th edition) thoroughly covers descriptive research methods, vital for observing and documenting phenomena. Despite the difficulty in finding a free PDF of the complete textbook, grasping these methods is essential. The text likely details techniques like naturalistic observation, case studies, and surveys, used to paint a picture of behaviors and characteristics within a population.

Students seeking supplemental materials may find PDF versions of test banks containing questions on descriptive statistics used to summarize data collected through these methods. The 14th edition likely stresses the importance of careful observation, accurate recording, and avoiding researcher bias when employing descriptive approaches; These methods establish a foundation for further, more in-depth research.

Data Collection Techniques

Methods in Behavioral Research (14th edition) explores surveys, observational methods, and interviews; finding a free PDF is challenging, yet crucial for learning.

Surveys and Questionnaires

Methods in Behavioral Research, 14th Edition, extensively covers the design and implementation of effective surveys and questionnaires as vital data collection tools. Students learn to formulate clear, unbiased questions, considering various response formats – multiple choice, Likert scales, and open-ended inquiries – to gather meaningful data.

The textbook details crucial aspects like sampling techniques to ensure representative participant groups, and methods for minimizing response bias. While a free PDF of the complete 14th edition is difficult to locate directly, understanding these techniques is paramount. Resources like test banks and study guides, sometimes available online, can supplement learning, though accessing the core textbook remains a challenge for budget-conscious students seeking a readily downloadable version.

Observational Methods

Methods in Behavioral Research, 14th Edition, dedicates significant attention to observational methods, detailing both naturalistic and controlled observation techniques; Students explore systematic observation, coding schemes, and the importance of inter-rater reliability to ensure data accuracy. The text emphasizes minimizing observer bias and the ethical considerations inherent in observing human behavior.

While a freely accessible PDF of the full 14th edition proves elusive, mastering these observational approaches is crucial. Supplemental materials, such as test banks, may offer practice questions, but they don’t replace the comprehensive coverage within the textbook itself. Finding affordable access – through eBooks or library resources – remains a common strategy for students seeking to learn these methods without incurring substantial costs, despite the desire for a free downloadable copy.

Interviews

Methods in Behavioral Research, 14th Edition, thoroughly examines interview techniques as a vital data collection tool. It covers structured, semi-structured, and unstructured interview formats, detailing the strengths and weaknesses of each; The textbook stresses the importance of crafting effective interview questions, establishing rapport with participants, and minimizing interviewer effects to obtain reliable and valid data.

Despite the search for a free PDF version of the 14th edition, students can benefit from understanding the nuances of interview methodology. Resources like student study guides, though not a substitute for the core text, can reinforce key concepts. Accessing the textbook through library resources or eBook platforms offers a legitimate and comprehensive learning experience, bypassing the challenges of locating an unauthorized downloadable copy.

Data Analysis Methods

The 14th edition details descriptive and inferential statistics, alongside software like SPSS and R; a free PDF remains difficult to find.

Descriptive Statistics

Methods in Behavioral Research, 14th Edition, comprehensively covers descriptive statistics as foundational tools for data summarization and interpretation. These techniques, crucial for understanding research findings, involve measures of central tendency – mean, median, and mode – providing insights into typical scores. Furthermore, the text details measures of variability, such as standard deviation and range, illustrating data spread.

Students learn to effectively present data using tables and graphs, enhancing clarity and communication. While the textbook itself isn’t readily available as a free PDF, understanding these descriptive methods is paramount. The 14th edition likely emphasizes practical application, preparing students for analyzing real-world behavioral data, even without immediate access to a downloadable version.

Inferential Statistics

Methods in Behavioral Research, 14th Edition, delves into inferential statistics, building upon descriptive foundations to enable researchers to draw conclusions beyond observed data. The textbook likely explains hypothesis testing, p-values, and statistical significance, allowing students to determine if results are likely due to chance or a genuine effect.

Common inferential tests, such as t-tests, ANOVA, and chi-square, are probably covered, alongside their assumptions and appropriate applications. While a free PDF of the 14th edition is difficult to find, mastering these concepts is vital for interpreting research literature and conducting rigorous studies. The edition likely stresses the importance of effect sizes alongside statistical significance, promoting a nuanced understanding of research outcomes.

Statistical Software Packages (SPSS, R)

Methods in Behavioral Research, 14th Edition, undoubtedly acknowledges the crucial role of statistical software in modern behavioral research. While a free PDF of the textbook isn’t readily available, the content likely emphasizes practical application using industry-standard packages like SPSS and R.

Students likely learn how to input data, perform analyses, and interpret outputs generated by these programs. The textbook probably provides guidance on selecting appropriate statistical tests within the software and understanding the underlying logic. Though specific software tutorials aren’t typically included in the core text, supplemental resources or online materials may offer hands-on practice. Proficiency in SPSS or R is essential for researchers to efficiently analyze data and replicate findings.

Specific Topics Addressed in the 14th Edition

The 14th edition likely delves into validity, reliability, ethical research practices, and detailed guidance for crafting a comprehensive research proposal.

Validity and Reliability

Methods in Behavioral Research, 14th Edition, undoubtedly dedicates significant attention to the crucial concepts of validity and reliability – cornerstones of sound research. Expect a thorough exploration of different validity types, including internal, external, construct, and statistical validity, detailing how to ensure research accurately measures what it intends to.

The text will likely cover reliability assessment techniques, such as test-retest reliability, inter-rater reliability, and internal consistency, emphasizing the importance of consistent and dependable measurements. Students will likely find detailed explanations on how to enhance both validity and reliability throughout the research process, from study design to data analysis, ensuring the credibility and trustworthiness of findings. The availability of a PDF version would greatly aid in focused study of these vital concepts.

Ethical Considerations in Research

Methods in Behavioral Research, 14th Edition, will almost certainly devote substantial coverage to the ethical responsibilities inherent in conducting research with human participants. Expect detailed discussions on informed consent, privacy protection, confidentiality, and minimizing potential harm – both physical and psychological.

The textbook likely addresses Institutional Review Board (IRB) procedures and the importance of adhering to ethical guidelines established by organizations like the American Psychological Association (APA). It will probably explore complex ethical dilemmas researchers may encounter, such as deception, data fabrication, and conflicts of interest. Access to a PDF copy would allow for convenient review of these critical ethical principles, ensuring responsible and ethical research practices are understood and implemented.

Research Proposal Development

The Methods in Behavioral Research, 14th Edition, undoubtedly provides comprehensive guidance on crafting a robust research proposal. Expect detailed instruction on formulating research questions, conducting literature reviews, selecting appropriate methodologies (experimental, non-experimental, etc.), and justifying research designs.

The textbook likely outlines the essential components of a proposal – introduction, literature review, methods, data analysis plan, and expected outcomes. A PDF version would be invaluable for students learning to articulate their research ideas clearly and persuasively; It would facilitate easy access to examples and templates, aiding in the development of a well-structured and fundable research project. Mastering proposal writing is crucial for successful research endeavors, and this edition likely offers practical tools and strategies.

Resources and Supplements

Test banks and answer keys, often sought alongside the PDF, supplement learning; instructor resources and student study guides are also available.

Test Banks and Answer Keys

Test banks for Methods in Behavioral Research, 14th Edition, are highly sought-after resources by both students and instructors. These collections of questions, designed to assess comprehension of the material, often accompany the textbook, though obtaining them separately, particularly as a free PDF download, can be challenging.

Students frequently search for these test banks with answer keys to aid in their studying and self-assessment. They provide a valuable tool for identifying areas where further review is needed. However, it’s crucial to acknowledge the ethical considerations surrounding access to these materials; unauthorized distribution is often prohibited.

While some sources claim to offer free downloads, verifying their legitimacy and legality is paramount. Legitimate access is typically granted to instructors through official publisher channels.

Instructor Resources

Instructors utilizing Methods in Behavioral Research, 14th Edition, benefit from a suite of supplementary materials designed to enhance their teaching experience. These resources are typically not available as free PDF downloads to the general public, but are provided to verified educators through the publisher’s platform.

Commonly included are instructor’s manuals, which offer detailed guidance on lesson planning, discussion questions, and assignment ideas. Powerpoint presentation slides, pre-prepared to align with textbook chapters, are also frequently available. Access to the test bank, crucial for creating assessments, is a key component of these resources.

These materials aim to streamline course preparation and provide instructors with the tools needed to effectively deliver the content of the 14th edition.

Student Study Guides

Students seeking to maximize their understanding of Methods in Behavioral Research, 14th Edition, may find supplementary study guides beneficial. While a complete, official study guide PDF isn’t widely available for free, various resources can aid learning. These guides typically include chapter summaries, key term definitions, practice quizzes, and review questions.

Unofficial study guides, created by students or third-party providers, sometimes circulate online, but their accuracy and completeness should be carefully evaluated. The primary goal of these guides is to reinforce concepts presented in the textbook and prepare students for exams.

Effective study habits, combined with utilizing available resources, are crucial for success when engaging with the material in this edition.

Challenges and Updates in the 14th Edition

The 14th edition addresses evolving research technologies and updated ethical guidelines, though finding a free PDF copy presents ongoing accessibility challenges for students.

Addressing New Technologies in Research

The 14th edition of Methods in Behavioral Research acknowledges the significant impact of emerging technologies on the field. Researchers now leverage digital tools for data collection, analysis, and dissemination, necessitating updated methodological approaches. While a readily available free PDF of the textbook isn’t common, the content within reflects these changes.

The book likely explores how platforms for online surveys, social media analytics, and sophisticated statistical software (like SPSS and R) are reshaping research practices. It probably discusses the challenges and opportunities presented by big data, artificial intelligence, and virtual reality in behavioral studies. Students seeking the PDF may find older editions or supplemental materials online, but the latest edition is crucial for understanding these technological advancements and their implications for rigorous research.

Changes in Ethical Guidelines

The 14th edition of Methods in Behavioral Research undoubtedly addresses evolving ethical considerations within the field. Contemporary research demands heightened sensitivity to participant privacy, informed consent, and data security, especially with the rise of digital data collection. Finding a free PDF version may be difficult, but the core principles remain paramount.

The textbook likely details updated guidelines regarding online research, the use of vulnerable populations, and the responsible handling of sensitive information. It probably emphasizes the importance of Institutional Review Boards (IRBs) and the need for researchers to stay current with changing regulations. Students should prioritize accessing the latest edition to ensure their research practices align with current ethical standards, even if obtaining the PDF proves challenging.

prefixes and suffixes pdf worksheet

Prefixes and suffixes are powerful tools for expanding vocabulary and understanding word meanings; these worksheets offer focused
practice! They’re designed to help students dissect words, identify these key components, and ultimately, become more confident readers and writers.

These educational resources cover a range of activities, from simple fill-in-the-blank exercises to more complex tasks involving adding prefixes and suffixes to base words.

What are Prefixes?

Prefixes are groups of letters added to the beginning of a word to change its meaning. Think of them as little clues that hint at what the word signifies! They don’t stand alone as words themselves, but they dramatically alter the meaning of the root word they’re attached to.

For example, adding the prefix ‘un-‘ to ‘happy’ creates ‘unhappy’, completely reversing the original meaning. Common prefixes like ‘re-’, ‘dis-’, ‘pre-’, and ‘mis-’ each carry specific meanings – ‘re-‘ means again, ‘dis-‘ often indicates negation, ‘pre-‘ signifies before, and ‘mis-‘ suggests something done wrongly.

Understanding prefixes is crucial for decoding unfamiliar words and expanding vocabulary. Worksheets focusing on prefixes help students recognize these patterns and apply their knowledge to new words, improving both reading comprehension and spelling skills.

What are Suffixes?

Suffixes are letter groups added to the end of a word, modifying its meaning or grammatical function. Unlike prefixes, suffixes often indicate tense, number, or part of speech. They work alongside the root word to create a nuanced understanding of its role within a sentence.

Consider the suffix ‘-ed’; adding it to ‘walk’ transforms it into ‘walked’, indicating past tense. Similarly, ‘-ing’ denotes a continuous action, as in ‘walking’. Other common suffixes like ‘-er’ and ‘-or’ often signify a person who performs an action, while ‘-ly’ typically creates an adverb.

Mastering suffixes is vital for accurate grammar and effective communication. Worksheets dedicated to suffixes empower students to identify these endings and understand how they impact a word’s meaning and usage.

Why Use Prefix and Suffix Worksheets?

Prefix and suffix worksheets are invaluable tools for bolstering literacy skills. They provide targeted practice in decoding words and expanding vocabulary, moving beyond rote memorization towards a deeper understanding of word construction.

These resources help students recognize patterns, enabling them to decipher unfamiliar words independently. By breaking down words into their component parts – prefix, root, and suffix – students gain confidence in tackling complex texts.

Furthermore, worksheets reinforce spelling rules and grammatical concepts. Activities like matching definitions or adding prefixes/suffixes solidify learning through active engagement. They cater to diverse learning styles and year levels, offering a flexible approach to language development.

Ultimately, these worksheets empower students to become more proficient readers, writers, and communicators.

Common Prefixes and Their Meanings

Understanding common prefixes like ‘un-‘, ‘re-‘, ‘dis-‘, ‘pre-‘, and ‘mis-‘ unlocks the meanings of countless words, enhancing reading comprehension skills.

‘Un-‘ Prefix

The prefix ‘un-‘ is exceptionally common and generally indicates negation or reversal of an action or state. It essentially means “not” or “opposite of.” For example, adding ‘un-‘ to ‘happy’ creates ‘unhappy,’ signifying a lack of happiness. Similarly, ‘untie’ means to reverse the action of tying.

Worksheets focusing on ‘un-‘ often present students with base words and ask them to add the prefix to form new words, then define those new words. Exercises might include transforming ‘kind’ into ‘unkind,’ or ‘certain’ into ‘uncertain.’

Understanding this prefix is crucial for decoding unfamiliar vocabulary. Students learn to recognize that when they encounter a word beginning with ‘un-‘, it likely represents the opposite of the root word’s meaning. Practice with ‘un-‘ builds a strong foundation for tackling more complex words.

‘Re-‘ Prefix

The prefix ‘re-‘ signifies repetition or doing something again. It often implies a renewed action or a return to a previous state. Common examples include ‘rewrite’ (to write again), ‘replay’ (to play again), and ‘return’ (to go back). Recognizing ‘re-‘ helps students quickly grasp the meaning of unfamiliar words.

Worksheets centered around ‘re-‘ typically challenge students to add the prefix to base words, creating new terms and then explaining their meanings. Activities might involve transforming ‘build’ into ‘rebuild,’ or ‘act’ into ‘react.’

Mastering ‘re-‘ enhances reading comprehension and vocabulary skills. Students learn to anticipate the meaning of words with this prefix, understanding that the core action is being repeated or reversed. Consistent practice solidifies this understanding and boosts confidence.

‘Dis-‘ Prefix

The prefix ‘dis-‘ generally indicates negation, reversal, or absence of something. It often conveys a sense of disapproval or lack. Familiar examples include ‘disagree’ (not agree), ‘disappear’ (to cease to appear), and ‘disrespect’ (lack of respect). Identifying ‘dis-‘ provides a crucial clue to a word’s meaning.

Worksheets focusing on ‘dis-‘ commonly present students with base words and ask them to add the prefix, forming antonyms. For instance, transforming ‘approve’ into ‘disapprove,’ or ‘connect’ into ‘disconnect.’ These exercises reinforce the concept of opposites.

Understanding ‘dis-‘ is vital for both reading and writing; It allows students to decipher the meaning of unfamiliar words and express nuanced ideas. Regular practice with ‘dis-‘ prefix worksheets builds vocabulary and analytical skills.

‘Pre-‘ Prefix

The prefix ‘pre-‘ signifies “before” or “prior to.” It indicates that an action occurs beforehand, or a state exists in advance. Common examples include ‘preheat’ (to heat before cooking), ‘preview’ (to view before release), and ‘prehistoric’ (before recorded history). Recognizing ‘pre-‘ unlocks a word’s temporal context.

Worksheets centered on ‘pre-‘ often challenge students to combine it with base words to create new terms. Activities might involve transforming ‘write’ into ‘prewrite,’ or ‘view’ into ‘preview.’ These exercises solidify the understanding of ‘before’ as the core meaning.

Mastering ‘pre-‘ enhances comprehension and expands vocabulary. It enables students to interpret the timing of events and anticipate outcomes. Consistent practice with ‘pre-‘ prefix worksheets strengthens linguistic abilities and analytical thinking.

‘Mis-‘ Prefix

The prefix ‘mis-‘ denotes something done wrongly, badly, or with an unfortunate outcome. It implies an error or a deviation from the correct way of doing something. Familiar examples include ‘misunderstand’ (to understand incorrectly), ‘misbehave’ (to behave badly), and ‘misspell’ (to spell incorrectly). Identifying ‘mis-‘ signals a negative or flawed action.

Worksheets focusing on ‘mis-‘ typically present students with base words and ask them to add the prefix to form new words. Tasks might involve changing ‘lead’ to ‘mislead,’ or ‘judge’ to ‘misjudge.’ These exercises reinforce the concept of ‘wrong’ or ‘badly’ as the central meaning.

Understanding ‘mis-‘ is crucial for accurate interpretation and effective communication. It allows students to discern nuances in meaning and avoid potential misunderstandings. Regular practice with ‘mis-‘ prefix worksheets builds vocabulary and analytical skills.

Common Suffixes and Their Meanings

Suffixes, added to word endings, alter meaning or grammatical function. Common examples include ‘-ed’, ‘-ing’, ‘-er’, ‘-ly’, ‘-ful’, and ‘-less’, enriching language skills!

‘-ed’ Suffix

The ‘-ed’ suffix is incredibly common in the English language, primarily functioning to indicate the past tense of regular verbs. For example, “walk” becomes “walked,” signifying an action that has already occurred. However, its role extends beyond simply denoting past actions.

The ‘-ed’ suffix can also create past participles, used in forming perfect tenses (like “have walked”). Furthermore, it sometimes indicates a state or condition resulting from an action. Consider “bored” – it’s not an action, but a feeling resulting from something.

Worksheets focusing on the ‘-ed’ suffix often involve exercises where students transform base verbs into their past tense forms. They might also encounter sentences where they need to identify the function of the ‘-ed’ ending – is it showing past tense, or describing a state?

Understanding the nuances of the ‘-ed’ suffix is crucial for both reading comprehension and accurate writing, making it a key component of prefixes and suffixes instruction.

‘-ing’ Suffix

The ‘-ing’ suffix is remarkably versatile, primarily signaling the present participle of a verb, often used with auxiliary verbs to form continuous tenses – “I am walking,” for instance. This indicates an action in progress at a specific moment. However, the ‘-ing’ suffix isn’t limited to verb forms alone.

It can also transform verbs into gerunds, functioning as nouns. For example, “Swimming is my favorite sport” uses “swimming” as the subject of the sentence. Worksheets dedicated to the ‘-ing’ suffix frequently present exercises requiring students to add the suffix to base verbs correctly, paying attention to spelling rules (doubling consonants, dropping the ‘e’).

Activities might also involve identifying whether an ‘-ing’ word is functioning as a verb or a noun within a sentence. Mastering the ‘-ing’ suffix is vital for constructing grammatically correct and nuanced sentences, a core skill reinforced through prefixes and suffixes practice.

‘-er’ and ‘-or’ Suffixes

The suffixes ‘-er’ and ‘-or’ commonly denote a person who performs an action or possesses a certain quality. The ‘-er’ suffix is frequently attached to verbs to create nouns indicating the one doing the action – a “teacher” teaches, a “writer” writes. However, it can also indicate a comparative degree, as in “faster” or “bigger”.

The ‘-or’ suffix serves a similar purpose, often appearing in words like “actor,” “doctor,” or “inventor.” Distinguishing between when to use ‘-er’ versus ‘-or’ can be tricky, and worksheets often focus on this nuance.

Exercises typically involve identifying the person or thing described by words with these suffixes, or adding the correct suffix to a given verb to form a corresponding noun. Understanding these suffixes enhances vocabulary and comprehension skills, crucial components of prefixes and suffixes study.

‘-ly’ Suffix

The ‘-ly’ suffix is predominantly used to transform adjectives into adverbs, indicating how something is done. For example, “quick” becomes “quickly,” and “sad” transforms into “sadly.” This conversion is a fundamental aspect of understanding English grammar and sentence structure. However, it’s important to note that not all words ending in ‘-ly’ are adverbs; some are adjectives themselves, like “friendly” or “lovely”.

Worksheets focusing on the ‘-ly’ suffix often present students with adjectives and ask them to create the corresponding adverb. Conversely, they might be given adverbs and tasked with identifying the original adjective.

Exercises also frequently include sentence completion tasks, requiring students to use the correctly formed adverb to describe an action. Mastering this suffix improves descriptive writing and overall language proficiency, solidifying understanding of prefixes and suffixes.

‘-ful’ and ‘-less’ Suffixes

The suffixes ‘-ful’ and ‘-less’ are instrumental in modifying word meanings, creating adjectives that denote possession or lack of a quality. ‘-ful’ signifies “full of,” indicating an abundance of something – for instance, “hopeful” means full of hope, and “beautiful” implies full of beauty. Conversely, ‘-less’ denotes a lack of something, as in “hopeless” (without hope) or “careless” (without care).

Worksheets commonly present base words and challenge students to add either ‘-ful’ or ‘-less’ to form new adjectives. These exercises often include context clues to guide students in selecting the appropriate suffix.

Furthermore, activities may involve using these newly formed adjectives in sentences, demonstrating comprehension of their meanings. Understanding these prefixes and suffixes enhances vocabulary and improves descriptive writing skills, fostering a deeper grasp of the English language.

Types of Prefix and Suffix Worksheet Exercises

Prefix and suffix worksheets utilize diverse exercises, including fill-in-the-blanks, matching definitions, and adding components to base words, fostering comprehension.

Fill-in-the-Blank Exercises

Fill-in-the-blank exercises are a cornerstone of prefix and suffix worksheets, providing a straightforward method for students to practice applying their knowledge. These exercises typically present sentences with missing prefixes or suffixes, requiring students to select the correct component from a word bank or to generate it independently.

For example, a sentence might read, “The opposite of ‘agree’ is ____agree,” prompting the student to fill in the prefix “dis-”. Similarly, “I am ____ing a letter to my friend” would require the addition of the suffix “writ-”. These activities reinforce the understanding of how these word parts alter meaning.

The document highlights examples where students fill blanks with prefixes like ‘un-’ and ‘re-’, demonstrating practical application. These exercises are often tiered in difficulty, starting with common prefixes and suffixes and progressing to more challenging ones, ensuring accessibility for various learning levels.

Matching Prefixes/Suffixes to Definitions

Matching prefixes/suffixes to definitions is a valuable exercise found within many prefix and suffix worksheets. This activity strengthens comprehension by directly linking the word part to its meaning, moving beyond simple application to a deeper understanding of etymology.

Typically, these exercises present two columns: one listing prefixes or suffixes (like ‘un-’, ‘re-’, ‘-ful’, ‘-less’) and the other providing their corresponding definitions (like ‘not’, ‘again’, ‘full of’, ‘without’). Students must draw lines or write letters to correctly pair each word part with its meaning.

Such exercises, as seen in comprehensive sets, build a foundational understanding. This method encourages students to actively recall and apply definitions, solidifying their knowledge. The worksheets often include a diverse range of prefixes and suffixes, promoting a broad vocabulary base and analytical skills.

Adding Prefixes to Base Words

Adding prefixes to base words is a core skill reinforced by numerous prefix and suffix worksheets. These exercises present students with a base word – like ‘happy’, ‘play’, or ‘agree’ – and a prefix, such as ‘un-’, ‘re-’, or ‘dis-’. The task is to combine them correctly to form a new word with an altered meaning.

Worksheets often provide a blank space for students to write the complete word, encouraging active construction. Some variations ask students to choose the correct prefix from a list, testing their understanding of nuanced meanings. Year 6 worksheets, for example, frequently include this type of activity.

This practice isn’t just about spelling; it’s about understanding how prefixes modify meaning. Through repetition and application, students learn to decode unfamiliar words and expand their vocabulary effectively. These exercises are fundamental for building literacy skills.

Adding Suffixes to Base Words

Adding suffixes to base words is a key focus of many prefix and suffix worksheets, particularly for younger learners like those in Year 2. These exercises typically involve attaching suffixes like ‘-ed’, ‘-ing’, ‘-er’, ‘-or’, ‘-ly’, ‘-ful’, or ‘-less’ to given base words, altering their meaning or grammatical function.

Worksheets often present a base word and ask students to add the appropriate suffix to create a new word. Some activities focus on specific suffix families, like exploring different uses of ‘-er’ and ‘-or’. Understanding how suffixes change a word’s tense or create adjectives is crucial.

These exercises aren’t merely about memorization; they’re about grasping the rules of English morphology. Through consistent practice, students develop a deeper understanding of how words are formed and how to use them correctly in their writing.

Worksheet Activities for Different Year Levels

Prefix and suffix worksheets are adaptable for various ages; Year 2 focuses on simple suffixes, while Year 6 tackles more complex prefixes and suffixes.

Year 2 Suffix Activities

Year 2 activities concentrate on building a foundational understanding of suffixes. These worksheets typically involve adding common suffixes like ‘-ed’, ‘-ing’, ‘-er’, and ‘-est’ to simple base words. The goal is to help young learners recognize how suffixes change the meaning or tense of a word.

A popular activity is the “Roll a Suffix” game, where children roll a dice to determine which suffix to add to a given word, fostering engagement and reinforcing learning. Worksheets often include picture prompts to aid comprehension and provide visual support. Emphasis is placed on recognizing the changes in meaning – for example, understanding how adding ‘-ed’ transforms a verb into the past tense.

These exercises are designed to be more than just adding letters; they aim to develop a deeper understanding of how language works, preparing students for more complex grammatical concepts in later years. The focus remains on making learning fun and accessible for young children.

Year 6 Prefix and Suffix Worksheets

Year 6 worksheets significantly increase the complexity, introducing a wider range of both prefixes and suffixes. Students are expected to not only add these to base words but also to understand the nuances of meaning they impart. Activities often involve identifying prefixes and suffixes within longer, more challenging words.

Exercises commonly include fill-in-the-blank questions where students must select the correct prefix or suffix from a list to complete a word, demonstrating their understanding of definitions. Another frequent task is analyzing how a prefix or suffix alters the original word’s meaning, requiring a higher level of critical thinking.

These worksheets prepare students for secondary school by building a strong vocabulary and a solid grasp of morphology. They encourage independent word analysis and a deeper appreciation for the structure of the English language, fostering confident communication skills.

Interactive Worksheet Games

Gamified learning boosts engagement! Roll a Suffix is a fun example, where dice rolls dictate which suffix students add to words, reinforcing learning playfully.

Roll a Suffix Game

Roll a Suffix is a dynamic and engaging worksheet activity specifically designed for Year 2 students to solidify their understanding of suffixes. This game transforms learning into an exciting challenge, moving beyond traditional rote memorization.

The core mechanic is simple: children take turns rolling a dice. Each number on the dice corresponds to a different suffix – for example, ‘-ed’, ‘-ing’, ‘-er’, ‘-est’, or ‘-ful’. After rolling, the student adds the indicated suffix to a provided base word, or a word of their choosing, creating a new word.

This hands-on approach encourages active participation and reinforces the concept that suffixes alter a word’s meaning. It’s a fantastic way to practice spelling and grammar skills in a fun, low-pressure environment. The game can be easily adapted for individual or small group work, fostering collaboration and peer learning.

Downloadable Roll a Suffix game worksheets are readily available online, offering a convenient and effective learning tool.

Resources and Printable Worksheets

Numerous online platforms offer comprehensive prefix and suffix sets, alongside free, printable worksheets. These resources simplify teaching and learning word parts effectively!

Comprehensive Prefix and Suffix Sets

Comprehensive sets of prefix and suffix resources are invaluable for educators seeking a thorough approach to word building. These collections typically include detailed charts listing common prefixes and suffixes, alongside their meanings and illustrative examples. Many sets also feature a variety of printable worksheets designed to reinforce learning through diverse exercises.

You’ll find resources that categorize prefixes by their meanings – such as those indicating negation (un-, dis-), repetition (re-), or time (pre-) – and similarly categorize suffixes based on their grammatical function (e.g., forming nouns, adjectives, or verbs). These organized sets often include answer keys for easy assessment.

Furthermore, some comprehensive packages offer interactive activities and games to engage students and make learning more enjoyable. Downloading a complete set provides a cohesive and structured learning experience, ensuring students develop a strong foundation in understanding how prefixes and suffixes impact word meaning.

Free Printable Prefix and Suffix Worksheets

Free printable worksheets focusing on prefixes and suffixes are readily available online, offering a cost-effective way to supplement classroom learning or provide at-home practice. These resources typically come in PDF format, ensuring easy access and compatibility across various devices. A wide range of exercises are commonly included, such as fill-in-the-blank activities, matching exercises, and tasks requiring students to add prefixes or suffixes to base words.

Many websites offer worksheets tailored to different grade levels, ensuring age-appropriateness and skill alignment. Some resources provide answer keys for self-assessment or teacher convenience. These worksheets often focus on commonly used prefixes like un-, re-, dis- and suffixes like -ed, -ing, -ly.

Utilizing these free resources allows educators and parents to reinforce vocabulary development and enhance students’ understanding of word structure without any financial burden, promoting literacy skills effectively.

Understanding Prefix and Suffix Definitions

A prefix alters a word’s meaning when added before it, while a suffix changes meaning when added to the end; worksheets clarify these!

Defining the Term ‘Prefix’

A prefix is a group of letters which is added to the beginning of a word to change its meaning. Think of it as a little addition that comes before the main part of the word! Understanding prefixes is crucial for decoding unfamiliar vocabulary and expanding reading comprehension.

For example, consider the word “unhappy.” The prefix “un-” is added to the base word “happy” to create a new word with the opposite meaning. Similarly, “re-” in “rewrite” indicates doing something again. Prefixes don’t stand alone as words themselves; they always need a base word to attach to.

Worksheets focusing on prefixes often ask students to identify the prefix in a given word, define its meaning, and then determine how that meaning alters the overall word. Recognizing common prefixes like ‘dis-’, ‘pre-’, and ‘mis-’ can significantly improve a student’s ability to understand and utilize language effectively.

why does my pdf not print correctly

Why Does My PDF Not Print Correctly? ⏤ A Comprehensive Troubleshooting Guide (Updated 02/07/2026)

PDF printing problems stem from diverse sources, including outdated software, corrupted files, or connectivity issues; resolving these requires systematic troubleshooting and potential file repair.

I. Common PDF Printing Problems

Numerous frustrating issues can plague PDF printing, disrupting workflows and causing wasted resources. Distorted text and images frequently occur, presenting a garbled or unrecognizable output, often linked to font embedding or image compression problems within the PDF itself. Missing pages are another common complaint, potentially due to file corruption or errors during PDF creation. Conversely, encountering blank pages can indicate issues with the printing process or hidden layers within the document.

Incorrect colors can arise from printer profile mismatches or color space discrepancies. Slow printing or complete print failure often points to printer driver problems, large file sizes, or network connectivity issues. These problems aren’t isolated; they can be caused by software glitches, printer malfunctions, or even the PDF file’s inherent structure. Identifying the specific symptom is the first step towards effective troubleshooting, as each issue demands a unique approach to resolution.

Distorted Text and Images

When text appears garbled or images are stretched and pixelated during PDF printing, the root cause often lies within font handling or image compression. PDFs may not embed fonts correctly, causing the printer to substitute them, leading to visual distortions. Similarly, overly compressed images can lose detail when printed, appearing blurry or pixelated.

Compatibility issues between the PDF creator and the printer can also contribute, especially with complex layouts. Basic applications lacking full PDF support may struggle to render elements accurately. Trying to print complex files with basic applications can exacerbate these problems. Furthermore, corrupted PDF files can manifest as distorted visuals. Flattening the PDF or utilizing the “Print as Image” option can sometimes circumvent these issues by rasterizing the content, forcing a consistent visual output.

Missing Pages

Encountering missing pages during PDF printing is a frustrating issue often linked to file corruption or problems within the print queue. A corrupted PDF may not contain all intended data, resulting in incomplete output. Alternatively, the print spooler might be failing to process all pages correctly, especially after updates or system glitches. Clearing the print queue and restarting the printer are crucial first steps.

Sometimes, the issue isn’t the file itself, but rather the PDF reader’s interpretation of it. Trying an alternative PDF viewer can help determine if the problem is reader-specific. Additionally, ensure the “Print to PDF” printer is enabled and functioning correctly. If only one file exhibits this behavior, attempting to compress or flatten the PDF might resolve the issue by simplifying its structure for printing.

Blank Pages

PDFs printing with blank pages often indicate issues with form fields, layers, or embedded content. If the PDF contains interactive forms, those fields might not be rendering correctly during the printing process. Flattening the PDF—converting interactive elements into static content—can often resolve this. Similarly, hidden or problematic layers could be causing pages to appear empty.

Connectivity issues or printer driver glitches can also manifest as blank pages. Ensuring a stable connection and updating or reinstalling the printer driver are essential troubleshooting steps. Checking the PDF’s security settings is also vital; restrictive permissions might prevent certain content from printing. Finally, opening the PDF on another device helps isolate whether the problem lies within the file itself or your specific system configuration.

Incorrect Colors

PDFs displaying incorrect colors when printed frequently relate to color profile mismatches between the document, the PDF reader, and your printer. Ensure your printer is configured to handle the color space used in the PDF (RGB or CMYK). Sometimes, the PDF itself might lack an embedded color profile, leading to interpretation errors by the printing software.

Driver issues can also contribute to color discrepancies; updating to the latest driver version is crucial. Furthermore, verify your printer settings within the print dialog box – accidental grayscale or economy mode selections can drastically alter color output. Trying to “Print as Image” can sometimes bypass color management issues, forcing a pixel-by-pixel rendering. Finally, different PDF readers may interpret colors slightly differently, so testing with an alternative reader is worthwhile.

Slow Printing or Print Failure

Experiencing significantly slow PDF printing or complete print failures often points to a congested print queue or resource limitations on your computer. A stalled print job can block subsequent requests, creating a bottleneck. Clearing the print queue is a fundamental first step in resolving this. Large or complex PDFs, especially those with high-resolution images, naturally require more processing time and can strain system resources.

Connectivity problems between your computer and the printer can also cause failures. Verify the cable connection or Wi-Fi signal strength. Corrupted PDF files can also trigger print errors; attempting to print a different PDF can help isolate the issue. Restarting your computer can clear temporary files and processes that might be interfering with the printing process, often providing a quick fix.

II. Software Related Issues

Several software-related factors can contribute to PDF printing problems. An outdated PDF reader, like Adobe Acrobat, may lack the necessary support for newer PDF features or contain bugs that cause printing errors. Ensuring you have the latest version is crucial. Furthermore, the PDF file itself might be corrupted, leading to printing failures or distorted output; testing the file on another device can confirm this.

Compatibility issues can arise if the PDF was created with a newer version of the PDF specification than your reader supports. Specific errors within Adobe Acrobat, such as crashes during printing, often require troubleshooting within the application itself or reinstalling the software. Basic applications may also struggle with complex PDFs due to limited support.

Outdated PDF Reader

An outdated PDF reader is a frequent culprit behind printing issues. Older versions may lack support for newer PDF features, fonts, or compression methods, resulting in distorted text, missing images, or complete print failures. They can also contain software bugs that directly interfere with the printing process. Regularly updating your PDF reader, such as Adobe Acrobat or alternative viewers, ensures compatibility and access to the latest fixes.

These updates often include improvements to printing functionality and address known errors. Failing to update leaves your system vulnerable to these problems. Even if a PDF appears to open correctly, an outdated reader might still struggle to render it accurately for printing, leading to unexpected results. Prioritize keeping your software current for optimal performance.

Corrupted PDF File

A corrupted PDF file is a common cause of printing errors, manifesting as missing pages, garbled text, or a complete inability to print. Corruption can occur during file creation, saving, transfer, or due to storage media issues; To diagnose this, attempt opening the PDF on a different device; if the problem persists there, the file itself is likely damaged.

Try downloading the PDF again if it was obtained online, as the original download might have been incomplete or interrupted. If the file is crucial, consider utilizing PDF repair tools, though success isn’t guaranteed. Compressing or flattening the PDF can sometimes circumvent minor corruption issues, allowing it to print. Regularly backing up important PDF files can prevent data loss from corruption.

Compatibility Issues with PDF Version

PDF versions evolve, and older PDF readers may struggle with newer features or formatting used in more recent PDF versions. Conversely, a newer reader might have trouble with extremely old PDF formats. This incompatibility can lead to printing distortions, missing elements, or outright print failures. Not all programs handle PDFs equally well, especially basic applications lacking full support for complex files.

To address this, try opening the PDF with a different reader, such as Adobe Acrobat Reader, which generally supports a wide range of versions. Alternatively, consider “printing to PDF” – essentially creating a new PDF from the problematic file using a PDF printer driver. This often resolves compatibility issues by converting the file to a more universally supported format. Updating your PDF reader is also crucial.

Problems with Adobe Acrobat (Specific Errors)

Even within Adobe Acrobat, specific errors can disrupt PDF printing. Connectivity issues, driver conflicts, and file-specific problems frequently manifest. Users often encounter errors during the printing process, particularly with Adobe PDF files. These can range from general print failures to more cryptic error messages indicating problems with the PDF structure or the printer communication.

Troubleshooting involves ensuring Acrobat is updated to the latest version, as updates often address known bugs. Clearing the print queue and restarting both Acrobat and the computer can resolve temporary glitches. If the issue persists, consider repairing the Acrobat installation or, as a last resort, reinstalling it. Learning how to troubleshoot and resolve common PDF printing errors within Adobe Acrobat is essential for consistent results.

III. Printer & Driver Issues

PDF printing failures are often linked to printer and driver problems. Outdated or corrupted printer drivers are a common culprit, leading to miscommunication between your computer and the printer. Ensuring your printer is correctly selected as the default printer is crucial; accidental switching can cause documents to be routed elsewhere.

Print queue errors, where jobs become stuck or corrupted, also frequently occur. Restarting the print queue or clearing it entirely can resolve these issues. Furthermore, outdated printer firmware can cause compatibility problems with PDF files. Regularly checking for and installing firmware updates is recommended. Addressing these printer and driver-related issues is a fundamental step in resolving PDF printing difficulties.

Outdated or Corrupted Printer Driver

An outdated or corrupted printer driver is a frequent cause of PDF printing errors. These drivers act as translators between your computer’s operating system and the printer, and if they’re faulty, miscommunication occurs, resulting in distorted output or complete print failure. Corruption can happen due to software conflicts, incomplete installations, or even malware.

Updating to the latest driver version, available from the printer manufacturer’s website, often resolves these issues. A clean reinstallation of the driver – completely removing the old one first – is recommended if updates don’t work. This ensures a fresh, uncorrupted installation. Regularly checking for driver updates is a proactive step towards preventing PDF printing problems and maintaining optimal printer performance.

Printer Not Selected Correctly

A surprisingly common reason for PDF printing failures is simply having the incorrect printer selected. This can happen easily, especially on systems with multiple printers installed, or after adding a new printer. Your computer might be attempting to send the print job to a disconnected printer, a virtual PDF creator (like “Microsoft Print to PDF”), or an older, unused device.

Before printing, always double-check the printer selection within the print dialog box. Ensure the correct printer is highlighted and chosen. If the desired printer isn’t listed, verify it’s properly connected to your computer and powered on. Sometimes, removing and re-adding the printer can resolve detection issues, forcing the system to recognize the available devices correctly and prevent printing errors.

Print Queue Errors

A clogged or malfunctioning print queue is a frequent culprit behind PDF printing problems. The print queue temporarily stores print jobs before sending them to the printer; if it encounters an error, jobs can become stuck, preventing subsequent documents from printing. This can manifest as a document remaining perpetually “printing” or disappearing from the queue altogether.

Clearing the print queue is a crucial troubleshooting step. In Windows, access the print queue through Control Panel or Settings. Cancel all pending documents, then restart the Print Spooler service. On other operating systems, similar queue management tools exist. If a specific PDF consistently causes queue errors, it might indicate a file corruption issue requiring repair or recreation. Regularly clearing the queue prevents build-up and ensures smooth printing.

Printer Firmware Issues

Outdated or corrupted printer firmware can significantly impact PDF printing accuracy and functionality. Firmware is the software embedded within your printer that controls its operations; if it’s not up-to-date, it may lack compatibility with newer PDF features or contain bugs that cause printing errors. These errors can range from distorted text and images to complete print failures.

Manufacturers regularly release firmware updates to address these issues and improve printer performance. Check your printer manufacturer’s website for the latest firmware version compatible with your model. The update process usually involves downloading the firmware file and installing it through a USB connection or the printer’s network interface. Ensuring current firmware is a vital step in resolving persistent PDF printing problems and maintaining optimal printer operation.

IV. Troubleshooting Steps ⏤ Quick Fixes

When facing PDF printing issues, several quick fixes can often resolve the problem without extensive troubleshooting. First, restart your computer; this clears temporary files and processes that might be interfering with the printing process. A surprising number of issues are resolved simply by rebooting the system. Next, clear the print queue – sometimes, stuck print jobs can cause subsequent prints to fail.

Another swift solution is updating printer drivers. Outdated drivers can lead to compatibility problems with PDF files. Visit your printer manufacturer’s website to download and install the latest drivers. These simple steps address common causes of printing errors and can quickly restore functionality, saving you time and frustration before delving into more complex solutions.

Restarting Your Computer

A frequently overlooked, yet remarkably effective, solution to PDF printing problems is simply restarting your computer. This action clears temporary files, cached data, and running processes that may be conflicting with the printing operation. Restarting effectively resets the system’s resources, potentially resolving software glitches or driver conflicts that are preventing successful printing.

It’s surprising how often a simple reboot solves the issue. The operating system reloads all core components, ensuring a fresh start for all applications, including your PDF reader and printer drivers. Before attempting more complex troubleshooting steps, always begin with a restart – it’s a quick, easy, and often successful first step towards resolving PDF printing errors.

Clearing the Print Queue

A clogged print queue is a common culprit behind PDF printing failures. When documents become stuck in the queue – due to errors, cancellations, or printer issues – subsequent print jobs can be blocked. Clearing the queue removes these stalled jobs, allowing new print requests to proceed without interruption.

To clear the queue, access your printer settings (typically through the Control Panel or System Preferences). Locate the print queue and cancel all pending documents. Restarting the print spooler service after clearing the queue can further ensure a clean slate. If the problem persists for a single file, consider compressing or flattening the PDF before re-attempting to print, as this can resolve underlying file complexities.

Updating Printer Drivers

Outdated or corrupted printer drivers frequently cause PDF printing problems, leading to distorted output, errors, or complete print failures. Drivers act as the communication bridge between your computer and printer; if they’re outdated, they may not correctly interpret the PDF’s instructions.

Updating to the latest drivers ensures compatibility and optimal performance. Visit the printer manufacturer’s website to download the most recent drivers specifically for your printer model and operating system. During installation, it’s recommended to completely remove the old driver first. Regularly checking for driver updates is a proactive step towards preventing printing issues and maintaining a smooth workflow. A fresh driver install can often resolve inexplicable PDF printing errors.

V. Advanced Troubleshooting & Solutions

When standard fixes fail, advanced techniques can resolve persistent PDF printing issues. Repairing or recreating a corrupted PDF is crucial; attempting to open it on another device can confirm file integrity. Utilizing the “Print as Image” option rasterizes the PDF, bypassing potential interpretation errors, though it may reduce text clarity.

Flattening PDF forms converts interactive elements into static content, eliminating compatibility problems. Checking PDF security settings ensures no restrictions prevent printing. If problems persist, explore alternative PDF readers or converters, as some programs handle complex files better than others. Finally, ensure printer firmware is current, as updates often address compatibility and performance issues.

Repairing or Recreating Corrupted PDFs

A corrupted PDF can manifest as printing errors, missing pages, or distorted content. First, attempt to open the file on a different device to isolate whether the issue lies with the file itself or your system. If confirmed corrupted, many PDF editors offer repair functionalities, attempting to recover salvageable data.

If repair fails, recreating the PDF is often necessary. This could involve re-saving the document from its original source application, or utilizing a “Print to PDF” function from a different program to generate a new, hopefully uncorrupted, version. Compressing or flattening the PDF before printing can also sometimes resolve issues stemming from complex file structures.

Using “Print as Image” Option

When standard PDF printing fails, the “Print as Image” option can often circumvent underlying issues. This method rasterizes the PDF, essentially converting it into a series of images before sending it to the printer, bypassing potential problems with fonts, vector graphics, or complex layouts that your printer might struggle to interpret directly.

However, be aware that printing as an image typically results in a larger file size and potentially lower print quality, especially for text, as it loses its vector sharpness. Access this setting within your printer’s advanced properties in the print dialog box. It’s a useful workaround, particularly for files with unusual formatting or when other troubleshooting steps haven’t yielded success.

Flattening PDF Forms

Interactive PDF forms, containing fillable fields and JavaScript, can sometimes cause printing errors due to compatibility issues with certain printers or PDF readers. Flattening a PDF form merges all form fields into the document as static content, effectively removing the interactive elements. This process converts the form into a non-editable document, but often resolves printing problems associated with form functionality.

Many PDF editors, including Adobe Acrobat, offer a flattening feature. After flattening, the form will print as a standard document. While you lose the ability to edit the form directly, it ensures a consistent and reliable print output. This is a particularly effective solution when dealing with complex forms that consistently fail to print correctly.

Checking PDF Security Settings

PDF documents can have security restrictions applied, controlling actions like printing, copying, and editing. These settings, often implemented for confidentiality or copyright protection, might inadvertently prevent successful printing. Permissions can be set to disallow printing altogether, or to require a password for printing access.

To troubleshoot printing issues, verify the document’s security settings. Open the document properties (usually found under ‘File’ then ‘Properties’ or ‘Document’) and navigate to the ‘Security’ tab. Check if printing is permitted. If restricted, you may need the appropriate permissions or password from the document creator. Removing or modifying these restrictions, if authorized, can resolve the printing problem. Always respect copyright and usage rights when altering security settings.

Alternative PDF Readers & Converters

If you consistently encounter printing issues with a specific PDF reader, exploring alternatives can be a valuable troubleshooting step. Different readers interpret PDF code slightly differently, and one might handle a problematic file more effectively than another. Popular options include Foxit Reader, SumatraPDF, and even web browsers like Chrome or Edge, which have built-in PDF viewers.

Furthermore, consider converting the PDF to a different format, such as a Microsoft Word document (.docx) or an image format (like .jpg or .png), using an online converter or dedicated software; Printing from these alternative formats can bypass the original PDF’s issues. However, be aware that conversion may alter the document’s formatting, so review the output carefully before printing.

craftsman 1 2 hp garage door opener manual

Craftsman 1/2 HP Garage Door Opener Manual: A Comprehensive Guide

This guide details assembly, installation, operation, troubleshooting, and maintenance for your Craftsman 1/2 HP garage door opener, referencing PDF manuals and WD822KD models.

Understanding Your Craftsman Opener Model

Craftsman garage door openers, often manufactured by Chamberlain, come in various models, each with specific features and capabilities. Identifying your exact model is crucial for accessing the correct documentation and support. Common series include those utilizing 1/2 HP motors, designed for standard residential doors.

Understanding the model number – often found on a sticker located on the opener unit itself – unlocks access to dedicated owner’s manuals, typically available as PDF downloads. These manuals detail everything from initial setup and safety precautions to troubleshooting common issues and performing routine maintenance.

Different models, like the WD822KD, may have unique functionalities, such as smart home integration or advanced security features. Knowing your model ensures you can fully utilize its capabilities and find solutions tailored to its specific design. Referencing the manual is the first step towards successful operation and longevity of your Craftsman opener.

Identifying the Specific Model Number

Locating your Craftsman garage door opener’s model number is paramount for accessing the correct resources. This unique identifier distinguishes your unit and ensures you obtain the appropriate owner’s manual and troubleshooting guidance. Typically, the model number is affixed to a sticker or label directly on the opener’s motor unit.

Carefully inspect the sides, top, or back of the motor housing. Look for a label that includes terms like “Model Number,” “Model No.,” or simply “Model.” Common examples include WD822KD or variations incorporating a series number. Note the complete alphanumeric code precisely as it appears.

This number is essential when searching for PDF manuals online or contacting Craftsman/Chamberlain customer support. Having the correct model number streamlines the process, guaranteeing you receive accurate information specific to your 1/2 HP opener. Accurate identification prevents using incorrect instructions and potential damage.

Locating the Owner’s Manual (PDF Download)

Accessing a PDF version of your Craftsman 1/2 HP garage door opener manual is often the quickest and most convenient method. Several online resources host these documents. Begin by visiting the Chamberlain Group website, as they manufacture Craftsman openers. Search using your specific model number – for example, WD822KD – to filter results.

Alternatively, utilize general search engines like Google, specifying “Craftsman garage door opener manual PDF” along with your model number. Numerous third-party websites archive manuals, but verify the source’s reliability. ManualsLib and similar sites can be helpful.

Downloaded PDFs offer searchable text, allowing you to quickly find information on installation, operation, or troubleshooting. Ensure the manual corresponds to your 1/2 HP model for accurate guidance. Keep a digital copy for future reference, avoiding the need to repurchase a physical copy.

Safety Precautions Before Installation & Use

Prioritize safety during installation and operation of your Craftsman 1/2 HP garage door opener. Disconnect the power supply at the breaker before commencing any work. Never attempt installation if you’re uncomfortable with electrical or mechanical tasks; consult a qualified professional.

Ensure the garage door is balanced correctly. An improperly balanced door can cause severe injury. Test the door’s balance by manually lifting it halfway; it should remain stationary. Always clear the area of people and objects before operating the opener.

Never allow children to play near the garage door or opener. Regularly test the safety sensors to confirm they prevent the door from closing on obstructions. Familiarize yourself with the manual release mechanism for emergency situations; Adhering to these precautions minimizes risks.

Installation Process

Follow the manual’s steps for rail assembly, opener attachment, safety sensor connection, and travel limit adjustments, ensuring secure mounting and proper functionality.

Assembling the Rail System

Begin by carefully unpacking all rail components, verifying against the parts list in your owner’s manual. Typically, this involves connecting multiple rail sections using bolts and fasteners provided. Ensure each connection is secure, but avoid over-tightening, which could damage the rail.

Pay close attention to the rail’s curvature, as it needs to align correctly with your garage door’s track. The manual will illustrate the proper orientation. Some models feature pre-assembled sections, simplifying this step. Once assembled, carefully lift the rail into position, supporting it adequately to prevent bending or damage.

Remember to attach any necessary brackets or supports as indicated in the instructions. These brackets will secure the rail to the ceiling joists or wall, providing stability during operation. Double-check all connections before proceeding to the next stage of installation, ensuring a robust and reliable rail system.

Attaching the Opener to the Door

Before beginning, ensure the garage door is fully closed and secured. Position the opener unit directly above the center of the door, using the provided mounting brackets. Mark the bracket locations on the header above the door, ensuring they align with solid structural members – ceiling joists are ideal.

Securely fasten the mounting brackets to the header using lag screws, verifying they are firmly anchored. Carefully lift the opener unit onto the brackets, ensuring it’s properly seated and locked into place. Next, attach the door bracket to the top of the garage door, typically using bolts and nuts.

Connect the door bracket to the opener’s arm using the provided connecting link. Adjust the length of the link to achieve the correct door travel arc, as detailed in the manual. Double-check all connections for tightness and stability before proceeding, ensuring a safe and reliable attachment.

Connecting the Safety Sensors

Safety sensors are crucial for preventing accidental door closure on obstructions. Locate the sensor lenses and wiring, typically included with the opener unit. Mount the sensors on either side of the garage door opening, approximately 6 inches above the floor, ensuring they face each other directly.

Connect the sensor wires to the designated terminals on the opener unit’s control panel, paying close attention to polarity. Ensure the wires are securely fastened and routed away from moving parts. After wiring, test the sensors by placing an object in the door’s path while attempting to close it.

The door should immediately stop and reverse direction; If it doesn’t, re-check the wiring connections and sensor alignment. Proper sensor function is vital for safety; consult the manual for detailed troubleshooting steps if issues persist. Regular testing is recommended.

Adjusting Travel Limits

Travel limits define how far the garage door opens and closes. Locate the adjustment screws on the opener unit, typically marked “Up” and “Down”. These control the upper and lower limits of the door’s travel.

Begin by loosening the locking nuts on the adjustment screws. Then, incrementally adjust the “Up” screw to set the desired open height, and the “Down” screw to set the closed position. Test the adjustments after each small change by activating the opener.

Ensure the door doesn’t overtravel or stop short of fully opening or closing. Tighten the locking nuts once the limits are correctly set. Refer to the owner’s manual for specific instructions related to your model, as procedures may vary. Precise adjustment prevents strain on the door and opener.

Operating Your Garage Door Opener

Learn to effectively use the wall control, program remote controls, understand rolling code security, and utilize the manual release for safe operation.

Using the Wall Control

The wall control serves as your primary indoor operating point for the Craftsman garage door opener. Typically mounted near a service door, it allows convenient control without needing a remote. To operate, simply press the clearly marked “Up” or “Down” button. The door will begin to move in the selected direction.

Observe the indicator lights on the control panel. A steady light usually indicates the door is moving, while a flashing light may signal a safety sensor issue or programming mode. Be aware that some models feature a “Stop” button for immediate halting of door travel.

If the wall control isn’t responding, first check its power source and ensure it’s securely connected. Refer to the owner’s manual for specific troubleshooting steps related to wall control functionality, including potential reset procedures. Always prioritize safety and avoid attempting repairs if you’re uncomfortable or unsure.

Remote Control Programming

Programming your remote is essential for convenient, keyless operation of your Craftsman garage door. Most models utilize a “Learn” or “Smart” button on the opener unit itself – typically located on the motor housing. Pressing this button initiates a programming mode, usually indicated by a flashing LED.

Within a specified timeframe (often 30 seconds), press and hold the desired button on your remote control. Successful programming is usually confirmed by the garage door opener lights flashing or the door itself briefly moving. Repeat this process for each additional remote you wish to pair.

If programming fails, ensure the remote has fresh batteries and you’re within range of the opener. Consult your owner’s manual for model-specific instructions, as procedures can vary. Understanding the rolling code feature ensures security, changing the code with each use.

Understanding the Learning/Rolling Code Feature

Craftsman garage door openers often employ a “Learning” or “Rolling Code” security system, significantly enhancing protection against unauthorized access. Unlike older fixed-code systems, rolling code technology generates a new security code each time the remote is used. This prevents code grabbing and replay attacks, where someone intercepts and duplicates your remote’s signal.

When programming a remote, the opener doesn’t simply store a single code; it establishes an encrypted communication link. Each press of the remote sends a unique, time-sensitive code. The opener then updates its internal code sequence, ensuring the next transmission will be different.

This dynamic system makes it virtually impossible for someone to gain access even if they briefly capture a signal. If a remote is lost, reprogramming all remotes is crucial to invalidate the compromised code.

Manual Release Mechanism – How and When to Use

Your Craftsman garage door opener is equipped with a manual release mechanism, designed for emergency situations or when the opener is malfunctioning. This allows you to disconnect the door from the opener, enabling manual operation. Typically, it’s a red cord hanging from the rail.

To engage the release, pull the cord firmly towards the opener. The door will then be free to open and close by hand. Important: exercise caution, as the door may be heavy and under spring tension.

Use the manual release during power outages, opener failures, or for maintenance. After re-engaging the opener, ensure the door is properly connected and the safety sensors are aligned before operating it with the remote or wall control. Always test the safety features after reconnection.

Troubleshooting Common Issues

Resolve opener problems like non-responsiveness, partial movement, sensor failures, and remote malfunctions using this section’s diagnostic steps and solutions for Craftsman models.

Opener Not Responding

If your Craftsman 1/2 HP garage door opener fails to respond, begin by verifying the power supply. Ensure the opener is properly plugged into a functioning electrical outlet and that the circuit breaker hasn’t tripped. Check for any power interruptions within your home. Next, examine the wall control panel; confirm the batteries are fresh and the wiring connections are secure.

Consider the safety sensors – a misaligned or obstructed sensor beam will prevent operation. Clean the sensor lenses and realign them if necessary. Also, investigate the manual release mechanism; ensure it isn’t engaged, as this disconnects the opener from the door. If the issue persists, inspect the logic board for any visible damage or error lights. Refer to your owner’s manual’s troubleshooting section for specific error code interpretations. Finally, test the remote control with a new battery to rule out a remote-specific problem.

Door Opens/Closes Partially

If your Craftsman 1/2 HP garage door opener causes the door to open or close only partially, the most common culprit is improperly adjusted travel limits. These limits define how far the door travels up and down. Use the adjustment knobs on the opener unit to fine-tune the up and down travel settings, increasing or decreasing the distance as needed.

Also, inspect the safety sensors; even slight misalignment can trigger partial operation. Ensure the sensors are clean, properly aligned, and free from obstructions. A binding door, caused by friction in the tracks or rollers, can also contribute to this issue. Lubricate the tracks and rollers, and check for any damaged components. Finally, verify the spring system is functioning correctly; a weak or broken spring can prevent full door movement. Consult a professional if spring issues are suspected.

Safety Sensors Not Working

If your Craftsman 1/2 HP garage door opener’s safety sensors aren’t functioning, the door will likely not close, or may reverse mid-close. First, visually inspect the sensors for obstructions – even dust or cobwebs can interfere. Ensure the sensors are aligned; the indicator lights should be lit steadily. If one or both lights are off or blinking, realignment is necessary.

Carefully adjust the sensor brackets until both lights are solid. Check the wiring connections to the sensors and the opener unit for looseness or damage. A faulty wire can disrupt the signal. If the sensors still don’t work, try cleaning the sensor lenses with a soft cloth. If problems persist, consult the owner’s manual for specific troubleshooting steps related to your model, or consider professional assistance.

Remote Control Malfunctions

Experiencing issues with your Craftsman 1/2 HP garage door opener’s remote control? The first step is to check the battery. A weak battery is a common culprit. Replace it with a fresh one, ensuring correct polarity. If a new battery doesn’t resolve the problem, you may need to reprogram the remote to the opener. Refer to the owner’s manual for the specific programming procedure for your model – it often involves pressing a “Learn” button on the opener unit.

If multiple remotes aren’t working, the issue might be with the opener’s receiver. Interference from other devices can sometimes cause malfunctions. Try moving potential sources of interference away from the opener. If reprogramming fails, consult the manual for advanced troubleshooting or contact a qualified technician for assistance.

Maintenance & Repair

Regular upkeep ensures optimal performance. Lubricate moving parts, check chain tension, replace bulbs, and inspect hardware for tightness – vital for longevity.

Regular Lubrication Points

Maintaining proper lubrication is crucial for smooth and quiet operation of your Craftsman 1/2 HP garage door opener. Focus on key areas to prevent wear and tear, extending the lifespan of your system. Begin by lubricating the chain or belt drive – apply a silicone-based lubricant specifically designed for garage door openers, avoiding oil-based products which attract dust.

Next, address the rail system; apply lubricant along the entire length of the rail, ensuring even distribution. The opener’s internal gears also require periodic lubrication – consult your owner’s manual for access points. Don’t forget the door hinges, rollers, and springs; these components experience significant stress and benefit from regular silicone spray.

Avoid over-lubrication, as excess lubricant can attract dirt and grime. Wipe away any excess with a clean cloth. Frequency depends on usage, but aim for at least twice a year, or more often in harsh climates. Proper lubrication minimizes friction, reduces noise, and ensures reliable performance.

Checking Chain/Belt Tension

Maintaining correct tension in your Craftsman 1/2 HP garage door opener’s chain or belt drive is vital for efficient operation and preventing damage. For chain drives, check for excessive slack; a slight downward deflection is normal, but significant sagging indicates a need for adjustment. Consult your owner’s manual for specific tensioning instructions, typically involving adjusting a screw or nut on the motor assembly.

Belt drives require a different approach. Inspect the belt for cracks, fraying, or wear. Tension should be firm, but not overly tight, as this can strain the motor. Proper tension ensures the belt grips the drive sprocket effectively, transferring power without slipping. If the belt appears loose or damaged, replacement is recommended.

Regularly inspect the chain or belt during maintenance. Incorrect tension can lead to noise, reduced lifting power, and premature wear of the drive system. Always disconnect power before making any adjustments or repairs.

Replacing the Light Bulb

Replacing the light bulb in your Craftsman 1/2 HP garage door opener is a straightforward task, but safety is paramount. Always disconnect power to the opener at the circuit breaker before beginning. Locate the light bulb socket, typically on the motor unit. Note the bulb type – often an incandescent or LED – and wattage specified in your owner’s manual.

Allow the bulb to cool completely before handling; Gently unscrew the old bulb and replace it with a new one of the correct type and wattage. Do not exceed the maximum wattage rating to prevent overheating and potential damage. Reconnect power and test the new bulb.

If the bulb doesn’t illuminate, check the bulb itself, the socket connections, and the opener’s wiring. Consult the manual for troubleshooting steps. Using the correct bulb ensures optimal illumination and prevents electrical hazards.

Inspecting and Tightening Hardware

Regularly inspecting and tightening the hardware of your Craftsman 1/2 HP garage door opener is crucial for safe and reliable operation. Begin by visually examining all bolts, nuts, and screws on the motor unit, rail system, and door brackets. Pay close attention to connections that experience frequent movement or stress.

Use a wrench to gently tighten any loose hardware, but avoid over-tightening, which could strip threads or damage components. Check the chain or belt tension and adjust as needed, referring to your owner’s manual for specific instructions. Inspect the door hinges and rollers for wear and tear, lubricating them as necessary.

A thorough inspection and tightening routine can prevent unexpected failures, reduce noise, and extend the lifespan of your garage door opener. Prioritize safety and consult the manual if you encounter any issues.

Advanced Features & Compatibility

Explore smart home integration, Chamberlain/LiftMaster compatibility, and the GDC1s enclosure for device addition, addressing potential video playback issues with online manuals.

Smart Home Integration (if applicable)

Modern Craftsman 1/2 HP garage door openers may offer smart home integration capabilities, allowing control via smartphone apps or voice assistants like Amazon Alexa or Google Assistant. This functionality typically requires a compatible hub or adapter, such as the Chamberlain MyQ system, which often integrates seamlessly with these openers.

To enable smart control, you’ll likely need to connect the opener to your home’s Wi-Fi network and follow the instructions within the MyQ app. This process usually involves creating an account and pairing the opener with the hub. Once connected, you can monitor door status, receive alerts, and operate the opener remotely.

Compatibility varies depending on the specific model and year of manufacture. Check your owner’s manual or the Chamberlain website to confirm if your opener supports smart home integration and which accessories are required. Ensure your Wi-Fi network meets the minimum requirements for a stable connection.

Compatibility with Chamberlain/LiftMaster Systems

Craftsman garage door openers, including the 1/2 HP models, share significant technological overlap with Chamberlain and LiftMaster systems, as these brands are all under the same parent company. This often translates to compatibility with Chamberlain and LiftMaster accessories, such as remote controls and wall controls.

Many Craftsman openers utilize Chamberlain’s Security+ rolling code technology, meaning that LiftMaster or Chamberlain remotes programmed for similar frequencies (typically 315 MHz or 390 MHz) may work with your Craftsman opener without requiring reprogramming. However, always verify compatibility using the model numbers.

Furthermore, the MyQ technology, prevalent in Chamberlain and LiftMaster systems, is frequently compatible with newer Craftsman models, enabling smart home integration. When seeking replacement parts or upgrades, checking both Chamberlain and LiftMaster catalogs alongside Craftsman’s can broaden your options and potentially yield cost savings.

Understanding the GDC1s Enclosure and Device Addition

The GDC1s enclosure serves as the interface for adding smart home connectivity to compatible Craftsman garage door openers. This small device plugs in near your existing garage door opener controller, enabling features like remote access and monitoring via a smartphone app.

To add the GDC1s, first, open the enclosure and plug it into a nearby power outlet. Then, follow the specific instructions provided with your garage door opener controller to initiate the device addition process. This typically involves putting the controller into pairing mode.

The process varies depending on the controller model, but generally requires using the MyQ app to discover and connect to the GDC1s. Ensure a stable Wi-Fi connection during setup. Successful connection unlocks smart features, enhancing convenience and security.

Troubleshooting Video Playback Issues (Related to Online Manual Access)

Accessing online manuals, particularly videos demonstrating Craftsman garage door opener features, can sometimes encounter playback problems. Common issues include videos failing to load, displaying error messages like “video not found,” or experiencing buffering. These problems often stem from browser compatibility, internet connection instability, or website server issues.

To resolve these issues, first, ensure a stable and high-speed internet connection. Clear your browser’s cache and cookies, or try a different browser altogether. Disabling browser extensions, especially ad blockers, can also help.

If problems persist, verify that your browser supports the necessary video codecs. Consider installing a compatible plugin like VLC, or checking the website’s help section for specific troubleshooting steps. Sometimes, the issue lies with the website itself, requiring patience or contacting their support team.

phase locked loop pdf

Phase-Locked Loops (PLLs): A Comprehensive Guide

Phase-Locked Loops Control Tutorial‚ a detailed 18-page PDF by NV Kuznetsov (2019‚ cited 17 times)‚ explores PLLs as negative feedback systems‚ crucial for frequency and phase locking.

Phase-Locked Loops (PLLs) represent a cornerstone of modern electronic systems‚ functioning as sophisticated feedback control mechanisms. A readily available Phase-Locked Loops Control Tutorial‚ a comprehensive 18-page PDF authored by NV Kuznetsov in 2019 and cited 17 times‚ provides a foundational understanding. PLLs dynamically adjust the phase of a locally generated signal to precisely match the phase of an incoming reference signal;

This automatic control process is vital in numerous applications‚ including frequency synthesis and clock recovery. The tutorial details how PLLs utilize a negative feedback loop‚ ensuring stability and accuracy in signal synchronization‚ making them indispensable in communication and timing systems.

Basic PLL Architecture

The fundamental architecture of a Phase-Locked Loop (PLL)‚ as detailed in the Phase-Locked Loops Control Tutorial PDF (Kuznetsov‚ 2019)‚ centers around a negative feedback system. This system continuously compares the phase of an input signal with the phase of the output signal from a Voltage-Controlled Oscillator (VCO). Any phase difference generates an error signal.

This error signal is then processed to adjust the VCO’s frequency‚ driving the output phase closer to the input phase. The tutorial emphasizes that this feedback loop is crucial for achieving stable and accurate phase and frequency locking‚ forming the core of PLL operation.

Key Components of a PLL

According to the Phase-Locked Loops Control Tutorial PDF (Kuznetsov‚ 2019)‚ a PLL fundamentally comprises a Phase Detector‚ a Loop Filter‚ and a Voltage-Controlled Oscillator (VCO). The Phase Detector compares input and feedback signals‚ generating an error voltage proportional to the phase difference. This voltage is then filtered by the Loop Filter to remove unwanted noise and high-frequency components.

Finally‚ the filtered voltage controls the VCO’s frequency‚ adjusting it until the output signal is phase-locked to the input. These interconnected components work in harmony to achieve stable frequency and phase control.

Negative Feedback System Explained

The Phase-Locked Loops Control Tutorial PDF (Kuznetsov‚ 2019) emphasizes that a PLL operates as a negative feedback system. This means the output signal is sampled and compared to the input reference‚ creating an error signal. This error signal drives the system to reduce the difference between input and output – hence‚ “negative” feedback.

This feedback loop continuously adjusts the VCO’s frequency‚ striving for phase and frequency alignment. The inherent stability of negative feedback ensures the PLL maintains lock‚ even with variations in input signal or component drift‚ making it a robust control mechanism.

Phase Detector Fundamentals

According to the Phase-Locked Loops Control Tutorial PDF (Kuznetsov‚ 2019)‚ the phase detector is central to PLL operation. It compares the phase of the input reference signal with the feedback signal from the VCO‚ generating an output voltage proportional to the phase difference.

This voltage then guides the VCO towards locking. The tutorial implicitly suggests various detector types exist (XOR‚ edge-triggered‚ analog)‚ each with unique characteristics. Accurate phase detection is paramount; errors directly impact lock range and stability‚ highlighting its critical role within the PLL architecture.

Types of Phase Detectors (XOR‚ Edge-Triggered‚ Analog)

While the Phase-Locked Loops Control Tutorial PDF (Kuznetsov‚ 2019) doesn’t explicitly detail each type‚ it establishes the necessity of phase comparison. Different detectors achieve this differently. XOR detectors respond to phase differences with a duty cycle variation. Edge-triggered detectors react to signal transitions‚ offering pulse-based phase information.

Analog detectors‚ conversely‚ provide a continuous voltage proportional to the phase error. The optimal choice depends on application specifics‚ impacting sensitivity‚ linearity‚ and lock performance. Understanding these distinctions is vital for effective PLL design.

Phase Detection Principles

The Phase-Locked Loops Control Tutorial PDF (Kuznetsov‚ 2019) highlights that a PLL fundamentally operates by comparing the phase of an input reference signal with the phase of its Voltage-Controlled Oscillator (VCO). Phase detection quantifies this difference‚ generating an error signal.

This error signal drives the VCO‚ adjusting its frequency until phase alignment – “lock” – is achieved. Effective phase detection requires minimizing ambiguity and maximizing sensitivity to small phase deviations. The accuracy of this process directly influences the PLL’s overall performance and stability.

Loop Filter Design Considerations

As detailed in the Phase-Locked Loops Control Tutorial PDF (Kuznetsov‚ 2019)‚ the loop filter is a critical component‚ significantly impacting PLL performance. It removes unwanted noise and spurious signals from the phase detector output‚ ensuring stable operation.

Careful consideration must be given to filter order and bandwidth selection. A higher order filter provides better noise attenuation but can reduce the PLL’s dynamic response. Bandwidth dictates the lock-in range and capture speed‚ requiring a trade-off between stability and responsiveness.

Loop Filter Impact on PLL Performance

The Phase-Locked Loops Control Tutorial PDF (Kuznetsov‚ 2019) emphasizes the loop filter’s profound influence on PLL behavior. It shapes the dynamic response‚ stability‚ and noise characteristics of the entire system. An improperly designed filter can lead to instability‚ excessive phase noise‚ or slow lock times.

Specifically‚ the filter attenuates unwanted signals‚ determines the loop bandwidth‚ and affects the PLL’s ability to track input frequency variations. Optimizing the filter is crucial for achieving desired performance metrics in various applications‚ as detailed within the referenced document.

Filter Order and Bandwidth Selection

According to the Phase-Locked Loops Control Tutorial PDF (Kuznetsov‚ 2019)‚ filter order and bandwidth are key design considerations. Higher-order filters provide steeper roll-off‚ improving noise rejection but potentially increasing instability risks. Bandwidth dictates the PLL’s tracking speed and noise performance – a wider bandwidth enables faster tracking but also allows more noise to pass through.

The selection process involves a trade-off between these factors‚ guided by the specific application requirements. The PDF details how to calculate appropriate values based on desired loop dynamics and stability margins.

Voltage-Controlled Oscillator (VCO) Characteristics

The Phase-Locked Loops Control Tutorial PDF (Kuznetsov‚ 2019) emphasizes the VCO as a critical PLL component. It’s a special generator with frequency tuning controlled by an input voltage. A VCO’s tuning range defines the frequency span it can achieve‚ impacting the PLL’s overall operational flexibility.

Linearity and noise performance are also vital. Non-linearity introduces distortion‚ while noise degrades the PLL’s stability and accuracy. The PDF details analyzing these characteristics for optimal PLL design and performance.

VCO Frequency Tuning Range

According to the Phase-Locked Loops Control Tutorial PDF (Kuznetsov‚ 2019)‚ the VCO’s frequency tuning range is a fundamental parameter. It dictates the span of frequencies the oscillator can generate in response to changes in the control voltage. A wider tuning range offers greater flexibility in PLL applications‚ allowing it to lock onto a broader spectrum of input signals.

However‚ a larger range can sometimes compromise linearity. The PDF highlights the trade-offs involved in selecting a VCO with an appropriate tuning range for a specific PLL design‚ balancing flexibility with performance.

VCO Linearity and Noise Performance

The Phase-Locked Loops Control Tutorial PDF (Kuznetsov‚ 2019) emphasizes that VCO linearity is critical for PLL accuracy. Non-linearity introduces distortion‚ impacting the PLL’s ability to maintain a stable lock‚ especially with complex modulation schemes. A linear VCO ensures a predictable relationship between control voltage and output frequency.

Furthermore‚ the PDF details how VCO noise directly affects the PLL’s phase noise performance. Lower VCO noise translates to a cleaner output signal‚ vital in applications like frequency synthesis and communication systems where signal purity is paramount.

Lock-In Range and Capture Range

The Phase-Locked Loops Control Tutorial PDF (Kuznetsov‚ 2019) highlights the distinction between lock-in and capture ranges as fundamental PLL performance metrics. The capture range defines the initial frequency difference a PLL can acquire lock from‚ while the lock-in range specifies the frequency variations the PLL can track after it’s already locked.

The document also references the “Gardner problem‚” concerning determining the lock-in range for multidimensional PLL systems. A wider lock-in range provides greater stability against external disturbances and component variations‚ crucial for robust operation.

Gardner Problem and Multidimensional PLLs

As detailed in the Phase-Locked Loops Control Tutorial PDF (Kuznetsov‚ 2019)‚ the “Gardner problem” centers on accurately calculating the lock-in range for multidimensional Phase-Locked Loop (PLL) systems. This is a significant challenge because traditional methods for single-dimensional PLLs don’t directly apply to systems with multiple feedback loops or complex phase detection schemes.

The report demonstrates potential solutions to this problem‚ crucial for designing stable and reliable multidimensional PLLs. Solving the Gardner problem ensures the PLL can maintain lock across a wider range of operating conditions and disturbances.

PLL Applications

The Phase-Locked Loops Control Tutorial PDF highlights the broad applicability of PLLs. Key applications include frequency synthesis‚ enabling the creation of precise and stable frequencies from a reference signal‚ and clock recovery‚ vital in digital communication systems for extracting timing information from data streams.

Furthermore‚ PLLs are integral to technologies like the SKY Q system‚ as referenced in online information‚ and indirectly linked to infrastructure like the Metrocentre through supporting communication networks. Their ability to synchronize signals makes them essential in modern electronic systems.

Frequency Synthesis

As detailed in the Phase-Locked Loops Control Tutorial PDF‚ a primary PLL application is frequency synthesis. This involves generating stable output frequencies that are precise multiples of a reference frequency. PLLs achieve this by locking a Voltage-Controlled Oscillator (VCO) to a desired multiple of the reference signal.

This capability is crucial in communication systems‚ allowing for channel selection and precise frequency control. The PDF emphasizes PLLs’ role in creating a wide range of frequencies from a single‚ accurate source‚ making them fundamental building blocks in modern radio and wireless technologies.

Clock Recovery

The Phase-Locked Loops Control Tutorial PDF highlights clock recovery as another significant PLL application‚ particularly vital in digital communication systems. Data streams often arrive without an accompanying clock signal; PLLs extract this timing information from the data itself.

By locking onto the transitions within the data stream‚ the PLL’s VCO replicates the original clock frequency and phase. This recovered clock then synchronizes digital circuits‚ enabling accurate data sampling and processing. The PDF underscores PLLs’ essential role in reliable data transmission and reception.

Digital PLLs (DPLLs)

The Phase-Locked Loops Control Tutorial PDF details Digital PLLs (DPLLs) as PLL implementations utilizing digital logic for most or all of their functional blocks. Unlike traditional analog PLLs‚ DPLLs employ digital phase detectors‚ loop filters‚ and sometimes even digitally controlled oscillators (DCOs).

This digital approach offers advantages like improved stability‚ reduced sensitivity to component variations‚ and easier integration with digital systems. The PDF explains that DPLLs are increasingly prevalent in applications demanding high precision and programmability‚ such as frequency synthesis and data recovery.

PLL Modeling and Analysis

The Phase-Locked Loops Control Tutorial PDF emphasizes the importance of rigorous modeling and analysis for PLL design. It details how PLLs‚ as negative feedback systems‚ can be analyzed using techniques from control theory‚ including transfer functions and stability criteria.

The document highlights the Gardner problem – determining the lock-in range for multidimensional PLL systems – as a key analytical challenge. Accurate modeling allows engineers to predict PLL performance‚ optimize loop filter parameters‚ and ensure stable operation across varying conditions‚ crucial for reliable system implementation.

RS-232 Interface and PLLs

The Phase-Locked Loops Control Tutorial PDF briefly references RS-232 interfaces within the broader context of PLL applications. PLLs are frequently employed in serial communication systems‚ like those utilizing RS-232‚ to perform clock recovery – extracting a timing signal from the received data stream;

This recovered clock‚ generated by the PLL‚ synchronizes the receiver with the transmitter‚ enabling accurate data decoding. The document indicates RS-232 is noted on page 871‚ suggesting a discussion of how PLLs facilitate reliable data transmission and reception in these serial communication protocols.

Programmed I/O and PLL Registers

According to the Phase-Locked Loops Control Tutorial PDF‚ programmed I/O commands interact with PLL registers for configuration and control. The document specifically mentions page 955 detailing registers‚ alongside conversion processes on page 1004 and a value of 912 related to these operations.

These registers allow users to adjust PLL parameters‚ such as loop filter settings‚ VCO frequency‚ and phase detector characteristics. Programmed I/O enables software-based manipulation of the PLL‚ offering flexibility in adapting the loop’s behavior to specific application requirements.

PLL in Communication Systems

The Phase-Locked Loops Control Tutorial PDF highlights the fundamental role of PLLs within communication systems. PLLs are essential for tasks like clock recovery‚ enabling accurate data synchronization in digital communication streams. They also facilitate frequency synthesis‚ generating precise carrier frequencies for modulation and demodulation processes.

Furthermore‚ PLLs contribute to spectral purity‚ reducing unwanted noise and interference. This is critical for reliable data transmission and reception. The document implicitly suggests PLLs are foundational components in modern communication infrastructure‚ ensuring signal integrity and efficient bandwidth utilization.

SKY Q and PLL Technology

Information sourced from available data indicates SKY Ultimate for SKY Q customers benefit from technology reliant on Phase-Locked Loops (PLLs). While the Phase-Locked Loops Control Tutorial PDF doesn’t directly detail SKY Q‚ PLLs are vital for the precise frequency and timing control needed in satellite communication systems.

PLLs ensure accurate carrier recovery and clock synchronization‚ essential for decoding the digital signals transmitted by satellites. This allows SKY Q receivers to reliably deliver high-quality television and on-demand content. The stability and accuracy provided by PLLs are therefore integral to the SKY Q user experience.

Metrocentre and PLL Related Technologies (Indirectly)

The Phase-Locked Loops Control Tutorial PDF doesn’t explicitly link to Metrocentre; however‚ the shopping centre’s infrastructure likely utilizes technologies dependent on PLLs; Modern communication systems‚ powering point-of-sale transactions‚ security systems‚ and digital signage within Metrocentre‚ rely on precise timing and frequency synchronization.

PLLs are fundamental to these systems‚ ensuring reliable data transmission and signal processing; Furthermore‚ the train station’s signaling and communication systems‚ connecting Metrocentre to the national rail network‚ also benefit from PLL technology. While indirect‚ PLLs contribute to the functionality of the Metrocentre environment.

PLL Experimentation and Testing

Practical application of Phase-Locked Loop concepts‚ as detailed in the referenced PDF tutorial‚ necessitates experimentation. “Experiment No. 10: Phased Locked Loop” suggests a hands-on approach to understanding PLL behavior. Testing involves verifying lock-in range‚ capture range‚ and stability under varying conditions.

Analyzing the VCO’s linearity and noise performance is crucial. The PDF highlights the importance of understanding PLL components and their interaction. Successful experimentation requires careful observation and measurement of phase and frequency relationships‚ validating theoretical principles outlined in the control tutorial.

Future Trends in PLL Design

While the 2019 Kuznetsov PDF provides a strong foundation‚ Phase-Locked Loop (PLL) design continues to evolve. Advancements focus on addressing the “Gardner problem” for multidimensional PLL systems‚ improving lock-in range and stability. Digital PLLs (DPLLs) are gaining prominence due to their programmability and noise immunity.

Further research explores PLL applications in advanced communication systems‚ like those found in SKY Q technology. Miniaturization and low-power designs are critical for portable devices. Expect increased integration with programmable I/O and sophisticated register control‚ enhancing adaptability and performance.

apq guide

What is APQ? A Comprehensive Guide (Updated 02/07/2026)

APQ signifies Storage of Chemical Products, encompassing handling and storage procedures. The APQ guide offers improvement tools, KPIs, and supporting resources for organizations.

APQ, representing the Storage of Chemical Products, has emerged as a critical framework for organizations managing these materials. The APQ guide series provides a systematic approach, utilizing tools and methodologies designed to elevate standards in chemical product handling. Its significance lies in promoting safety, regulatory compliance, and operational efficiency within the chemical industry and related sectors.

This comprehensive guide isn’t merely a set of recommendations; it’s a pathway to advancement. The series details a structured framework – Assess, Aspire, Act, and Advance – enabling organizations to pinpoint areas for improvement, set ambitious goals, implement effective changes, and continuously refine their processes. Furthermore, the APQ guide emphasizes transparency, particularly regarding co-funding sources, fostering trust and accountability.

Ultimately, the APQ guide aims to empower organizations to proactively manage risks associated with chemical storage, ensuring a safer and more sustainable future. It’s a vital resource for anyone involved in the lifecycle of chemical products.

Defining APQ: Storage of Chemical Products

APQ fundamentally defines the principles and practices surrounding the safe and compliant storage of chemical products. It extends beyond simple containment, encompassing all aspects of handling, from initial receipt and inventory management to long-term preservation and eventual disposal; The APQ guide meticulously details these processes, offering a structured methodology for organizations to optimize their chemical storage protocols.

This definition isn’t static; it’s continually evolving with advancements in safety regulations and best practices. The APQ guide serves as a dynamic resource, providing updates and recommendations to ensure organizations remain current with industry standards. It emphasizes a proactive approach, identifying potential hazards and implementing preventative measures.

Crucially, APQ, as outlined in the guide, isn’t solely about avoiding incidents; it’s about fostering a culture of responsibility and continuous improvement in chemical product stewardship.

The APQ Guide: Overview and Purpose

The APQ guide is a comprehensive resource designed to assist organizations in effectively managing and improving their chemical product storage practices. It’s structured to provide practical tools and systematic approaches, notably through the Assess, Aspire, Act, and Advance Framework, enabling continuous progress. The guide’s core purpose is to elevate safety, ensure regulatory compliance, and optimize operational efficiency related to chemical storage.

It contains a detailed catalog of improvement tools and Key Performance Indicators (KPIs), offering a measurable pathway to enhanced performance. Furthermore, the APQ guide highlights available supporting resources, fostering a collaborative environment for implementation.

Ultimately, the guide aims to empower organizations to proactively address risks and build a robust chemical storage management system.

Key Components of the APQ Guide

The APQ guide features the Assess, Aspire, Act, and Advance Framework, a catalog of improvement tools, and crucial Key Performance Indicators (KPIs) for success.

The Assess, Aspire, Act, and Advance Framework

The APQ Guide Series introduces a systematic approach to organizational advancement through the “Assess, Aspire, Act, and Advance” Framework. This structured methodology provides a roadmap for continuous improvement in the storage and handling of chemical products. Initially, the ‘Assess’ phase involves a thorough evaluation of current practices, identifying strengths and areas needing development. Following assessment, the ‘Aspire’ stage focuses on defining desired future states and setting ambitious, yet achievable, goals.

Subsequently, the ‘Act’ phase translates aspirations into concrete actions, implementing targeted improvements and solutions. Finally, the ‘Advance’ stage emphasizes ongoing monitoring, refinement, and the pursuit of further enhancements. This iterative framework ensures sustained progress and fosters a culture of continuous improvement within organizations utilizing the APQ guide, ultimately leading to safer and more efficient chemical product management.

Catalog of Improvement Tools within the APQ Guide

The APQ guide doesn’t just outline principles; it delivers a practical catalog of improvement tools designed to enhance chemical product storage and handling. This comprehensive collection equips organizations with the resources needed to address specific challenges and optimize their operations. The guide provides a systematic approach to identifying areas for improvement and selecting the most appropriate tools for the task.

These tools span a range of methodologies, from risk assessment and hazard analysis to process optimization and performance monitoring. Detailed guidance and examples are provided to facilitate effective implementation. Furthermore, the APQ guide emphasizes the importance of tailoring these tools to the unique needs and context of each organization, ensuring maximum impact and sustainable results. Appendices contain detailed examples for practical application.

Key Performance Indicators (KPIs) in APQ

APQ implementation relies heavily on tracking Key Performance Indicators (KPIs) to measure progress and demonstrate the effectiveness of implemented improvements. The APQ guide emphasizes the importance of selecting KPIs that are directly aligned with organizational goals and objectives related to chemical product storage safety and efficiency. These indicators provide quantifiable data to monitor performance, identify trends, and make informed decisions.

Examples of relevant KPIs include incident rates, storage capacity utilization, compliance levels, and response times to emergencies. Regular monitoring and analysis of these KPIs allow organizations to proactively address potential issues and continuously improve their APQ performance. The guide provides guidance on establishing baseline measurements, setting targets, and reporting on KPI results to stakeholders.

APQ Guide Preparation and Implementation

APQ preparation involves detailed guidelines, team building, and transparent co-funding source descriptions. The APQ guide supports systematic approaches for organizations.

Guidelines for APQ Preparation: A Detailed Look

APQ preparation necessitates a structured approach, beginning with a clear understanding of the organization’s current state and desired future improvements. Establishing a dedicated and knowledgeable team is paramount, ensuring diverse expertise related to chemical product storage and handling.

A crucial element involves a transparent disclosure of all co-funding sources, detailing any potential influences or dependencies. This fosters trust and accountability throughout the APQ implementation process. Furthermore, meticulous documentation of all procedures, assessments, and corrective actions is essential for maintaining compliance and demonstrating continuous improvement.

The APQ guide emphasizes open communication and collaboration among team members, stakeholders, and relevant regulatory bodies. Regular reviews and updates to the APQ plan are vital to adapt to changing circumstances and emerging best practices. Ultimately, successful APQ preparation lays the foundation for safe, efficient, and compliant chemical product storage.

Co-funding Sources and Transparency in APQ

Maintaining complete transparency regarding co-funding sources is a cornerstone of effective APQ implementation. The APQ guide stresses the importance of openly declaring all financial contributions, whether from internal budgets, grants, or external partnerships. This disclosure should encompass the amount of funding, the source, and any associated conditions or expectations.

Lack of transparency can compromise the integrity of the APQ process and raise concerns about potential biases. Clear documentation of co-funding arrangements is crucial for auditability and accountability.

Furthermore, organizations should proactively identify and address any potential conflicts of interest arising from co-funding relationships. A robust system for managing these disclosures ensures that decisions are made objectively and in the best interest of safe chemical product storage, aligning with the principles outlined within the APQ guide.

Building an Effective APQ Team

The APQ guide emphasizes that a successful implementation hinges on assembling a dedicated and skilled team. This team should possess a diverse range of expertise, encompassing chemical handling, safety regulations, risk assessment, and project management. Clear roles and responsibilities are paramount, ensuring each member understands their contribution to the overall APQ process.

Effective communication and collaboration are also vital. The team must foster an open environment where concerns can be raised and solutions discussed freely.

Furthermore, the APQ guide suggests including representatives from various departments – operations, maintenance, and emergency response – to ensure a holistic approach. A well-defined team structure, coupled with ongoing training, will significantly enhance the effectiveness of the APQ initiative.

APQ and Agency Profiling

The APQ guide utilizes the Agency Profile Questionnaire (APQ) to determine applicable standards based on agency size, function, and operational characteristics.

The Agency Profile Questionnaire (APQ) Explained

The Agency Profile Questionnaire, or APQ, serves as a crucial component within the broader APQ guide series. It’s designed as a systematic approach to comprehensively understand an agency’s specific operational context. This questionnaire isn’t merely a data-gathering exercise; it’s a foundational step in determining which standards are most relevant and applicable to a given organization.

Specifically, the APQ delves into key aspects of the agency, meticulously evaluating its size – considering factors like employee count and physical footprint – and its core function, outlining the primary services or activities it undertakes. This detailed assessment allows for a tailored approach to compliance and improvement. The questionnaire’s insights directly inform the selection of appropriate standards, ensuring that agencies focus on areas that genuinely impact their operations and risk profiles.

Ultimately, the APQ streamlines the standardization process, making it more efficient and effective for all involved.

Determining Applicable Standards Using the APQ

A core function of the APQ guide is facilitating the identification of relevant standards for an agency. The process begins with a thorough completion of the Agency Profile Questionnaire (APQ), which captures critical details about the organization’s size, function, and operational scope. This data isn’t simply collected; it’s analyzed to pinpoint the standards that directly address the agency’s unique needs and potential risks.

The APQ doesn’t prescribe a one-size-fits-all approach. Instead, it provides a framework for a nuanced assessment, recognizing that different agencies face different challenges. By considering factors like the nature of services provided and the scale of operations, the APQ helps organizations prioritize standards that will yield the greatest impact. This targeted approach ensures efficient resource allocation and a more effective compliance strategy.

APQ Based on Agency Size and Function

The APQ guide acknowledges that a small, localized agency will have vastly different requirements than a large, nationally operating one. Consequently, the application of standards, as determined through the Agency Profile Questionnaire (APQ), is heavily influenced by agency size. Larger agencies often face more complex regulatory landscapes and require more robust systems for compliance.

Furthermore, the agency’s core function plays a crucial role. An agency dealing with highly sensitive materials will naturally be subject to stricter standards than one providing general administrative services. The APQ facilitates this differentiation, ensuring that the standards applied are proportionate to the risks involved. This tailored approach maximizes efficiency and minimizes unnecessary burdens, allowing agencies to focus on their primary missions.

APQ in Relation to Product Quality Planning

The APQ Guide Series delivers practical tools and systematic approaches, while Advanced Product Quality Planning (APQP) focuses on product development procedures.

APQP vs. APQ: Understanding the Differences

Distinguishing between Advanced Product Quality Planning (APQP) and the APQ Guide is crucial for effective implementation. APQP is a structured framework primarily utilized within the automotive industry, concentrating on product development processes from concept to production. It emphasizes proactive quality assurance throughout the entire product lifecycle, employing detailed procedures and techniques.

Conversely, the APQ Guide centers on the storage of chemical products, offering a catalog of improvement tools and Key Performance Indicators (KPIs). It provides recommendations for supporting resources and focuses on organizational advancement through a systematic approach – the Assess, Aspire, Act, and Advance Framework. While both aim for quality, their scopes differ significantly; APQP is product-focused, and APQ is storage-focused.

Advanced Product Quality Planning (APQP) Framework

The Advanced Product Quality Planning (APQP) framework represents a highly structured process, deeply rooted in preventative methodologies. It’s designed to ensure product satisfaction, encompassing five phases: Plan and Define Program, Product Design and Development, Process Design and Development, Product and Process Validation, and Feedback, Assessment, and Corrective Action.

Though distinct from the APQ Guide’s focus on chemical product storage, understanding APQP highlights a commitment to proactive quality. Each phase involves specific deliverables and verification steps, aiming to identify and mitigate potential issues before they impact production. This framework utilizes tools like Failure Mode and Effects Analysis (FMEA) and Design for Manufacturability (DFM) to optimize both product and process reliability, ultimately enhancing overall quality outcomes.

APQ Tools and Examples: Practical Application

The APQ Guide Series delivers a practical toolkit and systematic approaches for organizations striving for advancement. These tools aren’t merely theoretical; they’re designed for real-world implementation in chemical product storage scenarios. Examples include detailed checklists for facility inspections, hazard assessments, and emergency response planning.

Furthermore, the guide provides templates for documenting storage procedures, tracking inventory, and managing safety data sheets (SDS). Supporting resources, often found within accompanying ZIP files, offer further guidance and customizable forms. Practical application involves integrating these tools into existing workflows, ensuring consistent adherence to best practices, and fostering a culture of safety and compliance within the organization.

Resources and Further Information

The APQ Guide Series is readily accessible, alongside associated ZIP file resources. Supporting materials aid implementation, while future developments promise continued advancements in APQ.

Accessing the APQ Guide Series

The APQ Guide Series is designed as a practical resource, offering organizations a systematic approach to enhancing chemical product storage and handling practices. Accessing these guides is crucial for understanding and implementing the recommended improvements. Currently, the series is available through designated industry portals and regulatory agency websites.

Organizations can typically download individual guides or the complete series in a digital format, often as PDF documents. Furthermore, links to relevant supporting documentation and online training modules are frequently provided alongside the guides themselves. It’s important to regularly check for updates, as the APQ landscape is continually evolving with new regulations and best practices. The series aims to empower organizations with the knowledge and tools needed to maintain compliance and optimize their chemical storage procedures.

ZIP File Resources Associated with the APQ Guide

Complementing the APQ Guide Series, a comprehensive ZIP file is available, containing valuable supplementary materials designed to facilitate implementation. This archive typically includes detailed templates for documentation, customizable checklists for audits, and practical examples illustrating the application of APQ principles.

Within the ZIP file, users will find tools and resources to support the ‘Assess, Aspire, Act, and Advance’ framework, aiding in the systematic evaluation and improvement of chemical product storage. These resources are intended to be readily adaptable to various organizational contexts and agency sizes. The ZIP file ensures all necessary materials are conveniently accessible, streamlining the adoption of best practices and promoting consistent application of the APQ standards across different facilities and operations.

Supporting Resources for APQ Implementation

The APQ Guide Series doesn’t operate in isolation; a wealth of supporting resources exists to bolster successful implementation. These encompass industry best practice documents, relevant regulatory guidelines pertaining to chemical product storage, and access to expert consultations. Organizations can leverage these resources to deepen their understanding of APQ principles and tailor them to their specific needs.

Furthermore, collaborative networks and professional organizations offer valuable training programs and workshops focused on APQ methodologies. These resources facilitate knowledge sharing and provide opportunities for peer-to-peer learning. Utilizing these supplementary materials ensures a holistic approach to APQ, maximizing its effectiveness and fostering a culture of continuous improvement within the organization.

Future Trends and Developments in APQ

The landscape of chemical product storage and quality planning is constantly evolving, driving future trends within APQ. We anticipate increased integration of digital technologies, such as IoT sensors for real-time monitoring of storage conditions and AI-powered analytics for predictive risk assessment. Enhanced data management and cybersecurity protocols will become paramount, safeguarding sensitive information related to chemical inventories and handling procedures.

Furthermore, a growing emphasis on sustainability and circular economy principles will shape APQ practices, promoting responsible chemical lifecycle management. Expect to see advancements in eco-friendly storage solutions and a greater focus on minimizing environmental impact. The APQ Guide will continue to adapt, incorporating these innovations to ensure its relevance and effectiveness;

hotpoint cooker manual

Hotpoint Cooker Manual: A Comprehensive Guide

Navigating this manual ensures optimal performance and safety with your Hotpoint cooker, offering detailed instructions for installation, operation, and maintenance procedures.

Understanding Your Hotpoint Cooker

Your Hotpoint cooker is a sophisticated kitchen appliance designed for efficient and versatile cooking. This section provides a foundational understanding of its capabilities. Familiarize yourself with the different cooking zones – the hob (cooktop) for quick searing and boiling, and the oven for baking, roasting, and grilling.

Hotpoint cookers come in various models, including gas, electric, and induction. Understanding your specific model is crucial. Refer to the model number located on the appliance’s data plate (usually found around the oven door frame) for accurate information.

Modern Hotpoint cookers often feature advanced technologies like fan-assisted cooking for even heat distribution, programmable timers for convenient meal preparation, and self-cleaning functions for effortless maintenance. This manual will guide you through utilizing these features effectively, ensuring optimal cooking results and a long-lasting appliance.

Safety Precautions

Prioritizing safety is paramount when operating your Hotpoint cooker. Always ensure adequate ventilation during use, especially with gas models, to prevent carbon monoxide buildup. Never leave the cooker unattended while in operation. Keep flammable materials away from the hob and oven to avoid fire hazards.

Exercise extreme caution when handling hot cookware and oven racks; use oven gloves or protective mitts. Supervise children closely around the cooker, and teach them about its potential dangers. Regularly inspect the power cord for damage, and do not use the appliance if it is faulty.

For gas cookers, ensure the gas supply is properly installed and maintained by a qualified technician. Never attempt to repair the cooker yourself; contact a certified service engineer for any repairs. Disconnect the cooker from the power supply before cleaning or performing maintenance.

Cooker Components & Overview

Your Hotpoint cooker comprises several key components designed for efficient cooking. The hob, or cooktop, features burners or heating elements for surface cooking, controlled by intuitive knobs or a touch panel. The oven provides a spacious cavity for baking, roasting, and grilling, with various functions selectable via the control panel.

A control panel manages oven temperature, cooking modes, and timer settings. Many models include a grill compartment for direct heat cooking. A cooling fan ensures safe operation by dissipating heat. The door is designed with a viewing window and secure locking mechanism.

Depending on the model, additional features may include a programmable timer, self-cleaning function, and fan-assisted cooking. Familiarize yourself with the location and function of each component for optimal usage and maintenance.

Installation & Setup

Proper installation is crucial for safe and efficient operation; carefully unpack, inspect for damage, and connect to the appropriate power or gas supply.

Unpacking and Initial Inspection

Upon delivery, carefully unpack your Hotpoint cooker, retaining all packaging materials until you’ve confirmed complete functionality and satisfaction. Inspect the appliance thoroughly for any signs of shipping damage – dents, scratches, or broken components.

Compare the contents against the included parts list to ensure everything is present, including shelves, racks, and any specialized accessories. Note any discrepancies immediately and contact the retailer or Hotpoint customer support.

Remove all protective films and transit restraints from both the oven cavity and the hob surface. Check that the door seals are intact and properly aligned. Before proceeding, verify the cooker’s voltage matches your household supply. A damaged cooker should not be installed; report it to the delivery company and the retailer.

Connecting to Power Supply

Before connecting your Hotpoint cooker to the power supply, ensure the voltage indicated on the appliance’s rating plate matches your home’s electrical system. This is crucial to prevent damage and ensure safe operation. The cooker must be earthed for safety; never bypass the earth connection.

Installation should ideally be performed by a qualified electrician, adhering to all local and national electrical codes. Use a dedicated circuit breaker of the appropriate amperage for the cooker, as specified in the technical specifications section of this manual.

Do not use extension cords or adapters. The power cable should be routed away from heat sources and sharp edges. Verify the connection is secure and that the cooker is properly grounded before switching on the power. A loose connection can create a fire hazard.

Gas Connection (If Applicable)

If your Hotpoint cooker utilizes gas, connection must be performed by a qualified and registered gas engineer, strictly adhering to local gas safety regulations. Never attempt to connect the gas supply yourself. Ensure the gas supply pressure is compatible with the cooker’s requirements, as detailed on the rating plate.

Before connection, thoroughly inspect the gas supply pipe and fittings for any leaks using a suitable leak detection solution. A gas leak is extremely dangerous and requires immediate attention. The gas connection point must be easily accessible for future maintenance and inspection.

After connection, the gas engineer should perform a full safety check, including a burner flame assessment to ensure correct combustion. Regularly check the gas hose for cracks or damage and replace it if necessary. Proper ventilation is essential when using a gas cooker.

Operating Your Hotpoint Cooker

Familiarize yourself with the control panel, oven functions, and hob operation for efficient cooking; always refer to the detailed settings guide provided within.

Control Panel Explained

The Hotpoint cooker’s control panel is designed for intuitive operation, featuring a clear display and easily accessible controls. Typically, you’ll find dedicated knobs or touch-sensitive buttons for oven temperature, cooking functions (bake, broil, convection), and timer settings. Digital models often include a clock and a minute minder. Understanding the symbols is crucial; a flame icon usually represents gas ignition, while varying temperature levels are indicated numerically or with low, medium, and high settings.

For electric cookers, power level indicators are common, allowing precise heat control. The timer function can be set for automatic shut-off, ensuring meals are cooked to perfection without constant monitoring. Some advanced models incorporate pre-programmed settings for specific dishes, simplifying the cooking process. Always consult the detailed diagrams within this manual to identify each control’s specific function and ensure safe, efficient operation of your Hotpoint cooker.

Oven Functions & Settings

Hotpoint cookers offer a variety of oven functions to cater to diverse cooking needs. Conventional baking utilizes heat from the bottom element, ideal for cakes and pastries. Fan-assisted cooking, employing a rear fan, distributes heat evenly, reducing cooking times and ensuring consistent results for roasts and multiple dishes. Grilling provides intense top-down heat, perfect for browning and crisping.

Convection baking combines fan assistance with a higher temperature, accelerating cooking and creating a golden-brown finish. Specialized settings like defrost and slow cook offer added versatility. Temperature settings range from low (150°F) to high (550°F), allowing precise control. Always preheat the oven according to recipe instructions. Refer to the function guide within this manual for optimal settings for various food types, maximizing your Hotpoint cooker’s performance.

Hob/Cooktop Operation

Your Hotpoint cooker’s hob/cooktop features various zones designed for different cookware sizes and heating requirements. Electric hobs utilize radiant heating elements, while induction hobs generate heat directly within the cookware, offering faster and more efficient cooking. Each zone has adjustable power levels, typically ranging from low to high, controlled via intuitive dials or touch controls.

Ensure cookware is suitable for the hob type – induction hobs require magnetic-based pots and pans. Always match the pan size to the zone size for optimal heat transfer. Avoid placing empty cookware on a hot zone. Residual heat indicators illuminate when a zone is still hot, preventing accidental burns. Regular cleaning is essential to maintain performance and prevent damage. Consult the detailed zone guide within this manual for specific usage instructions and safety precautions.

Cleaning & Maintenance

Regular cleaning preserves your Hotpoint cooker’s performance and longevity; follow the outlined procedures for daily upkeep, oven cycles, and hob care.

Daily Cleaning Procedures

Maintaining a clean Hotpoint cooker daily prevents buildup and ensures optimal performance. After each use, allow all surfaces to cool completely before cleaning. For the hob, wipe down spills immediately with a damp cloth and mild detergent. Avoid abrasive cleaners, as they can damage the surface.

The cooker’s exterior can be cleaned with a soft cloth and warm, soapy water. Pay attention to control panels, wiping gently to avoid damaging the markings. For stainless steel surfaces, use a dedicated stainless steel cleaner for a streak-free finish. Regularly check and empty the crumb tray located at the bottom of the oven to prevent odors and potential fire hazards.

Remember to disconnect the cooker from the power supply before undertaking any thorough cleaning. Consistent daily cleaning minimizes the need for more intensive cleaning procedures later on, extending the life of your appliance.

Oven Cleaning – Self-Cleaning Cycles

Many Hotpoint cookers feature self-cleaning cycles, utilizing high temperatures to burn off food residue. Before initiating a self-cleaning cycle, remove all racks, baking stones, and thermometers from the oven interior. Ensure the oven door is securely locked, as it will automatically lock during the cycle due to extreme heat.

Select the appropriate self-cleaning cycle duration based on the level of soiling – options typically range from 2 to 4 hours. A strong odor may be emitted during the cycle, so ensure adequate ventilation by opening windows. Once the cycle completes and the oven cools, wipe away any remaining ash with a damp cloth.

Avoid interrupting the self-cleaning cycle, and never manually unlock the door during operation; Regular use of self-cleaning cycles minimizes manual scrubbing and keeps your oven in pristine condition.

Hob/Cooktop Cleaning & Care

Maintaining a clean hob/cooktop is crucial for optimal performance and longevity. After each use, allow the surface to cool completely before cleaning. For everyday spills, use a soft cloth dampened with warm, soapy water. Avoid abrasive cleaners or scouring pads, as they can scratch the surface.

For stubborn, burnt-on food residue, apply a specialized cooktop cleaner and follow the manufacturer’s instructions. Ceramic hobs benefit from a glass scraper to gently remove stuck-on particles. Regularly polish stainless steel hobs with a stainless steel cleaner to prevent staining and maintain shine.

Ensure all burners and heating elements are completely dry before resuming operation. Prompt cleaning prevents buildup and ensures efficient heat distribution.

Troubleshooting Common Issues

This section provides solutions for frequently encountered problems, guiding you through diagnosing and resolving issues with your Hotpoint cooker efficiently and safely.

Oven Not Heating

If your Hotpoint oven isn’t heating, first verify the power supply and ensure the cooker is correctly connected. Check the control panel to confirm the oven function is activated and the desired temperature is set. A common issue is a tripped circuit breaker or blown fuse – reset or replace as needed.

Examine the oven’s heating elements; a visible break indicates a need for replacement by a qualified technician. Also, inspect the oven’s thermostat – a faulty thermostat can prevent the oven from reaching temperature. If using self-cleaning cycles, ensure the oven has fully cooled before attempting to use it.

For gas cookers, confirm the gas supply is on and the igniter is functioning correctly. If the problem persists, do not attempt self-repair; contact a certified Hotpoint service engineer for assistance to avoid potential hazards and ensure proper diagnosis and repair.

Hob Not Working

Should your Hotpoint hob cease to function, begin by checking the power supply and ensuring the cooker is properly plugged in. Verify that the correct burner is selected and the control knob is turned to the desired setting. A common cause is a tripped circuit breaker, so check your electrical panel and reset if necessary.

For electric hobs, inspect the heating elements for any visible damage or breaks. If using an induction hob, ensure your cookware is compatible with induction technology. Gas hob issues often stem from a blocked burner port or a faulty igniter – carefully clean the burner ports and test the igniter spark.

If the problem continues, avoid attempting self-repair and contact a qualified Hotpoint service technician. They can accurately diagnose the issue and perform the necessary repairs safely and effectively, preventing further damage or potential hazards.

Error Codes & Their Meanings

Hotpoint cookers utilize error codes to signal specific malfunctions, aiding in diagnosis and repair. A flashing ‘E1’ often indicates a temperature sensor fault within the oven, requiring professional attention. ‘E2’ typically signals a heating element failure, while ‘E3’ suggests an issue with the cooker’s control board – do not attempt to fix this yourself.

For gas cookers, error codes related to gas supply or ignition may appear. ‘F01’ could mean a flame failure, prompting a safety shut-off. Always consult the full error code list in your cooker’s manual for precise definitions. Ignoring error codes can lead to further damage or unsafe operation.

Record the error code before contacting Hotpoint customer support; this will expedite the troubleshooting process. Remember, attempting repairs without proper knowledge can void your warranty and pose safety risks.

Advanced Features & Settings

Explore sophisticated options like precise timer functions, versatile grill modes, and fan-assisted cooking for optimal results and customized culinary experiences.

Timer Functions

Hotpoint cookers boast intuitive timer functionalities designed to enhance cooking convenience and precision. The primary timer allows you to set a delayed start, enabling you to prepare meals in advance and have them ready when you are.

A secondary timer functions as a minute minder, ideal for tracking cooking times for specific dishes or components of a meal. Many models feature a ‘duration’ timer, calculating automatic switch-off based on the set cooking time.

To utilize the timer, simply access the control panel and navigate to the timer settings. Input the desired time using the numerical buttons, and select the appropriate timer mode (delay start, minute minder, or duration). The cooker will automatically execute the programmed function, providing audible alerts upon completion.

Remember to consult your specific model’s manual for detailed instructions and advanced timer options.

Grill Operation

The Hotpoint cooker’s grill function provides a rapid, high-heat cooking method, perfect for browning, toasting, and finishing dishes. Before operation, ensure the grill pan is correctly positioned and that all accessories are heat-resistant.

Select the grill setting on the control panel – options typically include a full grill (using both elements) and a half grill (using a single element for smaller items). Preheating is crucial for optimal results; allow several minutes for the grill to reach the desired temperature.

Position food on the grill pan, maintaining a safe distance from the heating element to prevent burning. Monitor cooking closely, as grilling is a fast process. For best results, turn food halfway through the cooking time.

Always exercise caution when using the grill, as surfaces become extremely hot.

Fan Assisted Cooking

Hotpoint cookers often feature fan-assisted oven technology, designed to distribute heat evenly throughout the oven cavity. This results in faster cooking times and more consistent results, particularly when cooking multiple dishes simultaneously.

To utilize this function, select the fan-assisted setting on the control panel, often indicated by a symbol depicting a fan. The fan circulates hot air, reducing hot spots and ensuring food cooks uniformly on all shelves.

Reduce cooking temperatures by approximately 20°C (68°F) compared to conventional oven settings when using fan assistance. This prevents over-browning and ensures food remains moist.

Fan-assisted cooking is ideal for roasting meats, baking pastries, and cooking large quantities of food.

Technical Specifications

This section details crucial cooker parameters, including energy consumption rates, precise dimensions, overall weight, and comprehensive warranty coverage details for your Hotpoint model.

Energy Consumption

Understanding your Hotpoint cooker’s energy usage is vital for efficient operation and cost savings. This appliance is categorized with an energy efficiency class, typically ranging from A+++ (most efficient) to G (least efficient), as indicated on the energy label affixed to the cooker.

The label also displays annual energy consumption estimates for both the oven and hob, calculated based on standard usage patterns. Actual consumption will vary depending on cooking habits and frequency. For electric cookers, power consumption during operation is measured in kilowatts (kW), while gas cookers utilize gas volume (cubic meters or feet).

To minimize energy waste, preheat the oven only when necessary, utilize appropriately sized cookware, and ensure proper ventilation around the appliance. Regularly cleaning the oven and hob also contributes to improved energy efficiency. Refer to the energy label and the full product specifications for precise energy consumption data related to your specific Hotpoint cooker model.

Dimensions & Weight

Accurate dimensions and weight specifications are crucial for proper installation and ensuring the cooker fits seamlessly into your kitchen space. Hotpoint cookers are available in various sizes, typically ranging from standard 60cm width to larger 90cm or 70cm models; Height generally falls between 85cm and 90cm, while depth varies depending on the features and design.

Detailed dimensional diagrams, including overall height, width, and depth, as well as specific measurements for hob and oven cavities, are provided in the installation guide. The weight of the cooker, which can range from 50kg to over 80kg depending on the model, is also specified for safe handling and floor load considerations.

Always verify these measurements before purchasing and during installation to avoid any compatibility issues; Ensure sufficient space around the cooker for ventilation and safe operation, as outlined in the installation instructions. Refer to your cooker’s specific product sheet for precise dimensions and weight details.

Warranty Information

Your Hotpoint cooker is covered by a manufacturer’s warranty, providing peace of mind and protection against defects in materials and workmanship. The standard warranty period typically lasts for one year from the date of purchase, covering parts and labor for repairs performed by authorized service technicians.

Extended warranty options may be available for purchase, offering additional coverage beyond the standard period. The warranty does not cover damage caused by misuse, improper installation, accidental damage, or normal wear and tear.

To make a warranty claim, retain your proof of purchase and contact Hotpoint’s customer support team. Detailed warranty terms and conditions are included in the documentation provided with your cooker. Registering your appliance online can streamline the warranty process. Always adhere to the recommended maintenance schedule to maintain warranty validity.

can i drive automatic car with manual licence

Can I Drive an Automatic Car with a Manual Licence? ⎯ A Comprehensive Guide (Updated 02/07/2026)

As of today, 02/07/2026, Australian drivers holding only an automatic licence cannot legally operate a manual vehicle. Doing so risks fines and potential legal repercussions, according to traffic authorities.

The question of whether a driver with a manual transmission licence can legally operate a vehicle with an automatic transmission – and conversely – is a common source of confusion for Australian motorists. This guide aims to provide a comprehensive and up-to-date answer, as of July 2nd, 2026. The core issue revolves around the differing skillsets required for each transmission type and the legal classifications of driving licences.

Recent trends show a significant shift in driver preferences towards automatic vehicles, coupled with a decline in individuals obtaining manual licences. This has led to a national shortage of qualified manual driving instructors and a dwindling availability of manual cars for purchase. However, despite these changes, the legal framework remains clear: a licence specifically restricts the driver to the transmission type for which they were tested.

Many drivers assume that because an automatic car is ‘easier’ to drive, a manual licence would automatically grant permission to operate one. This is incorrect. Understanding these distinctions is crucial to avoid potential fines, insurance complications, and, most importantly, ensuring road safety. This guide will delve into the specifics of Australian law, insurance implications, and the options available for upgrading your licence.

Understanding Driving Licence Categories

Australian driving licences are categorized based on the type of vehicle permitted to be operated. Traditionally, a standard ‘C’ class licence (car) was not differentiated by transmission type. However, this has evolved, and now many licences explicitly state whether they are valid for automatic, manual, or both transmissions. This distinction is critical for legal compliance.

A licence restricted to ‘automatic’ vehicles permits the driver to operate only those vehicles equipped with an automatic transmission. Conversely, a licence permitting ‘manual’ transmission allows operation of both manual and automatic vehicles. This is because mastering a manual transmission demonstrates a broader understanding of vehicle control and mechanics.

The myGov account system allows drivers to easily access and verify their licence conditions, including any transmission restrictions. It’s essential to check your licence details through myGov to confirm your permitted vehicle types. Incorrectly assuming your licence covers both transmissions can lead to significant legal and financial consequences. Understanding these categories is the first step towards responsible and lawful driving.

The Legal Position: Australia

Across Australia, the legal stance is clear: driving a manual vehicle with an automatic-only licence is a violation of road rules. Traffic Department Directors, like Brigadier Mohamed Saad, have explicitly stated that individuals found operating a manual car with an inappropriate licence face fines. The specific penalty amount varies by state and territory, but the consequences are consistent.

This isn’t a grey area; the law differentiates between the skills demonstrated by drivers licensed for each transmission type. An automatic licence signifies proficiency in operating a vehicle with automatic assistance, not necessarily the fundamental control required for a manual transmission.

Authorities emphasize that checking your licence conditions via your myGov account is crucial. Ignorance of the restrictions is not a valid defence. The legal framework aims to ensure all drivers possess the necessary skills to safely operate the vehicle they are driving, protecting both the driver and other road users. Compliance is paramount to avoid legal ramifications.

Legal Ramifications of Driving Without the Correct Licence

Driving a manual vehicle on an automatic-only licence in Australia carries significant legal consequences. While the exact fines differ between states and territories, drivers risk substantial penalties. Beyond the financial cost, accumulating demerit points on your licence is highly probable, potentially leading to suspension.

More seriously, driving without the correct licence can invalidate your car insurance. In the event of an accident, insurance companies may refuse to cover damages, leaving the driver personally liable for all associated costs – a potentially devastating financial burden.

Furthermore, a conviction for this offence appears on your traffic record and could impact future licence applications or even employment opportunities requiring a clean driving history. Authorities are firm on enforcement, viewing it as a serious breach of road safety regulations. It’s crucial to verify your licence conditions through your myGov account to avoid these severe repercussions.

Automatic vs. Manual Licences: Key Differences

The core distinction lies in the skills assessed during the driving test. An automatic licence test focuses on vehicle control without clutch or gear changes, emphasizing observation, road positioning, and hazard perception. Conversely, a manual licence test demands proficiency in coordinating the clutch, gear stick, and accelerator – skills deemed more complex.

Historically, obtaining a manual licence provided greater flexibility, allowing drivers to operate both automatic and manual vehicles. However, current regulations in Australia generally restrict automatic licence holders to automatic transmissions only. This reflects a perceived difference in driver control and responsibility.

The shift towards automatic transmissions also influences this distinction. With fewer manual cars available and a decline in manual driving instructors, the demand for manual licences has decreased. Insurance premiums also reflect this, with manual licence holders often paying less due to the perceived higher skill level;

Why the Restriction Exists: Skill and Control

The restriction preventing automatic licence holders from driving manuals stems from a fundamental difference in driver skill and vehicle control. Manual transmissions require a greater degree of driver involvement, demanding precise coordination of clutch, gear selection, and throttle control to manage speed and power effectively.

Authorities argue this heightened level of control fosters a deeper understanding of vehicle mechanics and road conditions. Drivers proficient in manual transmissions are considered better equipped to handle emergency situations requiring precise gear changes or engine braking. The ability to downshift for increased control is a key factor.

While modern automatic transmissions are sophisticated, they abstract away this direct control. The restriction isn’t necessarily about difficulty, but about demonstrating a broader skillset. It’s a matter of proving competency in a wider range of driving scenarios, ensuring a higher standard of driver proficiency on Australian roads.

Insurance Implications: Higher Premiums for Automatic Licence Holders

Recent research indicates a significant financial implication for drivers holding only an automatic licence: higher car insurance premiums. On average, motorists with an automatic-only licence pay approximately 84 more annually for their car insurance compared to those with a manual licence.

Insurance companies justify this disparity by associating manual licence holders with a potentially lower risk profile. The assumption is that drivers who’ve demonstrated proficiency in a manual transmission possess a greater overall driving skill set, potentially leading to fewer accidents. This is a statistical correlation, not a definitive rule.

However, this premium difference is becoming a point of contention as automatic vehicles dominate the market. The logic behind penalizing drivers for a licence reflecting the prevalent vehicle type is increasingly questioned. Despite this, the current trend shows automatic-only licence holders facing a tangible financial disadvantage when insuring their vehicles.

The Declining Popularity of Manual Transmissions

The automotive landscape is undergoing a significant shift, marked by a dramatic decline in the popularity of manual transmissions. Increasingly, drivers are opting for the convenience and ease of use offered by automatic vehicles, leading to fewer manual cars being sold and, consequently, fewer drivers learning to operate them.

This trend isn’t merely a preference for comfort; it’s driven by technological advancements in automatic gearboxes, offering smoother shifts and improved fuel efficiency. The once-significant performance advantage of manual transmissions has largely diminished, further eroding their appeal.

Consequently, the demand for manual driving lessons is dwindling, contributing to a national shortage of qualified manual driving instructors. This creates a cyclical problem: fewer instructors mean less access to manual training, further accelerating the decline in manual licence uptake. The shift reflects changing driver preferences and the evolution of automotive technology.

National Shortage of Manual Driving Instructors

Australia is currently experiencing a concerning national shortage of qualified manual driving instructors. This scarcity directly impacts aspiring drivers seeking a manual licence, creating longer wait times for lessons and, in some areas, limited availability altogether. The decline stems from several interconnected factors, primarily the decreasing demand for manual lessons.

As fewer individuals choose to learn manual transmissions, fewer driving instructors are specializing in this skill set. Many instructors have transitioned to focusing solely on automatic lessons, where the demand is significantly higher and more profitable; This creates a self-perpetuating cycle, making it harder for those who do want to learn manual to find suitable instruction.

The shortage also poses challenges for driving schools, potentially limiting their ability to offer comprehensive training programs. This situation underscores the broader trend of declining manual transmission popularity and its ripple effects throughout the driving education system.

The Impact on Car Availability: Fewer Manual Options

The dwindling popularity of manual transmissions is having a noticeable impact on car availability within the Australian market. Car manufacturers are responding to consumer preferences, and as demand for manual vehicles decreases, production numbers are subsequently reduced. This trend means fewer new cars are offered with a manual gearbox, limiting choices for drivers who prefer or require this option.

Even for those who successfully obtain a manual licence, finding a suitable vehicle can be challenging. Dealerships often stock a smaller selection of manual cars, and wait times for specific models can be considerably longer. This scarcity extends to the used car market as well, where manual vehicles are becoming increasingly rare.

The reduced availability impacts not only individual buyers but also driving schools, struggling to maintain a fleet of manual vehicles for instruction due to the limited supply. This further exacerbates the challenges faced by those learning to drive a manual transmission.

Can an Automatic Licence Be Upgraded to a Manual?

Yes, it is generally possible to upgrade an automatic driving licence to a manual licence in Australia. However, it doesn’t typically involve a simple endorsement. Drivers with an automatic-only licence must undertake the full practical driving test in a manual vehicle to demonstrate competency. This means mastering clutch control, gear changes, and hill starts – skills not required for an automatic licence.

The upgrade process essentially treats the applicant as a new learner driver, requiring them to meet the same standards as someone taking their initial manual driving test. This ensures they possess the necessary skills and understanding to safely operate a vehicle with a manual transmission.

While some states may have slight variations in the procedure, the core requirement remains consistent: a successful completion of the manual driving test is mandatory for upgrading the licence.

The Process of Obtaining a Manual Licence

The process of obtaining a manual licence typically mirrors that of acquiring any new driver’s licence, with a crucial addition: demonstrating proficiency in a manual transmission vehicle. Initially, prospective drivers must meet the standard eligibility criteria, including age requirements and vision standards, and obtain a learner’s permit.

Learners then undertake supervised driving practice, logging the required hours as mandated by their state or territory. Crucially, a significant portion of this practice must be completed in a manual vehicle to gain the necessary skills. Once sufficient practice is logged, the learner can schedule a practical driving test.

The test itself assesses the driver’s ability to safely and competently operate a manual vehicle, including smooth gear changes, clutch control, hill starts, and general road awareness. Passing this test results in the issuance of a full manual driving licence, granting the driver the ability to legally operate both automatic and manual transmission vehicles.

Costs Associated with Taking a Manual Driving Test

The financial outlay for obtaining a manual licence extends beyond standard learner permit and licence application fees. A significant cost component is professional driving lessons specifically focused on mastering manual transmission. These lessons, essential for many learners, can range from AUD $60 to $100+ per hour, with a recommended minimum of 10-20 hours.

The practical driving test itself incurs a fee, varying by state or territory, typically between AUD $100 and $200. Furthermore, access to a suitable manual vehicle for practice and the test is necessary. If a learner doesn’t have access to one, rental options are available, costing approximately AUD $80 ⎯ $150 per day.

Insurance for a learner driver using a borrowed or rented manual vehicle also adds to the expense. Finally, potential re-test fees, should the initial attempt be unsuccessful, must be factored in. Considering all these elements, obtaining a manual licence can easily cost between AUD $800 and $2500+.

myGov Account and Licence Information

While a myGov account doesn’t directly display your driving licence details – specifying automatic or manual transmission – it serves as a central hub for accessing various government services related to driving and vehicle ownership. Through linked accounts like Roads and Maritime Services (RMS) in New South Wales, or VicRoads in Victoria, you can potentially view a digital record of your licence.

Creating a myGov account is a prerequisite for accessing online services such as updating your address, renewing your licence (depending on the state), and checking demerit points. It streamlines interactions with transport authorities and simplifies administrative tasks. You cannot, however, create a myGov account within the myGov app; account creation must occur via the myGov website.

Linking your licence information to myGov allows for efficient management of your driver profile and ensures you receive important notifications from relevant government agencies. It’s a crucial step for staying informed about your driving record and fulfilling legal obligations.

Accessing ANU Email and Related Services

While seemingly unrelated to driving licence restrictions, accessing Australian National University (ANU) email and related services highlights the importance of secure online account management – a skill transferable to managing your driving record and associated government portals like myGov. ANU provides students and staff with email accounts for official communication.

Accessing your ANU email involves navigating a dedicated login portal and potentially utilizing multi-factor authentication for enhanced security. Related services include mailing lists for departmental updates, and access to Microsoft Office 365, encompassing Word, Excel, PowerPoint, and OneDrive for online storage. These tools facilitate efficient communication and document management.

The ANU Knowledge Base offers comprehensive support and troubleshooting guides for accessing and utilizing these services. Familiarity with these digital platforms builds confidence in navigating online systems, which is beneficial when dealing with government websites to verify your licence type (automatic or manual) and ensure compliance with road regulations.

Domain Name Registration for Business Websites

Just as understanding your driving licence category is crucial for legal road operation, securing a professional online presence begins with domain name registration for your business website. A domain name – like business.gov.au – serves as your website’s address on the internet, vital for brand recognition and customer trust.

Registering a domain involves selecting an available name (often mirroring your business name) and choosing a suitable extension (e.g., .com, .au, .net). This process typically involves using a domain registrar and paying an annual fee. A domain-based email address (e.g., info@yourbusiness.com) significantly enhances professionalism, with 83% of small businesses reporting a positive impact.

Similar to ensuring you have the correct licence before driving, a registered domain name establishes your online legitimacy. It’s a foundational step in building a credible online identity, allowing customers to easily find and contact you. Neglecting this step can hinder your business’s growth and reputation, much like driving without a valid licence.

Professionalism of Domain-Based Email Addresses

Much like possessing the appropriate driving licence demonstrates competence and legality, utilizing a domain-based email address projects a strong sense of professionalism for your business. A generic email provider (like @gmail.com) can appear less credible than an address tied directly to your company’s domain (e.g., @yourbusiness.com).

In fact, a significant 83% of small businesses report that a domain-based email address helped them appear more professional. This perception of legitimacy builds trust with clients and partners, fostering stronger relationships. It signals that you’ve invested in your brand and are committed to a long-term presence.

Just as driving with an incorrect licence carries risks, relying on a free email service can subtly undermine your business’s image. A custom email address reinforces your brand with every communication, leaving a lasting positive impression. It’s a small detail with a substantial impact on perceived credibility and overall business success.

The Rise of Automatic Cars and Changing Driver Preferences

The automotive landscape is shifting dramatically, mirroring the evolving needs and preferences of drivers. Increasingly, automatic transmissions are dominating the market, leading to fewer individuals choosing to learn manual driving skills. This trend directly impacts the demand for manual driving tests and, consequently, the availability of manual vehicles.

The historical debate between Ford and Holden, once a passionate discussion of manual versus automatic, now feels somewhat dated. Modern drivers prioritize convenience and ease of use, favoring the simplicity of automatic transmissions. This preference is compounded by the growing sophistication of automatic gearboxes, offering improved fuel efficiency and performance.

As a result, a national shortage of manual driving instructors is emerging, further limiting access to manual licence training. Fewer people are opting for manual tests, creating a cycle where manual car options become scarcer, even for those who successfully obtain a manual licence. This shift necessitates understanding the legal implications of driving with the correct licence type.

Ford vs. Holden: The Historical Manual vs. Automatic Debate

For decades, the rivalry between Ford and Holden in Australia wasn’t just about vehicle features; it fueled a passionate debate over manual versus automatic transmissions. Enthusiasts fiercely defended the control and engagement offered by a manual gearbox, often associating it with a more “pure” driving experience. This preference was deeply ingrained in Australian car culture.

Traditionally, many drivers believed a manual transmission provided superior fuel economy and a stronger connection to the vehicle. Performance enthusiasts favored manuals for their ability to precisely control gear selection during spirited driving. However, advancements in automatic transmission technology have begun to erode these advantages.

While the Ford versus Holden debate once represented a significant divide, the landscape has changed. The increasing prevalence of automatic transmissions, driven by convenience and technological improvements, has diminished the prominence of manual options. This shift highlights how driver preferences evolve, impacting licence choices and the availability of vehicles, ultimately influencing whether one can legally drive an automatic car with a manual licence.

The 2025 Trends in Driving Licence Choices

Data from 2025 reveals a continuing decline in the number of Australians opting to learn to drive a manual transmission vehicle. This trend is directly impacting the types of driving licences being issued, with a significant majority now being automatic-only. Fewer people are undertaking the manual driving test, contributing to a dwindling pool of qualified manual drivers.

This shift isn’t solely due to driver preference; the decreasing availability of manual cars also plays a role. As manufacturers produce fewer manual models, the incentive to obtain a manual licence diminishes. Consequently, the demand for manual driving instructors is also decreasing, creating a national shortage.

The implications are clear: more drivers are legally restricted to operating automatic vehicles only. This reinforces the importance of understanding licence limitations and the legal ramifications of driving without the correct endorsement, particularly concerning whether one can legally drive an automatic car with a manual licence.

Frequently Asked Questions (FAQs)

Q: Can I drive a manual car if I only have an automatic licence? A: No, in Australia, you cannot legally drive a manual vehicle with an automatic-only licence. You will face fines if caught;

Q: Is it possible to upgrade from an automatic to a manual licence? A: Yes, you can obtain a manual licence after holding an automatic licence, requiring a separate practical driving test in a manual vehicle.

Q: Will my car insurance be affected by my licence type? A: Yes, research indicates that drivers with automatic licences generally pay higher car insurance premiums – an average of AUD 84 more – compared to those with manual licences.

Q: Why are fewer people learning to drive manual cars? A: The decline is due to the decreasing availability of manual vehicles, changing driver preferences, and a shortage of manual driving instructors.

Q: Where can I find information about my driving licence? A: You can access and manage your licence details through your myGov account, linked to relevant state or territory road authorities.

Understanding the distinctions between automatic and manual driving licences is crucial for all Australian motorists. While the shift towards automatic transmissions continues, and manual car options dwindle, legal compliance remains paramount. Driving a vehicle without the appropriate licence carries significant risks, including fines and potential legal consequences.

For those with an automatic licence considering driving a manual vehicle, or vice versa, obtaining the correct endorsement is essential. The process of upgrading a licence, though involving a practical test and associated costs, ensures both legal operation and enhanced driving skills.

Furthermore, remember that your licence type can influence insurance premiums. Staying informed about these factors, and utilizing resources like myGov for licence information, contributes to safer and more responsible driving practices. Prioritizing legal compliance and continuous learning will ensure a secure journey for everyone on Australian roads.

american pageant 17th edition pdf

American Pageant 17th Edition PDF: A Comprehensive Guide

The American Pageant, a widely-used U.S. History textbook, offers a detailed narrative. Finding the 17th edition’s PDF requires careful consideration of legality and resource availability, aiding APUSH students.

What is the American Pageant?

The American Pageant, currently in its 17th edition, stands as a cornerstone textbook for Advanced Placement United States History (APUSH) courses nationwide. Authored by David M. Kennedy, Lizabeth Cohen, and Thomas A. Bailey, it provides a comprehensive and engaging narrative of American history, spanning from the nation’s pre-Columbian origins to the present day.

Its enduring popularity stems from its detailed coverage, balanced perspective, and accessible writing style. The textbook isn’t merely a recitation of facts; it actively interprets historical events, exploring their causes, consequences, and significance within the broader context of American development. Students appreciate its inclusion of primary source materials, compelling visuals, and thought-provoking analytical questions.

The American Pageant is designed to prepare students for the rigorous demands of the APUSH exam. Its chapters are structured to align with the College Board’s curriculum framework, and it consistently emphasizes critical thinking skills. The availability of the 17th edition in PDF format, while convenient, raises important questions about copyright and ethical access, which will be discussed further.

The 17th Edition: Key Updates and Changes

The 17th edition of The American Pageant builds upon the established foundation of previous editions, incorporating recent scholarship and addressing evolving perspectives in historical interpretation. Significant updates include expanded coverage of social and cultural history, with a greater emphasis on the experiences of marginalized groups – including African Americans, women, and Native Americans – throughout American history.

Furthermore, the 17th edition reflects contemporary concerns regarding environmental history and the impact of globalization. New sections delve into the complexities of the 21st century, analyzing the War on Terror, the rise of digital technology, and the changing demographics of the United States;

The authors have also refined the textbook’s analytical framework, strengthening its focus on causation, comparison, and contextualization. While the core narrative remains consistent, the 17th edition presents a more nuanced and inclusive portrayal of the American past, making it a valuable resource for students seeking a comprehensive understanding of the nation’s history. Accessing this updated content via PDF offers convenience, but legality remains a key consideration.

Where to Find the American Pageant 17th Edition PDF

Locating a PDF version of The American Pageant 17th edition presents several options, each with varying degrees of legality and reliability. The official textbook publisher, Cengage, typically offers digital versions for purchase through their website or authorized online retailers. These are the most legitimate and secure sources, ensuring access to the complete and accurate content.

However, numerous websites claim to offer free PDF downloads. These sources often host pirated copies, which may be incomplete, contain errors, or even harbor malware. Caution is strongly advised when considering such options. Educational institutions sometimes provide students with access to digital textbooks through learning management systems or library subscriptions.

Exploring these institutional resources is a safe and legal alternative. Searching online forums and student communities might reveal shared links, but verifying the source’s trustworthiness is crucial. Remember, unauthorized distribution of copyrighted material is illegal and unethical.

Legality and Ethical Considerations of PDF Downloads

Downloading a PDF of The American Pageant 17th edition without proper authorization raises significant legal and ethical concerns. Copyright law protects the intellectual property of the authors and publisher, Cengage. Obtaining a copy through unauthorized channels, such as websites offering free downloads, constitutes copyright infringement – a violation with potential legal consequences.

Ethically, supporting authors and publishers by purchasing legitimate copies ensures the continued production of high-quality educational materials. Utilizing pirated PDFs undermines this system and devalues the work invested in creating the textbook. Furthermore, illegally obtained files often lack quality control, potentially containing errors or incomplete content, hindering effective learning.

Prioritizing legal and ethical access demonstrates respect for intellectual property rights and supports the educational ecosystem. Consider purchasing a digital copy from Cengage or utilizing resources provided by your educational institution. Responsible academic practice includes respecting copyright laws and contributing to a fair and sustainable learning environment.

Navigating the Textbook’s Structure

The American Pageant 17th edition is meticulously structured to facilitate comprehensive understanding of U.S. History. Chapters are organized chronologically, beginning with pre-Columbian America and progressing through contemporary events. Each chapter typically incorporates a consistent format: a chapter outline, introductory narrative, primary source excerpts, key terms, and review questions.

Effective navigation involves utilizing the textbook’s features. Pay close attention to chapter summaries, which condense essential information. The “American Voices” sections present firsthand accounts, offering valuable perspectives. Marginal notes provide definitions and contextual details, enhancing comprehension. Visual aids, including maps and illustrations, supplement the text.

Furthermore, the textbook’s appendices contain helpful resources like the Declaration of Independence and the Constitution. Mastering the structure allows students to efficiently locate specific information and grasp the overarching narrative of American history. Consistent engagement with these elements maximizes learning potential.

Chapter Summaries and Key Themes

The American Pageant 17th edition’s chapter summaries are crucial for solidifying understanding. These concise overviews distill complex historical events into manageable segments, highlighting pivotal moments and figures. Key themes consistently woven throughout the narrative include the evolution of American democracy, the impact of economic forces, and the ongoing struggle for social justice.

Each chapter explores specific periods, such as the Colonial era, the Revolutionary War, and the Civil Rights Movement, identifying core arguments and interpretations. Recurring themes of westward expansion, immigration, and political reform provide a framework for analyzing historical developments. Understanding these overarching themes allows students to connect disparate events and recognize patterns.

Analyzing the summaries alongside the chapter content reinforces learning. Identifying the central arguments and recognizing the recurring themes fosters a deeper appreciation for the complexities of American history and its enduring legacy.

Utilizing the Textbook for AP US History Exam Preparation

The American Pageant 17th edition serves as a foundational resource for AP US History students. Its comprehensive coverage aligns directly with the College Board’s curriculum, making it invaluable for exam preparation. Effective utilization involves more than just reading; active engagement is key.

Focus on the “American Pageant”’s chapter review questions, which test comprehension and analytical skills. Pay close attention to key terms, individuals, and events highlighted throughout each chapter. Supplement textbook reading with external resources like practice tests and online quizzes to reinforce learning.

The textbook’s chronological structure aids in understanding historical cause and effect. Mastering the ability to synthesize information and construct well-supported arguments is crucial for success on the APUSH exam. Consistent review and practice are essential for maximizing performance.

The Role of YouTube in Supplementing American Pageant Study

YouTube emerges as a powerful supplementary tool for students utilizing the American Pageant 17th edition. While the textbook provides a detailed foundation, YouTube offers diverse learning formats, catering to different learning styles. Visual and auditory learners particularly benefit from video content.

Numerous channels specialize in AP US History review, providing concise summaries, in-depth analyses, and mnemonic devices. These videos can clarify complex concepts and offer alternative perspectives on historical events. The platform’s accessibility allows for on-demand learning, fitting seamlessly into busy schedules.

Furthermore, YouTube fosters a sense of community, with students sharing study tips and engaging in discussions. Utilizing YouTube alongside the textbook enhances comprehension and retention, ultimately improving APUSH exam performance. It’s a dynamic resource for modern learners.

APUSH Review Videos on YouTube: Popular Channels

Several YouTube channels have become invaluable resources for students studying with the American Pageant 17th edition. Adam Norris offers fast-paced, comprehensive reviews, often focusing on key themes and potential exam questions. His content directly aligns with the textbook’s chronological structure.

Jocz Productions provides engaging and visually appealing videos, utilizing maps, timelines, and primary source analysis. This channel excels at contextualizing historical events and fostering deeper understanding. Heimler’s History delivers thorough content, including unit reviews and practice quizzes, mirroring the textbook’s scope.

Additionally, Crash Course US History, while broader in scope, offers accessible overviews of major periods and concepts. These channels, combined with the textbook, create a robust learning ecosystem, maximizing student preparation for the APUSH exam. They provide diverse approaches to mastering the material.

Specific Chapter Review Videos Available on YouTube

Numerous YouTube videos directly correlate with chapters from the American Pageant 17th edition. For Chapter 16, focusing on the Progressive Era, Adam Norris provides a concise review of key reforms and figures like Theodore Roosevelt. Jocz Productions offers a detailed analysis of the muckrakers and their impact.

Regarding Chapter 17, covering World War I, Heimler’s History presents a comprehensive overview of the causes, events, and consequences of the war, aligning with the textbook’s narrative. Many channels also offer reviews for Chapter 20, the Roaring Twenties, examining consumerism and cultural shifts.

Searching “American Pageant Chapter [Number] Review” on YouTube yields a wealth of resources. These videos often supplement the textbook’s content, providing alternative explanations and visual aids, enhancing comprehension and retention for APUSH students.

YouTube as a Resource for Historical Context and Analysis

YouTube extends beyond simple chapter reviews, offering crucial historical context often supplementing the American Pageant 17th edition. Channels like Crash Course U.S. History provide broader narratives, connecting textbook events to larger global trends and societal shifts. This is particularly useful for understanding the complexities of periods like the Civil Rights Movement or the Cold War.

Furthermore, YouTube hosts documentaries and lectures from historians, offering diverse perspectives on historical events. These resources can deepen understanding beyond the textbook’s scope, fostering critical thinking skills. Channels often analyze primary sources, providing insights into the motivations and experiences of people from the past.

The platform’s visual nature aids comprehension, with maps, images, and archival footage bringing history to life. Utilizing YouTube alongside the American Pageant creates a more immersive and engaging learning experience.

Understanding the Textbook’s Companion Website

The American Pageant 17th edition’s companion website serves as a valuable extension of the printed text, offering a wealth of supplementary materials. Typically, these websites include practice quizzes for each chapter, allowing students to self-assess their comprehension of key concepts and terminology. These quizzes often mirror the format and difficulty of questions found on the AP U.S. History exam.

Beyond quizzes, the companion website frequently provides downloadable study guides, timelines, and primary source documents. These resources enhance understanding and facilitate deeper engagement with the historical material. Interactive maps and simulations can also be found, offering a dynamic way to visualize historical events and geographical contexts.

Access to the website often requires a code bundled with a new copy of the textbook; however, exploring legitimate educational resources is crucial when seeking American Pageant 17th edition PDF access.

Practice Questions and Online Resources

Supplementing your study of the American Pageant 17th edition with practice questions is crucial for APUSH success. Numerous online platforms offer AP U.S. History practice exams and quizzes, often categorized by chapter or historical period. These resources allow students to test their knowledge and identify areas needing further review.

Beyond the textbook’s companion website, consider utilizing free resources like Khan Academy, which provides comprehensive history content and practice exercises. Websites dedicated to AP exam preparation, such as AP Classroom (through College Board), offer official practice materials and feedback.

When searching for American Pageant 17th edition PDF materials, remember to prioritize legal and ethical sources. Combining textbook study with diverse online practice questions maximizes your understanding and exam readiness, ensuring a strong foundation in U.S. History.

The Textbook’s Coverage of Major Historical Periods

The American Pageant 17th edition meticulously covers all major periods in U.S. History, from the pre-Columbian era through the 21st century. It dedicates significant attention to the colonial period, detailing the diverse motivations and experiences of European settlers and the impact on Native American populations.

The textbook provides in-depth analysis of the American Revolution, the formation of the new nation, and the challenges of early republic. It thoroughly examines the causes and consequences of the Civil War and Reconstruction, alongside the rise of industrialization and urbanization.

Furthermore, the American Pageant 17th edition offers comprehensive coverage of the 20th and 21st centuries, including the World Wars, the Cold War, the Civil Rights Movement, and contemporary political and social developments. This broad scope ensures a complete understanding of American history.

Focus on Key Historical Figures and Events

The American Pageant 17th edition places significant emphasis on pivotal historical figures who shaped the course of American history. From founding fathers like George Washington and Thomas Jefferson to transformative leaders like Abraham Lincoln and Franklin D. Roosevelt, the textbook provides detailed biographical information and analyzes their impact.

Key events are also thoroughly examined, including the American Revolution, the Louisiana Purchase, the Civil War, and both World Wars. The textbook doesn’t merely present facts; it explores the causes, consequences, and lasting legacies of these events.

Furthermore, the American Pageant highlights social and cultural movements, such as the abolitionist movement, the women’s suffrage movement, and the Civil Rights Movement, demonstrating their profound influence on American society. This focus ensures a nuanced understanding of the nation’s past.

Comparing the 17th Edition to Previous Editions

The 17th edition of American Pageant builds upon the established foundation of prior editions, incorporating updated scholarship and a more inclusive historical narrative. While the core chronological structure remains consistent, significant revisions address evolving interpretations of American history.

Notably, the 17th edition expands coverage of marginalized groups – including African Americans, Native Americans, and women – offering a more comprehensive and nuanced portrayal of their experiences. Previous editions, while thorough, often presented a predominantly Eurocentric perspective.

Furthermore, the newest edition features updated statistics, revised maps, and enhanced visual aids to improve clarity and engagement. The authors have also refined the writing style for greater accessibility. While older editions remain valuable, the 17th edition represents the most current and comprehensive version available for APUSH students.

Tips for Effective Textbook Study and Note-Taking

Successfully navigating the American Pageant 17th edition requires strategic study habits. Begin by previewing each chapter’s key terms and headings before diving into the full text. Active reading – highlighting, annotating, and questioning – is crucial for comprehension.

When taking notes, prioritize conciseness and organization. Utilize outlines, concept maps, or Cornell notes to structure information effectively. Focus on identifying major themes, cause-and-effect relationships, and significant historical figures.

Don’t simply copy text; paraphrase information in your own words to solidify understanding. Regularly review your notes and supplement them with external resources like YouTube review videos. Practice applying your knowledge through practice questions and self-testing. Consistent, focused study will maximize your learning from this comprehensive textbook.