no equipment 30 day workout program pdf

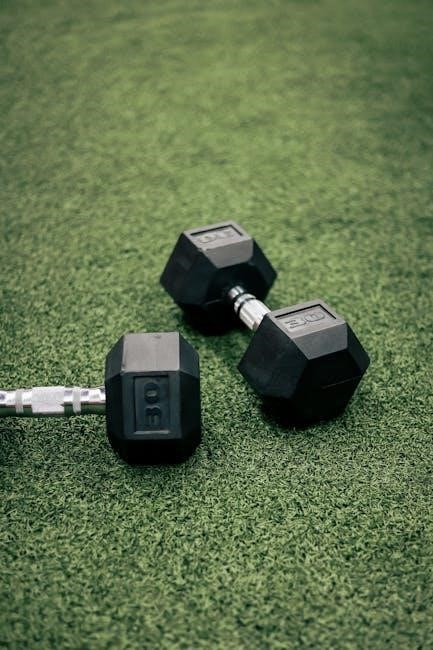
Embark on a transformative fitness journey! This 30-day program utilizes bodyweight exercises, requiring no equipment, perfect for beginners and seasoned fitness enthusiasts alike.

It’s a fantastic way to build strength, improve endurance, and achieve your fitness goals conveniently, as highlighted by various online resources and fitness challenges.

Program Overview and Benefits

This program is structured around progressive overload, gradually increasing intensity each week. Expect full-body workouts, focusing on core strength, push-up variations, and plyometrics. Benefits include improved cardiovascular health, increased muscle tone, and enhanced flexibility – all achievable without gym access.

Online resources emphasize its accessibility and effectiveness for beginners, while offering modifications for advanced users. It’s a convenient, time-efficient path to a fitter, stronger you, promoting consistent results.

Who is This Program For? (Beginner to Intermediate)

This 30-day plan is ideal for individuals with limited or no prior workout experience, as well as those seeking a convenient, equipment-free routine. It’s suitable for beginners aiming to build a fitness foundation and intermediate levels wanting a challenging refresh.

Modifications are key; exercises can be scaled to match individual fitness levels. Consistency and proper form are prioritized, making it accessible and effective for a broad range of users.

Warm-up Routine (5-10 Minutes)

Prepare your body for success! A dynamic warm-up, including cardio like jumping jacks and high knees, is crucial before each workout session.

This increases blood flow and prepares muscles, minimizing injury risk and maximizing performance.

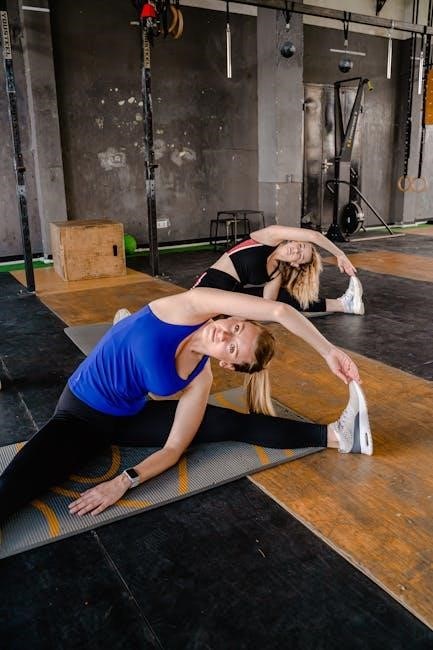
Dynamic Stretching Exercises

Engage in fluid movements to enhance flexibility! Include arm circles, leg swings, torso twists, and walking lunges in your warm-up.

These dynamic stretches actively prepare your muscles for exercise, unlike static stretches which are better suited for cool-downs. Prioritize controlled motions through a full range of motion, gradually increasing intensity. This prepares joints and boosts circulation, reducing the chance of strains during your 30-day program.

Cardio Warm-up (Jumping Jacks, High Knees)

Elevate your heart rate with invigorating cardio! Begin with 60 seconds of jumping jacks, followed by 60 seconds of high knees, and then repeat the sequence once more.

These exercises increase blood flow to your muscles, delivering vital oxygen and preparing your cardiovascular system for the workout ahead. This dynamic warm-up boosts energy levels and enhances performance throughout your 30-day no-equipment fitness journey, ensuring optimal results.

Week 1: Building a Foundation

Focus on mastering core strength and fundamental movements! This week establishes a solid base with beginner-friendly exercises, preparing you for increased intensity.

Focus: Core Strength and Basic Movements

This week prioritizes establishing a strong core and perfecting foundational exercises. Expect a routine centered around planks, crunches, and mastering proper push-up form – potentially starting with incline variations.

Basic squats and lunges will also be introduced, emphasizing correct technique over speed or repetitions. The goal is to build a solid base of strength and stability, preparing your body for more challenging workouts in the weeks ahead, as suggested by various fitness plans.

Workout Schedule: Days 1-7

Days 1, 3, and 5 focus on full-body circuits: planks (30 seconds), squats (15 reps), push-ups (as many reps as possible), and lunges (10 reps per leg). Days 2, 4, and 6 are active recovery – light cardio like jogging or brisk walking for 30 minutes.

Day 7 is a complete rest day. Remember to prioritize proper form and listen to your body. Adjust repetitions as needed, building gradually throughout the week, mirroring common beginner workout schedules.

Week 2: Increasing Intensity

Elevate your fitness! This week introduces push-up variations and intensified lower body exercises, challenging your strength and endurance for noticeable progress.

Expect increased repetitions and sets, building upon the foundation established in Week 1, as seen in many online programs.

Focus: Push-up Variations and Lower Body

This week’s emphasis lies in diversifying your upper body strength through push-up variations – standard, incline, decline, and wide-grip – targeting different chest and arm muscles.

Simultaneously, we’ll intensify lower body workouts with increased squat repetitions and potentially introducing jump squats for added plyometric power.

These combined exercises, frequently found in no-equipment programs, promote balanced muscle development and enhanced overall fitness, building upon the foundational strength from Week 1.

Workout Schedule: Days 8-14

Days 8-10: Focus on push-up variations (3 sets of 8-12 reps) and squat routines (3 sets of 15-20 reps). Incorporate lunges (3 sets of 10 reps per leg) for lower body engagement.

Days 11-12: Active recovery – light cardio like jogging in place or jumping jacks (10 minutes) followed by stretching.

Days 13-14: Repeat the Day 8-10 routine, aiming to increase reps or sets, progressively overloading your muscles for continued growth and strength gains.

Week 3: Advanced Bodyweight Exercises

Elevate your fitness! This week introduces plyometrics and challenging core work, demanding discipline and focus to build strength and muscle effectively.

Focus: Plyometrics and Core Challenges

This week centers on explosive power and robust core stability. Plyometric exercises, like jump squats, enhance athleticism and calorie burn, while advanced core challenges—planks with variations, Russian twists—strengthen your midsection.

Expect increased intensity, demanding proper form to prevent injury. Remember, discipline is key for maximizing results with these bodyweight movements, building both strength and endurance.

Workout Schedule: Days 15-21

Days 15-17 focus on plyometrics and core, incorporating jump squats, burpees, and challenging plank variations. Days 18 & 20 are dedicated to full-body circuits, combining previous exercises for increased intensity. Day 19 and 21 are active recovery—light cardio and stretching.

Prioritize form over speed, and listen to your body. Adjust reps as needed, ensuring consistent effort throughout each session to maximize progress during this pivotal week.

Week 4: Consolidation and Progression

This final week blends exercises, increasing repetitions and sets for continued gains. Focus on maintaining proper form while pushing your limits for optimal results!

Consistency is key to solidifying progress and building a sustainable fitness routine.

Focus: Combining Exercises and Increasing Reps

This week emphasizes circuit training, seamlessly linking exercises for a full-body challenge. Expect combinations like squats followed by push-ups, and planks transitioning into lunges.

Reps are strategically increased across all movements, demanding greater muscular endurance and strength. This progression builds upon the foundation established in previous weeks, maximizing results without needing equipment. Remember discipline is crucial for home workouts!

Workout Schedule: Days 22-30

Days 22-24 focus on high-intensity circuits, combining strength and cardio for optimal fat burn. Days 25-27 involve longer sets with minimal rest, pushing endurance limits.

Days 28-30 are dedicated to active recovery and lighter workouts, preventing burnout. Incorporate a mix of full-body routines and targeted muscle group sessions, maintaining consistency for lasting results. Remember to listen to your body!

Key Exercises Included

This program features diverse exercises! Expect push-up variations, squat challenges, and core work like planks and twists, building full-body strength effectively.

These movements require no equipment, making fitness accessible and convenient for everyone, anytime, anywhere.

Push-up Variations (Standard, Incline, Decline, Wide)

Mastering push-ups is fundamental! This program incorporates several variations to target different chest and arm muscles. Standard push-ups build foundational strength, while incline versions reduce difficulty.

Decline push-ups increase intensity, focusing on the upper chest. Wide-grip push-ups emphasize the outer chest. Progressing through these variations maximizes muscle engagement and prevents plateaus, ensuring continuous improvement throughout the 30-day challenge.

Squat Variations (Standard, Jump Squats)

Squats are essential for lower body strength! This program features standard squats to build a solid foundation, targeting quads, hamstrings, and glutes. As you progress, incorporate jump squats for increased intensity and explosive power.

Jump squats elevate your heart rate, adding a cardio element. These variations enhance athletic performance and contribute to overall lower body development, crucial for a well-rounded 30-day fitness journey.

Core Exercises (Plank, Crunches, Russian Twists)

Strengthen your core for stability and power! This program integrates planks to build isometric strength, enhancing posture and balance. Crunches target the abdominal muscles, while Russian twists engage obliques for rotational strength.

Consistent core work improves athletic performance and reduces injury risk. These exercises require no equipment, making them ideal for a convenient and effective 30-day fitness plan.

Cool-down and Stretching (5-10 Minutes)

Prioritize recovery! A 5-10 minute cool-down with static stretches for major muscle groups is crucial for flexibility and reducing post-workout soreness.

Static Stretching for Major Muscle Groups

Focus on lengthening muscles post-workout. Hold each stretch for 20-30 seconds, targeting quads, hamstrings, calves, chest, triceps, and shoulders.

Examples include hamstring stretches, quad stretches, triceps extensions, and shoulder cross-body stretches. Deep breathing enhances relaxation and improves flexibility. Consistent static stretching aids recovery, prevents injuries, and improves overall range of motion, complementing the 30-day program.

Importance of Cool-down for Recovery

A proper cool-down is crucial post-exercise. It gradually lowers heart rate and blood pressure, preventing dizziness and muscle soreness.

Cool-downs facilitate lactic acid removal, reducing muscle stiffness. Combining light cardio with static stretching optimizes recovery. Neglecting a cool-down can hinder progress and increase injury risk. Prioritizing this step ensures your body adapts effectively to the 30-day no-equipment workout program’s demands.

Nutrition Guidelines for Optimal Results

Fuel your body effectively! Prioritize protein intake for muscle repair and recovery, alongside adequate hydration to support performance throughout this 30-day program.

Importance of Protein Intake

Protein is crucial for muscle repair and growth during this 30-day no-equipment program. Adequate intake supports recovery from workouts, minimizing soreness and maximizing results.

Aim for a consistent protein source with each meal, including lean meats, eggs, or plant-based alternatives. This nutritional strategy complements the exercise plan, enhancing strength gains and overall fitness improvements, as emphasized by fitness resources.

Hydration Strategies

Maintaining optimal hydration is vital throughout this 30-day no-equipment workout program. Drink water consistently, before, during, and after each session to support performance and recovery.

Dehydration can hinder progress and increase fatigue. Carry a water bottle and sip regularly. Consider electrolyte replenishment, especially during intense workouts, to maintain fluid balance and enhance overall well-being, as recommended by fitness experts.

Modifications for Different Fitness Levels

Adapt the program to your needs! Beginners can modify exercises for easier variations, while advanced users can increase intensity for optimal challenge and progress.

Easier Modifications for Beginners

Starting your fitness journey? Modify push-ups by performing them against a wall or on your knees, reducing the load. Squats can be shallower, focusing on form.

Planks can be held for shorter durations, building core strength gradually. Remember, consistency is key! Prioritize proper technique over repetitions. Listen to your body and progress at your own pace, ensuring a safe and effective workout experience.

Harder Modifications for Advanced Users

Ready to push your limits? Elevate your push-ups with decline variations or add a clap between repetitions. Increase squat difficulty with jump squats or pistol squats.

For planks, try plank variations like plank jacks or single-arm planks. Focus on explosive movements and controlled tempos. Challenge yourself with increased reps and shorter rest periods to maximize strength gains and endurance.

Tracking Progress and Staying Motivated

Monitor your journey! Utilize a workout journal to record sets, reps, and feelings. Setting realistic goals and celebrating small wins fuels continued dedication.

Workout Journaling

Detailed logging is key to success! Consistently record each workout’s date, exercises performed, sets, repetitions, and any modifications made; Note perceived exertion levels – were exercises easy, challenging, or very difficult?

Tracking allows you to visualize progress, identify plateaus, and adjust the program accordingly. This practice, emphasized by fitness professionals, fosters accountability and provides valuable insights into your body’s response to training.

Setting Realistic Goals

Achievable goals fuel motivation! Begin by defining specific, measurable, attainable, relevant, and time-bound (SMART) objectives. Instead of “get fit,” aim for “complete 30-day program, increasing push-ups by five.”

Break down larger goals into smaller weekly milestones. Celebrate successes, and don’t be discouraged by setbacks. Realistic expectations, as advised by trainers, prevent burnout and promote long-term adherence.

Rest and Recovery

Prioritize rejuvenation! Adequate rest—including 7-9 hours of sleep—and active recovery techniques are crucial for muscle repair and preventing overtraining during this program.

Importance of Sleep

Sleep is paramount for recovery and progress. During sleep, your body repairs muscle tissue damaged during workouts, and replenishes energy stores. Aim for 7-9 hours of quality sleep each night to maximize the benefits of this 30-day program.

Insufficient sleep hinders muscle growth, increases cortisol levels (leading to muscle breakdown), and compromises your immune system. Prioritizing sleep is as vital as the workouts themselves for optimal results and preventing injury.

Active Recovery Techniques

Embrace active recovery for enhanced recuperation! Incorporate light activities like walking, yoga, or gentle stretching on rest days. These techniques promote blood flow, reducing muscle soreness and stiffness without hindering recovery.

Avoid complete inactivity; movement aids in flushing out metabolic waste. Foam rolling can also target specific muscle groups, releasing tension and improving flexibility, complementing the 30-day program’s intensity.

Potential Risks and Safety Precautions

Prioritize safety during your workouts! Maintain proper form to prevent injuries, and always listen to your body, stopping if you experience pain.

Proper Form and Technique

Mastering form is crucial for maximizing results and minimizing injury risk. Focus on controlled movements throughout each exercise, engaging the correct muscle groups.

Avoid rushing through repetitions; prioritize quality over quantity. Online resources often demonstrate proper technique for exercises like push-ups and squats. Maintaining a neutral spine during core work is vital. Incorrect form can lead to strains or more serious issues, hindering progress and potentially causing setbacks.

Listening to Your Body

Pay close attention to your body’s signals throughout the 30-day program. Don’t push through sharp pain; differentiate between muscle soreness and injury.

Rest when needed, and don’t hesitate to modify exercises if they cause discomfort. Active recovery days are essential. Ignoring pain can lead to setbacks. Prioritize self-awareness and adjust the intensity based on how you feel, ensuring a safe and sustainable fitness journey.

flex fit hat size guide

Understanding Flexfit Hat Sizing

Flexfit hats revolutionized headwear, offering comfort and fit assurance through size ranges, unlike traditional fitted caps․ Established in 1994, Flexfit utilizes polyurethane spandex blends․

What is Flexfit Technology?

Flexfit technology, pioneered by Yupoong, Inc․ in 1994, represents a significant advancement in hat construction․ It uniquely weaves polyurethane spandex into the hat’s fabric, typically alongside polyester․ This innovative blend allows the hat to stretch and conform to a wide range of head sizes, eliminating the need for adjustable straps or a perfectly precise fit․

Unlike traditional caps, Flexfit hats aren’t simply sized; they cover size ranges․ This means one hat can comfortably accommodate multiple head circumferences, providing a secure yet comfortable fit for various individuals․ The technology prioritizes both comfort and a streamlined aesthetic․

The Benefits of Flexfit Hats

Flexfit hats offer numerous advantages over traditional fitted or snapback caps․ The primary benefit is superior comfort, stemming from the hat’s ability to stretch and mold to the wearer’s head․ This eliminates pressure points and ensures a snug, yet not constricting, fit․ Size assurance is another key advantage; covering size ranges reduces the risk of an ill-fitting hat․

Furthermore, Flexfit technology provides a cleaner, more streamlined look compared to hats with adjustable straps․ A properly fitted Flexfit hat stays securely in place, preventing slippage, and is ideal for various activities․

Measuring Your Head for a Flexfit Hat

Accurate head circumference measurement is crucial for selecting the correct Flexfit size, avoiding discomfort from hats that are too tight or too loose․

Tools You’ll Need

Measuring for a Flexfit hat requires minimal tools, making it easily achievable at home; The primary and most essential tool is a flexible measuring tape – fabric or plastic works best․ Avoid metal tapes, as they don’t conform to the head’s shape effectively․ A mirror is also highly recommended, allowing you to ensure the tape is positioned correctly around your head․

Having a friend assist can be beneficial for increased accuracy, especially when reaching the back of your head․ While not strictly necessary, a pen and paper are helpful for recording the measurement immediately, preventing any potential for forgetting the number․ These simple tools will ensure a precise fit!

How to Accurately Measure Head Circumference

Accurate measurement is crucial for finding your perfect Flexfit hat size․ Begin by holding the measuring tape horizontally around your head, approximately one inch above your eyebrows and ears․ Ensure the tape is snug but not overly tight – comfort is key․

Keep the tape level all the way around, and note the point where the end of the tape meets the starting point․ This measurement, in inches or centimeters, represents your head circumference․ Repeat the process a couple of times to confirm consistency and accuracy․ A too-small or too-large measurement leads to discomfort!

Where to Position the Measuring Tape

Proper tape placement is essential for an accurate Flexfit hat size․ Position the measuring tape about one inch above your eyebrows, ensuring it circles your head comfortably; The tape should also pass approximately one inch above your ears, maintaining a consistent level throughout the measurement process․

Avoid pulling the tape too tightly, as this can result in a smaller measurement than your actual head circumference․ Conversely, a loose tape will yield a larger, inaccurate size․ Keep the tape parallel to the ground for the most reliable results, guaranteeing a well-fitting hat․

Flexfit Hat Size Chart – General Overview

Common Flexfit sizes include One Size (OS), Small/Medium (S/M), and Large/Extra Large (L/XL), covering a broad range of head circumferences for optimal fit․

Common Flexfit Sizes: OS, S/M, L/XL

Flexfit hats are notably categorized into three primary size ranges: One Size (OS), Small/Medium (S/M), and Large/Extra Large (L/XL)․ The “One Size” option is designed to comfortably fit a wider spectrum of head sizes, offering versatility․ S/M typically accommodates head circumferences between 55-58 cm (21 ⅝ — 22 ⅞ inches)․

The L/XL range is crafted for larger heads, generally fitting circumferences from 59-62 cm (23 ¼ ─ 24 ⅜ inches)․ Understanding these ranges is crucial for selecting a Flexfit hat that provides both a secure and comfortable fit, avoiding issues like hats being too tight or too loose․ These sizes ensure size assurance․

Converting Head Circumference to Flexfit Size

Accurately measuring your head circumference is paramount to finding the perfect Flexfit hat size․ Once measured, converting this measurement to the corresponding Flexfit size is straightforward․ A head circumference of approximately 55-58 cm (21 ⅝ — 22 ⅞ inches) generally corresponds to a S/M size․

For larger heads measuring 59-62 cm (23 ¼ — 24 ⅜ inches), an L/XL size is typically recommended․ If your measurement falls outside these ranges, the “One Size” option might be suitable, as it’s designed for broader compatibility․ Utilizing a hat size chart is essential for precise conversion․

Detailed Flexfit Size Guide (Inches & Centimeters)

Flexfit offers varied sizes – One Size, Small/Medium, and Large/Extra Large – catering to diverse head circumferences, measured in both inches and centimeters․

One Size (OS) Flexfit Hats

Flexfit’s “One Size” (OS) hats are designed to comfortably fit a broad range of head sizes, typically accommodating head circumferences between 21 ¼ and 23 inches (54-58․5 cm)․ This makes them a convenient option when precise measurements aren’t available or for those who fall within this common range․

The integrated spandex technology allows the hat to stretch and conform to the wearer’s head, providing a secure yet comfortable fit․ However, individuals with significantly larger or smaller head sizes might find the fit less optimal․ It’s crucial to remember that while versatile, “One Size” doesn’t guarantee a perfect fit for everyone․

Small/Medium (S/M) Flexfit Hats

Flexfit Small/Medium (S/M) hats generally suit head circumferences ranging from 21 ¼ to 22 ⅞ inches (54 to 58 cm)․ These are ideal for individuals with smaller head sizes who find the “One Size” option too loose․ The stretchy blend of materials ensures a snug, comfortable fit without feeling constricting․

This size range provides a more secure fit for those seeking a closer, more personalized feel․ It’s important to accurately measure your head circumference to determine if S/M is the appropriate choice, avoiding potential discomfort from a hat that’s either too tight or too loose․

Large/Extra Large (L/XL) Flexfit Hats

Flexfit Large/Extra Large (L/XL) hats are designed for those with larger head sizes, typically fitting head circumferences between 23 to 24 ⅜ inches (58․4 to 61․6 cm)․ This size range accommodates individuals who find the S/M or One Size options too small, ensuring a comfortable and secure fit․

The inherent stretch in Flexfit technology allows for a snug yet comfortable feel, even at the larger end of the spectrum․ Accurate measurement is crucial; selecting L/XL prevents the hat from being uncomfortably tight or prone to slipping, maximizing wearability and enjoyment․

Flexfit Sizing for Women

Most women’s hat sizes range from 54 cm to 59 cm (21 to 23 inches), with the average size being around 22 inches – consider this when choosing!

Average Women’s Hat Sizes

Determining the average women’s hat size is crucial for a comfortable Flexfit experience․ Generally, most women fall within a range of 54cm to 59cm, which translates to approximately 21 ¼ to 23 ¼ inches in head circumference․ However, this is a broad spectrum, and individual variations exist․

A common average is around 22 inches․ It’s important to remember that hair length and style can influence the measurement, so measuring without any hair styling products is best․ Accurate measurement ensures selecting the correct Flexfit size, avoiding hats that are either too tight or too loose, maximizing comfort and style․

Finding the Right Flexfit for a Woman’s Head

To find the perfect Flexfit hat, women should accurately measure their head circumference․ Once measured, consult a Flexfit size chart, matching the measurement to the corresponding size range – One Size (OS), Small/Medium (S/M), or Large/Extra Large (L/XL)․

Consider that Flexfit hats offer stretch, accommodating slight variations within a size range․ If between sizes, opting for the larger size is generally recommended for comfort․ Remember to measure where the hat will naturally sit on the head for the most accurate result, ensuring a secure yet comfortable fit․

Flexfit Sizing for Men

Flexfit caters to men with varying head sizes, utilizing OS, S/M, and L/XL options․ Accurate head circumference measurement is key to selecting the correct fit․

Average Men’s Hat Sizes

Determining average men’s hat sizes involves understanding head circumference measurements․ Most men fall within the range of 57 to 61 centimeters, translating to approximately 22․5 to 24 inches․ However, individual variations are common, necessitating accurate self-measurement․ A head circumference of 58cm (22․8 inches) is often considered the average for adult males․

Flexfit hats accommodate these variations with their size ranges․ Men with larger heads may require an L/XL, while those with smaller heads might find an S/M more comfortable․ It’s crucial to avoid relying solely on averages and prioritize a precise measurement for optimal fit and comfort․ Remember, a properly fitted hat shouldn’t feel too tight or loose․

Choosing the Correct Flexfit for a Man’s Head

Selecting the right Flexfit hat for a man’s head begins with an accurate head circumference measurement․ Once determined, consult a Flexfit size chart, matching the measurement to the corresponding size range – OS, S/M, or L/XL․ If the measurement falls between sizes, it’s generally recommended to size up for a more comfortable fit․

Consider the hat’s material; polyester/spandex blends offer greater stretch․ A properly fitted Flexfit shouldn’t feel constricting or slide around․ Prioritize comfort and ensure the hat sits securely without causing pressure points․ Remember, Flexfit’s size ranges provide assurance of a good fit, unlike traditional fitted caps․

Flexfit vs․ Traditional Fitted Hats

Flexfit hats offer size ranges for fit assurance, unlike traditional fitted caps with fixed sizes․ Flexfit’s stretch provides superior comfort and accommodates varying head sizes․

The Advantage of Size Ranges

Traditional fitted hats come in specific sizes, demanding precise head measurements for a comfortable fit – a challenge for many․ Flexfit technology overcomes this with its innovative size ranges, like S/M and L/XL, offering greater flexibility․ This approach accommodates natural head size variations and slight fluctuations, ensuring a more reliable fit for a wider range of individuals․

Finding your perfect Flexfit is easier; it won’t just fit, but feel comfortable too․ This eliminates the frustration of a hat that’s either too tight or too loose, providing a consistently pleasant wearing experience․ The size ranges minimize the risk of incorrect sizing, making hat shopping simpler and more convenient․

Flexfit’s Stretch and Comfort

The core of Flexfit’s superior comfort lies in its unique construction․ The signature technology weaves polyurethane spandex into the hat’s fabric, granting it exceptional stretchability․ This allows the hat to conform to the wearer’s head shape, providing a snug yet comfortable fit without feeling constricting․ Unlike rigid traditional caps, Flexfit moves with you, enhancing all-day wearability․

This stretch isn’t just about comfort; it’s about a secure fit․ The elasticity ensures the hat stays in place, even during activity, eliminating constant adjustments․ The blend of materials creates a breathable and lightweight feel, further contributing to the overall comfort experience․

Snapback Hats and Flexfit – What’s the Difference?

Snapback hats feature adjustable plastic straps, while Flexfit utilizes stretchy materials for a snug fit across size ranges, offering superior comfort․

Adjustability Features

Snapback hats boast a distinct adjustability feature: a series of plastic snaps on a strap at the back, allowing for a customized fit․ Users can select from multiple snap closures to tighten or loosen the hat’s circumference․ Conversely, Flexfit hats forgo traditional snaps, relying instead on the inherent stretch of their blended materials – typically polyester and spandex – to conform to various head sizes․

This elastic quality provides a secure, comfortable fit without the need for manual adjustments․ Flexfit’s design covers size ranges, ensuring a fit that feels tailored, while Snapback offers a more granular, adjustable experience․ The choice depends on preference for a fitted or customizable feel․

Choosing Between Snapback and Flexfit

Selecting between a Snapback and a Flexfit hat hinges on your desired fit and style․ Snapbacks excel in providing a highly adjustable fit, ideal for those who prefer precise control over tightness․ They also offer a classic, often more structured look․ However, the snaps can sometimes be uncomfortable for prolonged wear․

Flexfit hats prioritize comfort and a streamlined appearance․ Their stretchy fabric conforms to your head, offering a snug yet flexible fit․ If you value all-day comfort and a low-profile style, Flexfit is an excellent choice․ Consider your head shape and personal preference when making your decision․

Troubleshooting Fit Issues

A poorly fitting hat causes discomfort or slippage; accurate head measurement and utilizing a hat size chart are crucial for finding the perfect Flexfit sizing․

Hat Too Tight?

If your Flexfit hat feels uncomfortably snug, it likely indicates the size is too small for your head circumference․ Remember, Flexfit technology offers some stretch, but excessive tightness restricts blood flow and causes headaches․ While a slight snugness is acceptable, persistent pressure is not․

Consider if you measured correctly – re-measure to confirm․ If the measurement aligns with the size you purchased, the hat may simply be at the lower end of its size range․ Unfortunately, Flexfit hats have limited stretch beyond their designed capacity․ Exchanging for the next size up (S/M if you have OS, or L/XL if you have S/M) is generally the best solution for a comfortable fit․

Hat Too Loose?

A Flexfit hat that slides around or doesn’t feel secure is too large․ While designed to accommodate size ranges, excessive looseness compromises the hat’s intended fit and style․ The hat should maintain a snug, yet comfortable, feel without requiring constant adjustment․

Double-check your initial head measurement; an inaccurate measurement is a common cause․ If the measurement was correct, consider that Flexfit sizes can vary slightly between styles․ Trying a size down (S/M if you have L/XL, or OS if you have S/M) might resolve the issue․ If still loose, explore styles with a more tailored fit, or consider adding a hat sizing strip internally․

Flexfit Hat Materials and Their Impact on Fit

Flexfit commonly uses polyester/spandex blends for stretch and comfort, while cotton options offer a different feel, potentially impacting how snugly the hat conforms to your head․

Polyester/Spandex Blends

Flexfit’s signature technology centers around weaving polyurethane spandex into the hat’s fabric, typically combined with polyester․ This blend is crucial for the hat’s defining characteristic: its stretch․ The spandex provides the elasticity allowing the hat to comfortably accommodate a range of head sizes within a given size designation – like S/M or L/XL․

Polyester contributes durability and helps maintain the hat’s shape․ This combination results in a hat that feels secure without being overly tight, offering a snug yet comfortable fit for various head shapes․ The blend also impacts breathability and moisture-wicking properties, enhancing overall wearability․

Cotton Flexfit Options

While Flexfit is renowned for its polyester/spandex blends, cotton Flexfit options offer a different feel․ These hats typically combine cotton with the signature spandex and often a touch of polyester for enhanced durability and shape retention․ Cotton provides a softer, more natural texture against the skin, appealing to those preferring a classic hat feel․

However, cotton Flexfit hats may exhibit slightly less stretch and potentially retain more moisture compared to their fully synthetic counterparts․ They still benefit from the size-ranging technology, but the fit might feel a bit less form-fitting initially․

Yupoong, Inc․ and Flexfit – The Brand Behind the Fit

Yupoong, Inc․, established in 1994, pioneered Flexfit technology, weaving spandex into hats for superior comfort and a range of assured sizing options․

History of Flexfit

Flexfit’s journey began in 1994 with Yupoong, Inc․, a hat purveyor aiming to redefine headwear comfort and fit․ Recognizing the limitations of traditional, fixed-size hats, Yupoong innovated by integrating polyurethane spandex into the hat’s construction․ This groundbreaking technology allowed for stretch and adaptability, accommodating a wider range of head sizes within a single cap․

This innovation wasn’t merely about convenience; it was about providing a consistently comfortable fit․ Flexfit quickly gained popularity, becoming a staple in the promotional products and fashion industries․ The brand’s commitment to quality and consistent sizing has solidified its position as a leader in the hat market, continually evolving while maintaining its core principles․

Yupoong’s Commitment to Quality

Yupoong, Inc․, the driving force behind Flexfit, demonstrates a steadfast dedication to producing high-quality headwear․ This commitment extends beyond the innovative Flexfit technology itself, encompassing meticulous material selection and rigorous manufacturing processes․ Registered trademarks are carefully protected, ensuring brand integrity and consumer confidence․

From the initial design phase to the final product, Yupoong prioritizes durability and consistent sizing․ This dedication is evident in their continued refinement of the spandex blend and their adherence to strict quality control standards․ Their 2026 copyright reinforces their ongoing commitment to excellence and innovation in the hat industry․

Where to Find Flexfit Size Charts

Flexfit size charts are readily available on the official Flexfit website and through various retailers, ensuring a perfect fit for every customer․

Official Flexfit Website

Flexfit’s official website serves as the primary resource for comprehensive sizing information․ Visitors can access detailed Flexfit size charts, categorized by hat style – including OS, S/M, and L/XL – providing measurements in both inches and centimeters․ The website also offers guidance on measuring head circumference accurately, ensuring customers select the appropriate size․

Furthermore, the official site features registered trademarks owned by Yupoong, Inc․, and copyright information dating back to 2026, demonstrating a commitment to providing up-to-date and reliable sizing guidance․ It’s the definitive source for understanding the nuances of Flexfit sizing․

Retailer Size Guides

Many retailers offering Flexfit hats provide their own size guides, often mirroring the information found on the official Flexfit website․ These guides typically include charts converting head circumference measurements into corresponding Flexfit sizes (OS, S/M, L/XL)․ However, slight variations can occur, so it’s prudent to cross-reference with the official source․

Retailer guides aim to simplify the selection process, offering a convenient point of reference for customers․ Always prioritize guides that detail measurements in both inches and centimeters for optimal accuracy when finding your perfect Flexfit․

hewlett packard user manual

HP user manuals provide essential guidance for optimal product performance and longevity, offering detailed instructions and troubleshooting steps for a seamless experience.

Accessing PDF versions via the HP website or dedicated product pages ensures users have readily available support for their specific HP devices;

Importance of User Manuals

HP user manuals are critically important for maximizing the functionality and lifespan of your device. They offer a structured approach to understanding complex features, ensuring users can effectively utilize all capabilities.

These guides provide step-by-step instructions for setup, operation, and maintenance, minimizing potential errors and troubleshooting common issues. Access to PDF manuals, readily available online, empowers users with self-service support, reducing reliance on external assistance.

Understanding safety precautions outlined within the manual is paramount for preventing damage to the printer and ensuring user safety. Properly utilizing the manual contributes to a positive and productive user experience with your HP product.

Scope of HP Products Covered

HP user manuals encompass a vast range of products, from everyday HP printers – including Designjet models – to more specialized computing solutions. Comprehensive documentation is available for HP LaserJet printers, detailing toner cartridge information and paper compatibility guidelines.

The scope extends to include detailed guides for initial setup, wireless network configuration, and advanced printing options like duplex printing. PDF manuals are readily accessible online, catering to diverse HP product lines.

Whether you own a basic inkjet or a professional-grade plotter, HP provides dedicated resources to support your specific device, ensuring optimal performance and user satisfaction.

HP Printer Manuals: A Comprehensive Guide

HP printer manuals, available in PDF format, offer detailed instructions for setup, operation, and troubleshooting, ensuring optimal printing performance and user support.

Locating HP Printer Manuals Online

HP provides convenient online access to a vast library of printer manuals, readily available through their official support website. Users can easily locate the correct manual by entering their specific printer model number into the search bar.

Alternatively, navigating through the HP support pages, categorized by printer series (like Designjet), allows for a more targeted search. Direct links to PDF manuals are often provided on the product support pages, streamlining the download process. The HP Designjet printer manuals are specifically found at http://designjet.hp.com, offering a dedicated resource for these models.

Google searches can also quickly direct users to the appropriate HP support page for their printer, ensuring easy access to documentation.

Downloading PDF Manuals

HP printer manuals are predominantly offered in PDF format, ensuring broad compatibility and ease of access across various devices. Downloading these manuals is typically a straightforward process, involving a simple click on the provided download link on the HP support website or relevant product page.

Once downloaded, the PDF file can be opened, viewed, and printed using a PDF reader application. HP recommends utilizing the latest version of Adobe Acrobat Reader for optimal viewing and functionality, guaranteeing a smooth user experience. These manuals contain comprehensive information regarding printer operation and maintenance.

Supported Adobe Acrobat Reader Versions

HP recommends utilizing the most current version of Adobe Acrobat Reader to ensure optimal viewing and printing of PDF user guides. While older versions may function, compatibility issues and rendering errors can occur, potentially hindering access to crucial information.

Regularly updating Adobe Acrobat Reader guarantees full support for the latest PDF features and security enhancements. HP designs its PDF manuals with the newest Reader versions in mind, maximizing clarity and usability. This ensures a seamless experience when accessing vital printer documentation and troubleshooting guides.

HP Designjet Printer Manuals

HP Designjet printer manuals are readily accessible in PDF format directly on the HP website, specifically through the product support pages tailored to each Designjet model. These comprehensive guides cover everything from initial setup and paper handling to advanced printing features and troubleshooting procedures.

Users can easily locate their specific manual by navigating to http://designjet.hp.com or searching for their printer model on the main HP support site. These resources empower users to maximize their Designjet printer’s capabilities and resolve any potential issues efficiently.

Understanding Your HP Printer

HP printers feature diverse components, including a control panel for settings and functions, alongside detailed specifications outlined in accompanying printer guides.

Printer Components and Functions

HP printers comprise several key components working in harmony. The paper path facilitates document handling, while the print head delivers ink or toner to the page. A crucial element is the control panel, enabling users to manage print settings and monitor printer status.

The internal memory buffers print jobs, and the connectivity interfaces – USB or network – allow communication with computers. Understanding these functions is vital for efficient operation. The fuser unit applies heat to bond toner, and the scanner (in multifunction models) digitizes documents. Proper component care ensures optimal performance and extends the printer’s lifespan.

Control Panel Overview

HP printer control panels vary by model, but generally feature a display screen for status updates and settings navigation. Buttons allow users to initiate copies, scan documents, or access the printer menu. Many panels include a cancel button to halt ongoing print jobs.

Wireless indicators show network connectivity, while ink or toner level indicators alert users to supply needs. Some advanced panels offer touchscreen functionality for intuitive control. Understanding the control panel’s layout and functions is essential for customizing print settings, troubleshooting issues, and maximizing printer capabilities.

Printer Specifications Guide

HP printer specifications guides detail crucial information for optimal paper selection and performance. These guides outline supported paper types, weights, and sizes, ensuring compatibility and preventing print quality issues. They also specify maximum print resolutions, supported print languages, and connectivity options like USB or Ethernet.

Understanding these specifications is vital for achieving desired print results and avoiding potential printer malfunctions. Referencing the guide, such as HP part number 5002-1801 for LaserJet models, ensures users utilize appropriate materials and settings for their specific HP printer.

Setting Up Your HP Printer

HP user manuals guide users through unboxing, connecting to computers via USB or wireless networks, and installing necessary software for seamless operation.

Unboxing and Initial Setup

HP user manuals emphasize carefully unpacking your printer, removing all packing materials, and verifying the inclusion of all components – printer, power cord, setup cartridges, and documentation.

Initial setup typically involves connecting the power cord, loading paper into the designated tray, and installing the necessary software or drivers from the provided CD or HP’s website.

The manual guides users through the initial printer alignment process, ensuring optimal print quality from the start. Following these steps precisely guarantees a smooth and trouble-free beginning with your new HP printer.

Refer to the manual for specific instructions tailored to your printer model.

Connecting to a Computer

HP user manuals detail both USB and wireless connection options for linking your printer to a computer. For USB connections, the manual instructs users to connect the USB cable (often not included) between the printer and computer, allowing the operating system to automatically detect and install drivers.

Wireless setup involves accessing the printer’s control panel or utilizing HP’s software to connect to your Wi-Fi network. The manual provides clear, step-by-step instructions for selecting your network and entering the password.

Successful connection is confirmed through a status indicator on the printer and within the HP software.

Wireless Network Setup

HP printer manuals guide users through a straightforward wireless setup process. Initially, ensure your printer is within range of your Wi-Fi router. Access the printer’s control panel and navigate to the wireless setup wizard, often found under ‘Network’ or ‘Wireless’ settings.

The printer will scan for available networks; select yours from the list and enter the correct password when prompted. Alternatively, HP’s software simplifies this process by automatically detecting and configuring the connection.

A successful connection is indicated by a stable wireless signal icon on the printer’s display.

Printing with Your HP Printer

HP manuals detail proper paper loading techniques and print settings adjustments for optimal results, ensuring high-quality documents and images every time.

Explore duplex printing options to conserve paper and reduce environmental impact, as outlined in your printer’s user guide.

Loading Paper

HP printer manuals emphasize the importance of using the correct paper type and size for optimal print quality and to avoid paper jams.

Carefully consult your printer’s documentation to understand the supported paper specifications, including weight and finish.

Always fan the stack of paper before loading it into the input tray to prevent sheets from sticking together.

Adjust the paper guides to fit snugly against the edges of the paper stack, ensuring proper alignment during printing.

Avoid overfilling the input tray, as this can also lead to paper feeding issues.

Print Settings and Options

HP printers offer a wide array of print settings accessible through the printer driver or control panel, allowing users to customize their output.

Common options include paper size, print quality (draft, normal, best), color mode (color or grayscale), and number of copies.

Users can also adjust advanced settings like print resolution, media type, and borderless printing.

Exploring these options enables tailored prints for various needs, from everyday documents to professional-quality photos.

Refer to your printer’s manual for a comprehensive guide to all available print settings and their effects.

Duplex Printing

HP printers frequently support duplex printing, an eco-friendly feature that automatically prints on both sides of the paper, reducing paper consumption.

This option is typically enabled within the print settings of your document or through the printer’s control panel interface.

Duplex printing modes can include automatic two-sided printing or manual two-sided printing, requiring user intervention to flip the paper.

Ensure your printer and paper type are compatible with duplex printing for optimal results and to avoid paper jams.

Consult your printer’s manual for specific instructions on enabling and configuring duplex printing.

Troubleshooting Common Issues

HP manuals offer solutions for frequent problems like paper jams, connectivity errors, and diminished print quality, guiding users through effective resolutions.

Detailed steps and diagrams assist in diagnosing and resolving issues, minimizing downtime and maximizing printer functionality.

Paper Jams

HP user manuals dedicate significant attention to resolving paper jams, a common printing issue. They emphasize the importance of turning off the printer before attempting to clear any jammed paper to prevent potential damage or injury.

Detailed diagrams illustrate the various locations where paper jams can occur within the printer, including the input tray, output area, and internal pathways. The manuals provide step-by-step instructions for carefully removing the jammed paper, advising against pulling forcefully, which could leave fragments behind.

Furthermore, HP guides suggest inspecting the paper stock for compatibility and proper condition, as incorrect paper types or damaged sheets are frequent causes of jams. They also recommend cleaning the paper feed rollers to ensure smooth paper handling and prevent future occurrences.

Connectivity Problems

HP user manuals offer comprehensive troubleshooting for connectivity issues, covering USB, network, and wireless connections. They guide users through verifying cable connections, ensuring the printer is properly detected by the computer, and confirming the correct driver installation.

For network connectivity, manuals detail steps for checking network settings, IP addresses, and router configurations. Wireless setup instructions include guidance on selecting the correct network, entering the password accurately, and resolving signal strength problems.

HP also provides diagnostic tools and software utilities to identify and resolve connectivity conflicts. The manuals emphasize the importance of restarting both the printer and computer as a first step in troubleshooting, often resolving simple connection errors.

Print Quality Issues

HP user manuals address print quality concerns with detailed troubleshooting steps. They guide users through identifying issues like faded prints, streaks, or blurry text, and offer solutions tailored to the specific problem.

Manuals explain how to check ink or toner levels, clean print heads, and adjust print settings for optimal results. Paper type compatibility is also emphasized, as using incorrect paper can significantly impact print quality.

HP provides diagnostic tools within printer software to assess print head alignment and perform cleaning cycles. The manuals also suggest running test pages to evaluate print quality and identify potential hardware issues requiring service.

HP LaserJet Printer Specifics

HP LaserJet manuals detail toner cartridge information, paper compatibility guidelines, and recommendations for genuine HP LaserJet toner to ensure optimal printing.

Toner Cartridge Information

HP LaserJet printers are designed to work optimally with genuine HP toner cartridges, ensuring consistent print quality and reliability. Using non-HP cartridges may lead to diminished performance or even printer damage.

Manuals provide specific guidance on cartridge installation, removal, and recycling procedures. They also detail how to interpret cartridge status messages displayed on the printer’s control panel.

HP recommends using only recommended toner cartridges, as the printer, toner, and formula are engineered to work together seamlessly. This collaboration delivers superior results and extends the lifespan of your HP LaserJet printer.

Paper Compatibility

HP LaserJet printers support a wide range of paper types and weights, but compatibility varies by model. User manuals detail the recommended paper specifications for optimal printing performance, including bond, brochure, and specialty papers.

The HP LaserJet Printer Family Paper Specifications Guide (HP part number 5002-1801) provides comprehensive information on supported paper characteristics. Your paper supplier should understand these requirements to ensure consistent results.

Using incompatible paper can cause paper jams, poor print quality, or even damage to the printer. Always refer to your printer’s manual for specific paper recommendations and guidelines.

Recommended HP LaserJet Toner Cartridges

HP strongly recommends using genuine HP LaserJet toner cartridges for consistent, reliable print quality and optimal printer performance. HP designs its printers, toner cartridges, and toner formulas to work together seamlessly.

Using non-HP cartridges may lead to diminished print quality, increased risk of printer malfunctions, and potential voiding of your printer’s warranty. Genuine HP cartridges deliver vibrant colors, sharp text, and durable prints.

Refer to your printer’s user manual or the HP website to identify the correct toner cartridge model number for your specific HP LaserJet printer.

Maintenance and Care

Regular cleaning and printer head maintenance are crucial for extending your HP printer’s lifespan and ensuring consistently high-quality print results.

Following recommended care procedures prevents issues and optimizes performance.

Cleaning Your Printer

HP recommends regular cleaning to maintain optimal printer performance and print quality. Begin by powering off the printer and disconnecting it from the power source for safety.

Use a soft, lint-free cloth, lightly dampened with distilled water, to wipe down the exterior surfaces. Avoid using harsh chemicals or abrasive cleaners, as these can damage the printer’s finish.

For internal cleaning, access the paper path and gently remove any dust or debris with a dry cloth. HP also provides cleaning pages through the printer software, which can help maintain the print head’s functionality. Always refer to your specific printer model’s manual for detailed cleaning instructions.

Printer Head Maintenance

HP printers require periodic print head maintenance to ensure consistent print quality and prevent clogging. Utilize the built-in cleaning utilities accessible through the printer’s control panel or HP software on your computer.

These utilities run cleaning cycles that flush ink through the print head nozzles, removing any obstructions. For stubborn clogs, multiple cleaning cycles may be necessary, but avoid excessive use as it consumes ink.

Regularly printing test pages helps identify and address print head issues promptly. Refer to your printer’s manual for specific instructions and troubleshooting tips related to print head maintenance for your model.

Extending Printer Lifespan

To maximize your HP printer’s lifespan, consistent preventative maintenance is crucial. Regularly clean the exterior and interior, removing dust and debris that can accumulate and cause malfunctions. Use only HP recommended paper types to avoid jams and damage to internal components.

Properly store the printer in a cool, dry environment when not in use, protecting it from extreme temperatures and humidity. Avoid overloading the paper tray and always use genuine HP toner or ink cartridges.

Following these guidelines will contribute to the long-term reliability and performance of your HP printer.

Safety Instructions and Warnings

HP printers require adherence to general safety precautions, electrical safety guidelines, and environmental considerations for safe operation and to prevent potential hazards.

General Safety Precautions

HP emphasizes reading and understanding all documentation accompanying your printer before operation. This includes crucial safety instructions designed to prevent injury and ensure proper usage. Always operate the printer on a stable, level surface, allowing adequate ventilation to prevent overheating.

Avoid placing the printer near water or exposing it to liquids. Do not attempt to disassemble or repair the printer yourself, as this could lead to electrical shock or damage. Keep the printer area clean and free of obstructions. Never insert objects into the printer’s openings that are not intended for use.

Exercise caution when handling hot surfaces, such as the fuser unit, after printing. Disconnect the power cord before cleaning or performing maintenance. Following these precautions will contribute to a safe and productive printing experience.

Electrical Safety

HP printers are designed with electrical safety in mind, but user adherence to guidelines is paramount. Always connect the printer to a properly grounded electrical outlet that matches the voltage specified on the printer’s power supply. Never use damaged power cords or plugs; replace them immediately.

Avoid overloading electrical circuits with multiple devices. Do not expose the power cord to moisture or physical damage. When disconnecting the printer, always grasp the plug, not the cord.

Refrain from using the printer during electrical storms. If the printer exhibits any electrical malfunctions, such as sparks or unusual smells, disconnect it immediately and contact HP support. Prioritizing these electrical safety measures ensures a secure operating environment.

Environmental Considerations

HP is committed to environmental sustainability, and responsible printer usage plays a vital role. Properly dispose of used toner cartridges and packaging materials through HP’s recycling programs, reducing landfill waste. Utilize eco-friendly paper options and consider duplex printing to conserve paper resources.

Energy Star-certified HP printers are designed to minimize energy consumption. Enable power-saving modes when the printer is idle.

Reduce your environmental footprint by responsibly managing printer supplies and promoting recycling initiatives. HP provides resources and information on sustainable printing practices to help users minimize their impact on the planet.

indian passport surrender application form pdf

Indian Passport Surrender Application Form PDF: A Comprehensive Guide

Indian motorcycles offer customization, quality, and a dynamic riding experience; however, this guide focuses on surrendering an Indian passport, detailing the PDF application process.

Understanding Passport Surrender

Passport surrender is the formal process of relinquishing your Indian passport to the government. This is a crucial step when you’ve acquired foreign citizenship or are otherwise legally required to do so. It’s not simply about giving up the physical document; it’s a legal declaration that you no longer wish to claim Indian citizenship through that passport.

Successfully completing this process ensures you avoid potential legal complications related to dual citizenship, especially when traveling or conducting financial transactions; The surrender process culminates in the issuance of a Surrender Certificate, a vital document confirming your passport has been officially surrendered. This certificate serves as proof of compliance with Indian law and is often required for various administrative purposes in your new country of citizenship. Understanding the nuances of this process is paramount for a smooth transition.

Who Needs to Surrender an Indian Passport?

Primarily, individuals who have acquired foreign citizenship are legally obligated to surrender their Indian passport. This applies regardless of whether the foreign citizenship was obtained voluntarily or involuntarily. Furthermore, Indian citizens who intend to permanently reside in a foreign country, even without formally acquiring citizenship, may also need to surrender their passport.

Specifically, those holding an Indian passport and a Person of Indian Origin (PIO) card, or an Overseas Citizen of India (OCI) card, are often required to surrender their passport as part of the OCI/PIO application process. It’s crucial to check the latest guidelines from the Indian government, as regulations can evolve. Failing to surrender when required can lead to legal repercussions and complications with travel or financial matters.

Reasons for Surrendering an Indian Passport

The most common reason for surrendering an Indian passport is the acquisition of foreign citizenship. Indian law mandates that citizens who obtain citizenship of another country must relinquish their Indian passport. Another significant reason is permanent residency abroad; while not always mandatory, surrendering simplifies travel and avoids potential conflicts with immigration laws.

Individuals applying for an Overseas Citizen of India (OCI) or Person of Indian Origin (PIO) card are frequently required to surrender their Indian passport as part of the application process. This ensures clarity regarding citizenship status. Furthermore, some individuals choose to surrender their passport to demonstrate a clear commitment to their new country of residence, or to streamline administrative processes related to visas and international travel.

Acquiring Foreign Citizenship and Passport Surrender

When an Indian citizen acquires foreign citizenship, surrendering their Indian passport becomes a legal obligation. This isn’t merely a procedural step; it’s a requirement under Indian nationality law, preventing dual citizenship (with limited exceptions). The process ensures alignment with the laws of both countries involved.

Upon receiving confirmation of foreign citizenship, individuals must initiate the passport surrender process. Delaying this can lead to complications with travel documents and potential legal issues. The surrender certificate obtained after completing the process serves as official proof of renouncing Indian citizenship, crucial for various international transactions and applications. It’s vital to understand the specific regulations of the country granting citizenship regarding passport surrender timelines and requirements.

The Surrender Certificate: Importance and Use

The Surrender Certificate is a pivotal document issued by the Indian government upon successful surrender of an Indian passport. It serves as definitive proof that you have relinquished your Indian citizenship, a crucial requirement for completing naturalization processes in your new country of residence. This certificate isn’t just a formality; it’s often a mandatory submission for visa applications, permanent residency, and citizenship approvals abroad.

Furthermore, the Surrender Certificate is valuable for various administrative purposes, such as opening bank accounts, obtaining driver’s licenses, and registering property in your adopted country. Keeping the original certificate in a secure location is paramount, as obtaining a duplicate can be a lengthy and complex process. It’s a tangible confirmation of your legal status and a key component of your international identity.

Locating the Indian Passport Surrender Application Form PDF

Indian passport surrender forms are readily available online, primarily through official government channels, ensuring authenticity and preventing reliance on potentially outdated sources.

Official Government Website for the Form

The primary and most reliable source for obtaining the Indian Passport Surrender Application Form PDF is the official website of the Ministry of External Affairs (MEA), Government of India. Specifically, navigate to the section dedicated to passport services, often found under the “Services” or “Passport” tab. Look for a dedicated link labeled “Surrender of Indian Passport” or similar phrasing.

This official portal guarantees you are accessing the most current version of the form, minimizing the risk of rejection due to outdated documentation. The MEA website typically provides downloadable PDFs in multiple formats, ensuring compatibility across various devices. Be cautious of third-party websites claiming to offer the form, as these may contain inaccuracies or be attempts at phishing. Always verify the URL begins with “https://passportindia.gov.in” or a similar official government domain to ensure authenticity and data security. Direct access to the form streamlines the surrender process.

Downloading the PDF Form

Once you’ve located the Indian Passport Surrender Application Form on the official MEA website, downloading it is a straightforward process. Typically, the form is available as a direct PDF download link. Clicking this link will initiate the download to your computer or mobile device. Ensure you have a PDF reader installed, such as Adobe Acrobat Reader, to open and view the downloaded file.

After downloading, verify the file’s integrity by checking its size and ensuring it opens without errors. Save the PDF to a secure location on your device for easy access during the application process. It’s advisable to download a fresh copy each time you begin a new application to guarantee you’re using the latest version. Avoid downloading the form from unofficial sources, as these may contain malware or outdated information, potentially causing delays or rejection of your application.

Alternative Sources for the Form (Cautionary Note)

While the official MEA website is the most reliable source for the Indian Passport Surrender Application Form PDF, you might encounter it on other websites; However, exercising extreme caution is crucial when utilizing these alternative sources; Numerous unofficial sites may host outdated versions of the form, potentially leading to application rejection due to incorrect information or formatting.

Furthermore, some third-party websites may harbor malicious software disguised as the application form. Downloading from such sources poses a significant security risk to your device and personal data. Always prioritize the official government portal to safeguard against these threats. If you must use an alternative source, thoroughly scan the downloaded file with a reputable antivirus program before opening it. Remember, verifying the authenticity of the form is your responsibility.

Completing the Indian Passport Surrender Application Form

Indian motorcycle customization mirrors the detailed process of completing the surrender form; meticulous attention to required documents and accurate section completion is vital.

Required Documents Checklist

Successfully surrendering your Indian passport necessitates a comprehensive collection of supporting documentation. First, the original Indian passport requiring surrender is absolutely essential. A self-attested photocopy of the passport’s first and last pages, alongside any pages containing endorsements or observations, must also be included.

Proof of foreign citizenship is crucial; this can be a copy of your foreign passport, naturalization certificate, or Overseas Citizen of India (OCI) card. An affidavit, as per the specified format, declaring how the passport was obtained and the reasons for surrender, is also mandatory. Two recent passport-sized photographs, adhering to the strict photograph specifications, are required.

Furthermore, a self-attested copy of the page of your present foreign passport or other valid foreign travel document containing your visa for India is needed. Finally, ensure you have proof of address, such as a utility bill or bank statement, and the prescribed application fee payment receipt.

Filling Out the Application Form – Section-by-Section Guide

The Indian passport surrender application form demands meticulous completion. Begin with Part A, providing personal details like name, date of birth, and address – ensure consistency with existing records. Section B requires passport details: passport number, issue date, and place of issue. Accurately declare your current citizenship status in Part C, specifying the country and date of acquisition.

Part D focuses on reasons for surrender; clearly state your reason – acquisition of foreign citizenship is common. In Part E, provide details of your foreign passport or citizenship document. Ensure all entries are legible and match supporting documents.

The declaration section requires your signature and date. Double-check all information before signing, as inaccuracies can cause delays. Remember to use black ink and avoid overwriting. A neatly completed form significantly streamlines the surrender process, minimizing potential complications.

Photograph Specifications

Recent passport-sized photographs are crucial for your Indian passport surrender application. The photograph must be color, with a white background, measuring precisely 51mm x 51mm (2 inches x 2 inches). Your face should occupy 70-80% of the photograph, ensuring clear visibility.

Avoid wearing sunglasses or any head covering unless for religious reasons, and even then, the face must be fully visible. The photograph should be a clear, front view of your face, with neutral expression and eyes open. Ensure there are no shadows or glare on your face.

Photos must be high-quality, without any pixelation or damage. Do not staple or write on the photograph. Typically, two identical photographs are required. Adhering to these specifications prevents rejection of your application due to photograph discrepancies, ensuring a smoother surrender process.

Affidavit Requirements

An affidavit is often a mandatory component of the Indian passport surrender application, particularly when surrendering due to foreign citizenship acquisition. This sworn statement confirms the reasons for surrender and your commitment to relinquishing Indian citizenship.

The affidavit must be drafted on non-judicial stamp paper, the value of which varies by state. It should clearly state your name, passport number, date of birth, and details of your acquired foreign citizenship, including the date of acquisition.

The affidavit needs to be notarized by a public notary. It must explicitly declare that all information provided is true and correct to the best of your knowledge. Some regional passport offices may provide a specific affidavit template; checking their website is advisable. Ensure the affidavit is signed and dated correctly.

Submission Process and Fees

Passport surrender applications, along with required documents and the applicable fee (as of 02/07/2026), must be submitted to designated Passport Seva Kendras.

Where to Submit the Application

Submitting your Indian passport surrender application requires careful attention to the designated locations. Generally, applications are accepted at Passport Seva Kendras (PSKs) located across India. These centers are equipped to handle the surrender process and ensure proper documentation is received. It’s crucial to schedule an appointment online through the official Passport India website before visiting a PSK, as walk-in submissions are typically not permitted.

Additionally, Indian embassies, high commissions, and consulates abroad are authorized to accept surrender applications from Indian citizens residing overseas. The specific procedures and required documents may vary slightly depending on the location, so it’s advisable to check the respective embassy/consulate’s website for detailed instructions. Ensure you have all necessary paperwork, including the completed application form, original passport, and any supporting documents, before your appointment to avoid delays.

Passport Surrender Fee Details (as of 02/07/2026)

As of today, February 7th, 2026, the fee for surrendering an Indian passport is INR 5,000 (approximately $60 USD, exchange rates may apply). This fee is non-refundable and must be paid at the time of application submission. Accepted modes of payment typically include cash, credit/debit cards, and demand drafts drawn in favor of the Passport Officer at the respective Passport Seva Kendra (PSK) or Indian embassy/consulate.

It’s important to verify the current fee amount on the official Passport India website before submitting your application, as fees are subject to change. Ensure you obtain a valid receipt as proof of payment, as it will be required for processing your surrender certificate. Failure to pay the correct fee may result in the rejection of your application, causing unnecessary delays. Keep the payment receipt safe for your records.

Processing Time for Surrender Applications

The typical processing time for Indian passport surrender applications currently ranges from 30 to 60 days from the date of successful application submission, as of February 7th, 2026. However, this timeframe is an estimate and can vary depending on several factors, including the volume of applications being processed at the specific Passport Seva Kendra (PSK) or Indian embassy/consulate, and any potential verification requirements.

Complex cases, or those requiring additional scrutiny, may take longer to process. Applicants are encouraged to regularly check their application status online through the Passport India portal using their application reference number. While expedited processing isn’t generally available, submitting a complete and accurate application with all required documents can help minimize potential delays. Patience is advised throughout the process.

Post-Submission and Certificate Issuance

Following submission, track your application online; upon approval, the surrender certificate is issued, finalizing the process and confirming passport relinquishment.

Tracking Your Application Status

After submitting your Indian passport surrender application, diligently monitoring its progress is crucial for peace of mind and timely processing. The official government portal provides a dedicated tracking system, allowing applicants to check the status online using their application reference number or passport details.

Regularly checking the status helps you stay informed about each stage – from initial receipt and verification to processing and final certificate issuance. While the processing time varies, consistent tracking minimizes uncertainty. Be prepared to have your application reference number readily available, as it’s essential for accessing the tracking information.

The online tracking system typically displays updates regarding document verification, police verification (if applicable), and the overall progress of your application. If you encounter any discrepancies or delays, contacting the relevant passport office with your application details is recommended for clarification and assistance.

Receiving the Surrender Certificate

Upon successful processing of your Indian passport surrender application, the Surrender Certificate – a vital document confirming the cancellation of your Indian citizenship – will be issued. This certificate is typically dispatched via registered post to the address provided in your application form. Ensure the address is accurate and accessible to avoid delivery issues.

Delivery timelines vary depending on your location and postal service efficiency. Regularly check your postal deliveries and be prepared to sign for the certificate upon arrival. Once received, carefully verify all details on the certificate, including your name, passport number, and date of surrender, for accuracy.

If any discrepancies are found, immediately contact the issuing passport office for correction. Safeguard the Surrender Certificate as it serves as crucial proof for various legal and administrative processes related to your foreign citizenship or residency.

What to Do with Your Surrendered Passport

After successfully surrendering your Indian passport and receiving the official Surrender Certificate, it’s crucial to understand the handling of your former travel document. The surrendered passport is typically cancelled by the issuing authority and returned to you with a clear indication of its invalidity – often with a hole punched through it.

While the passport is no longer valid for travel, it’s essential to retain it securely alongside your Surrender Certificate. This document may be requested as supporting evidence when applying for visas, residency permits, or citizenship in your new country of residence.

Do not attempt to use the surrendered passport for any purpose, as it is officially invalidated. Properly storing both the cancelled passport and the Surrender Certificate ensures a smooth process for future immigration or citizenship-related matters.

Common Mistakes to Avoid

Carefully review all documentation, ensuring completeness and accuracy to prevent delays; incorrect submissions, incomplete forms, and improper fee payments are frequent errors.

Incorrect Document Submission

Submitting an incomplete set of required documents is a primary cause for application rejection or significant processing delays. The surrender process demands meticulous attention to detail regarding supporting paperwork. Ensure all documents are self-attested copies, as originals may not be returned. Commonly missed items include proof of foreign citizenship – a copy of the foreign passport or naturalization certificate – and address proof as per current regulations.

Furthermore, discrepancies between the information provided in the application form and the supporting documents will raise red flags. For example, name variations or conflicting dates of birth must be rectified before submission. Always cross-reference each document against the application to guarantee consistency. Failure to do so can lead to extensive verification procedures and prolonged waiting times. Remember to check the official guidelines for the most up-to-date document checklist.

Incomplete Application Form

An incomplete Indian passport surrender application form is a frequent reason for processing delays or outright rejection. Every section must be filled accurately and comprehensively, leaving no fields blank. Even seemingly minor omissions, such as a missing signature or an unstated previous address, can cause complications. Pay close attention to the instructions accompanying the PDF form, as they detail specific requirements for each field.

Ensure all answers are truthful and consistent with supporting documentation. If a particular section doesn’t apply to your situation, clearly indicate “N/A” (Not Applicable) instead of leaving it empty. Double-check for typographical errors and ensure all entries are legible. A poorly completed form necessitates clarification requests from the passport authorities, significantly extending the overall processing time. Thoroughness is key to a smooth surrender process.

Incorrect Fee Payment

Paying the incorrect passport surrender fee is a common error that leads to application rejection. As of 02/07/2026, the specific fee amount must be verified on the official government website before submitting your application. Ensure you are paying the fee applicable to your specific surrender scenario, as different circumstances may incur varying charges. Acceptable payment methods are clearly outlined in the application instructions; using an unapproved method will render your payment invalid.

Retain a copy of your payment receipt as proof of transaction. This receipt must be securely attached to your application form. Any discrepancies between the amount paid and the required fee, or a missing payment receipt, will result in your application being returned. Always double-check the fee details and payment method to avoid unnecessary delays and complications in the surrender process.

naked and famous fit guide

Naked and Famous Fit Guide: A Comprehensive Overview (Updated 02/07/2026)

Naked and Famous Denim offers diverse fits, from super slim Skinny Guy to roomy True Guy, catering to various preferences and body types; explore detailed sizing!

Naked and Famous Denim has rapidly become a celebrated name within the denim community, renowned for its commitment to quality, innovative fabrics, and unique fits. Originating in Montreal, Canada, the brand distinguishes itself by offering a wide spectrum of denim options, ranging from classic indigo washes to experimental and avant-garde materials like reflective, corduroy, and even plant-based fabrics.

What truly sets Naked and Famous apart is their dedication to providing a diverse range of fits designed to accommodate various body types and style preferences. They don’t shy away from offering both incredibly slim silhouettes and more relaxed, traditional cuts. Understanding their sizing philosophy and the nuances of each fit is crucial for finding the perfect pair. The brand consistently emphasizes checking individual product page size charts and utilizing available resources, like fit videos, to ensure an accurate and satisfying purchase.

Understanding Naked and Famous Sizing Philosophy

Naked and Famous Denim employs a sizing system that often differs from conventional denim brands, necessitating careful attention to detail. Their approach prioritizes actual measurements over relying solely on traditional waist sizes. It’s common for their tagged size to be smaller than what one might typically wear, particularly in fits like the Easy Guy where a size up is frequently recommended.

A key aspect of their philosophy is acknowledging potential shrinkage after washing. Many of their fabrics, especially raw denim, will contract upon the first wash, so factoring this into your initial size selection is vital. Furthermore, discrepancies between tag sizes and actual measurements can occur, reinforcing the importance of consulting the specific size chart provided on each product page. They strongly encourage customers to measure themselves accurately and compare those measurements to the chart for the best fit.

Key Fit Styles Explained

Naked and Famous offers a spectrum of fits—Skinny, Easy, Straight, and True Guy—each designed with a unique silhouette and varying degrees of roominess.

Skinny Guy Fit: A Detailed Look

The Skinny Guy fit from Naked and Famous represents a modern, streamlined aesthetic, designed for those who prefer a close-to-the-body silhouette. This style features a medium rise, sitting comfortably on the waist, and maintains a slim cut throughout the entire leg – from thigh to ankle; It’s not excessively tight, allowing for comfortable movement while still delivering a distinctly fashionable, tapered look.

This fit is ideal for individuals seeking a contemporary style and works particularly well with various footwear options, including sneakers, boots, and even more refined dress shoes. The Skinny Guy is a versatile choice, easily dressed up or down depending on the occasion. It’s a foundational style within the Naked and Famous collection, consistently popular for its flattering and adaptable design.

Easy Guy Fit: Comfort and Style

The Naked and Famous Easy Guy fit strikes a perfect balance between comfort and contemporary style, offering a relaxed yet refined silhouette. Designed for everyday wear, this fit provides ample room for movement without sacrificing a modern aesthetic. It’s characterized by a comfortable rise and a slightly tapered leg opening, creating a versatile look suitable for various body types.

Often described as a modern classic, the Easy Guy is a popular choice for those seeking a more laid-back alternative to slimmer fits. It pairs exceptionally well with casual footwear like sneakers or boots, and can be easily dressed up with a button-down shirt. The Easy Guy is a testament to Naked and Famous’ commitment to creating denim that feels as good as it looks, offering both style and practicality.

Straight Guy Fit: Classic and Relaxed

The Naked and Famous Straight Guy fit embodies timeless denim style, offering a classic silhouette that remains perpetually in fashion. This fit provides a consistent straight line from the hip through to the ankle, delivering a relaxed yet structured appearance. It’s a versatile option, appealing to those who prefer a traditional denim aesthetic without feeling constricted.

Designed for comfort and ease of movement, the Straight Guy is ideal for everyday wear and suits a wide range of body types. It’s a particularly good choice for individuals who prefer a more traditional fit or those seeking a comfortable alternative to slimmer cuts. Pair it with anything from t-shirts and sneakers to button-downs and boots for a versatile and effortlessly cool look. It’s a foundational piece for any denim collection.

True Guy Fit: Roomy and Traditional

The Naked and Famous True Guy fit represents a return to classic, comfortable denim styling. Characterized by its straight fit and generous cut, this style offers ample room throughout the seat and thighs, providing a relaxed and traditional feel. It’s designed for those who prioritize comfort and a looser silhouette, reminiscent of vintage workwear.

Featuring a mid-rise waist and a straight leg opening, the True Guy is a versatile option suitable for various body types. It’s an excellent choice for individuals who prefer a more relaxed fit or those seeking a comfortable alternative to slimmer, more modern cuts. This fit allows for ease of movement and pairs well with a range of footwear, from work boots to casual sneakers, creating a timeless and effortlessly cool aesthetic.

Decoding the Size Chart

Naked and Famous provides detailed size charts on each product page, alongside helpful videos demonstrating accurate measurement techniques for optimal fit selection.

Waist Measurement Guide

Accurately measuring your waist is crucial for finding the perfect Naked and Famous denim fit. Begin by locating your natural waistline – typically, this is the narrowest part of your torso, or where you comfortably bend sideways. Ensure you’re standing relaxed, not flexing or holding your breath.

Use a flexible measuring tape, and wrap it snugly around your waist, keeping it parallel to the floor. Avoid pulling the tape too tight, as this will result in an inaccurate measurement. Record the measurement in inches. It’s best to have someone else assist you for greater precision.

Compare your waist measurement to the Naked and Famous size chart available on each product page. Remember that some fits, like the Easy Guy, may recommend sizing up, especially if you prefer a more comfortable fit. Consider whether you plan to wear the jeans on your waist or hips, as this will influence your size selection.

Inseam Measurement Guide

Determining your correct inseam is vital for achieving the desired jean length with Naked and Famous denim. The inseam is measured from the crotch of your pants down to the bottom hem. For an accurate measurement, wear shoes similar to those you’ll typically pair with your jeans.

Have a friend assist you, or carefully measure a well-fitting pair of pants. Start at the crotch seam and extend the measuring tape down the inside of the leg to where you want the hem to fall – typically at the top of your shoe. Record this measurement in inches.

Consult the Naked and Famous size chart on the product page, as inseam lengths can vary between styles. Consider if you prefer a stacked, broken-in, or cuffed look, adjusting your inseam choice accordingly. Remember that raw denim may shrink slightly after washing.

Knee Measurement Guide

Accurately measuring your knee circumference is crucial when selecting the right Naked and Famous fit, particularly for styles like the Easy Guy or True Guy which offer more room in the thigh. Lay your favorite, well-fitting pair of jeans flat on a surface.

Measure 12 inches down from the crotch along the inside seam of the leg. At this 12-inch mark, measure straight across the leg opening to determine the knee width. Ensure the measuring tape is taut but not overly stretched.

Record this measurement in inches. Compare your knee measurement to the Naked and Famous size chart provided on each product page. This will help you determine if a particular fit will accommodate your thigh and knee size comfortably. Consider your preference for a slimmer or more relaxed fit around the knee.

Common Sizing Issues & Solutions

Naked and Famous sizing can vary; expect discrepancies, potential shrinkage after washing, and differences between tag sizes and actual measurements—consult charts carefully!

Sizing Discrepancies: What to Expect

When navigating Naked and Famous denim sizing, it’s crucial to understand that inconsistencies can occur. Many customers have reported experiencing variations between the tagged size and the actual fit of the jeans. This isn’t necessarily a defect, but rather a characteristic of the brand’s production process and the nature of raw denim.

These discrepancies often stem from the unique qualities of the denim itself, including slight variations in the fabric’s weave and shrinkage potential. It’s common to find that a size 36 tagged jean might fit more like a true 38, or vice versa. Therefore, relying solely on the tag size isn’t recommended.

To mitigate potential issues, always prioritize referencing the detailed size charts provided on each product page. Comparing your measurements to the chart is the most reliable way to determine the appropriate size. Be prepared to potentially size up or down based on these measurements, and don’t hesitate to consult online fit videos for visual guidance.

Dealing with Shrinkage After Washing

Naked and Famous denim, particularly raw or unsanctioned fabrics, is known to shrink upon the first wash. This is a natural characteristic of untreated denim and isn’t a flaw. Expect approximately 1-2 inches of shrinkage in both the waist and length, though this varies depending on the fabric weight and wash method.

To minimize excessive shrinkage, it’s recommended to wash your jeans inside out in cold water on a gentle cycle. Avoid using hot water or harsh detergents. Tumble drying is strongly discouraged, as it significantly accelerates shrinkage. Instead, hang your jeans to dry, preferably flat or on a sturdy hanger.

If you anticipate significant shrinkage, consider sizing up initially to account for the reduction in size after washing. Remember that subsequent washes will result in less shrinkage than the first. Understanding this process is key to achieving the perfect fit with your Naked and Famous jeans.

Tag Size vs. Actual Measurements

Naked and Famous sizing can sometimes differ from standard tagged sizes. The tag size often reflects the pre-shrinkage measurements, meaning the jeans may initially feel slightly larger than expected. It’s crucial not to rely solely on the tag when determining your fit. Always prioritize comparing your actual body measurements – waist and inseam – with the detailed size charts provided on each product page.

Many customers report discrepancies, finding their tagged size doesn’t perfectly align with their usual jean size. This is particularly common with raw denim. Referencing online fit videos can also be incredibly helpful, as they visually demonstrate how different fits look on various body types.

Ultimately, focusing on actual measurements, rather than the tagged size, will lead to a more accurate and satisfying fit with your Naked and Famous denim.

Fit Recommendations Based on Body Type

For slim builds, Skinny Guy offers a sleek silhouette, while athletic builds benefit from Easy Guy’s comfort, and larger builds find room in True Guy.

Best Fits for Slim Builds

Individuals with a slimmer physique generally excel in fits designed to accentuate their natural shape without appearing overly constricting. The Naked and Famous Skinny Guy fit is a prime example, offering a medium rise and a consistently slim leg opening throughout its entire length. This provides a streamlined aesthetic, hugging the legs comfortably without feeling excessively tight.

However, for those who prefer a touch more room, the Easy Guy fit can also be a fantastic option. While still relatively tailored, it provides a slightly more relaxed experience, particularly around the thighs and knees. This allows for greater freedom of movement while maintaining a modern, stylish appearance. Consider a lower rise for a contemporary look, or a mid-rise for a classic feel. Remember to consult the specific product page size chart for the most accurate measurements, as variations can occur between different washes and fabrics.

Best Fits for Athletic Builds

Those with athletic builds, characterized by broader shoulders and well-developed legs, require jeans that accommodate their physique without feeling restrictive. The Naked and Famous Straight Guy fit often proves ideal, offering a classic, relaxed silhouette with ample room in the seat and thighs. This prevents the jeans from appearing too tight or strained across the legs, allowing for comfortable movement and a balanced proportion.

Alternatively, the True Guy fit provides even more space, boasting a straight fit with extra room throughout. This is particularly beneficial for individuals with larger thighs. However, be mindful of the waist; athletic builds sometimes require a size up to ensure a comfortable fit. Always prioritize checking the product page size chart and considering the fabric composition, as some materials have less stretch than others. A visit to the Montreal flagship store could also provide personalized fitting advice.

Best Fits for Larger Builds

For individuals with larger builds, prioritizing comfort and a flattering fit is paramount. The Naked and Famous True Guy fit emerges as a strong contender, offering a roomy and traditional silhouette with substantial space in the seat and thighs. This prevents the jeans from feeling constricting or appearing disproportionate. The mid-rise also contributes to a more comfortable and secure fit.

The Easy Guy fit can also be suitable, providing a balance between comfort and style. However, careful attention to the size chart is crucial. It’s often advisable to measure accurately and potentially size up, especially in the waist. Be aware of potential shrinkage after washing, and consider a fit video for visual guidance. Visiting the Montreal flagship store allows for expert assistance in finding the perfect fit, ensuring both comfort and a polished appearance.

Where to Find the Most Accurate Sizing Information

Product page size charts, online fit videos, and a visit to the Montreal flagship store provide the most reliable Naked and Famous sizing guidance.

Utilizing the Product Page Size Charts

Naked and Famous prioritizes providing detailed sizing information directly on each product page, recognizing that variations exist between styles and fabrics. These charts aren’t simply conversions; they represent the actual garment measurements, allowing for a more precise fit prediction. Before making a purchase, carefully review the chart associated with the specific jeans you’re considering.

Pay close attention to measurements like waist and inseam, but also consider the ‘knee’ measurement for a comprehensive understanding of the leg opening. Remember that raw denim will shrink after the initial wash, so factoring in potential shrinkage is crucial. The product pages often include notes regarding the expected shrinkage percentage for the particular denim weight and weave. Utilizing these charts diligently minimizes the risk of ordering an incorrect size and ensures a satisfying denim experience.

Referencing Online Fit Videos

Naked and Famous understands that static size charts aren’t always enough; visualizing the fit is incredibly helpful. They actively create and share fit videos showcasing different styles on various body types. These videos demonstrate how each fit – Skinny Guy, Easy Guy, Straight Guy, and True Guy – looks in motion and provides a realistic representation of the silhouette.

Pay attention to how the jeans sit on the hips, the amount of room in the thighs, and the break at the ankles. Observing these details can significantly improve your sizing decision. Furthermore, many denim enthusiasts and retailers also create independent fit videos, offering diverse perspectives and body types. Supplementing the official videos with these resources provides a well-rounded understanding of the Naked and Famous fit philosophy and helps you choose the perfect pair.

Visiting the Montreal Flagship Store

For the ultimate Naked and Famous fit experience, a visit to their Montreal flagship store is highly recommended. This allows for personalized, in-person assistance from knowledgeable staff who can guide you through the various fits and sizes. They can assess your body type and recommend styles that will complement your build, ensuring a perfect fit.

The flagship store offers the broadest selection of Naked and Famous denim, including exclusive washes and collaborations. You can try on multiple sizes and styles to compare and contrast, something difficult to replicate online. The staff can also provide expert advice on care instructions to maintain the fit and longevity of your jeans. It’s a truly immersive experience for any denim enthusiast!

Care Instructions to Maintain Fit

Maintaining the fit of your Naked and Famous denim requires careful attention to washing and drying procedures. To minimize shrinkage, especially with unsanforized denim, cold water washes are crucial. Always wash your jeans inside out to protect the indigo dye and preserve the color. Avoid using harsh detergents or bleach, opting instead for a gentle cycle and a denim-specific wash.

Line drying is highly recommended to prevent excessive shrinkage and maintain the original shape. If using a dryer, select the lowest heat setting and remove the jeans while slightly damp. Frequent washing isn’t necessary; spot cleaning and airing out can extend the time between washes. Proper care ensures your Naked and Famous jeans retain their fit and quality for years to come.

the curious case of benjamin button pdf

The Curious Case of Benjamin Button PDF: A Comprehensive Guide (Updated 02/07/2026)

Today, February 7th, 2026, accessing F. Scott Fitzgerald’s poignant tale in PDF format is remarkably straightforward, with options ranging from Litres ebook services to free online reading platforms.

F. Scott Fitzgerald’s “The Curious Case of Benjamin Button,” initially published in 1922, presents a uniquely compelling narrative. It diverges from conventional storytelling by chronicling the life of Benjamin Button, a man who is born old and ages in reverse. This fantastical premise allows Fitzgerald to explore profound themes of time, aging, societal expectations, and the human condition.

The story, often encountered today as a readily available PDF, captivates readers with its imaginative concept and poignant observations. Its enduring appeal has been amplified by the acclaimed 2008 film adaptation, bringing wider recognition to Fitzgerald’s original work. Finding the story in PDF format allows for convenient access and study, enabling readers to delve into the intricacies of Fitzgerald’s prose and the story’s philosophical undercurrents. The tale’s exploration of life’s journey, viewed through an unconventional lens, continues to resonate with audiences nearly a century after its first publication.

Historical Context of the Publication

“The Curious Case of Benjamin Button” emerged during the vibrant, yet turbulent, Jazz Age of the 1920s. Fitzgerald, a defining voice of this era, captured the societal shifts and disillusionment following World War I. The story’s initial appearance in Scribner’s Magazine in 1922 reflects a period of experimentation in literature and a questioning of traditional norms.

Interestingly, the story’s opening line references 1860, deliberately setting a historical stage before the modern era. Today, accessing the story as a PDF allows readers to contextualize it within this specific timeframe. The availability of the story in PDF format facilitates academic study and appreciation of its literary significance. Understanding the Jazz Age’s influence – its exuberance and underlying anxieties – enriches the reading experience, revealing layers of meaning within Fitzgerald’s unique narrative structure and thematic concerns.

Availability of the PDF Version

Currently, obtaining a PDF copy of “The Curious Case of Benjamin Button” is surprisingly accessible. The ebook service Litres offers the story within the “The Curious Case of Benjamin Button and Selected Tales of the Jazz Age Collection” for download. Numerous websites also provide free online reading options, though caution regarding source legitimacy is advised.

Several sources offer the story as a PDF file, ranging in size around 218 KB. When downloading the PDF, prioritize reputable platforms to ensure file safety and avoid malware. As of February 2nd, 2026, OpenAI’s ChatGPT can even assist in discussing the story, though it doesn’t directly provide the PDF itself. Remember to verify the authenticity of any downloaded file before opening it.

Understanding the Narrative

Fitzgerald’s captivating story, available in PDF format, explores a life lived in reverse, prompting reflection on time, aging, and societal norms.

F. Scott Fitzgerald’s “The Curious Case of Benjamin Button,” readily available as a PDF download, presents the extraordinary life of Benjamin Button, born with the physical appearance of an elderly man. He progressively grows younger throughout his existence, a stark contrast to the conventional aging process.

The narrative follows Benjamin’s journey as he navigates relationships, societal expectations, and personal identity, all while experiencing life backward. Initially, he’s cared for as an old man, then gradually adapts to younger stages, eventually experiencing childhood and infancy. His romance with Daisy is central, though complicated by their diverging ages and life stages.

The story, often found in collections like “The Curious Case of Benjamin Button and Other Stories,” explores themes of time’s passage, societal norms, and the human condition. Benjamin’s unique existence challenges conventional perceptions of life and aging, making it a thought-provoking and enduring tale.

Key Characters and Their Roles

Benjamin Button, the protagonist of Fitzgerald’s story – easily accessed as a PDF – is born old and ages in reverse, challenging societal norms and experiencing life uniquely. His journey is one of self-discovery amidst a world that doesn’t understand him.

Daisy represents conventionality and the constraints of societal expectations. Her relationship with Benjamin is pivotal, yet fraught with the difficulties arising from their differing ages and life stages. She embodies a longing for a traditional life.

Mr. and Mrs. Button, Benjamin’s parents, initially struggle to accept their son’s unusual condition, reflecting societal discomfort with difference. They attempt to raise him as normally as possible, despite the challenges. Other characters, encountered throughout Benjamin’s life, highlight the story’s themes of time and acceptance.

Themes Explored in the Story

The PDF version of “The Curious Case of Benjamin Button” powerfully explores several profound themes. Central is the concept of time and its relentless, often arbitrary, nature. Benjamin’s reversed aging forces a re-evaluation of life’s conventional trajectory.

Aging and mortality are also key, prompting reflection on the beauty and fragility of life. The story challenges societal norms surrounding age and appearance, questioning what constitutes a “normal” life.

Identity and acceptance are interwoven throughout, as Benjamin navigates a world that struggles to categorize him. His journey highlights the importance of self-acceptance and finding meaning despite societal pressures. Ultimately, Fitzgerald’s tale, readily available as a PDF, is a meditation on the human condition.

The Significance of Aging in Reverse

The core premise of “The Curious Case of Benjamin Button,” easily accessible in PDF format, is the exploration of aging in reverse, a concept brimming with symbolic weight. This unusual life path allows Fitzgerald to deconstruct conventional understandings of time, experience, and societal expectations.

Benjamin’s journey isn’t merely a biological anomaly; it’s a lens through which to examine the stages of life – infancy, childhood, adulthood – from a radically different perspective. The PDF reveals how his reversed aging impacts relationships, societal integration, and his own self-perception.

It forces a confrontation with the inevitability of decline, but experienced in an unconventional order. This unique narrative structure, readily available in the PDF version, elevates the story beyond a simple fantastical tale, transforming it into a poignant philosophical inquiry.

Exploring Different Versions & Formats

PDF versions of this story, alongside ebook formats, are readily available; Litres offers downloads, while free online options provide convenient access to Fitzgerald’s work.

The Original Short Story Publication

Fitzgerald’s “The Curious Case of Benjamin Button” initially appeared in print in 1922, published in the Smart Set magazine. This original publication predates the widely known 2008 film adaptation by decades, establishing the story’s enduring literary presence. Finding a direct PDF of the 1922 Smart Set issue is challenging, but numerous collections featuring the story have been digitized and are available.

Later, it was included in the 1935 anthology, “The Curious Case of Benjamin Button and Other Stories.” This collection, often found in PDF format, provides a convenient way to access the story alongside other Fitzgerald works. Several sources indicate a 218 KB PDF file exists containing the ebook version of this collection. Digital archives and online booksellers frequently offer these compiled editions, making the original story accessible in a modern, downloadable format.

PDF Availability on Litres

Litres, a prominent ebook service, offers “The Curious Case of Benjamin Button and Selected Tales of the Jazz Age Collection” for download. This provides a readily available PDF version of Fitzgerald’s story, bundled with other works reflecting the era. While Litres typically requires a purchase to access the PDF, it ensures a legally obtained and high-quality digital copy.

The platform’s user-friendly interface allows for easy navigation and download across various devices. Users can expect a professionally formatted PDF, preserving the integrity of the text. Checking Litres’ website directly is recommended for current pricing and availability, as offerings can change. This represents a reliable option for readers seeking a dedicated PDF of the story within a broader Fitzgerald collection.

Free Online Reading Options

These free options often present the text with potential formatting inconsistencies or the inclusion of advertisements. While convenient for a quick read, they may not provide the polished experience of a dedicated PDF. Always prioritize reputable sources and be mindful of copyright considerations when accessing literature online; Searching specifically for “read online” alongside the story title yields numerous results.

Downloading the PDF: Sources and Safety

While finding a legitimate, free PDF of “The Curious Case of Benjamin Button” can be challenging, several sources exist. Litres offers the ebook for purchase and download in PDF format. Be extremely cautious when downloading from unofficial websites, as these often harbor malware or viruses. Always scan downloaded files with reputable antivirus software before opening them.

Prioritize established ebook retailers and libraries for safe downloads. Avoid sites promising “free PDF downloads” without verifying their legitimacy. Consider the risks associated with copyright infringement when obtaining content from unverified sources. Protecting your digital security is paramount; a compromised device is a steep price to pay for a free ebook. Verify the file size and source before proceeding.

Analyzing Literary Elements

Fitzgerald’s masterful writing employs symbolism, first-person narration, and unique structural pacing to explore profound themes within this captivating, reverse-aging narrative.

Fitzgerald’s Writing Style

F. Scott Fitzgerald’s prose in “The Curious Case of Benjamin Button” is characterized by a deceptively simple elegance, masking complex thematic explorations. He masterfully blends a conversational tone with moments of profound philosophical insight, drawing readers into Benjamin’s extraordinary life. The narrative voice, delivered in the first person, creates an intimate connection, allowing us to experience the world through Benjamin’s uniquely reversed perspective.

Fitzgerald’s style isn’t overtly ornate; instead, it’s marked by precision and a subtle use of imagery. He avoids excessive description, focusing instead on conveying emotional resonance and the psychological impact of Benjamin’s aging process. This understated approach enhances the story’s poignant quality, making its exploration of time, mortality, and societal norms all the more impactful. The writing feels both timeless and distinctly rooted in the Jazz Age sensibility, reflecting Fitzgerald’s broader literary concerns.

Symbolism and Imagery

“The Curious Case of Benjamin Button” is rich with symbolism, most notably the reversed aging process itself, representing a challenge to conventional notions of time and life’s trajectory. Benjamin’s journey can be interpreted as a commentary on societal expectations and the fleeting nature of youth and beauty. Clocks and timepieces frequently appear, emphasizing the story’s preoccupation with temporality and the constraints it imposes.

Imagery related to childhood and old age is juxtaposed throughout, highlighting the absurdity of Benjamin’s existence and prompting reflection on the stages of life. The story’s setting, shifting through different eras, symbolizes the passage of time and the changing social landscape. Fitzgerald employs these symbolic elements not to offer definitive answers, but to provoke contemplation on the human condition and the complexities of existence.

The Use of First-Person Narration

Fitzgerald’s choice of a first-person narrator in “The Curious Case of Benjamin Button” is crucial to the story’s impact. The narrator, a friend of Benjamin’s, provides a detached yet intimate perspective on the extraordinary events unfolding. This narrative distance allows for both observation and emotional resonance, preventing the story from becoming overly sentimental or melodramatic.

The first-person perspective also lends a sense of authenticity and believability to the fantastical premise. By presenting the story as a recounted tale, Fitzgerald invites the reader to suspend disbelief and engage with the narrative on a more personal level. The narrator’s voice shapes our understanding of Benjamin, offering insights into his character and experiences while maintaining a degree of mystery.

The Story’s Structure and Pacing

“The Curious Case of Benjamin Button” employs a unique chronological structure, moving backward in time as Benjamin ages in reverse. This unconventional approach immediately captivates the reader and establishes the story’s central paradox. Fitzgerald masterfully controls the pacing, dedicating significant portions to key periods in Benjamin’s life – his unconventional childhood, his societal integration, and his eventual decline into infancy.

The narrative isn’t linear; it jumps between significant life events, mirroring the fragmented nature of memory and the subjective experience of time. This deliberate pacing allows Fitzgerald to explore themes of societal expectations, love, and loss with nuanced depth. The story’s structure reinforces the central theme of defying conventional norms, both in life and in narrative form.

Connections to Other Works & Adaptations

Fitzgerald’s short story, deeply rooted in the Jazz Age, inspired a notable 2008 film adaptation, prompting comparisons between the original narrative and its cinematic interpretation.

Relationship to the Jazz Age

F. Scott Fitzgerald’s “The Curious Case of Benjamin Button,” though not explicitly detailing roaring parties or flapper culture, is intrinsically linked to the Jazz Age through its thematic exploration of societal norms and the fleeting nature of time. Published in 1922, the story emerged during a period of significant social upheaval and a rejection of Victorian constraints.

The Jazz Age represented a liberation from tradition, a fascination with youth, and a pursuit of pleasure – concepts subtly mirrored in Benjamin’s reversed aging process. His life challenges conventional expectations of growth and maturity, reflecting the era’s questioning of established order. The story’s melancholic tone, however, also hints at the disillusionment that lay beneath the surface of the Jazz Age’s exuberance.

Fitzgerald, a defining voice of the era, captured the anxieties and contradictions of a generation grappling with modernity, and this undercurrent resonates within Benjamin Button’s unusual existence, making it a compelling reflection of its time.

The 2008 Film Adaptation

David Fincher’s 2008 film adaptation of “The Curious Case of Benjamin Button,” starring Brad Pitt, significantly broadened the story’s reach and introduced it to a new generation. While the PDF version of the original short story offers a concise and introspective experience, the film expands upon Fitzgerald’s narrative, adding layers of romantic drama and visual spectacle.

The film delves deeper into Benjamin’s relationships, particularly his complex love story with Daisy, providing a more extensive exploration of themes like fate, loss, and the acceptance of mortality. Though diverging from the source material in several aspects, the adaptation maintains the core philosophical questions posed by Fitzgerald’s tale.

Accessing the PDF allows for a direct comparison between the original vision and Fincher’s interpretation, highlighting the challenges and creative choices involved in translating a literary work to the screen. Both versions offer unique and compelling perspectives on this extraordinary life story.

Comparisons Between the Story and the Film

Examining the PDF of Fitzgerald’s original short story alongside David Fincher’s 2008 film reveals substantial differences in scope and emphasis. The story, readily available in PDF format, is a concise, almost fable-like exploration of aging in reverse, focusing on the societal oddities and philosophical implications. The film, however, expands this into a sweeping romantic epic spanning decades.

While both versions retain the central premise, the film adds significant character development and subplots absent from the original text; The PDF showcases Fitzgerald’s succinct prose and understated tone, contrasting with the film’s more dramatic and visually-driven approach.

Reading the PDF first provides a clearer understanding of Fitzgerald’s core ideas, allowing viewers to appreciate how the film interprets and elaborates upon them. Both mediums offer compelling experiences, but cater to different preferences for narrative depth and stylistic presentation.

ChatGPT and AI’s Role (February 2, 2026 Update)

OpenAI’s ChatGPT, updated February 2nd, 2026, can now analyze the “Curious Case of Benjamin Button” PDF, facilitating insightful discussions and literary exploration.

OpenAI’s ChatGPT and Literary Analysis

Leveraging the power of advanced AI, OpenAI’s ChatGPT, as of February 2nd, 2026, presents a novel approach to dissecting complex literary works like F. Scott Fitzgerald’s “The Curious Case of Benjamin Button.” Users can now upload or paste text from the PDF version of the story, prompting ChatGPT to perform detailed analyses. This includes identifying key themes – such as the nature of time, aging, and societal expectations – and exploring the symbolism woven throughout the narrative.

ChatGPT excels at character analysis, offering insights into Benjamin Button’s unique journey and the motivations of supporting characters. It can also deconstruct Fitzgerald’s distinctive writing style, pinpointing elements of imagery and narrative structure. Furthermore, the AI can facilitate comparative analyses, drawing connections between “Benjamin Button” and other works from the Jazz Age or exploring the story’s impact on the 2008 film adaptation. The conversational format allows for dynamic exploration, enabling users to refine their queries and delve deeper into specific aspects of the text, enhancing comprehension and critical thinking.

Using ChatGPT to Discuss the Story

Engaging with “The Curious Case of Benjamin Button” through ChatGPT, updated as of February 2nd, 2026, unlocks interactive learning possibilities. Users can pose direct questions about the PDF text – for example, “Explain the significance of Benjamin’s relationship with Daisy,” or “How does Fitzgerald use first-person narration to impact the reader’s perspective?” ChatGPT’s conversational ability fosters a dynamic dialogue, allowing for clarification and deeper exploration of nuanced themes.

Beyond simple question-and-answer sessions, ChatGPT can facilitate debates and role-playing exercises. Imagine prompting the AI to argue for or against a particular interpretation of the story’s ending. It can also assist in crafting essays or presentations, providing outlines, suggesting supporting evidence from the text, and even offering feedback on writing style. The tool’s accessibility makes literary analysis more inclusive, empowering students and enthusiasts alike to engage with Fitzgerald’s masterpiece in a meaningful and personalized way, fostering a richer understanding of the narrative’s complexities.

The Future of AI and Literature

Looking ahead, the intersection of AI – exemplified by OpenAI’s ChatGPT, updated February 2nd, 2026 – and literary study promises transformative changes. While currently assisting with analysis of texts like “The Curious Case of Benjamin Button” PDF, AI’s role will likely evolve. Future models may generate personalized reading experiences, adapting the narrative based on user preferences or even creating interactive versions of classic stories.

However, ethical considerations remain paramount. Ensuring AI doesn’t replace critical thinking or diminish the value of human interpretation is crucial. The potential for AI to create “deepfake” literature, mimicking authorial styles, also raises concerns about authenticity. Ultimately, the goal should be to leverage AI as a tool to enhance our engagement with literature, not to supplant it, fostering a deeper appreciation for the art of storytelling and the enduring power of works like Fitzgerald’s poignant tale.

Resources and Further Reading

Explore the full text online, alongside academic articles and criticism, plus related works by F. Scott Fitzgerald to deepen your understanding.

Finding the Full Text Online

Locating a digital copy of “The Curious Case of Benjamin Button” is surprisingly accessible in 2026. Several online platforms offer the story, often in PDF format, allowing for convenient reading across various devices. While dedicated ebook services like Litres provide downloadable versions – sometimes for a fee – numerous websites host the text for free online reading.

However, caution is advised when downloading PDFs from unfamiliar sources. Always prioritize reputable websites to avoid potential malware or compromised files. A quick search will reveal options, but verifying the source’s legitimacy is crucial. Remember that the story originally appeared in print collections, so searching for those editions can also yield results. ChatGPT, updated on February 2nd, 2026, can even assist in locating reliable links, though always double-check any provided URL.

Academic Articles and Criticism

Delving into scholarly analyses of “The Curious Case of Benjamin Button” reveals a wealth of critical perspectives. While a direct PDF of comprehensive academic articles isn’t always freely available, databases like JSTOR, Project MUSE, and Google Scholar offer access – often through institutional subscriptions. These resources contain essays exploring the story’s themes of aging, time, and societal norms.

Researchers frequently examine Fitzgerald’s narrative structure and symbolism, connecting the story to the Jazz Age and broader philosophical questions. ChatGPT, as of February 2nd, 2026, can summarize key arguments from these articles, aiding in research. However, relying solely on AI-generated summaries isn’t sufficient; consulting the original sources is vital for a nuanced understanding of the critical discourse surrounding this captivating tale.

Related Works by F. Scott Fitzgerald

Exploring Fitzgerald’s broader literary landscape enriches the reading experience of “The Curious Case of Benjamin Button.” His novel, The Great Gatsby, remains his most celebrated work, readily available in PDF format through various online retailers and libraries. Tender Is the Night offers another compelling exploration of societal disillusionment and personal struggles, also frequently found as a downloadable PDF.

Furthermore, the collection “F. Scott Fitzgerald and Six Other Stories,” containing “Benjamin Button,” provides context for the author’s stylistic evolution. Litres, as of today’s date, February 7th, 2026, offers digital collections including this story alongside others. ChatGPT can assist in comparing themes across these works, but accessing the full texts – often in PDF – is crucial for a complete appreciation of Fitzgerald’s genius.

Exploring the Author’s Life and Influences

F. Scott Fitzgerald’s life, steeped in the Jazz Age, profoundly shaped his writing, including “The Curious Case of Benjamin Button.” Born in 1896, his experiences with wealth, social class, and the changing American landscape permeate his work. Understanding his personal struggles – particularly his relationship with Zelda Sayre – provides valuable insight into the themes of longing and disillusionment present in the story, often accessible in PDF biographies.

The societal shifts of the early 20th century, the rise of consumerism, and the questioning of traditional values all influenced Fitzgerald’s perspective. Researching his life, readily available through online resources and downloadable PDFs, illuminates the context surrounding the story’s 1922 publication. ChatGPT can aid in exploring these connections, but primary source materials, including biographical PDFs, are essential for a nuanced understanding;

frigidaire ffcd2413us manual

Frigidaire FFCD2413US Dishwasher: A Comprehensive Guide

This guide details the Frigidaire FFCD2413US dishwasher, offering a 20-page PDF manual in English, averaging an 8․7 rating from seven reviewers․

The Frigidaire FFCD2413US is a 24-inch built-in dishwasher designed for efficient and reliable cleaning․ This comprehensive guide serves as a resource for owners, providing detailed instructions and information to maximize the appliance’s performance and lifespan․ Access to a readily available PDF manual, spanning 20 pages, ensures users have immediate access to support․

Currently boasting an average rating of 8․7 from seven user reviews, the FFCD2413US is a popular choice for households seeking a balance of features and affordability․ This guide will cover everything from initial setup and operation to maintenance, troubleshooting, and understanding its advanced capabilities․ Whether you’re a first-time dishwasher owner or a seasoned appliance user, this resource will help you get the most out of your Frigidaire dishwasher․

Overview of Features and Specifications

The Frigidaire FFCD2413US boasts several key features enhancing dishwashing performance․ Notably, it includes an Advanced Drying System utilizing a heating element for first-time drying results – detailed loading instructions are found in the owner’s manual․ This 24-inch built-in model offers a variety of wash cycles to accommodate different dish loads and soil levels․

The manual, available as a 20-page PDF, outlines complete specifications, including dimensions and weight․ Users benefit from access to guides and manuals for optimal operation․ While specific water and energy consumption details are within the manual, the appliance is designed with efficiency in mind․ Explore the manual for recommended detergent usage and cycle selections to achieve sparkling clean dishes․

Safety Precautions

Prior to operating the Frigidaire FFCD2413US dishwasher, carefully review the safety guidelines detailed within the owner’s manual․ Disconnect electrical power before performing any maintenance or cleaning, as outlined in the manual․ Avoid using harsh chemicals or abrasive cleaners, which could damage the appliance or pose a health risk – refer to the manual for approved cleaning agents․

Ensure proper grounding of the electrical connection to prevent shock hazards, a critical point covered in the installation section of the manual․ Keep children away from the dishwasher during operation and when detergents are present․ The manual provides specific warnings regarding detergent usage and potential hazards․ Always follow the loading instructions to prevent injury from sharp objects․

Installation and Setup

The Frigidaire FFCD2413US manual provides detailed instructions for unpacking, water supply, electrical connections, and precise leveling for optimal performance․

Unpacking and Inspection

Carefully unpack your Frigidaire FFCD2413US dishwasher, referencing the owner’s manual for guidance․ Thoroughly inspect the appliance for any shipping damage before installation․ Check for dents, scratches, or broken parts․

Remove all packing materials, including tape, foam, and cardboard․ Ensure all accessories, such as spray arms, racks, and the manual itself, are present․ If any damage is discovered, immediately contact the retailer or Frigidaire customer support․

Retain the original packaging materials until you are satisfied with the dishwasher’s condition․ The manual emphasizes documenting any damage with photographs for a smoother claims process․ Proper inspection prevents future issues!

Water Supply Connection

Connecting the water supply to your Frigidaire FFCD2413US requires careful attention․ Consult the owner’s manual for detailed diagrams and instructions․ Typically, a ½-inch NPT male connector is needed for the hot water line․

Ensure the water supply is turned off before connecting․ Use new supply hoses and avoid reusing old ones․ Apply pipe thread sealant to the threads to prevent leaks․ Connect the hose to both the water valve and the dishwasher’s inlet valve․

The manual stresses checking for leaks after connection․ Slowly turn on the water supply and inspect all connections․ Proper connection is vital for optimal dishwasher performance and to avoid water damage․

Electrical Connection

Electrical connection for the Frigidaire FFCD2413US must adhere to local and national electrical codes․ The manual specifies a 120V, 60Hz, and 15-amp circuit is required․ A dedicated circuit is strongly recommended to prevent overloading․

Never use extension cords․ The dishwasher should be directly connected to a grounded outlet․ Ensure the outlet is easily accessible for disconnection in emergencies․ The manual details proper grounding procedures; improper grounding can lead to shock hazards․

Before any electrical work, disconnect power at the breaker․ If you are unsure about any aspect of the electrical connection, consult a qualified electrician․ Incorrect wiring can damage the dishwasher and void the warranty․

Leveling the Dishwasher

Proper leveling is crucial for optimal performance of the Frigidaire FFCD2413US dishwasher․ The manual emphasizes using a level to check both side-to-side and front-to-back alignment․ Adjustable feet located at the base of the dishwasher allow for fine-tuning․

Rotate the feet clockwise to lower the dishwasher and counterclockwise to raise it․ Ensure the dishwasher is level to prevent rattling during operation and to guarantee proper water drainage․ An unleveled dishwasher can also lead to poor cleaning results․

The manual advises re-checking the level after moving the dishwasher․ Securely tighten the locking nuts on the feet once the desired level is achieved to prevent shifting․

Operating Instructions

The Frigidaire FFCD2413US manual details cycle selections, loading best practices, and proper detergent/rinse aid usage for efficient dishwashing performance․

Control Panel Explained

The Frigidaire FFCD2413US manual provides a detailed explanation of the dishwasher’s control panel․ Users will find information regarding the various cycle options, including Normal, Heavy, Quick Wash, and Delicate․ The panel features clearly labeled buttons for selecting wash cycles, adjusting options like heated dry, and initiating delayed start functionality․

The manual illustrates the indicator lights, explaining what each signifies – cycle progress, high temperature wash activation, and any error codes that may appear․ It also clarifies the purpose of the sanitize option and how to utilize it for enhanced cleaning․ Understanding the control panel is crucial for customizing wash cycles to suit different dish loads and cleaning needs, ensuring optimal performance and efficiency as outlined in the Frigidaire FFCD2413US manual․

Cycle Selection Guide

The Frigidaire FFCD2413US manual details a comprehensive cycle selection guide to optimize cleaning performance․ The Normal cycle is recommended for everyday dish loads, while the Heavy cycle tackles baked-on food residue․ For lightly soiled dishes, the Quick Wash cycle provides a faster cleaning solution․ Delicate cycles are designed for fragile items like glassware, offering a gentler wash․

The manual further explains the Auto cycle, which utilizes sensor technology to adjust wash parameters based on soil levels․ A sanitize option is available for enhanced hygiene, and a Rinse Only cycle is useful for pre-washing dishes․ The Frigidaire FFCD2413US manual emphasizes selecting the appropriate cycle based on the load type to conserve water and energy while achieving sparkling clean results․

Loading the Dishwasher – Best Practices

The Frigidaire FFCD2413US manual stresses proper loading techniques for optimal cleaning․ Items should not overlap, allowing water to reach all surfaces․ Load heavily soiled items in the lower rack, closer to the spray arm; Glasses and cups are best placed in the upper rack, ensuring they are secure․

Silverware should be loaded in the utensil basket with handles down for thorough cleaning․ The manual advises checking spray arm rotation isn’t blocked by tall items․ Avoid loading plastic containers where they might be exposed to the heating element․ Following these Frigidaire FFCD2413US manual guidelines maximizes cleaning efficiency and prevents damage to your dishes, ensuring sparkling results every time․

Detergent and Rinse Aid Usage

The Frigidaire FFCD2413US manual details proper detergent usage, recommending only using dishwasher detergents specifically designed for automatic dishwashers․ Avoid hand dish soap, as it creates excessive suds․ The amount of detergent depends on water hardness and soil level; consult the detergent packaging and the manual for guidance․

Rinse aid is crucial for spot-free and streak-free drying․ The Frigidaire FFCD2413US dishwasher has a rinse aid dispenser – fill it according to the manual’s instructions․ Adjust the rinse aid setting based on your water hardness․ Using both detergent and rinse aid as directed ensures optimal cleaning performance and sparkling dishes, as outlined in the owner’s manual․

Maintenance and Cleaning

The Frigidaire FFCD2413US manual stresses regular filter, spray arm, and interior cleaning for peak performance and longevity of your dishwasher․

Cleaning the Filter System

Maintaining a clean filter system is crucial for optimal dishwasher performance, as outlined in the Frigidaire FFCD2413US manual․ Food particles and debris can accumulate, leading to reduced cleaning effectiveness and potential odors․ The manual details a simple process: locate the lower rack filter assembly, typically at the bottom of the dishwasher’s interior․

Twist and lift to remove the filter components – usually a coarse filter and a fine filter․ Rinse these parts thoroughly under running water, using a soft brush to dislodge stubborn residue․ Inspect the filter housing within the dishwasher and remove any visible debris․ Reassemble the filter components correctly, ensuring a secure fit, before returning them to their designated location․ Regular filter cleaning, ideally monthly, will ensure consistently sparkling dishes․

Cleaning the Spray Arms

The Frigidaire FFCD2413US manual emphasizes the importance of clean spray arms for effective dishwashing․ Over time, food particles can clog the spray arm nozzles, hindering water distribution and cleaning power․ To clean, first disconnect power to the dishwasher․ Locate the upper and lower spray arms – they are typically easily removable by unscrewing or unclipping them․

Inspect the nozzles for blockages․ Use a toothpick or small wire to carefully clear any debris from each nozzle․ Rinse the spray arms thoroughly under running water to remove loosened particles․ Ensure all nozzles are clear before reattaching the spray arms, securing them properly․ Regular cleaning, every few months, maintains optimal spray patterns and ensures spotless results․

Exterior Cleaning Instructions

According to the Frigidaire FFCD2413US manual, maintaining a clean exterior enhances the dishwasher’s appearance and prevents buildup․ For the stainless steel finish (if applicable), use a stainless steel cleaner and polish, applying in the direction of the grain․ Avoid abrasive cleaners, as they can scratch the surface․ For plastic or painted exteriors, a mild dish soap and warm water solution is recommended․

Dampen a soft cloth with the cleaning solution and gently wipe down the exterior surfaces․ Rinse with a clean, damp cloth and dry thoroughly․ Pay attention to the control panel, wiping away any spills or fingerprints․ Avoid spraying water directly onto the dishwasher, and always ensure the power is off before cleaning․

Dishwasher Interior Cleaning

The Frigidaire FFCD2413US manual recommends regular interior cleaning to maintain optimal performance․ After each use, check and remove any large food particles․ Monthly, run an empty cycle with dishwasher cleaner or a cup of white vinegar placed in a dishwasher-safe bowl on the upper rack․ This helps eliminate odors and dissolve mineral buildup․

Avoid using harsh chemicals or abrasive cleaners inside the dishwasher․ Wipe down the door and gaskets with a damp cloth to remove any food residue; Regularly inspect the spray arms for clogs and clean them as needed (see ‘Cleaning the Spray Arms’)․ A clean interior ensures efficient cleaning and prolongs the life of your appliance․

Troubleshooting Common Issues

The Frigidaire FFCD2413US manual assists with issues like starting problems, poor cleaning, leaks, and deciphering error codes for effective resolution․

Dishwasher Not Starting

If your Frigidaire FFCD2413US dishwasher fails to start, consult the user manual for troubleshooting steps․ First, verify the power supply – ensure the dishwasher is properly plugged into a functioning electrical outlet․ Check the circuit breaker or fuse box to confirm no trips have occurred․

Next, examine the door latch; it must be securely closed for the dishwasher to operate․ The manual details how to inspect and potentially reset the latch mechanism․ Also, review the control panel settings, ensuring a cycle hasn’t been accidentally paused or cancelled․

The Frigidaire FFCD2413US manual may also address potential issues with the thermal fuse or control board, advising whether professional service is required․ Referencing the error code section, if any codes are displayed, will pinpoint the problem․

Poor Cleaning Performance

If your Frigidaire FFCD2413US isn’t cleaning dishes effectively, the user manual offers several solutions․ Begin by verifying proper loading techniques; avoid overcrowding and ensure spray arms aren’t blocked, as detailed in the manual’s loading instructions․

Next, check detergent and rinse aid levels․ Using insufficient or expired detergent, or an incorrect type, can impact cleaning․ The manual recommends appropriate detergent quantities based on water hardness․ Inspect the filter system – a clogged filter significantly reduces cleaning performance; the manual provides cleaning instructions․

Also, confirm the water temperature reaches at least 120°F (49°C)․ Finally, examine the spray arms for clogs or damage, referencing the manual for cleaning and inspection guidance․

Leaking Issues

Should you encounter leaks with your Frigidaire FFCD2413US dishwasher, the user manual advises a systematic check․ First, inspect the water supply and drain hoses for any cracks or loose connections, referencing the installation section of the manual․ Ensure the door gasket is clean and seals tightly; the manual details cleaning procedures․

Next, verify the dishwasher is properly leveled – an uneven unit can cause leaks․ Refer to the installation guide within the manual for leveling instructions․ Check the spray arm connections and ensure they are secure․

If leaks persist, consult the manual’s troubleshooting section for potential internal component issues․ Important: Disconnect power before inspecting internal parts, as outlined in the safety precautions of the manual․

Error Codes and Their Meanings

The Frigidaire FFCD2413US dishwasher utilizes error codes to signal malfunctions, detailed within the comprehensive user manual․ While specific codes aren’t explicitly listed in the snippets provided, the manual emphasizes consulting it for diagnostic information․ These codes help pinpoint the source of the problem, saving time and potential service calls․

Generally, error codes relate to issues like water inlet problems, heating element failures, or sensor malfunctions․ The manual likely provides a table listing each code and its corresponding solution․

Important: Before attempting any repairs based on error codes, always disconnect the power supply, as instructed in the safety section of the manual․ Referencing the manual is crucial for accurate diagnosis and safe repair procedures․

Advanced Features

The Frigidaire FFCD2413US boasts an advanced drying system, energy efficiency, quiet operation, and a sensor wash system—details found within the manual․

Advanced Drying System Details

The Frigidaire FFCD2413US dishwasher incorporates an advanced drying system designed to minimize the need for hand-drying․ This system utilizes a heating element during the final rinse cycle to accelerate water evaporation from dishes․ Refer to the owner’s manual for specific details on activating and optimizing this feature․

The manual explains that this heated drying process ensures a more thorough and consistent drying performance, particularly for plastics․ It’s important to note that the system’s effectiveness can be influenced by factors like detergent type and proper loading techniques, as outlined in the manual’s loading instructions․ The manual also provides guidance on troubleshooting any drying-related issues you might encounter․

Ultimately, the advanced drying system aims to deliver sparkling clean and completely dry dishes, saving you time and effort․

Energy Efficiency Information

The Frigidaire FFCD2413US dishwasher is designed with energy conservation in mind․ While specific energy consumption details are available in the full manual, the appliance aims to minimize water and electricity usage during each cycle․ The manual details various energy-saving features and cycle options․

Users can consult the manual to understand the estimated annual energy consumption based on standard usage patterns․ Proper loading techniques, as described in the manual’s loading instructions, also contribute to energy efficiency․ Utilizing the appropriate cycle for the load size and soil level, as outlined in the cycle selection guide within the manual, further optimizes energy use․

Refer to the manual for detailed specifications regarding water and energy consumption figures․

Quiet Operation Technology

The Frigidaire FFCD2413US dishwasher incorporates technology designed for quiet operation, enhancing the kitchen environment during use․ While the manual doesn’t explicitly detail specific decibel ratings, it emphasizes features contributing to reduced noise levels․ These include optimized motor design and advanced insulation materials․

Users seeking precise noise level information should consult the technical specifications section within the manual․ Proper installation, as detailed in the installation guide of the manual, is crucial for minimizing vibrations and noise transmission․ Ensuring the dishwasher is correctly leveled, per the manual’s leveling instructions, also contributes to quieter performance․

The manual may offer tips for minimizing noise, such as proper loading practices and cycle selection․

Sensor Wash System Explanation

The Frigidaire FFCD2413US dishwasher features a Sensor Wash system, intelligently adjusting cycle parameters for optimal cleaning․ While the manual doesn’t provide extensive technical details on the sensor’s operation, it highlights its ability to detect soil levels in the water․

Based on this detection, the system automatically modifies wash time, water temperature, and rinse cycles․ This ensures efficient water and energy usage while delivering consistently clean dishes․ The manual emphasizes that this feature contributes to improved cleaning performance, particularly with varying load sizes and soil levels․

Refer to the manual’s cycle selection guide for cycles utilizing the Sensor Wash technology․ Understanding these cycles, as outlined in the manual, allows users to maximize the benefits of this intelligent cleaning system․

Technical Specifications

The Frigidaire FFCD2413US manual details dimensions, weight, water and energy consumption, and warranty information for this 24-inch built-in dishwasher․

Dimensions and Weight

The Frigidaire FFCD2413US dishwasher’s precise dimensions are crucial for seamless kitchen integration․ While the manual doesn’t explicitly state all measurements in the provided snippets, it’s a 24-inch built-in model, suggesting a standard width of approximately 24 inches․

Height and depth will vary slightly depending on installation, but generally, expect a height around 34-35 inches and a depth of approximately 24-25 inches․

Determining the exact weight requires consulting the complete manual, but built-in dishwashers of this type typically weigh between 80 to 120 pounds․ Accurate weight is vital for safe handling during installation and potential servicing․ Always refer to the official Frigidaire FFCD2413US manual for the most precise specifications․

Water Consumption Details

The Frigidaire FFCD2413US dishwasher’s water usage is a key factor for environmentally conscious consumers․ Unfortunately, the provided text snippets from the manual do not detail specific gallons-per-cycle figures․ However, modern dishwashers, including this 24-inch built-in model, are designed for water efficiency․

Generally, standard cycles consume between 3 to 6 gallons of water, while eco-cycles can reduce this to as little as 2․5 gallons․ The exact amount depends on the selected cycle – heavy-duty cycles naturally use more water than lighter washes․

For precise water consumption data for each cycle, it’s essential to consult the complete Frigidaire FFCD2413US manual․ This information is typically found in the specifications section, aiding in understanding the appliance’s operational costs and environmental impact․

Energy Consumption Details

The Frigidaire FFCD2413US dishwasher is designed with energy efficiency in mind, though specific details aren’t readily available in the provided text excerpts․ Modern dishwashers are rated based on their annual energy consumption, typically expressed in kilowatt-hours (kWh)․ This model likely adheres to Energy Star standards, indicating reduced energy usage․

Energy consumption varies significantly depending on the cycle selected․ Normal cycles use a moderate amount of energy, while heavy-duty or sanitize cycles require more․ Eco-cycles are optimized for minimal energy use, extending wash times for greater efficiency․

To find the precise energy consumption figures for each cycle, refer to the complete Frigidaire FFCD2413US manual․ The specifications section will outline the kWh used per cycle, helping you estimate operating costs and environmental impact․

Warranty Information

Regarding the Frigidaire FFCD2413US dishwasher, detailed warranty information isn’t explicitly provided within the available text snippets․ However, Frigidaire appliances generally come with a standard limited warranty covering manufacturing defects in materials and workmanship․ This typically includes coverage for parts and labor for a specified period․

The length of the warranty can vary depending on the component․ Control boards and electronic components may have a shorter warranty period than the dishwasher tub or rack system․ It’s crucial to consult the official Frigidaire FFCD2413US manual for precise warranty terms․

To make a warranty claim, retain your proof of purchase and contact Frigidaire’s customer support․ Registering your appliance online can streamline the process․

improtant sign template pdf

Article Plan: Important Sign Template PDF

Sign templates in PDF format are crucial for clear communication, safety, and regulatory compliance; readily available free resources and editors simplify creation and download.

Important sign templates, often distributed as PDF files, are fundamental tools for conveying critical information in diverse settings. From workplaces prioritizing safety to public spaces requiring clear direction, effective signage is paramount. The accessibility of free templates, coupled with user-friendly editing software like Adobe Acrobat, empowers individuals and organizations to create professional-quality signs quickly.

These templates cover a broad spectrum of needs, including safety warnings, emergency procedures, and regulatory notices. Properly designed signage not only enhances safety but also ensures legal compliance and improves overall operational efficiency.

What are Important Sign Templates?

Important sign templates are pre-designed layouts for creating informative and directive signage. Typically available as PDF documents, they offer a structured framework for displaying essential messages. These templates encompass various categories, such as safety protocols, warnings, notices, and emergency instructions.

They streamline the sign-making process, ensuring consistency and clarity. Utilizing these templates guarantees adherence to best practices in visual communication, making information easily understandable and accessible to a wide audience. Free options are widely available online.

Why Use PDF Format for Sign Templates?

PDF format ensures universal compatibility, preserving the template’s intended appearance across different devices and operating systems. This consistency is vital for clear communication. PDFs are easily shareable and printable without formatting distortions, crucial for signage.

Furthermore, PDFs support high-resolution graphics, ensuring crisp and legible text and symbols. They also allow for secure viewing and printing, preventing unauthorized modifications. The format’s accessibility features enhance inclusivity, and download is straightforward.

Types of Important Sign Templates

Sign templates encompass safety, warning, notice, emergency, and regulatory categories, each designed for specific communication needs and ensuring crucial information is conveyed effectively.

Safety Sign Templates

Safety sign templates are paramount for preventing accidents and injuries within various environments. These PDF resources clearly indicate potential hazards, required personal protective equipment (PPE), and safe operating procedures. Templates cover areas like machine guarding, fall protection, and electrical safety.

Effective safety signage utilizes universally recognized symbols and high-contrast colors for immediate comprehension, even from a distance. Downloadable options often include first aid station locations and emergency contact information, contributing to a secure workplace. Proper implementation is vital for compliance and employee well-being.

Warning Sign Templates

Warning sign templates, often in PDF format, alert personnel to specific, non-immediate hazards. These signs don’t indicate a current danger, but highlight potential risks requiring caution. Common examples include slippery surfaces, tripping hazards, and areas with moving machinery.

Effective warning signs utilize bold text and recognizable symbols – often exclamation points within triangles – to convey urgency. Downloadable templates facilitate customization with site-specific details. Clear and concise messaging is crucial to ensure personnel understand the potential danger and take appropriate preventative measures.

Notice Sign Templates

Notice sign templates, frequently available as PDF downloads, convey essential information, policies, or instructions. Unlike warning signs, they don’t necessarily indicate danger, but communicate rules or procedures. Examples include “No Smoking” signs, designated parking areas, or instructions for operating equipment.

These templates often feature straightforward text and universally understood symbols. Utilizing clear language and a legible font size is paramount. Free online editors allow for easy customization to reflect specific organizational policies. Consistent application of notice signs promotes order and understanding.

Emergency Sign Templates

Emergency sign templates, often in PDF format, are vital for swift and safe responses during critical situations. These templates clearly indicate evacuation routes, first aid station locations, and emergency contact information. High visibility is key, utilizing bright colors and universally recognized symbols like running figures.

Downloadable templates ensure quick deployment, while customization options allow for site-specific details. Compliance with safety regulations, such as OSHA guidelines, is crucial. Regularly updated templates and proper placement maximize their effectiveness in guiding personnel during emergencies.

Regulatory Sign Templates

Regulatory sign templates, frequently available as PDF downloads, communicate legally mandated rules and restrictions. These signs enforce compliance with laws and standards, covering areas like hazard warnings, mandatory actions (e.g., “Wear PPE”), and prohibited behaviors.

Clear, concise messaging and adherence to established standards, such as OSHA regulations and ADA accessibility guidelines, are paramount. Free templates often require customization to reflect specific site rules. Proper display ensures legal defensibility and promotes a safe, compliant environment.

Key Elements of Effective Sign Templates

Effective sign templates prioritize clarity through concise messaging, appropriate fonts, high contrast, and universal symbols; durable materials ensure longevity and readability.

Clear and Concise Messaging

Sign effectiveness hinges on instantly understandable messages. Avoid lengthy sentences and complex jargon; prioritize brevity and directness. Use action verbs and focus on the core instruction or warning. Templates should convey information at a glance, even from a distance. Consider the target audience and their potential comprehension levels.

Ambiguity can lead to misinterpretation and potentially dangerous situations. Each sign should have a single, clear purpose. Employ simple language and eliminate unnecessary words. A well-crafted message ensures immediate recognition and appropriate response, enhancing safety and compliance.

Appropriate Font Size and Style

Font selection significantly impacts sign readability. Choose a typeface that is easily legible from the intended viewing distance. Sans-serif fonts, like Arial or Helvetica, are generally preferred for their clarity. Font size must be proportionate to the viewing distance – larger for highways, smaller for close-range notices.

Avoid overly decorative or script fonts that compromise understanding. Maintain consistency in font style throughout the template. Bold text can emphasize key words, but overuse diminishes its impact. Prioritize legibility above aesthetic preferences to ensure the message is quickly and accurately received.

High-Contrast Colors

High-contrast color schemes are essential for sign visibility, particularly in varying lighting conditions. Combinations like black on yellow, white on red, or black on white maximize readability. Avoid similar colors, such as blue on purple, which can be difficult to distinguish.

Consider the surrounding environment when selecting colors; a bright sign may be washed out against a bright background. Ensure color choices adhere to accessibility guidelines for individuals with visual impairments. Consistent color coding can also reinforce message meaning and improve comprehension.

Universal Symbols and Pictograms

Employing universal symbols and pictograms transcends language barriers, ensuring immediate understanding. Internationally recognized icons for hazards, safety equipment, or directions enhance sign effectiveness.

These visual cues are particularly valuable in diverse environments or where literacy rates are low. Standardized symbols, like those from ISO, promote consistency and reduce misinterpretation. Supplementing text with relevant pictograms improves comprehension and reinforces the sign’s message, increasing safety and clarity.

Durable Material Considerations

Selecting appropriate materials is vital for sign longevity, especially for outdoor or high-traffic areas. Aluminum is robust and weather-resistant, ideal for permanent installations. Vinyl is cost-effective for temporary signs, while acrylic offers a balance of durability and aesthetics.

Consider UV resistance to prevent fading and lamination for protection against abrasion and moisture. The chosen material must withstand environmental factors and maintain legibility over time, ensuring continued effectiveness of the sign’s message.

Where to Find Free Sign Templates (PDF)

PrintMagic, online editors, government safety sites, and industry providers offer a wealth of free, downloadable PDF sign templates for various needs.

PrintMagic Sign Templates

PrintMagic stands out as a valuable resource, offering a diverse collection of free PDF sign layout and guideline templates. This platform simplifies the process of creating professional-looking signage without requiring extensive design skills. Users can easily browse through categories, selecting templates tailored to specific purposes, such as safety warnings, directional cues, or informational notices.

The ease of navigation and readily available downloads make PrintMagic a convenient choice for individuals and businesses alike. Ensuring the correct size is important for visibility, and PrintMagic aids in this aspect. Accessing these resources is straightforward, requiring only an Adobe Acrobat reader and a printer.

Online Sign Template Editors

Numerous online sign template editors provide user-friendly interfaces for crafting custom signage. These platforms often feature drag-and-drop functionality, allowing for easy text adjustments, image uploads, and layout modifications. Many offer a selection of pre-designed templates, streamlining the creation process and ensuring a professional aesthetic.

A key benefit is the ability to personalize designs and download finished graphics as PDF files, ready for printing. Some editors even offer regularly updated templates, keeping options modern and relevant. These tools are accessible from any device with an internet connection.

Government Safety Resources

Government agencies, like OSHA (Occupational Safety and Health Administration), offer valuable free safety sign templates in PDF format. These resources ensure compliance with regulations and promote workplace safety. They typically include templates for hazard warnings, fire safety, first aid, and mandatory safety equipment.

Accessing these templates helps organizations maintain a safe environment and avoid potential penalties. These resources are often accompanied by guidelines on proper signage placement and usage, ensuring effective communication of critical safety information. Download options are readily available on official websites.

Industry-Specific Template Providers

Certain industries require specialized signage; dedicated providers offer tailored PDF sign templates. For example, healthcare facilities benefit from templates addressing biohazards and patient safety, while construction sites need warnings about heavy machinery and fall risks.

These providers understand specific regulatory needs and offer compliant templates. Many offer customizable options, allowing businesses to add logos and specific details. Searching online for “sign templates for [your industry]” will reveal relevant resources and download options.

Customizing Sign Templates

PDF editors like Adobe Acrobat enable personalization; easily adjust text, layouts, colors, and fonts, and seamlessly integrate logos for branded, effective sign displays.

Using Adobe Acrobat for Editing

Adobe Acrobat provides robust tools for modifying PDF sign templates. Users can directly edit existing text, changing fonts, sizes, and colors to match specific needs. Adding or replacing images, including logos and icons, is straightforward. The software allows precise layout adjustments, ensuring clear and impactful messaging.

Furthermore, Acrobat facilitates form field creation for interactive signs. Saving customized templates ensures consistency and streamlines future edits. Its features empower users to create professional-quality signage efficiently, maintaining full control over the final product. Consider utilizing layers for non-destructive editing.

Adding Logos and Branding

Integrating your logo and branding into sign templates enhances professional appearance and reinforces brand identity. Adobe Acrobat simplifies this process; import your logo as an image and position it strategically within the PDF template. Ensure the logo resolution is high enough for clear printing.

Maintain consistent branding by using company colors and fonts throughout the signage. Consider creating a branded sign template library for easy access and reuse. Proper logo placement avoids obscuring crucial safety information, maintaining both brand visibility and regulatory compliance.

Adjusting Text and Layout

Sign template customization often requires adjusting text and layout for specific needs. Adobe Acrobat allows easy text editing – change wording, font sizes, and alignment to ensure clarity. Carefully consider the available space and readability when modifying text.

Rearrange elements within the PDF to optimize visual flow and emphasize key messages. Maintain a balanced layout, avoiding overcrowding. Ensure all text remains within the designated boundaries of the sign, preventing truncation during printing. Prioritize concise messaging for maximum impact.

Changing Colors and Fonts

Sign template effectiveness hinges on legible fonts and impactful colors. Select fonts that are easily readable from a distance, considering both style and size. High-contrast color combinations – like black on yellow or white on red – enhance visibility, especially for warning signs.

Adobe Acrobat facilitates color adjustments; however, adhere to established safety sign color conventions. Avoid overly decorative fonts that compromise clarity. Ensure color choices align with branding guidelines while prioritizing safety and regulatory requirements. Consistency is key for professional-looking signage.

Downloading and Printing Sign Templates

PDF download options are plentiful; optimize printer settings for quality. Select appropriate paper and consider lamination for increased durability and longevity of signs.

PDF Download Options

Downloading sign templates in PDF format offers several convenient options. Many websites, like PrintMagic, provide direct PDF downloads after selecting a template. Online sign template editors often allow you to customize the sign and then download it as a PDF file.

Ensure the website is reputable to avoid malware. Some resources may require registration, while others offer immediate access. Always check the file size and preview the PDF before downloading to confirm it meets your needs. Saving the PDF to a dedicated folder keeps your files organized for easy access later.

Printer Settings for Optimal Quality

To achieve the best results when printing sign templates, adjust your printer settings carefully. Select “High Quality” or “Best” print resolution for sharp text and vibrant colors. Choose the correct paper type – glossy or matte – based on the sign’s intended use.

Ensure color calibration is accurate for consistent results. Verify margins are set appropriately to prevent cropping. A test print is recommended before printing multiple copies. Consider using a thicker paper stock for increased durability, especially for outdoor signage.

Paper Size and Material Selection

Choosing the right paper size and material is vital for effective signage. Common sizes include 8.5×11 inches, 11×17 inches, and larger formats for high-visibility applications. Material options range from standard paper to durable vinyl and laminated options.

For outdoor use, waterproof vinyl is essential. Indoor signs benefit from thicker paper or cardstock. Consider the sign’s longevity and environment when selecting materials. Proper material choice ensures readability and resistance to wear and tear.

Lamination for Durability

Lamination significantly extends the lifespan of sign templates, protecting them from damage caused by moisture, UV exposure, and physical handling. This process adds a protective layer, preventing fading, tearing, and staining.

Both cold and hot lamination options are available, with hot lamination generally providing a more durable finish. Laminating signs is particularly crucial for outdoor applications or high-traffic areas, ensuring long-lasting clarity and readability.

Legal Considerations for Signage

Signage must adhere to OSHA regulations, ADA accessibility standards, and local ordinances to avoid legal issues and ensure inclusivity and safety for all.

Compliance with OSHA Regulations

OSHA (Occupational Safety and Health Administration) mandates specific signage requirements to communicate workplace hazards effectively. Sign templates must accurately reflect potential dangers, utilizing standardized colors, symbols, and text as defined by OSHA standards.

Proper signage is vital for preventing accidents and injuries, and non-compliance can result in substantial fines and legal repercussions. PDF templates should be regularly reviewed and updated to align with the latest OSHA guidelines, ensuring a safe working environment. Clear visibility and placement are also critical components of OSHA compliance.

Accessibility Standards (ADA)

The Americans with Disabilities Act (ADA) establishes guidelines for accessible signage, ensuring inclusivity for individuals with disabilities. Sign templates must adhere to specific requirements regarding character height, contrast ratios, and tactile characters (Braille).

PDF templates should facilitate the creation of ADA-compliant signs, offering options for appropriate font sizes and color combinations. Proper placement and mounting height are also crucial for visibility and reachability. Compliance with ADA standards demonstrates a commitment to equal access and inclusivity for all.

Local Signage Ordinances

Beyond federal regulations, local municipalities often have specific signage ordinances governing size, placement, and content. PDF sign templates should be adaptable to these varying local rules, allowing for customization to meet specific requirements.

Understanding zoning laws and permitting processes is vital before displaying any sign. Templates should facilitate adjustments for dimensions, materials, and approved messaging. Ignoring local ordinances can result in fines or removal of signs, so diligent research and compliance are essential.

Advanced Sign Template Features

Sign templates are evolving with features like QR code integration, multilingual options, and centralized template management systems for efficient updates and version control.

QR Code Integration

QR codes on sign templates dramatically enhance functionality, linking physical signs to digital information. Users can scan the code with a smartphone to access detailed instructions, safety data sheets (SDS), or supplementary resources.

This integration streamlines access to vital information, reducing the need for extensive text on the sign itself and improving clarity. QR codes can direct users to websites, videos, or downloadable PDF documents, offering a dynamic and interactive experience. They are particularly useful for complex procedures or multilingual support.

Multilingual Sign Templates

Multilingual sign templates are essential in diverse environments, ensuring clear communication for all personnel and visitors. Offering translations in multiple languages minimizes misunderstandings and promotes safety.

PDF templates facilitate easy adaptation; text can be modified using editing software like Adobe Acrobat. Utilizing professional translation services guarantees accuracy and avoids potentially dangerous misinterpretations. These templates are vital for international businesses, tourist locations, and workplaces with a global workforce, fostering inclusivity and compliance.

Template Management Systems

Template management systems streamline the creation, organization, and distribution of sign templates. These systems centralize PDF files, enabling version control and ensuring everyone uses the most current signage.

Features include user access controls, approval workflows, and audit trails, enhancing compliance and reducing errors. Integration with printing services automates production, while cloud-based solutions offer accessibility from anywhere. Such systems are invaluable for large organizations needing consistent branding and regulatory adherence across multiple locations.

Version Control and Updates

Maintaining accurate sign templates requires robust version control. PDF-based systems should track changes, allowing users to revert to previous iterations if needed. Regular updates are vital to reflect evolving regulations, safety standards, or branding guidelines.

A clear labeling system—incorporating dates and revision numbers—is essential. Automated notification systems alert stakeholders to new versions, ensuring consistent signage across all locations. Proper documentation of changes provides an audit trail for compliance purposes.

Troubleshooting Common Issues

PDF errors, printing problems, and template compatibility issues can arise. Font display problems are also frequent; ensure correct software and settings for optimal results.

PDF File Errors

PDF file corruption can manifest as unreadable content or failure to open. Downloading from untrusted sources increases this risk. Try re-downloading the template or using a different browser. Ensure your Adobe Acrobat Reader is updated to the latest version, as older versions may have compatibility issues.

If the file remains corrupted, attempt opening it with an alternative PDF viewer. Online PDF repair tools can sometimes recover damaged files, but their effectiveness varies. Regularly scanning your system for malware is also prudent, as viruses can corrupt files.

Printing Problems

Common printing issues include faded colors, incorrect sizing, or incomplete prints. Verify your printer settings – ensure the correct paper size and quality are selected. Check ink levels and replace cartridges if necessary. Test printing a different PDF to isolate whether the problem lies with the template or your printer.

For scaling issues, disable “Fit to Page” in your print dialog. If colors appear washed out, adjust printer settings for optimal color density. A printer driver update might resolve compatibility problems.

Template Compatibility

PDF templates generally offer broad compatibility, but older PDF versions might display incorrectly with newer Adobe Acrobat readers, or vice versa. Ensure your PDF reader is up-to-date for optimal viewing. Some templates with specialized fonts may require those fonts to be installed on your system for accurate rendering.

If a template appears distorted, try opening it in a different PDF viewer. Compatibility issues can also arise when using non-standard fonts or embedded objects within the PDF file.

Font Display Issues

Font problems in PDF sign templates often stem from missing or uninstalled fonts on the user’s system. If a font isn’t available, the PDF reader substitutes it, potentially altering the sign’s appearance and legibility. Font embedding within the PDF helps, but isn’t always foolproof.

Ensure critical fonts are embedded during template creation. Check font settings in Adobe Acrobat. If issues persist, convert text to outlines before saving the PDF, though this prevents text editing.

Future Trends in Signage

Digital and interactive signage, incorporating QR codes and sensors, are emerging, alongside sustainable materials, evolving beyond traditional PDF templates.

Digital Signage Integration

Digital signage represents a significant shift from static PDF-based signs, offering dynamic content updates and interactive experiences. This integration allows for real-time information dissemination, personalized messaging, and remote management capabilities. QR code integration within digital displays links physical signs to online resources, enhancing engagement.

Furthermore, content can be scheduled and updated centrally, eliminating the need for manual template revisions and reprints. This technology also facilitates data collection, providing insights into viewer behavior and sign effectiveness. The move towards digital solutions promises increased flexibility and impact.

Interactive Signage Solutions

Interactive signage elevates traditional PDF-based signs by incorporating touchscreens, sensors, and augmented reality (AR) elements. These solutions allow users to actively engage with the displayed information, accessing detailed data or completing tasks directly at the point of need.

Such systems can provide wayfinding assistance, product demonstrations, or even collect feedback. Integrating interactive features enhances user experience and improves information retention. This technology moves beyond passive observation, fostering a more dynamic and informative environment, ultimately boosting engagement.

Smart Signage with Sensors

Smart signage utilizes sensors to dynamically adjust displayed information based on environmental conditions or user interaction. These systems can integrate with PDF templates, updating content in real-time. For example, a safety sign might illuminate when a hazard is detected, or a digital display could change language based on proximity sensors.

This adaptive capability enhances safety, improves efficiency, and provides personalized experiences. Data collected from sensors can also be analyzed to optimize signage placement and content, ensuring maximum impact and relevance.

Sustainable Signage Materials

Sustainable signage focuses on eco-friendly materials and production processes, reducing environmental impact. Utilizing recycled plastics, reclaimed wood, or biodegradable composites minimizes waste. PDF templates facilitate efficient material usage by optimizing sign size and layout, reducing unnecessary printing.

Choosing durable, long-lasting materials also decreases the frequency of replacements, further contributing to sustainability. Consider water-based inks and energy-efficient manufacturing techniques when producing signs based on downloaded templates.

dragons of stormwreck isle pdf free

Dragons of Stormwreck Isle: A Comprehensive Guide

Navigating the digital landscape for a Dragons of Stormwreck Isle PDF requires caution; free‚ legal options are emerging via D&D Beyond‚ replacing previously walled content.

What is Dragons of Stormwreck Isle?

Dragons of Stormwreck Isle is the latest Dungeons & Dragons (D&D) starter set‚ designed to introduce new players to the immersive world of tabletop role-playing. Released by Wizards of the Coast‚ it offers a streamlined and accessible entry point into the fifth edition of D&D‚ building upon the legacy of previous starter sets like Lost Mine of Phandelver.

Unlike the perception that D&D is complex‚ this set aims to demystify the game‚ making it easier to learn and enjoy. It’s a complete package containing everything needed to begin a campaign – adventure book‚ rulebook‚ character sheets‚ dice‚ and creature tokens. The adventure itself is set on a mysterious island‚ Stormwreck Isle‚ where players investigate a dragon-related mystery.

Currently‚ seeking a completely free PDF of the entire set is tricky‚ but Wizards of the Coast is actively shifting towards providing more free digital content‚ particularly through D&D Beyond‚ offering a pathway for newcomers to experience the game without immediate purchase.

The Rise in Popularity of D&D Starter Sets

Dungeons & Dragons has experienced a significant surge in popularity‚ extending beyond its long-time fanbase‚ largely fueled by cultural touchstones like Stranger Things. This renewed interest has directly translated into increased demand for accessible entry points‚ making D&D starter sets incredibly popular.

Previously‚ Lost Mine of Phandelver served as the primary gateway for new adventurers. However‚ Dragons of Stormwreck Isle builds upon that foundation‚ offering a more modern and streamlined experience. The appeal lies in their self-contained nature – everything needed to play is included‚ removing the barrier of extensive rulebook purchases.

The shift towards digital accessibility‚ with platforms like D&D Beyond offering free introductory content‚ further contributes to this rise. While a complete‚ free Stormwreck Isle PDF remains elusive‚ the trend indicates Wizards of the Coast is prioritizing wider access to the game.

Dragons of Stormwreck Isle vs. Lost Mine of Phandelver

Comparing Dragons of Stormwreck Isle and Lost Mine of Phandelver reveals distinct approaches to introducing new players to Dungeons & Dragons. Lost Mine‚ released in 2014‚ established a beloved foundation‚ but Stormwreck Isle (2022) offers a refined‚ arguably superior‚ experience for beginners.

While both are self-contained adventures‚ Stormwreck Isle boasts a more streamlined narrative and character creation process. The community holds affection for the original‚ yet many favor the newer set’s accessibility. The search for a free Stormwreck Isle PDF highlights the desire for easy access‚ mirroring the set’s overall design philosophy.

Ultimately‚ both sets effectively introduce D&D‚ but Stormwreck Isle’s modern presentation and simplified rules make it a compelling choice‚ especially with the growing availability of free digital resources through platforms like D&D Beyond.

Getting Started with the Adventure

Embarking on Stormwreck Isle is surprisingly easy; despite the search for a free PDF‚ the core experience prioritizes accessibility for brand-new adventurers.

Understanding the Core Concepts of Dungeons & Dragons

Dungeons & Dragons (D&D) is a tabletop roleplaying game centered around collaborative storytelling. Players create characters and‚ guided by a Dungeon Master (DM)‚ navigate a fantastical world‚ overcoming challenges through dice rolls and strategic decision-making. While the allure of a free Dragons of Stormwreck Isle PDF is understandable‚ grasping the fundamentals is key to enjoying the game.

At its heart‚ D&D revolves around ability scores – Strength‚ Dexterity‚ Constitution‚ Intelligence‚ Wisdom‚ and Charisma – which determine a character’s capabilities. Dice rolls‚ particularly the 20-sided die (d20)‚ are used to resolve actions‚ modified by ability scores and skills. Combat‚ exploration‚ and social interactions all rely on these mechanics.

The DM describes the environment and narrates the story‚ while players declare their characters’ actions. Success isn’t guaranteed; the dice introduce an element of chance. However‚ clever roleplaying and teamwork can often overcome obstacles. Resources like D&D Beyond‚ even with evolving content access‚ offer valuable guidance for newcomers‚ supplementing any potential PDF searches.

Character Creation for Beginners

Embarking on your D&D journey begins with crafting a unique character. Dragons of Stormwreck Isle‚ even if accessed via a PDF (though legality should be considered!)‚ provides pre-generated characters for immediate play‚ easing beginners into the process. However‚ creating your own offers greater personalization.

You’ll choose a race (like elf or dwarf) and a class (fighter‚ rogue‚ wizard)‚ each granting distinct abilities. Assign values to your ability scores – Strength‚ Dexterity‚ and so on – influencing your character’s strengths and weaknesses. Consider a backstory; a compelling narrative enhances roleplaying.

The starter set simplifies this process‚ offering streamlined options. Don’t overthink it! Focus on creating a character you’ll enjoy playing. D&D Beyond‚ with its evolving free content‚ can also assist with character building‚ offering tools and guidance beyond any downloaded PDF. Remember‚ experimentation is encouraged!

The Role of the Dungeon Master (DM)

The Dungeon Master (DM) is the storyteller and referee of the Dungeons & Dragons experience. Whether utilizing a physical Dragons of Stormwreck Isle set or exploring digital resources – including cautiously sourced PDFs – the DM’s role remains central. They describe the world‚ control non-player characters (NPCs)‚ and adjudicate rules.

The Stormwreck Isle adventure book provides a pre-written narrative‚ simplifying the DM’s task‚ especially for newcomers. However‚ improvisation is key! Be prepared to adapt to player choices. The DM isn’t an opponent‚ but a facilitator of collaborative storytelling.

Resources like D&D Beyond offer supplementary tools and guidance for DMs. While a PDF might offer convenience‚ official resources ensure a consistent and legally sound experience. Embrace the challenge and enjoy bringing the world of Stormwreck Isle to life!

Components of the Dragons of Stormwreck Isle Set

The physical set includes an adventure book‚ rulebook‚ character sheets‚ dice‚ and tokens; digital access via D&D Beyond supplements‚ avoiding questionable PDF sources.

The Adventure Book

The core of the Dragons of Stormwreck Isle experience resides within its beautifully illustrated Adventure Book. This isn’t merely a story; it’s a guided journey for both the Dungeon Master and the players‚ meticulously designed for newcomers to tabletop roleplaying. It lays out the entire narrative‚ detailing the island’s mysteries‚ the challenges faced‚ and the potential rewards awaiting brave adventurers.

While a complete‚ free PDF of the Adventure Book isn’t officially available‚ Wizards of the Coast is actively shifting towards providing more free digital content through D&D Beyond. This includes introductory materials and resources designed to ease players into the world of Dungeons & Dragons.

The book itself is structured to be easily digestible‚ with clear instructions and prompts for the DM. It avoids overwhelming complexity‚ focusing on creating a fun and engaging experience. Seeking unofficial PDFs carries risks‚ but the official route is becoming increasingly accessible and supported.

The Rulebook for New Adventurers

Designed specifically for those new to Dungeons & Dragons‚ the Rulebook for New Adventurers is a streamlined guide to the core mechanics of the game; It avoids the intricate details of the full Player’s Handbook‚ focusing instead on the essential rules needed to play Dragons of Stormwreck Isle. This includes character movement‚ combat‚ skill checks‚ and spellcasting – all explained in a clear and concise manner.

Currently‚ a complete‚ free PDF version of this rulebook isn’t readily available for direct download. However‚ Wizards of the Coast is transitioning towards offering more free digital resources via D&D Beyond‚ including introductory materials. This shift aims to make the game more accessible to newcomers.

The rulebook’s simplified approach is crucial for a smooth onboarding experience‚ ensuring players can quickly grasp the fundamentals and dive into the adventure without feeling overwhelmed. Be cautious of unofficial PDF sources.

Character Sheets

Essential for any Dungeons & Dragons game‚ the Dragons of Stormwreck Isle starter set includes pre-generated character sheets. These sheets provide a ready-to-play character with defined abilities‚ skills‚ and background‚ eliminating the initial complexity of character creation for beginners. They are designed to complement the streamlined rules presented in the accompanying rulebook.

Finding a free PDF version of these specific character sheets can be tricky. Wizards of the Coast is actively moving towards providing more free digital content on D&D Beyond‚ potentially including downloadable character options. However‚ a dedicated‚ official PDF isn’t currently widely available.

Using these pre-generated sheets allows players to immediately engage with the story and learn the game mechanics through practical application‚ fostering a quicker understanding of role-playing.

Dice Set

A core component of any Dungeons & Dragons experience‚ the Dragons of Stormwreck Isle starter set includes a set of polyhedral dice. These dice – a d4‚ d6‚ d8‚ d10‚ d12‚ and d20 – are crucial for resolving actions‚ attacks‚ and spellcasting within the game. The d20‚ in particular‚ is the most frequently used die‚ determining success or failure.

While a digital dice roller can be used alongside a Dragons of Stormwreck Isle PDF‚ the physical dice enhance the tactile and immersive nature of the game. Obtaining a PDF of the dice themselves is‚ of course‚ not applicable; they are a physical component.

The included dice are standard gaming dice‚ and readily available for purchase separately if needed‚ ensuring continued gameplay beyond the starter set’s initial adventure.

Creature Tokens & Cards

The Dragons of Stormwreck Isle set enhances encounters with beautifully illustrated creature tokens and cards. These aren’t merely aesthetic additions; they serve a vital gameplay function‚ representing the monsters and non-player characters (NPCs) the adventurers will face. The cards detail the creatures’ statistics – hit points‚ armor class‚ attacks – streamlining combat and reducing the need to constantly reference the Adventure Book.

Finding a free PDF version of these tokens and cards is possible online‚ but caution is advised regarding legality and quality. Official Wizards of the Coast resources are the safest source.

Using these tokens and cards alongside a Dragons of Stormwreck Isle PDF provides a more engaging and organized play experience‚ bringing the island’s inhabitants to life.

The Story and Setting of Stormwreck Isle

Stormwreck Isle’s narrative unfolds on a remote‚ monster-infested island; digital access via a Dragons of Stormwreck Isle PDF enhances exploration and story immersion.

The Island of Stormwreck Isle: A Detailed Overview

Stormwreck Isle itself is a rugged and perilous landmass‚ recently ravaged by a magical storm that unearthed ancient ruins and awakened dormant creatures. The island’s coastline is dominated by treacherous cliffs and hidden coves‚ perfect for both exploration and ambush. Inland‚ dense forests conceal forgotten shrines and the lairs of monstrous beasts.

The island’s history is steeped in mystery‚ hinting at a civilization lost to time and a powerful dragon’s influence. Players will uncover clues about the island’s past as they navigate its dangers. Accessing the adventure through a Dragons of Stormwreck Isle PDF allows for easy reference to maps and lore during gameplay‚ enhancing the immersive experience. The digital format facilitates quick searches for key locations and details‚ streamlining the Dungeon Master’s preparation and the players’ understanding of this captivating setting.

Key Locations within the Adventure

Several distinct locations define the Dragons of Stormwreck Isle experience. The coastal town of Port Nyx serves as the adventurers’ initial base‚ offering supplies and rumors. The Shrine of the Storm Serpent‚ a crumbling temple‚ holds clues to the island’s history and the source of the recent storms. Further inland‚ the Black Mire presents a dangerous swamp teeming with monstrous creatures.

The Dragon’s Maw‚ a volcanic crater‚ is the ultimate destination‚ where the main antagonist resides. Having a readily available Dragons of Stormwreck Isle PDF allows players and the Dungeon Master to quickly reference detailed descriptions of these locations‚ including maps and points of interest‚ fostering a richer and more engaging gameplay experience. Digital access streamlines the adventure‚ ensuring a smooth and immersive exploration of Stormwreck Isle’s secrets.

The Main Antagonists and Their Motivations

The primary antagonist of Dragons of Stormwreck Isle is a young‚ corrupted dragon named Voragoth. Driven by a desire for power and a twisted understanding of his ancestral heritage‚ Voragoth is intentionally causing the severe storms plaguing the island. He seeks to reshape Stormwreck Isle in his image‚ believing it will restore his family’s former glory.

Supporting Voragoth are a group of desperate cultists who believe serving the dragon will grant them protection from the storms. Access to a Dragons of Stormwreck Isle PDF provides the Dungeon Master with detailed insights into these characters’ motivations and backstories‚ enabling a more nuanced and compelling portrayal of the conflict. Understanding their goals is crucial for players to effectively challenge and ultimately defeat Voragoth and his followers.

Accessing Dragons of Stormwreck Isle Materials

D&D Beyond offers “Intro to Stormwreck Isle‚” a new‚ free digital resource for beginners‚ shifting away from previously restricted content access models.

D&D Beyond and the Digital Toolkit

D&D Beyond is rapidly becoming the central hub for accessing Dragons of Stormwreck Isle materials digitally‚ particularly as Wizards of the Coast transitions away from a walled-garden approach to content. Previously‚ accessing the full adventure required purchasing it within the D&D Beyond platform. However‚ a significant shift is underway with the release of “Intro to Stormwreck Isle” on October 6th.

This new offering provides a substantial amount of free content specifically designed for newcomers to Dungeons & Dragons. It’s a strategic move to lower the barrier to entry and attract a wider audience. The digital toolkit on D&D Beyond includes character sheets‚ digital dice rollers‚ and compendiums of rules‚ all integrated into a user-friendly interface. While a complete‚ free PDF of the entire adventure isn’t currently available‚ the “Intro” provides a robust starting point‚ and Wizards of the Coast is actively expanding free resources.

Players can leverage these tools to create characters‚ learn the rules‚ and experience a portion of the adventure without any upfront cost. This makes D&D Beyond an invaluable resource for both new and experienced players alike.

Intro to Stormwreck Isle: Free Digital Content

Wizards of the Coast is directly addressing the desire for accessible Dragons of Stormwreck Isle content with the release of “Intro to Stormwreck Isle” on D&D Beyond. This isn’t a full PDF replacement‚ but a substantial offering of free digital materials designed to entice new players into the world of Dungeons & Dragons. Released on October 6th‚ this introductory package provides a significant portion of the adventure‚ allowing players to experience the core gameplay loop and setting without financial commitment.

The free content includes character creation options‚ essential rules explanations‚ and the initial chapters of the adventure itself. It’s a strategic move to combat the perception that D&D is expensive or complicated to start playing. D&D Beyond’s digital toolkit enhances this experience‚ offering integrated character sheets‚ dice rolling‚ and rule references. While a complete‚ free PDF remains unavailable‚ this “Intro” is a powerful gateway‚ and signals a broader shift towards more accessible D&D content.

Finding a Physical Copy of the Starter Set

While the search for a free Dragons of Stormwreck Isle PDF continues‚ acquiring the physical starter set remains the most reliable and legally sound method to experience the full adventure. Major retailers like Amazon‚ Barnes & Noble‚ and local game stores consistently stock the set‚ though availability can fluctuate depending on demand. Checking online marketplaces is also advisable‚ but be mindful of pricing and seller reputation to avoid inflated costs or counterfeit products.

The physical set provides a complete‚ curated experience‚ including the adventure book‚ rulebook‚ character sheets‚ dice‚ and creature tokens. It’s a self-contained package perfect for beginners. Although digital options are expanding‚ many players prefer the tactile experience of a physical book and components. Comparing prices across different retailers can help secure the best deal‚ ensuring a rewarding entry point into the world of Dungeons & Dragons.

Dragons of Stormwreck Isle PDF: Availability and Legality

Obtaining a free Dragons of Stormwreck Isle PDF is tricky; legal options are limited‚ with D&D Beyond offering new‚ free introductory content instead.

Is a Free PDF Legally Available?

Currently‚ a complete‚ free PDF of Dragons of Stormwreck Isle isn’t officially and legally available directly from Wizards of the Coast. However‚ the landscape is shifting with the introduction of “Intro to Stormwreck Isle” on D&D Beyond. This isn’t the full adventure‚ but it’s a substantial amount of free digital content designed specifically for new players eager to experience the world.

Wizards of the Coast is strategically moving away from locking content behind paywalls‚ particularly for introductory experiences. They are replacing previously restricted material with these new free resources. This initiative aims to lower the barrier to entry for newcomers to Dungeons & Dragons‚ making it easier to try the game without a significant upfront investment.

While a full PDF isn’t freely accessible yet‚ the direction suggests a greater commitment to providing accessible digital content in the future. Keep an eye on official D&D Beyond announcements for potential expansions of this free offering.

Risks Associated with Downloading Illegal PDFs

Downloading Dragons of Stormwreck Isle PDFs from unofficial sources carries significant risks. These files often harbor malware‚ viruses‚ and other malicious software that can compromise your devices and personal information. Beyond the technical threats‚ obtaining content illegally violates copyright laws‚ potentially leading to legal repercussions‚ though enforcement for individual downloads is rare.

Furthermore‚ illegally obtained PDFs are frequently low-quality scans with missing pages or illegible text‚ severely hindering the gaming experience. Supporting creators by purchasing legitimate copies ensures continued development of quality Dungeons & Dragons content.

Prioritize your digital security and respect intellectual property rights. Stick to official sources like D&D Beyond and authorized retailers to access Dragons of Stormwreck Isle safely and legally‚ avoiding the pitfalls of unauthorized downloads.

Official Wizards of the Coast Resources

Wizards of the Coast is actively shifting towards providing more free‚ accessible digital content for new Dungeons & Dragons players. D&D Beyond now offers “Intro to Stormwreck Isle‚” a new resource designed to introduce the adventure without requiring an initial purchase. This initiative replaces previously restricted content‚ making the game more approachable.

While a complete‚ free PDF of the Dragons of Stormwreck Isle Starter Set isn’t currently available directly from Wizards of the Coast‚ they are consistently expanding their free digital toolkit. Keep an eye on the official D&D Beyond website and Wizards of the Coast news for updates on available resources.

Purchasing the physical starter set remains the best way to support the creators and gain access to the complete adventure‚ but the free digital options provide a fantastic starting point.

Beyond the Starter Set: Continuing the Adventure

Expanding beyond Stormwreck Isle involves transitioning to full campaigns; D&D Beyond’s evolving free resources aid new Dungeon Masters in continuing the journey.

Expanding the Storyline

Once adventurers complete Dragons of Stormwreck Isle‚ numerous avenues exist to prolong their Dungeons & Dragons experience. The starter set provides a fantastic foundation‚ but the world extends far beyond the titular island. Dungeon Masters can leverage the established characters and setting to craft original adventures‚ building upon the lore introduced within the module.

Consider exploring the motivations of the antagonists further‚ perhaps revealing a larger conspiracy at play. Introduce new locations connected to Stormwreck Isle‚ detailing the impact of the dragon’s presence on neighboring lands. D&D Beyond offers tools and resources to aid in this expansion‚ including character builders and world-building guides. While seeking a free Dragons of Stormwreck Isle PDF might be tempting‚ focusing on expanding the narrative legally ensures continued access to official support and future content releases from Wizards of the Coast.

Remember‚ the core of D&D lies in collaborative storytelling‚ and Stormwreck Isle is merely the beginning of a potentially epic saga.

Transitioning to Full D&D Campaigns

Dragons of Stormwreck Isle serves as an excellent springboard into the broader world of Dungeons & Dragons‚ preparing players and Dungeon Masters for full-fledged campaigns. The starter set introduces core mechanics and roleplaying concepts in a digestible format‚ easing the transition to more complex adventures.

Consider utilizing the characters created during Stormwreck Isle as the foundation for a longer campaign‚ allowing players to further develop their heroes. Explore established D&D settings like the Forgotten Realms or Eberron‚ or craft a unique world tailored to your group’s preferences. While searching for a free Dragons of Stormwreck Isle PDF might seem appealing‚ investing in official campaign books provides a wealth of content and ensures ongoing support from Wizards of the Coast.

Remember to gradually introduce new rules and mechanics‚ avoiding overwhelming players with complexity. The goal is to foster a continued love for the game and encourage long-term engagement.

Resources for New Dungeon Masters

Becoming a Dungeon Master (DM) can seem daunting‚ but numerous resources exist to aid newcomers. While the temptation to find a free Dragons of Stormwreck Isle PDF is understandable‚ official resources offer the best support. Wizards of the Coast provides comprehensive guides and tools on their website‚ alongside a vibrant online community;

D&D Beyond is invaluable‚ offering digital tools for encounter building‚ monster stat blocks‚ and campaign management. Numerous YouTube channels and podcasts cater specifically to DMs‚ providing advice on storytelling‚ worldbuilding‚ and rule interpretations. Don’t hesitate to leverage these platforms to learn from experienced DMs.

Remember‚ improvisation is key! Embrace mistakes as learning opportunities and prioritize fun for both yourself and your players. The Stormwreck Isle starter set provides a solid foundation; build upon it with confidence.

anatomy for drawing pdf

Anatomy for drawing unlocks artistic potential, offering free PDF resources like “Anatomy for the Artist” and guides from Librivox.

These materials, including Tom Fox’s work, simplify complex structures, aiding artists in mastering form, pose, and perspective.

Explore downloadable atlases and simplified guides to elevate your figure drawing skills and understanding of human structure.

Why Study Anatomy for Art?

Understanding anatomy is paramount for artists aiming to move beyond superficial representation and achieve genuine realism in their work. Accessing resources like free PDF downloads – such as “Anatomy for the Artist” and materials from Librivox – provides a foundational understanding of the human form.

Studying skeletal and muscular structures isn’t merely about memorization; it’s about comprehending how forms interact and move. This knowledge allows for more convincing poses, accurate foreshortening, and a deeper connection to the subject matter.

Without anatomical understanding, drawings can appear flat, stiff, or disproportionate. Resources like those available online, and in PDF format, empower artists to build a solid base, improving observational skills and ultimately, artistic expression. It’s the key to believable and dynamic artwork.

Understanding Proportions

Accurate proportions are fundamental to believable figure drawing, and studying anatomy – aided by readily available PDF resources like “Anatomy for the Artist” – is crucial for mastering them. These guides often include schematic drawings illustrating ideal ratios and relationships between body parts.

While variations exist, understanding the ‘average’ human proportion provides a starting point. Resources detail how the head serves as a unit of measurement, influencing the height and limb lengths.

However, proportion isn’t static. PDF materials and online tutorials emphasize how pose and perspective alter perceived proportions. Learning to recognize these shifts, informed by anatomical knowledge, allows artists to depict figures convincingly in dynamic positions. Ignoring proportions leads to distortions; mastering them unlocks realism.

The Skeletal System – Foundation for Form

PDF guides, like “Anatomy for the Artist”, reveal the skeleton’s role in defining form; understanding key bones is vital for accurate and dynamic drawings.

Key Bones for Artists

Understanding foundational skeletal structures is paramount for artists, and numerous PDF resources facilitate this learning process. The skull, readily available in detailed anatomical charts within downloadable guides like “Anatomy for the Artist”, dictates facial form and expression.

The rib cage, often schematized in these resources, defines the torso’s volume and influences posture. Equally crucial is the pelvis, a complex structure impacting weight distribution and movement, clearly illustrated in anatomy atlases.

Artists benefit from studying the humerus, radius, and ulna of the arm, alongside the femur, tibia, and fibula of the leg, as these bones govern limb articulation. These free or affordable PDFs provide schematic drawings and detailed views, enabling artists to build convincing and anatomically sound figures.

Skull Anatomy for Portraiture

Mastering skull anatomy is fundamental for portrait artists, and accessible PDF resources, such as those found through Librivox and dedicated anatomy guides, are invaluable. These materials detail the cranial bones – frontal, parietal, temporal, and occipital – shaping the head’s overall form.

Facial features are directly influenced by underlying bone structure; the zygomatic arch defines cheekbones, while the maxilla and mandible form the upper and lower jaws. Downloadable atlases provide views of these structures, aiding in accurate representation.

Understanding the orbits (eye sockets) and nasal aperture is crucial for realistic depictions. Artists can utilize free resources and PDFs to study these landmarks, improving their ability to capture likeness and expression.

Rib Cage and Spine – Core Structure

The rib cage and spine form the central axis of the body, crucial for understanding posture and movement in figure drawing. Numerous anatomy PDFs, readily downloadable, illustrate the spine’s vertebral column – cervical, thoracic, and lumbar regions – and its impact on the torso’s curvature.

The rib cage, comprised of ribs and the sternum, protects vital organs and dictates the torso’s shape. Artists benefit from studying these structures using resources like “Anatomy for the Artist”, available online.

Understanding how the rib cage articulates with the spine and influences surface forms is key. Free resources and detailed atlases help visualize these relationships, enabling more dynamic and anatomically accurate figure drawings.

The Pelvis – Form and Movement

The pelvis is a foundational structure for drawing the lower body, influencing balance, weight distribution, and locomotion. Anatomy PDFs, often available for free download, detail the ilium, ischium, and pubis bones forming this complex structure. Resources like those found through Librivox and artist-focused guides are invaluable.

Understanding the pelvic tilt and its effect on the spine and hips is crucial for dynamic poses. “Anatomy for the Artist” and similar resources demonstrate how the pelvis connects to the sacrum and femur, impacting movement.

Accurate depiction of the pelvis requires studying its form and how muscles attach, enhancing realism in figure drawing. Explore downloadable atlases to master this essential anatomical region.

Muscular Anatomy – Adding Volume and Realism

Anatomy PDFs reveal muscle groups, enhancing drawings; resources like “Anatomy for the Artist” offer free insights into form and realistic depictions.

Major Muscle Groups for Figure Drawing

Understanding key muscle groups is crucial for dynamic figure drawing, and thankfully, numerous anatomy PDF resources are readily available. Artists benefit from studying the major players – the deltoids, biceps, triceps, pectorals, abdominals, and gluteals – as foundational elements.

Resources like “Anatomy for the Artist” (often found as a free download) visually break down these muscle groups, illustrating their forms and how they interact. Focusing on these primary muscles allows artists to build convincing volume and weight in their figures.

Furthermore, understanding how muscles attach to bones – information frequently included in detailed anatomy guides – is vital for accurate pose construction. Librivox and other platforms offer supplementary audio resources to enhance learning. Mastering these core muscle groups dramatically improves the realism and believability of artistic representations.

Muscles of the Arm and Hand

Detailed study of the arm and hand muscles is essential for expressive figure drawing, and several anatomy PDFs cater specifically to this area. Key muscles include the biceps brachii, triceps brachii, brachialis, and forearm muscles responsible for wrist and hand movement.

Resources like downloadable artist anatomy guides illustrate these muscles’ origins, insertions, and actions, aiding in accurate depiction. Understanding the thenar and hypothenar eminences of the hand – often detailed in free anatomical atlases – is crucial for realistic hand poses.

Artists can find valuable information within “Anatomy for the Artist” PDFs, visualizing how muscle groups influence surface form. Mastering these details allows for nuanced expression and believable hand gestures, elevating the quality of figure drawings.

Muscles of the Leg and Foot

Accurate depiction of leg and foot muscles demands focused study, readily supported by anatomy for drawing PDF resources. Key muscle groups include the quadriceps, hamstrings, calf muscles (gastrocnemius and soleus), and the intricate muscles of the foot itself.

Free anatomical atlases and artist-focused guides detail origins, insertions, and functions, crucial for understanding movement and form. The tibialis anterior, often overlooked, significantly impacts shin shape.

PDF downloads like “Anatomy for the Artist” visually demonstrate how these muscles interact, influencing surface anatomy. Understanding foot arch structure and muscle attachments is vital for dynamic poses. Mastering these details enables artists to create believable weight distribution and realistic leg anatomy.

Facial Muscles – Expression and Detail

Capturing nuanced facial expressions requires a solid understanding of underlying musculature, easily accessible through anatomy for drawing PDF resources; Key muscles include the orbicularis oculi (around the eyes), zygomaticus major and minor (smiling), and the buccinator (cheek).

Free downloadable guides, like those found through Librivox and artist-specific atlases, illustrate how muscle contractions create wrinkles and folds.

PDF materials, such as “Anatomy for the Artist”, demonstrate how these muscles attach to the skull and influence facial planes. Understanding the complex network around the mouth and eyes is crucial for conveying emotion. Detailed study enhances realism and believability in portraiture, allowing for expressive and dynamic character designs.

Drawing the Torso

Anatomy for drawing PDF guides reveal abdominal and back muscles, crucial for realistic form. Schematics from resources like Watson-Guptill aid understanding.

Understanding the Abdominal Muscles

Anatomy for drawing PDFs emphasize the abdominal muscles as key to portraying realistic torso form. These resources, like those available for free download, detail the rectus abdominis – the “six-pack” muscle – and its role in flexion.

Beyond aesthetics, understanding the obliques (internal and external) is vital; They contribute to rotation and lateral flexion, impacting the torso’s shape during various poses.

Artists benefit from studying how these muscles interact with the spine and pelvis, as depicted in anatomical atlases.

Resources such as “Anatomy Made Simple for Artists” break down these complexities, offering schematics and illustrations to aid in accurate representation. Mastering abdominal anatomy enhances dynamic pose construction and believable weight distribution.

Back Muscles and Their Influence on Form

Anatomy for drawing PDFs often underrepresent the back muscles, yet they profoundly influence the torso’s silhouette. Resources like those found through free download options highlight the importance of the latissimus dorsi, contributing significantly to the body’s V-shape and arm movement.

The erector spinae group, running along the spine, dictates posture and spinal curves. Understanding their attachments is crucial for depicting realistic bending and twisting.

Artists utilizing anatomical atlases will discover how these muscles interact with the ribcage and pelvis, shaping the overall form.

Guides like “Anatomy for the Artist” provide schematics illustrating muscle attachments and actions, enabling accurate representation of the back’s complex structure in various poses.

Drawing Limbs

Anatomy for drawing PDFs detail limb structure; resources showcase shoulder, elbow, and wrist anatomy.

Accurate depictions require understanding muscle attachments, available through free downloads.

Anatomy of the Shoulder and Upper Arm

Understanding the shoulder and upper arm’s anatomy is crucial for artists, and numerous PDF resources are available to aid in this study. Key structures include the clavicle, scapula, and humerus – foundational elements detailed in guides like “Anatomy for the Artist.”

Focus on the deltoid muscle, biceps brachii, and triceps brachii, as these significantly influence the form. Free downloadable anatomical charts illustrate muscle origins and insertions, vital for accurate representation. Pay attention to how these muscles interact during movement, impacting the overall silhouette.

Resources often include schematic drawings, like those found in Watson-Guptill publications, simplifying complex forms. Mastering this area allows for dynamic and believable poses, enhancing the realism of your artwork. Explore PDFs for detailed insights into bone structure and muscular relationships.

Anatomy of the Elbow and Forearm

The elbow and forearm present a fascinating anatomical study for artists, with readily available PDF resources to guide your learning. Key bony landmarks include the ulna and radius, crucial for understanding joint articulation. Explore free downloadable atlases detailing these structures, like those mentioned in online resources.

Focus on the forearm muscles – flexors and extensors – which significantly impact the shape and movement. Resources such as “Anatomy for the Artist” often include schematic drawings illustrating muscle origins and insertions. Understanding the pronator and supinator muscles is vital for depicting realistic hand positions.

Detailed PDF guides help visualize how these muscles interact, influencing the form and creating believable contours. Mastering this anatomy enhances your ability to draw dynamic poses and accurately represent the human arm.

Anatomy of the Wrist and Hand

The wrist and hand, complex structures, benefit greatly from dedicated anatomical study, with numerous PDF resources available for artists. Understanding the carpal bones – eight small bones forming the wrist – is foundational. Free downloadable anatomy guides, like those found through Librivox and artist-focused resources, illustrate these intricate arrangements.

Focus on the muscles of the forearm that control hand and finger movement. These muscles’ tendons traverse the wrist, creating visible forms. Resources such as “Anatomy for the Artist” often provide schematic drawings detailing muscle attachments and actions.

Pay attention to the thenar and hypothenar eminences – fleshy pads at the base of the thumb and little finger. Detailed PDFs help visualize these forms and their influence on hand shape, enabling more realistic depictions.

Facial Anatomy for Artists

Facial anatomy, accessible via free PDF downloads, reveals underlying bone structures and planes crucial for artists seeking realistic portraiture and expressive detail.

Underlying Bone Structure of the Face

Understanding the facial skeleton is paramount for artists. Numerous free PDF resources, like “Anatomy for the Artist,” detail the foundational bones shaping the face – the cranium and facial bones.

The skull isn’t merely a rigid form; it dictates muscle attachment points and influences surface contours. Artists must visualize the zygomatic arch (cheekbone), maxilla (upper jaw), mandible (lower jaw), and nasal bones.

These structures define key landmarks. Knowing their positions allows for accurate depiction of facial features, even with varying muscle mass or expressions. PDF guides often include schematic drawings illustrating these relationships.

Mastering this skeletal framework provides a solid base for layering muscle and achieving believable, three-dimensional portraits. It’s the unseen foundation of realistic facial representation.

Facial Planes and Landmarks

Facial planes, simplified geometric forms overlaid on the face, are crucial for artists. Anatomy resources, often available as free PDF downloads like “Anatomy for the Artist,” illustrate these planes – frontal, temporal, orbital, and nasal.

Identifying key landmarks – the brow ridge, cheekbones, corners of the mouth, and chin – anchors these planes. These landmarks aren’t isolated points; they’re determined by underlying bone structure.

Understanding how light interacts with these planes creates form and volume. Artists use them to simplify complex shapes and accurately render shadows and highlights.

PDF guides frequently include diagrams demonstrating plane construction. Mastering these concepts elevates portraiture, enabling artists to depict nuanced expressions and realistic facial anatomy with confidence.

Resources for Anatomy Study (PDFs & More)

Free PDF downloads, like “Anatomy for the Artist,” and resources from Librivox offer accessible learning. Explore guides and atlases to enhance your skills!

Free Anatomy PDF Downloads

Numerous invaluable resources are readily available as free PDF downloads for artists eager to deepen their anatomical understanding. Websites like Librivox offer audio learning, complementing visual study. Specifically, “Anatomy for the Artist.pdf” is a frequently cited and easily accessible option, providing a foundational overview of human form.

Furthermore, resources like “Anatomy Made Simple for Artists” (9781398800076) are available for direct download, offering a streamlined approach to complex structures. Tom Fox’s comprehensive guide, “Anatomy for Artists Drawing Form Pose,” is also often found as a free PDF, detailing perspective and pose.

These PDFs provide schematic drawings and detailed illustrations, enabling artists to study at their own pace and build a strong foundation for realistic figure drawing. Always respect copyright and usage guidelines when utilizing these resources.

Recommended Anatomy Books for Artists

While free PDF resources are excellent starting points, investing in dedicated anatomy books can significantly enhance an artist’s understanding. Though specific titles weren’t directly listed beyond those available as PDFs, the prevalence of “Anatomy for the Artist” suggests its physical counterpart is highly regarded.

Considering the content found within downloadable resources – schematic drawings, detailed muscle and bone structures, and pose analysis – seeking out expanded versions of these concepts in book form is beneficial.

Look for publications that focus on applying anatomical knowledge to artistic practice, rather than purely medical texts. Books mirroring the content of Tom Fox’s guide, or those building upon “Anatomy Made Simple,” will prove most valuable. Prioritize texts with clear illustrations and practical exercises to solidify learning.

Online Anatomy Resources and Tutorials

Supplementing PDF downloads with interactive online resources accelerates learning. While the provided text doesn’t detail specific tutorial sites, the availability of “Anatomy for the Artist” in free digital formats hints at a wealth of online content.

Search for platforms offering 3D anatomical models, allowing artists to rotate and examine the human form from all angles. Video tutorials demonstrating muscle and bone structure in motion are invaluable for understanding dynamic poses.

Explore artist communities and forums where anatomical studies are shared and critiqued. Leverage resources that bridge the gap between anatomical accuracy and artistic expression, focusing on how knowledge translates to compelling figure drawing and portraiture. Remember to verify the credibility of online sources.

Applying Anatomy to Different Poses

PDF guides like “Anatomy for the Artist” help translate skeletal and muscular knowledge into dynamic poses, mastering weight distribution and foreshortening effectively.

Dynamic Poses and Weight Distribution

Understanding anatomical structures is crucial for convincingly portraying dynamic poses. Free PDF resources, such as “Anatomy for the Artist,” illustrate how weight shifts influence the body’s form and balance.

Artists can utilize these resources to visualize the skeletal and muscular systems working in concert to support movement.

Consider the line of gravity – an imaginary vertical line passing through the body’s center of mass.

Proper weight distribution ensures poses appear natural and grounded, avoiding stiffness or instability.

By studying anatomical references, artists can accurately depict how muscles contract and stretch during action, creating a sense of realism and energy within their artwork.

These downloadable guides provide schematic drawings and detailed explanations to aid in mastering this essential skill.

Foreshortening and Anatomical Accuracy

Foreshortening, the visual effect where an object appears shorter than it actually is due to its angle, demands a strong grasp of anatomy. Free PDF resources, like anatomical atlases available for download, are invaluable for mastering this technique.

Accurate representation requires understanding how forms compress and overlap in perspective.

Resources such as “Anatomy for the Artist” provide schematic drawings illustrating how limbs and the torso change shape as they recede into space.

Without a solid anatomical foundation, foreshortened figures can appear distorted or unnatural.

Careful study of muscle and bone structure helps artists anticipate these changes and maintain believable proportions.

Utilizing these downloadable guides ensures that even in extreme perspectives, the underlying anatomy remains convincing and contributes to a dynamic composition.