decal instructions

Decal Instructions: A Comprehensive Guide

This guide details applying decals, from preparation to finishing, covering waterslide, dry transfers, and self-adhesive types. It includes techniques for curved surfaces and using tools like Cricut.

Understanding Decals

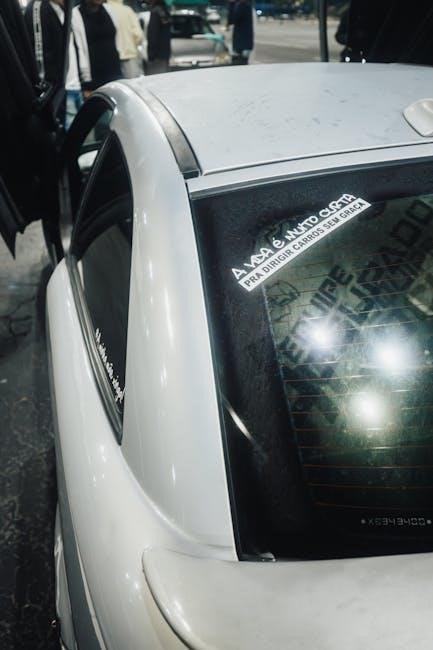
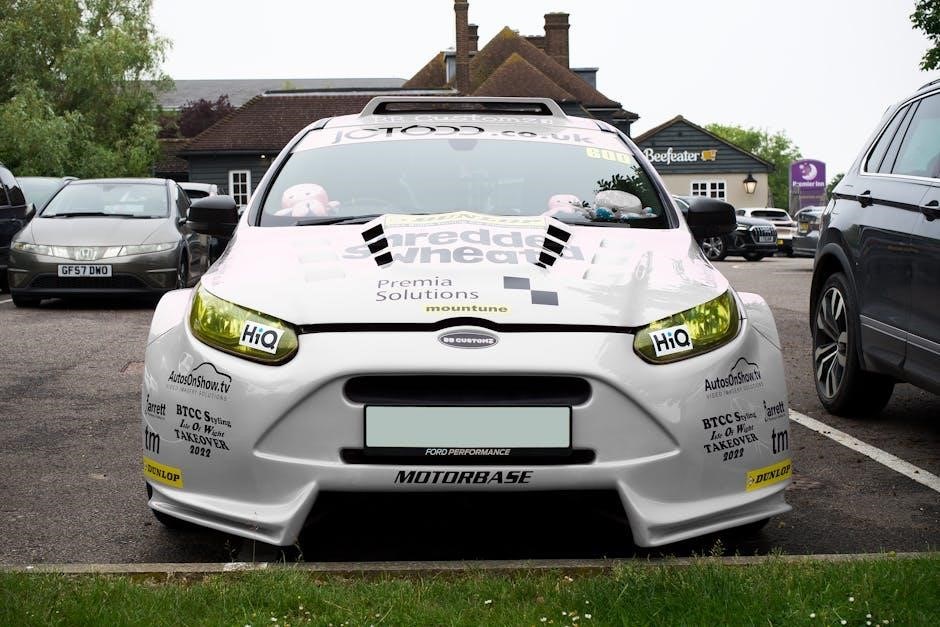
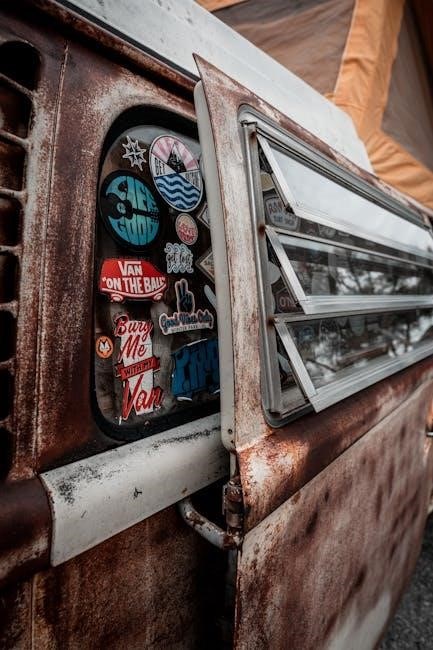
Decals are essentially images or designs transferred from a backing paper to a surface, enhancing its appearance with detail and personalization. They’ve become incredibly popular across diverse applications, ranging from model building and customizing tumblers to automotive detailing and even intricate miniature work like adorning Space Marine miniatures.

The core principle involves adhesion – getting the design to stick firmly and smoothly to the target surface. However, the method of achieving this adhesion varies significantly depending on the type of decal. Understanding these differences is crucial for successful application. Factors like the surface material, the decal’s composition, and the desired finish all influence the best approach.

Proper decal application isn’t simply sticking something on; it’s a process that requires preparation, careful execution, and often, the use of specialized products like decal fixers and setters to ensure a professional, bubble-free, and long-lasting result. Mastering these techniques unlocks a world of creative possibilities.

Types of Decals Available

The decal world offers a variety of options, each suited to different projects and skill levels. Waterslide decals are arguably the most common, favored by modelers for their intricate detail and ability to conform to curved surfaces after soaking and sliding into position. They require careful handling and often benefit from decal softener.

Dry transfer decals, conversely, apply directly to the surface with pressure, leaving the design behind as the backing is removed. These are often used for smaller, simpler designs and demand precise placement as repositioning is difficult. Self-adhesive decals, similar to stickers, are the easiest to apply, making them ideal for beginners and quick projects.

Beyond these core types, decals can also be created using machines like Cricut, allowing for custom designs cut from vinyl. The choice depends on the complexity of the design, the surface being decorated, and the desired level of durability and finish.

Waterslide Decals: The Most Common Type

Waterslide decals dominate the modeling and customization world due to their versatility and detail. These decals feature a design printed on a soluble backing. The process begins by carefully cutting excess material around the design, minimizing handling difficulties. Soaking the decal in lukewarm water for a specified time releases the design from its backing.

A crucial step involves using decal softener, like GSW Decal Fixer, applied to the model’s surface before and sometimes after application. This helps the decal conform to contours and reduces silvering – the appearance of air bubbles trapped beneath the decal. Gently sliding the decal from the backing onto the surface requires patience.

Removing excess water with a soft cloth and addressing any remaining air bubbles completes the initial application. Proper sealing with a decal fixer ensures long-lasting adhesion and protects the design.

Dry Transfer Decals

Dry transfer decals, unlike waterslide versions, don’t require water. Instead, they utilize a sticky carrier sheet. These decals are applied by firmly rubbing the design onto the target surface, transferring the image directly. This method is favored for its precision and minimal risk of wrinkling or silvering, common issues with waterslide decals.

However, dry transfers are less forgiving. Positioning is critical, as repositioning can be difficult or impossible. Careful alignment is essential before applying pressure. They are often used for smaller details or markings where absolute accuracy is paramount, like shoulder pad details on miniature models.

While they don’t need softening solutions, ensuring a perfectly clean and smooth surface is vital for optimal adhesion. Removing the backing sheet slowly and evenly aids in a clean transfer, avoiding tearing or incomplete application.

Self-Adhesive Decals

Self-adhesive decals are the simplest to apply, resembling stickers. They feature a pre-applied adhesive backing, eliminating the need for water or transfer agents. These decals are widely used for various applications, including tumblers and general crafting projects, due to their ease of use and versatility.

Application involves peeling the backing and carefully positioning the decal onto the surface. Using transfer tape can be beneficial for intricate designs or larger decals, ensuring accurate placement and preventing tearing. Smooth out any air bubbles with a squeegee or a soft cloth, working from the center outwards.

While convenient, self-adhesive decals may not conform as well to complex curves compared to waterslide options. Surface preparation remains crucial; a clean, smooth surface guarantees strong adhesion and a professional finish. Cricut machines are frequently used to create custom self-adhesive decals.

Preparing for Decal Application

Proper preparation is key! This involves cleaning, smoothing the surface, carefully cutting excess decal material, and potentially soaking the decal for optimal adhesion.

Surface Preparation: Cleaning and Smoothing

Before applying any decal, meticulous surface preparation is absolutely crucial for a flawless finish. Begin by thoroughly cleaning the intended surface to remove any dust, mold release agents, fingerprints, or oils. A mild soap and water solution works well, followed by a complete rinse and drying. For plastic models, a plastic cleaner can be beneficial.

Smoothing the surface is equally important. Any imperfections – scratches, blemishes, or uneven textures – will be visible through the decal. Use fine-grit sandpaper (typically 600 grit or higher) to gently smooth out any irregularities. Be careful not to over-sand, as this can alter the surface detail. After sanding, clean the surface again to remove any sanding dust.

A smooth, clean surface ensures the decal adheres properly and conforms to the shape of the object, minimizing the risk of bubbles or wrinkles. Remember, the decal will only look as good as the surface it’s applied to, so invest time in this critical step!

Cutting Excess Decal Material

Once the decal is soaked and separated from its backing paper, trimming away excess material is a vital step for easier handling and a cleaner application. Carefully use a sharp hobby knife or small scissors to cut closely around the design, removing as much of the clear carrier film as possible without damaging the decal itself.

Reducing the amount of carrier film minimizes the visible edge around the decal after application and simplifies the process of sliding it into position. A large excess can make maneuvering the decal difficult, increasing the chance of wrinkles or misplacement. The decal itself is already large, so less to work with is better.

Take your time during this process; precision is key. A well-trimmed decal will blend seamlessly with the surface, creating a professional-looking result; Remember to discard the trimmed pieces responsibly.

Soaking the Decal

Proper soaking is crucial for waterslide decals to release from their backing paper. Gently place the cut decal into a small dish of lukewarm (not hot!) water. Allow it to soak for the recommended time – this varies depending on the decal type, but generally ranges from 30 seconds to a few minutes. Observe the decal closely; the carrier film will begin to soften and appear translucent.

Avoid prolonged soaking, as this can damage the decal and make it fragile. Once the decal appears fully softened, carefully test a corner to see if it slides easily. If it doesn’t, give it a few more seconds. Before applying it to the model, ensure the decal has soaked long enough.

A properly soaked decal will glide smoothly onto the surface, conforming to contours and minimizing the risk of air bubbles.

Using Decal Softener

Decal softener is a vital tool for achieving a professional finish, especially when applying decals to complex or curved surfaces. Before applying the decal to the model, apply a small amount of decal softener – like GSW Decal Fixer – to the surface where the decal will be placed. This creates a slightly tacky base, aiding adhesion and helping the decal conform to details.

After sliding the decal into position and removing excess water, apply another coat of softener over the decal itself. This further softens the decal film, allowing it to mold tightly around curves, rivets, and panel lines. Be cautious not to over-saturate, as excessive softener can dissolve the decal.

Allow the softener to work for the recommended time, then gently blot away any excess with a soft cloth. This process minimizes silvering and ensures a seamless, realistic appearance.

Applying the Decal

Carefully position, slide, and secure the decal, removing excess water. Address any air bubbles immediately for a smooth, professional application, ensuring proper adhesion and a flawless finish.

Positioning the Decal

Precise decal positioning is crucial for a professional result. Before fully sliding the decal from its backing, carefully consider its intended location on the model or surface. Utilize reference images or markings to ensure accurate placement, especially with intricate designs or multiple decals.

Gently nudge the decal into the approximate position while it’s still on the backing paper. This allows for minor adjustments before the adhesive fully engages. Avoid pressing down firmly at this stage, as it will make repositioning difficult. For complex curves or angles, consider cutting the decal into smaller, more manageable sections for easier manipulation.

Take your time and double-check the alignment from multiple angles. A slightly off-center or crooked decal can detract from the overall appearance. Remember that once the decal is fully applied, making significant adjustments can be challenging, potentially leading to tearing or damage. Proper initial positioning saves time and frustration later in the process.

Sliding the Decal into Place

Once positioned, gently slide the decal off the backing paper. Applying a small amount of decal softener to the surface beforehand can aid this process, allowing the decal to conform to contours. Use a soft brush, a cotton swab, or even your finger to encourage the decal to release from the backing, working from the center outwards.

Maintain gentle, consistent pressure to avoid wrinkles or creases. If the decal resists sliding, apply a bit more decal softener and allow it to sit for a few more seconds. Avoid excessive force, as this can tear the delicate decal; The goal is a smooth, controlled transfer, not a rushed one.

As the decal slides, continue to monitor its alignment and make minor adjustments as needed. Remember that the softener provides a window of opportunity for repositioning, but it’s limited. Once the decal is fully in place, proceed to the next step – removing excess water – to secure its position.

Removing Excess Water

After sliding the decal into its desired location, carefully remove the excess water surrounding it. A soft, clean cloth or a slightly dampened cotton swab works best for this task. Gently blot the area, avoiding any rubbing or sliding motions that could disrupt the decal’s placement. The aim is to absorb the water without disturbing the delicate film.

Pay particular attention to the edges of the decal, ensuring all water is removed from underneath. This helps the adhesive bond properly to the surface. Continue blotting until the surface appears relatively dry, but don’t worry about removing every single drop at this stage. A slight residue is acceptable.

Be patient and methodical during this process. Rushing can lead to air bubbles or a poorly adhered decal. Once the bulk of the water is removed, allow the decal to dry partially before addressing any remaining bubbles or imperfections.

Dealing with Air Bubbles

Air bubbles are a common issue during decal application, but they’re usually manageable. Immediately after positioning and removing excess water, inspect the decal for any trapped air. Small bubbles can often be coaxed out gently using a soft brush, like a clean toothbrush, or a cotton swab. Apply light pressure and work from the center of the bubble towards the edge.

For more stubborn bubbles, a tiny pinprick can be made with a needle, allowing the air to escape. However, exercise extreme caution to avoid damaging the decal itself. After pricking, gently press the area to smooth it out. Decal softener, applied sparingly, can also help reduce the appearance of bubbles by allowing the decal to conform more closely to the surface.

Remember, patience is key. Don’t aggressively poke or prod at the decal, as this can cause tearing or distortion. Allow sufficient drying time for the decal to settle and any remaining minor bubbles to dissipate.

Finishing Touches & Advanced Techniques

Explore advanced methods like applying decal fixers, sealing for durability, and tackling curved surfaces, tumblers, or miniature models for professional results.

Applying Decal Fixer/Setter

Decal fixer, or setting solution, is a crucial step after positioning your waterslide decal. Applying a small amount of GSW Decal Fixer to the model’s surface before sliding the decal helps it conform to surface details and reduces silvering – that undesirable shiny film under the decal.

This solution essentially softens the decal film, allowing it to hug contours and imperfections. It’s recommended to apply it sparingly, as excessive amounts can damage the decal or the underlying paint. Allow the fixer to dry completely before proceeding.

After the decal is in place, another coat of fixer can be applied over the decal itself. This further enhances adhesion and helps to “melt” the decal into the surface, making it appear as though it’s painted on. Patience is key; allow each coat to fully dry before adding another. Multiple light coats are preferable to one heavy application.

Sealing the Decal

Sealing the decal is the final protective layer, safeguarding your meticulous work against scratches, wear, and potential damage from handling. This step isn’t always strictly necessary, but it significantly extends the decal’s lifespan and maintains its vibrant appearance, especially on frequently touched items like tumblers or miniatures.

Various sealants are available, including matte, satin, and gloss finishes. The choice depends on the desired look and the surface material. Apply the sealant in thin, even coats, allowing each coat to dry completely before applying the next. Avoid heavy applications, which can cause runs or cloudiness.

For miniatures, a spray-on varnish is often preferred for uniform coverage. On tumblers, epoxy resin provides a durable, waterproof seal. Ensure the sealant is compatible with both the decal and the underlying surface to prevent any adverse reactions or peeling. Proper sealing ensures your decal remains pristine for years to come.

Applying Decals to Curved Surfaces

Applying decals to curved surfaces, like tumblers or vehicle bodies, presents unique challenges due to the potential for wrinkling and distortion. Careful preparation and technique are crucial for a seamless finish. Begin by ensuring the surface is exceptionally clean and smooth. Warming the surface slightly with a hairdryer can increase its flexibility, aiding decal adhesion.

When sliding the decal, work slowly and deliberately, gently coaxing it to conform to the curve. Use a soft brush or decal application tool to smooth out any air bubbles or wrinkles as you go. Decal softener is particularly helpful here, allowing the decal to stretch and mold to the shape.

For tight curves, consider slicing the decal into smaller sections before applying. This allows for greater control and reduces the risk of tearing. Patience is key; take your time and work methodically for professional-looking results on even the most challenging curves.

Decal Application on Tumblers

Applying decals to tumblers requires a specific approach to ensure a smooth, lasting finish on the curved surface. Begin with a meticulously cleaned tumbler, free of oils or residue. Precise cutting around the decal design minimizes excess material and simplifies application. Soaking the waterslide decal thoroughly is vital, allowing it to separate cleanly from the backing paper.

Positioning is critical; carefully align the decal before sliding it into place. Utilize a soft brush or squeegee to gently remove air bubbles and excess water, working from the center outwards. Decal softener is highly recommended, enabling the decal to conform to the tumbler’s curves without wrinkling.

After application, allow ample drying time before sealing with a tumbler-specific epoxy or sealant. This protects the decal from scratches and ensures it remains vibrant and intact through repeated use and washing.

Decal Application to Miniature Models (Space Marines)

Applying decals to Space Marine miniatures demands precision, particularly on contoured surfaces like shoulder pads. Begin by carefully cutting around the decal, reducing excess material for easier handling and a cleaner look. A thorough soaking is crucial, allowing the decal to release fully from its backing sheet.

Utilize decal softener liberally; this is key to conforming the decal to the miniature’s curves and preventing silvering – that undesirable trapped air bubble effect. Gently position the decal using tweezers or a fine brush, then slide it into place. Remove excess water with a clean cotton swab, being careful not to disturb the decal’s alignment.

Finally, apply a decal fixer to seal the decal and protect it from chipping during handling and gameplay. Patience and a steady hand are essential for achieving professional-looking results on these detailed models.

Using Decals with Cricut Machines

Cricut machines offer a streamlined approach to decal creation and application, particularly for custom designs. Begin by designing your decal in Cricut Design Space, ensuring precise cuts for clean edges. Utilize appropriate vinyl material – permanent for durable applications, removable for temporary ones.

After cutting, carefully weed away the excess vinyl, leaving only your desired decal design. Transfer tape is essential; apply it smoothly over the decal, ensuring full adhesion. Gently lift the decal from its backing using the transfer tape, maintaining the design’s integrity.

Position the decal onto your target surface, applying even pressure to ensure a secure bond. Slowly peel away the transfer tape, leaving the decal flawlessly adhered. For complex designs, use a brayer to eliminate air bubbles and achieve a professional finish.

Contrasting Striping for Visual Impact

Employing contrasting striping alongside decals dramatically enhances a vehicle or model’s aesthetic appeal, drawing the eye and creating a more dynamic appearance. Strategic placement of stripes, differing significantly in color from the base surface, generates visual interest and highlights key design elements.

Consider the overall design scheme when selecting stripe colors; complementary or analogous colors can create harmonious effects, while bold contrasts deliver a more aggressive look. Stripe width and orientation also play crucial roles – wider stripes command more attention, while angled stripes convey a sense of motion.

When applying stripes in conjunction with decals, ensure seamless integration. Align stripes to complement decal shapes or create visual pathways leading to focal points. Proper masking and precise application are vital for achieving clean, professional-looking results, maximizing the impact of both elements.

Decal Application in Autodesk VRED

Within Autodesk VRED, applying decals is a streamlined process utilizing texture mapping capabilities. The workflow begins by dragging a desired texture file directly onto the geometry within the VRED viewport. This action automatically initiates a wizard designed to facilitate precise decal assignment.

The wizard guides users through crucial settings, including decal scale, rotation, and position. Users can adjust these parameters in real-time, previewing the changes directly on the model. Accurate positioning is paramount, ensuring the decal aligns correctly with the intended surface contours and design elements.

VRED offers advanced features like projection mapping, allowing decals to conform to complex shapes. Furthermore, material properties can be adjusted to control decal transparency, reflectivity, and bump mapping, enhancing realism. This method provides a non-destructive workflow, enabling iterative design and refinement.

admiral washer manual

Understanding Your Admiral Washer: A Comprehensive Manual Guide

This guide assists owners in navigating their Admiral washer, offering insights into model identification, troubleshooting, maintenance, and accessing vital support resources.

Admiral washers, manufactured by Whirlpool, represent a blend of dependable performance and affordability within the laundry appliance market. Understanding your Admiral washer begins with recognizing its lineage – benefiting from Whirlpool’s engineering and parts compatibility. This manual aims to empower owners with the knowledge to maximize their washer’s lifespan and efficiency.

Whether you’re a first-time user or a seasoned homeowner, locating the model and serial numbers is crucial for accessing support, ordering replacement parts, and understanding your appliance’s specific features. This guide will detail exactly where to find these vital identifiers on both top-load and front-load models, setting the stage for effective troubleshooting and maintenance.

Locating the Model Number

Finding your Admiral washer’s model number is the first step towards effective troubleshooting and parts replacement. This unique identifier is essential when seeking assistance from customer service or ordering specific components. The location of this number varies depending on whether you have a top-load or front-load model.

Generally, the model number is found on a product label affixed to the appliance. This label is typically located on the back or bottom of the washer. Careful inspection of these areas will reveal a sticker containing a series of letters and numbers – this is your model number. Keep it readily available for future reference!

Where to Find the Model Number on Top-Load Washers

For top-load Admiral washers, the model number is commonly located on a label situated on the inside of the lid. Open the lid and carefully inspect the upper frame, often near the hinges. You may need a flashlight to clearly view the sticker. Alternatively, check the back panel of the washer; the label might be affixed there.

The label will display a combination of letters and numbers, clearly identifying your specific model. A video demonstrating this process can be helpful for visual learners. Remember to record this number as it’s crucial for any service requests or part replacements.

Where to Find the Model Number on Front-Load Washers

Locating the model number on front-load Admiral washers typically involves checking the area inside the door frame. Open the washer door and look for a label affixed to the door jamb or the surrounding metal frame. It’s often a rectangular sticker containing various details, including the model number.

If you don’t find it there, inspect the back of the machine. The label might be located on the rear panel. A helpful video tutorial can visually guide you through this process. Having the model number readily available is essential for troubleshooting, ordering parts, and contacting customer support.

Decoding the Serial Number

The Admiral washer serial number provides crucial information about the machine’s manufacturing date, aiding in determining its age and potentially identifying recall notices. Understanding the format is key; one common style uses a “Blue Year — Red Week” system. For example, a serial number like MX040676 indicates the machine was manufactured in the 4th week of 2006.

The blue portion signifies the year, while the red portion denotes the week of production. Utilizing this code, alongside online resources or contacting customer service, allows you to pinpoint the washer’s age for maintenance or warranty purposes.

Understanding the Serial Number Format (Style 2: Blue Year — Red Week)

Style 2 serial numbers, commonly found on Admiral washers, employ a color-coded system to reveal the manufacturing date. The first two digits, typically printed in blue, represent the year the washer was produced. Following this, a set of digits displayed in red indicates the specific week of that year when the unit rolled off the assembly line.

For instance, if a serial number reads MX040676, “04” in blue signifies the year 2004, and “06” in red denotes the 6th week of that year. This straightforward format allows for quick and accurate age determination.

Using the Serial Number to Determine Washer Age

Determining your Admiral washer’s age is straightforward using the serial number. As detailed in Style 2 formatting, the initial blue digits represent the year of manufacture. Simply interpret these two digits to establish the production year. Combining this with the red digits – indicating the week of the year – provides a precise manufacturing timeframe.

For example, a serial number beginning with “26” in blue signifies a 2026 production year. Knowing the age is crucial for assessing potential wear and tear, researching compatible parts, and understanding warranty coverage. This simple decoding process empowers owners with valuable information about their appliance.

Common Admiral Washer Problems & Troubleshooting

Admiral washers, like all appliances, can experience issues. Common problems include the washer failing to start, often due to a power supply issue or a faulty lid switch. Another frequent concern is a washer that won’t drain, potentially caused by a clogged drain pump or hose. Excessive vibration during the spin cycle can stem from an unbalanced load or worn suspension components.

Before calling for service, attempt basic troubleshooting: check the power cord, ensure the lid is securely closed, and inspect the drain hose for obstructions. Addressing these simple fixes can often resolve the issue quickly and efficiently.

Washer Won’t Start: Potential Causes

If your Admiral washer refuses to start, several factors could be at play. First, verify the power cord is securely plugged into a functioning outlet. A tripped circuit breaker or blown fuse is another common culprit – check your electrical panel. The lid switch is crucial; if faulty, the washer won’t initiate a cycle, even if the lid is closed.

Additionally, a malfunctioning motor or a problem with the control board could prevent startup. Inspect the water inlet valves to ensure they’re receiving power and opening correctly. A thorough check of these components will help pinpoint the source of the issue.

Washer Not Draining: Troubleshooting Steps

When your Admiral washer retains water, begin by checking the drain hose for kinks or obstructions. Ensure it isn’t excessively bent or clogged with lint or debris. Next, inspect the drain pump filter – it’s often located at the front of the machine, behind a small access panel – and clear out any foreign objects.

A clogged drain pump itself is another possibility. Listen for humming sounds during the drain cycle; silence could indicate a pump failure. Finally, verify the washer isn’t experiencing a control board issue preventing the drain cycle from initiating.

Excessive Vibration During Spin Cycle

If your Admiral washer shakes violently during the spin cycle, the first step is to ensure the washer is level. Use a leveling tool to adjust the feet until the machine sits firmly on the floor. An unbalanced load is a common culprit; redistribute items evenly within the drum.

Check that the shipping bolts have been removed – these are installed during transport to stabilize the drum. Worn suspension rods or shock absorbers can also cause excessive vibration. Inspect these components for damage and replace if necessary. Finally, verify the floor itself is stable and can support the washer’s weight.

Finding Replacement Parts

Locating the correct replacement parts for your Admiral washer begins with identifying the precise model number. This number is crucial for ensuring compatibility. Utilize online parts retailers, specifying your model number in the search bar to filter results accurately. Because Admiral washers are manufactured by Whirlpool, many Whirlpool parts are directly compatible.

When searching, cross-reference part numbers if possible. If you encounter difficulties, contacting Admiral customer service (1-800-269-2609) or utilizing their online chat support can provide assistance in identifying the correct parts for your specific appliance. Always prioritize genuine or approved replacement parts for optimal performance.

Utilizing the Model Number for Parts Searches

The model number is your key to successful parts searches for your Admiral washer. Inputting this number into online parts databases narrows down options to components specifically designed for your machine. Websites dedicated to appliance parts will display diagrams and lists of compatible parts when the correct model number is entered.

Double-check the part number against the description to confirm it matches the component you need to replace. Many sites also offer exploded views, visually illustrating where each part is located within the washer. If your model isn’t listed, contacting customer service with the number is recommended.

Whirlpool Parts Compatibility with Admiral Washers

Admiral washers are manufactured by Whirlpool, meaning a significant number of parts are directly interchangeable between the two brands. When searching for replacement parts, you can often successfully use Whirlpool part numbers alongside your Admiral washer’s model number. This expands your sourcing options and potentially lowers costs.

However, always verify compatibility before purchasing. Some cosmetic or specific feature-related parts might differ. Cross-referencing the part number with both Admiral and Whirlpool databases is a prudent step. Online parts retailers frequently indicate Whirlpool compatibility for Admiral models, simplifying the process.

Admiral Washer Maintenance

Regular maintenance extends the lifespan and optimizes the performance of your Admiral washer. Implement routine cleaning procedures, including wiping down the exterior with a damp cloth and regularly cleaning the detergent dispenser. Periodically run an empty hot water cycle with a washing machine cleaner to remove residue and prevent odors.

Preventative maintenance is key. Inspect hoses for cracks or leaks, and ensure proper leveling to minimize vibration. Clean the lint filter (if applicable) after each load. Avoid overloading the washer, as this strains the motor and components. Following these simple steps ensures reliable operation.

Regular Cleaning Procedures

Maintaining cleanliness is crucial for optimal Admiral washer performance. Wipe down the exterior surfaces with a soft, damp cloth to remove dust and spills. Regularly clean the detergent dispenser to prevent buildup and clogs, ensuring proper dispensing. Run a cleaning cycle monthly using a washing machine cleaner, selecting a hot water temperature.

Don’t forget the door gasket on front-load models – wipe it down after each use to prevent mildew. Inspect and clean the drain pump filter periodically to remove lint and debris. These simple procedures will keep your Admiral washer functioning efficiently and prevent unpleasant odors.

Preventative Maintenance Tips

Proactive care extends the life of your Admiral washer. Always use HE (High Efficiency) detergent in HE machines to avoid excessive suds and residue. Avoid overloading the washer, as this strains the motor and components. Level the washer properly to minimize vibration and noise during operation.

Periodically inspect the hoses for cracks or leaks, replacing them as needed. Leave the washer door ajar after use to allow ventilation and prevent mildew growth. Following these simple preventative measures will help ensure years of reliable performance from your Admiral washing machine.

Customer Support & Resources

For assistance with your Admiral washer, several support avenues are available. Direct contact with Admiral Customer Service is possible at 1-800-269-2609, offering personalized troubleshooting and guidance. If you prefer digital support, utilize their online chat feature for immediate assistance with common issues and questions.

Should your model not be listed in online resources, don’t hesitate to contact the customer service team. Remember to have your model and serial number readily available when contacting support to expedite the process and receive accurate assistance tailored to your specific Admiral washer.

Contacting Admiral Customer Service (1-800-269-2609)

Reaching Admiral’s dedicated customer service team at 1-800-269-2609 provides direct access to expert support for your washing machine. Before calling, locate your washer’s model and serial number; this information is crucial for efficient assistance. Be prepared to describe the issue in detail, including any error codes displayed.

The representatives can guide you through troubleshooting steps, explain warranty coverage, and assist with locating replacement parts if needed. Note the date and time of your call, and the representative’s name for future reference. This ensures a clear record of your interaction and any advice given.

Using Online Chat Support

Admiral offers convenient online chat support as an alternative to phone assistance. This feature allows for real-time interaction with a customer service representative directly through the Admiral website. Before initiating a chat, gather your washer’s model and serial number – these details are essential for accurate support.

Online chat is ideal for quick questions, troubleshooting minor issues, or seeking guidance on specific features. You can easily copy and paste error codes or descriptions of the problem. A transcript of the chat is often available for your records, providing a documented history of the conversation and any solutions offered.

Safety Precautions

Prioritize safety when operating your Admiral washer. Always ensure the machine is properly grounded to prevent electrical shock. Never attempt to repair the washer yourself unless you are a qualified technician; improper repairs can be hazardous. Keep children and pets away from the washer during operation, and never allow them to play inside.

Before cleaning or performing maintenance, disconnect the power supply. Do not overload the washer, as this can cause damage and instability. Avoid using flammable liquids near the appliance. Regularly inspect the power cord for damage and replace it if necessary. Follow all warning labels affixed to the machine.

General Safety Guidelines for Washer Operation

To ensure safe operation, always load the Admiral washer with appropriate sized loads, avoiding overstuffing. Never wash items that have been cleaned with flammable solvents. Keep the area around the washer clear of obstructions. Do not attempt to operate the washer if it is damaged or malfunctioning.

Always close the lid or door during operation to prevent injury. Be cautious when opening the door after a hot wash cycle, as steam may be present. Never reach into a running washer. If you smell gas, immediately ventilate the area and contact your gas company. Regularly check pockets for objects before washing.

Electrical Safety Considerations

Prioritize electrical safety by ensuring the washer is properly grounded. Never operate the appliance with a damaged power cord or plug. Avoid using extension cords; plug directly into a dedicated, appropriately rated outlet. Do not expose the electrical components to water or moisture.

Always disconnect the power supply before performing any maintenance or repairs. If the outlet is not grounded, consult a qualified electrician for installation. Never attempt to repair electrical components yourself; contact a certified technician. Be mindful of the voltage requirements specified on the washer’s data plate.

bobbie goods coloring book pdf free download

Bobbie Goods Coloring Book PDF Free Download: A Comprehensive Guide (Updated 02/07/2026)

Bobbie Goods offers delightful coloring pages, often available as free PDF downloads. Discover charming Christmas scenes and relaxing designs from Bobbie Goods’ coloring books.

Numerous resources, like ColorearW, provide access to these printable artworks, including a document with 81 pages, and Cozy Colors books with 12 free printable pages.

What is Bobbie Goods?

Bobbie Goods is an artist and creator renowned for a whimsical and endearing style, primarily expressed through delightful coloring book designs. Her work centers around charming characters engaged in everyday, often cozy, adventures, offering a comforting and lighthearted aesthetic.

The appeal lies in the intricate yet accessible illustrations, making them perfect for both children and adults seeking a relaxing creative outlet. Bobbie Goods’ creations frequently feature themes of home, nature, and simple joys, fostering a sense of warmth and tranquility.

Many of her coloring pages are readily available as free PDF downloads, particularly through platforms like ColorearW, allowing a wide audience to experience her artistic vision. The artist’s dedication to providing accessible art has cultivated a dedicated following, eager to immerse themselves in her charming universe.

The Appeal of Bobbie Goods Coloring Pages

Bobbie Goods coloring pages offer a unique escape into a charming world filled with endearing characters and delightful scenes. The primary appeal stems from their whimsical nature and the comforting aesthetic they provide, making them ideal for stress relief and creative expression.

These pages aren’t overly complex, yet possess enough detail to engage colorists of all skill levels. The themes often revolve around cozy home life, peaceful nature settings, and simple, joyful moments, resonating with those seeking tranquility.

The accessibility of free PDF downloads further enhances their appeal, allowing anyone to easily enjoy Bobbie Goods’ artistry. Whether for personal relaxation, homeschooling activities, or simply a fun pastime, these coloring pages provide a delightful and accessible creative outlet.

Where to Find Bobbie Goods Coloring Book PDF Free Downloads

Several online platforms offer Bobbie Goods coloring book PDF downloads at no cost. ColorearW is a prominent source, specifically featuring Christmas coloring pages in PDF format. Additionally, various websites host collections of Bobbie Goods’ artwork, often compiling free printable pages.

Searching online using keywords like “Bobbie Goods coloring pages free PDF” will yield numerous results, including links to downloadable files and online coloring options. Social media platforms and online forums dedicated to coloring enthusiasts also frequently share links to these resources.

It’s important to exercise caution when downloading from unfamiliar sites (discussed later), but legitimate sources provide easy access to a wide range of Bobbie Goods’ charming designs.

Legitimate Sources for Free Downloads

When seeking Bobbie Goods coloring book PDFs, prioritizing legitimate sources is crucial. ColorearW consistently provides free, readily available downloads, particularly for seasonal themes like Christmas. Websites hosting official artist content or fan communities with established reputations are also reliable options.

Platforms like archive.org sometimes feature uploaded copies of coloring books, though availability varies. Checking artist-linked social media accounts (if available) can reveal direct links to free printable pages or downloadable PDFs.

Remember to verify the source’s credibility before downloading. Look for clear copyright information and avoid sites with excessive advertisements or suspicious download prompts. Utilizing these trusted avenues ensures a safe and enjoyable coloring experience.

ColorearW and Similar Websites

ColorearW stands out as a prominent hub for Bobbie Goods coloring pages, offering a diverse collection readily available for free PDF download. The site specializes in providing access to numerous designs, including the popular Christmas-themed pages, allowing enthusiasts to easily print and enjoy the artwork.

While ColorearW is a key resource, exploring similar websites can expand your options. Several fan-based platforms and online coloring communities curate and share Bobbie Goods content. These sites often feature categorized collections, making it simpler to find specific themes or characters.

Always exercise caution and verify the legitimacy of any website before downloading files. Look for active communities and positive user feedback as indicators of reliability.

Beware of Unofficial Download Sites

Navigating the internet for Bobbie Goods coloring book PDF downloads requires caution. Numerous unofficial websites claim to offer free access, but these often pose significant risks to your digital security.

These sites frequently harbor malware, viruses, and potentially unwanted programs disguised as downloadable content. Clicking on suspicious links or downloading files from untrusted sources can compromise your device and personal information.

Furthermore, many unofficial sites violate copyright laws by distributing copyrighted material without permission. Supporting these platforms undermines the artist’s work and creative rights. Prioritize legitimate sources and exercise extreme vigilance when encountering offers that seem too good to be true. Always scan downloaded files with updated antivirus software.

Potential Risks of Downloading from Unverified Sources

Downloading Bobbie Goods coloring book PDFs from unverified sources carries substantial risks. Beyond the threat of malware and viruses, your device could be exposed to spyware, silently collecting personal data.

These compromised files can lead to identity theft, financial fraud, and further system infections. Unofficial sites often bundle downloads with unwanted browser extensions or adware, disrupting your online experience with intrusive advertisements.

Moreover, the quality of the PDF itself may be poor – low resolution, incomplete pages, or even corrupted files. Supporting these sites also encourages copyright infringement, devaluing the artist’s creative efforts. Always prioritize reputable platforms and employ robust antivirus protection to mitigate these dangers when seeking free downloads.

Understanding the Coloring Book Content

Bobbie Goods coloring books feature endearing characters in everyday adventures, with popular themes including Christmas and relaxing designs, often spanning 81 pages.

Themes and Characters in Bobbie Goods Coloring Books

Bobbie Goods coloring books consistently present a whimsical and charming universe, captivating colorists with their endearing characters and delightful scenes. The core appeal lies in the depiction of these characters engaging in relatable, everyday adventures, fostering a sense of warmth and connection. While specific character details vary across different books and page sets, a consistent aesthetic of cuteness and gentle humor prevails.

Themes frequently explored include cozy domesticity, seasonal celebrations – particularly Christmas, as evidenced by dedicated Christmas coloring pages – and moments of peaceful relaxation. The “Relax-Coloring Pages” specifically emphasize stress relief through intricate yet approachable designs. These pages often showcase simpler compositions, allowing for mindful coloring experiences. The overall content aims to provide a comforting and enjoyable artistic outlet for individuals of all ages, offering a delightful escape into a world of gentle imagination.

Christmas Coloring Pages – A Popular Choice

Bobbie Goods Christmas coloring pages have emerged as a particularly beloved selection within the artist’s repertoire, consistently drawing significant attention from fans. These pages beautifully capture the spirit of the holiday season, featuring adorable characters immersed in festive activities. Expect to find scenes of gift-giving, decorating Christmas trees, enjoying cozy winter landscapes, and perhaps even encounters with Santa Claus himself.

The popularity stems from the charming and heartwarming aesthetic, offering a delightful way to embrace the joy of Christmas through creative expression. Many are readily available as free PDF downloads, making them accessible to a wide audience. The designs are generally considered approachable for all skill levels, providing a relaxing and enjoyable activity for both children and adults. These pages represent a perfect blend of festive cheer and artistic fulfillment, making them a seasonal favorite.

Relax-Coloring Pages and Their Benefits

Bobbie Goods offers a wonderful collection of “Relax-coloring pages,” specifically designed to promote mindfulness and reduce stress through artistic engagement. These pages feature intricate yet soothing illustrations, providing an escape from the demands of daily life. Downloading these pages as PDF files allows for convenient access and printing, enabling users to enjoy a calming activity whenever and wherever they choose.

The benefits of coloring extend beyond simple enjoyment; it’s a proven method for enhancing focus, improving motor skills, and fostering creativity. The repetitive nature of coloring can be incredibly therapeutic, helping to quiet the mind and alleviate anxiety. Bobbie Goods’ designs, with their charming aesthetic, further amplify these positive effects, offering a delightful pathway to relaxation and well-being. Numerous illustrated drawings are available from the coloring books.

The Number of Pages in Available Books (e.g., 81 pages)

Bobbie Goods coloring books come in varying lengths, offering diverse options to suit different preferences and coloring commitments. One frequently cited book, “Boobie Goods Coloring Book,” boasts a substantial 81 pages filled with intricate designs and charming illustrations. This provides hours of coloring enjoyment for enthusiasts of all ages.

Beyond the 81-page volume, Bobbie Goods also releases smaller collections, such as the “Cozy Colors Books” series, which includes 12 free printable coloring pages. These shorter books are perfect for quick coloring sessions or for those new to the artist’s work. Availability also includes sets with 15 pages, like “My Color Charts”. The variety in page counts ensures there’s a Bobbie Goods coloring experience for everyone, easily accessible as PDF downloads.

Specific Bobbie Goods Coloring Book Titles

Bobbie Goods offers titles like “Boobie Goods Coloring Book” (81 pages) and “Cozy Colors Books” with free printable pages, available in PDF format.

“Boobie Goods Coloring Book” – Clarification and Availability

The title “Boobie Goods Coloring Book” often appears in searches, and it’s important to address potential confusion. While the name might seem unusual, it refers to the artist’s brand, Bobbie Goods, known for whimsical and charming illustrations. The 81-page coloring book is a popular offering, frequently shared as a free PDF download online.

Availability can vary, but several sources host the file. It’s crucial to exercise caution when downloading from unofficial sites, as these may contain malware or inappropriate content. Legitimate sources, or links shared within established coloring communities, are recommended. The book features a delightful collection of scenes and characters typical of Bobbie Goods’ style, providing hours of creative enjoyment for colorists of all ages. Finding a reliable PDF ensures a safe and enjoyable coloring experience.

Cozy Colors Books and Free Printable Pages

Bobbie Goods’ “Cozy Colors Books” represent a delightful extension of her popular coloring page style, offering a comforting and relaxing artistic experience. Alongside the full coloring books, Bobbie Goods frequently releases free printable pages, allowing fans to sample her work or enjoy quick coloring sessions. These free pages, often numbering 12 in a set, are readily available for PDF download from various online platforms.

The “Cozy Colors” theme emphasizes warmth and tranquility, featuring endearing characters and charming scenes perfect for stress relief. These resources are particularly popular with those seeking mindful activities. Many coloring enthusiasts appreciate the convenience of instantly downloadable PDF files, enabling immediate access to creative content. Exploring these options provides a fantastic way to engage with Bobbie Goods’ art without a financial commitment.

Availability of Different Versions (e.g., 2 versions .pdf)

When searching for Bobbie Goods coloring book PDF downloads, it’s common to encounter multiple versions of the same title. As noted on October 23, 2023, some releases, like the “Boobie Goods Coloring Book,” are available in two distinct PDF versions. This can be due to updates, corrections, or simply different distribution methods.

These variations might include slight differences in page layout, image quality, or included content; Users should carefully check the source and file details before downloading to ensure they are obtaining the desired version. Finding both versions allows colorists to choose the one that best suits their preferences or printing capabilities. Always prioritize downloads from reputable sources to avoid corrupted files or potential security risks when accessing these PDF resources.

Printing and Using the PDF Coloring Pages

Bobbie Goods’ PDFs are perfect for home printing! Use quality paper and adjust print settings for vibrant results, ideal for pencils, markers, and educational activities.

Optimal Print Settings for Best Results

To achieve the highest quality prints of your Bobbie Goods coloring pages, careful attention to your printer settings is crucial. Begin by selecting a paper type that corresponds to the weight and finish of your chosen paper stock – typically, a ‘high-quality photo paper’ or ‘best’ setting yields superior results.

Ensure your printer is set to print at 300 DPI (dots per inch) for sharp, detailed lines. Avoid ‘draft’ or ‘economy’ modes, as these significantly reduce print quality. For PDF files, disable any scaling options to prevent distortion or cropping of the image.

Color management settings can also impact the final output. If your printer allows, select the appropriate color profile for your paper type. A test print is always recommended to fine-tune settings and ensure the colors accurately reflect the original artwork. Experiment with different settings to discover what works best with your specific printer and paper combination.

Paper Recommendations for Coloring

Selecting the right paper significantly enhances the Bobbie Goods coloring experience. For pencil coloring, a smooth, medium-weight paper (around 65-80lb) is ideal, preventing excessive shading and allowing for layering. If you prefer markers, a heavier weight paper (90-100lb) is essential to minimize bleed-through and ghosting.

Bright white paper showcases vibrant colors beautifully, while off-white paper offers a softer, more vintage aesthetic; Consider textured paper for added visual interest, but be mindful that it may affect blending techniques.

PDF print quality is also affected by paper choice. For detailed Bobbie Goods designs, a coated paper stock will yield sharper lines and richer colors. Experiment with different types to find your preference, balancing cost with desired results. Ultimately, the best paper is one that complements your chosen coloring tools and personal style.

Coloring Tools – Pencils, Markers, and More

The beauty of Bobbie Goods coloring pages lies in their versatility, accommodating a wide range of coloring tools. Colored pencils are a popular choice, offering control and blendability for subtle shading and detail. Marker enthusiasts will appreciate the bold, vibrant colors achievable with alcohol-based or water-based markers – remember heavier paper to prevent bleed-through!

Gel pens add a shimmering touch, perfect for highlighting details or creating unique effects. Watercolor pencils combine the benefits of both mediums, allowing for washes of color. Don’t limit yourself; experiment with crayons, pastels, or even fineliners for outlining.

When using PDF downloads, consider the intricacy of the Bobbie Goods designs. Fine-tipped tools are ideal for detailed areas, while broader tools suit larger spaces; The right tools unlock the full potential of these charming illustrations.

Using Coloring Pages for Educational Purposes (Homeschool, Teachers)

Bobbie Goods coloring pages offer a surprisingly versatile educational tool for both homeschool environments and traditional classrooms. The charming illustrations can spark creative writing prompts, encouraging students to develop narratives around the characters and scenes.

These free PDF downloads can reinforce color recognition, fine motor skills, and hand-eye coordination. Teachers can utilize the pages for quiet time activities, rewards, or as part of themed lessons – especially around holidays like Christmas, given the availability of festive designs.

The designs also lend themselves to discussions about composition and artistic techniques. Furthermore, they provide a relaxing outlet for students, promoting mindfulness and reducing stress. Integrating Bobbie Goods into learning makes education enjoyable!

Copyright and Usage Rights

Bobbie Goods’ free PDF downloads come with terms of use; respecting the artist’s work is crucial. Personal use is generally permitted, but commercial application is prohibited.

Understanding the Terms of Use for Free Downloads

When accessing Bobbie Goods coloring pages as free PDF downloads, understanding the associated terms of use is paramount. While many sites offer these resources for personal enjoyment, specific restrictions often apply. Generally, these downloads are intended for non-commercial use only, meaning you can print and color the pages for yourself, family, or educational purposes like homeschooling or classroom activities.

However, redistributing the PDF files, selling colored versions, or using the images for profit is typically prohibited. Some artists retain copyright, and unauthorized reproduction infringes upon their rights. Always check the specific website’s terms before downloading and using the content. Look for disclaimers or licensing information that outlines permitted and prohibited activities. Respecting these guidelines ensures continued access to free coloring pages and supports the artist’s creative endeavors.

Failure to comply with these terms could lead to legal repercussions.

Respecting the Artist’s Work – Bobbie Goods

Bobbie Goods creates charming and whimsical coloring pages, offering a delightful escape through art. When enjoying these free PDF downloads, it’s crucial to acknowledge and respect the artist’s dedication and creativity. While free access is generously provided, remember that these designs represent significant effort and talent.

Supporting Bobbie Goods doesn’t always require monetary contribution. Simply adhering to the terms of use – avoiding commercial exploitation and unauthorized distribution – is a powerful form of respect. Sharing the artist’s work responsibly, by linking to official sources or crediting Bobbie Goods when showcasing colored pages, helps expand their reach and appreciation.

Consider purchasing official coloring books or merchandise if possible, directly supporting the artist’s continued creation of beautiful and engaging content. Acknowledging the value of artistic work fosters a positive and sustainable creative environment.

guid validator

GUID validators are essential tools for verifying the format and structure of Globally Unique Identifiers. These tools quickly assess if a string conforms to GUID standards.

What is a GUID?

A GUID, or Globally Unique Identifier, represents a 128-bit value functioning as a unique reference number within computer systems. It’s crucial for distinguishing data across different applications and databases, ensuring no collisions occur. Visually, a GUID is typically displayed as a string of 32 hexadecimal digits, thoughtfully grouped and separated by hyphens – a format designed for readability and ease of use.

Essentially, a GUID guarantees a high probability of uniqueness, making it ideal for identifying records without central authority. This characteristic is fundamental to its widespread adoption in software development and data management.

What is a UUID?

A UUID, or Universally Unique Identifier, is a 128-bit label employed for identifying information within computer systems. It serves a similar purpose to a GUID, providing a highly probable guarantee of uniqueness without requiring a central registration authority. UUIDs are widely utilized across various platforms and applications for diverse identification needs.

The term GUID is often used interchangeably with UUID, particularly within the Microsoft ecosystem, though technically they originated from different standards. Both ensure data integrity and facilitate distributed system functionality by providing a reliable method for uniquely identifying elements.

GUID vs. UUID: Understanding the Difference

While frequently used as synonyms, GUID (Globally Unique Identifier) and UUID (Universally Unique Identifier) have distinct origins. UUID is the broader, open standard defined by the Open Software Foundation (OSF), while GUID specifically refers to the Microsoft implementation of UUID.

Essentially, all GUIDs are UUIDs, but not all UUIDs are GUIDs. The core functionality – generating unique identifiers – remains the same. GUID validators can typically handle both formats seamlessly, as the underlying structure is consistent. Understanding this nuance is helpful, but for practical validation purposes, the distinction is often irrelevant.

Why Validate GUIDs?

GUID validation ensures data integrity, prevents application errors caused by malformed identifiers, and mitigates potential security risks stemming from invalid GUID usage.

Data Integrity and Consistency

Validating GUIDs is paramount for maintaining data integrity within systems. Because GUIDs serve as unique identifiers, ensuring their correctness prevents collisions and inconsistencies. A faulty GUID can lead to incorrect data associations, potentially corrupting relationships between records in databases or across applications.

Consistent GUID validation enforces a standard format, reducing the risk of errors during data exchange and processing. This is especially crucial in distributed systems where data originates from various sources. By verifying GUIDs, developers can confidently rely on the uniqueness and reliability of these identifiers, bolstering the overall robustness of their applications and data management practices.

Preventing Application Errors

Implementing GUID validation proactively prevents a range of application errors. Incorrectly formatted or invalid GUIDs can cause crashes, unexpected behavior, or data retrieval failures. Applications expecting a valid GUID may throw exceptions or enter unstable states when encountering an improperly constructed identifier.

Robust validation routines act as a safeguard, catching these errors before they propagate through the system. This is particularly important in scenarios where GUIDs are used as primary keys or foreign keys in databases. Validating GUIDs at the input stage minimizes the risk of runtime errors and enhances the overall stability and reliability of the software.

Security Implications of Invalid GUIDs

While seemingly benign, invalid GUIDs can introduce security vulnerabilities. If an application doesn’t properly validate GUID inputs, it might be susceptible to injection attacks or data manipulation. Attackers could potentially exploit this weakness to access unauthorized data or perform unintended actions.

Insufficient validation can also lead to denial-of-service scenarios, where malicious actors flood the system with invalid GUIDs, causing performance degradation or crashes. Thorough GUID validation is, therefore, a crucial security measure, ensuring that only legitimate identifiers are processed, protecting the application and its data from potential threats.

GUID Structure and Format

A GUID is a 128-bit value, typically represented as 32 hexadecimal digits, grouped and separated by hyphens for readability and validation.

The 128-bit Value Explained

A GUID’s foundation lies in its 128-bit architecture, providing an astronomically large number of possible unique identifiers. This expansive space dramatically minimizes the chance of accidental duplication, crucial for distributed systems. Each GUID represents a unique reference number, essential for identifying information across different computer systems.

This 128-bit value is not simply a long string of numbers; it’s carefully structured to encode specific information, including a version and a variant. Understanding this structure is key to effective GUID validation. The sheer size of the 128-bit space ensures practical uniqueness even without centralized registration, making GUIDs ideal for decentralized applications.

Hexadecimal Digits and Hyphenation

GUIDs are visually represented as a string of 32 hexadecimal digits – numbers 0-9 and letters A-F. These digits are grouped into sections separated by hyphens, creating a standardized format for readability and parsing. This specific formatting isn’t merely aesthetic; it aids in quick visual inspection for validity.

The typical GUID format is 8-4-4-4-, with hyphens strategically placed. A GUID validator will confirm this structure. Correct hyphenation is a fundamental aspect of GUID validation, ensuring the string adheres to the established standard. Incorrect formatting immediately flags a potential issue, indicating an invalid GUID.

GUID Versions: A Brief Overview

GUIDs aren’t monolithic; they come in different versions, each generated using a distinct method. A GUID validator can often identify the version; Version 1 relies on timestamps and MAC addresses, while Version 4, the most common, uses random number generation. Understanding these versions is crucial for specific applications.

Different versions offer varying degrees of uniqueness and security. Some validators incorporate version checking as part of their process. While a basic validator confirms format, advanced tools verify version compliance. Knowing the version helps determine the GUID’s origin and potential limitations, aiding in robust data management and validation.

Online GUID Validation Tools

Numerous online tools swiftly validate GUIDs without coding. Simply paste the value to instantly check its format and structure for accuracy and compliance.

Benefits of Using Online Validators

Online GUID validators offer several key advantages for developers and users alike. They provide a remarkably quick and convenient method for verifying GUID/UUID strings, eliminating the need to write or debug validation code; This is particularly useful for one-off checks or when integrating with external systems where data integrity is crucial.

These tools are accessible from any device with an internet connection, requiring no installation or configuration; They are often free to use, making them a cost-effective solution for routine validation tasks. Furthermore, online validators can help identify formatting errors, ensuring that GUIDs adhere to the standard hyphenation and hexadecimal digit conventions, ultimately improving data quality and application stability.

Popular Online GUID Validator Websites

Several websites offer readily available GUID/UUID validation services. One such tool is a simple GUID test and validation utility, allowing users to quickly confirm if a given string is a valid GUID without complex analysis. Another option is a dedicated UUID/GUID validator, which not only checks the format but also attempts to determine the GUID’s version.

Furthermore, applications serving as GUID/UUID validators provide a professional interface for verifying the format and structure of identifiers. These resources are often web-based, created using technologies like create-react-app, offering a user-friendly experience. These platforms streamline the validation process, ensuring data accuracy and reliability.

How to Use an Online GUID Validator

Utilizing an online GUID validator is remarkably straightforward. Typically, these tools present a text input field where you simply paste the GUID string you wish to validate. After pasting, initiate the validation process – often triggered by a button labeled “Validate” or similar. The validator then analyzes the input, checking for correct formatting, including the expected hyphen placement and hexadecimal character composition.

The results are usually displayed immediately, indicating whether the GUID is valid or invalid. Some validators also provide additional information, such as the identified GUID version. This quick and easy process eliminates the need for manual inspection or coding, offering instant verification.

GUID Validation Libraries and APIs

Numerous programming languages offer libraries and APIs for GUID validation, enabling seamless integration into applications for robust format and structure checks.

Programming Languages Supported

GUID validation libraries are widely available across many popular programming languages, facilitating easy integration into diverse projects. Developers working with languages like Python can utilize packages specifically designed for UUID/GUID verification. Similarly, Java offers robust libraries for handling and validating these identifiers.

For .NET developers, built-in functionalities and dedicated NuGet packages provide comprehensive GUID validation capabilities. JavaScript, frequently used in web development, also boasts several libraries for client-side and server-side validation. Languages like C++, PHP, and Ruby also have options, though they might require more manual implementation or reliance on third-party tools. The broad support ensures developers can validate GUIDs regardless of their chosen technology stack.

Integrating GUID Validation into Applications

Seamlessly incorporating GUID validation into applications is crucial for maintaining data integrity. This often involves utilizing dedicated libraries or APIs within your chosen programming language. Validation should occur at multiple layers – during data input, before database storage, and potentially during data retrieval.

Implementing validation functions helps prevent invalid GUIDs from corrupting your system. Error handling is vital; gracefully manage invalid inputs by providing informative messages to users or logging errors for debugging. Consider using validation attributes or decorators for a cleaner, more maintainable codebase. Thorough testing with both valid and invalid GUIDs is essential to ensure the validation logic functions correctly.

Example Code Snippets (Conceptual)

Illustrative code snippets demonstrate GUID validation implementation. In Python, a regular expression could check the format: `re.match(r’^[0-9a-f]{8}-[0-9a-f]{4}-[0-9a-f]{4}-[0-9a-f]{4}-[0-9a-f]{12}$’, guid_string)`.

Java might utilize `java.util.UUID.fromString(guidString)` within a try-catch block to handle invalid formats. Similarly, C# offers `Guid.TryParse(guidString, out Guid guid)`, returning a boolean indicating success. These examples showcase basic validation; more robust solutions might incorporate version and variant checks. Remember to adapt these snippets to your specific language and framework, prioritizing clear error handling and comprehensive testing.

Creating Your Own GUID Validator

Developing a custom GUID validator involves utilizing regular expressions or implementing validation logic in code, ensuring accuracy through rigorous testing procedures.

Using Regular Expressions for Validation

Employing regular expressions presents a concise method for GUID validation; A well-crafted regex pattern can effectively check if a given string adheres to the standard GUID format – specifically, 32 hexadecimal digits separated by hyphens. This approach allows for quick identification of improperly formatted identifiers.

The typical regex pattern mirrors the GUID structure: eight hexadecimal characters, followed by a hyphen, repeated four times, concluding with another eight hexadecimal characters. While efficient, regex validation primarily focuses on format, not necessarily uniqueness or version. It’s a strong first step, but may require supplemental checks for comprehensive validation.

Consider the pattern: `^[0-9a-fA-F]{8}-[0-9a-fA-F]{4}-[0-9a-fA-F]{4}-[0-9a-fA-F]{4}-[0-9a-fA-F]{12}$`. This pattern ensures the string matches the expected GUID layout.

Implementing Validation Logic in Code

Implementing GUID validation within your code involves a series of checks beyond simple format verification. Begin by confirming the string’s length is correct ( including hyphens). Subsequently, utilize regular expressions, as previously discussed, to ensure adherence to the standard GUID structure.

Further refinement includes parsing the string into its constituent parts and verifying each section contains valid hexadecimal characters. More advanced validation might involve checking the GUID version and variant. Error handling is crucial; gracefully manage invalid GUID inputs to prevent application crashes.

Libraries often provide built-in validation functions, simplifying the process and enhancing reliability. However, understanding the underlying logic empowers developers to customize validation based on specific application requirements.

Testing and Ensuring Accuracy

Rigorous testing is paramount when implementing a GUID validator. Create a comprehensive test suite encompassing valid GUIDs, invalid formats (incorrect length, invalid characters), and edge cases like nil GUIDs. Include tests for different GUID versions and variants to confirm correct handling.

Employ both positive and negative testing – verifying the validator correctly identifies valid GUIDs and rejects invalid ones. Automated testing frameworks streamline this process, ensuring consistent and repeatable results. Regularly update the test suite as the validation logic evolves.

Thorough testing builds confidence in the validator’s accuracy and reliability, safeguarding data integrity within your applications.

Advanced GUID Validation Techniques

Beyond basic format checks, advanced techniques involve verifying GUID version, variant, and ensuring the GUID isn’t a nil GUID, enhancing validation.

Version and Variant Checking

GUID validation extends beyond simply confirming the correct hyphenation and hexadecimal digit count. A crucial advanced step involves verifying the GUID’s version and variant. The version number, encoded within specific bits of the GUID, indicates the algorithm used for generation – impacting compatibility and interpretation. Different applications might expect specific versions.

Similarly, the variant defines the layout and encoding scheme. Checking the variant ensures adherence to established standards, preventing potential issues during data exchange or processing. Incorrect version or variant information can signal a malformed or improperly generated GUID, potentially leading to application errors or data inconsistencies. Thorough validation includes inspecting these critical components.

Checking for Nil GUIDs

A critical aspect of robust GUID validation is identifying “nil” GUIDs. These are special GUID values representing the absence of an identifier, often all zeros. While technically valid GUIDs, their presence can indicate missing or uninitialized data, potentially causing errors in applications relying on unique identification.

GUID validators should explicitly check for this all-zero condition. Failing to detect nil GUIDs can lead to unexpected behavior, particularly in database operations or when linking records. Proper handling involves either rejecting nil GUIDs during input or treating them as distinct null values, depending on the application’s requirements. Ignoring them can compromise data integrity.

Database Integration and Validation

Integrating GUID validation directly into database systems is crucial for maintaining data integrity. Utilizing database constraints, such as check constraints, allows for automatic GUID format verification upon insertion or update. This prevents invalid GUIDs from ever entering the database, reducing the risk of application errors downstream.

Furthermore, database-level validation can leverage native GUID data types where available, ensuring efficient storage and indexing. When using string representations, consistent formatting (including hyphenation) should be enforced. Regularly scheduled data quality checks can identify and flag any existing invalid GUIDs, enabling proactive data cleansing and correction.

Tools and Technologies for GUID Validation

Various tools aid GUID validation, including React-based applications and command-line utilities, offering convenient methods for verifying GUIDs across different platforms.

React-Based GUID Validator Applications

React-based GUID validator applications provide a user-friendly interface for validating GUIDs directly within a web browser. These applications, often created using create-react-app, offer a convenient way to quickly check the validity of GUID strings without requiring any server-side processing or complex setup.

Typically, these applications feature a simple input field where users can paste or type their GUID. Upon submission, the application utilizes JavaScript logic to verify the GUID’s format, ensuring it adheres to the standard 32 hexadecimal digit structure with appropriate hyphenation.

The benefit lies in their accessibility and ease of use, making them ideal for developers and testers who need to frequently validate GUIDs during development or quality assurance processes.

Command-Line GUID Validation Tools

Command-line GUID validation tools offer a powerful and efficient method for validating GUIDs, particularly within automated scripts and build processes. These tools are typically implemented using scripting languages like Python or Bash, providing a non-interactive way to verify GUID format and structure.

Users can input GUID strings as arguments to the command, and the tool will return a boolean result indicating validity. This is incredibly useful for integration into continuous integration/continuous deployment (CI/CD) pipelines, ensuring data integrity throughout the software development lifecycle.

Such tools streamline validation, eliminating the need for manual checks and reducing the risk of errors.

Other Useful Utilities

Beyond dedicated GUID validators and React-based applications, several broader utilities can assist with GUID handling and verification. Text editors with regular expression support allow for custom GUID pattern matching, providing a flexible validation approach.

Online JSON validators often include features to check the validity of GUIDs embedded within JSON data structures, ensuring data consistency. Furthermore, database management tools frequently offer built-in constraints to enforce GUID format during data insertion.

These diverse tools collectively enhance the ability to manage and validate GUIDs across various development and operational contexts.

Best Practices for GUID Handling

Employ robust generation methods, store GUIDs as strings, and implement graceful error handling for invalid inputs to maintain data integrity.

Generating Valid GUIDs

Ensuring the creation of valid GUIDs is paramount for system reliability. Utilize established libraries or functions within your programming language designed specifically for GUID generation. Avoid manual construction, as it’s prone to errors and can lead to non-unique identifiers.

These libraries typically adhere to established standards, guaranteeing the correct format – 32 hexadecimal digits separated by hyphens – and versioning. Leveraging these tools minimizes the risk of introducing invalid GUIDs into your database or application logic. Proper GUID generation is the first step towards robust data management and preventing potential application failures stemming from incorrect identifiers.

Storing GUIDs in Databases

When storing GUIDs in databases, selecting the appropriate data type is crucial. Utilize GUID or UUID-specific data types provided by your database system (e.g., `UNIQUEIDENTIFIER` in SQL Server, `UUID` in PostgreSQL). Avoid storing GUIDs as strings, as this hinders efficient indexing and querying.

Using the correct data type enables optimized database operations and ensures data integrity. Properly indexed GUID columns facilitate faster lookups and joins. Furthermore, database-level constraints can enforce GUID validity, preventing the insertion of malformed identifiers. This approach contributes to a more robust and reliable data storage solution.

Handling Invalid GUIDs Gracefully

Robust applications must handle invalid GUIDs gracefully to prevent crashes or unexpected behavior. Implement thorough validation checks before processing GUIDs received from external sources, such as user input or APIs. When an invalid GUID is detected, avoid abrupt program termination.

Instead, log the error, provide informative feedback to the user, and attempt to recover or default to a safe state. Consider using default GUID values or prompting the user for correct input. Proper error handling ensures a smoother user experience and maintains application stability, even when encountering malformed identifiers.

citizen blue angels watch manual pdf

Citizen Blue Angels Watch Manual PDF: A Comprehensive Guide

Discover essential resources for your Citizen Blue Angels Skyhawk A.T JY8128-56L‚ including free PDF manual downloads and detailed instructions for optimal use.

Citizen’s Blue Angels collection represents a prestigious partnership‚ honoring the renowned U;S. Navy Flight Demonstration Squadron. These timepieces aren’t merely instruments for telling time; they embody precision‚ innovation‚ and a deep respect for aviation excellence. The collection specifically commemorates the skill and dedication of the Blue Angels pilots‚ translating their demanding world into robust and feature-rich watches.

Each Citizen Blue Angels watch‚ like the JY8128-56L‚ is designed with a distinctive aesthetic‚ often incorporating the team’s iconic blue and yellow colors. Beyond their striking appearance‚ these watches boast advanced technologies‚ including Citizen’s signature Eco-Drive and Atomic Timekeeping. Owners seeking to fully understand and utilize these features will find a comprehensive manual invaluable‚ offering detailed guidance on all functionalities.

Understanding the JY8128-56L Model

The Citizen Blue Angels Skyhawk A.T JY8128-56L is a sophisticated timepiece packed with advanced features. This model is renowned for its Eco-Drive technology‚ eliminating the need for battery replacements‚ and its Atomic Timekeeping‚ ensuring exceptional accuracy by synchronizing with radio signals. It also boasts World Time functionality‚ a Flight Chronograph‚ and an LED Backlight for enhanced visibility.

Understanding the intricacies of the JY8128-56L requires a detailed review of its manual. The manual provides step-by-step instructions for setting the time and date‚ utilizing the alarm‚ navigating the World Time settings‚ and operating the stopwatch. It also explains the Power Reserve Indicator and offers troubleshooting tips for common issues‚ ensuring optimal performance and longevity of this impressive watch.

Locating the Official Citizen Manual PDF

Finding the official Citizen manual PDF for your Blue Angels watch is crucial for understanding its features. Citizen provides manuals as free downloads‚ categorized under “watches” on their official website. You can typically locate it by searching for the model number‚ JY8128-56L‚ or by browsing their manuals section and entering the first character of your model.

The official PDF offers comprehensive instructions‚ rated highly by users (average 9.3/10). It’s available in multiple languages‚ ensuring accessibility. Downloads are straightforward‚ and the manual covers everything from basic operation to advanced functions. If direct access proves difficult‚ exploring authorized Citizen jewelers’ websites may also yield a direct link to the official PDF.

Alternative Download Sources for the Manual

While the official Citizen website is the primary source‚ alternative options exist for obtaining the Blue Angels JY8128-56L manual PDF. Several online repositories host watch manuals‚ offering access if the official site experiences issues or if you prefer a different browsing experience. Websites specializing in watch documentation often archive older models‚ including the Skyhawk C650‚ which shares similar functionalities.

Furthermore‚ online forums dedicated to Citizen watches frequently have threads where users share PDF manuals. A quick search can reveal helpful links. Remember to exercise caution when downloading from unofficial sources‚ ensuring the file is safe and virus-free. These alternatives provide valuable backups and accessibility when the primary source isn’t readily available.

Key Features and Functions

Explore the advanced capabilities of your Citizen Blue Angels watch‚ including Eco-Drive technology‚ atomic timekeeping‚ world time‚ and a flight chronograph.

Eco-Drive Technology Explained

Citizen’s innovative Eco-Drive technology powers your Blue Angels watch using any light source – sunlight‚ fluorescent‚ or even indoor lighting. This eliminates the need for battery replacements‚ offering a sustainable and convenient power solution. The watch converts light into energy‚ storing the excess in a rechargeable lithium-ion capacitor.

Optimal performance is achieved when the power reserve is sufficient for all features and functions. A low charge indicator alerts you when light exposure is needed. Consistent light exposure ensures reliable operation and extends the lifespan of your Citizen timepiece. This solar-powered system is a core benefit‚ reducing environmental impact and providing long-term usability.

Understanding how Eco-Drive works ensures you maximize your watch’s potential and enjoy its continuous operation without the hassle of traditional battery changes.

Atomic Timekeeping Synchronization

Citizen’s Atomic Timekeeping feature‚ also known as Radio Controlled‚ enables your Blue Angels watch to automatically synchronize with official atomic clock signals. This ensures exceptional accuracy‚ maintaining time within a few milliseconds per month. The watch receives time signals from transmitters located globally‚ adjusting for daylight saving time where applicable.

Synchronization typically occurs overnight while you sleep‚ but can be initiated manually if needed. Successful synchronization is indicated on the watch display. Interference can sometimes affect signal reception; moving to an open area may improve results. This feature eliminates the need for manual time adjustments‚ providing unparalleled precision.

Regular synchronization guarantees your Citizen watch displays the most accurate time possible‚ a key benefit of this advanced technology.

World Time Functionality

The Citizen Blue Angels watch boasts a comprehensive World Time function‚ allowing you to easily display the current time in various cities around the globe. This feature is invaluable for frequent travelers or individuals needing to track times across multiple time zones simultaneously. The watch stores time data for numerous major cities‚ categorized by region.

Navigating the World Time settings involves selecting a city or time zone‚ and the watch will automatically adjust to display the corresponding local time. You can cycle through different cities to quickly view the time in desired locations. This eliminates the mental calculations often required when dealing with time differences.

The World Time function enhances the watch’s utility‚ making it a practical tool for international communication and scheduling.

Flight Chronograph Features

The Citizen Blue Angels Skyhawk series incorporates advanced Flight Chronograph capabilities‚ designed with pilots and aviation enthusiasts in mind. These features extend beyond standard stopwatch functionality‚ offering specialized tools for flight calculations. Expect precise measurement of elapsed time‚ lap times‚ and split times‚ crucial for navigation and performance tracking.

The chronograph often includes a flight log memory‚ capable of storing multiple flight records with details like start time‚ lap times‚ and total flight duration. This data can be reviewed post-flight for analysis. Dedicated buttons and a clear display facilitate easy operation even during dynamic conditions.

These features transform the watch into a valuable instrument for pilots‚ providing essential timing information during all phases of flight.

LED Backlight Operation

The Citizen Blue Angels Skyhawk utilizes a highly functional LED (Light Emitting Diode) backlight system‚ ensuring optimal readability in low-light or nighttime conditions. Activation is typically achieved through a dedicated button press‚ illuminating the watch face for clear time and function viewing. Many models feature adjustable brightness levels‚ allowing customization based on ambient light and personal preference.

Some versions offer an “Afterglow” function‚ where the backlight remains illuminated for a short period after the button is released‚ providing a lingering glow for quick glances. The LED is designed for energy efficiency‚ minimizing impact on the Eco-Drive power reserve.

Consult your specific model’s manual for precise instructions on backlight control and duration settings.

Using the Watch: Step-by-Step Instructions

Master your Citizen Blue Angels Skyhawk with clear‚ concise instructions for time setting‚ alarm adjustments‚ chronograph use‚ and world time navigation – explore the PDF!

Setting the Time and Date

Initiating time and date adjustments on your Citizen Blue Angels Skyhawk A.T. involves a series of precise steps‚ detailed within the official PDF manual. Begin by ensuring the watch is not in charging mode for accurate synchronization. Typically‚ you’ll pull out the crown to the first click to access time setting. Rotate the crown to adjust the hour and minutes accordingly.

For date setting‚ pull the crown out to the second click. Then‚ rotate the crown to cycle through and select the correct date. Pay close attention to AM/PM indicators during the process. After setting‚ carefully push the crown back to its original position‚ ensuring it’s fully seated to maintain water resistance. Refer to the manual’s diagrams for visual guidance‚ as procedures can vary slightly based on specific model revisions. Precise execution guarantees accurate timekeeping and date display.

Adjusting the Alarm

Setting the alarm on your Citizen Blue Angels Skyhawk A.T.‚ as detailed in the PDF manual‚ requires navigating through the watch’s function modes. Begin by pressing the appropriate button – often labeled ‘Alarm’ or ‘Mode’ – to enter alarm setting mode. The manual provides clear illustrations of button locations. Once in alarm mode‚ pull the crown out to the first click.

Rotate the crown to set the desired alarm hour and minutes‚ paying attention to the AM/PM indicator. Some models feature multiple alarm settings; the manual explains how to cycle through these options. After setting‚ push the crown back in. To activate or deactivate the alarm‚ consult the manual for the specific button combination. Proper alarm configuration‚ guided by the PDF‚ ensures timely alerts without disrupting regular timekeeping.

Utilizing the Stopwatch Function

Accessing the stopwatch on your Citizen Blue Angels Skyhawk A.T.‚ as outlined in the official PDF manual‚ is straightforward. Typically‚ a dedicated button initiates the stopwatch‚ starting the elapsed time counter. The manual clearly illustrates which button performs this function. Pressing the same button again usually pauses or stops the timer.

To reset the stopwatch to zero‚ refer to the manual for the specific reset button or combination. Some models offer lap timing functionality‚ allowing you to record split times. The PDF manual details how to activate and utilize this feature. Accurate stopwatch operation‚ guided by the manual’s instructions‚ is crucial for precise timing during activities. Understanding the button sequence ensures efficient use of this valuable function.

Navigating the World Time Settings

The Citizen Blue Angels Skyhawk A.T.’s world time function‚ comprehensively explained in the PDF manual‚ allows tracking of multiple time zones simultaneously. Accessing this feature typically involves entering a specific mode via the crown or buttons‚ as detailed in the manual’s instructions. You’ll then select a city representing the desired time zone.

The manual illustrates how to scroll through the pre-programmed city list or manually input a time zone offset. Accurate world time setup‚ guided by the PDF manual‚ is essential for travelers or those needing to coordinate with international contacts. The manual also clarifies how to swap the displayed time zones and utilize daylight saving time adjustments for precise global timekeeping.

Understanding the Power Reserve Indicator

The Citizen Blue Angels watch‚ powered by Eco-Drive technology‚ features a power reserve indicator detailed within the official PDF manual. This indicator displays the remaining energy stored in the rechargeable battery‚ crucial for understanding watch operation. The manual explains that optimal performance is achieved when the indicator shows sufficient reserve for all features and functions.

A low charge warning‚ as described in the manual‚ signals the need for light exposure to recharge the battery. The PDF manual clarifies that prolonged insufficient light can lead to watch stoppage. Understanding the indicator’s levels‚ as illustrated in the manual‚ ensures consistent and reliable timekeeping‚ maximizing the benefits of the Eco-Drive system.

Troubleshooting Common Issues

Refer to the Citizen manual PDF for solutions to resetting‚ synchronization problems‚ low charge indicators‚ and water resistance care‚ ensuring optimal performance.

Resetting the Watch

When encountering operational issues with your Citizen Blue Angels watch‚ a reset can often restore functionality. The official manual PDF provides detailed‚ step-by-step instructions for performing a full reset. Typically‚ this involves a specific sequence of button presses‚ often utilizing the mode and light buttons simultaneously.

Before initiating a reset‚ understand that this process will erase any personalized settings‚ such as alarm times or world time configurations‚ returning the watch to its factory default state. Consult the manual to confirm the exact procedure for your JY8128-56L model‚ as variations may exist. A reset is particularly useful when the display freezes‚ buttons become unresponsive‚ or the watch fails to synchronize with atomic time signals. Following the manual’s guidance ensures a safe and effective reset‚ preserving the watch’s integrity and restoring its intended operation.

Dealing with Synchronization Problems

Atomic timekeeping is a key feature of the Citizen Blue Angels‚ but synchronization issues can occur. The official manual PDF details troubleshooting steps. Ensure you’re in an area with a strong radio signal – typically outdoors‚ away from obstructions. Initiate a manual sync attempt via the watch’s mode buttons‚ as outlined in the manual.

If synchronization fails repeatedly‚ check the receiver status indicator. A weak signal or interference may be the cause. Try moving to a different location or time of day. The manual also explains how to adjust the reception conditions. Remember‚ synchronization isn’t instantaneous; allow sufficient time for the process. Refer to the PDF for specific error codes and their corresponding solutions‚ ensuring your Citizen watch maintains accurate timekeeping.

Low Charge Indicator and Solutions

The Citizen Blue Angels utilizes Eco-Drive technology‚ meaning it’s powered by light. A low charge indicator signals insufficient energy reserves. The official manual PDF explains this indicator’s behavior and provides solutions. Expose the watch to bright light – sunlight is most effective‚ but artificial light works too. Ensure the watch face is unobstructed.

Prolonged lack of light will lead to power saving mode. The manual details how to reset the watch after a complete discharge. Avoid frequent‚ deep discharges as they can shorten the battery’s lifespan. Regularly exposing your Citizen to sufficient light prevents this. Consult the PDF for optimal charging practices and troubleshooting steps if the low charge persists despite adequate light exposure‚ ensuring continued functionality.

Water Resistance and Care

Your Citizen Blue Angels watch boasts a specific water resistance rating‚ detailed in the official manual PDF. Understand this rating – it doesn’t cover hot water‚ steam‚ or impacts. Regularly rinse your watch with fresh water after exposure to saltwater or chlorine to prevent corrosion. The manual emphasizes avoiding forceful contact with hard surfaces.

Ensure the crown is fully pushed in and screwed down tightly before any water exposure. Periodically check the gasket’s condition; a damaged gasket compromises water resistance. The PDF provides guidance on professional servicing for gasket replacement. Proper care extends your watch’s life and maintains its water-resistant properties‚ safeguarding its intricate mechanisms from potential damage.

Technical Specifications

Explore detailed specifications within the Citizen Blue Angels manual PDF‚ covering case materials‚ movement caliber‚ dimensions‚ weight‚ and precise water resistance ratings.

Case and Band Materials

The Citizen Blue Angels watches‚ as detailed in the official manual PDF‚ typically feature a robust and lightweight case constructed from stainless steel‚ ensuring durability and a premium feel. Many models incorporate titanium components for enhanced strength and reduced weight‚ appealing to pilots and enthusiasts alike. The band options commonly include stainless steel bracelets‚ providing a classic and secure fit‚ or durable polyurethane straps designed for comfort during extended wear.

Specific materials are clearly outlined within the downloadable manual‚ detailing the grade of stainless steel or titanium used. The manual also provides guidance on proper care and maintenance to preserve the integrity and appearance of both the case and band materials‚ ensuring longevity and continued aesthetic appeal. Understanding these material specifications‚ found in the PDF‚ helps owners appreciate the quality craftsmanship of their Citizen Blue Angels timepiece.

Movement Caliber Details

The Citizen Blue Angels watches are powered by Citizen’s renowned Eco-Drive technology‚ specifically utilizing the JY8128 caliber in many models‚ as detailed in the official manual PDF. This movement is a high-precision quartz caliber‚ celebrated for its atomic timekeeping synchronization capabilities. The manual thoroughly explains how the Eco-Drive system converts light into energy‚ eliminating the need for battery replacements.

Further details within the PDF manual outline the movement’s accuracy – typically ±15 seconds per month – and its functions‚ including perpetual calendar‚ world time‚ and a 1/20th second chronograph. The manual also provides technical specifications regarding the power reserve‚ typically indicating a substantial reserve duration when fully charged. Understanding the caliber details‚ as presented in the manual‚ enhances appreciation for the watch’s engineering.

Dimensions and Weight

The Citizen Blue Angels Skyhawk A.T JY8128-56L‚ as detailed in the official manual PDF‚ boasts a substantial yet comfortable presence on the wrist. The case diameter typically measures approximately 48mm‚ excluding the crown and pushers‚ making it a prominent timepiece. Case thickness generally falls around 13mm‚ contributing to its robust feel.

The manual PDF doesn’t always explicitly state weight‚ but the watch is known to weigh around 180-200 grams due to its titanium construction and complex movement. These dimensions and weight contribute to the watch’s overall durability and legibility. Referencing the manual provides precise specifications for your specific model. Understanding these physical attributes aids in appreciating the watch’s design and wearability.

Water Resistance Rating

The Citizen Blue Angels Skyhawk A.T JY8128-56L‚ as outlined in the official manual PDF‚ features a robust water resistance rating of 200 meters (20 ATM); This signifies the watch is suitable for recreational scuba diving and high-impact water sports‚ though the manual advises periodic inspection of seals.

The PDF manual emphasizes that water resistance isn’t permanent and can diminish over time due to wear and tear. Avoid operating the crown or pushers underwater‚ as this compromises the seal. After saltwater exposure‚ rinse the watch thoroughly with fresh water. Always consult the manual for detailed care instructions to maintain optimal water resistance and prolong the life of your timepiece. Proper care ensures reliable performance in aquatic environments.

decimal operations worksheet pdf

Decimal operations worksheets, often available as PDFs, provide focused practice with addition, subtraction, multiplication, and division. These resources are crucial for mastering decimal concepts.

They help students build confidence and fluency, applying arithmetic skills to real-world problems involving money, measurements, and more, enhancing mathematical literacy.

What are Decimal Operations?

Decimal operations encompass the fundamental mathematical processes – addition, subtraction, multiplication, and division – performed specifically with numbers containing decimal points. These aren’t isolated skills; they build upon a solid understanding of place value, extending whole number arithmetic to include fractional parts.

Effectively performing these operations requires careful alignment of decimal points, especially during addition and subtraction, ensuring that tenths are added to tenths, hundredths to hundredths, and so on. Multiplication and division involve slightly different techniques, often relating to counting decimal places in both the multiplicand and multiplier, or adjusting the divisor when dividing.

Worksheets, frequently found as PDF downloads, are designed to provide structured practice. They often start with simpler problems and gradually increase in complexity, reinforcing these core skills. Mastering decimal operations is essential for numerous real-world applications, from financial calculations to scientific measurements.

Why Use Decimal Operations Worksheets?

Decimal operations worksheets, readily available as PDFs, offer a targeted and efficient method for skill development. They provide repetitive practice, crucial for solidifying understanding and building fluency in performing calculations with decimals. This focused approach helps students move beyond rote memorization towards conceptual mastery.

These worksheets cater to diverse learning styles, offering a visual and structured format. They allow for independent practice, enabling students to work at their own pace and identify areas where they need further support. The PDF format ensures accessibility and easy printing for use at home or in the classroom.

Furthermore, worksheets bridge the gap between abstract concepts and real-world applications. Problems often mirror scenarios involving money, measurements, or data analysis, demonstrating the practical relevance of decimal operations and enhancing problem-solving abilities.

Basic Decimal Addition and Subtraction

Decimal addition and subtraction worksheets (often PDFs) build foundational skills. Aligning decimal points is key for accurate calculations, ensuring correct sums and differences.

Understanding Decimal Place Values

Decimal place value is fundamental to successfully performing operations with decimals, and worksheets, frequently in PDF format, often begin by reinforcing this concept. Students must grasp that digits to the right of the decimal point represent fractional parts of a whole.

Each position – tenths, hundredths, thousandths, and so on – denotes a decreasing power of ten. A solid understanding of place value is essential for correctly aligning numbers during addition and subtraction. Worksheets typically include exercises where students identify the place value of digits within a decimal number.

They may also involve writing numbers in expanded form (e.g., 3.14 = 3 + 0.1 + 0.04) to solidify comprehension; Furthermore, comparing decimals requires a firm grasp of place value; PDF worksheets often present comparison problems to assess this skill. Mastering this initial step sets the stage for more complex decimal calculations.

Adding Decimals with the Same Number of Decimal Places

Adding decimals becomes straightforward when they share the same number of decimal places. Worksheets, often available as PDFs, frequently start with these types of problems to build confidence. The key is to vertically align the numbers, ensuring the decimal points are lined up directly above each other;

Then, simply add the digits in each column, starting from the rightmost column (tenths, hundredths, etc.), just like with whole number addition. Carry over values as needed. Finally, bring the decimal point straight down into the answer.

PDF worksheets will present numerous examples like 2.35 + 1.42, reinforcing this process. This method minimizes confusion and allows students to focus on the addition algorithm itself. Practice with these problems establishes a strong foundation for tackling more challenging decimal addition scenarios.

Subtracting Decimals with the Same Number of Decimal Places

Subtracting decimals with matching decimal places follows a similar principle to addition. PDF worksheets often prioritize this skill after mastering addition, providing structured practice. Align the decimal points vertically, ensuring each place value column corresponds correctly.

Begin subtracting the digits in the rightmost column, borrowing from adjacent columns if necessary, just as with whole number subtraction. Continue this process across all columns. Crucially, maintain the decimal point’s position in the answer, bringing it directly down from the aligned numbers above.

Examples on worksheets, such as 5.78 ౼ 2.34, reinforce this method. This focused practice builds fluency and minimizes errors. Mastering this foundational skill prepares students for subtracting decimals with varying place values.

Adding and Subtracting Decimals with Different Decimal Places

PDF worksheets frequently present challenges involving decimals with unequal place values. To address this, the core strategy involves adding zeros as placeholders. This ensures both numbers have the same number of decimal places, simplifying the operation. For example, when adding 3.14 and 1.2, rewrite it as 3.14 + 1.20.

Align the decimal points and proceed with standard addition or subtraction. The added zeros do not change the value of the number, only its representation. Worksheet exercises often start with simpler examples, gradually increasing complexity.

This technique reinforces place value understanding and prevents common errors. Consistent practice with these PDF resources builds confidence and proficiency in handling varied decimal scenarios, preparing students for more advanced mathematical concepts.

Decimal Multiplication

Decimal multiplication worksheets, often in PDF format, focus on multiplying decimals by whole numbers and other decimals, building essential arithmetic skills through practice.

Multiplying Decimals by Whole Numbers

Worksheets dedicated to multiplying decimals by whole numbers are a cornerstone of mastering decimal arithmetic. These resources, frequently available as PDF downloads, present problems where students apply multiplication skills while carefully managing decimal placement.

The core concept involves treating the whole number as if it were a decimal with trailing zeros. For example, 3 x 2.5 is approached as 3.0 x 2.5. Students then perform standard multiplication, and finally, count the total number of decimal places in both factors to correctly position the decimal point in the product.

PDF worksheets often start with simpler examples, gradually increasing in complexity. They may include problems requiring students to estimate the product before calculating, reinforcing number sense. Effective practice with these worksheets builds a strong foundation for more advanced decimal multiplication techniques, ensuring accuracy and conceptual understanding.

These exercises are vital for real-world applications, such as calculating the total cost of multiple items with decimal prices.

Multiplying Decimals by Decimals

Multiplying decimals by other decimals requires a systematic approach, and dedicated PDF worksheets provide ample practice. These resources build upon the foundation of multiplying decimals by whole numbers, adding the complexity of decimal placement in both factors.

The process begins by ignoring the decimal points and performing standard multiplication as with whole numbers. Subsequently, students count the total number of decimal places in both original decimals. This sum determines the number of decimal places in the final product.

Worksheet problems often range from simple multiplications like 0.2 x 0.3 to more complex scenarios. Many PDFs include estimation exercises to encourage number sense and check for reasonableness of answers. Consistent practice with these worksheets solidifies understanding and minimizes errors.

Mastering this skill is crucial for various real-world calculations, such as determining areas or converting units involving decimal values.

Estimating Decimal Products

Estimating decimal products is a vital skill for verifying the reasonableness of calculated answers, and decimal operations worksheets – often in PDF format – heavily emphasize this. These worksheets move beyond precise calculations, fostering number sense and mental math abilities.

The core technique involves rounding each decimal factor to the nearest whole number before multiplying. This simplification allows for quick, approximate calculations. For example, 2.2 x 1.8 becomes approximately 2 x 2 = 4.

PDF worksheets typically present problems alongside space for both the estimated product and the exact answer, encouraging comparison. This comparison highlights potential errors in the precise calculation.

Effective worksheets also include problems requiring students to determine if a given answer is reasonable given an estimated product. This reinforces the practical application of estimation in real-world scenarios, building confidence and mathematical intuition.

Decimal Division

Decimal division worksheets, frequently found as PDFs, build skills in dividing decimals by whole numbers and other decimals, tackling remainders effectively.

Dividing Decimals by Whole Numbers

Dividing decimals by whole numbers is a foundational skill reinforced through dedicated worksheets, often available as convenient PDF downloads. These resources typically present problems where a decimal number is divided by a non-decimal whole number, requiring students to understand place value and division procedures.

Many worksheets begin with simpler examples, gradually increasing in complexity. A common approach involves setting up the division problem like long division, ensuring the decimal point in the quotient is aligned correctly with the decimal point in the dividend.

PDF worksheets often include step-by-step examples to guide students through the process. Practice problems may involve dividing money amounts (e.g., splitting a bill), measuring lengths, or solving other real-world scenarios. The goal is to develop fluency and accuracy in performing this essential decimal operation.

Effective worksheets also provide answer keys for self-assessment and teacher verification, promoting independent learning and targeted practice.

Dividing Decimals by Decimals

Dividing decimals by decimals presents a slightly more complex challenge, and dedicated worksheets – frequently found as PDFs – are invaluable for practice. These resources focus on problems where both the divisor and dividend are decimal numbers, requiring an initial step to eliminate the decimal in the divisor.

Typically, students are taught to multiply both the divisor and dividend by a power of ten (10, 100, 1000, etc.) to convert the divisor into a whole number. This maintains the quotient’s value while simplifying the division process. Worksheet problems then proceed like dividing by a whole number, emphasizing careful alignment of the decimal point in the quotient.

PDF worksheets often include examples demonstrating this initial multiplication step, followed by a series of practice problems. These may involve real-world applications like calculating unit prices or converting measurements.

Answer keys are crucial for self-checking and identifying areas needing further attention. Mastering this skill builds a strong foundation for more advanced mathematical concepts.

Dealing with Remainders in Decimal Division

Decimal division often results in remainders, and worksheets – commonly available as PDFs – specifically address how to handle these. Unlike whole number division, remainders in decimal division are typically continued by adding a zero to the dividend, allowing the division process to proceed further and generate decimal places in the quotient.

These PDF resources emphasize continuing the division until a desired level of precision is reached, or until the remainder becomes zero. Problems often instruct students to round the quotient to a specific number of decimal places.

Worksheets may present scenarios where interpreting the remainder is crucial, such as determining how many items can be distributed equally with a portion left over.

Practice problems progressively increase in complexity, requiring students to apply the concept of adding zeros and continuing the division process. Answer keys provide solutions and demonstrate the correct placement of the decimal point in the quotient, reinforcing understanding.

Decimal Operations Worksheet Practice

Decimal operations worksheet PDFs offer diverse problems – addition, subtraction, multiplication, and division – to solidify skills and build confidence in calculations.

Types of Problems Included in Worksheets

Decimal operations worksheet PDFs commonly feature a wide array of problem types designed to comprehensively assess and reinforce understanding. Addition and subtraction problems are foundational, starting with aligning decimal points and progressing to scenarios with varying decimal places.

Multiplication exercises begin with multiplying decimals by whole numbers, then expand to multiplying two decimals, often including estimation practice to check for reasonableness. Division problems cover dividing decimals by whole numbers and decimals by decimals, with a focus on correctly placing the decimal point in the quotient.

Many worksheets also incorporate real-world word problems requiring students to identify the appropriate operation and apply their skills in practical contexts, such as calculating costs, measurements, or averages. Furthermore, some PDFs include problems focused on converting fractions to decimals and rounding decimals to specified places, enhancing overall number sense. Difficulty levels vary, catering to beginner, intermediate, and advanced learners.

Real-World Applications of Decimal Operations

Decimal operations worksheet PDFs aren’t just abstract exercises; they prepare students for numerous real-world scenarios. Consider financial literacy: calculating costs with sales tax, determining discounts, or managing budgets all rely heavily on decimal addition, subtraction, multiplication, and division.

In culinary arts, recipes frequently use decimals for ingredient measurements, requiring precise calculations for scaling recipes up or down; Scientific measurements, like length, weight, and volume, are often expressed in decimals, demanding accurate calculations and conversions.

Furthermore, understanding decimals is crucial for interpreting data presented in charts and graphs, analyzing statistics, and making informed decisions in everyday life. Even simple tasks like calculating mileage or determining the average speed require decimal operations. Mastering these skills through worksheet practice builds confidence and practical mathematical ability.

Worksheet Difficulty Levels (Beginner, Intermediate, Advanced)

Decimal operations worksheet PDFs cater to diverse skill levels, typically categorized as Beginner, Intermediate, and Advanced. Beginner worksheets focus on foundational concepts – identifying decimal place values and simple addition/subtraction with aligned decimals. These build a solid base.

Intermediate worksheets introduce more complex scenarios: adding and subtracting decimals with varying place values, multiplying decimals by whole numbers, and basic division. Students begin estimating products and quotients.

Advanced worksheets challenge students with multiplying and dividing decimals by decimals, solving multi-step problems, and applying decimal operations to word problems. These often include scenarios requiring rounding and converting fractions to decimals. The progression ensures a gradual increase in complexity, fostering a deeper understanding and mastery of decimal operations.

Finding and Utilizing Decimal Operations Worksheets (PDF)

Numerous websites offer free decimal operations worksheet PDFs for download. Paid resources provide more extensive problem sets and answer keys for comprehensive practice.

Free Printable Decimal Operations Worksheets

Decimal operations worksheet PDFs are readily available from various online educational resources, offering a cost-effective way to supplement learning. Websites like Math-Drills, Education.com, and K5 Learning provide a diverse range of free worksheets covering addition, subtraction, multiplication, and division of decimals.

These worksheets often cater to different skill levels, from beginner exercises focusing on basic decimal addition and subtraction to more advanced problems involving multiplying and dividing decimals. Many sites allow filtering by specific operation or difficulty, enabling targeted practice.

The PDF format ensures easy printing and accessibility, making them ideal for classroom use or home practice. Teachers and parents can quickly download and distribute these resources to reinforce decimal concepts. Look for worksheets that include answer keys for self-assessment and efficient grading. Utilizing these free resources can significantly enhance a student’s understanding and proficiency in decimal operations.

Paid Decimal Operations Worksheet Resources

While numerous free decimal operations worksheet PDFs exist, paid resources often offer more comprehensive and specialized content. Platforms like Teachers Pay Teachers host a vast collection of worksheets created by educators, providing varied problem types and detailed answer keys.

These paid resources frequently include differentiated worksheets catering to diverse learning needs, along with bundled sets covering multiple decimal concepts. Some offer interactive PDFs with fillable fields for digital completion and automated grading. Premium worksheets may also incorporate real-world application problems and challenging exercises for advanced learners.

Purchasing these resources supports educators and provides access to high-quality, meticulously designed materials. They can save teachers valuable time in lesson planning and assessment creation. Consider paid options when seeking extensive practice, customized content, or advanced problem-solving scenarios beyond what free resources typically provide.

Tips for Effectively Using Worksheets

When utilizing decimal operations worksheet PDFs, start with foundational concepts before progressing to more complex problems. Encourage students to show their work, emphasizing proper alignment of decimal points during addition and subtraction. Regularly review completed worksheets to identify areas needing reinforcement.

Promote estimation techniques to check the reasonableness of answers, particularly with multiplication and division. Vary the worksheet types to maintain engagement and address different skill levels. Consider timed practice to build fluency, but prioritize accuracy over speed initially.

Utilize worksheets as both independent practice and collaborative activities. Discuss challenging problems as a class, fostering peer learning. Don’t solely rely on worksheets; integrate them with hands-on activities and real-world applications to solidify understanding of decimal concepts.

Advanced Decimal Operations Concepts

Decimal operations worksheet PDFs extend to converting fractions, rounding, and applying these skills to complex problems. Mastery builds a strong numerical foundation.

Converting Fractions to Decimals

Decimal operations worksheet PDFs frequently include exercises focused on converting fractions to their decimal equivalents, a vital skill for bridging number systems. This process often involves division; the numerator of the fraction is divided by the denominator. For example, converting 1/4 requires dividing 1 by 4, resulting in 0.25.

Worksheets progressively increase complexity, starting with simple fractions like halves and quarters, then moving to more challenging fractions. Some worksheets present fractions already in simplified form, while others require students to simplify before converting. Understanding equivalent fractions is also reinforced.

Advanced PDFs may include converting repeating decimals back into fractions, demanding a deeper understanding of the relationship between the two forms. These exercises solidify a student’s grasp of numerical representation and prepare them for more advanced mathematical concepts. Practice is key to mastering this conversion.

Rounding Decimals

Decimal operations worksheet PDFs dedicate significant space to rounding decimals, a practical skill for estimation and presenting data concisely. These worksheets typically present decimals and specify a place value (tenths, hundredths, thousandths) to which students must round. The core principle involves identifying the digit immediately following the target place value.

If this digit is 5 or greater, the target digit is increased by one, and all subsequent digits are truncated. Conversely, if it’s less than 5, the target digit remains unchanged, and subsequent digits are removed. Worksheets often include number lines to visually demonstrate the rounding process.

More advanced PDFs incorporate real-world scenarios, like rounding monetary values or measurements. They may also ask students to explain their reasoning, reinforcing conceptual understanding. Consistent practice with these worksheets builds accuracy and fluency in rounding decimals to specified places.

guido’s menus

Guido’s Menus: A Comprehensive Overview (as of 02/07/2026)

Guido’s presents a diverse Mediterranean experience, blending Italian classics with traditional Spanish tapas, offering made-to-order dishes and fresh, flavorful options daily.

Guido’s Pizzeria and Tapas is a celebrated dining destination, passionately delivering the vibrant flavors of the Mediterranean to its valued customers since 1993. We expertly combine the best of Italian and Spanish culinary traditions, offering a unique and satisfying experience. From classic Italian fare to authentic Spanish entrées and tapas, Guido’s caters to diverse palates with a commitment to freshness and quality.

Our menu boasts made-to-order dishes, including the renowned Guido’s Homemade Lasagna and tantalizing Tapas Calientes, culminating in the rich indulgence of our Caramelized Flan. With multiple locations throughout Metro Detroit and in Sault Ste. Marie, Guido’s provides convenient access to exceptional cuisine, alongside catering services for any event.

History and Family Roots

The story of Guido’s is deeply rooted in family tradition and a passion for authentic cuisine. Since 1993, the Guido family has dedicated itself to crafting exceptional Mediterranean dishes, built upon cherished family recipes passed down through generations. These recipes, originating from both Italian and Spanish influences, form the heart of our menu and define the Guido’s experience.

This dedication to quality and authenticity stems from a commitment to honoring the family’s heritage and sharing it with the community. Every dish is prepared with love and care, using fresh ingredients and time-honored techniques. The deep roots of the Guido family in Kin—and beyond—are reflected in every bite, creating a truly memorable dining experience.

Guido’s Culinary Philosophy: Mediterranean Focus

Guido’s culinary philosophy centers around the vibrant flavors and fresh ingredients of the Mediterranean region. We strive to deliver an authentic taste of both Italy and Spain, seamlessly blending classic techniques with a modern approach. Our menu is a testament to the health benefits and deliciousness inherent in Mediterranean cuisine, emphasizing fresh vegetables, lean proteins, and flavorful herbs.

We believe in the power of simple, high-quality ingredients prepared with care. From our homemade lasagna to our sizzling tapas, every dish is designed to transport you to the sun-drenched shores of the Mediterranean. This focus ensures a dining experience that is both satisfying and nourishing, reflecting our commitment to both taste and well-being.

Core Menu Categories

Guido’s core menu boasts Italian classics, vibrant Spanish tapas and entrées, and Guido’s Premium Pizza, offering diverse flavors for every palate and occasion.

Italian Classics at Guido’s

Guido’s proudly presents a selection of time-honored Italian dishes, crafted with authentic family recipes and the freshest ingredients. Central to this category is Guido’s Homemade Lasagna, a layered masterpiece featuring rich meat sauce, creamy béchamel, and perfectly cooked pasta – available in generous portions.

Beyond lasagna, guests can indulge in a variety of pasta dishes, prepared with either a robust meat sauce or a vibrant marinara. The menu also features classic Italian fare prepared fresh to order, ensuring a delightful dining experience. Don’t forget to complement your meal with Guido’s signature house salad, a refreshing blend of crisp greens, vegetables, and a tangy dressing. Baked dishes can be customized with Provel cheese for an extra layer of flavor!

Spanish Tapas & Entrees

Guido’s delivers “A Taste of Spain” with a vibrant selection of both traditional tapas and satisfying entrees. The “Tapas Calientes” – hot tapas offerings – provide a delightful sampling of Spanish flavors, prepared fresh and served with flair. For a more substantial meal, explore our entree options, designed to transport your palate to the heart of Spain.

A standout dish is the Charbroiled Lamb Lollipops, expertly seasoned with rosemary, garlic, and white wine, and served alongside sautéed Spanish potatoes. These can also be prepared with chicken or shrimp in a flavorful garlic cream sauce. Guido’s commitment to freshness ensures each dish bursts with authentic Spanish taste, offering a truly immersive culinary journey.

Pizza Selection: Guido’s Premium Pizza

Guido’s Premium Pizza offers a delightful range of options, crafted with fresh dough and expertly blended sauce, prepared daily in-house. Customers can customize their pizzas with a variety of toppings, ensuring a personalized culinary experience. For those seeking a regional twist, pizzas can be baked with Provel cheese for an additional charge, adding a unique St. Louis flavor.

We pride ourselves on using high-quality ingredients and time-honored techniques to create pizzas that are both delicious and satisfying. Whether you prefer a classic meat or marinara sauce base, Guido’s Premium Pizza delivers a consistently exceptional taste. With 11 locations in Metro Detroit and one in Sault Ste. Marie, enjoying our premium pizza is convenient and accessible.

Signature Dishes & Specialties

Guido’s excels with specialties like Homemade Lasagna, flavorful Tapas Calientes, decadent Caramelized Flan, and savory Charbroiled Lamb Lollipops – truly exceptional choices!

Guido’s Homemade Lasagna: A Detailed Look

Guido’s Homemade Lasagna is a celebrated culinary masterpiece, meticulously crafted with layers of rich, flavorful ingredients. Each portion is generously sized, offering two substantial servings of pure Italian comfort. The foundation begins with perfectly al dente pasta, expertly layered with a robust and savory meat sauce, simmered to perfection with traditional herbs and spices.

A creamy, decadent béchamel sauce is then delicately spread, adding a luxurious texture and richness. The lasagna is baked to a golden brown, creating a delightful crust. It’s traditionally served alongside Guido’s signature house salad, a vibrant mix of fresh greens, crisp vegetables, and a tangy, homemade dressing, perfectly complementing the hearty lasagna.

This dish embodies Guido’s commitment to fresh, made-to-order cuisine, offering a truly authentic and satisfying dining experience.

Tapas Calientes: Hot Tapas Offerings

Guido’s Tapas Calientes selection brings the vibrant flavors of Spain to your table, offering a delightful array of hot tapas designed for sharing and savoring. A standout dish is the Charbroiled Lamb Lollipops, expertly seasoned with rosemary, garlic, and a touch of white wine, served alongside perfectly sautéed Spanish potatoes – a truly unforgettable experience.

For those preferring poultry or seafood, the tapas are also prepared in a luscious garlic cream sauce. Customers can choose between chicken for $5 or shrimp for $7.99, both equally delicious and satisfying. These hot tapas are a testament to Guido’s dedication to authentic Spanish cuisine, prepared with fresh ingredients and a passion for flavor.

Each bite is a journey to the heart of Spain!

Caramelized Flan: The Dessert Highlight

Guido’s Caramelized Flan is more than just a dessert; it’s a rich and decadent experience, consistently highlighted as a customer favorite and a true testament to their pastry chef’s skill. This classic Spanish custard is meticulously crafted, boasting a silky-smooth texture and a beautifully caramelized top that delivers a satisfyingly sweet crunch with every spoonful.

The flan’s sweetness is perfectly balanced, creating a harmonious blend of flavors that lingers on the palate. It’s the ideal ending to any Guido’s meal, whether you’ve enjoyed Italian classics or Spanish tapas. Prepared fresh daily, this dessert embodies Guido’s commitment to quality and authentic Mediterranean flavors.

Indulge in a slice of pure dessert heaven!

Charbroiled Lamb Lollipops

Guido’s Charbroiled Lamb Lollipops are a signature appetizer, showcasing a delightful fusion of flavors and textures. These tender lamb chops are expertly seasoned and charbroiled to perfection, then generously topped with a fragrant blend of rosemary, garlic, and a splash of white wine. This aromatic combination elevates the natural richness of the lamb, creating a truly unforgettable culinary experience.

Served alongside sautéed Spanish potatoes, this dish offers a satisfying balance of savory and earthy notes; Customers rave about the lamb’s tenderness and the vibrant flavors of the marinade. You can also enjoy this dish with chicken or shrimp!

A perfect shareable plate to start your meal!

Pasta Dishes: Variety and Preparation

Guido’s pasta dishes represent the heart of its Italian heritage, offering a diverse selection to satisfy every palate. From classic spaghetti to hearty lasagna, each dish is crafted with meticulous attention to detail, utilizing fresh, high-quality ingredients. The cornerstone of their pasta preparation lies in the commitment to perfectly “al dente” pasta – firm to the bite and expertly cooked.

Customers can choose between rich meat sauce or vibrant marinara sauce, with the option to add Provel cheese for an extra layer of flavor. Guido’s dedication to freshness extends to their sauce preparation, blended daily in-house.

Every pasta dish is made-to-order, ensuring a truly personalized dining experience.

Menu Variety & Options

Guido’s boasts extensive variety, including daily hot bars, salad bars, fresh sandwiches, sushi, prepared foods, and customizable options for every diner.

Daily Hot Bar & Salad Bar

Guido’s daily hot bar is a rotating selection of comforting, flavorful dishes, prepared fresh throughout the day to ensure peak quality and taste. Guests can expect a variety of entrees, sides, and seasonal specialties, offering something new with each visit.

Complementing the hot bar is Guido’s expansive salad bar, a vibrant display of crisp, fresh greens, colorful vegetables, and a diverse array of toppings. Create your perfect salad with a selection of dressings, cheeses, and proteins.

Both the hot and salad bars are designed to provide a convenient and customizable dining experience, catering to diverse preferences and dietary needs. It’s a perfect option for a quick lunch or a light, healthy dinner.

Fresh Sandwiches & Prepared Foods

Guido’s offers a delightful selection of freshly made sandwiches, crafted with premium ingredients and served on a variety of breads. From classic Italian subs to innovative specialty creations, there’s a sandwich to satisfy every craving. All sandwiches are made to order, ensuring maximum freshness and flavor.

Beyond sandwiches, Guido’s boasts a range of house-made prepared foods, perfect for a quick and convenient meal. These include pasta salads, marinated vegetables, and flavorful side dishes, all prepared daily in-house.

These prepared foods provide a convenient alternative for those seeking a delicious and satisfying meal without the wait. They are ideal for lunch, dinner, or a quick snack, offering a taste of Guido’s quality and freshness on the go.

Sushi Offerings at Guido’s

Guido’s surprisingly extends its culinary expertise to include a selection of fresh and expertly crafted sushi. This unexpected addition to the Mediterranean-focused menu offers customers a diverse dining experience, blending Italian and Spanish flavors with Japanese tradition.

The sushi menu features a variety of classic rolls, including California rolls, spicy tuna rolls, and shrimp tempura rolls, all prepared with high-quality ingredients. Guido’s ensures freshness by preparing sushi daily, utilizing skilled sushi chefs.

This unique offering caters to a broader palate, providing a convenient and delicious option for sushi lovers alongside Guido’s signature Italian and Spanish dishes. It demonstrates a commitment to variety and customer satisfaction.

Ordering & Location Information

Guido’s boasts over eleven Metro Detroit locations, plus one in Sault Ste. Marie, offering convenient online ordering for carry-out, delivery, and catering services.

Metro Detroit Locations (11+)

Guido’s Premium Pizza proudly serves the Metro Detroit area with a network of more than eleven convenient locations. These restaurants are dedicated to providing speedy delivery service alongside efficient carry-out options, ensuring customers can enjoy their favorite Mediterranean dishes with ease. Beyond individual orders, Guido’s extends its services to cater for a wide range of events, from intimate gatherings to large parties and corporate meetings.

Each Detroit-area Guido’s location maintains the family’s commitment to freshness, preparing every menu item to order. This dedication extends to crafting their signature dough, grating cheeses, slicing vegetables, and blending sauces daily. Customers can expect consistent quality and authentic family recipes at each location, embodying the heart of Guido’s culinary philosophy.

Sault Ste. Marie Location

Guido’s extends its commitment to quality Mediterranean cuisine to Sault Ste. Marie, offering residents and visitors a taste of Italy and Spain. This northern Michigan location mirrors the standards set by its Metro Detroit counterparts, providing both convenient carry-out and speedy delivery services. Customers in Sault Ste. Marie can now readily access Guido’s signature dishes, including the renowned Homemade Lasagna and flavorful Spanish Tapas.

Like all Guido’s restaurants, the Sault Ste. Marie location prioritizes fresh, made-to-order meals. The team diligently prepares dough, grates cheese, slices vegetables, and blends sauces daily, ensuring every bite delivers authentic flavor. Catering services are also available, making Guido’s a perfect choice for local events and gatherings.

Online Ordering for Carry-Out & Delivery

Guido’s understands the modern demand for convenience, offering a seamless online ordering system for both carry-out and speedy delivery. Customers can easily browse the extensive menu – featuring Italian classics, Spanish tapas, and Guido’s Premium Pizza – directly through the website or mobile app. This platform allows for customization of orders, ensuring each meal is tailored to individual preferences.

The online system streamlines the ordering process, providing estimated preparation and delivery times. Whether craving a hearty lasagna, a selection of tapas, or a freshly made pizza, Guido’s brings the taste of the Mediterranean directly to your door. Secure payment options and order tracking further enhance the customer experience, making it simple and efficient.

Catering Services for Events

Guido’s extends its culinary expertise beyond the restaurant walls with comprehensive catering services, perfect for parties, meetings, and all types of events. Offering a diverse menu encompassing Italian and Spanish flavors, Guido’s can customize catering packages to suit any occasion and budget. From elegant tapas spreads to hearty pasta buffets and Guido’s signature lasagna, options abound.

Their experienced catering team handles all the details, from menu planning and food preparation to delivery and setup, ensuring a stress-free experience for the host. With 11+ Metro Detroit locations and a presence in Sault Ste. Marie, Guido’s can readily serve a wide geographic area. Let Guido’s elevate your next event with authentic Mediterranean cuisine and exceptional service.

Promotions & Updates

Guido’s publishes monthly guides detailing delicious deals, new recipes, and in-store happenings, keeping customers informed about the latest offers and menu additions.

Monthly Guides & Deals

Each month, Guido’s releases a comprehensive guide designed to keep patrons fully informed about the latest and most exciting offerings. These guides aren’t simply advertisements; they’re a curated experience, showcasing seasonal specials, limited-time menu items, and exclusive deals available at all locations.

Expect to find featured recipes inspired by family traditions, providing a glimpse into the culinary heart of Guido’s. The guides also highlight upcoming events, catering promotions, and opportunities to join the Guido’s team. Digital versions are readily accessible online, ensuring convenient access to all the delicious details. Don’t miss out – stay connected and savor the savings!

Guido’s Commitment to Freshness

Since 1993, Guido’s has built its reputation on an unwavering dedication to fresh, high-quality ingredients and made-to-order preparation. This isn’t just a slogan; it’s a core principle woven into every aspect of the menu. From the dough, crafted daily in-house, to the meticulously grated cheeses and hand-sliced vegetables, every component receives individual attention.

The sauces are blended fresh, ensuring vibrant flavors in every bite. This commitment extends to sourcing the best possible produce, guaranteeing peak freshness and taste. Guido’s believes that exceptional food begins with exceptional ingredients, and this philosophy shines through in every dish served, delivering an authentic and satisfying experience.

Ingredient Quality & Preparation

Guido’s prioritizes fresh ingredients, preparing dishes to order—from crafting dough and sauces to grating cheese and slicing vegetables—ensuring peak flavor.

Made-to-Order Dishes

At Guido’s, the commitment to freshness is paramount, and this is vividly demonstrated through their dedication to preparing every menu item specifically when an order is placed. This isn’t simply a matter of convenience; it’s a core philosophy rooted in the family’s culinary traditions since 1993. Each lasagna is meticulously layered, each sauce is blended, and every vegetable is sliced just before it’s incorporated into your meal.

This approach guarantees that every bite is bursting with vibrant flavors and optimal texture. From the classic Italian fare to the traditional Spanish entrées and tapas, the made-to-order system ensures a consistently high-quality dining experience. It’s a testament to Guido’s pride in their products and their dedication to delivering an authentic taste of the Mediterranean.

Fresh Dough & Sauce Preparation

Guido’s dedication to quality begins with the fundamentals: the dough and the sauce. Unlike many establishments, Guido’s doesn’t rely on pre-made ingredients. They meticulously craft their pizza dough in-house daily, ensuring a perfect texture and flavor base for their Premium Pizza selections; This commitment extends to their sauces, which are blended fresh each day, utilizing carefully selected ingredients to create rich and authentic flavors.

This hands-on approach guarantees a superior taste experience, setting Guido’s apart. The freshness of the dough and sauce is a cornerstone of their Italian classics and contributes significantly to the overall quality of their entire menu. It’s a testament to their unwavering commitment to providing customers with the best possible Mediterranean cuisine.

Cheese Selection & Grating

Guido’s understands the pivotal role cheese plays in elevating a dish, particularly within Italian cuisine. They don’t simply purchase pre-shredded cheese; instead, they meticulously select high-quality cheeses and grate them fresh to order. This practice ensures optimal flavor and meltability, enhancing the texture and taste of their pizzas, lasagnas, and other signature creations.

Notably, Guido’s offers the option to bake pizzas with Provel cheese for an additional charge, catering to local preferences. This dedication to fresh grating and quality cheese selection demonstrates their commitment to providing an authentic and superior dining experience. It’s a small detail that makes a significant difference in the final product.

Vegetable Sourcing & Slicing

Guido’s commitment to freshness extends to their vegetable preparation. They prioritize sourcing high-quality vegetables, ensuring vibrant flavors and optimal texture in every dish. Crucially, vegetables aren’t pre-cut or delivered pre-sliced; instead, Guido’s staff meticulously slices them in-house, daily. This hands-on approach guarantees peak freshness and allows for precise control over portion sizes and presentation.

This dedication to detail is evident in their salads, pizzas, and tapas, where crisp, perfectly sliced vegetables contribute significantly to the overall dining experience. By avoiding pre-cut options, Guido’s maintains a superior level of quality and flavor, reinforcing their promise of made-to-order excellence.

Restaurant Details & Contact

Guido’s Pizzeria and Tapas, located on The Hill, offers authentic family recipes. Contact information and booking details for Saint Louis, MO are available.

Guido’s Pizzeria and Tapas ─ The Hill Location

Nestled in the heart of St; Louis’s historic “The Hill” neighborhood, Guido’s Pizzeria and Tapas brings generations of family tradition to every dish. This location is renowned for its authentic Italian-American cuisine and vibrant Spanish tapas offerings, creating a unique dining experience.

Here, you’ll find beloved classics prepared with fresh, high-quality ingredients – from their signature homemade lasagna to a tempting array of Tapas Calientes. The atmosphere is warm and inviting, reflecting the Guido family’s commitment to hospitality.

Whether you’re seeking a casual meal or a celebratory gathering, Guido’s on The Hill provides a taste of Spain and Italy, lovingly crafted and served with passion. It’s a true neighborhood gem!

Restaurant Booking Information (Saint Louis, MO)

Planning a visit to Guido’s Pizzeria and Tapas in Saint Louis, Missouri? Reservations are highly recommended, especially for larger parties and peak dining hours. You can conveniently book your table online through several popular restaurant reservation platforms.

Alternatively, you can reach Guido’s directly by phone to secure your preferred time slot. The restaurant welcomes walk-ins, but seating availability cannot be guaranteed. Guido’s caters to diverse dining needs, offering options for intimate dinners, family celebrations, and group events.

Explore options at one of 3551 great restaurants in Saint Louis, but experience the authentic family recipes made with love at Guido’s!

nick jr too tv guide

Nick Jr. Too TV Guide: A Comprehensive Overview (Updated 02/07/2026)

Today’s Nick Jr. Too programming features Blaze and the Monster Machines at 1:20 PM, followed by Rubble & Crew. This guide provides detailed listings for the next two weeks!

What is Nick Jr. Too?

Nick Jr. Too is a dedicated television channel specifically designed to cater to the youngest members of the family – preschoolers and very young children. It’s a spin-off channel from the popular Nick Jr. network, offering a curated selection of programming geared towards early childhood development and entertainment.

Unlike its parent channel, Nick Jr. Too focuses on a continuous stream of shows, often without traditional commercial breaks, creating a seamless viewing experience for little ones. The channel’s core mission revolves around providing engaging, educational, and age-appropriate content that fosters learning through play.

You’ll find a vibrant mix of colorful animation and endearing characters, all carefully chosen to capture the attention of preschool-aged viewers. Nick Jr. Too aims to be a safe and stimulating environment where children can explore, learn, and grow, making it a favorite destination for families seeking quality children’s programming. It’s currently available on channel 617.

Target Audience and Programming Philosophy

Nick Jr. Too’s primary target audience is children aged 2 to 5 years old – the preschool demographic. Programming is meticulously selected to align with the developmental needs and interests of this age group, emphasizing educational value alongside entertainment.

The channel’s programming philosophy centers around “learning through play.” Shows are designed to subtly introduce foundational concepts like numbers, letters, shapes, colors, and social-emotional skills. Emphasis is placed on positive role modeling, encouraging kindness, cooperation, and problem-solving.

Content aims to be both stimulating and calming, offering a balance between energetic adventures and gentle, reassuring narratives. Nick Jr. Too prioritizes age-appropriateness, ensuring all programming is free from overly complex themes or potentially frightening content. The goal is to create a safe and enriching viewing experience that supports early childhood development and sparks imagination.

Current Programming Blocks

Nick Jr. Too organizes its daily schedule into distinct programming blocks designed to cater to different times of day and viewing habits; Mornings typically feature a block of introductory shows focused on foundational learning, easing children into the day with gentle educational content.

Midday programming often showcases longer-form series, like Blaze and the Monster Machines and Rubble & Crew, offering more immersive storytelling and character development. These blocks frequently include repeat airings to accommodate varied schedules.

Afternoon blocks may incorporate a mix of newer episodes and popular favorites, providing a balance of fresh content and familiar comfort. Evening programming tends to wind down with calmer, more soothing shows, preparing children for bedtime. These blocks are subject to change based on network priorities and seasonal programming events.

Popular Shows Currently Airing

Nick Jr. Too consistently delivers engaging content for preschoolers, and several shows currently dominate the viewing schedule. Blaze and the Monster Machines, a high-octane adventure series, remains a firm favorite, captivating audiences with its blend of racing, problem-solving, and teamwork. Season 5, Episode 513, “The Big Balloon Rescue,” is a recent highlight.

Alongside Blaze, Rubble & Crew is gaining significant traction. This construction-themed show, currently in its second season (Episode 220 featuring “The Crew Builds A Post Office” and “The Crew…”), emphasizes community, creativity, and practical skills.

These programs, alongside others, form the core of Nick Jr. Too’s current offerings, providing a diverse range of entertainment and educational experiences. The channel strategically schedules these popular shows throughout the day to maximize viewership and maintain a consistent audience.

Blaze and the Monster Machines

Blaze and the Monster Machines is a cornerstone of the Nick Jr. Too programming lineup, consistently attracting a dedicated young audience. This animated series centers around AJ, a young boy, and Blaze, his monster truck best friend, as they navigate exciting races and solve problems using STEM principles. The show cleverly integrates mathematics and physics into its narratives, making learning fun and accessible for preschoolers.

Currently airing in its fifth season, Blaze continues to introduce new challenges and adventures. Episode 513, “The Big Balloon Rescue,” recently aired and exemplifies the show’s focus on teamwork and quick thinking. Viewers can expect fast-paced action, colorful animation, and positive messages about friendship and perseverance.

Regular scheduling ensures Blaze remains readily available for young viewers on Nick Jr. Too, solidifying its position as a channel favorite.

Rubble & Crew

Rubble & Crew is a vibrant addition to the Nick Jr. Too schedule, captivating preschoolers with its construction-themed adventures. The series follows Rubble, a young bulldog, and his crew of construction pups as they tackle building projects and help their community. Each episode emphasizes problem-solving, collaboration, and the satisfaction of a job well done.

Currently in its second season, Rubble & Crew consistently delivers engaging storylines. Episode 220, featuring segments “The Crew Builds A Post Office” and “The Crew…”, showcases the show’s commitment to relatable scenarios and creative solutions. The bright animation and upbeat music further enhance the viewing experience.

Nick Jr. Too’s consistent scheduling ensures that Rubble & Crew is a reliable option for parents seeking educational and entertaining content for their little ones, making it a popular choice.

Accessing the Nick Jr. Too TV Schedule

Staying up-to-date with the Nick Jr. Too TV schedule is easier than ever, offering multiple convenient access points for parents and viewers. A complete schedule covering the next two weeks is readily available online, allowing you to plan viewing sessions in advance. Simply click on a program listing to reveal all upcoming airings and potential streaming options.

For those preferring a quick glance, today’s TV schedule for Nick Jr. Too is prominently displayed on various TV listing websites and guides. These resources provide a clear overview of what’s currently airing and what’s coming up next, ensuring you don’t miss your child’s favorite shows.

Local TV listings guides also feature Nick Jr. Too, often including the channel number for your specific provider. Checking these resources provides a comprehensive view of the channel’s programming.

Online TV Listings and Guides

Numerous online platforms offer comprehensive TV listings for Nick Jr. Too, providing a convenient way to explore the channel’s programming. These guides typically present the schedule in an easy-to-read format, often categorized by time slots and program titles. Many sites allow users to filter listings by date, making it simple to find specific shows or plan future viewing.

Popular TV listing websites compile schedules from various sources, ensuring accuracy and completeness. These resources often include detailed episode descriptions and TV ratings, helping parents make informed viewing choices. Furthermore, some guides integrate streaming options, indicating where episodes are available on demand.

Dedicated TV guide apps for smartphones and tablets also provide access to the Nick Jr. Too schedule on the go. These apps often feature customizable alerts, notifying users when their favorite shows are about to air.

Nick Jr. Too Channel Number and Availability

Nick Jr. Too’s channel number varies depending on your television service provider and location. It’s designed specifically for a younger audience, delivering engaging and educational content to preschoolers. Commonly, you can find Nick Jr. Too on channel 617, but this is subject to change.

To determine the precise channel number for your area, it’s best to consult your cable or satellite provider’s channel lineup. Most providers offer online tools or customer service representatives who can assist you in locating the channel. Availability also depends on your subscription package; some basic packages may not include Nick Jr. Too.

Digital television services and streaming platforms are expanding access to Nick Jr. Too, offering alternative viewing options beyond traditional cable or satellite. Checking with your provider is crucial for accurate information.

Streaming Options for Nick Jr. Too

Beyond traditional cable and satellite, several streaming options provide access to Nick Jr. Too’s delightful programming; Paramount+, the streaming service from Paramount Global, frequently features content from Nick Jr. Too, including on-demand episodes and live streams of the channel itself, depending on your subscription tier.

Many live TV streaming services, such as YouTube TV, Hulu + Live TV, and Sling TV, also carry Nick Jr. Too as part of their channel lineups. These services offer a cable-like experience with the flexibility of streaming on various devices.

Furthermore, individual episodes and clips are often available for purchase or rental through digital platforms like Amazon Prime Video and Apple TV. Checking these platforms provides additional viewing choices. Always verify current availability, as streaming rights can change.

Nick Jr. Too Schedule – Today’s Highlights

As of today, February 7th, 2026, Nick Jr. Too offers a vibrant schedule for its young viewers. The day kicks off with a morning block of engaging preschool favorites, designed to entertain and educate. Currently, at 1:20 PM, a new episode of Blaze and the Monster Machines, Season 5 Episode 513 – “The Big Balloon Rescue,” is airing.

Immediately following Blaze, at 1:45 PM, viewers can enjoy Rubble & Crew, Season 2 Episode 220, featuring two exciting segments: “The Crew Builds A Post Office” and “The Crew…” The afternoon continues with a curated selection of episodes from popular series.

Check local listings for precise times and potential variations, as schedules are subject to change. This highlights reel provides a snapshot of today’s programming, ensuring a fun-filled viewing experience!

Nick Jr. Too Schedule – Next Two Weeks

Planning your viewing for the next fourteen days on Nick Jr. Too is now easier than ever! A complete schedule of all upcoming airings is readily available, allowing you to map out your preschooler’s favorite shows. While specific episode details beyond today, February 7th, 2026, require consulting the full TV listings, you can anticipate continued broadcasts of Blaze and the Monster Machines and Rubble & Crew.

Expect a consistent rotation of beloved Nick Jr. Too programs, interspersed with new episodes and themed programming blocks. The schedule is designed to provide a balance of entertainment and educational content.

Clicking on a program within the comprehensive guide reveals all upcoming airings and available streaming options. Stay tuned for potential special events and premieres announced throughout the next two weeks!

Understanding the TV Guide Format

Navigating the Nick Jr. Too TV guide is straightforward, designed for quick and easy access to scheduling information. Listings are presented chronologically, displaying the start time of each program alongside its title and episode details when available. You’ll find clear distinctions between new airings and repeat broadcasts.

The guide also indicates program length, helping you plan activities around viewing times. Look for notations indicating HD broadcasts for optimal picture quality. Furthermore, the guide often links directly to streaming options, allowing seamless transitions from live TV to on-demand content.

Remember to check the date displayed to ensure you’re viewing the current schedule. The guide is regularly updated to reflect any changes or additions to the programming lineup.

How to Find Specific Episodes

Locating particular episodes on Nick Jr. Too requires utilizing the channel’s online TV listings and guides. Most guides allow searching by show title, enabling you to view all upcoming airings of your child’s favorite programs. Once you’ve selected a show, look for episode titles or descriptions to pinpoint the specific installment you’re seeking.

If you know the airdate, filtering by date can significantly narrow your search. Many streaming platforms associated with Nick Jr. Too also offer search functionality, allowing you to browse available episodes on-demand. Remember to check the Nick Jr. Too app for exclusive content and episodes not always available through traditional TV listings.

Utilizing keywords related to the episode’s plot can also aid in your search, especially when episode titles are vague.

Parental Controls and TV Ratings

Nick Jr. Too prioritizes a safe viewing experience for preschoolers, and understanding TV ratings is crucial. The channel primarily airs content rated TV-Y and TV-Y7, indicating age-appropriateness for young children. TV-Y signifies content suitable for all children, while TV-Y7 may contain mild fantasy violence.

However, parental controls are essential for complete peace of mind. Most cable and satellite providers offer features to block specific channels or set time limits for viewing. Streaming platforms also provide parental control options, allowing you to create profiles with restricted content access.

Regularly reviewing these settings ensures your child only accesses approved programming. Familiarize yourself with your TV’s built-in parental control features for an added layer of security. Active monitoring and open communication with your child about their viewing habits are also highly recommended.

Nick Jr. Too App and On-Demand Content

Nick Jr. Too extends its entertainment beyond traditional television with a dedicated app and a robust selection of on-demand content. The Nick Jr. app allows subscribers to stream episodes of their favorite shows, including Blaze and the Monster Machines and Rubble & Crew, on various devices like smartphones, tablets, and smart TVs.

On-demand options provide flexibility, enabling children to watch programs at their convenience. Many episodes are available for streaming immediately after their initial broadcast. This feature is particularly useful for catching up on missed shows or revisiting beloved stories.

The app often includes interactive elements, games, and exclusive content, enhancing the viewing experience. Accessing on-demand content typically requires a subscription through a participating TV provider or a direct subscription to the Nick Jr. streaming service.

Troubleshooting TV Schedule Issues

Encountering discrepancies with the Nick Jr. Too TV schedule can be frustrating. If a program isn’t airing as listed, first verify your local time zone settings on your television or cable box. Occasionally, schedules are subject to last-minute changes due to unforeseen circumstances, such as breaking news or programming adjustments.

Check your TV provider’s website or app for the most up-to-date schedule information, as they may have specific channel listings. If the issue persists, try resetting your cable box or streaming device. Ensure all connections are secure.

For ongoing problems, contacting your TV provider’s customer support is recommended. They can investigate potential signal issues or scheduling errors. Online TV guides and the official Nick Jr. website are also valuable resources for confirming program times.

Alternative Ways to Watch Nick Jr. Too

Beyond traditional cable or satellite television, several alternative options exist for enjoying Nick Jr. Too programming. Streaming services are increasingly popular, offering on-demand access to a wide range of shows. Many providers include Nick Jr. Too in their channel lineups, allowing viewers to watch live or catch up on missed episodes.

The Nick Jr. Too app provides another convenient way to watch, offering a selection of episodes and clips accessible on various devices. This is ideal for viewing on-the-go or when a television isn’t available.

Exploring options like YouTube TV, Hulu + Live TV, or Sling TV may also grant access to the channel. Checking each provider’s specific channel offerings is crucial before subscribing. These alternatives provide flexibility and convenience for Nick Jr. Too fans.

Future Programming and Upcoming Shows

While specific details regarding future programming on Nick Jr. Too remain largely undisclosed as of February 7th, 2026, the network consistently introduces fresh content to engage its young audience. Expect continued seasons of popular series like Blaze and the Monster Machines and Rubble & Crew, potentially with exciting new storylines and characters.

Nick Jr. Too often previews upcoming shows through brief interstitials and promotional spots during existing programming blocks. Keeping an eye on the official Nick Jr. website and social media channels is the best way to stay informed about premiere dates and show announcements.

The network’s programming philosophy centers around educational entertainment, so anticipate new shows that blend fun with learning, fostering creativity and development in preschoolers. Continued innovation in animation and interactive content is also likely.

Resources for Nick Jr. Too Information

For the most up-to-date and comprehensive information regarding Nick Jr. Too’s TV schedule, programming, and related content, several key resources are available. The official Nick Jr. website (nickjr.com) serves as a central hub, offering detailed TV listings, episode guides, and character profiles.

Numerous online TV listing guides, such as those found on major television websites, provide searchable schedules for Nick Jr. Too, allowing users to filter by date, time, and program. Social media platforms, including Facebook, Twitter, and Instagram, are frequently updated with show announcements and schedule changes.

Additionally, dedicated fan communities and forums often compile and share information about upcoming episodes and programming blocks. Remember to verify information from unofficial sources with the official Nick Jr. website for accuracy.

77 ways to play tenzi pdf

Tenzi, a remarkably swift dice game, captivates players with its simplicity and exhilarating pace, offering numerous game variations as detailed in available PDF guides.

The core appeal lies in the simultaneous rolling and frantic attempts to achieve ten dice displaying the same number, creating a uniquely engaging experience.

Resources like Amazon and online communities showcase the game’s accessibility, with downloadable rules and tutorials enhancing the fun for all ages and skill levels.

What is Tenzi?

Tenzi is a lightning-fast dice game celebrated for its straightforward rules and addictive gameplay, often detailed in downloadable PDF rulebooks like those found alongside game purchases.

Each player receives ten dice and, upon the command “Go!”, simultaneously rolls, aiming to be the first to achieve all ten dice displaying the same numerical value.

The game’s simplicity belies its strategic depth, with quick recognition and efficient rerolling being key to victory. Numerous variations, potentially outlined in a “77 ways to play” guide, add replayability.

It’s a fantastic option for quick bursts of fun, family gatherings, or even as an icebreaker.

The Appeal of a Fast-Paced Dice Game

Tenzi’s core appeal stems from its exhilarating speed and accessibility, making it a hit across age groups – details often found in comprehensive guides, potentially a “77 ways to play” PDF.

The simultaneous rolling creates a chaotic, yet captivating, energy, demanding quick reflexes and focused observation. Unlike strategic games, Tenzi prioritizes reaction time and a bit of luck.

Its simplicity allows for immediate play, while the competitive element fuels engagement. The availability of variations, as suggested by extensive rule resources, keeps the game fresh and exciting.

It’s a perfect antidote to slower-paced games, offering instant gratification.

Understanding the Core Gameplay

Tenzi’s gameplay revolves around rapid dice rolling, aiming for all ten dice to display the same number – rules often detailed in guides like a “77 ways” PDF.

Players roll simultaneously upon the “Go!” command, creating a fast-paced scramble to achieve matching dice.

Success hinges on speed and luck!

Basic Tenzi Rules

Tenzi begins with each player receiving ten dice, held in hand. A designated player shouts “Go!”, initiating a simultaneous roll from all participants – a core element often explained in comprehensive rule sets, potentially found in a “77 ways” PDF.

Following the initial roll, players quickly reroll any dice that don’t match, continuing until all ten dice display the same number.

The first player to achieve this “Tenzi” wins the round. These fundamental rules prioritize speed and a bit of luck, making it accessible and exciting for all ages.

The “Go!” Command and Simultaneous Rolling

The utterance of “Go!” is the catalyst for the frenetic energy of Tenzi, triggering a simultaneous dice roll from every player – a key aspect often detailed in expanded rule guides, like a potential “77 ways” PDF.

This synchronized start eliminates turn-taking, demanding quick reflexes and rapid rerolling.

The immediacy of the simultaneous roll is central to the game’s appeal, fostering a competitive and chaotic atmosphere where speed is paramount and luck plays a significant role.

Winning a Round of Tenzi

A player triumphs in a Tenzi round by being the first to achieve all ten dice displaying the identical number – a straightforward objective often clarified in comprehensive rule sets, potentially found within a “77 ways to play” PDF.

This requires relentless rerolling and a touch of fortune.

The first player to shout “Tenzi!” upon achieving this feat claims victory for that round, showcasing the game’s emphasis on speed and observant awareness.

Variations of Tenzi Gameplay

Tenzi offers diverse playstyles, from classic speed rounds to timed challenges, often detailed in resources like a “77 ways to play” PDF guide.

These variations cater to different skill levels and preferences, enhancing replayability.

Regular Tenzi: Speed is Key

Regular Tenzi embodies the game’s core principle: rapid dice manipulation. Players simultaneously roll all ten dice, striving to achieve all displaying the same number first.

The “Go!” command initiates a chaotic flurry of rolls and rerolls, demanding quick reflexes and focused observation.

Many resources, including comprehensive guides like a potential “77 ways to play” PDF, emphasize this frantic pace as central to the experience.

Success hinges on swiftly identifying and rerolling mismatched dice, making speed and precision paramount for victory in this classic Tenzi format.

Tenzi with a Timer

Introducing a timer to Tenzi elevates the challenge, adding intense pressure to the already fast-paced gameplay. Players race against the clock to achieve ten matching dice.

This variation, often detailed in expanded rule sets like a “77 ways to play” PDF, forces quicker decisions and more aggressive rerolling strategies.

The time limit introduces a thrilling element of risk – do you focus on accuracy or simply roll as fast as possible?

Successfully completing a round before the timer expires demands both skill and a bit of luck, amplifying the excitement for all participants.

Tenzi for Different Skill Levels

Tenzi’s adaptability makes it enjoyable for players of all ages and abilities; Simplified rules, often found in comprehensive guides like a “77 ways to play” PDF, cater to younger children or beginners.

Experienced players can embrace advanced variations, incorporating timers or handicaps to increase the difficulty and maintain engagement.

Adjusting the number of dice used per player is another effective method for scaling the challenge, ensuring a fair and fun experience for everyone involved.

This inclusivity is a key reason for Tenzi’s widespread appeal.

Tenzi and Other Dice Games

Tenzi distinguishes itself from traditional dice games like Yahtzee with its speed and simultaneous play, though both share a dice-rolling foundation, as explored in PDF guides.

Its fast-paced nature attracts players seeking a quicker, more chaotic experience.

Similarities to Yahtzee

Tenzi and Yahtzee both fundamentally rely on manipulating dice rolls to achieve specific combinations, demanding strategic thinking and a touch of luck from players.

Both games involve recognizing numerical patterns and attempting to optimize rolls, though they differ significantly in execution.

Like Yahtzee, success in Tenzi hinges on understanding probability and adapting to unpredictable outcomes, as detailed in various PDF rule sets and strategy guides available online.

However, Tenzi lacks the scoring complexity of Yahtzee, focusing instead on pure speed and simultaneous action.

Differences Between Tenzi and Other Dice Games

Tenzi distinguishes itself from traditional dice games like Yahtzee through its emphasis on speed and simultaneous play, eliminating turn-based structures.

Unlike games with complex scoring systems, Tenzi’s objective – achieving ten matching dice – is remarkably straightforward, making it accessible to all ages.

Many PDF guides highlight this simplicity, contrasting it with the strategic depth of other dice games.

The frantic, real-time nature of Tenzi creates a unique, energetic atmosphere absent in more methodical dice-rolling experiences.

Tenzi as a Gateway to Dice Game Enthusiasts

Tenzi serves as an excellent introduction to the world of dice games, captivating newcomers with its fast-paced action and simple rules, often detailed in readily available PDF guides.

Its accessibility lowers the barrier to entry, sparking an interest in more complex games like Yahtzee.

The immediate gratification of quick rounds fosters a love for dice-based gameplay.

Many players discover a passion for dice mechanics through Tenzi, leading them to explore a wider range of strategic and engaging dice games.

Creating Your Own Tenzi Experience

Tenzi’s accessibility allows for DIY versions; printable rules (PDF format) are widely available online, enabling customized gameplay and affordable fun for everyone involved.

Experiment with different dice colors!

DIY Tenzi: Making Your Own Dice

Creating your own Tenzi dice is a fantastic, budget-friendly option! While commercially produced sets are readily available, crafting them yourself adds a personal touch.

You can utilize wooden blocks, carefully cutting and sanding them into cube shapes. Alternatively, polymer clay offers versatility in color and design. After baking (for clay) or finishing (for wood), clearly mark each face with dots representing numbers one through six.

Numerous online resources, including PDF guides detailing various Tenzi variations, can inspire your dice designs and gameplay modifications.

Finding Printable Tenzi Rules (PDF)

Locating printable Tenzi rules in PDF format is surprisingly easy! A quick online search reveals numerous sources offering downloadable instructions for standard and variant gameplay.

Websites dedicated to board and dice games frequently host these files, providing clear explanations of scoring, setup, and the all-important “Go!” command. Resources often include variations beyond the basic ruleset.

Exploring communities focused on “77 ways to play Tenzi” may uncover unique PDF guides with inventive rule modifications and challenges.

Resources for Tenzi Rules Online

Numerous online platforms provide comprehensive Tenzi rules and gameplay guidance. YouTube hosts a wealth of tutorial videos demonstrating the game’s fast-paced action and clarifying any ambiguities.

Amazon’s product page for Tenzi often links to supplementary materials, while dedicated board game websites offer detailed rule explanations and variant suggestions.

For those seeking “77 ways to play Tenzi,” online forums and communities are invaluable, sharing custom rules and strategic tips.

Tenzi for Groups and Families

Tenzi shines as an inclusive party game, fostering lively competition and quick thinking for all ages, with diverse variations found in PDF guides.

Its simplicity makes it ideal for family game nights, promoting interaction and laughter, while adaptable rules cater to varied skill levels.

Tenzi as a Party Game

Tenzi truly excels as a dynamic party game, instantly injecting energy and excitement into any gathering. Its incredibly fast-paced nature and simple rules make it accessible to everyone, regardless of gaming experience.

The simultaneous rolling creates a chaotic, yet hilarious, atmosphere, encouraging lively interaction and friendly competition amongst players. Numerous variations, often detailed in downloadable PDF guides, allow for customization and extended play.

From speed challenges to themed rounds, Tenzi consistently delivers a memorable and engaging experience, making it a perfect icebreaker or a central activity for social events.

Tenzi for Family Game Night

Tenzi is an exceptional choice for family game night, fostering both friendly competition and quality time together. Its straightforward rules are easily grasped by children and adults alike, ensuring everyone can participate and enjoy the fun.

The quick rounds keep younger players engaged, while the element of chance levels the playing field, offering opportunities for all family members to win. Many creative variations, often found in PDF rule sets, add replayability.

Tenzi promotes quick thinking and number recognition, making it a subtly educational and thoroughly entertaining experience for the whole family.

Tenzi for Educational Purposes

Tenzi surprisingly lends itself well to educational settings, enhancing mathematical skills in a playful manner. The game reinforces number recognition, pattern identification, and quick mental calculations, benefiting students of various ages.

Teachers can utilize Tenzi to practice addition, subtraction, or even multiplication, adapting rules for different learning objectives. Printable PDF guides often suggest tailored variations for classroom use.

Its fast-paced nature keeps students engaged, transforming learning into an enjoyable and competitive activity, fostering a positive attitude towards mathematics.

Advanced Tenzi Strategies

Mastering Tenzi involves refined dice handling, rapid number recognition, and minimizing rerolls—skills honed through practice. PDF guides detail advanced techniques for competitive play.

Strategic hand positioning and efficient rolling contribute to faster results, maximizing chances of victory in this exhilarating dice game.

Dice Handling Techniques

Efficient dice manipulation is crucial for speed in Tenzi. Mastering techniques like the “cup shake” and controlled release minimizes wasted motion, accelerating the rerolling process.

Experienced players often utilize a consistent shaking rhythm and a specific cup depth to optimize dice tumbling. PDF resources detailing 77 ways to play often highlight these nuances.

Furthermore, learning to quickly gather and re-roll stray dice without disrupting the others is a valuable skill. Practice these techniques to gain a competitive edge and reduce overall game time.

Quick Recognition of Numbers

Rapid number identification is paramount in Tenzi’s fast-paced gameplay. Players must instantly assess their dice and pinpoint which numbers require rerolling, maximizing efficiency.

Developing a “number sense” – recognizing patterns and values at a glance – significantly reduces reaction time. Many PDF guides, including those detailing 77 variations, emphasize this skill.

Practice focusing on individual dice faces and mentally noting the numbers. This focused attention, honed through repetition, will dramatically improve your speed and overall performance.

Minimizing Rerolls

Strategic rerolling is crucial for Tenzi mastery. Avoid indiscriminately rerolling all dice; instead, focus on those furthest from a complete set, conserving precious seconds.

Experienced players often hold onto dice showing common numbers, increasing the probability of matching during subsequent rolls. PDF guides outlining 77 variations often highlight this tactic.

Carefully assess each roll before acting, prioritizing dice that hinder progress. Efficient rerolling, combined with quick number recognition, is the key to victory in this exhilarating game.

Tenzi Rules and Scoring in Detail

Scoring in Tenzi is straightforward: be the first to roll all ten dice to the same number! PDF guides detail variations, but the core remains simple.

Understanding common rule misunderstandings, often clarified in online resources, ensures fair play and maximizes enjoyment for all participants.

Detailed Breakdown of Scoring

Tenzi’s scoring is delightfully simple – the first player to achieve all ten dice displaying the same number shouts “Tenzi!” and wins the round. There aren’t complex point systems or cumulative scores; it’s purely a race against opponents.

However, PDF rule variations sometimes introduce scoring nuances for multiple rounds or team play. These often involve awarding points for fastest rolls or penalties for incorrect calls. The official rules prioritize speed, making quick recognition and dice manipulation crucial for victory.

Ultimately, the focus remains on that exhilarating moment of achieving all ten matching dice!

Common Rule Misunderstandings

A frequent point of confusion in Tenzi revolves around the “Go!” command – it must be a clear, single declaration initiating simultaneous rolling. Hesitation or multiple calls can cause disputes. Some players mistakenly believe rerolling must cease immediately upon someone shouting “Tenzi!”

PDF rule sets clarify that all players continue until they achieve Tenzi, even if another player has already won. Another misunderstanding involves dice touching; they must be clearly separated during rolling.

Clear communication and pre-game rule agreement prevent frustration!

Official Tenzi Rulebook Resources

While a single, definitive “official” Tenzi rulebook isn’t prominently available, numerous resources provide comprehensive guidelines. Amazon product pages often link to downloadable PDF versions outlining gameplay. Online board game communities and forums host user-created rule summaries, frequently referencing the core mechanics.

YouTube tutorials demonstrate gameplay, clarifying nuances. Examining variations detailed in “77 ways to play Tenzi” PDFs offers expanded rulesets.

These collective resources ensure a consistent and enjoyable Tenzi experience.

Tenzi and Online Platforms

Tenzi thrives online with digital adaptations and vibrant communities; downloadable PDFs, like “77 ways to play Tenzi”, expand gameplay options.

YouTube tutorials demonstrate strategies, while forums foster discussion and rule clarification.

Digital Tenzi Games

Digital Tenzi experiences bring the fast-paced fun to smartphones and tablets, offering convenient gameplay anytime, anywhere. While a direct digital version mirroring “77 ways to play Tenzi” PDF isn’t widely available, several apps capture the core mechanics.

These apps often include variations and scoring options, replicating the excitement of the physical game. Players can enjoy solo challenges or compete against friends online, enhancing the social aspect. Exploring app stores reveals options catering to different preferences, providing accessible Tenzi entertainment.

Tenzi Communities and Forums

Tenzi enthusiasts connect online through dedicated communities and forums, sharing strategies, variations – potentially inspired by resources like a “77 ways to play Tenzi” PDF – and house rules. These platforms foster a vibrant exchange of ideas, enhancing the gameplay experience.

Players discuss optimal dice handling techniques, scoring nuances, and creative game modifications. Online groups provide a space for newcomers to learn and experienced players to refine their skills, building a supportive Tenzi network.

YouTube Tutorials on Tenzi Gameplay

YouTube hosts a wealth of Tenzi tutorials, visually demonstrating gameplay and rule explanations, potentially referencing comprehensive guides like a “77 ways to play Tenzi” PDF. These videos cater to diverse learning styles, offering step-by-step instructions for beginners and advanced strategies for seasoned players.

Content creators showcase various game variations, scoring methods, and troubleshooting tips, making it easy to grasp the game’s dynamics. Visual learners benefit greatly from these accessible and informative resources, enhancing their Tenzi experience.

Tenzi Accessories and Expansions

Tenzi offers diverse dice colors and travel sets, enhancing gameplay; exploring “77 ways to play Tenzi” PDF guides may inspire unique accessory uses.

Merchandise expands the experience, while varied dice sets cater to different preferences, adding customization and fun to this fast-paced game.

Different Dice Colors and Sets

Tenzi isn’t limited to standard dice; numerous color variations exist, from vibrant rainbow sets to classic monochrome options, enhancing visual appeal and player distinction.

These sets often include glow-in-the-dark dice for nighttime play or themed dice catering to specific interests, adding a layer of personalization.

Exploring resources like “77 ways to play Tenzi” PDF guides might reveal creative uses for different colored dice in variant game modes, increasing strategic depth and replayability.

Collectors often seek limited-edition sets, further expanding the Tenzi universe beyond the core gameplay experience.

Tenzi Travel Versions

Tenzi’s portability is enhanced by dedicated travel versions, typically featuring a compact carrying case to contain the ten dice for on-the-go fun.

These sets are ideal for vacations, road trips, or simply playing outside the home, maintaining the game’s fast-paced excitement in any location.

Some “77 ways to play Tenzi” PDF resources may suggest adapting the game for limited spaces, utilizing the travel version’s convenience.

The smaller size doesn’t compromise gameplay, ensuring the same thrilling experience remains accessible wherever adventure takes you.

Tenzi-Related Merchandise

Beyond the core game, Tenzi boasts a range of related merchandise, including dice in various colors and themed sets to personalize the experience.

You can find accessories like dice cups or storage pouches, enhancing both gameplay and organization.

Some “77 ways to play Tenzi” PDF guides might inspire creative uses for additional dice, expanding game possibilities.

Novelty items, such as Tenzi-themed posters or apparel, cater to dedicated fans, showcasing their love for this quick-thinking dice game.

Troubleshooting Common Tenzi Issues

Tenzi disputes often arise from unclear rules or dice rolling disagreements; consulting a “77 ways to play Tenzi” PDF can clarify ambiguities.

Ensure fair play and resolve conflicts by referencing official guidelines.

Dice Rolling Problems

Dice not rolling correctly are a frequent Tenzi issue; uneven surfaces or faulty dice can impact gameplay, potentially requiring a replacement set.

Players should ensure ample space and a flat surface for optimal rolling, avoiding obstructions.

If dice consistently land on the same number, suspicion of weighted dice arises, necessitating a switch. A comprehensive “77 ways to play Tenzi” PDF might offer solutions or alternative rules for compromised dice, ensuring fair and enjoyable rounds for everyone involved.

Disputes Over Winning

Winning disputes in Tenzi often stem from unclear observations of who achieved “Tenzi” first amidst the rapid rolling, creating momentary chaos.

Establishing a clear signal – a shouted “Tenzi!” – and a designated judge can mitigate disagreements.

A detailed “77 ways to play Tenzi” PDF could include tie-breaking rules or suggest video recording rounds for definitive proof, fostering friendly competition and preventing frustration during gameplay.

Clarifying Ambiguous Rules

Tenzi’s simplicity can still lead to rule ambiguities, particularly regarding rerolling after the “Go!” command or handling dice that fall off the playing surface.

A comprehensive “77 ways to play Tenzi” PDF should address these scenarios with explicit guidelines, ensuring consistent gameplay.

Including visual aids and examples within the PDF would further clarify potentially confusing rules, promoting a smoother and more enjoyable experience for all players.

The History of Tenzi

Tenzi emerged as a fast-paced dice game, gaining popularity through word-of-mouth and online resources, including downloadable guides like the “77 ways to play” PDF.

Its evolution reflects a desire for quick, engaging gameplay, accessible to diverse audiences.

Origins and Development of the Game

Tenzi’s origins are rooted in a desire for a simple, yet intensely competitive, dice game, diverging from complex titles like Yahtzee. The game’s development focused on speed and simultaneous play, creating a unique dynamic.

Early iterations likely involved informal house rules, eventually solidifying into the standard gameplay we know today. The proliferation of online resources, including downloadable guides such as the “77 ways to play” PDF, significantly contributed to its widespread adoption and the emergence of numerous variations.

These resources fostered a community-driven evolution of the game, expanding its appeal and ensuring its continued relevance in the world of tabletop entertainment.

Evolution of Tenzi Rules

Initially, Tenzi rules were likely quite fluid, evolving through informal playtesting and community feedback. The core mechanic of simultaneous rolling remained consistent, but variations in scoring and optional rules emerged.

The advent of online resources, like the comprehensive “77 ways to play” PDF, catalyzed a standardization of rules while simultaneously showcasing creative adaptations. These guides documented common house rules and introduced novel challenges, fostering a dynamic and evolving gameplay experience.

This ongoing refinement ensures Tenzi remains fresh and engaging for both newcomers and seasoned players.

Tenzi’s Popularity Over Time

Tenzi’s rise in popularity correlates with the increasing demand for quick, accessible, and engaging family games. Its simple premise and fast-paced action quickly garnered a devoted following, amplified by word-of-mouth and online communities.

The availability of resources like the “77 ways to play” PDF further fueled its growth, offering diverse gameplay options and attracting a wider audience. Amazon’s product page demonstrates continued strong sales.

Tenzi remains a popular choice for game nights and gatherings.

thinking man guide to pleasuring a woman

Genuine connection, fueled by open communication and mindful presence, transcends mere physical acts. This guide explores intimacy, emphasizing emotional depth and respectful exploration for shared pleasure.

Understanding the Landscape of Female Pleasure

Navigating female pleasure requires recognizing its multifaceted nature, extending far beyond simplistic notions. Sexual satisfaction is deeply personal, influenced by emotional states, situational factors, and individual physiology. It’s crucial to move past the dominance of sensual conversations and acknowledge the importance of healthy sexuality.

Understanding that a woman’s readiness for intimacy isn’t solely tied to a timeframe – it’s a complex interplay of physical and emotional recovery – is paramount. Effective communication, respectfully expressing desires and actively listening to your partner, forms the bedrock of fulfilling encounters.

Furthermore, recognizing the variability of female response and debunking common myths surrounding orgasm are essential steps towards genuine connection and mutual enjoyment. This landscape demands empathy, patience, and a willingness to learn.

The Importance of Emotional Connection

A profound emotional connection serves as the fertile ground where true intimacy blossoms. Oxytocin, the “love hormone,” fosters trust, empathy, and social bonding – all vital components of a satisfying sexual experience. Prioritizing emotional intimacy before, during, and after physical intimacy elevates pleasure exponentially.

This isn’t merely about feeling comfortable; it’s about creating a safe space for vulnerability and open communication. Sharing desires respectfully and attentively listening to your partner’s needs builds a deeper understanding and strengthens the bond.

Neglecting this emotional foundation reduces intimacy to a purely physical act, diminishing potential for profound satisfaction and lasting connection. Cultivating emotional intimacy is not supplemental; it’s fundamental.

Female Anatomy & Physiology: A Foundation for Understanding

Knowledge is power. Understanding the clitoris, vaginal sensitivity, and hormonal influences – like oxytocin – empowers a thoughtful approach to enhancing a woman’s pleasure.

The Clitoris: Central to Orgasm

The clitoris is the primary center for female orgasm, possessing over 8,000 nerve endings – far exceeding those found in the penis. Direct or indirect stimulation is crucial, yet often misunderstood. A thoughtful partner recognizes that clitoral pleasure isn’t solely about direct, forceful touch.

Varied techniques, gentle pressure, and exploration of the surrounding areas – the clitoral hood and labia – can unlock intense sensations. Understanding individual preferences is paramount; open communication allows for discovering what feels best. Ignoring the clitoris, or assuming a one-size-fits-all approach, diminishes potential pleasure. Prioritizing clitoral stimulation demonstrates respect and a genuine desire to fulfill her needs, fostering deeper intimacy and connection.

Vaginal Sensitivity & Internal Stimulation

While the clitoris reigns supreme, the vagina possesses significant erogenous potential, though sensitivity varies greatly among individuals. The G-spot, an area on the anterior vaginal wall, can be a source of intense pleasure for some, responding to specific pressure and angle.

However, focusing solely on the G-spot can be counterproductive. Internal stimulation, whether through penetration or manual exploration, should complement, not replace, clitoral attention. Slow, deliberate movements, coupled with open communication about comfort and sensation, are key. Respecting boundaries and adapting to her responses ensures a pleasurable experience, fostering trust and deepening the emotional connection. Remember, exploration and attentiveness are paramount.

The Role of Hormones (Oxytocin & Beyond)

Hormones profoundly influence female arousal and pleasure, with oxytocin – the “love hormone” – playing a central role. Released during intimacy, it fosters trust, empathy, and bonding, deepening emotional connection. Genotypic differences can impact oxytocin receptor sensitivity, influencing individual responses.

Beyond oxytocin, estrogen levels affect vaginal lubrication and sensitivity, while dopamine contributes to feelings of reward and motivation. Understanding these hormonal influences isn’t about manipulation, but about recognizing the biological context of pleasure. Creating a safe, relaxed environment encourages oxytocin release, enhancing the overall experience and strengthening the emotional bond between partners.

Communication: The Cornerstone of Pleasure

Open dialogue, actively listening, and respectfully expressing desires are paramount. Clear communication unlocks preferences, builds trust, and transforms encounters into mutually satisfying experiences.

Active Listening & Asking Questions

Truly hearing your partner extends far beyond simply waiting for your turn to speak. It demands focused attention, acknowledging both verbal and non-verbal cues – her body language, subtle shifts in tone, and unspoken desires.

Ask open-ended questions, inviting her to articulate what feels good, what she enjoys, and what she’d like to explore. Avoid leading questions that suggest a “right” answer. Instead, foster a safe space where she feels comfortable expressing her authentic self.

Pay attention to enthusiastic agreement and hesitant responses. These provide valuable insights into her boundaries and preferences. Remember, consent is ongoing and can be revoked at any time. Demonstrate genuine curiosity and a willingness to learn her unique map to pleasure.

Expressing Your Own Desires Respectfully

Sharing your own wants and needs is crucial for reciprocal intimacy, but it must be done with sensitivity and consideration. Frame your desires as invitations, not demands. Use “I” statements to express your feelings without placing blame or pressure.

For example, instead of saying “You never…”, try “I would really enjoy it if we could…” This approach fosters a collaborative atmosphere, encouraging open dialogue and mutual exploration.

Be mindful of her response and respect her boundaries. If she’s hesitant or uncomfortable, don’t push the issue; Genuine connection thrives on mutual respect and a willingness to compromise. Remember, vulnerability requires courage from both partners.

Foreplay: Building Anticipation & Connection

Extended foreplay cultivates emotional intimacy and heightens arousal through sensual touch, attentive communication, and shared exploration – a vital prelude to deeper connection.

The Power of Touch: Beyond Genitals

Thoughtful touch extends far beyond direct genital stimulation, unlocking a universe of sensual possibilities. Explore the erogenous zones – the neck, inner thighs, back, and even the scalp – with varying pressure and rhythm. Pay close attention to her reactions; non-verbal cues are paramount.

Slow, deliberate strokes can build anticipation, while playful teasing ignites curiosity. Incorporate different textures – silk, feathers, or warm hands – to heighten sensation. Remember, the goal isn’t simply to arouse, but to create a shared experience of pleasurable discovery. Prioritize her comfort and enjoyment, adapting your touch based on her responses. This mindful approach fosters trust and deepens the emotional connection, transforming touch into a powerful language of intimacy.

Sensual Exploration & Variety

Embrace experimentation and move beyond routine to unlock new dimensions of pleasure. Introduce diverse sensory experiences – scented oils, soft music, or playful blindfolds – to heighten anticipation. Explore different types of touch, from gentle caresses to firm massage, observing her preferences closely.

Variety isn’t just about techniques; it’s about shifting the focus. Incorporate playful banter, shared fantasies, or intimate conversation to stimulate her mind alongside her body. Don’t be afraid to deviate from expectations and embrace spontaneity. Remember, the key is to create a safe and exciting space where she feels comfortable expressing her desires and exploring her sensuality without inhibition. This fosters a deeper, more fulfilling connection.

Techniques for Enhanced Pleasure

Mastering skillful touch, oral sex, and positional play unlocks deeper intimacy. Prioritize her comfort and responsiveness, adapting techniques based on communicated desires and feedback.

Oral Sex: A Detailed Guide

Elevating this intimate act requires attentive exploration and a focus on her unique sensitivities. Begin with gentle kisses and caresses, gradually increasing intensity as she guides you. Understanding female anatomy – the clitoris being central – is paramount. Vary your technique; incorporate both direct and indirect stimulation, paying close attention to her reactions.

Communication is key. Regularly ask about her preferences – pressure, speed, and areas of focus. Don’t assume; actively listen to her verbal and non-verbal cues. Utilize your hands alongside oral stimulation for a multi-sensory experience. Remember, it’s not about performance, but about creating a pleasurable and connected moment, prioritizing her enjoyment above all else.

Manual Stimulation: Techniques & Pressure

Mastering manual stimulation involves a delicate balance of pressure, rhythm, and attentive observation. Start gently, exploring the clitoral area with varying degrees of touch – circular motions, light strokes, and focused pressure. Observe her responses closely; her body will reveal what feels best.

Avoid rigidity; fluidity is crucial. Combine different techniques – use your fingertips, palms, or even a soft cloth. Incorporate lubrication to enhance comfort and sensation. Remember, the goal isn’t simply to reach orgasm, but to build anticipation and create a deeply pleasurable experience. Communication is vital; ask what she likes and adjust accordingly, prioritizing her comfort and enjoyment throughout.

Positional Play: Exploring Different Angles

Positional variety unlocks new sensations and intensifies pleasure. Experiment beyond missionary, prioritizing positions that allow for clitoral stimulation during penetration. Woman-on-top offers her control over depth and angle, while side-lying positions enable intimate connection and focused touch.

Consider positions that elevate her hips, enhancing G-spot access. Don’t be afraid to explore less conventional angles, always prioritizing her comfort and enjoyment. Communication is key – ask what feels good and adjust accordingly. Remember, the best position isn’t about dominance, but about maximizing mutual pleasure and creating a shared, sensual experience.

Addressing Common Misconceptions

Debunking myths surrounding female orgasm is crucial; responses vary greatly. Focus on individual needs, open communication, and prioritizing her experience above preconceived notions.

Debunking Myths About Female Orgasm

Many pervasive myths hinder genuine understanding of female pleasure. The idea of a “right” way to orgasm, or that all women experience it identically, is demonstrably false. Beliefs that orgasm must be the endpoint of sex create unnecessary pressure and detract from the enjoyment of intimacy itself.

Furthermore, the notion that women always need clitoral stimulation to reach climax ignores the diverse range of sensitivities and preferences. Dismissing the importance of emotional connection and foreplay as secondary is another harmful misconception.

A thoughtful approach recognizes that female response is highly variable, influenced by physical, emotional, and situational factors. Prioritizing open communication and attentive listening allows for a personalized exploration of pleasure, free from rigid expectations.

The Variability of Female Response

Acknowledging the inherent diversity in female sexual response is paramount. Recovery time after pleasure, for instance, isn’t fixed; it’s a blend of physical, emotional, and contextual elements. One encounter won’t mirror the next, even with the same partner. Hormonal fluctuations, stress levels, and overall well-being significantly impact arousal and orgasm.

Individual preferences regarding touch, pressure, and stimulation vary enormously. What one woman finds intensely pleasurable, another might find uncomfortable or ineffective.

A “thinking man” embraces this variability, abandoning rigid expectations and prioritizing attentive observation. Genuine curiosity and a willingness to adapt are key to unlocking a partner’s unique landscape of pleasure, fostering deeper intimacy and connection.

Post-Pleasure & Aftercare

Nurturing emotional intimacy through cuddling and gentle connection solidifies the experience. Prioritize shared vulnerability and mindful presence for lasting satisfaction.

Emotional Intimacy & Cuddling

The moments following pleasure are profoundly important, often overlooked in pursuit of the act itself. This is where genuine connection deepens, moving beyond physical satisfaction to emotional resonance. Cuddling isn’t merely a comforting gesture; it’s a powerful release of oxytocin, the “love hormone,” fostering trust and strengthening the bond between partners.

Prioritize vulnerability and shared presence. Put away distractions – phones, thoughts of the day – and simply be with your partner. Gentle touch, soft words, and attentive listening create a safe space for emotional expression. This isn’t about initiating further physical activity, but about savoring the afterglow and reinforcing the emotional connection that made the experience meaningful. Remember, lasting intimacy is built on these quiet, tender moments.

Recovery Time & Individual Differences

Understanding that recovery isn’t linear is crucial. The often-cited notion of a fixed “refractory period” for women is a vast oversimplification. Physical, emotional, and situational factors all play a role in how quickly a woman feels ready for further intimacy. Respecting her individual needs and cues is paramount.

Pay attention to non-verbal signals. Fatigue, emotional vulnerability, or simply a desire for quiet connection are all valid reasons for needing time. Avoid pressure or assumptions. A thoughtful partner prioritizes her comfort and well-being above all else. Recognizing these differences fosters trust and demonstrates genuine care, ultimately enhancing future experiences and deepening the emotional bond.

Stoicism and Intimacy: A Unique Perspective

Cultivating self-control and presence allows for mindful sensuality, focusing on the experience itself rather than outcomes. This approach fosters deeper connection and genuine enjoyment.

The Role of Self-Control and Presence

Stoic principles offer a powerful framework for enhancing intimacy. Self-control isn’t about suppressing desire, but managing impulses to fully inhabit the present moment. This mindful awareness shifts focus from achieving orgasm to savoring each sensation and connection with your partner.

Presence demands letting go of anxieties about performance or expectations. It’s about truly seeing and responding to your partner’s cues, both verbal and nonverbal. By embracing acceptance – of her responses, your own feelings, and the unfolding experience – you create a safe space for vulnerability and genuine pleasure. This disciplined attention cultivates a deeper, more meaningful connection, transforming intimacy into a shared exploration of sensation and emotion.

Mindful Sensuality

Mindful sensuality extends Stoic presence into the realm of touch and sensation. It’s about intentionally slowing down, focusing on the quality of each caress, and noticing the subtle shifts in your partner’s body. This isn’t simply about technique; it’s about cultivating a heightened awareness of the present moment through physical connection.

Explore textures, temperatures, and pressures with deliberate curiosity. Pay attention to her reactions – the tightening of muscles, the softening of breath – and adjust your touch accordingly. By relinquishing the need to “perform” and embracing a spirit of playful exploration, you unlock a deeper level of intimacy and shared pleasure. This focused attention transforms a physical act into a deeply sensual and emotionally resonant experience.