mazda bt-50 workshop manual pdf

Mazda BT-50 Workshop Manual PDF: A Comprehensive Guide

Digital download options for the Mazda BT-50 (and Ford Ranger) workshop manual in PDF format are readily available, viewable with common readers like Adobe or Foxit.

Understanding the BT-50 Series

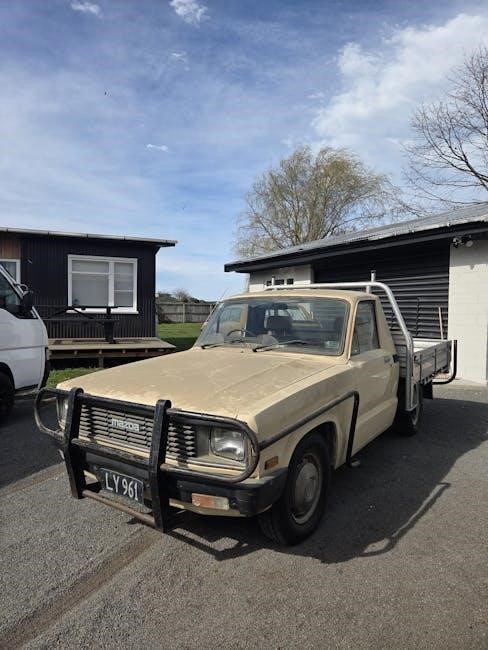
The Mazda BT-50, often sharing a platform with the Ford Ranger, represents Mazda’s entry into the rugged pickup truck segment. Understanding its lineage is crucial when seeking workshop information. Initial models (2006-2011) share significant mechanical components with the contemporary Ford Ranger, meaning many repair procedures and parts are interchangeable. Later iterations (2011-2018), while still related to the Ranger, feature Mazda’s distinct styling and refinements.

These vehicles are categorized into series like UP and UR, impacting specific features and components. Knowing your BT-50’s production year and series is paramount for accessing the correct workshop manual. The BT-50 is designed for both work and leisure, demanding a comprehensive understanding of its systems for effective maintenance and repair.

Availability of Workshop Manuals (2006-2011)

For Mazda BT-50 models spanning 2006 to 2011 (often the BT50 series, closely related to the Ford Ranger), workshop manuals are widely accessible in digital PDF format. Numerous online resources offer these manuals for download, catering to both professional mechanics and DIY enthusiasts. These PDFs comprehensively cover all aspects of vehicle maintenance, repair, and overhaul.

Many sources provide free downloadable options, though verifying the manual’s completeness and accuracy is essential. Compatibility with standard PDF readers like Adobe, Foxit, or Nitro is guaranteed. These manuals are invaluable for tackling repairs, understanding complex systems, and ensuring the longevity of your BT-50.

Availability of Workshop Manuals (2011-2018)

Securing a workshop manual in PDF format for Mazda BT-50 models manufactured between 2011 and 2018 is straightforward. These manuals, often tailored for the UP and UR series, are readily available for digital download from various online platforms. They serve as essential resources for anyone undertaking maintenance or repairs on these vehicles.

Like the earlier models, these PDFs are compatible with popular PDF readers such as Adobe, Foxit, and Nitro, ensuring easy access and usability. Downloading a free copy of the factory service or repair manual allows owners and mechanics to efficiently diagnose and resolve issues, maximizing the vehicle’s performance and lifespan.

PDF Reader Compatibility

The digital Mazda BT-50 workshop manuals, available in PDF format, are designed for broad accessibility and user convenience. These manuals aren’t restricted to specific software; they can be seamlessly viewed and utilized with a wide array of freely available PDF readers. Popular choices include Adobe Acrobat Reader, a long-standing industry standard, as well as alternatives like Foxit Reader and Nitro PDF.

This compatibility ensures that users, regardless of their operating system or existing software, can easily access the detailed repair information contained within the manuals. The widespread support for PDF format eliminates the need for specialized or costly software, making the manuals a practical and affordable resource.

UP and UR Series Coverage

Workshop manuals in PDF format specifically cater to the Mazda BT-50’s UP and UR series, representing a significant portion of the vehicle’s production run. These manuals provide comprehensive repair and maintenance guidance tailored to the unique specifications of these series. Owners and mechanics alike will find detailed diagrams, step-by-step instructions, and troubleshooting procedures designed for these particular models.

The coverage extends to all major vehicle systems, ensuring that users have the information needed to address a wide range of repair tasks. This focused approach simplifies the repair process and minimizes the risk of errors, making these manuals invaluable for both professional technicians and DIY enthusiasts working on UP or UR series BT-50s.

BT50 Series Coverage

The availability of dedicated workshop manuals extends to the foundational BT50 series (2006-2011), offering crucial repair and maintenance information for these earlier models. These PDF manuals are designed to assist owners and mechanics in addressing a broad spectrum of issues, from routine servicing to complex repairs. Detailed illustrations and clear, concise instructions guide users through each procedure, ensuring accuracy and efficiency.

Coverage encompasses all essential vehicle systems, providing a complete resource for maintaining and restoring BT50 series vehicles. Access to these manuals empowers owners to undertake repairs confidently, potentially saving on costly professional servicing. The digital format allows for easy viewing and portability, making it a convenient tool for any BT-50 owner.

Key Areas Covered in the Manual

These manuals thoroughly detail engine repair, transmission procedures, braking systems, electrical troubleshooting, suspension work, and comprehensive body/paintwork guidance.

Engine Repair and Maintenance

The Mazda BT-50 workshop manual provides exhaustive details regarding engine repair and routine maintenance procedures. This encompasses everything from basic oil changes and filter replacements to more complex tasks like cylinder head removal and engine rebuilds.

Detailed diagrams and step-by-step instructions guide technicians through diagnostic procedures, identifying potential issues with fuel systems, ignition components, and cooling systems.

Specific torque specifications, adjustment procedures, and component locations are clearly outlined, ensuring accurate and efficient repairs. The manual also covers preventative maintenance schedules, helping owners maintain optimal engine performance and longevity. It’s a crucial resource for both professional mechanics and DIY enthusiasts seeking to keep their BT-50 running smoothly.

Transmission and Drivetrain Procedures

The Mazda BT-50 workshop manual delivers comprehensive guidance on transmission and drivetrain servicing. It details procedures for both manual and automatic transmissions, including removal, disassembly, inspection, and reassembly.

Coverage extends to clutch adjustments, differential servicing, and driveshaft maintenance. Detailed illustrations clarify component locations and proper assembly techniques.

Troubleshooting sections assist in diagnosing common transmission issues, such as slipping gears or harsh shifting. Specific torque specifications and fluid level requirements are provided for accurate repairs. The manual also addresses four-wheel-drive system maintenance, including transfer case servicing and front differential procedures, ensuring optimal drivetrain performance and reliability.

Braking System Diagnostics and Repair

The Mazda BT-50 workshop manual provides exhaustive details for diagnosing and repairing the vehicle’s braking system. It covers disc and drum brake service, including pad replacement, rotor resurfacing, and wheel cylinder maintenance.

Detailed procedures are included for brake line bleeding and ABS system diagnostics. The manual outlines how to identify and resolve issues like spongy brake pedals or uneven braking.

Specific torque specifications for brake components are provided, ensuring safe and effective repairs. Troubleshooting guides assist in pinpointing the source of brake system malfunctions, while diagrams illustrate component locations and proper assembly. It also details parking brake adjustments and inspections for optimal braking performance.

Electrical System Troubleshooting

The Mazda BT-50 workshop manual offers comprehensive guidance for troubleshooting the vehicle’s complex electrical system. It includes detailed wiring diagrams, component locations, and testing procedures for all electrical circuits.

The manual assists in diagnosing issues with the starting system, charging system, lighting, and accessory circuits. Procedures for using a multimeter and scan tool are explained, enabling accurate fault identification.

Specific instructions are provided for diagnosing and repairing issues related to the PCM/ECU/BCM computer systems, including programming and module replacement. It covers fuse and relay locations, as well as troubleshooting common electrical gremlins, ensuring efficient and effective repairs.

Suspension and Steering Components

The Mazda BT-50 workshop manual delivers detailed procedures for inspecting, diagnosing, and repairing all suspension and steering components. It covers shock absorbers, springs, control arms, ball joints, and steering linkages, providing torque specifications and adjustment procedures.

Detailed illustrations guide technicians through disassembly, inspection, and reassembly processes. The manual includes instructions for wheel alignment, ensuring optimal handling and tire wear. Troubleshooting guides address common issues like excessive play, noise, and vibration.

Specific attention is given to power steering systems, including pump diagnosis, hose replacement, and fluid level checks, enabling comprehensive maintenance and repair of the BT-50’s ride and handling.

Body Repair and Paintwork

The Mazda BT-50 workshop manual provides guidance on body repairs, covering panel alignment, welding procedures, and corrosion protection techniques. It details the proper methods for removing and replacing body panels, ensuring structural integrity is maintained throughout the repair process.

Paintwork sections outline surface preparation, primer application, and paint matching procedures, crucial for achieving a factory finish. The manual specifies recommended paint types and application techniques for various BT-50 colors.

Detailed diagrams illustrate body component locations and assembly sequences, aiding in accurate repairs. It also includes information on sealant application and anti-chip coating procedures, enhancing the longevity and appearance of the vehicle’s body.

Advanced Systems & Diagnostics

The manual delves into Mazda Connect, PCM/ECU/BCM programming, and window regulator diagnostics, offering detailed procedures for troubleshooting complex BT-50 systems.

Mazda Connect Infotainment System

The Mazda BT-50 workshop manual provides crucial insights into the Mazda Connect infotainment system, standard on 7th generation Mazda models like the Mazda3, CX-30, MX-30, CX-5 (excluding Center Line), and CX-60.

Detailed diagrams and step-by-step instructions assist in diagnosing and resolving issues related to the system’s functionality. This includes troubleshooting connectivity problems, navigation errors, audio malfunctions, and display irregularities. The manual covers system updates, software resets, and component replacement procedures.

Technicians can utilize the manual to understand the system’s architecture, wiring schematics, and communication protocols. It also aids in identifying compatible accessories and performing calibrations for optimal performance. Proper use of the manual ensures efficient repair and maintenance of the Mazda Connect system, enhancing the overall driving experience.

PCM/ECU/BCM Computer Systems Programming

The Mazda BT-50 workshop manual details procedures for programming and updating the vehicle’s PCM (Powertrain Control Module), ECU (Engine Control Unit), and BCM (Body Control Module). It addresses frequently asked questions regarding compatible devices for these systems, a common inquiry among Mazda owners and technicians.

The manual outlines methods for installing replacement modules and updating system files where applicable. It clarifies the evolution of OBD (On-Board Diagnostics) – from earlier systems up to approximately 2002, and the subsequent adoption of OBD II from the 2003 model year onwards.

Specific programming tools and software requirements are identified, alongside safety precautions to prevent system errors. This section is vital for performing advanced diagnostics and ensuring optimal vehicle performance.

Window Regulator Issues & Repair

The Mazda BT-50 workshop manual provides detailed guidance on diagnosing and resolving common window regulator problems. A frequently reported issue involves intermittent window operation – windows failing to respond immediately to switch commands, requiring multiple attempts to activate.

The manual illustrates step-by-step procedures for troubleshooting these issues, covering both electrical and mechanical components of the window system. It details how to identify faulty window switches, regulators, and motors.

Repair procedures include removing and replacing window regulators, testing electrical connections, and lubricating moving parts. Diagrams and illustrations aid in understanding the window mechanism and ensuring correct reassembly, restoring smooth and reliable window function;

Manual Usage & Resources

Access downloadable PDFs for free, aiding BT-50 repairs; consider vehicle reliability when maintaining your Mazda, and consult model-specific details for optimal results.

Locating Free Downloadable PDFs

Finding a free downloadable PDF of the Mazda BT-50 workshop manual requires diligent searching online. Numerous websites offer these manuals, covering both the 2006-2011 and 2011-2018 model years, suitable for the BT50 and UP/UR series vehicles.

However, exercise caution when downloading from unofficial sources, ensuring the file is safe and virus-free. Always verify the manual’s completeness and accuracy before relying on it for repairs. Some forums dedicated to Mazda and Ford Ranger vehicles also host links to these manuals, shared by community members. Remember to respect copyright and usage terms when accessing these resources. A reliable PDF reader, such as Adobe, Foxit, or Nitro, is essential for viewing the downloaded manual effectively.

Reliability Considerations for Mazda Vehicles

Mazda, generally, enjoys a reputation for building reliable vehicles, though specific models exhibit varying degrees of dependability. Owners frequently discuss the Mazda 3’s reliability, often comparing it favorably to other cars they’ve owned. Access to a comprehensive workshop manual, like the BT-50 PDF, is crucial for preventative maintenance, directly impacting long-term reliability.

Regularly consulting the manual for scheduled services and addressing issues promptly can mitigate potential problems. While the BT-50 is a robust vehicle, proper maintenance, guided by the workshop manual, is key. Considering owner experiences with models like the CX-30 and Crosstrek highlights the importance of informed ownership and diligent care for any Mazda vehicle.

Model Specific Information (CX-30, Crosstrek)

Interestingly, despite seeking a BT-50 workshop manual, many users also explore other Mazda and Subaru models. One individual details switching between a Mazda CX-30 G25 Touring (FWD) and a Subaru Crosstrek 2.0R Series, both 2024 models. The CX-30, in Ceramic Metal Colour, is praised for its luxurious feel and exceptional driving experience, particularly its engine.

This highlights a broader interest in Mazda’s passenger vehicle lineup alongside the BT-50’s utility. While the BT-50 manual focuses on truck-specific repairs, understanding Mazda’s overall engineering philosophy, evident in models like the CX-30, can inform a more holistic approach to vehicle maintenance and troubleshooting, even for the BT-50.

Troubleshooting Common BT-50 Problems

Access to a comprehensive BT-50 workshop manual PDF is crucial for diagnosing and resolving frequent issues. One reported problem involves the window regulator, where the window may fail to respond initially, requiring multiple switch activations. Once moving, operation becomes intermittent, stopping and starting during travel.

The manual provides detailed electrical system diagrams and troubleshooting steps to pinpoint the cause – potentially a faulty switch, regulator motor, or wiring issue. Furthermore, the manual aids in PCM/ECU/BCM computer system programming and updates, essential for resolving software-related malfunctions impacting various vehicle functions. Proper diagnostics, guided by the manual, save time and repair costs.

carnegie learning algebra 2 answer key pdf

Carnegie Learning Algebra 2 Answer Key PDF: A Comprehensive Guide

Carnegie Learning’s Algebra II resources offer detailed solutions, aiding students and educators alike. Accessing the official answer key PDF unlocks a deeper understanding of complex concepts.

What is Carnegie Learning Algebra 2?

Carnegie Learning Algebra 2 is a mathematics curriculum designed for high school students, focusing on a cognitive approach to learning. Unlike traditional textbooks, it emphasizes conceptual understanding and problem-solving skills through interactive activities and real-world applications. The program utilizes a unique blend of print and digital resources, including textbooks, online platforms, and adaptive practice tools.

It aims to move beyond rote memorization, encouraging students to explore mathematical concepts deeply and build a strong foundation for future studies; The curriculum is structured around modules and topics, providing a comprehensive coverage of Algebra 2 standards. Carnegie Learning also offers support materials for educators, including professional development and implementation resources.

The Importance of an Answer Key

An answer key for Carnegie Learning Algebra 2 is invaluable for both students and teachers. For students, it provides a means to check their work, identify areas of weakness, and reinforce their understanding of concepts. It’s not simply about getting the “right” answer, but about understanding the process to arrive at that solution.

Teachers benefit by using the answer key to efficiently assess student progress and tailor instruction accordingly. It saves valuable time and allows them to focus on providing individualized support. Access to detailed solutions fosters independent learning and promotes a deeper grasp of algebraic principles, ultimately enhancing academic performance.

Where to Find the Official Carnegie Learning Algebra 2 Answer Key PDF

Locating the official Carnegie Learning Algebra 2 Answer Key PDF often requires accessing resources through your school or educational institution. Many schools provide access via their learning management systems or directly from the Carnegie Learning website with appropriate credentials.

Alternatively, some textbook retailers may offer the answer key as a supplemental purchase. Be cautious of unofficial sources, as accuracy cannot be guaranteed. Carnegie Learning also provides a “Texas Math Solution” with terminology glossaries, potentially containing answer support. Explore their website and contact customer support for legitimate access options.

Understanding the Structure of the Textbook

Carnegie Learning Algebra 2 utilizes a modular approach, covering functions, equations, and trigonometry, with a unique focus on conceptual understanding and skill development.

Modules and Topics Covered

Carnegie Learning Algebra 2 systematically builds mathematical proficiency through carefully sequenced modules. Module 1 focuses on functions and their graphs, establishing a foundational understanding. Module 2 delves into systems of equations and inequalities, exploring various solution methods. Polynomial functions are the core of Module 3, examining their properties and applications.

Module 4 extends to rational and radical functions, building upon previous concepts. Later modules often incorporate trigonometry, extending mathematical toolsets. Each module contains several topics, building from basic skills to complex problem-solving. The textbook’s glossary defines key terminology, supporting comprehension throughout the course. Access to the answer key aids in mastering these diverse topics.

Key Features of Carnegie Learning Algebra 2

Carnegie Learning Algebra 2 distinguishes itself through a cognitive coaching approach, promoting deeper conceptual understanding. The textbook emphasizes mathematical reasoning and problem-solving skills, rather than rote memorization. It incorporates real-world applications, making mathematics relevant to students’ lives.

Interactive features and digital resources enhance the learning experience. The textbook’s structure encourages collaboration and discussion; A comprehensive mathematics glossary clarifies terminology. The availability of a detailed answer key is a crucial feature, enabling students to independently verify their work and identify areas needing improvement. This supports self-directed learning and mastery of the material.

How the Textbook Differs from Traditional Approaches

Carnegie Learning Algebra 2 departs from traditional lecture-based methods, prioritizing student exploration and discovery. Unlike conventional textbooks focused on procedural skills, this program emphasizes conceptual understanding and mathematical reasoning. It utilizes a “problem-based” learning approach, where students tackle challenges before formal instruction;

The textbook’s design fosters active participation and collaboration. It moves away from simply presenting formulas, instead guiding students to derive and apply them. The integrated answer key supports this independent learning style, allowing students to self-assess and refine their understanding without relying solely on teacher guidance. This promotes a more robust and lasting grasp of algebraic concepts.

Specific Module Answer Key Resources

Carnegie Learning provides module-specific answer keys, often accessible through online platforms or teacher resources, supporting focused practice and assessment.

Module 1: Functions and Their Graphs ─ Answer Key Availability

Module 1, focusing on functions and their graphs, presents a foundational element of Algebra 2. Obtaining the answer key for this module is crucial for verifying comprehension of key concepts like function notation, domain, and range.

Access to the Carnegie Learning answer key PDF for Module 1 is typically granted to educators through the platform’s digital resources. Students may find limited access through their teachers or assigned online portals. Resources indicate that detailed solutions are available, enabling students to check their work and pinpoint areas needing further study. Understanding these graphical representations is vital for success in subsequent modules.

Module 2: Systems of Equations and Inequalities ─ Answer Key Details

Module 2 delves into solving systems of equations and inequalities, a core skill in Algebra 2. The Carnegie Learning answer key for this module provides step-by-step solutions for various methods, including substitution, elimination, and graphing.

Details regarding the answer key PDF reveal it includes worked-out examples for linear and non-linear systems. Educators gain access through the Carnegie Learning digital platform, while student access is often mediated by instructors. Utilizing this resource allows for accurate self-assessment and identification of common errors in solving these types of problems, reinforcing a solid understanding of the concepts.

Module 3: Polynomial Functions ౼ Answer Key Access

Module 3, focusing on Polynomial Functions, presents a significant challenge for many Algebra 2 students. The corresponding Carnegie Learning answer key offers crucial support, detailing solutions for factoring, finding roots, and graphing polynomial equations.

Access to the answer key PDF is typically granted through the Carnegie Learning online platform, requiring instructor credentials for full access. Students often receive selective access via assignments. The key provides detailed breakdowns of complex problems, aiding in understanding the behavior of polynomial functions and mastering techniques like synthetic division. This resource is invaluable for verifying work and pinpointing areas needing further study.

Module 4: Rational and Radical Functions ౼ Answer Key Location

Module 4, covering Rational and Radical Functions, often requires meticulous problem-solving. The Carnegie Learning Algebra 2 answer key for this module is a vital resource, providing step-by-step solutions for simplifying expressions, solving equations, and understanding function transformations.

Locating the answer key PDF generally involves accessing the Carnegie Learning digital platform. Instructors typically have complete access, while students may find solutions linked to specific assignments. This key clarifies concepts like asymptotes, domain restrictions, and rationalizing denominators. Utilizing this resource effectively allows students to check their work, identify errors, and build confidence in tackling these challenging function types.

Utilizing Answer Keys for Effective Study

Answer keys aren’t just for checking answers; they’re powerful learning tools. Students can pinpoint errors, understand solution steps, and reinforce Algebra 2 concepts.

Checking Your Work and Identifying Errors

Carnegie Learning Algebra 2’s answer key PDF provides an invaluable opportunity for self-assessment. After completing problems, students can meticulously compare their solutions to the provided answers, immediately identifying any discrepancies. This isn’t simply about finding the “right” answer; it’s about understanding where mistakes occurred.

Carefully reviewing step-by-step solutions within the key allows students to trace their thought process back to the point of error. Was it an algebraic manipulation, a misunderstanding of a concept, or a simple calculation mistake? Pinpointing these errors is crucial for preventing their recurrence. Utilizing the answer key proactively transforms practice from a passive activity into an active learning experience, fostering a deeper grasp of the material.

Understanding Step-by-Step Solutions

The Carnegie Learning Algebra 2 answer key PDF isn’t merely a collection of answers; it’s a detailed guide to problem-solving. Many entries feature comprehensive, step-by-step solutions, breaking down complex problems into manageable stages. This allows students to follow the logical progression from the initial problem statement to the final solution.

These detailed solutions are particularly beneficial when encountering challenging concepts. Students can analyze each step, understanding the reasoning behind each algebraic manipulation or application of a theorem. This fosters a deeper conceptual understanding, moving beyond rote memorization. By studying these solutions, students learn how to approach similar problems independently, building confidence and problem-solving skills.

Using Answer Keys as a Learning Tool, Not Just for Answers

The Carnegie Learning Algebra 2 answer key PDF should be viewed as a powerful learning resource, extending far beyond simply checking answers. Resist the temptation to solely copy solutions! Instead, attempt each problem independently first, then use the key to analyze your approach.

Compare your work to the provided solutions, identifying where you deviated or made errors. Focus on understanding why your method differed, and what principles were applied in the correct solution. This self-assessment process is crucial for solidifying understanding. The answer key facilitates independent learning, allowing students to pinpoint weaknesses and refine their skills, ultimately fostering mathematical proficiency.

Alternative Resources for Solutions

Beyond the official PDF, explore online forums, tutoring services, and educational platforms for Carnegie Learning Algebra 2 support and alternative solution methods.

Online Forums and Communities

Online forums and communities dedicated to mathematics, and specifically Algebra 2, can be invaluable resources. Students frequently share insights, ask questions, and collaboratively solve problems related to Carnegie Learning materials. Platforms like Chegg Study and dedicated math help websites often host threads discussing specific exercises from the textbook.

These communities provide a space to compare approaches, clarify confusing concepts, and gain alternative perspectives on problem-solving. While not a direct replacement for the official answer key PDF, they offer peer support and can help students understand the why behind the solutions, fostering a deeper grasp of the material. Remember to critically evaluate information shared and verify solutions independently.

Tutoring Services and Websites

Numerous online tutoring services and websites offer assistance with Carnegie Learning Algebra 2. Platforms like Skooli, TutorMe, and Khan Academy provide access to qualified tutors who can guide students through challenging problems and explain concepts in detail. These services often allow for one-on-one sessions tailored to individual learning needs.

Some websites specialize in providing step-by-step solutions to textbook problems, though access may require a subscription. While these aren’t a substitute for understanding the material, they can be helpful when students are stuck. Remember that relying solely on solutions without engaging with the process hinders long-term learning; use these resources to supplement, not replace, active study and the answer key PDF.

Educational Platforms Offering Support

Several educational platforms extend support for students using Carnegie Learning Algebra 2. These platforms often integrate with the textbook, providing supplementary materials like practice quizzes, video explanations, and interactive exercises. Carnegie Learning itself offers a “Math Solution” with guides and resources specifically for Algebra II, enhancing comprehension.

Additionally, platforms like Chegg Study and Course Hero host user-submitted content, including solutions and explanations, though verifying accuracy is crucial. These resources can complement the official answer key PDF, offering diverse perspectives. However, prioritize understanding the underlying concepts rather than simply copying answers; these platforms should aid, not replace, genuine learning efforts.

Troubleshooting Common Issues

PDF download problems, incorrect versions, and navigation difficulties can arise. Ensure a stable internet connection and verify the source for accurate answer key access.

PDF Download Problems

Downloading the Carnegie Learning Algebra 2 Answer Key PDF can sometimes present challenges. Common issues include incomplete downloads, corrupted files, or the file simply not opening. First, verify your internet connection is stable and strong. Clear your browser’s cache and cookies, then attempt the download again.

Ensure you are using a compatible PDF reader, such as Adobe Acrobat Reader, which is frequently recommended. If the problem persists, try downloading with a different browser. Occasionally, the issue stems from server-side problems on Carnegie Learning’s end; in such cases, waiting and trying again later is advisable. Confirm the file size matches the expected size to rule out an incomplete download.

Incorrect Answer Key Versions

Finding an incorrect or outdated Carnegie Learning Algebra 2 Answer Key PDF is a frustrating, yet common, problem. Different textbook editions and revisions necessitate corresponding answer keys. Ensure the PDF version precisely matches your student’s textbook edition – check the ISBN number for confirmation.

Unofficial sources often circulate inaccurate or incomplete answer keys. Always prioritize obtaining the official key directly from Carnegie Learning or a verified educational platform. Discrepancies between the textbook problems and the answer key suggest a version mismatch. Using the wrong key can hinder learning and reinforce incorrect solutions, so verification is crucial.

Navigating the Answer Key Effectively

Effectively using a Carnegie Learning Algebra 2 Answer Key PDF requires understanding its organization. Most keys are structured by chapter and section, mirroring the textbook’s layout. Utilize the PDF’s search function to quickly locate solutions for specific problems – searching by problem number is often the fastest method.

Pay attention to the solution format; Carnegie Learning emphasizes conceptual understanding. The key often includes step-by-step explanations, not just final answers. Familiarize yourself with the notation and terminology used. A well-organized key, combined with diligent searching, maximizes its value as a learning resource.

Specific Chapter Answer Key Information

Chapter-specific answer key resources for Carnegie Learning Algebra 2 are available, offering detailed solutions for linear equations, quadratic functions, and trigonometry.

Chapter 3: Linear Equations and Inequalities ౼ Solution Guides

Chapter 3 of Carnegie Learning Algebra 2 focuses on mastering linear equations and inequalities. Finding solution guides for this chapter is crucial for reinforcing concepts like slope-intercept form, standard form, and solving systems of equations. The official answer key PDF provides step-by-step breakdowns of each problem, enabling students to identify errors and understand the reasoning behind each solution.

These guides often include detailed explanations for graphing linear inequalities, solving absolute value equations, and applying these concepts to real-world scenarios. Utilizing these resources effectively allows students to build a strong foundation for more advanced algebraic topics. Remember to cross-reference solutions with worked examples in the textbook for a comprehensive understanding.

Chapter 5: Quadratic Functions ─ Answer Key Breakdown

Chapter 5 in Carnegie Learning Algebra 2 delves into quadratic functions, a cornerstone of higher mathematics. The answer key PDF for this chapter is invaluable for understanding concepts like factoring, completing the square, and utilizing the quadratic formula. A detailed breakdown reveals solutions for finding the vertex, axis of symmetry, and intercepts of parabolas.

Students can use the key to verify their work on graphing quadratic functions and solving quadratic equations. It also clarifies how to interpret solutions in context, including identifying real and complex roots. The answer key isn’t just about getting the right answer; it’s about understanding how to arrive at that answer, strengthening problem-solving skills.

Chapter 9: Trigonometry ─ Answer Key Resources

Chapter 9 of Carnegie Learning Algebra 2 introduces the fundamentals of trigonometry, including trigonometric ratios, unit circle concepts, and trigonometric identities. The corresponding answer key PDF provides crucial support for mastering these often-challenging topics. It offers step-by-step solutions for problems involving sine, cosine, and tangent functions, as well as applications to right triangles.

Students can utilize the answer key to check their work on solving trigonometric equations and evaluating expressions. It also aids in understanding the relationships between angles and sides in triangles. Accessing these resources ensures a solid foundation for future math courses requiring trigonometric knowledge and skills.

Legality and Ethical Considerations

Answer keys are copyrighted; responsible use respects Carnegie Learning’s rights. Avoid academic dishonesty by utilizing resources to understand, not simply copy, solutions.

Copyright and Fair Use

Carnegie Learning materials, including the Algebra 2 answer key PDF, are protected by copyright law. This means unauthorized reproduction, distribution, or modification is prohibited. Fair use allows limited use of copyrighted material for purposes like education, criticism, or research.

However, simply downloading and sharing the entire answer key constitutes a copyright violation. Educators may utilize portions for lesson planning and student support, but must adhere to licensing agreements. Students should use the answer key as a self-checking tool, not for wholesale copying of solutions. Respecting copyright ensures continued access to quality educational resources.

Violating copyright can lead to legal consequences, so always prioritize ethical and lawful access to materials.

Avoiding Academic Dishonesty

Utilizing the Carnegie Learning Algebra 2 answer key PDF responsibly is crucial for maintaining academic integrity. Submitting solutions copied directly from the answer key as your own work is a form of cheating. This undermines the learning process and devalues your educational achievements.

The answer key should be employed as a tool for self-assessment and understanding, not as a shortcut to bypass genuine problem-solving. Focus on learning the underlying concepts and developing your own skills. Relying solely on the answer key hinders your ability to apply knowledge independently.

Embrace the challenge of tackling problems yourself, and use the answer key to verify your work and identify areas for improvement.

Responsible Use of Answer Keys

The Carnegie Learning Algebra 2 answer key PDF is a powerful learning aid when used ethically and effectively. Treat it as a study companion, not a replacement for active problem-solving. Begin by attempting each problem independently, showcasing your understanding of the concepts.

Afterward, consult the answer key to check your solutions and pinpoint areas where you struggled. Analyze the step-by-step explanations to grasp the correct methodology. Don’t simply memorize answers; focus on understanding the ‘why’ behind each step.

Utilize the answer key to reinforce learning and build confidence, but always prioritize developing your own mathematical skills.

Future Updates and Resources

Carnegie Learning continually refines its materials, including Algebra 2, offering updated resources and support for students and educators navigating the answer key.

New Editions and Revisions

Carnegie Learning frequently updates its Algebra 2 textbook and accompanying materials, meaning the answer key PDF may undergo revisions with each new edition. These updates often reflect changes in curriculum standards, pedagogical approaches, and feedback from educators and students.

It’s crucial to ensure you are using the answer key that corresponds precisely to your edition of the textbook. Older versions may contain inaccuracies or discrepancies when used with newer content. Checking the Carnegie Learning website for the most current edition information and associated answer key resources is highly recommended. Staying informed about these changes guarantees access to the most accurate and helpful solutions.

Carnegie Learning’s Ongoing Support

Carnegie Learning provides continuous support for its Algebra 2 program, extending beyond the textbook and answer key PDF. They offer professional development opportunities for teachers, equipping them with strategies to effectively implement the curriculum and address student challenges.

Their website hosts a comprehensive mathematics glossary defining key terminology used throughout the course. Furthermore, Carnegie Learning actively maintains online resources and frequently asked questions sections to assist both students and educators. Accessing these supplementary materials, alongside the answer key, fosters a robust learning environment and ensures ongoing success with Algebra 2 concepts.

Staying Informed About Available Resources

To remain current with Carnegie Learning Algebra 2 resources, including the answer key PDF, regularly check the official Carnegie Learning website. Sign up for their newsletters to receive updates on new editions, revisions, and supplementary materials.

Explore their “Texas Math Solution” platform for additional guides and resources specifically tailored to the Texas curriculum. Engaging with online forums and communities dedicated to Carnegie Learning can also provide valuable insights and information about accessing the latest answer key versions and support materials. Proactive monitoring ensures you have the tools needed for success.

la la land sheet music piano pdf

La La Land Sheet Music: A Comprehensive Guide for Piano Players

La La Land’s enchanting melodies have captivated audiences, driving demand for piano sheet music in PDF format. Numerous resources offer arrangements,
ranging from easy beginner pieces to complex, professional transcriptions.

What is La La Land and Why the Popularity of its Music?

La La Land, released in 2016, is a critically acclaimed musical romantic drama directed by Damien Chazelle. The film tells the story of Mia, an aspiring actress, and Sebastian, a jazz pianist, navigating their dreams in Los Angeles. Its vibrant visuals, compelling narrative, and, crucially, its unforgettable musical score propelled it to widespread popularity, earning six Academy Awards.

The music, composed by Justin Hurwitz, is a modern homage to classic Hollywood musicals, blending jazz, pop, and orchestral elements. This unique soundscape resonated deeply with audiences, sparking a renewed interest in musical film scores. Consequently, demand for La La Land sheet music, particularly for piano, surged.

The accessibility of piano arrangements, often available as PDF downloads, allows musicians of all levels to learn and perform these beloved songs. The emotional depth and melodic beauty of the music, combined with the film’s cultural impact, continue to fuel its enduring appeal and the ongoing search for quality sheet music.

The Core Themes: Mia & Sebastian’s Theme ⏤ An Overview

“Mia & Sebastian’s Theme” is arguably the most recognizable piece from La La Land, serving as a leitmotif representing their evolving relationship. The melody appears in various forms throughout the film, initially as a hopeful jazz piano solo, then as a romantic duet, and finally in poignant, melancholic variations;

Its musical structure is relatively simple, making it a popular choice for piano players of intermediate skill levels. Numerous sheet music arrangements are available in PDF format, catering to different interpretations and abilities. These range from simplified versions for beginners to more complex arrangements incorporating richer harmonies and improvisational elements.

The theme’s emotional resonance stems from its bittersweet quality, reflecting the characters’ dreams and sacrifices. Finding a piano sheet music PDF that captures this nuance is key to a successful performance. Many transcriptions focus on faithfully recreating Hurwitz’s original intent, while others offer creative liberties for advanced players.

Availability of La La Land Sheet Music in PDF Format

La La Land sheet music, particularly for piano, is widely available in PDF format across the internet. This accessibility stems from the film’s immense popularity and the demand from musicians eager to learn its iconic melodies. A quick search reveals numerous websites offering both official and user-created transcriptions.

The prevalence of PDFs makes it convenient for pianists to instantly download and print arrangements. However, it’s crucial to be mindful of copyright restrictions when sourcing sheet music. Official publishers like Alfred Music and Musicnotes.com provide licensed PDF versions, ensuring legal and high-quality scores.

Community-driven platforms like MuseScore also host a vast collection of La La Land piano sheet music in PDF, often available for free. While these can be valuable resources, verifying the accuracy and legality of the arrangements is recommended. The ease of PDF distribution has created a diverse, yet sometimes unregulated, landscape for La La Land fans.

Free vs. Paid Sheet Music Options: A Comparison

When seeking La La Land piano sheet music in PDF format, a key decision lies between free and paid options. Free resources, like those found on MuseScore, offer a cost-effective entry point, providing access to numerous arrangements created by the community. However, these often vary in accuracy and may lack professional formatting.

Paid sheet music, available through platforms like Musicnotes.com and Sheet Music Plus, guarantees officially licensed and meticulously transcribed scores. These versions typically boast higher print quality, accurate fingerings, and reliable notation. The investment ensures a more polished learning experience.

Consider your skill level and needs. Beginners might find free, simplified arrangements sufficient, while advanced players often benefit from the precision of paid versions. Furthermore, supporting composers and publishers through paid purchases contributes to the creation of future musical works. Ultimately, the choice depends on your budget and desired level of quality for your La La Land piano journey.

Popular Platforms for Downloading La La Land Piano Sheet Music

Several online platforms cater to musicians seeking La La Land piano sheet music in PDF format. MuseScore stands out as a community-driven hub, offering a vast library of user-submitted arrangements, often available for free. While quality varies, it’s a great starting point for exploring different interpretations.

Musicnotes.com provides officially licensed sheet music, ensuring accuracy and high print quality. They offer a wide selection of La La Land pieces, with options for various skill levels. Sheet Music Plus boasts an even more extensive catalog, including arrangements beyond standard piano scores, like vocal accompaniments and ensemble versions.

These platforms generally offer instant digital download in PDF format, allowing immediate access to your chosen pieces. Consider browsing each site to compare pricing, arrangement styles, and available difficulty levels to find the perfect match for your musical goals and piano proficiency.

MuseScore: A Community-Driven Resource

MuseScore is a popular, free platform for accessing La La Land piano sheet music in PDF format, distinguished by its community-driven nature. Users upload their arrangements, creating a diverse and expansive library. This means you’ll find numerous versions of pieces like “Mia & Sebastian’s Theme” and “City of Stars,” catering to different skill levels and preferences.

The benefit of MuseScore lies in its accessibility – much of the content is available for free download. However, the quality can vary significantly, as arrangements aren’t always professionally vetted. It’s crucial to preview scores before downloading, checking for accuracy and readability.

Searching for “La La Land” or specific song titles will yield a range of results. Look for scores with high ratings and positive comments from other users as indicators of quality. PDF downloads are readily available, making it a convenient option for quick access to piano arrangements.

Musicnotes.com: Official and Licensed Sheet Music

Musicnotes.com stands out as a premier destination for officially licensed La La Land piano sheet music in PDF format. Unlike community-based platforms, Musicnotes.com partners directly with music publishers, ensuring high-quality, accurate transcriptions of Justin Hurwitz’s compositions.

This means you can confidently purchase and download PDF scores knowing they’ve been professionally arranged and approved. The site offers a wide selection, including arrangements for solo piano, vocal accompaniment, and even ensemble performances. You’ll find varying difficulty levels, clearly indicated, allowing you to choose pieces appropriate for your skill.

While Musicnotes.com requires a purchase for each sheet music download, the investment guarantees a reliable and legally compliant resource. They frequently offer previews, letting you examine the arrangement before committing to a buy. The PDFs are typically well-formatted and easy to read, enhancing the learning experience.

Sheet Music Plus: Extensive Catalog and Arrangements

Sheet Music Plus presents itself as a vast repository for La La Land piano sheet music available in PDF format, boasting one of the most extensive catalogs online. They offer a diverse range of arrangements, catering to all skill levels – from beginner-friendly simplified versions to advanced, technically demanding transcriptions of Justin Hurwitz’s scores.

Beyond official publications, Sheet Music Plus also features arrangements created by independent composers, providing unique interpretations of beloved songs like “Mia & Sebastian’s Theme” and “City of Stars.” This variety allows pianists to discover arrangements tailored to their specific preferences and playing style.

The platform provides options for both digital downloads (PDF) and physical sheet music delivery. While pricing varies depending on the arrangement and publisher, Sheet Music Plus frequently runs promotions and offers discounts. Careful browsing is recommended to find the best deals on La La Land piano sheet music.

Specific Pieces Available: A Detailed Look

A significant selection of La La Land pieces are readily available as piano sheet music in PDF format. “Mia & Sebastian’s Theme” is consistently the most sought-after, appearing in numerous arrangements – from simplified beginner versions to complex solo piano scores. “City of Stars” also enjoys widespread availability, often presented with chord charts for vocal accompaniment.

“Another Day of Sun,” the energetic opening number, presents a challenge for pianists, with arrangements varying in complexity. “Audition (The Fools Who Dream)” is frequently found in vocal sheet music, but dedicated piano arrangements are also accessible.

Many platforms offer medleys combining several songs from the soundtrack. These can be a convenient way to learn multiple pieces simultaneously. When searching for PDF versions, be mindful of the arrangement’s accuracy and completeness, ensuring it faithfully represents Justin Hurwitz’s original composition.

Mia & Sebastian’s Theme: Difficulty Levels and Arrangements

“Mia & Sebastian’s Theme” boasts the widest range of piano sheet music availability in PDF format, catering to all skill levels. Beginner arrangements simplify the melody and harmony, often utilizing single-note accompaniment and basic chords. Intermediate versions introduce more complex chord voicings and rhythmic patterns, demanding greater dexterity.

Advanced arrangements faithfully recreate the original’s intricate harmonies and dynamic nuances, requiring significant technical proficiency. Many PDF versions include separate parts for both hands, allowing for a more authentic performance. Some arrangements feature embellishments and improvisational sections, adding a personal touch.

Players can find simplified versions focusing on the main melody, or complete scores including the introduction and variations. Carefully assess the arrangement’s difficulty before purchasing to ensure it aligns with your current piano skills.

City of Stars: Sheet Music Variations for Different Skill Levels

“City of Stars” piano sheet music in PDF format presents a diverse spectrum of arrangements, accommodating varying levels of expertise. Beginner versions typically feature simplified chords and melodies, focusing on the song’s core harmonic progression. These arrangements often omit complex embellishments, making them accessible to novice players.

Intermediate players can find arrangements with richer harmonies, incorporating seventh chords and inversions. These versions demand greater hand coordination and a stronger understanding of musical theory. More advanced arrangements replicate the song’s original instrumentation, including piano accompaniment and subtle harmonic textures.

Many PDF scores include vocal melodies, allowing singers to accompany themselves on the piano. Consider your technical abilities and musical goals when selecting an arrangement.

Another Day of Sun: Finding Arrangements for Piano

Locating piano sheet music in PDF for “Another Day of Sun” can be slightly more challenging due to its complex orchestration. This vibrant opening number from La La Land demands a skilled pianist to capture its energetic spirit. Simplified arrangements are available, often focusing on the core melody and chord progression, suitable for intermediate players.

However, truly replicating the song’s dynamic energy requires more advanced arrangements. These versions often include layered harmonies and rhythmic complexities, mirroring the original’s big band sound.

Several online platforms offer transcriptions, ranging in quality and accuracy. Look for scores that clearly indicate the difficulty level and provide accurate notation.

Be prepared to adapt and simplify sections if the arrangement exceeds your current skill level.

Audition (The Fools Who Dream): Sheet Music and Performance Considerations

“Audition (The Fools Who Dream)” is arguably the most emotionally resonant piece from La La Land, and finding suitable piano sheet music in PDF requires careful selection. Many arrangements prioritize capturing the song’s delicate and introspective mood. Beginner to intermediate players can find simplified versions focusing on the melody and basic chord accompaniment.

However, conveying the song’s emotional depth necessitates attention to dynamics and phrasing. More advanced arrangements incorporate richer harmonies and subtle variations, mirroring the original’s nuanced performance.

When performing this piece, prioritize conveying the vulnerability and hope embedded within the lyrics.

Pay close attention to the rubato and tempo changes, allowing the music to breathe and tell a story.

Consider the song’s context within the film to inform your interpretation.

Justin Hurwitz’s Compositions: Understanding the Musical Style

Justin Hurwitz’s musical style in La La Land draws heavily from classic Hollywood scores, blending jazz harmonies with contemporary sensibilities. When approaching his compositions via piano sheet music – often available in PDF format – recognizing these influences is key to an authentic performance.

His work frequently features extended chords, sophisticated voice leading, and a penchant for memorable melodies. The piano arrangements often demand a nuanced touch, requiring players to navigate complex harmonies and dynamic shifts.

Understanding Hurwitz’s use of leitmotifs – recurring musical themes associated with characters or ideas – enhances interpretation.

Many PDF sheet music editions highlight these thematic connections.

His compositions aren’t merely technically challenging; they prioritize emotional storytelling through musicality.

Copyright and Legal Considerations When Using Sheet Music

When accessing La La Land piano sheet music in PDF format, understanding copyright law is crucial. Most arrangements are protected by copyright, belonging to Justin Hurwitz, the publishers (like Alfred Publishing), or the arrangers themselves.

Downloading or distributing copyrighted sheet music without permission is illegal. While some websites offer “free” PDFs, these are often unauthorized and constitute copyright infringement.

Legally obtaining sheet music involves purchasing it from authorized retailers like Musicnotes.com or Sheet Music Plus, or utilizing subscription services with appropriate licensing.

Be cautious of websites offering suspiciously low prices or claiming “royalty-free” arrangements without clear documentation.

Public performance of copyrighted music, even with legally obtained sheet music, may require additional licensing from performance rights organizations.

Respecting copyright protects the creators and ensures continued musical innovation.

Tips for Learning La La Land Pieces on Piano

Successfully tackling La La Land piano sheet music, often found in PDF format, requires a strategic approach. Begin by selecting a piece aligned with your current skill level – start with easier arrangements of “Mia & Sebastian’s Theme” or “City of Stars.”

Break down complex passages into smaller, manageable sections. Practice each hand separately before combining them, focusing on accuracy and rhythm.

Utilize online tutorials and lessons to understand phrasing and dynamics. Slow practice with a metronome is essential for developing consistent timing.

Pay attention to the harmonic structure; La La Land’s music features rich jazz influences.

Don’t be afraid to simplify challenging sections initially, gradually adding complexity as you improve.

Regular, focused practice, even in short bursts, yields better results than infrequent, lengthy sessions. Enjoy the beautiful melodies!

Recommended Piano Skill Level for Each Song

Determining the appropriate skill level for La La Land piano sheet music, readily available as PDF downloads, is crucial for a rewarding learning experience. “Another Day of Sun” generally suits intermediate to advanced players due to its energetic rhythms and complex chords.

“Mia & Sebastian’s Theme” offers arrangements for beginner, intermediate, and advanced levels; simplified versions are excellent for early learners. “City of Stars” is accessible to late beginners and intermediate pianists, focusing on lyrical melodies.

“Audition (The Fools Who Dream)” presents a challenge for intermediate to advanced players, demanding emotional expression and technical proficiency.

Beginners should explore simplified arrangements or focus on learning chord progressions. Intermediate players can tackle moderately difficult arrangements, while advanced pianists can enjoy the full complexity of the original scores.

Always assess your comfort level and choose arrangements that push you without being overwhelming.

Resources for Finding Tutorials and Lessons Online

Supplementing your La La Land piano sheet music (often found in PDF format) with online tutorials significantly enhances the learning process. YouTube is a treasure trove, offering numerous piano tutorials for individual songs like “Mia & Sebastian’s Theme” and “City of Stars”.

Many instructors provide step-by-step guidance, breaking down complex passages into manageable sections. Websites like Flowkey and Skoove offer interactive lessons specifically designed for popular songs, including selections from La La Land.

Online piano learning platforms, such as Pianote and Hoffman Academy, provide structured courses that can build your foundational skills before tackling these pieces.

Consider searching for tutorials tailored to your skill level – beginner, intermediate, or advanced – to ensure appropriate instruction. Don’t hesitate to explore multiple resources to find a teaching style that resonates with you.

Utilizing these online resources alongside your sheet music will accelerate your progress and enjoyment.

the tutorial is too hard chapter 134

The Tutorial is Too Hard: A Deep Dive into Chapter 134 and the Series

Chapter 134, available on ROLIASCAN and Mgeko․cc, sparks debate; the unseen fight’s result fuels speculation, aligning with the series’ core premise of relentless difficulty․

Overview of “The Tutorial is Too Hard”

“The Tutorial is Too Hard,” penned by Gandara, is a fusion fantasy novel rapidly gaining popularity, presented as a manhwa/manhua accessible through platforms like Mgeko․cc and scanlation sites such as ROLIASCAN and Arenascans․ The core concept revolves around a protagonist thrust into an impossibly challenging tutorial, a trial by fire designed to test – and likely break – most individuals․

Recent discussions, particularly surrounding Chapter 134, highlight the series’ unique appeal: a narrative driven by escalating difficulty․ The deliberate withholding of the fight’s outcome in this chapter isn’t a narrative oversight, but a deliberate choice reflecting the story’s central theme․ Readers actively engage with fan theories, attempting to decipher the implications of this ambiguity․ The story’s premise, as the title suggests, centers on surviving an overwhelmingly difficult scenario, and Chapter 134 exemplifies this perfectly․

The Core Premise: Difficulty as a Narrative Driver

“The Tutorial is Too Hard” doesn’t merely feature difficulty; it is the narrative․ The series thrives on constantly raising the stakes, presenting obstacles seemingly insurmountable for the protagonist․ This is powerfully demonstrated in Chapter 134, where the obscured fight result isn’t a plot hole, but a deliberate tactic․

Gandara utilizes this premise to explore themes of survival, adaptation, and the burden of power․ The lack of immediate gratification – not showing the fight’s conclusion – forces readers to contemplate the protagonist’s situation and potential outcomes․ Platforms like ROLIASCAN and Mgeko․cc facilitate this engagement, fostering discussion and speculation․ The series’ success hinges on this constant tension, making each challenge, like those in Chapter 134, a crucial element of the storytelling, driving the plot and character development forward․

Gandara’s Writing Style and Popularity

Gandara, the author of “The Tutorial is Too Hard,” has captivated readers with a fusion fantasy style that emphasizes relentless challenges and emotional depth․ The popularity of the series, readily accessible on platforms like Mgeko․cc and through scanlation sites like ROLIASCAN, stems from this unique approach․

Chapter 134 exemplifies Gandara’s skill in building suspense․ The deliberate withholding of the fight’s outcome isn’t a weakness, but a demonstration of control over pacing and reader engagement․ This technique, coupled with complex character interactions and exploration of difficult themes, resonates with a broad audience․ Arenascans and other manga collections further contribute to the series’ reach, showcasing Gandara’s growing influence within the fantasy genre․ The author’s ability to consistently deliver high-stakes scenarios is a key driver of the series’ success․

Chapter 134: Key Events and Analysis

Chapter 134, found on ROLIASCAN, centers on a pivotal, yet unseen, battle; its obscured result embodies the series’ core concept of extreme difficulty․

Recap of Events Leading to Chapter 134

Prior to Chapter 134 of “The Tutorial is Too Hard,” the protagonist faced escalating challenges designed to test his limits within the brutal tutorial system․ These trials, consistently exceeding expectations in difficulty, pushed him to adapt and evolve at an accelerated pace․ The narrative built towards a confrontation, hinted at through previous chapters, involving a significant power disparity between the protagonist and his opponent․

Readers, following updates on platforms like ROLIASCAN and Mgeko․cc, witnessed the protagonist’s strategic preparations and emotional turmoil as he braced for this crucial battle․ The anticipation surrounding this fight was heightened by the series’ established pattern of withholding complete information, leaving fans to speculate on the outcome․ The events leading up to Chapter 134 established a high-stakes scenario, setting the stage for a potentially transformative moment in the story․

Detailed Breakdown of Chapter 134’s Plot Points

Chapter 134 centers around a pivotal, yet curiously obscured, fight sequence․ While the battle itself isn’t explicitly shown – a deliberate choice by author Gandara – the chapter focuses intensely on the emotional and psychological impact on the protagonist․ Readers following on ROLIASCAN and Mgeko․cc note the detailed descriptions of his internal state, particularly his reactions to external stimuli․

A key plot point involves a mysterious drink consumed by the protagonist, which amplifies his empathy, allowing him to feel the emotions of those around him․ This isn’t presented as mental contamination, as some initially speculated, but rather a heightened emotional sensitivity․ The chapter builds tension by focusing on the anticipation of the fight’s outcome, rather than the action itself, leaving the result ambiguous and fueling fan theories․

The Significance of the Unseen Fight Result

The deliberate omission of the fight’s outcome in Chapter 134, readily available on platforms like ROLIASCAN, is central to the narrative’s core concept: “The tutorial is too difficult․” Gandara’s choice isn’t about withholding information, but reinforcing the overwhelming odds faced by the protagonist․ It emphasizes the relentless pressure and the constant struggle for survival that defines the series․

This narrative technique shifts the focus from a simple win-or-loss scenario to the protagonist’s internal resilience and adaptation․ The ambiguity encourages reader engagement and fuels speculation, as seen in discussions across online communities․ The unseen result underscores that overcoming challenges isn’t always about victory, but about enduring and evolving within an impossibly harsh environment․ It’s a testament to the series’ unique approach to power fantasy․

Character Development in Chapter 134

Chapter 134 reveals emotional depth, with the protagonist experiencing amplified feelings through a mysterious drink, impacting reactions and showcasing evolving empathy․

Focus on the Protagonist’s Growth

Chapter 134 marks a significant turning point in the protagonist’s development, moving beyond mere survival instincts․ The introduction of the drink, and its subsequent effect of mirroring the emotions of those nearby, forces a confrontation with feelings previously suppressed․ This isn’t presented as mental contamination, but rather a heightened state of empathy, compelling the character to acknowledge and process the emotional landscape around him․

Previously focused on overcoming physical challenges within the brutal tutorial, the protagonist now grapples with internal shifts․ This newfound sensitivity doesn’t diminish his resolve, but adds layers of complexity to his decision-making․ He’s no longer solely reacting to threats; he’s factoring in the emotional weight of his actions and the feelings of others, hinting at a potential evolution towards a more compassionate, yet still fiercely determined, individual․ This growth is subtle, yet profoundly impactful, setting the stage for future conflicts and relationships․

Supporting Characters and Their Roles

While Chapter 134 primarily focuses on the protagonist’s internal shift, supporting characters play a crucial, albeit understated, role in catalyzing this growth․ Their emotional states, amplified by the drink’s effect on the protagonist, become integral to his experience․ The reactions of allies and even potential adversaries contribute to the complex emotional tapestry he navigates․

Though not explicitly detailed, the presence of these characters and their feelings are vital․ They serve as a mirror, reflecting aspects of the protagonist’s own suppressed emotions and forcing him to confront them․ Their happiness, fear, or desperation directly impact his state, highlighting the interconnectedness within the tutorial’s harsh environment․ This indirect interaction underscores the importance of relationships, even within a system designed to isolate and eliminate․ Their roles aren’t about direct action, but about emotional resonance;

Emotional Impact and Character Reactions

Chapter 134 delivers a significant emotional punch, largely due to the protagonist’s newfound ability to feel the emotions of those around him․ This isn’t presented as mental contamination, but rather a heightened empathy, amplifying joy and despair alike․ The impact is profound, shifting his perspective and forcing a confrontation with feelings previously suppressed by the tutorial’s brutal demands․

Character reactions, though experienced through the protagonist, are palpable․ The shared happiness becomes intensely uplifting, while the suffering of others weighs heavily upon him․ This creates internal conflict, challenging his survival instincts with a burgeoning sense of compassion․ The chapter expertly portrays this emotional turmoil, showcasing a vulnerability rarely seen․ It’s a turning point, suggesting a potential evolution beyond mere survival, hinting at a deeper, more human response to the tutorial’s challenges․

Themes Explored in “The Tutorial is Too Hard”

Chapter 134 intensifies themes of survival, adaptation, and the burden of power, as the protagonist grapples with amplified empathy and emotional resonance․

Survival and Adaptation

Chapter 134 of “The Tutorial is Too Hard” profoundly showcases the core themes of survival and adaptation, central to the entire series․ The narrative consistently throws insurmountable challenges at the protagonist, forcing constant evolution․ This chapter, readily available on platforms like ROLIASCAN and Mgeko․cc, doesn’t deviate from this pattern․

The unseen fight, a key element discussed amongst fans, exemplifies this․ The lack of a clear outcome isn’t a narrative oversight, but a deliberate choice highlighting the unpredictable nature of the tutorial and the need to adapt to ambiguity․ Success isn’t guaranteed, and even apparent victories can carry hidden costs․

The protagonist’s journey isn’t about becoming overpowered; it’s about learning to endure, strategize, and exploit every advantage in a relentlessly hostile environment․ This constant pressure to adapt is what defines the series and resonates with readers, making survival a truly hard-won achievement․

The Burden of Power

Chapter 134, accessible through sites like Mgeko․cc and ROLIASCAN, subtly explores the burden of power within “The Tutorial is Too Hard․” While the protagonist continues to grow stronger, the narrative avoids glorifying this progression․ Instead, it hints at the emotional and psychological toll of constantly facing life-or-death situations and wielding increasing abilities․

A key detail, revealed in spoiler discussions, centers around a drink affecting the protagonist’s emotional state – mirroring the feelings of those nearby․ This isn’t simply a power, but a vulnerability, demonstrating how heightened sensitivity can become a liability․

The series suggests that power isn’t a solution, but another layer of complexity․ It amplifies existing struggles and introduces new ones, forcing the protagonist to grapple with the consequences of their strength․ This nuanced portrayal sets “The Tutorial is Too Hard” apart, presenting power as a responsibility, not a reward․

Emotional Resonance and Empathy (Spoilers)

Chapter 134, readily found on platforms like ROLIASCAN and Mgeko․cc, significantly deepens the exploration of emotional resonance within “The Tutorial is Too Hard․” Spoilers reveal a pivotal moment involving a drink that allows the protagonist to directly feel the emotions of those around him․ This isn’t presented as mental contamination, but as a raw, unfiltered connection․

This mechanic dramatically shifts the narrative focus, highlighting the weight of others’ suffering and joy․ The protagonist isn’t merely observing hardship; he’s experiencing it viscerally․ This fosters a powerful sense of empathy, forcing him to confront the human cost of the tutorial’s brutal challenges․

The chapter suggests that true strength lies not just in overcoming obstacles, but in understanding and sharing the emotional burdens of others․ This empathetic connection adds a layer of complexity to the protagonist’s journey, making his struggles all the more compelling․

Reading Platforms and Accessibility

Chapter 134 is easily accessible via ROLIASCAN, Mgeko․cc, and Arenascans, offering fans multiple avenues to enjoy this compelling installment of the series․

ROLIASCAN and Other Scanlation Sites

Chapter 134 of “The Tutorial is Too Hard” finds a significant portion of its readership through scanlation websites like ROLIASCAN, which provides a readily available online platform for fans․ These sites play a crucial role in disseminating the series, particularly for audiences seeking immediate access to new chapters․ ROLIASCAN’s consistent updates and user-friendly interface have made it a popular choice for following the story․

However, it’s important to acknowledge the broader landscape of scanlation․ While ROLIASCAN is frequently mentioned in discussions surrounding the series, other platforms also contribute to its accessibility․ These alternative sites offer varying levels of quality and update schedules, catering to diverse reader preferences․ The availability of Chapter 134 across multiple platforms demonstrates the dedicated fan base and the demand for this compelling narrative․ Readers often compare experiences and recommend sites based on speed and translation quality․

Mgeko․cc as a Source

Mgeko․cc emerges as a prominent online source for reading “The Tutorial is Too Hard,” including the highly anticipated Chapter 134․ The website is frequently cited by fans as a reliable and fast-updating platform for accessing the manhwa․ Mgeko․cc’s appeal lies in its dedicated focus on providing a seamless reading experience, allowing enthusiasts to stay current with the unfolding narrative․

The site’s accessibility and consistent uploads have positioned it as a go-to destination for those eager to delve into Gandara’s work․ Readers appreciate the platform’s straightforward interface and the ease with which they can navigate to the latest chapters, like Chapter 134․ Mgeko․cc’s role in the series’ dissemination is significant, fostering a vibrant online community around “The Tutorial is Too Hard” and enabling widespread enjoyment of the story․

Arenascans and Manga Collections

Arenascans is highlighted as a valuable resource within the broader landscape of manga collections, offering access to “The Tutorial is Too Hard,” including Chapter 134․ The platform’s Manga List menu facilitates easy discovery of various series, allowing readers to explore a diverse range of titles alongside Gandara’s work․ Arenascans’ strength lies in its curated collections and organized presentation of manga content․

Users can select specific chapters, such as Chapter 134, for a full-page reading experience․ This feature caters to those who prefer an immersive and uninterrupted view of the artwork and narrative․ Arenascans contributes to the accessibility of “The Tutorial is Too Hard,” providing an alternative avenue for fans to engage with the story and stay updated on its progression․ It’s a key hub for manga enthusiasts seeking comprehensive collections․

Future Predictions and Fan Theories

Chapter 134’s ambiguous fight outcome ignites theories about the protagonist’s evolving power and potential story arcs, driven by the series’ challenging premise․

Potential Story Arcs

Following the events of Chapter 134, fan speculation centers on several compelling story arcs․ A prominent theory suggests a deeper exploration of the emotional consequences experienced by the protagonist, hinted at by the “SPOILER” regarding the drink and its empathic effects․ This could lead to arcs focused on managing and utilizing these newfound sensitivities․

Another potential path involves unraveling the mysteries surrounding the unseen fight․ Was it a decisive victory, a strategic retreat, or something more complex? The narrative could delve into the repercussions of this encounter, introducing new adversaries or alliances․ Given the series’ title, “The Tutorial is Too Hard,” future arcs will likely continue to escalate the challenges faced by the protagonist, pushing his limits and forcing constant adaptation․

Furthermore, the series’ fusion fantasy elements offer opportunities for exploring diverse realms and power systems․ We might see the protagonist venturing into new tutorial stages, each presenting unique and increasingly difficult trials․ The ongoing exploration of power dynamics and the “burden of power” – a key theme – will undoubtedly continue to shape the narrative trajectory․

Speculation on the Protagonist’s Journey

Considering the aftermath of Chapter 134, speculation regarding the protagonist’s journey intensifies․ The unresolved fight outcome suggests a period of strategic regrouping and internal growth, rather than immediate escalation․ His increasing emotional awareness, stemming from the drink’s effects – as revealed in the “SPOILER” – will likely become central to his development․

Will he learn to control and weaponize this empathy, or will it prove to be a debilitating weakness? The series’ core premise, “The Tutorial is Too Hard,” implies a relentless cycle of challenges, suggesting the protagonist will face trials designed to exploit this vulnerability․

Fans theorize a potential arc focused on mastering emotional regulation, perhaps through guidance from unexpected allies․ His journey isn’t solely about power leveling, but about adapting to increasingly complex and emotionally taxing situations․ The protagonist’s path will likely involve confronting not just external threats, but also his own internal struggles, making his survival a testament to resilience and adaptability․

manual walkie talkie motorola

Motorola Talkabout owners manuals provide comprehensive guidance for safe and effective use. Essential reading includes the RF Energy Exposure and Product Safety Guide.

These manuals detail features like turning radios on/off, volume adjustment, and proper communication protocols for optimal performance across various Motorola models.

What are Motorola Walkie Talkies?

Motorola walkie talkies, often called two-way radios, are portable communication devices enabling direct voice transmission. Motorola Talkabout models, detailed in their respective owners manuals, offer license-free operation for personal use. These devices utilize radio frequencies to transmit and receive signals, allowing real-time conversations without relying on cellular networks.

The manuals emphasize understanding RF energy exposure guidelines for safe operation. Key features, like channel selection and the push-to-talk (PTT) function, are thoroughly explained. They are ideal for recreational activities, events, and situations where reliable, immediate communication is crucial, offering a dependable alternative to mobile phones in areas with limited coverage.

Brief History of Motorola Two-Way Radios

Motorola’s pioneering work in two-way radio began in 1928 with the development of police mobile radios, revolutionizing public safety communication. This innovation evolved into portable handheld radios, precursors to today’s walkie talkies. Throughout the decades, Motorola consistently advanced radio technology, focusing on improved signal clarity, range, and durability.

The Talkabout series, documented in detailed owners manuals, represents Motorola’s commitment to accessible communication. These manuals reflect a history of user-focused design. From early emergency services to recreational use, Motorola radios have remained a trusted communication tool, continually adapting to meet evolving needs.

Understanding Key Features

Motorola walkie talkie manuals highlight essential features like channel selection, PTT functionality, and squelch control, ensuring clear and reliable communication for all users.

Channel Selection and Frequency

Motorola walkie talkie manuals emphasize the importance of all radios within a group being set to the same channel for successful communication; These manuals detail how to select channels, often using a rotating dial or button presses.

Understanding frequency is crucial; manuals explain how channels correlate to specific frequencies, impacting range and potential interference. Some models offer pre-programmed channels, while others allow for custom frequency programming. Proper channel selection minimizes interference and ensures clear transmissions, as detailed within the owner’s guides.

Push-to-Talk (PTT) Functionality

Motorola walkie talkie manuals consistently highlight the Push-to-Talk (PTT) button as the primary method for initiating transmissions. Before speaking, users must press and hold the PTT button, activating the microphone and sending their voice.

Releasing the PTT button switches the radio back to receive mode. Manuals often include troubleshooting tips for PTT button issues, such as ensuring it’s fully depressed or checking for obstructions. Effective PTT usage, as described in the guides, is vital for clear, two-way communication.

Squelch Control Explained

Motorola walkie talkie manuals detail squelch control as a feature minimizing unwanted background noise. Squelch settings determine the signal strength required to open the speaker. Lower settings increase sensitivity, capturing weaker signals but also more noise.

Higher settings reduce noise but may block faint transmissions. Manuals advise adjusting squelch to find a balance between clarity and signal reception. Proper squelch adjustment, as outlined in the guides, enhances communication quality by filtering out static and interference, improving overall usability.

Setting Up Your Motorola Walkie Talkie

Motorola manuals emphasize proper battery installation and powering on. Users should then program channels and scan for available frequencies, adjusting volume for clear communication.

Installing Batteries and Powering On

Motorola walkie-talkie manuals consistently highlight the importance of correct battery installation for optimal performance and longevity. Typically, this involves locating the battery compartment, inserting batteries with the correct polarity (as indicated inside the compartment), and securing the cover.

To power on the radio, users generally need to press and hold the MENU/Power button. The manual details that a visual or auditory cue confirms successful activation. Always refer to your specific model’s manual, like the Talkabout T42, for precise instructions, as procedures can vary slightly between different Motorola radios.

Channel Programming and Scanning

Motorola walkie-talkie manuals emphasize the significance of channel selection for clear communication. To program channels, users typically navigate the menu system using the buttons, referencing the specific instructions in their model’s guide – such as the Talkabout T5900.

Scanning functionality allows the radio to automatically search for active channels. The manual details how to initiate a scan, and explains that the radio will pause on any detected transmissions. Proper channel programming and scanning ensure effective communication within a group, avoiding interference and maximizing range.

Setting Volume Levels

Motorola walkie-talkie manuals clearly illustrate how to adjust the volume for comfortable listening. Typically, dedicated “+” and “-” buttons control the audio output, as detailed in the Talkabout T42 owner’s manual;

Users should adjust the volume to a level that allows clear reception without distortion, considering the surrounding environment. Maintaining appropriate volume levels is crucial for effective communication and prevents missed transmissions. The manual also advises testing the volume with another radio to ensure audibility for all group members.

Using Your Walkie Talkie Effectively

Motorola manuals emphasize setting all radios to the same channel for communication. Proper etiquette and understanding range limitations are also key for optimal use.

Proper Communication Etiquette

Motorola walkie-talkie manuals consistently highlight the importance of clear and concise communication. Before transmitting, always identify yourself to ensure everyone knows who is speaking. Utilize a brief, pre-agreed upon signal – like “Over” – to indicate you’ve finished speaking and are awaiting a response;

Avoid lengthy monologues; keep transmissions short and to the point, allowing others a chance to contribute. Refrain from using jargon or codes unfamiliar to all parties. Respect channel usage and avoid unnecessary chatter, especially in emergency situations. Following these guidelines ensures efficient and effective communication for all users.

Range and Signal Strength Considerations

Motorola walkie-talkie manuals emphasize that stated range is maximized in optimal conditions – clear line of sight, unobstructed terrain. Actual range is significantly impacted by obstacles like buildings, trees, and hills. Signal strength diminishes with distance and interference.

To maximize range, maintain a clear line of sight whenever possible. Higher antenna placement can improve signal transmission and reception. Be aware that weather conditions can also affect performance. Regularly check signal strength indicators and adjust channels or locations as needed for reliable communication.

Troubleshooting Common Issues

Motorola walkie-talkie manuals address frequent problems. If no power or sound occurs, check battery installation and ensure the volume is adjusted. Poor reception often stems from obstructions or being out of range; relocate or change channels. PTT button malfunctions may require battery removal/reinstallation.

Consult the manual for specific model troubleshooting steps. Interference from other devices can also cause issues. Resetting the radio to factory defaults is a last resort. If problems persist, refer to Motorola’s support website or online forums for assistance.

Safety Information and Guidelines

Motorola manuals emphasize reading the RF Energy Exposure and Product Safety Guide before use. This ensures understanding of operating temperatures and battery safety precautions.

RF Energy Exposure and Product Safety

Motorola walkie-talkie manuals consistently prioritize user safety, beginning with a dedicated RF Energy Exposure and Product Safety Guide. This crucial document details essential information regarding exposure to radio frequency energy, adhering to established safety standards.

Understanding these guidelines is paramount before operating the device. The manual outlines specific operational instructions designed to minimize exposure and ensure responsible use. It covers topics like appropriate antenna handling, maintaining a safe distance during transmission, and awareness of potential interference. Following these recommendations safeguards both the user and those nearby, promoting a secure communication experience with your Talkabout radio.

Operating Temperature and Environmental Factors

Motorola walkie-talkie manuals emphasize the importance of operating conditions for optimal performance and longevity. These guides detail acceptable temperature ranges for both charging and usage, typically outlining limits for extreme heat or cold.

Environmental factors, such as humidity and exposure to dust or water, are also addressed. Manuals advise against operating the radios in excessively damp or corrosive environments. Proper care, including avoiding direct sunlight and protecting the device from rain, is crucial. Adhering to these guidelines ensures reliable operation and prevents potential damage to your Talkabout radio.

Battery Safety Precautions

Motorola walkie-talkie manuals prioritize battery safety, providing crucial guidelines for users. These manuals strongly advise against disassembling or modifying the battery pack, as this can pose a risk of fire or chemical exposure.

Proper charging procedures are detailed, emphasizing the use of Motorola-approved chargers only. Avoid extreme temperatures during charging and storage. Damaged batteries should be immediately replaced and disposed of responsibly, following local regulations. The manuals also caution against short-circuiting the battery terminals, ensuring safe operation of your Talkabout device.

Specific Motorola Models & Manuals

Motorola offers diverse models like the T42, T5900, and GP2000s Alpha, each with dedicated owners manuals available for download and online access.

Motorola Talkabout T42 Manual Overview

The Motorola Talkabout T42 Owners Manual is a crucial resource for users, prioritizing safety and operational understanding. It begins with essential RF Energy Exposure and Product Safety guidelines, detailing responsible radio usage. Key sections cover powering the device on and off, utilizing the MENU button, and precisely adjusting volume levels with dedicated buttons.

The manual emphasizes the importance of all radios within a group being set to the same channel for successful communication. It provides clear instructions on holding the radio correctly during both talking and listening, ensuring optimal signal transmission and reception. This manual serves as a comprehensive guide for maximizing the T42’s functionality.

Motorola Talkabout T5900 User Guide

Accessing the Motorola Talkabout T5900 user manual is facilitated through resources like the Internet Archive, offering free download, borrowing, and streaming options. This guide provides detailed instructions for operating the T5900, ensuring users can fully utilize its features. The availability through the Internet Archive promotes accessibility and preservation of valuable product information.

Users are encouraged to support the Internet Archive’s mission by considering donations, respecting their privacy policy, and acknowledging that information is not sold or traded. The manual itself covers all aspects of T5900 operation, from basic functions to advanced settings, empowering users with comprehensive knowledge.

Motorola GP2000s Alpha Manual Details

The Motorola GP2000s Alpha walkie-talkie manual, available on platforms like ManualLib, is a comprehensive resource for users and technicians. This collection of manuals provides detailed information on the radio’s operation, maintenance, and troubleshooting procedures. The manual’s item size is 11.3MB, added to the archive on January 6, 2022.

It’s identified by a unique identifier, ensuring easy retrieval. This resource is invaluable for understanding the GP2000s Alpha’s functionalities, offering insights into its technical specifications and operational characteristics, aiding in effective use and repair.

Advanced Features & Settings

Motorola walkie-talkie manuals explain advanced settings like VOX, call tones, and privacy codes, enhancing communication flexibility and security for users.

VOX (Voice Operated Exchange) Function

Motorola walkie-talkie manuals detail the Voice Operated Exchange (VOX) function, enabling hands-free communication. This feature automatically transmits when sound is detected, eliminating the need to press the PTT button. Manuals explain how to adjust VOX sensitivity levels to suit different environments, minimizing false activations from background noise.

Proper VOX setup, as outlined in the guides, ensures clear transmissions and convenient operation. Users learn to balance sensitivity for reliable activation while avoiding unwanted broadcasts. The manuals also cover potential interference and troubleshooting steps related to the VOX functionality, maximizing its usability.

Call Tones and Privacy Codes

Motorola walkie-talkie manuals explain the use of call tones and privacy codes to enhance communication. Call tones signal to others before transmitting, while privacy codes (CTCSS/DCS) limit reception to radios set to the same code, reducing interference. Manuals detail how to select and program these features for clearer, more secure conversations.

Understanding these settings, as described in the guides, allows users to minimize unwanted interruptions and maintain privacy. The manuals clarify that privacy codes don’t offer complete security, but improve clarity in crowded environments. Proper configuration ensures effective communication within a designated group.

Monitor Function Explained

Motorola walkie-talkie manuals detail the ‘Monitor’ function, bypassing the squelch control to hear all radio activity on the current channel, even weak signals. This feature, explained in user guides like those for the Talkabout series, is useful for checking channel clarity before transmitting or detecting distant, faint transmissions.

Manuals caution that continuous monitoring drains battery life. It’s recommended for brief checks only. The function temporarily disables privacy codes, allowing reception of all signals. Understanding its purpose, as outlined in the documentation, enhances effective radio operation and troubleshooting.

Maintenance and Care

Motorola walkie-talkie manuals emphasize regular cleaning, proper battery charging/storage, and careful antenna handling to ensure optimal performance and longevity of your device.

Cleaning Your Walkie Talkie

Motorola walkie-talkie manuals consistently recommend regular cleaning to maintain optimal functionality and hygiene. Before cleaning, always remove the batteries to prevent accidental activation and potential damage. Use a soft, damp cloth to wipe down the exterior casing, avoiding harsh chemicals or abrasive cleaners that could scratch the surface or damage internal components.

Pay particular attention to the speaker grill and microphone port, gently removing any dust or debris. For stubborn dirt, a slightly moistened cotton swab can be used. Ensure the walkie-talkie is completely dry before reattaching the batteries and resuming operation. Avoid immersing the device in water or any liquid.

Battery Charging and Storage

Motorola walkie-talkie manuals emphasize proper battery care for longevity and performance. Utilize only the charger specifically designed for your model to avoid damage. Charging times vary; consult your manual for specifics. Avoid overcharging, as it can reduce battery lifespan. When storing for extended periods, remove the batteries to prevent corrosion and potential leakage.

Store batteries in a cool, dry place, away from direct sunlight and extreme temperatures. Rechargeable batteries should be partially charged before long-term storage. Always refer to the manual for specific battery type recommendations and disposal guidelines.

Antenna Care and Replacement

Motorola walkie-talkie manuals highlight the antenna’s crucial role in signal transmission and reception. Regularly inspect the antenna for any signs of damage, such as bends, cracks, or corrosion. Avoid forceful bending or twisting, as this can compromise its performance. If the antenna becomes damaged, it should be replaced promptly.

Use only Motorola-approved replacement antennas to ensure compatibility and optimal functionality. Improperly installed or incompatible antennas can reduce range and potentially damage the radio. Consult your manual for specific antenna replacement instructions and safety precautions.

Troubleshooting Common Problems

Motorola walkie-talkie manuals address issues like no power, poor reception, or PTT button malfunctions, offering step-by-step solutions for quick resolution.

No Power or Sound

Motorola walkie-talkie manuals frequently address the issue of no power or sound. First, verify correct battery installation and ensure batteries aren’t depleted; replace if necessary. Confirm the radio is switched on by pressing and holding the MENU/power button.

If power is present, check the volume level using the up and down buttons. Ensure the squelch level isn’t set too high, blocking weak signals. Consult the manual for specific troubleshooting steps related to your model, like the T42 or GP2000s Alpha, as procedures can vary. A reset might also resolve the issue.

Poor Reception or Range

Motorola walkie-talkie manuals highlight several causes for poor reception or limited range. Obstacles like buildings, trees, and terrain significantly impact signal strength. Ensure all radios in your group are set to the same channel for clear communication.

Verify antenna connections are secure and undamaged; a damaged antenna drastically reduces range. Lowering the squelch level (consult your T42 or GP2000s Alpha manual) can help receive weaker signals. Interference from other devices may also be a factor. Try relocating to a more open area for improved performance.

PTT Button Issues

Motorola walkie-talkie manuals address potential Push-to-Talk (PTT) button malfunctions. A common issue is a sticky or unresponsive button, often caused by dirt or debris. Carefully clean around the button with a soft, dry cloth – avoid liquids;

If the PTT button still doesn’t function correctly, consult the T5900 user guide or the specific manual for your model (like the GP2000s Alpha). Some models may have programmable PTT settings. Ensure the button isn’t locked or assigned to an unintended function. If problems persist, professional repair may be necessary.

Resources and Support

Motorola’s support website offers extensive resources, including downloadable manuals for models like the T42 and GP2000s Alpha. Online forums and communities also provide assistance.

Motorola Support Website

Motorola’s official support website serves as a central hub for accessing a wealth of information regarding their walkie-talkie products. Users can directly download comprehensive owner’s manuals for a vast range of Talkabout models, including the popular T42 and more advanced options like the T5900.

Beyond manuals, the website provides FAQs, troubleshooting guides, and safety information, such as the crucial RF Energy Exposure and Product Safety Guide. It’s a valuable resource for resolving common issues and understanding the full capabilities of your Motorola two-way radio, ensuring optimal and safe operation.

Online Forums and Communities

Numerous online forums and communities dedicated to two-way radios offer invaluable support for Motorola walkie-talkie users. These platforms provide a space to connect with fellow enthusiasts, share experiences, and seek assistance with specific models like the GP2000s Alpha or Talkabout series.

Users frequently discuss manual interpretations, troubleshooting tips beyond the official documentation, and modifications. These communities are excellent resources for finding solutions to unique problems and gaining deeper insights into maximizing the functionality of your Motorola radio, complementing the official manuals.

Finding Replacement Parts

Locating replacement parts for your Motorola walkie-talkie can extend its lifespan and maintain optimal performance. While Motorola’s official support website is a primary resource, numerous third-party retailers specialize in two-way radio components.

When searching, having your specific model number (like T42 or T5900) from the owner’s manual is crucial. Common replacements include antennas, batteries, and speaker microphones. Online marketplaces and specialized radio supply stores often carry these parts, ensuring continued functionality of your trusted communication device.

weber spirit e 310 user manual

Weber Spirit E-310 User Manual: A Comprehensive Guide

This comprehensive guide details the Weber Spirit E-310, offering assembly, operation, maintenance, and troubleshooting instructions․ Access manuals and diagrams online for optimal grilling!

Welcome to the world of Weber grilling! The Spirit E-310 is a popular gas grill known for its reliability and performance․ This manual serves as your guide to safely and effectively using your new grill․ Whether you’re a seasoned grill master or a beginner, understanding its features is key․

Detailed instructions, exploded views, and parts lists are readily available online, ensuring a smooth assembly and maintenance experience․ Explore the manual to unlock the full potential of your Weber Spirit E-310․

Understanding the Grill Components

The Weber Spirit E-310 comprises several key components working in harmony․ These include the robust grill cart and body providing stability, durable cooking grates for optimal heat distribution, and flavorizer bars that vaporize drippings for enhanced flavor․

The burners and ignition system are crucial for starting and controlling the heat․ Familiarizing yourself with each part, referencing exploded view diagrams, will aid in assembly and future maintenance, as detailed in the manual․

Grill Cart and Body

The Weber Spirit E-310’s cart and body are constructed for durability and stability during grilling․ The cart provides a solid base, often featuring convenient side tables for prep work and tool storage․ The body, typically porcelain-enameled, protects against rust and corrosion, ensuring longevity․

Carefully follow the manual’s assembly instructions to securely attach all cart components․ Proper assembly is vital for safe and enjoyable grilling experiences, supporting the weight of the grill and its contents․

Cooking Grates and Flavorizer Bars

Weber Spirit E-310 cooking grates, typically porcelain-enameled cast iron, distribute heat evenly for optimal cooking․ Flavorizer bars sit below the grates, vaporizing drippings to infuse food with smoky flavor while protecting burners․

The manual details proper grate cleaning and seasoning to prevent sticking and rust․ Regularly inspect Flavorizer bars, replacing them when worn, as they are crucial for flavor and grill longevity․

Burners and Ignition System

Weber Spirit E-310 burners are stainless steel, providing consistent and reliable heat․ The manual outlines cleaning procedures to prevent clogging and ensure optimal performance․ The ignition system, typically push-button, requires periodic maintenance for consistent sparking․

Troubleshooting steps for a grill that won’t light are detailed, including checking gas supply and burner ports․ Proper burner function is vital for efficient cooking and even heat distribution․

Assembly Instructions Overview

The Weber Spirit E-310 requires assembly, detailed in the included Installation Manual․ Carefully follow each step, referencing the exploded view diagrams for component placement․ Ensure all parts are present before beginning․

The manual emphasizes proper tightening of screws and bolts for stability․ A successful assembly guarantees safe and efficient operation of your new grill․ Online resources and videos can supplement the printed instructions․

Step-by-Step Assembly Guide

Begin by attaching the legs to the grill cart, ensuring secure fastening with provided hardware․ Next, assemble the side shelves and attach them to the cart․ Carefully install the flavorizer bars and cooking grates, aligning them correctly․

Connect the burners and verify proper ignition functionality․ Finally, attach the grease management system․ Refer to the exploded view diagrams for visual guidance throughout the process․ Double-check all connections for safety․

Tools Required for Assembly

For successful assembly of your Weber Spirit E-310, you’ll need a Phillips head screwdriver, a flathead screwdriver, and an adjustable wrench․ A rubber mallet can be helpful for gently securing components․

While not essential, a power drill with appropriate bits can expedite the process․ Ensure you have a level to guarantee a stable grill setup․ Always prioritize using the correct tools to prevent damage to parts during installation․

First-Time Use and Seasoning

Before your inaugural cookout, perform a crucial burn-off․ Ignite all burners on high for about 15-20 minutes with the lid closed․ This eliminates manufacturing residues․

Next, season the cooking grates․ Lightly coat them with high-heat cooking oil after the burn-off․ This prevents food from sticking and protects against rust․ Proper seasoning ensures optimal performance and longevity of your Weber Spirit E-310․

Initial Burn-Off Procedure

The initial burn-off is essential for removing oils and residues from the manufacturing process․ Open the grill lid and turn all burners to the highest setting․ Allow the grill to run for approximately 15 to 20 minutes․

This process will create some smoke and odor, which is normal․ Ensure adequate ventilation․ After the burn-off, your Weber Spirit E-310 is ready for seasoning the cooking grates, preparing it for delicious meals!

Seasoning the Cooking Grates

Seasoning the grates creates a natural, non-stick surface, preventing food from sticking and protecting against rust․ After the initial burn-off, reduce the burners to medium-high heat․

Apply a thin coat of high-heat cooking oil to the grates using a paper towel or brush․ Continue heating for 15-20 minutes, then allow to cool․ Repeat this process for optimal seasoning, ensuring your Weber Spirit E-310 is ready for grilling!

Operating Instructions

Operating your Weber Spirit E-310 is straightforward․ Begin by ensuring the grill lid is open․ Turn on the gas supply and follow the lighting instructions․ Adjust the burner control knobs to achieve your desired cooking temperature․

Always preheat the grill for 10-15 minutes before cooking․ Monitor the lid thermometer for accurate temperature readings․ Remember to close the lid while cooking for even heat distribution and efficient grilling!

Lighting the Grill

Lighting your Weber Spirit E-310 is simple․ First, fully open the grill lid․ Turn the gas supply on․ Then, open the side burner valve slightly․ Press the electronic ignition button repeatedly, observing for a steady flame․

If it doesn’t light after several attempts, turn off the gas, wait five minutes, and try again․ Always ensure proper ventilation during lighting․ Never lean over the grill when igniting!

Adjusting Burner Control Knobs

Adjusting the burner control knobs on your Weber Spirit E-310 allows precise temperature control․ Rotate the knobs clockwise to increase the flame and heat, and counterclockwise to decrease it․

Each knob corresponds to a specific burner․ Start with a low setting and gradually increase as needed․ Remember, preheating takes time! Consistent monitoring ensures optimal cooking temperatures for various recipes․

Preheating the Grill

Preheating your Weber Spirit E-310 is crucial for successful cooking․ Turn all burner control knobs to the high position and allow the grill to heat for 10-15 minutes․

A properly preheated grill ensures even cooking and helps prevent food from sticking․ Use the built-in thermometer to monitor the internal temperature․ Once the desired temperature is reached, adjust the burners accordingly for your recipe․

Cooking Tips and Techniques

Mastering your Weber Spirit E-310 involves understanding cooking methods․ Direct cooking, with burners on high, is ideal for searing steaks and quick meals․ Indirect cooking, with burners on low or off, suits larger cuts and slower roasting․

Temperature control is key; utilize the lid thermometer and burner knobs․ Experiment with different heat zones for versatile grilling․ Remember, practice makes perfect!

Direct vs․ Indirect Cooking

Direct cooking on your Weber Spirit E-310 involves placing food directly over lit burners, achieving high heat for searing steaks, burgers, and vegetables quickly․ Indirect cooking utilizes the grill as an oven, with burners on low or off, circulating heat for roasting chicken or ribs․

Understanding these techniques expands your culinary possibilities․ Experiment with both methods to discover the best approach for various foods and desired results!

Temperature Control and Monitoring

Weber Spirit E-310 temperature control relies on adjusting burner knobs and utilizing the lid thermometer․ Preheating ensures even cooking, while monitoring internal food temperature with a meat thermometer is crucial for safety and desired doneness;

Experiment with burner settings to achieve specific heat levels․ Remember, consistent temperature management is key to grilling success, yielding perfectly cooked meals every time!

Cleaning and Maintenance

Regular cleaning extends the life of your Weber Spirit E-310․ After each use, burn off residue on high heat․ Periodically clean cooking grates with a grill brush, and scrape flavorizer bars to remove buildup․

Inspect burners for clogs and clean as needed․ A clean grill ensures optimal performance and prevents flare-ups․ Consistent maintenance guarantees years of enjoyable grilling experiences!

Cleaning Cooking Grates

After each grilling session, allow the cooking grates to cool slightly․ Use a sturdy grill brush to remove food particles and debris․ For stubborn residue, a paste of baking soda and water can be effective․

Avoid abrasive cleaners that could damage the grates’ finish․ Regularly cleaning the grates prevents flare-ups and ensures flavorful cooking․ Properly maintained grates contribute to a superior grilling experience․

Cleaning Flavorizer Bars

Regularly cleaning Flavorizer bars is crucial for optimal grill performance․ Remove the bars and scrape off accumulated grease and food debris with a putty knife or scraper․ Wash them with warm, soapy water, and a mild degreaser if needed․

Inspect for excessive wear or damage, replacing them when necessary․ Clean Flavorizer bars prevent flare-ups and vaporize drippings, enhancing flavor․ Maintaining these bars ensures a consistently delicious grilling experience․

Cleaning the Burners

Proper burner cleaning ensures efficient gas flow and consistent heating․ Turn off the gas supply and remove the cooking grates and Flavorizer bars․ Carefully detach the burners and inspect the ports for blockages․

Use a wire brush or pipe cleaner to clear any debris․ A mild solvent can help dissolve stubborn residue․ Reinstall the burners securely, verifying proper alignment․ Clean burners contribute to even cooking and optimal grill performance․

Troubleshooting Common Issues

Facing problems with your Weber Spirit E-310? Common issues include difficulty lighting and uneven heating․ For a grill that won’t light, check the gas supply, igniter battery, and burner ports․

Uneven heating often stems from blocked burners or uneven Flavorizer bar placement․ Regularly cleaning and proper component alignment are key․ Consult the manual for detailed diagnostics and solutions to restore optimal grilling performance․

Grill Won’t Light

If your Weber Spirit E-310 fails to ignite, first verify the gas tank is full and the valve is open․ Next, inspect the igniter battery – a weak battery is a frequent culprit․ Ensure the burner ports aren’t clogged with debris, hindering gas flow․

Check the igniter itself for damage․ Refer to your manual for specific troubleshooting steps and diagrams․ A blocked burner or faulty ignition system are common causes․

Uneven Heating

Experiencing uneven heating on your Weber Spirit E-310? First, confirm the burners are fully lit and burning with a consistent blue flame․ Uneven flames suggest a blocked burner port – clean them thoroughly․

Ensure flavorizer bars are correctly positioned, directing heat evenly․ Also, check for obstructions under the grill․ Wind can also cause temperature fluctuations; position the grill accordingly․ Consult your manual for detailed diagrams․

Replacing Parts

Need to replace parts on your Weber Spirit E-310? Sears Parts Direct and Weber’s official website are excellent resources for finding genuine replacement components․ Utilize the exploded view diagrams – available online and in some manuals – to identify the correct part number․

Always ensure the grill is cool and the gas supply is disconnected before attempting any repairs․ Refer to the manual for specific instructions related to part replacement․

Finding Replacement Parts

Locating replacement parts for your Weber Spirit E-310 is straightforward․ Begin with the official Weber website, utilizing the model number for precise matches․ Alternatively, retailers like Sears Parts Direct offer a vast inventory and helpful diagrams․

When searching, having the part number from the exploded view is crucial․ Common replacements include burners, flavorizer bars, and the ignition module․ Ensure compatibility before purchasing!

Exploded View Diagrams

Exploded view diagrams are invaluable for Weber Spirit E-310 maintenance and repair․ These detailed illustrations showcase every component, their placement, and relationships within the grill․ Access these diagrams through Weber’s official website or parts retailers like Sears Parts Direct․

They are essential for identifying parts during replacement and understanding the assembly process․ Carefully studying the diagram before disassembly simplifies repairs significantly, ensuring correct reassembly․

Safety Precautions

Prioritize safety when using your Weber Spirit E-310․ Always adhere to gas safety guidelines, ensuring proper gas tank connection and leak checks․ Position the grill on a level, non-combustible surface with adequate ventilation, away from flammable materials․

Never leave a lit grill unattended․ Keep children and pets at a safe distance; Regularly inspect the gas hose for damage․ Follow all instructions in the manual to prevent hazards․

Gas Safety Guidelines

Gas safety is paramount with the Weber Spirit E-310․ Always check gas hose connections for leaks using soapy water before each use․ Ensure the gas tank is securely positioned and upright․ Never store a spare gas tank near the grill․

If you smell gas, immediately shut off the gas supply and do not attempt to light the grill․ Follow the manual’s emergency shutdown instructions․ Proper ventilation is crucial․

Grill Placement and Ventilation

Proper placement of your Weber Spirit E-310 is vital for safe operation․ Position the grill on a level, non-combustible surface, away from flammable materials like wood or vinyl siding․ Maintain a minimum clearance of 10 feet from walls and overhead obstructions․

Adequate ventilation is essential to prevent gas buildup․ Never operate the grill in an enclosed space․ Ensure open airflow around the grill during use, following the manual’s guidelines․

Warranty Information

Weber’s limited warranty covers defects in materials and workmanship on your Spirit E-310․ The warranty period varies by component, with the stainless steel burner system typically covered for 10 years․ Other parts have shorter coverage durations, detailed in the official warranty statement․

To validate your warranty, register your grill promptly after purchase through Weber’s website․ Keep your proof of purchase for any warranty claims․

Weber’s Limited Warranty Coverage

Weber’s limited warranty safeguards against defects in materials and workmanship of the Spirit E-310․ The stainless steel burners are covered for ten years, while paint and finish are covered for five․ Other components, like the cooking box and lid, have a two-year warranty․

This warranty doesn’t cover normal wear, misuse, or damage from accidents․ Retain your purchase receipt for all warranty claims, and review the full warranty details on Weber’s official website․

Registering Your Grill

Registering your Weber Spirit E-310 is crucial for warranty validation and receiving important product updates․ Visit Weber’s website and complete the online registration form, requiring your grill’s model and serial number, alongside your purchase details․

Registration ensures Weber can contact you regarding safety notices or potential recalls․ It also streamlines the warranty claim process should you encounter any issues․ Keep your proof of purchase readily available during registration․

Understanding the GBS System

The Weber Spirit E-310 features the versatile Gourmet BBQ System (GBS)․ This innovative system allows for quick and easy attachment of various cooking inserts directly onto the cooking grate․

Compatible accessories include a griddle for breakfast favorites, a wok for stir-fries, and a pizza stone for authentic results․ GBS expands your grilling capabilities beyond traditional methods, offering diverse culinary possibilities․ Explore the range of GBS inserts to personalize your grilling experience!

Griddle and Wok Compatibility

The Weber Spirit E-310’s GBS system seamlessly integrates with both griddles and woks․ The griddle transforms your grill into a breakfast station, perfect for pancakes and eggs, offering even heat distribution․

Similarly, the wok insert enables authentic stir-fry cooking, delivering smoky flavors․ Ensure a secure fit by properly aligning the insert with the GBS grate․ These accessories broaden your cooking repertoire, making the Spirit E-310 incredibly versatile!

Flavorizer Bars: Types and Usage

Weber Spirit E-310 grills utilize Flavorizer bars to vaporize drippings, infusing food with smoky flavor and protecting burners․ These bars come in porcelain-coated cast iron or stainless steel variations․

Proper placement is crucial; angled towards the burners, they catch drippings․ Regular cleaning prevents flare-ups and maintains optimal performance․ Replacing worn bars ensures continued flavorful grilling․ Understanding their function enhances your Spirit E-310 experience!

Ignition System Maintenance

Maintaining the Weber Spirit E-310’s ignition system ensures reliable start-ups․ Regularly inspect the igniter for wear or damage, and clean the collector cap to remove debris․ A weak spark indicates a need for battery replacement or igniter module servicing․

Ensure proper alignment and clear pathways for the spark․ Consistent maintenance prevents frustrating lighting issues and extends the lifespan of your grill’s ignition components, guaranteeing effortless grilling sessions․

Gas Tank Connection and Safety

Connecting the gas tank to your Weber Spirit E-310 requires careful attention to safety․ Always check the hose for cracks or wear before each use․ Ensure a tight connection, utilizing soap and water to detect leaks – bubbles indicate a problem․

Store gas tanks outdoors in a well-ventilated area, away from heat sources․ Never overfill the tank, and always close the valve when not in use․ Prioritize safety for enjoyable grilling!

Storing Your Weber Spirit E-310

Proper storage extends the life of your Weber Spirit E-310․ Before long-term storage, thoroughly clean the grill, including cooking grates and flavorizer bars․ Disconnect the propane tank and store it separately outdoors, following safety guidelines․

Cover the grill with a fitted Weber cover to protect it from the elements․ Store in a dry, sheltered location, preventing rust and damage․ Regular maintenance ensures grilling readiness!

Frequently Asked Questions (FAQ)

Q: Where can I find a Weber Spirit E-310 manual? A: Online resources like Sears Parts Direct and Weber’s official website offer downloadable manuals․ Q: What if my grill won’t light? A: Check the igniter, gas supply, and burner ports for obstructions․

Q: How do I identify replacement parts? A: Utilize exploded view diagrams available online or in the manual․ Remember to use exact model names for accurate searches!

gfta scoring manual

GFTA Scoring Manual: A Comprehensive Guide

This manual details GFTA-3 procedures, offering scoring instructions, normative data, and interpretation guidelines for articulation assessment, ensuring standardized results and accurate analysis.

The Goldman-Fristoe Test of Articulation-Third Edition (GFTA-3) is a widely utilized, individually administered, comprehensive articulation assessment tool. Designed for children and young adults, the GFTA-3 evaluates articulation skills by examining the consistent and accurate production of speech sounds. It’s a diagnostic tool employed by speech-language pathologists (SLPs) to identify articulation errors and assess the severity of speech sound disorders.

The test’s structure involves presenting stimuli – words and sentences – and recording the examinee’s responses. The GFTA-3 provides both qualitative and quantitative data, allowing for a detailed analysis of articulation patterns. A key feature is its standardized administration and scoring, ensuring reliability and comparability across individuals. The scoring process, detailed in the accompanying manual, yields valuable insights into a client’s articulation abilities, aiding in treatment planning and monitoring progress.

Purpose of the GFTA-3

The primary purpose of the Goldman-Fristoe Test of Articulation-Third Edition (GFTA-3) is to provide a comprehensive assessment of articulation skills in individuals of varying ages. Specifically, it aims to identify speech sound errors, determine the nature of articulation difficulties, and quantify the severity of any observed impairments. This detailed evaluation assists speech-language pathologists (SLPs) in differentiating between typical articulation variations and clinically significant speech sound disorders.

Furthermore, the GFTA-3 serves as a crucial tool for establishing a baseline of articulation skills, tracking progress during intervention, and making informed decisions regarding treatment planning. The standardized scoring system allows for comparison to normative data, providing valuable context for interpreting a client’s performance. Ultimately, the test’s purpose is to support effective diagnosis and intervention for individuals with articulation challenges.

Test Components

The GFTA-3 comprises two primary components designed to assess articulation skills across different speech contexts. The first, Sounds-in-Words, evaluates the production of single words containing various phonemes. This section provides a foundational understanding of a client’s articulation abilities at the sound level. The second component, Sounds-in-Sentences, assesses articulation within connected speech, examining how sounds are produced in more naturalistic conversational contexts.

Each component utilizes a distinct stimulus set and scoring methodology. Sounds-in-Words focuses on isolated sound production, while Sounds-in-Sentences considers the influence of coarticulation and phonetic environment. Together, these components offer a holistic evaluation of articulation skills, providing a comprehensive profile of a client’s strengths and weaknesses.

Sounds-in-Words

The Sounds-in-Words section of the GFTA-3 presents a series of single words to the examinee for repetition. These words are carefully selected to represent a wide range of phonemes and phonetic environments. Scoring focuses on the accurate production of each sound within the word, considering substitutions, omissions, and distortions. Specific scoring rules apply to consonant clusters and medial position phonemes, ensuring consistent and reliable assessment.

This component provides a detailed analysis of a child’s ability to articulate individual sounds in isolation. The examiner meticulously records any errors, noting the type of error and the specific phoneme affected. The raw score from Sounds-in-Words contributes significantly to the overall GFTA-3 profile, offering valuable insights into articulation patterns.

Sounds-in-Sentences

The Sounds-in-Sentences portion of the GFTA-3 assesses articulation within a functional context, requiring the examinee to repeat sentences containing target sounds. This section evaluates how well articulation skills generalize beyond single-word production. Scoring considers vowel and consonant distortions, as well as omissions and substitutions, providing a comprehensive view of articulation abilities.

Unlike Sounds-in-Words, this component examines articulation in more natural speech patterns. The examiner carefully analyzes each response, noting any deviations from accurate production. The raw score from Sounds-in-Sentences, combined with the Sounds-in-Words score, provides a holistic assessment of articulation skills, aiding in diagnostic and treatment planning.

GFTA-3 Administration Procedures

Administration requires a standardized approach, specific materials, and establishing rapport with the examinee to ensure reliable and valid results during the articulation assessment.

Standardized Administration

Maintaining strict adherence to standardized administration protocols is paramount for ensuring the reliability and validity of the GFTA-3 results. The examiner must present the stimulus items precisely as outlined in the manual, utilizing consistent intonation and pacing. Any deviation from these guidelines could potentially influence the examinee’s responses and compromise the accuracy of the assessment.

Specifically, the examiner should avoid providing cues, repetitions, or corrections during the testing session. Each word and sentence should be presented only once, and the examinee’s initial response should be recorded, even if it is an attempt or an approximation. The testing environment should be free from distractions, and the examiner should maintain a neutral and encouraging demeanor throughout the assessment process. Consistent application of these standardized procedures is crucial for obtaining meaningful and comparable data.

Materials Required

Successful administration of the GFTA-3 necessitates a specific set of materials to ensure a smooth and standardized testing process. Primarily, the examiner will require the GFTA-3 Stimulus Book, containing the words and sentences used for assessment. Additionally, the GFTA-3 Record Forms are essential for accurately documenting the examinee’s responses and calculating scores.

A pencil or pen is needed for marking the record forms, and a quiet, well-lit testing environment is crucial to minimize distractions. While not explicitly required, a timer can be helpful for monitoring the duration of the assessment. Familiarity with the scoring manual is also vital, as it provides detailed instructions for interpreting the results. Having all these materials readily available before commencing the assessment will contribute to efficient and reliable data collection.

Establishing Rapport with the Examinee

Prior to initiating the GFTA-3 assessment, establishing a comfortable and cooperative atmosphere with the examinee is paramount. Begin by introducing yourself and explaining the purpose of the test in age-appropriate language, emphasizing that it’s not a pass or fail situation. A friendly demeanor and genuine interest in the child can significantly reduce anxiety and encourage participation.

Engage in brief, casual conversation to build trust and observe the child’s spontaneous speech. Using positive reinforcement and praise throughout the assessment is crucial. Maintain eye contact and a relaxed posture to convey acceptance and encouragement. Adapting your approach based on the child’s personality and developmental level will maximize their engagement and yield more accurate results. A positive rapport fosters a more natural and representative speech sample.

Scoring Procedures: Sounds-in-Words

Accurate scoring relies on detailed guidelines; phonemes in clusters and medial positions require specific attention, ensuring consistent and reliable articulation assessment results.

Phoneme-Specific Scoring Rules

The Goldman-Fristoe Test of Articulation-3 (GFTA-3) employs precise phoneme-specific scoring rules to ensure standardized and reliable articulation assessment. Each phoneme is evaluated based on its production in initial, medial, and final positions within words. The scoring manual provides detailed criteria for determining correct, incorrect, and inconsistent productions.

Substitutions are recorded when a phoneme is replaced by another, while omissions indicate the complete absence of a required sound. Distortions, representing altered but recognizable productions, are also carefully noted. The manual emphasizes consistent application of these rules, acknowledging that slight variations in articulation can significantly impact overall scores. Careful attention to phonetic transcription and auditory discrimination is crucial for accurate scoring. The GFTA-3 manual offers examples and clarifications to assist clinicians in navigating these nuanced scoring decisions, ultimately contributing to a comprehensive understanding of the examinee’s articulation skills.

Consonant Clusters Scoring

Scoring consonant clusters within the GFTA-3 requires specific attention, as errors can occur at multiple levels. The scoring manual dictates that each component sound within a cluster must be considered individually. If even one sound within the cluster is produced incorrectly, the entire cluster is marked as incorrect. This rigorous approach ensures a comprehensive evaluation of the child’s ability to sequence and coordinate multiple sounds.

For instance, in the cluster “str,” an error on the /s/, /t/, or /r/ sound results in a scored error. The manual provides guidance on differentiating between substitution, omission, and distortion errors within clusters. Clinicians must carefully analyze each sound’s production, noting any deviations from the target. Consistent application of these rules is vital for accurate interpretation of results and effective intervention planning, reflecting the complexity of consonant cluster production.

Medial Position Phoneme Scoring

The GFTA-3 scoring manual emphasizes distinct guidelines for phonemes occurring in the medial (middle) position of words. Errors in medial positions are scored similarly to initial and final positions – substitutions, omissions, and distortions are all recorded. However, clinicians must be particularly attentive to vowel context, as vowel variations can influence articulation. The manual stresses consistent application of scoring criteria regardless of the surrounding vowels.

Accurate identification of medial phoneme errors is crucial for a comprehensive articulation profile. The manual provides examples illustrating correct and incorrect responses in medial positions. It highlights the importance of differentiating between a true articulation error and a contextual variation. Following these guidelines ensures standardized scoring and reliable results, contributing to a more accurate assessment of the examinee’s speech sound production skills.

Diphthong Scoring Considerations

The GFTA-3 scoring manual provides specific guidance for evaluating diphthongs, acknowledging their complex nature. Diphthongs, or gliding vowels, require careful consideration as errors can manifest as substitutions, distortions, or omissions of either vowel component. Scoring focuses on the overall accuracy of the glide, rather than strict adherence to a perfect production of each vowel element.

Clinicians should note that simplification of diphthongs (e.g., /aɪ/ becoming /a/) is a common developmental pattern and should be scored accordingly. The manual emphasizes consistent application of scoring rules, differentiating between developmental simplification and true articulation errors. Detailed examples illustrate acceptable and unacceptable diphthong productions, ensuring standardized assessment and reliable interpretation of results. Accurate diphthong scoring is vital for a comprehensive articulation profile.

Scoring Procedures: Sounds-in-Sentences

This section details evaluating articulation in connected speech, focusing on vowel and consonant distortions, omissions, and substitutions, using established GFTA-3 guidelines.

Scoring Vowel Distortions

Vowel distortion scoring within the GFTA-3 requires careful consideration, as distortions represent articulatory deviations that don’t fully meet the criteria for a substitution. A distortion involves an inaccurate production, but the listener can still identify the intended vowel sound.

Scoring is based on the degree of perceptibility and impact on intelligibility. Mild distortions might receive a partial credit, while more significant distortions impacting comprehension would be scored more severely. The examiner must consistently apply the established criteria outlined in the scoring manual.

It’s crucial to differentiate between a true vowel substitution (producing a different vowel sound entirely) and a distortion (a misarticulation of the target vowel). The GFTA-3 manual provides specific examples and auditory discrimination exercises to aid in accurate identification and consistent scoring of vowel distortions, ensuring reliable results.

Scoring Consonant Distortions

Consonant distortion scoring in the GFTA-3 demands meticulous attention to detail, as distortions differ from substitutions. A distortion signifies an inaccurate articulation, yet the listener can still recognize the intended consonant sound, albeit imperfectly. The scoring hinges on the degree of deviation and its effect on speech clarity.

The manual emphasizes differentiating between distortions and substitutions – where a completely different sound replaces the target. Mild distortions may warrant partial credit, while severe distortions hindering comprehension receive heavier weighting. Consistent application of the scoring guidelines is paramount.

Examiners should utilize the provided auditory examples within the GFTA-3 manual to refine their perceptual skills and ensure reliable, standardized scoring of consonant distortions. This careful approach guarantees accurate assessment of articulation skills and supports informed clinical decision-making.

Scoring Omissions and Substitutions

The GFTA-3 scoring manual provides specific guidance for handling omissions and substitutions, crucial elements in articulation assessment. An omission occurs when a required sound is entirely absent from the response, while a substitution involves replacing the target sound with a different one.

Scoring differentiates between these errors; omissions generally receive a score of zero for that phoneme, indicating a complete lack of production. Substitutions, however, are scored based on the substituted sound’s pattern and intelligibility. The manual stresses consistent application of these rules.

Accurate identification of omissions versus substitutions is vital for a reliable articulation profile. Clinicians must carefully listen and analyze each response, referencing the manual’s examples to ensure standardized scoring. This meticulous approach yields a precise representation of the examinee’s articulation abilities.

Interpreting GFTA-3 Scores

GFTA-3 interpretation utilizes raw scores, standard scores (mean of 100, SD of 15), percentile ranks, and age equivalents to determine articulation proficiency.

Raw Scores and Standard Scores

Raw scores on the GFTA-3 represent the total number of correctly articulated sounds, directly reflecting the examinee’s performance on both the Sounds-in-Words and Sounds-in-Sentences sections. These scores, however, are not directly comparable across different ages due to developmental variations in speech sound acquisition. Therefore, conversion to standard scores is crucial for meaningful interpretation.

Standard scores are derived from the raw scores using normative data, allowing for comparison to a standardized population. The GFTA-3 employs a mean standard score of 100, with a standard deviation of 15. This distribution enables clinicians to determine how an individual’s articulation skills deviate from the average, providing a statistically sound basis for assessment and intervention planning. Tables within the scoring manual facilitate this conversion, categorized by age and gender, ensuring accurate score representation.

Percentile Ranks and Age Equivalents

Percentile ranks provide a clear understanding of an examinee’s performance relative to their peers. A percentile rank indicates the percentage of individuals in the normative sample who scored at or below the examinee’s score. For example, a percentile rank of 50 means the examinee performed the same as or better than 50% of the comparison group. This offers a readily understandable measure of articulation skill level.

Age equivalents, while often used, should be interpreted cautiously. They indicate the age at which the average child would achieve the same raw score. However, children develop at different rates, and an age equivalent doesn’t necessarily mean the child should be performing at that chronological age. The GFTA-3 scoring manual provides tables correlating raw, standard scores, percentile ranks, and age equivalents, aiding in comprehensive score interpretation and clinical decision-making.

Severity Levels of Articulation Difficulties

The GFTA-3 scoring manual categorizes articulation difficulties based on standard scores, providing a framework for understanding the clinical significance of a child’s performance. A Mild Articulation Impairment is indicated by standard scores ranging from 85 to 115, often requiring minimal intervention or monitoring.

Moderate Articulation Impairment, with scores between 69 and 84, suggests noticeable difficulties impacting intelligibility and potentially benefiting from targeted speech therapy. Scores Below 69 signify a Severe Articulation Impairment, indicating substantial challenges in speech production that likely require intensive intervention to improve communication skills. These severity levels guide treatment planning and help establish realistic expectations for progress.

Mild Articulation Impairment (85-115)

A GFTA-3 standard score between 85 and 115 indicates a Mild Articulation Impairment. Children within this range typically exhibit few noticeable speech errors, and their articulation generally doesn’t significantly impede communication or academic performance. Errors, when present, are often inconsistent and may involve less frequently occurring sounds.

Intervention at this level may not always be necessary, but monitoring speech development is recommended. Some clinicians suggest focused therapy targeting specific, persistent errors to prevent potential future difficulties. Parents should be educated on typical speech sound development and encouraged to provide a supportive language environment. Overall, this level suggests minimal clinical concern.

Moderate Articulation Impairment (69-84)

A GFTA-3 standard score falling between 69 and 84 signifies a Moderate Articulation Impairment. Children in this range demonstrate noticeable speech errors that may occasionally interfere with communication clarity, particularly for unfamiliar listeners. Multiple sound errors are typically present, and these errors are often consistent, impacting several phonetic environments.

Therapy is generally recommended for this level of impairment, focusing on correcting error patterns and improving overall intelligibility. Intervention should be structured and address both sound production and phonological awareness. Regular progress monitoring is crucial to ensure treatment effectiveness. Educational support may also be beneficial to address any potential academic impacts related to speech difficulties.

Severe Articulation Impairment (Below 69)

A GFTA-3 standard score below 69 indicates a Severe Articulation Impairment, representing substantial difficulties with speech production. These children exhibit numerous and consistent speech errors that significantly impede intelligibility, even for familiar listeners. Communication breakdowns are frequent, potentially impacting social-emotional development and academic performance.

Intensive and long-term speech therapy is typically required, addressing multiple sound errors and underlying phonological processes. A comprehensive evaluation is essential to identify the specific nature of the impairment and tailor intervention accordingly. Collaboration with educators and other professionals is crucial to provide holistic support. Early intervention is paramount to maximize the child’s communicative potential and prevent further developmental delays.

Normative Data and Standardization

GFTA-3 standardization involved a large, diverse sample, providing age- and gender-specific norms; the mean standard score is 100, with a standard deviation of 15.

Age Ranges and Sample Size

The GFTA-3 normative sample encompassed a broad age range, specifically children from 2 years 6 months to 12 years 11 months, ensuring comprehensive representation across developmental stages. This extensive age span allows for accurate comparisons and reliable interpretations of articulation skills as they emerge and refine over time.

The standardization process involved a substantial sample size of 1,440 children, carefully selected to reflect the demographic characteristics of the United States population. This large sample size is crucial for establishing robust normative data, minimizing the impact of sampling error, and enhancing the generalizability of the test results.

Within this overall sample, there was a balanced representation of males and females, as well as diverse ethnic and socioeconomic backgrounds, further strengthening the validity and reliability of the GFTA-3 norms. The careful attention to sample composition ensures that the test is fair and equitable for all children, regardless of their background.

Gender Differences in Scoring

The GFTA-3 acknowledges potential gender-related variations in articulation development and incorporates these considerations into its scoring procedures. Standard scores are provided separately for males and females within specific age groups, allowing for more nuanced and accurate interpretations of a child’s performance.

Analysis of the normative data revealed subtle, yet statistically significant, differences in articulation patterns between boys and girls. Generally, males tend to exhibit slightly lower articulation scores compared to females, particularly in certain sound categories. However, these differences are typically small and do not necessarily indicate a clinical impairment.

Clinicians should utilize the gender-specific norms when interpreting GFTA-3 results to avoid misinterpreting typical gender variations as articulation deficits. The manual provides detailed tables displaying standard scores, confidence intervals, and percentile ranks for both males and females, facilitating individualized assessment and informed decision-making.

Standard Deviation and Confidence Intervals

The GFTA-3 utilizes a standard deviation of 15 to quantify the variability of scores around the mean of 100. This statistical measure is crucial for determining the reliability and significance of individual test results. Confidence intervals, presented alongside standard scores, provide a range within which the true population score is likely to fall.

These intervals offer clinicians a more comprehensive understanding of a child’s performance, accounting for the inherent error associated with any assessment. Narrower confidence intervals indicate greater precision in the score, while wider intervals suggest more variability.

The scoring manual includes extensive tables detailing standard scores, confidence intervals, and percentile ranks, categorized by age and gender. Utilizing these statistical tools allows for a more informed and defensible interpretation of GFTA-3 results, supporting accurate diagnosis and treatment planning.

keys from the golden vault pdf

Keys from the Golden Vault: A Comprehensive Overview

Keys from the Golden Vault is a highly acclaimed Dungeons & Dragons 5e adventure readily available as a PDF download from various sources, including Boosty.

Numerous online platforms offer access to this popular heist-focused campaign, with translations and supplemental materials also frequently shared in PDF format.

What is Keys from the Golden Vault?

Keys from the Golden Vault is a sprawling, critically-acclaimed Dungeons & Dragons 5th Edition adventure meticulously designed around the thrilling premise of elaborate heists. Unlike traditional dungeon crawls, this campaign places players in the roles of master thieves, tasked with planning and executing daring robberies within the intricate city of Porthaven.

The adventure is widely available as a comprehensive PDF document, easily downloadable from various online sources. These PDF versions often include all necessary maps, handouts, and character information for a seamless gaming experience. The digital format allows Dungeon Masters (DMs) and players alike to readily access and utilize the campaign’s extensive content.

It’s a modular adventure, meaning DMs can tailor the experience to their group’s preferences, focusing on specific heists or weaving them together into a larger narrative. The PDF’s accessibility has fostered a vibrant community around the game, with fan-made translations and resources readily shared online.

The Core Concept: Heist-Based D&D

Keys from the Golden Vault fundamentally shifts the focus of a traditional D&D campaign, prioritizing intricate planning and skillful execution over brute force combat. The core gameplay loop revolves around meticulously researching targets, assembling a crew with specialized skills, and devising elaborate strategies to overcome security measures.

The adventure, readily available as a PDF, emphasizes player agency and creative problem-solving; Unlike quests with predetermined solutions, heists within Keys from the Golden Vault offer multiple approaches, rewarding ingenuity and adaptability. The PDF format facilitates easy reference to detailed information about locations, NPCs, and potential obstacles.

Success isn’t solely determined by dice rolls; clever roleplaying, social manipulation, and exploiting vulnerabilities are equally crucial. The downloadable PDF provides DMs with the tools to manage complex scenarios and react dynamically to player choices, fostering a truly immersive and engaging heist experience.

The Setting: The City of Porthaven

Keys from the Golden Vault unfolds within the richly detailed city of Porthaven, a bustling metropolis steeped in intrigue and opportunity. This coastal city, fully described within the adventure’s PDF, serves as a central hub for trade, crime, and political maneuvering. Porthaven isn’t merely a backdrop; it’s an integral character in itself, influencing every heist and interaction.

The PDF provides a comprehensive overview of Porthaven’s districts, landmarks, and notable locations, each brimming with potential targets and complications. From opulent noble estates to shadowy underworld dens, the city offers a diverse range of environments for players to explore and exploit.

Understanding Porthaven’s unique culture and power dynamics, detailed in the downloadable PDF, is crucial for successful heists. Players must navigate complex social hierarchies and forge alliances (or rivalries) with influential figures to achieve their goals. The city’s vibrant atmosphere and intricate web of connections create a truly immersive experience.

Porthaven’s Factions and Power Dynamics

The PDF for Keys from the Golden Vault meticulously details Porthaven’s intricate network of factions, each vying for control and influence within the city. These groups – from the Merchant Guilds to the criminal Syndicate known as the “Veiled Hand” – are not static entities; their relationships are constantly shifting, creating opportunities for players to exploit.

The adventure’s PDF emphasizes that understanding these power dynamics is paramount to success. Players can choose to align with a faction, manipulate them for their own gain, or even play them against each other. Each faction possesses unique resources, contacts, and agendas, all thoroughly outlined in the downloadable material.

The PDF also highlights the influence of the city’s nobility and the Watch, Porthaven’s law enforcement. Navigating these complex relationships, and potentially circumventing their authority, is a core element of the heist-based gameplay.

Key Features of the Adventure

The Keys from the Golden Vault PDF distinguishes itself through a focus on intricate heist planning and execution, moving beyond traditional dungeon crawls. The downloadable content provides detailed tools for players to meticulously plan their operations, including floorplans, NPC schedules, and security measures.

A significant feature, detailed within the PDF, is the emphasis on player agency. The adventure doesn’t dictate a single path to success; instead, it presents a dynamic environment where creativity and improvisation are rewarded. The PDF supports multiple approaches to each heist.

Furthermore, the PDF includes robust support for both experienced and novice Dungeon Masters, offering guidance on adapting challenges and managing the complex interplay of factions. It’s a comprehensive resource for running a thrilling, player-driven campaign.

Modular Design and Replayability

The Keys from the Golden Vault PDF excels in its modular design, allowing Dungeon Masters to seamlessly integrate individual heists into existing campaigns or run them as standalone adventures. This flexibility, clearly outlined in the PDF, significantly boosts replayability.

Each heist within the PDF is structured as a self-contained module, with varying objectives, challenges, and potential rewards. The PDF’s content enables DMs to remix and reconfigure elements, creating unique experiences for different player groups.

Moreover, the adventure’s open-ended nature, detailed in the PDF, encourages multiple solutions to each problem. Player choices drastically alter outcomes, ensuring that no two playthroughs are identical. The downloadable PDF truly fosters a dynamic and replayable campaign.

Downloading the PDF Version

Acquiring the Keys from the Golden Vault PDF is readily achievable through several online avenues. Numerous sources host the complete adventure in PDF format, catering to diverse preferences and accessibility needs. Many users report successful downloads from platforms like Boosty, where the translated versions are often available as PDF files.

Direct links to the PDF are frequently shared within D&D communities and forums. Be cautious when downloading, ensuring the source is reputable to avoid potentially harmful files. The original PDF, and its translations, are substantial in size, so a stable internet connection is recommended.

Several websites offer the PDF for free, while others may require a small contribution. Always respect copyright and support the creators when possible. The PDF format ensures compatibility across various devices.

Official and Unofficial Sources for Download

While an officially licensed, direct-from-publisher PDF isn’t currently available, the Keys from the Golden Vault PDF circulates widely through community-driven efforts. Unofficial sources, like dedicated fan translation groups and file-sharing platforms, are the primary means of access.

Boosty has emerged as a central hub, hosting numerous translated versions of the PDF, often supported by donations to the translators. Websites like AnyFlip also archive versions, though verifying their completeness is crucial. Caution is advised when downloading from unfamiliar sites; always scan files for viruses.

D&D-related forums and Reddit communities frequently share links to the PDF, but these can be ephemeral. Remember that downloading from unofficial sources carries inherent risks, and supporting creators is always encouraged when possible.

The Adventure’s Structure: Three Acts

Keys from the Golden Vault, as presented in the widely available PDF, is meticulously structured around a three-act heist framework, providing a compelling narrative arc for players. Act I focuses intensely on meticulous planning, requiring players to gather intelligence, recruit a crew, and devise a detailed infiltration strategy.

Act II plunges the party into the heart of the operation – the infiltration itself. This stage emphasizes stealth, problem-solving, and adapting to unforeseen circumstances within the heavily guarded vaults of Porthaven. The PDF details numerous challenges and potential complications.

Finally, Act III covers the thrilling escape and the aftermath of the heist. Success isn’t simply about acquiring the loot; it’s about evading capture and navigating the complex consequences of their actions, as outlined within the PDF’s concluding sections.

Act I: Planning the Heist

Act I, detailed extensively within the Keys from the Golden Vault PDF, is the foundational stage where players meticulously prepare for their audacious undertaking. This phase emphasizes investigation and reconnaissance, tasking the party with gathering crucial intelligence about the target vault and its security measures.

The PDF provides tools for players to identify potential crew members, each possessing unique skills and backgrounds vital to the heist’s success. Negotiation and recruitment become key elements, influencing the team’s capabilities. Players must also secure necessary resources – tools, disguises, and transportation – all detailed within the adventure.

Crucially, Act I culminates in the creation of a comprehensive heist plan, outlining every step of the infiltration and extraction. The PDF encourages dynamic planning, anticipating potential obstacles and formulating contingency strategies.

Act II: The Infiltration

Act II, thoroughly documented in the Keys from the Golden Vault PDF, plunges players into the heart of the operation – breaching the security of the target location. This stage demands skillful execution of the meticulously crafted plan from Act I, adapting to unforeseen circumstances as they arise.

The PDF presents a dynamic environment filled with intricate security systems, vigilant guards, and hidden traps. Players must leverage their characters’ skills – stealth, deception, and combat – to navigate these challenges. Success hinges on teamwork and creative problem-solving, as detailed scenarios unfold.

The adventure’s modular design, highlighted in the PDF, allows for varied approaches to infiltration, ensuring replayability. Players might choose a subtle, stealthy route or a more direct, forceful entry, each with unique risks and rewards.

Act III: The Escape and Aftermath

As detailed within the Keys from the Golden Vault PDF, Act III focuses on the thrilling escape following a successful (or perhaps compromised) heist. This phase tests the players’ resourcefulness and quick thinking under immense pressure, as alarms blare and pursuit intensifies.

The PDF outlines multiple escape routes, each presenting unique obstacles and challenges. Players must utilize their acquired loot and skills to evade capture, potentially engaging in desperate chases or cunning diversions. Contingency plans developed in Act I become crucial here.

Beyond the immediate escape, the PDF explores the aftermath of the heist, detailing the consequences of their actions. This includes dealing with rival factions, managing their newfound wealth, and facing potential legal repercussions. The adventure concludes with a satisfying resolution, shaped by the players’ choices.

Notable NPCs in Keys from the Golden Vault

The Keys from the Golden Vault PDF introduces a vibrant cast of Non-Player Characters (NPCs), each with their own motivations and secrets. These characters are integral to the heist’s planning and execution, offering assistance, posing obstacles, or even betraying the party.

Key figures detailed in the PDF include Lysandra, a cunning information broker; Silas Blackwood, a wealthy but eccentric collector; and Captain Valeria, a ruthless harbor master. Their detailed profiles, found within the PDF, provide DMs with ample material for roleplaying and improvisation.

The PDF emphasizes the importance of player interaction with these NPCs, as building relationships (or rivalries) can significantly impact the heist’s outcome. Understanding their personalities and agendas, as outlined in the document, is crucial for success.

Running the Adventure as a Dungeon Master

The Keys from the Golden Vault PDF provides Dungeon Masters (DMs) with a wealth of tools for a successful campaign. The document stresses flexibility, encouraging DMs to adapt the adventure to their players’ styles and preferences. The PDF’s modular design allows for easy customization of encounters and challenges.

Effective DMing, as guided by the PDF, involves emphasizing player agency and rewarding creative problem-solving. The PDF details numerous contingency plans for unexpected player actions, ensuring a dynamic and engaging experience. Mastering the factions and their interactions, detailed within the PDF, is also key.

The PDF suggests focusing on atmosphere and tension, utilizing descriptions and sound effects to immerse players in the city of Porthaven. Careful preparation using the PDF’s resources will lead to a memorable heist adventure.

Adapting the Adventure for Different Player Levels

The Keys from the Golden Vault PDF is designed with scalability in mind, allowing DMs to adjust the challenge for various player levels. The PDF suggests modifying enemy statistics and encounter complexity to suit the party’s power. Lower-level parties might benefit from simplified heist plans and fewer adversaries, as detailed in the PDF.

For higher-level groups, the PDF recommends introducing additional security measures, more skilled guards, and intricate traps. The PDF also encourages DMs to expand upon the existing factions and introduce new complications. Customizing the rewards to match the party’s level is also crucial, as outlined in the PDF.

Ultimately, the Keys from the Golden Vault PDF empowers DMs to tailor the experience, ensuring a thrilling and appropriately challenging heist for any adventuring party.

Community Resources and Translations

A vibrant community has sprung up around Keys from the Golden Vault, with numerous resources available alongside the core PDF. Fans actively share battle maps, custom handouts, and expanded lore online. Several unofficial PDF supplements enhance the gameplay experience, offering additional heist opportunities and character options.

Crucially, the adventure has been translated into multiple languages, making it accessible to a wider audience. Platforms like Boosty host many of these translated PDF versions, often supported by community donations. These translations ensure players worldwide can enjoy the intricate heists within Keys from the Golden Vault.

Dedicated online forums and Discord servers serve as hubs for discussion, sharing of homebrew content, and assistance with the PDF and its implementation.

Boosty and Other Translation Platforms

Boosty has become a central hub for accessing translated versions of Keys from the Golden Vault PDF. Many dedicated translators utilize the platform to distribute their work, often offering the PDF in exchange for support through Boosty’s donation system. This allows for continued translation efforts and community-driven content creation.

Beyond Boosty, other platforms also host translated PDFs, though their reliability can vary. Online forums and dedicated Discord servers frequently share links to these resources. It’s important to exercise caution when downloading from unofficial sources and verify the file’s integrity.

These platforms demonstrate the community’s commitment to making Keys from the Golden Vault accessible to a global audience, providing translated PDF versions for diverse language speakers.

Common Issues and Solutions When Downloading the PDF

Downloading the Keys from the Golden Vault PDF can sometimes present challenges. A frequent issue is encountering broken download links, particularly on less official websites. Always prioritize reputable sources like Boosty or verified community hubs to minimize this risk.

Another common problem is file corruption during download; Ensure a stable internet connection and consider using a download manager to resume interrupted downloads. If the PDF opens with errors, try a different PDF reader like Adobe Acrobat or Foxit Reader.

Occasionally, the PDF may be password-protected. Check the source for any provided passwords or instructions. Remember to scan downloaded files with antivirus software before opening them to safeguard against potential malware.

Comparison to Other D&D 5e Heist Adventures

Compared to other D&D 5e heist adventures, Keys from the Golden Vault PDF distinguishes itself through its intricate, modular design and focus on player agency. Unlike more linear adventures, it provides a robust toolkit for crafting unique heists, emphasizing planning and improvisation.

While adventures like Waterdeep: Dragon Heist offer pre-defined storylines, Keys from the Golden Vault empowers DMs to build heists from the ground up, utilizing detailed location descriptions and NPC motivations. It’s less about following a script and more about reacting to player choices.

The depth of the setting, Porthaven, and the sheer volume of content within the PDF also set it apart, offering a richer and more replayable experience than many comparable modules.

why is evolution true pdf

Evolution‚ a cornerstone of modern biology‚ is supported by diverse evidence—anatomy‚ molecular data‚ fossils‚ and observed changes.

Understanding evolution clarifies life’s interconnectedness and provides a framework for studying biology‚ ecology‚ and even medicine.

Resources like PDF documents detail the historical record and ongoing research confirming the reality of evolutionary processes.

What is Evolution?

Evolution‚ at its core‚ represents the change in the heritable characteristics of biological populations over successive generations. It isn’t a linear progression towards “perfection‚” but rather a branching process driven by mechanisms like natural selection‚ genetic drift‚ mutation‚ and gene flow.

The evidence supporting this isn’t a single ‘smoking gun’ but a convergence of observations from numerous fields. Fossil records demonstrate a historical sequence of life forms‚ while anatomical similarities reveal common ancestry. Molecular biology‚ particularly DNA comparisons‚ showcases the genetic relationships between species.

Numerous PDF resources detail these lines of evidence‚ illustrating how populations adapt to their environments‚ leading to the diversity of life we observe. Understanding evolution is crucial for comprehending the interconnectedness of all living things and the processes shaping our world.

Why is Understanding Evolution Important?

Grasping evolutionary principles is fundamental to numerous scientific disciplines‚ extending far beyond biology. In medicine‚ it informs our understanding of antibiotic resistance in bacteria and the evolution of viruses‚ crucial for developing effective treatments.

Agriculture benefits from evolutionary insights‚ enabling the breeding of crops and livestock with desirable traits. Conservation biology relies on evolutionary history to prioritize species for protection and manage biodiversity effectively.

Accessible PDF documents and online resources demonstrate how evolution explains the interrelationship among organisms. Ignoring evolution hinders our ability to address critical challenges facing humanity‚ from emerging diseases to environmental change. It’s not just a historical theory; it’s a vital tool for navigating the present and future.

Fossil Evidence: A Historical Record

Fossils provide a tangible sequence of life’s history‚ documenting transitions and confirming evolutionary relationships‚ as detailed in numerous PDF reports.

Transitional Fossils: Bridging the Gaps

Transitional fossils represent crucial evidence supporting evolution‚ showcasing intermediate forms between ancestral groups and their descendants. These fossils exhibit characteristics of both groups‚ effectively “bridging the gaps” in the evolutionary record. For example‚ Archaeopteryx displays reptilian features like teeth and a bony tail alongside avian traits like feathers‚ illustrating a link between reptiles and birds.

The discovery and analysis of such fossils‚ often detailed in accessible PDF resources‚ demonstrate that evolution isn’t a series of abrupt changes‚ but a gradual process of modification over time. They challenge the notion of “missing links” by providing concrete examples of evolutionary transitions. Studying these fossils allows scientists to reconstruct evolutionary pathways and understand the mechanisms driving species diversification‚ solidifying the evidence for evolutionary theory.

Fossil Dating Methods: Establishing a Timeline

Establishing a reliable timeline is fundamental to understanding evolution‚ and scientists employ various fossil dating methods. Radiometric dating‚ utilizing the decay of radioactive isotopes‚ provides absolute ages for fossils‚ often detailed in comprehensive PDF reports. Relative dating‚ comparing fossil positions within rock layers (stratigraphy)‚ establishes a sequence of events without pinpointing exact ages.

These methods‚ combined with paleomagnetic dating and other techniques‚ allow researchers to construct a chronological framework for life’s history. This timeline demonstrates a clear progression of life forms‚ aligning with evolutionary predictions. The consistency of dates obtained through multiple independent methods strengthens the evidence for evolution‚ confirming the age of fossils and the gradual changes observed over millions of years.

Anatomical Evidence: Similarities in Structure

Comparative anatomy reveals striking structural similarities among diverse organisms‚ indicating common ancestry—detailed in accessible PDF resources.

Homologous structures‚ vestigial organs‚ and analogous features all support the theory of evolution through modification.

Homologous Structures: Common Ancestry

Homologous structures represent compelling evidence for evolution‚ showcasing anatomical similarities in different organisms despite potentially varying functions. These structures point towards a shared common ancestor‚ where the basic skeletal framework was present and subsequently modified over time through natural selection to suit diverse lifestyles.

A classic example is the pentadactyl limb – the five-fingered structure found in the limbs of humans‚ bats‚ whales‚ and birds. While a human hand is used for grasping‚ a bat’s wing for flying‚ and a whale’s flipper for swimming‚ the underlying bone structure remains remarkably consistent. This isn’t due to chance; it’s a testament to their shared evolutionary heritage.

Detailed illustrations and explanations of homologous structures are readily available in educational PDF documents and online resources‚ further solidifying the concept of common ancestry and the power of evolutionary processes. Studying these structures provides a tangible link to the past‚ revealing the interconnectedness of life on Earth.

Analogous Structures: Convergent Evolution

Analogous structures demonstrate a fascinating phenomenon called convergent evolution‚ where organisms not closely related independently evolve similar traits as adaptations to similar environments or ecological niches. Unlike homologous structures‚ analogous structures don’t share a common ancestral origin; their similarities arise from functional necessity.

The wings of insects and birds provide a prime example. Both structures enable flight‚ but their underlying anatomy is vastly different. Insect wings are extensions of the exoskeleton‚ while bird wings are modified vertebrate limbs. This parallel development highlights how natural selection can arrive at similar solutions to similar challenges.

Exploring analogous structures in detail‚ often illustrated in educational PDFs‚ reveals the power of environmental pressures in shaping evolution. These examples underscore that evolution isn’t always a linear progression from a common ancestor‚ but can also involve independent innovation.

Vestigial Structures: Remnants of the Past

Vestigial structures are remnants of organs or features that served a function in an ancestor but are now reduced and non-functional‚ or have a significantly altered function‚ in the current organism. These structures provide compelling evidence for evolution‚ demonstrating how organisms retain traces of their evolutionary history.

Classic examples include the human appendix‚ the pelvic bones in whales‚ and the wings of flightless birds. These features offer no present-day advantage‚ yet their presence suggests a functional role in ancestral species. Detailed analyses‚ often found in comprehensive PDF resources‚ illustrate these evolutionary leftovers.

The persistence of vestigial structures isn’t due to a flawed design‚ but rather to the fact that evolution doesn’t create organisms from scratch; it modifies existing ones. They are historical artifacts‚ showcasing the gradual changes accumulated over generations.

Molecular Biology: The Genetic Code

DNA similarities across species‚ detailed in numerous PDF studies‚ reveal shared ancestry; protein comparisons further illuminate evolutionary relationships and confirm common origins.

DNA Similarities: Universal Genetic Language

The remarkable consistency of the genetic code across all life forms provides compelling evidence for a shared evolutionary history. Detailed within accessible PDF resources‚ the universality of DNA – the same four nucleotide bases (Adenine‚ Thymine‚ Guanine‚ Cytosine) – strongly suggests a single origin of life.

Comparative genomics reveals that the degree of DNA similarity correlates with the evolutionary relatedness of organisms. For instance‚ humans share approximately 98% of their DNA with chimpanzees‚ indicating a recent common ancestor. Even seemingly distant organisms exhibit fundamental genetic similarities‚ highlighting deep evolutionary connections.

These genetic parallels aren’t random; they reflect conserved genes essential for life‚ inherited from a common ancestor and modified over vast timescales. Analyzing these genetic fingerprints‚ as documented in numerous scientific publications and downloadable PDF reports‚ allows scientists to reconstruct the tree of life and trace evolutionary pathways.

Protein Comparisons: Evolutionary Relationships

Proteins‚ the workhorses of cells‚ offer another powerful line of evidence supporting evolution‚ extensively detailed in available PDF studies. The amino acid sequences that comprise proteins are determined by DNA‚ and similarities in these sequences reflect evolutionary relationships. Organisms sharing a more recent common ancestor will exhibit greater protein sequence similarity.

Cytochrome c‚ a protein crucial for cellular respiration‚ is a classic example. Its amino acid sequence is remarkably conserved across diverse species‚ from humans to yeast. Differences in the sequence accumulate over time due to mutations‚ providing a molecular clock to estimate divergence times.

Detailed analyses‚ often found in comprehensive PDF reports‚ demonstrate that the patterns of protein differences align with other lines of evidence‚ such as fossil records and anatomical comparisons‚ reinforcing the validity of evolutionary theory. These comparisons provide a robust and independent confirmation of evolutionary history.

Biogeography: The Distribution of Life

The geographical distribution of species‚ explored in detailed PDF analyses‚ reveals patterns consistent with evolutionary history and continental drift.

Isolated regions harbor unique species‚ demonstrating how populations diverge over time‚ supporting evolutionary processes.

Geographical Isolation and Speciation

Geographical isolation‚ a crucial driver of speciation‚ occurs when populations are physically separated by barriers like mountains‚ water bodies‚ or deserts.

This separation prevents gene flow‚ allowing distinct evolutionary paths to emerge within each isolated population. Over generations‚ these populations accumulate genetic differences through mutation‚ natural selection‚ and genetic drift.

Detailed studies‚ often available in PDF format‚ showcase examples like Darwin’s finches on the Galapagos Islands‚ where isolated populations developed unique beak shapes adapted to different food sources.

Eventually‚ these accumulated differences can become so significant that the populations can no longer interbreed‚ even if the barrier is removed‚ thus defining them as separate species. This process‚ documented extensively‚ provides compelling evidence for evolution.

Understanding these mechanisms‚ readily accessible through scientific literature‚ reinforces the validity of evolutionary theory.

Endemic Species: Unique to Specific Locations

Endemic species‚ found exclusively in a particular geographic area‚ powerfully illustrate evolutionary processes and biogeographical history.

Their restricted distribution often results from unique environmental conditions and prolonged isolation‚ fostering distinct adaptations not observed elsewhere.

Examples like lemurs in Madagascar or the flora of the Hawaiian Islands demonstrate how species evolve in response to localized pressures.

Detailed analyses‚ frequently presented in scientific PDF reports‚ reveal the genetic divergence and evolutionary pathways leading to endemism.

The presence of endemic species supports the idea that life has diversified over time‚ adapting to specific niches. Studying these unique organisms provides crucial insights into the mechanisms of evolution and the importance of conservation efforts.

Their existence is a testament to the power of natural selection.

Direct Observation of Evolutionary Change

Observed instances‚ like antibiotic resistance in bacteria and insecticide resistance in insects‚ demonstrate evolution in real-time‚ detailed in available PDF studies.

Antibiotic Resistance in Bacteria

Antibiotic resistance provides a compelling‚ directly observable example of evolution in action. Initially‚ a bacterial population might be susceptible to a specific antibiotic. However‚ random genetic mutations can arise within some bacteria‚ conferring resistance to that drug.

When the antibiotic is applied‚ susceptible bacteria are killed‚ but those with resistance survive and reproduce‚ passing on their resistance genes. Over time‚ the population shifts‚ becoming dominated by resistant strains. This process‚ driven by natural selection‚ is rapid and well-documented.

Numerous PDF reports and scientific publications detail the mechanisms of resistance and the spread of resistant bacteria‚ illustrating a clear evolutionary trajectory. This isn’t merely adaptation; it’s a fundamental shift in the genetic makeup of a population‚ proving evolution’s ongoing nature.

Insecticide Resistance in Insects

Insecticide resistance mirrors the process observed with antibiotic resistance‚ offering another potent demonstration of evolution. When insecticides are initially used‚ most insects are vulnerable. However‚ natural genetic variation exists within insect populations‚ and some individuals possess mutations that provide a degree of resistance.

Upon insecticide application‚ susceptible insects perish‚ while resistant individuals survive and reproduce‚ increasing the frequency of resistance genes in subsequent generations. This leads to a population increasingly dominated by resistant insects‚ rendering the insecticide ineffective.

Detailed studies‚ often available as PDF reports‚ document the genetic basis of insecticide resistance and its rapid evolution in various insect species‚ confirming evolutionary principles.

Evolution and Development (Embryology)

Embryonic development reveals striking similarities among diverse species‚ suggesting shared ancestry and evolutionary relationships‚ detailed in accessible PDF guides.

Similarities in Embryonic Development

Comparative embryology provides compelling evidence for evolution‚ showcasing remarkable parallels during early development across vastly different species. For instance‚ vertebrate embryos – fish‚ amphibians‚ reptiles‚ birds‚ and mammals – exhibit similar structures during their initial stages‚ including the presence of gill slits and a tail.

These features‚ while functional in aquatic species‚ are often modified or lost as development progresses in terrestrial organisms. This suggests a common ancestor possessing these traits‚ with subsequent evolutionary changes building upon this foundational blueprint. Detailed illustrations and explanations are readily available in numerous PDF resources dedicated to evolutionary biology.

The persistence of ancestral embryonic features highlights the conservative nature of developmental processes and offers strong support for the theory of descent with modification. Studying these similarities allows scientists to trace evolutionary relationships and reconstruct the history of life on Earth.

Resources for Further Study (PDFs & Online)

Numerous online resources and PDF documents comprehensively detail the evidence supporting evolution. The University of California Museum of Paleontology (UCMP) offers extensive educational materials‚ including interactive exhibits and downloadable PDFs on fossil evidence and evolutionary theory.

Khan Academy provides free video lessons and exercises covering evolutionary biology‚ accessible online. The National Center for Science Education (NCSE) offers resources defending the teaching of evolution and addressing common misconceptions. Many scientific journals‚ like Nature and Science‚ publish peer-reviewed articles on evolutionary research.

Furthermore‚ readily available PDF worksheets‚ such as “evidence-for-evolution-worksheet”‚ provide structured learning activities. These resources collectively demonstrate the robust scientific basis for understanding evolution as a fundamental process shaping life on Earth.

saxon algebra 1 answers pdf

Saxon Algebra 1 Answers PDF: A Comprehensive Guide

Saxon Algebra 1 homework answers are available in PDF format, with resources like Test 34, Form A solutions provided by Saxon Publishers since 1991.

What is Saxon Algebra 1?

Saxon Algebra 1 is a rigorous, college-preparatory mathematics course designed to build a strong foundation in fundamental algebraic concepts. It’s characterized by its incremental approach, introducing new material daily and consistently reviewing previously learned topics through practice problems. Resources, including homework answers in PDF format, are crucial for student success. These answers, like those found for Test 34, Form A, aid in self-checking and identifying areas needing improvement.

Published by Saxon Publishers since 1991, the curriculum emphasizes mastery through repetition and drill. Understanding the course’s structure is key when utilizing available answer keys and supplemental materials.

The Importance of Answer Keys

Answer keys, particularly Saxon Algebra 1 answers in PDF format, are invaluable tools for students and educators alike. They facilitate independent learning by allowing students to verify their solutions to homework assignments and practice problems, such as those found on Test 34, Form A. This self-assessment process reinforces understanding and pinpoints areas where further study is needed.

Beyond simple verification, answer keys promote a deeper comprehension of mathematical concepts. They enable students to analyze their errors, identify patterns, and correct misconceptions. Access to these resources, originating with Saxon Publishers in 1991, is essential for maximizing learning outcomes.

Where to Find Saxon Algebra 1 Answers PDF

Saxon Algebra 1 answers in PDF format can be located through several avenues. Official Saxon Publishers resources are a primary source, dating back to at least 1991, offering legitimate solutions, including those for tests like Test 34, Form A. Numerous third-party websites also claim to provide solutions, though verifying their accuracy is crucial.

PDF availability varies, and it’s important to consider the legality of accessing these materials. While some sites offer free downloads, ensure compliance with copyright regulations. Resources may include homework answers, drill sheets, and mixed practice problem solutions, aiding student self-assessment and comprehension.

Understanding the Saxon Math Approach

Saxon Math utilizes an incremental learning methodology, emphasizing mastery through consistent drill and homework, building upon previously learned concepts for success.

Incremental Learning Methodology

Saxon Algebra 1 employs a unique incremental approach, introducing new concepts in small, manageable steps. Each lesson builds upon prior knowledge, ensuring students don’t fall behind. This contrasts with traditional methods that often present large blocks of new information at once. Daily homework reinforces these concepts through repetitive practice, solidifying understanding. The curriculum systematically revisits previously covered material, preventing forgetting and promoting long-term retention. This continuous review, coupled with the gradual introduction of new topics, fosters a strong foundation in algebraic principles. The method’s success relies on consistent effort and diligent completion of assignments, ultimately leading to mastery.

Focus on Mastery and Drill

Saxon Algebra 1 prioritizes mastery through extensive drill and practice. The program doesn’t simply introduce a concept and move on; it requires repeated application to ensure genuine understanding. Homework assignments, often consisting of numerous problems, are designed to reinforce each lesson’s objectives. This relentless repetition isn’t about rote memorization, but about developing procedural fluency. Students are expected to consistently work through problems until they achieve accuracy and speed. The answer keys, therefore, become crucial tools for self-assessment and error correction, allowing students to identify and address weaknesses independently. This focus on drill builds confidence and competence.

The Role of Homework in Saxon Algebra 1

Saxon Algebra 1 heavily relies on consistent homework completion as a cornerstone of learning. Assignments typically include a mix of previously learned material – “mixed practice” – alongside new concepts. This interwoven approach reinforces earlier lessons while introducing new challenges. Students utilize answer keys to check their work, identifying errors and understanding solution processes. The homework isn’t merely about completing problems; it’s about self-diagnosis and correction. A dedicated form exists for students to document their work, showcasing problem sets and drill sheets. Regular homework builds a strong foundation, preparing students for assessments and future mathematical studies.

Specific Resources for Answers

Saxon Algebra 1 answers can be found through official Saxon Publishers resources and various third-party websites offering solutions in PDF format.

Official Saxon Publishers Resources

Saxon Publishers, since 1991, has been a primary source for Algebra 1 answer keys and supplemental materials. While complete answer keys aren’t always freely available online, the official website often provides resources for teachers and homeschool educators. These resources may include test forms, solution manuals, and additional practice problems.

Accessing these materials often requires purchase or enrollment as an educator. The availability of specific test solutions, like those for Test 34, Form A, demonstrates the publisher’s commitment to supporting student learning. Checking the official Saxon Publishers website is the most reliable starting point for accurate and authorized answer resources.

Third-Party Websites Offering Solutions

Numerous websites claim to offer Saxon Algebra 1 answers, but caution is advised. While some provide helpful explanations and worked-out solutions, the accuracy and legality of these resources can vary significantly. Users should critically evaluate the information presented and cross-reference it with official materials whenever possible.

These platforms often host user-submitted solutions or compile answers from various sources. It’s crucial to avoid sites that promote unauthorized distribution of copyrighted materials. Remember that relying solely on third-party answers can hinder genuine understanding and skill development. Always prioritize learning the concepts, not just finding the answers.

PDF Availability and Legality

Saxon Algebra 1 answer keys, including those for specific tests like Test 34, are sometimes found as downloadable PDFs online. However, accessing and distributing these materials raises significant legal concerns. Copyright laws protect the intellectual property of Saxon Publishers, Inc., and unauthorized reproduction or sharing of their answer keys is a violation.

While some PDFs may be available for educational purposes, it’s essential to ensure compliance with copyright regulations. Purchasing official solutions manuals directly from Saxon or authorized retailers is the most legitimate and ethical approach. Utilizing illegally obtained PDFs carries risks and undermines the creators’ rights.

Types of Problems and Solutions

Saxon Algebra 1 covers solving linear equations, working with inequalities, and graphing linear functions, with solutions available for practice and assessment, like Test 34.

Solving Linear Equations

Saxon Algebra 1 places significant emphasis on mastering the techniques for solving linear equations, a foundational skill in algebra. The provided resources, including answer keys like those for Test 34, Form A, offer step-by-step solutions to various equation types. Students encounter problems requiring distribution, combining like terms, and isolating the variable.

These solutions demonstrate the correct application of inverse operations to arrive at the accurate answer. Understanding these methods is crucial, as linear equations form the basis for more complex algebraic concepts. The answer keys facilitate self-checking and identifying areas needing further practice, reinforcing the incremental learning approach inherent in the Saxon curriculum.

Working with Inequalities

Saxon Algebra 1 extends the principles of solving equations to inequalities, introducing students to concepts like greater than, less than, and absolute value. The available answer keys, exemplified by solutions found in resources like those for Test 34, Form A, showcase how to manipulate inequalities while maintaining their validity.

A key aspect is understanding that multiplying or dividing by a negative number reverses the inequality sign. The resources demonstrate this crucial rule, alongside techniques for graphing inequalities on a number line. Mastering these skills is vital, as inequalities are frequently used in real-world modeling and problem-solving scenarios.

Graphing Linear Functions

Saxon Algebra 1 emphasizes the visual representation of linear equations through graphing. The answer keys, including those for specific tests like Test 34, Form A, provide solutions that demonstrate plotting points and drawing lines. Students learn to identify slope and y-intercept from equations and utilize these values to construct accurate graphs.

Understanding the relationship between the equation of a line and its graphical representation is crucial. Resources showcase how to convert equations into slope-intercept form (y = mx + b) for easier graphing. This skill builds a foundation for more advanced algebraic concepts and their applications.

Navigating the Answer Key

Saxon Algebra 1 answer keys feature test forms (A, B, C) with detailed solutions; students can self-assess and interpret steps for improved understanding.

Understanding Test Forms (A, B, C)

Saxon Algebra 1 tests are thoughtfully designed with three primary forms: A, B, and C. This structure isn’t arbitrary; it’s a core component of the Saxon methodology, intended to reinforce learning through repetition and varied practice. Each form presents the same core concepts but utilizes different numerical values and problem arrangements.

Students typically encounter Form A in class, followed by Form B as homework, and then Form C for further assessment. This progression ensures a comprehensive grasp of the material. Utilizing all three forms is crucial for mastery, as it prevents rote memorization of specific problem solutions and encourages a deeper understanding of the underlying mathematical principles. Accessing solutions for each form, like those found for Test 34, aids in identifying areas needing improvement.

Interpreting Solution Steps

When utilizing Saxon Algebra 1 answer keys, simply checking the final answer isn’t enough for effective learning. A crucial step is carefully interpreting the solution steps provided. These steps demonstrate the logical progression required to arrive at the correct result, revealing the underlying mathematical reasoning.

Pay close attention to each operation and the order in which it’s performed. If a step is unclear, revisit the corresponding textbook example or seek clarification from a tutor. Understanding how a problem is solved is far more valuable than merely knowing the answer. Resources like those for Test 34, Form A, can illuminate these processes, fostering a deeper comprehension of algebraic concepts.

Using Answer Keys for Self-Assessment

Saxon Algebra 1 answer keys are powerful tools for self-assessment, but should be used strategically. Avoid the temptation to immediately consult the answer when encountering a challenge. Instead, attempt each problem independently, demonstrating your understanding of the concepts.

Once completed, compare your solutions to the key, identifying areas of strength and weakness. Analyze errors – were they arithmetic mistakes, or do they indicate a conceptual misunderstanding? Utilize resources like those available for Test 34, Form A, to pinpoint specific problem types causing difficulty, and then revisit relevant textbook sections for focused review.

Common Challenges and How to Overcome Them

Saxon Algebra 1 students often struggle with word problems, factoring, and basic arithmetic; careful review of examples and utilizing answer keys aids comprehension.

Difficulty with Word Problems

Saxon Algebra 1 frequently presents challenges with translating real-world scenarios into mathematical equations. Students may struggle identifying relevant information and setting up the correct problem structure; Utilizing the provided answer keys allows for checking work and understanding the solution process step-by-step.

Carefully reviewing textbook examples is crucial, paying attention to how problems are initially approached and solved. Breaking down complex word problems into smaller, manageable parts can also improve comprehension. Consistent practice, coupled with analyzing errors using the answer key, builds confidence and problem-solving skills. Remember to define variables clearly before attempting a solution.

Struggling with Factoring

Saxon Algebra 1 places significant emphasis on factoring polynomials, a skill many students find difficult. The answer keys provide worked-out solutions, demonstrating the correct steps for various factoring techniques – from simple trinomials to more complex expressions.

Consistent practice is key to mastering factoring. Students should utilize the homework answers to identify areas of weakness and focus on those specific problem types. Reviewing textbook examples and understanding the underlying principles of factoring, such as the distributive property, is also essential. Don’t hesitate to break down problems into smaller steps and verify each one with the answer key.

Errors in Arithmetic

Saxon Algebra 1 builds upon foundational arithmetic skills, meaning seemingly small calculation errors can derail problem-solving. Utilizing the provided answer keys allows students to pinpoint these mistakes quickly and efficiently. Carefully reviewing each step, even those that appear straightforward, is crucial.

Common arithmetic errors include sign mistakes, incorrect order of operations, and miscalculations with fractions or decimals. The answer keys serve as a valuable self-checking tool, enabling students to identify and correct these errors before they become ingrained habits. Consistent practice and attention to detail are vital for minimizing arithmetic mistakes.

Beyond the Answer Key: Additional Support

Supplemental resources, including online tutoring and Saxon math support communities, can provide further assistance when navigating challenging concepts and problems.

Online Tutoring Resources

Numerous online platforms offer tutoring specifically tailored for Saxon Algebra 1 students. These resources provide personalized instruction, addressing individual learning gaps and reinforcing concepts presented in the textbook. Many platforms feature experienced tutors familiar with the Saxon methodology, including its incremental approach and emphasis on consistent practice.

Students can access one-on-one sessions, participate in group study sessions, or utilize pre-recorded video lessons covering specific topics. These services often allow students to submit specific problems, like those found in homework assignments or test forms (A, B, C), for targeted assistance. Utilizing these resources can supplement the answer key and foster a deeper understanding of the material, ultimately improving problem-solving skills.

Saxon Math Support Communities

Engaging with online communities dedicated to Saxon Math can be incredibly beneficial for students seeking assistance with Algebra 1. These forums and groups, often found on platforms like social media or dedicated websites, provide a space for students to connect, ask questions, and share solutions.

Members frequently collaborate on challenging problems, discuss different approaches to solving equations and inequalities, and offer support to one another. Accessing these communities allows students to learn from peers and experienced users, supplementing the use of answer keys and fostering a collaborative learning environment. These groups can be invaluable for navigating the Saxon curriculum’s unique structure.

Utilizing Textbook Examples

The Saxon Algebra 1 textbook itself is a powerful resource, often underutilized when students immediately seek answer keys. Carefully reviewing worked-out examples within each lesson provides a step-by-step demonstration of problem-solving techniques. These examples illustrate the application of concepts and offer a model for approaching similar problems.

Students should actively attempt to replicate the solution process independently before consulting answer keys. This practice reinforces understanding and builds confidence. By mastering the textbook examples, students develop a strong foundation for tackling homework assignments and tests, reducing reliance on simply checking answers.

Specific Test Solutions (Based on Available Data)

Test 34, Form A provides selected solutions for Saxon Algebra 1, including problems like x = 2, 8, and 7, demonstrating answer key availability.

Test 34, Form A ⎼ Selected Solutions

Examining Test 34, Form A reveals specific solutions available within Saxon Algebra 1 resources. For instance, problem 1 yields answers of 8 and 2, while problem 2 provides x = 2 and 85. Problem 3 is solved as 7 – 2, resulting in 2. Additionally, problem 4 has a solution of 1, and problem 5 is 3 – 57, equaling 4. Problem 6 is calculated as 4, offering a glimpse into the detailed solutions provided.

These selected answers demonstrate the comprehensive nature of the available answer keys, aiding students in verifying their work and understanding the problem-solving processes employed in Saxon Algebra 1.

Analyzing Sample Problems

Detailed analysis of sample problems from Saxon Algebra 1, like those found in Test 34, Form A, showcases the step-by-step solutions offered. These examples illustrate how to approach various algebraic concepts, from solving for ‘x’ in linear equations to simplifying expressions. The provided answers – 8, 2, x=2, 85, 7-2, 1, and 3-57 – aren’t just final results, but checkpoints for understanding the underlying methodology.

Students can leverage these solved problems to identify areas where they struggle and refine their techniques, ultimately improving their grasp of Saxon’s incremental learning approach.

Linear Algebra Connections (As Referenced)

Saxon Algebra 1 introduces absolute value concepts, foundational to linear algebra, demonstrating how to find a number’s magnitude, like |1| = 1 and |-1| = 1.

Absolute Value Concepts

Saxon Algebra 1 lays groundwork for more advanced mathematical studies by introducing the concept of absolute value. As referenced in related linear algebra materials from 2019, absolute value represents a number’s distance from zero, irrespective of direction. This means both positive and negative values can yield the same absolute value; for instance, the absolute value of 1 is 1, and similarly, the absolute value of -1 is also 1.

Understanding absolute value is crucial for solving equations and inequalities, and it forms a building block for concepts explored in linear algebra, particularly when dealing with vector magnitudes and distances in multi-dimensional spaces. The provided resources demonstrate this foundational principle within the context of Saxon’s curriculum.

Applications in Problem Solving

Saxon Algebra 1 emphasizes practical application of mathematical concepts, including those related to absolute value, as seen in referenced linear algebra contexts. The ability to translate real-world scenarios into algebraic equations is a core skill developed throughout the course. Utilizing answer keys, like those for Test 34 Form A, allows students to verify their problem-solving approaches and identify areas needing improvement.

These applications extend beyond simple calculations, fostering critical thinking and analytical skills. The curriculum, supported by resources from Saxon Publishers since 1991, prepares students for more complex problem-solving tasks in future mathematical endeavors and beyond.

Recent Research & Publications (Related Context)

Research includes stability analysis of cnoidal waves (Kartashov et al., 2003) and dynamic polycode texts (2025), offering indirect context to mathematical principles.

Stability Analysis of Cnoidal Waves (Indirect Relevance)

While seemingly distant from Saxon Algebra 1 solutions, research into the stability analysis of cnoidal waves, as detailed by Kartashov et al. (2003), demonstrates advanced mathematical modeling. This work, focusing on (1+1)-dimensional waves, utilizes complex analytical techniques. Though not directly applicable to solving linear equations or factoring, it exemplifies the broader mathematical landscape informing these foundational concepts.

The rigorous approach to wave stability—involving meticulous calculations and a deep understanding of mathematical principles—highlights the importance of precision and logical reasoning. These skills are crucial for success in algebra. The research indirectly reinforces the value of mastering fundamental mathematical operations, a core tenet of the Saxon approach.

Dynamic Polycode Texts (Indirect Relevance)

The study of Anglo-Saxon dynamic polycode texts (October 23, 2025) presents an intriguing, albeit indirect, connection to Saxon Algebra 1. Analyzing these texts requires deciphering layered information and recognizing patterns – skills transferable to problem-solving in mathematics. While the context differs drastically, the underlying cognitive processes share similarities.

Successfully interpreting these complex texts demands analytical thinking and attention to detail, mirroring the precision needed when working through algebraic equations and verifying solutions. The research emphasizes a systematic approach to understanding intricate structures, a valuable asset when navigating the incremental learning methodology inherent in Saxon Math.