shake and bake pork instructions

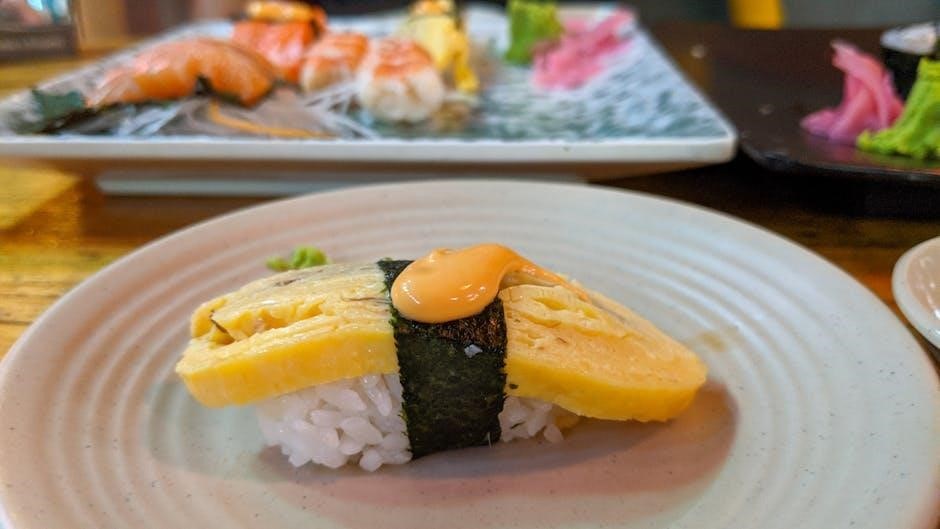
Shake and Bake Pork Instructions: A Comprehensive Guide

Shake and Bake pork, introduced in 1965, offers a convenient way to enjoy a fried-like flavor without deep frying. This guide details preparation and baking techniques.

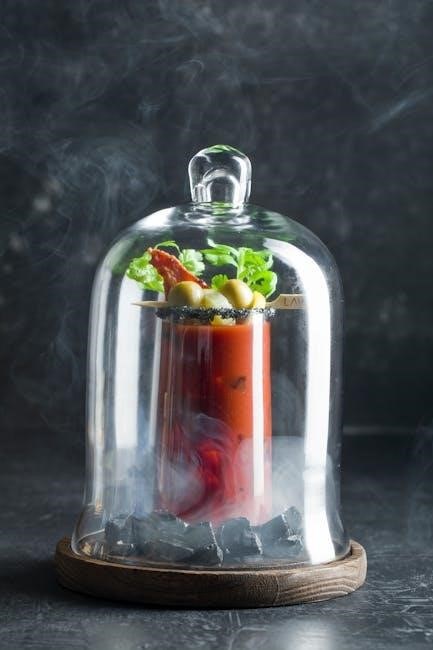
Shake and Bake pork has been a dinnertime staple for generations, debuting in 1965 as a convenient alternative to traditional frying methods. It quickly gained popularity, offering a crispy coating and savory flavor with minimal effort.

The product’s appeal lies in its simplicity – coating pork in a seasoned mix and baking it to golden perfection. Many fondly recall childhood memories associated with this easy-to-prepare meal, often served alongside classic side dishes;

Historical Context of Shake and Bake

Shake and Bake emerged in 1965, responding to a desire for convenient meal solutions amidst changing American lifestyles. Post-war convenience foods were gaining traction, and Shake and Bake offered a quicker, less messy alternative to frying.

Its initial success stemmed from mimicking the taste and texture of fried pork chops without the hassle of deep frying. The brand quickly became a household name, capitalizing on the growing demand for easy-to-prepare dinners.

Why Shake and Bake Pork is Popular

Shake and Bake pork’s enduring popularity rests on its simplicity and familiar taste. It provides a comforting, classic flavor profile reminiscent of childhood for many, evoking nostalgic feelings. The coating delivers a satisfying crunch, while the pork remains relatively juicy.

Furthermore, its convenience appeals to busy individuals and families seeking quick weeknight meal options, requiring minimal effort and cleanup compared to traditional frying methods.

Ingredients for Shake and Bake Pork

Essential ingredients include pork cuts – chops or roasts – the Shake and Bake coating mix, and optional seasonings to customize the flavor profile.

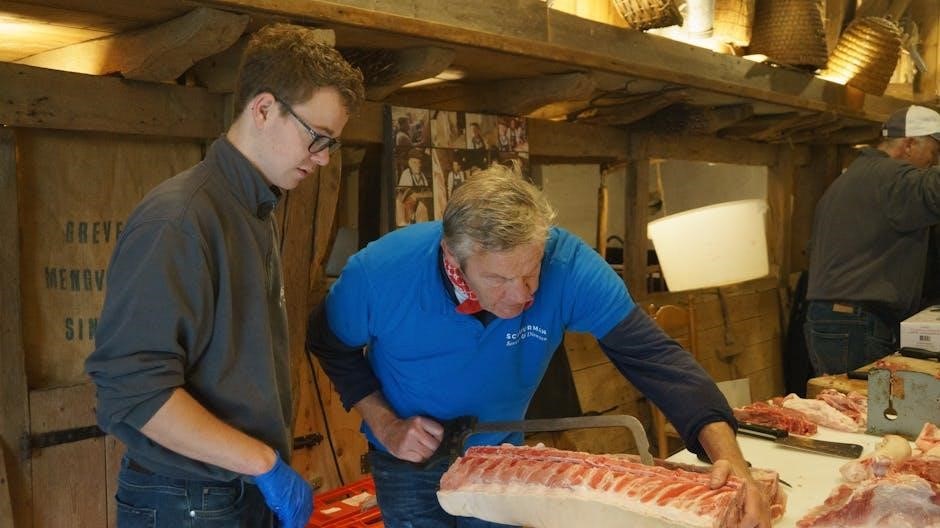
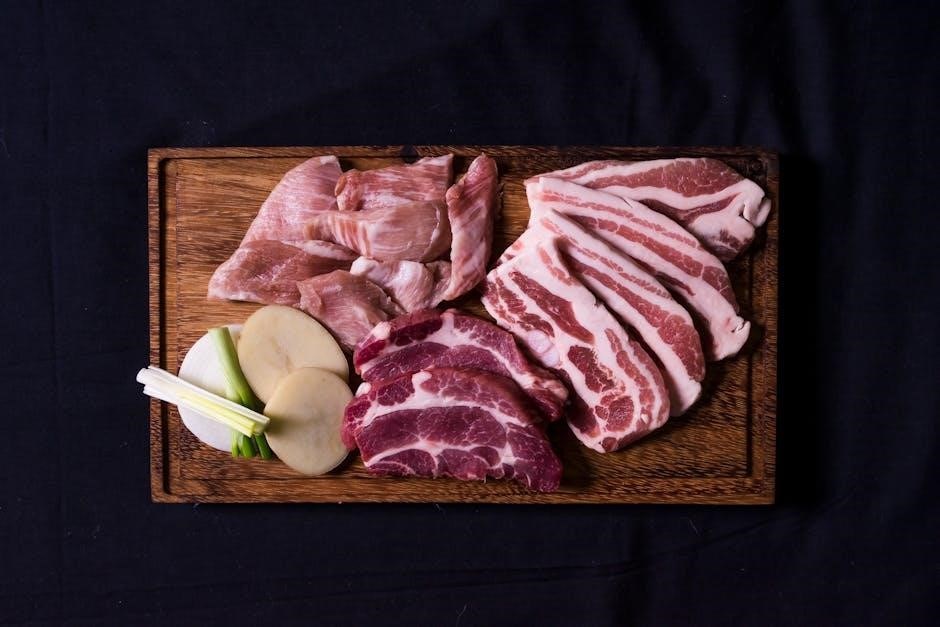
Pork Cut Selection (Chops, Roasts, etc.)

Selecting the right pork cut is crucial for optimal Shake and Bake results. Pork chops, particularly center-cut or bone-in, are popular choices due to their quick cooking time. Pork roasts, like shoulder or loin, require longer baking durations but yield tender, flavorful meat.

Thinner cuts, under an inch, cook faster and remain juicy. Larger roasts benefit from a marinade beforehand. Consider the number of servings needed when choosing; chops are ideal for individual portions, while roasts cater to families or gatherings. Ultimately, personal preference dictates the best cut!

Shake and Bake Coating Mix Components

Shake and Bake’s signature coating comprises seasoned breadcrumbs, flour, and spices. These components create a crispy exterior when baked. The breadcrumbs provide texture, while flour aids in adhesion and browning. A blend of seasonings, often including paprika, garlic powder, and onion powder, delivers the distinctive flavor.

Some variations include salt and sugar for enhanced taste. The mix is designed for convenience, eliminating the need to measure individual ingredients, offering a consistent result every time.

Optional Seasoning Additions

Enhance your Shake and Bake pork with personalized seasoning! Garlic powder, onion powder, paprika, and cayenne pepper can boost the flavor profile. Italian seasoning, herbs like rosemary or thyme, and a dash of black pepper add complexity. For a smoky taste, incorporate smoked paprika.

Experiment with different spice blends to create unique variations. Remember to use seasonings sparingly to complement, not overpower, the original mix’s flavor.

Preparing the Pork

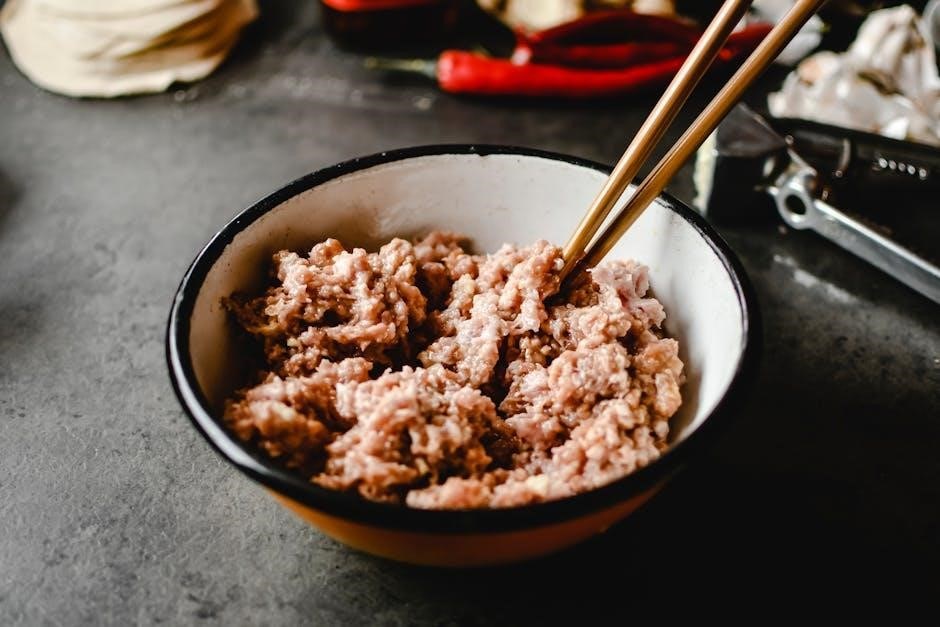
Proper pork preparation is key! Trimming excess fat and tenderizing tougher cuts ensures even cooking and optimal texture when using Shake and Bake.

Pork Preparation Techniques (Trimming, Tenderizing)

Begin by trimming any visible excess fat from the pork, as this can prevent the Shake and Bake coating from adhering properly. For tougher cuts like pork shoulder, tenderizing is crucial. You can achieve this through pounding with a meat mallet or using a marinade containing acidic ingredients like lemon juice or vinegar.

These methods break down muscle fibers, resulting in a more tender and flavorful final product. Ensure the pork is patted dry with paper towels before coating; this helps the coating stick effectively. Proper preparation significantly impacts the overall quality of your Shake and Bake pork.

Coating the Pork

To begin coating, place the prepared pork pieces into a shallow dish or a resealable plastic bag containing the Shake and Bake mix. Gently shake or toss to ensure each piece is fully covered. Avoid overcrowding the dish, as this can result in uneven coating.

Press the coating lightly onto the pork to help it adhere. For a thicker coating, repeat the process. Discard any leftover coating mix after use to prevent cross-contamination. A thorough coating is essential for achieving that signature crispy texture.

Ensuring Even Coating Coverage

Achieving uniform coverage is key to perfectly cooked Shake and Bake pork. After shaking or tossing, visually inspect each piece, paying close attention to sides and edges. Use your fingers to gently press the coating into any bare spots.

Avoid clumping; if the coating appears too thick in areas, shake off the excess. Consistent coverage guarantees even cooking and a satisfyingly crispy result throughout. Proper technique prevents unevenly coated portions.
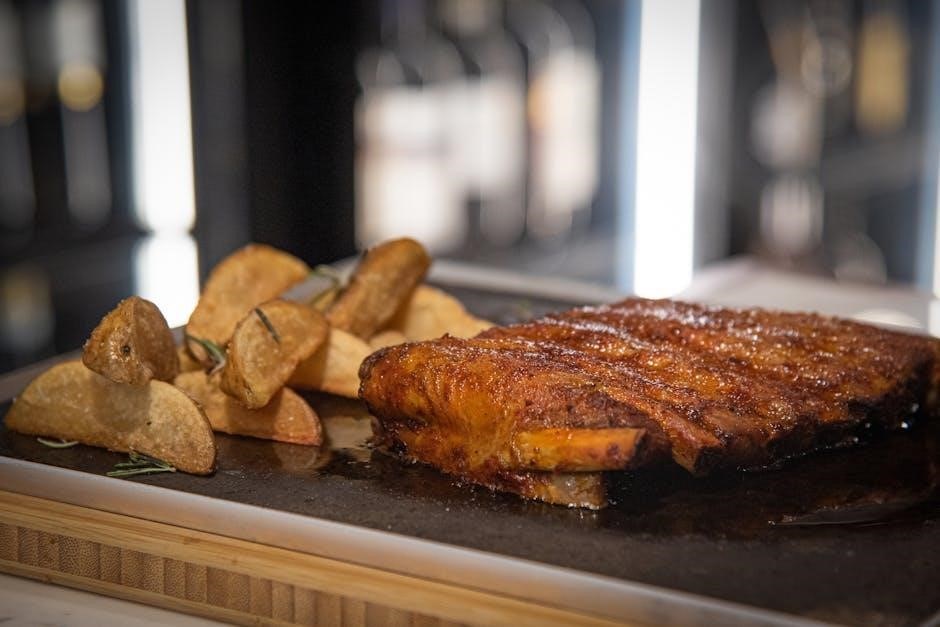
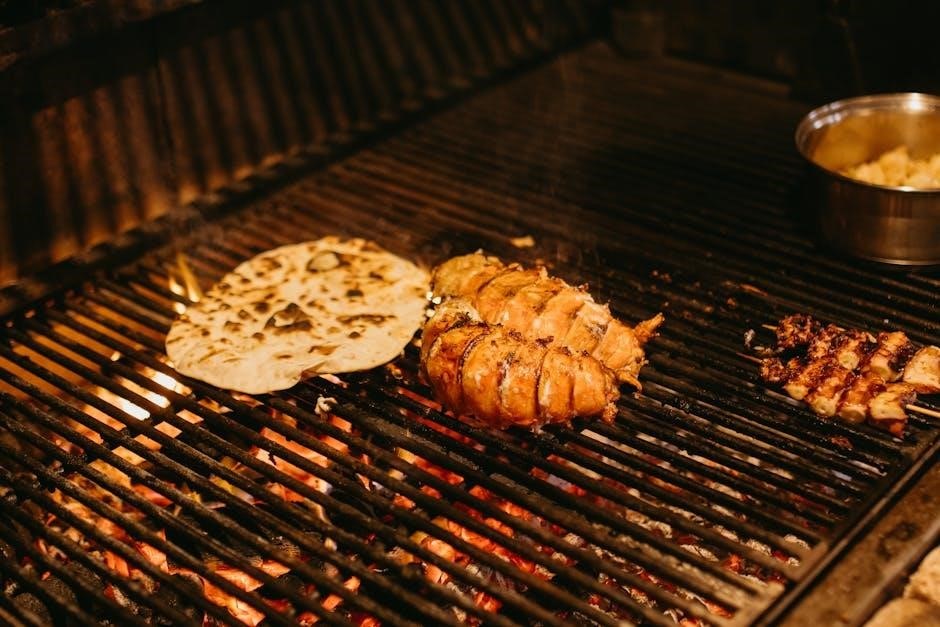
Baking Instructions

Baking Shake and Bake pork is straightforward. Place coated pork on a baking sheet and bake at the recommended temperature for the specified duration, ensuring doneness.

Optimal Oven Temperature

For achieving perfectly cooked Shake and Bake pork, maintaining the correct oven temperature is crucial. Generally, an oven temperature of 375°F (190°C) is recommended for most pork cuts; This temperature ensures the pork cooks evenly and the coating becomes delightfully crispy. However, always refer to the specific instructions on your Shake and Bake package, as variations may exist. Consistent heat distribution is key, so preheating your oven thoroughly before placing the pork inside is highly advised for optimal results.

Baking Time Guidelines Based on Pork Cut

Baking times for Shake and Bake pork vary depending on the cut used. Pork chops typically require 20-25 minutes, while a pork roast may need 30-40 minutes. Thicker cuts will naturally require longer cooking times. It’s essential to consult the Shake and Bake packaging for precise recommendations tailored to the specific product. Remember these are estimates; always verify doneness with a meat thermometer to ensure the pork reaches a safe internal temperature.

Checking for Doneness (Internal Temperature)

Ensuring pork reaches a safe internal temperature is crucial. Use a food thermometer inserted into the thickest part of the meat, avoiding bone. The USDA recommends a minimum internal temperature of 145°F (63°C) with a three-minute rest time; This guarantees the pork is safe to consume and retains its juiciness. Regularly checking the temperature during the final stages of baking prevents overcooking and dryness, resulting in perfectly cooked Shake and Bake pork.
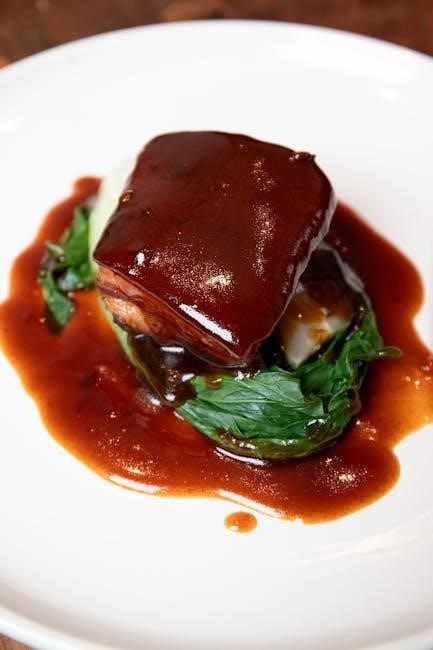
Serving Suggestions

Shake and Bake pork pairs wonderfully with green beans and other vegetables. Consider complementary sauces and garnishes to elevate the dining experience!

Recommended Side Dishes

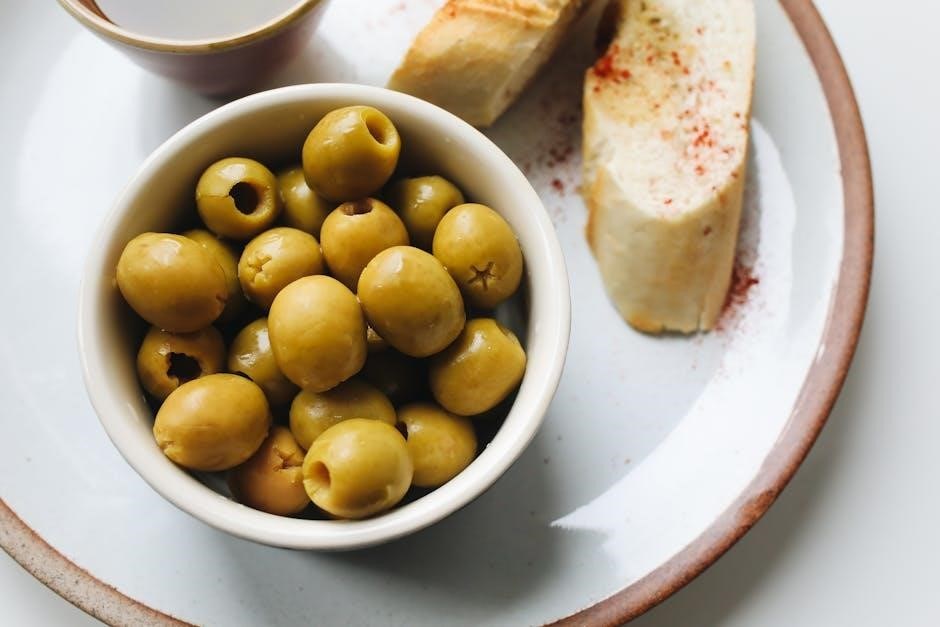
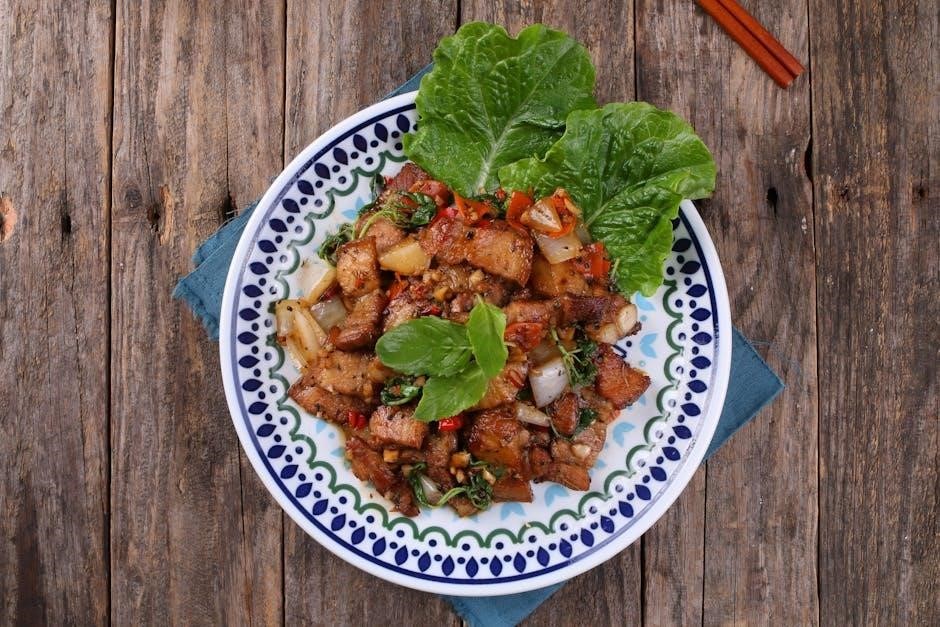
Shake and Bake pork’s savory coating complements a variety of sides. Classic choices include mashed potatoes, offering a comforting texture, and steamed or roasted green beans for a fresh, vibrant contrast. Macaroni and cheese provides a creamy indulgence, while a simple side salad with a vinaigrette dressing cuts through the richness. Consider coleslaw for a cool, crunchy element, or roasted sweet potatoes for added sweetness. Don’t forget corn on the cob during warmer months – a truly delightful pairing!

Sauce Pairings for Shake and Bake Pork

Shake and Bake pork benefits from diverse sauce pairings. Apple sauce provides a sweet and tangy counterpoint to the savory coating. Barbecue sauce, especially a smoky variety, enhances the pork’s flavor profile. Honey mustard offers a balanced sweet-and-savory experience. For a spicy kick, consider a sriracha mayo or a pepper jelly; Creamy horseradish sauce adds zest, while a simple gravy complements the comforting nature of the dish. Experiment to find your perfect match!

Garnishing Ideas

Shake and Bake pork presents a versatile canvas for garnishing. Fresh parsley or chives add a vibrant pop of color and subtle oniony flavor. A sprinkle of paprika enhances visual appeal and provides a gentle warmth. Lemon wedges brighten the dish and cut through richness. Sliced green onions offer a mild, fresh bite. Consider a dollop of applesauce or a drizzle of honey for sweetness. A side of colorful roasted vegetables completes the presentation.

Variations and Customizations

Shake and Bake pork allows for spice adjustments and herb combinations. Explore gluten-free options by using alternative coating mixes for dietary needs.

Spice Level Adjustments

Shake and Bake pork’s flavor profile is easily customized to suit individual preferences. For a milder taste, reduce the amount of seasoning packet included, or consider adding a pinch of sugar to balance the spices. To increase the heat, incorporate cayenne pepper, chili powder, or a dash of hot sauce directly into the coating mix before applying it to the pork.

Experiment with different pepper varieties – paprika for a smoky warmth, or chipotle powder for a more complex, fiery kick. Remember to taste-test the coating before fully coating the pork to ensure the desired spice level is achieved.

Herb and Spice Combinations

Shake and Bake pork provides a fantastic base for experimenting with diverse herb and spice blends. Enhance the flavor by adding dried rosemary, thyme, or oregano to the coating mix for an Italian-inspired twist. For a Southwestern flair, incorporate cumin, coriander, and a touch of smoked paprika.

Garlic powder and onion powder are versatile additions that complement the pork beautifully. Don’t hesitate to get creative – a pinch of cinnamon or nutmeg can add unexpected warmth and depth to the final dish.

Gluten-Free Shake and Bake Options

For those avoiding gluten, replicating the Shake and Bake experience requires a substitute for the wheat-based coating. A blend of rice flour, cornmeal, and almond flour creates a remarkably similar texture. Season this mixture generously with paprika, garlic powder, onion powder, and herbs.

Ensure all spices are certified gluten-free to prevent cross-contamination. Coating the pork in this blend before baking delivers a crispy, flavorful result suitable for dietary needs.

Troubleshooting Common Issues

Common problems include dry pork, a lack of crispiness in the coating, or undercooked meat. Adjusting baking time and temperature often resolves these issues effectively.

Pork is Dry

If your Shake and Bake pork is dry, several factors could be at play. Overbaking is a primary cause; carefully monitor the internal temperature using a meat thermometer. Consider brining the pork beforehand to increase moisture retention during cooking.

Ensure adequate coating coverage, as this helps seal in juices. Lowering the oven temperature slightly and extending the baking time can also promote more even cooking and prevent dryness. Adding a tablespoon of oil to the coating mix can contribute to a juicier result.

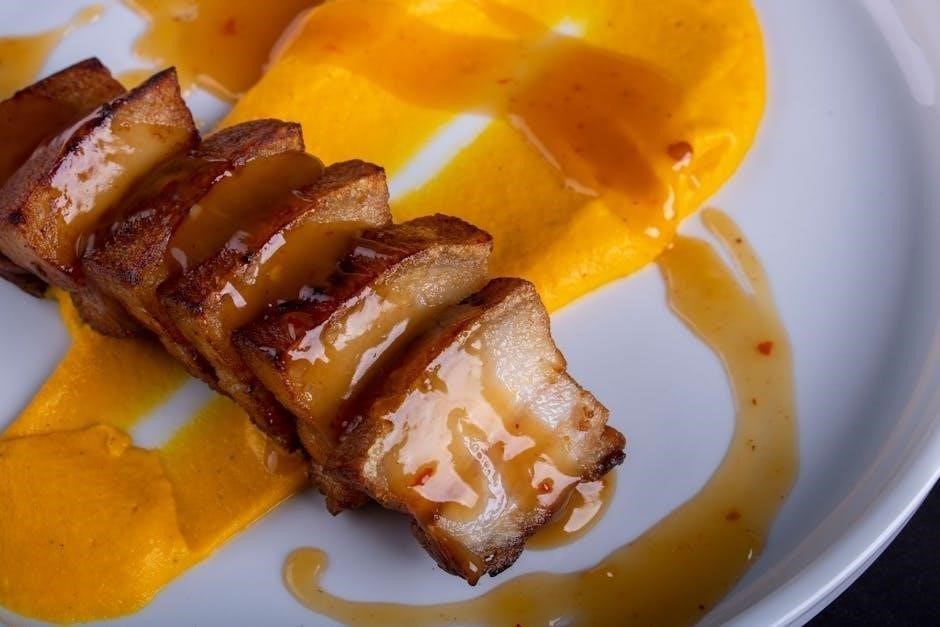
Coating is Not Crispy

A lack of crispiness in your Shake and Bake coating often stems from insufficient oven temperature or moisture. Ensure your oven is preheated to the recommended temperature and avoid overcrowding the baking sheet, which can trap steam.

Lightly spraying the coated pork with cooking oil before baking can enhance browning and crisping. Avoid covering the pork during baking, as this will also hinder the development of a crispy exterior. A slightly longer baking time may also be necessary.

Pork is Undercooked

Undercooked pork poses a food safety risk, so verifying internal temperature is crucial. Utilize a reliable food thermometer inserted into the thickest part of the pork, avoiding bone contact. Pork must reach an internal temperature of 145°F (63°C) for safe consumption.

If undercooked, return the pork to the oven and continue baking, checking the temperature every few minutes until it reaches the safe level. Baking time varies based on cut thickness.

Shake and Bake vs. Other Cooking Methods

Shake and Bake offers a quicker, less messy alternative to frying, with fewer calories than traditional oven-roasted pork, providing convenience and flavor.

Comparison to Frying

Shake and Bake presents a compelling alternative to frying pork, significantly reducing oil usage and the associated mess. While frying delivers a uniquely crispy exterior through submersion in hot oil, Shake and Bake achieves a similar texture with a coating that crisps in the oven. This method minimizes fat absorption, resulting in a lighter dish. Frying requires constant attention to temperature and potential splattering, whereas Shake and Bake offers a more hands-off, safer cooking experience. Ultimately, Shake and Bake provides a convenient path to a fried-like flavor profile without the drawbacks of deep-frying.

Comparison to Oven-Roasted Pork

Shake and Bake differs substantially from traditional oven-roasted pork, primarily in texture and flavor profile. Roasting typically yields tender, juicy pork with a more subtle, natural flavor. Shake and Bake, however, delivers a crispy, seasoned coating that provides a distinct, savory taste. Roasting often requires marinades or rubs for enhanced flavor, while Shake and Bake incorporates seasoning directly into the coating. The coating also creates a textural contrast absent in roasted pork, offering a satisfying crunch with each bite.

Health Considerations

Shake and Bake offers a lower-fat alternative to deep-fried pork, but it’s not without health considerations. The coating contributes significant sodium content, a concern for those monitoring salt intake. Additionally, the pre-mixed coating may contain added sugars and processed ingredients. Choosing leaner pork cuts and monitoring portion sizes can mitigate some concerns. Comparing nutritional information to oven-roasted pork reveals Shake and Bake often has higher sodium, but potentially less fat depending on preparation.

Safety Precautions

Handling raw pork requires careful hygiene to prevent cross-contamination. Always use a food thermometer to ensure pork reaches a safe internal temperature during baking.

Handling Raw Pork

Raw pork necessitates diligent food safety practices. Begin by ensuring your work surfaces are thoroughly cleaned and sanitized before and after handling. Avoid cross-contamination by using separate cutting boards and utensils for raw pork and other foods. Always wash your hands meticulously with soap and warm water for at least 20 seconds after touching raw pork or its packaging.

Proper storage is also crucial; keep raw pork refrigerated at 40°F (4°C) or below. Discard any pork that has been left at room temperature for more than two hours.

Oven Safety

Oven safety is paramount when preparing Shake and Bake pork. Always use oven mitts or pot holders when handling hot baking sheets and dishes to prevent burns. Ensure the oven rack is securely positioned before placing the pork inside; Never leave a hot oven unattended, and supervise children closely when the oven is in use.

Be mindful of the hot surfaces and avoid touching the oven’s heating elements. Allow the oven to cool completely before attempting to clean it.

Food Thermometer Usage

Utilizing a food thermometer is crucial for ensuring Shake and Bake pork reaches a safe internal temperature. Insert the thermometer into the thickest part of the pork, avoiding bone. For pork chops, aim for 145°F (63°C), and for roasts, 160°F (71°C).

Always sanitize the thermometer before and after use. Accurate temperature readings guarantee a safe and delicious meal, preventing potential foodborne illnesses.

Nutritional Information

Shake and Bake pork’s nutritional content varies by cut and preparation. Expect moderate calories, protein, and sodium levels; check package details for specifics.

Calorie Count

Shake and Bake pork’s calorie count is significantly influenced by the pork cut selected. A 3-ounce serving of pork chop, prepared with Shake and Bake, typically contains around 180-220 calories. This estimate assumes the use of the coating mix as directed and doesn’t include any added fats during cooking. Larger cuts, like roasts, will naturally yield higher calorie totals per serving. Consider leaner pork options to minimize calorie intake, and always review the specific nutritional information on the Shake and Bake packaging for accurate details.

Macronutrient Breakdown

Shake and Bake pork provides a blend of macronutrients. A typical 3-ounce serving delivers approximately 20-25 grams of protein, crucial for muscle maintenance. Carbohydrates generally range from 10-15 grams, primarily from the coating mix. Fat content varies based on the pork cut, averaging 8-12 grams, including saturated fats. Balancing these macronutrients is key for a healthy diet; pairing Shake and Bake pork with vegetables enhances nutritional value and provides essential fiber.

Sodium Content

Shake and Bake pork contains a notable amount of sodium, typically ranging from 400-600 milligrams per 3-ounce serving. This stems from the seasoning blend within the coating mix. Individuals monitoring their sodium intake should be mindful of this. Reducing sodium can be achieved by pairing it with low-sodium side dishes or exploring homemade coating alternatives with controlled salt levels. Careful consideration ensures a balanced and health-conscious meal.

Copycat Shake and Bake Recipes

Homemade coating mixes replicate the classic Shake and Bake flavor and texture, offering control over ingredients and allowing customization for pork or chicken dishes.

Homemade Coating Mix Recipes

Creating a Shake and Bake-style coating at home is surprisingly simple! Combine 1 ½ cups of crushed cornflakes (finely ground), ½ cup of grated Parmesan cheese, 2 tablespoons of paprika, 1 tablespoon of garlic powder, 1 teaspoon of onion powder, ½ teaspoon of black pepper, and ¼ teaspoon of salt.

Alternatively, a breadcrumb-based mix can be made with 1 ½ cups of seasoned breadcrumbs, ¼ cup of flour, and the same spice blend. These mixes deliver a similar crispy coating when applied to pork, offering a delightful homemade alternative.

Alternative Coating Ingredients

Beyond cornflakes and breadcrumbs, explore other coating options! Crushed potato chips (plain or flavored) provide a unique, savory crunch. Panko breadcrumbs offer a lighter, flakier texture compared to traditional breadcrumbs. For a gluten-free version, utilize almond flour or a blend of gluten-free flours with spices.

Experimenting with different ingredients allows for personalized flavor profiles. Remember to finely grind any larger ingredients for optimal adhesion and a consistent coating on the pork.

Recipe Adjustments for Different Pork Cuts

Adjust baking times based on the pork cut. Thicker cuts, like roasts, require longer cooking durations at lower temperatures to ensure tenderness. Pork chops, being thinner, cook faster and benefit from slightly higher heat. Always use a meat thermometer to verify internal temperature.

For bone-in cuts, add a few extra minutes to the baking time. Consider scoring the fat cap on roasts to promote even rendering and a crispier exterior.

cross stitch instructions for beginners

Crafting’s recent surge in popularity, especially during times of increased indoor activity, highlights cross stitch’s appeal as a calming and creatively fulfilling hobby.

Many find satisfaction in its imaginative aspects, and completed pieces beautifully enhance home décor, offering a rewarding experience for all skill levels.

What is Cross Stitch?

Cross stitch is a form of counted-thread embroidery, meaning stitches are made over a specific number of fabric threads, creating a pixelated design. It’s a remarkably accessible craft, requiring minimal specialized skills to begin, making it perfect for beginners seeking a relaxing and rewarding pastime.

Unlike freehand embroidery, cross stitch relies on following a pre-determined pattern, typically charted on graph paper. Each square on the chart represents one stitch on the fabric, ensuring accuracy and a defined image. This structured approach is incredibly satisfying, and the repetitive motion can be wonderfully meditative.

The beauty of cross stitch lies in its simplicity and versatility; it’s a craft that can be adapted to create everything from simple floral motifs to intricate landscapes. It’s a timeless technique, enjoyed by crafters for generations, and continues to thrive in today’s maker community.

Why Choose Cross Stitch as a Hobby?

In today’s fast-paced world, cross stitch offers a welcome escape, providing a calming and imaginative outlet for stress relief. The repetitive nature of the stitches can be incredibly meditative, promoting mindfulness and a sense of tranquility. It’s a hobby that allows you to disconnect from screens and reconnect with a tactile, creative process.

Beyond its therapeutic benefits, cross stitch yields beautiful, tangible results. Completed projects can add a personal touch to your home décor or serve as thoughtful, handmade gifts. The satisfaction of transforming a blank canvas into a vibrant design is immensely rewarding.

Furthermore, cross stitch is a relatively inexpensive hobby to start, requiring only a few basic materials. It’s a skill that can be learned at your own pace, with a wealth of online resources and supportive communities available to guide you.

Essential Materials for Cross Stitch

To begin your cross stitch journey, gather Aida cloth, floss (DMC or Anchor), needles, a hoop, and small scissors – these tools unlock creative expression!

Fabric: Aida Cloth Explained

Aida cloth is the most popular fabric for cross stitch, and for good reason! It’s an even-weave fabric, meaning the threads are neatly organized in a grid pattern, creating distinct squares. These squares, or holes, provide clear spaces to form your stitches, making it incredibly beginner-friendly.

The “count” of Aida cloth refers to the number of squares per inch. Lower counts (like 14-count) have larger squares, ideal for beginners as they are easier to see and stitch into. Higher counts (like 16 or 18-count) have smaller squares, resulting in a more detailed and refined finished piece.

White Aida is a classic choice, but it’s available in a wide range of colors, allowing you to complement your design. When starting, 14-count white Aida is highly recommended for its ease of use and versatility. It provides a forgiving surface to learn and practice your stitches.

Floss: Understanding DMC and Anchor Threads

Embroidery floss, the thread used in cross stitch, comes in a vast array of colors and materials. Two of the most prominent brands are DMC and Anchor, both offering excellent quality and extensive color palettes. DMC is globally recognized and boasts a standardized numbering system, making it easy to follow patterns.

Most floss is made of six strands twisted together. For cross stitch, you typically separate these strands to achieve the desired coverage. Patterns will specify how many strands to use – often two or three – influencing the stitch’s texture and fullness.

Both DMC and Anchor floss are typically made of 100% cotton, though variations exist. Choosing the right floss depends on personal preference and pattern requirements. Starting with DMC is often recommended due to its widespread availability and clear color charts.

Needles: Choosing the Right Size

Selecting the correct needle is crucial for comfortable and efficient cross stitch. Cross stitch needles, also known as tapestry needles, have a large eye to accommodate embroidery floss and a blunt tip to avoid splitting the fabric threads. Needle sizes are indicated by numbers; higher numbers denote larger needles.

For Aida cloth, a common fabric for beginners, sizes 24 and 26 are generally recommended. The size you choose depends on the Aida count – the number of squares per inch. Lower Aida counts (like 14-count) require larger needles (size 24), while higher counts (like 18-count) benefit from smaller needles (size 26).

Experimenting with different sizes helps find what feels most comfortable. A needle that slides through the fabric easily without forcing is ideal, ensuring neat and consistent stitches.

Hoops & Frames: Keeping Your Fabric Taut

Maintaining taut fabric is essential for even cross stitch tension and prevents distortion. Hoops and frames serve this purpose, holding the fabric secure while you work. Embroidery hoops are typically made of wood or plastic and come in various sizes.

For beginners, a 6-inch or 8-inch hoop is a good starting point. Ensure the fabric is centered within the hoop and tightened firmly, like a drum. Frames, often larger and more stable, are suitable for bigger projects. They can be freestanding or mounted on a stand.

Proper tension prevents puckering and makes counting stitches easier, contributing to a neater, more professional finish. Adjust as needed while stitching to maintain tautness.

Scissors: Small and Sharp are Key

Dedicated embroidery scissors are a crucial tool for any cross stitcher. Unlike general household scissors, these are designed with fine, pointed blades perfect for precisely snipping floss ends close to the fabric.

Small scissors offer greater control and prevent accidental cuts to your work. Sharpness is paramount; dull blades can fray the floss and make clean cuts difficult. Invest in a quality pair – they’ll last for years with proper care.

Keep them solely for embroidery to maintain their sharpness and avoid damage. Regularly clean and oil the blades for smooth operation and longevity. Precise cuts contribute to a polished, professional finish.

Basic Cross Stitch Techniques

Mastering fundamental stitches unlocks a world of creative possibilities. Learning to consistently create neat ‘X’ shapes, manage thread ends, and follow charts is essential.

The Basic X Stitch: Step-by-Step Guide

Begin by bringing your needle up through one hole in the Aida cloth, creating the first half of your stitch. Then, insert the needle diagonally across into the opposite hole, completing the first diagonal line.

Next, bring the needle up again through the third hole, positioned directly across from your starting point. This forms the second diagonal line, intersecting the first to create a complete ‘X’.

Ensure each stitch is consistent in tension – not too tight, nor too loose – for a neat and even appearance. Repeat this process, working rows of stitches in the same direction for efficiency.

Remember to maintain a consistent slant to all your stitches; either all top-left to bottom-right, or vice versa, for a polished look. Practice makes perfect, so don’t be discouraged if your first attempts aren’t flawless!

Starting and Ending Threads: Avoiding Knots

To begin a new thread, avoid knotting it! Instead, weave the end under several stitches on the back of your fabric. This secures the thread without unsightly bumps. A common technique is to leave a short tail on the front and weave it under completed stitches.

When finishing a thread, don’t simply cut it close to the fabric. Thread the needle back under several stitches on the reverse side, creating a secure anchor. Gently pull the thread to hide the tail within the existing stitches.

Consistent practice of these methods minimizes knots and ensures a clean, professional finish. Avoiding knots is crucial for a smooth fabric back and a durable piece.

Remember, patience is key when securing threads – a little extra time prevents frustration later!

Counting and Following a Pattern

Cross stitch patterns are essentially maps for your needle! They use symbols to represent different floss colors. Each square on the chart corresponds to one stitch on your Aida cloth; Accurate counting is essential for a successful design.

Begin by finding the center of your fabric and the pattern. Use a highlighter to mark off sections as you complete them. This prevents confusion and helps you stay on track. Work one color at a time, completing all instances of that symbol before moving on.

Double-check your counts frequently, especially when changing colors or navigating complex areas. A magnifying glass can be helpful for intricate patterns. Patience and precision are your allies!

Backstitch: Adding Detail and Definition

Backstitch is a fantastic technique to elevate your cross stitch projects, adding fine details and a polished look. Unlike the full cross stitch, backstitch creates a solid line, perfect for outlining shapes or adding small features like flower stems or facial expressions.

To execute a backstitch, bring your needle up through one hole, then down through the hole one space forward. Bring it up again a space ahead of your previous stitch, and repeat. It’s a simple, linear stitch!

Use a contrasting color to make the backstitch stand out, and refer to your pattern for placement. It truly brings your designs to life!

Understanding Cross Stitch Patterns

Patterns utilize symbols representing floss colors, arranged on a grid for easy replication on your fabric; mastering chart reading unlocks creative stitching possibilities.

Pattern Symbols and Colors

Cross stitch patterns aren’t simply colorful pictures; they’re coded maps for your needle! Each symbol on the chart corresponds to a specific floss color, usually indicated by a DMC or Anchor number. Don’t be intimidated by a seemingly complex chart – it’s a visual guide designed to make the process manageable.

Typically, a key or legend accompanies the pattern, clearly listing each symbol and its corresponding floss color. Pay close attention to this key; accurate color matching is crucial for a beautiful finished piece. Some patterns may also use shading or variations within a color, indicated by different symbols for slightly different hues.

Understanding these symbols is the first step to successfully translating the pattern onto your fabric. Take your time, double-check your work, and enjoy the process of bringing the design to life, one stitch at a time!

Grid Systems and Chart Reading

Cross stitch patterns are built upon a grid system, mirroring the evenweave structure of Aida cloth. Each square on the chart represents one stitch on your fabric. Learning to read this chart is fundamental to successful stitching. Start by locating the center of both the pattern and your fabric – often marked with arrows or notes.

Charts are read from right to left and top to bottom, following the grid. Pay attention to the scale; a single square doesn’t necessarily equal one centimeter. Count carefully to ensure accurate placement of each stitch, preventing distortion of the design.

Practice reading the chart slowly, tracing the pattern with your finger before stitching. This will help you internalize the grid system and confidently translate the design onto your Aida cloth.

Full vs. Partial Stitches

Cross stitch patterns utilize both full and partial stitches to create varying effects. A full cross stitch, as the name suggests, completes both diagonal legs of the ‘X’. These form the bulk of most designs, providing solid coverage and a traditional look.

Partial stitches, however, involve only one leg of the stitch – often a half stitch or a quarter stitch. These are used for shading, highlighting details, or creating a softer, more blended appearance. Charts clearly indicate partial stitches with specific symbols or notations.

Understanding the difference is crucial for accurately interpreting the pattern and achieving the intended visual outcome. Mastering both techniques expands your creative possibilities within cross stitch.

Beginner-Friendly Cross Stitch Projects

Starting with simple designs like floral motifs, geometric patterns, or alphabet charts builds confidence and reinforces fundamental techniques for new stitchers.

Simple Floral Designs

Floral patterns are an excellent starting point for beginners, offering a visually appealing and relatively straightforward introduction to cross stitch. Look for kits or patterns featuring large, simple blooms with clearly defined color blocks.

Begin by selecting a small design – a single flower or a cluster of two or three – to avoid feeling overwhelmed. Focus on mastering the basic X stitch and consistent tension before tackling more complex arrangements.

Utilize a limited color palette to simplify the process and reduce the number of thread changes. Pre-sorted floss kits are incredibly helpful for this. Remember to carefully follow the pattern chart, counting stitches accurately to maintain the design’s shape and proportions.

Don’t be afraid to experiment with different floss types to achieve varied textures and effects, but stick to beginner-friendly materials initially.

Geometric Patterns

Geometric designs provide a fantastic foundation for new cross-stitchers, emphasizing precise counting and stitch placement. These patterns often feature straight lines and repeating shapes, minimizing the need for intricate color blending or detailed shading.

Start with a simple repeating motif, like a grid of squares or a series of diagonal stripes. This allows you to practice consistent stitch length and tension without the distraction of complex imagery.

Focus on accurately following the pattern chart, paying close attention to the grid system and color symbols. Geometric patterns are particularly forgiving, as minor imperfections are less noticeable than in more detailed designs.

Experiment with different color combinations to create bold and modern effects, or opt for a monochromatic scheme for a more subtle look.

Alphabet and Monogram Charts

Alphabet and monogram charts are ideal beginner projects, offering a practical and personalized outcome. These designs allow you to practice individual stitches and color changes while creating something truly unique – initialed décor or personalized gifts.

Begin by selecting a simple alphabet style with clear, bold lettering. Focus on stitching each letter individually, ensuring consistent stitch tension and accurate placement on the Aida cloth.

Monograms, featuring one to three letters, are even simpler and quicker to complete. They’re perfect for practicing backstitching to outline the letters and add definition.

Experiment with different fonts and color combinations to create a monogram that reflects your personal style. These projects build confidence and provide a tangible sense of accomplishment.

Troubleshooting Common Issues

Stitching can present challenges, like tangled floss or accidental mistakes. Maintaining consistent tension is also key; practice and patience will overcome these common hurdles easily.

Dealing with Tangled Floss

Tangled floss is a nearly universal experience for cross stitchers, especially beginners! Don’t despair – it happens to everyone. The key is prevention and gentle untangling. To minimize tangles, avoid using excessively long strands of floss; shorter lengths are much easier to manage.

When tangles do occur, resist the urge to pull forcefully, as this can weaken and even break the thread. Instead, gently work the knot loose with a needle or your fingers. Laying the floss on a flat surface can also help visualize and separate the strands.

Consider using a floss organizer or bobbin to keep your threads neat and prevent them from becoming intertwined in the first place. A little preparation goes a long way in maintaining a smooth and enjoyable stitching experience!

Fixing Mistakes in Your Stitching

Mistakes are a natural part of learning any new craft, and cross stitch is no exception! Don’t be discouraged by imperfections; they’re opportunities to learn. If you’ve stitched a color in the wrong place, carefully remove the incorrect stitches using a seam ripper or small, sharp scissors.

Be gentle to avoid damaging the fabric. Once the incorrect floss is removed, you can stitch the correct color in its place. For isolated errors, this is a quick fix. For larger mistakes, consider carefully unpicking several stitches around the error to create a cleaner correction.

Remember to re-secure your thread after unpicking to prevent unraveling. Embrace mistakes as part of the process, and don’t strive for unattainable perfection!

Maintaining Consistent Tension

Consistent tension is crucial for a neat and professional-looking cross stitch piece. Avoid pulling your floss too tightly, as this can distort the fabric and create puckering. Conversely, loose stitches will appear sloppy and uneven. Aim for a balanced tension where the stitches lie flat against the fabric.

Practice makes perfect! Experiment with different levels of tension to find what feels comfortable and produces the best results. A good rule of thumb is to let the floss glide through the fabric with gentle pressure.

Pay attention to how your stitches look as you work, and adjust your tension accordingly. Consistent tension contributes significantly to the overall quality of your finished project.

Resources for Further Learning

Numerous online tutorials, websites, books, and magazines offer extensive cross stitch guidance. These resources provide patterns, techniques, and inspiration for beginners.

Online Tutorials and Websites

The internet is brimming with fantastic resources for budding cross-stitchers! YouTube channels offer visual, step-by-step guidance, perfect for grasping the basic X stitch and more complex techniques. Many creators demonstrate starting and ending threads, counting patterns, and troubleshooting common issues.

Websites dedicated to cross stitch, like DMC’s official site and various crafting blogs, provide free patterns, helpful articles, and vibrant online communities. These platforms allow you to connect with fellow enthusiasts, share your work, and ask questions. Pinterest is also a treasure trove of inspiration, linking to patterns and tutorials from across the web.

Exploring these digital resources empowers beginners to learn at their own pace and build confidence in their stitching abilities, fostering a love for this rewarding craft.

Cross Stitch Books and Magazines

For a tactile learning experience, cross stitch books and magazines remain invaluable resources. Books often provide comprehensive guides, covering everything from essential materials to advanced techniques, with detailed diagrams and clear instructions. They’re perfect for those who prefer a structured approach to learning.

Magazines offer a constant stream of fresh patterns, project ideas, and inspirational designs. Many include beginner-friendly charts and step-by-step tutorials, making them ideal for building skills gradually. They also showcase the latest trends and products in the cross stitch world.

These printed materials provide a focused and distraction-free learning environment, complementing online resources beautifully.

snoremd instructions

SnoreMD Instructions: A Comprehensive Guide

SnoreMD, a popular oral appliance, aims to reduce snoring and improve sleep quality. However, users may experience side effects like drooling, TMJ pain, or dry mouth.

Proper fitting and consistent cleaning are crucial for optimal results and minimizing discomfort. Understanding these instructions ensures a positive experience.

What is SnoreMD?

SnoreMD is an over-the-counter mandibular advancement device (MAD) designed to alleviate snoring and mild to moderate obstructive sleep apnea. Unlike complex CPAP machines, SnoreMD offers a more convenient and portable solution for improving nighttime breathing and sleep quality. It works by gently shifting the lower jaw forward, which helps to open the airway and reduce vibrations that cause snoring.

This device isn’t a cure for sleep apnea, but rather a management tool. It’s constructed from a medical-grade thermoplastic material, aiming for comfort and durability. SnoreMD is self-adjustable, allowing users to customize the protrusion of the jaw to find the most effective setting for their individual needs. The device comes in various sizes to accommodate different mouth shapes and sizes.

It’s important to note that SnoreMD is not suitable for everyone. Individuals with severe sleep apnea, certain dental conditions, or TMJ disorders should consult with a healthcare professional before using this device. While generally well-tolerated, potential side effects, such as drooling or jaw discomfort, can occur, and understanding these possibilities is crucial before starting use.

How SnoreMD Works: Mechanism of Action

SnoreMD operates on the principle of mandibular advancement. During sleep, the muscles in the throat relax, potentially causing the tongue to fall back and obstruct the airway. This obstruction leads to the characteristic vibrations we know as snoring. SnoreMD gently moves the lower jaw (mandible) forward, effectively increasing the space at the back of the throat.

This forward movement prevents the tongue and soft palate from collapsing into the airway, reducing or eliminating the vibrations. The device doesn’t directly affect breathing; instead, it optimizes the anatomical space to facilitate easier airflow. The self-adjusting feature allows users to incrementally increase the jaw advancement until they achieve optimal results – a reduction or cessation of snoring.

The thermoplastic material conforms to the user’s bite, ensuring a secure and comfortable fit. However, this adjustment can sometimes lead to temporary side effects like jaw soreness or increased salivation as the muscles adapt. The effectiveness of SnoreMD relies on consistent use and proper fitting, as even slight adjustments can significantly impact its performance. It’s a physical intervention, not a pharmaceutical solution.

Understanding the Different SnoreMD Models

SnoreMD currently offers a streamlined approach with a single, universally adjustable model, simplifying the selection process for consumers. Unlike some competitors with tiered systems, SnoreMD focuses on a ‘one-size-fits-most’ design, relying on its self-adjusting mechanism to cater to a wide range of jaw sizes and snoring severities.

The core component is a thermoplastic mouthpiece consisting of an upper and lower tray. These trays are designed to be molded to the individual’s unique bite, creating a customized fit. The device features incremental adjustment points, allowing users to gradually advance the lower jaw in small increments – typically 1mm adjustments – until optimal snoring reduction is achieved.

While there aren’t distinct ‘models’ in the traditional sense, variations may exist in bundled packages, potentially including additional cleaning supplies or carrying cases. It’s important to verify the contents of any purchase to ensure it meets individual needs. The focus remains on the core technology and its adaptability, rather than offering multiple device variations. Understanding this singular approach simplifies the instructions and user experience.

Setting Up Your SnoreMD Device

Setting up your SnoreMD device involves a simple, at-home fitting process. Begin by thoroughly cleaning the mouthpiece with warm water and a mild soap – avoid harsh chemicals or abrasive cleaners. The kit includes a fitting tray and instructions; carefully review these before starting.

First, place the device in hot water (not boiling!) for approximately 60-90 seconds to soften the thermoplastic material. Remove it carefully and allow it to cool slightly. Place the softened mouthpiece into your mouth, ensuring it’s positioned correctly – the upper tray should fit over your upper teeth, and the lower tray over your lower teeth.

Gently bite down and use your fingers to mold the trays to the contours of your teeth and gums. Maintain this bite for several minutes until the material hardens. Repeat this process for both the upper and lower trays, ensuring a snug and comfortable fit. If the fit isn’t satisfactory, repeat the softening and molding process. Proper setup is crucial for effectiveness and comfort, following the instructions closely.

Proper Fitting and Adjustment

Achieving a proper fitting with your SnoreMD device is paramount for both effectiveness and comfort. Initially, you might experience some tightness, which is normal. However, persistent discomfort warrants adjustment. If the device feels too loose, repeat the fitting process, ensuring a more secure bite during the molding stage.

If it feels too tight, or causes jaw discomfort, you can carefully re-soften the mouthpiece and remold it, reducing the biting pressure. Small adjustments can make a significant difference. Pay attention to how your teeth align within the trays; they should be evenly supported without excessive pressure on any single tooth.

Gradual adjustment is key. Start by wearing the device for short periods, gradually increasing the duration as you become accustomed to it. Monitor for any signs of TMJ pain or bite changes. If these occur, discontinue use and consult with a dental professional. Remember, a well-fitted SnoreMD should be comfortable enough to wear throughout the night, promoting restful sleep without causing undue stress on your jaw or teeth.

Daily Use and Maintenance

Consistent daily use is essential to experience the full benefits of your SnoreMD device. Wear it every night during sleep, even if you don’t anticipate significant snoring. This helps maintain the adjusted fit and reinforces the desired jaw positioning. Remember to insert and remove the device with clean hands to prevent bacterial contamination.

Maintenance is equally crucial. After each use, thoroughly clean your SnoreMD with mild soap and lukewarm water. Avoid harsh chemicals, abrasive cleaners, or hot water, as these can damage the material. A soft-bristled toothbrush is ideal for removing debris from the trays. Rinse thoroughly and allow it to air dry completely before storing.

Regularly inspect the device for any signs of wear and tear, such as cracks or discoloration. Proper storage in the provided case protects it from dust and damage. Following these simple daily routines will extend the lifespan of your SnoreMD and ensure optimal hygiene, contributing to a more comfortable and effective snoring solution.

Common Side Effects of SnoreMD

While SnoreMD is generally well-tolerated, some users may experience common side effects, particularly during the initial adjustment period. These are often mild and temporary, resolving as your body adapts to the device. The most frequently reported issue is excess salivation, or drooling, affecting up to 40% of users.

Another prevalent side effect is xerostomia, commonly known as dry mouth, experienced by around 30% of individuals. Conversely, some may experience both, though rarely alternating. Temporomandibular joint (TMJ) pain, manifesting as jaw discomfort, affects approximately 35% of users, alongside similar rates reporting dental or myofacial discomfort.

Mucosal dryness, impacting a significant 86% of patients in some studies, is also common. It’s important to note that these side effects are usually mild. If discomfort persists or worsens, consult your dentist or healthcare provider. Understanding these potential issues allows for proactive management and ensures a more positive experience with your SnoreMD device.

Excessive Drooling: Causes and Management

Excessive drooling is a frequently reported side effect of SnoreMD use, affecting a substantial percentage of users – up to 40% in some cases. This occurs because the device repositions the lower jaw, which can alter oral muscle control and the ability to effectively manage saliva during sleep. The altered position can stimulate saliva production while simultaneously reducing the natural swallowing reflex.

Managing this can involve several strategies. Initially, ensure the device isn’t fitted too loosely, as an improper fit can exacerbate the issue. Maintaining good oral hygiene is crucial, as increased saliva can contribute to minor skin irritation around the mouth. Some users find relief by positioning a towel or absorbent material near their head during sleep.

If drooling persists, consider consulting your dentist. They can reassess the fit of your SnoreMD and potentially make adjustments. While generally harmless, persistent excessive drooling can be bothersome; proactive management can significantly improve comfort and sleep quality. Remember, this is a common adjustment period symptom for many.

Dry Mouth (Xerostomia): Prevention and Relief

Dry mouth, clinically known as xerostomia, is another common side effect experienced by SnoreMD users, affecting around 30% of individuals. This occurs as the device’s repositioning of the jaw can inadvertently lead to mouth breathing during sleep, reducing saliva production. Saliva plays a vital role in oral health, lubricating the mouth and aiding in digestion.

Preventing and relieving dry mouth involves several approaches. Staying adequately hydrated throughout the day is paramount. Consider using a humidifier in your bedroom to add moisture to the air, especially during drier months. Avoid caffeinated beverages and alcohol before bedtime, as these can exacerbate dehydration.

Over-the-counter saliva substitutes can provide temporary relief, lubricating the mouth and easing discomfort. Sugar-free gum or lozenges can stimulate saliva flow. If dry mouth persists or becomes severe, consult your dentist. They may recommend prescription saliva stimulants or assess your SnoreMD fit to minimize mouth breathing. Maintaining good oral hygiene is also crucial to prevent complications.

Temporomandibular Joint (TMJ) Pain: Addressing Jaw Discomfort

Temporomandibular joint (TMJ) pain is a frequently reported side effect of SnoreMD use, impacting approximately 35% of users. This discomfort arises from the altered position of the jaw, placing stress on the TMJ – the joint connecting your jaw to your skull. Symptoms can range from mild aching to sharp, debilitating pain, often radiating to the face, neck, and ears.

Addressing TMJ discomfort begins with ensuring a proper SnoreMD fit. An ill-fitting device can exacerbate the strain on the jaw joint. If pain persists, try gently massaging the jaw muscles. Applying warm compresses to the affected area can also provide relief by relaxing the muscles;

Over-the-counter pain relievers, such as ibuprofen or naproxen, can help manage the pain. If the pain is severe or doesn’t subside, consult your dentist or a TMJ specialist. They may recommend physical therapy exercises or, in rare cases, adjustments to the SnoreMD appliance. Discontinue use if pain becomes unbearable and seek professional guidance.

Tooth Discomfort and Bite Changes: Long-Term Considerations

SnoreMD, like other mandibular advancement devices, can cause tooth discomfort and potential bite changes with prolonged use. Approximately 59% of users have reported some level of dental discomfort. This occurs because the device gently shifts the lower jaw forward, altering the alignment of your teeth and applying pressure.

Initially, this discomfort may manifest as soreness or sensitivity. However, long-term use can potentially lead to more significant shifts in your bite. While often minor and reversible upon discontinuing use, these changes warrant careful consideration. Maintaining excellent oral hygiene – brushing and flossing regularly – is paramount to prevent complications.

Regular dental check-ups are crucial while using SnoreMD. Your dentist can monitor your bite for any substantial changes and address any emerging issues. If you experience persistent or worsening tooth pain, looseness, or significant bite alterations, discontinue use and consult your dentist immediately. They may recommend adjustments to the device or alternative snoring solutions.

Consider the potential long-term effects before committing to indefinite SnoreMD use.

Myofacial Discomfort: Managing Facial Muscle Pain

SnoreMD, by repositioning the jaw, can sometimes induce myofacial discomfort – pain or soreness in the facial muscles. Approximately 35% of users report experiencing this side effect. This discomfort arises from the altered muscle engagement required to maintain the advanced jaw position throughout the night.

Initially, this may feel like general facial fatigue or tenderness. However, it can sometimes present as localized pain in the cheeks, jawline, or temples. Gentle facial massages can help alleviate tension and improve circulation, potentially reducing discomfort. Warm compresses applied to the affected areas may also provide relief.

If the pain is persistent or severe, consider reducing the advancement level of your SnoreMD device. A gradual adjustment period allows your facial muscles to adapt more comfortably. Over-the-counter pain relievers, like ibuprofen or acetaminophen, can offer temporary relief, but should not be relied upon long-term.

Consistent use, coupled with proper adjustment, often allows the muscles to adapt. However, if myofacial discomfort persists despite these measures, consult with your dentist or a healthcare professional.

Red and Puffy Eyes: Potential Link to SnoreMD Use

Recent user reports suggest a possible correlation between SnoreMD use and the development of red, puffy, and bloodshot eyes. While not a commonly reported side effect, this symptom warrants attention. The exact mechanism linking the device to ocular irritation remains unclear, but several theories exist.

One possibility is that altered jaw positioning affects lymphatic drainage, leading to fluid retention around the eyes. Another theory suggests that increased pressure on facial nerves during the night could contribute to inflammation. Additionally, changes in sleep patterns, even with reduced snoring, can sometimes manifest as ocular symptoms.

If you experience red and puffy eyes while using SnoreMD, first ensure the device fits correctly. An improperly fitted appliance could exacerbate pressure points. Discontinue use temporarily to see if symptoms subside. Applying cool compresses to the eyes may offer temporary relief.

If the condition persists, consult an ophthalmologist to rule out other potential causes. Documenting the onset of symptoms in relation to SnoreMD use will aid in diagnosis. Consider adjusting the device’s advancement or discontinuing use altogether if the issue remains unresolved.

Troubleshooting Common Issues

SnoreMD, while effective for many, can occasionally present challenges. Addressing these promptly ensures continued benefit. A frequent issue is the device not staying securely in place during sleep; Ensure proper fitting, following the instructions carefully. If it consistently dislodges, consider a different size or model.

Another concern is difficulty breathing while using SnoreMD. This is a serious symptom requiring immediate attention. Discontinue use and consult a physician. It may indicate the device is obstructing your airway, or that SnoreMD isn’t suitable for your specific anatomy.

Maintaining hygiene is vital. Regularly clean your SnoreMD device as per the provided instructions to prevent bacterial buildup. If discomfort arises, such as jaw pain or tooth soreness, adjust the advancement gradually. Sudden changes can exacerbate these issues.

If problems persist, review the warranty information for potential replacements or refunds. Customer support is available to assist with troubleshooting and provide guidance. Remember, consistent use and proper care are key to maximizing the benefits of your SnoreMD device.

Device Not Staying in Place

A common frustration with SnoreMD is the device repeatedly dislodging during sleep. Several factors can contribute to this issue. First, ensure you’ve selected the correct size. A device that’s too large or too small won’t maintain a secure fit.

Carefully follow the fitting instructions, gradually advancing the lower jaw component. Rushing this process can lead to instability. Experiment with slight adjustments to find the optimal position that minimizes snoring without compromising comfort or security.

If the device still falls out, consider your sleep position. Sleeping on your side may increase the likelihood of dislodgement compared to sleeping on your back; Try to maintain a consistent sleep posture.

Also, check for any damage to the device itself. Cracks or deformities can affect its ability to stay in place. If damage is present, contact customer support for a replacement. Persistent issues may indicate that SnoreMD isn’t the right solution for your anatomy, and a consultation with a sleep specialist is recommended.

Remember, a secure fit is crucial for both effectiveness and comfort.

Difficulty Breathing While Using SnoreMD

Experiencing difficulty breathing while using SnoreMD is a serious concern and requires immediate attention. While the device aims to improve airflow by repositioning the jaw, incorrect usage or underlying conditions can paradoxically obstruct breathing.

If you feel short of breath, gasp for air, or wake up feeling suffocated, immediately remove the device. Do not attempt to force yourself to continue using it. These symptoms could indicate a compromised airway.

Ensure the device isn’t advanced too far forward. Over-extension of the jaw can sometimes constrict the airway. Gradually adjust the device, and if breathing difficulties persist at any setting, discontinue use.

Individuals with pre-existing respiratory conditions, such as asthma or COPD, should exercise extra caution and consult their physician before using SnoreMD. Similarly, those with central sleep apnea should avoid using mandibular advancement devices.

If breathing problems continue even after removing the device, or if you experience chest pain, seek medical attention promptly. Your health and safety are paramount, and ignoring these symptoms could have severe consequences.

Always prioritize comfortable breathing over snoring reduction.

Cleaning and Storage Instructions

Maintaining proper hygiene is crucial for the longevity and effectiveness of your SnoreMD device, as well as your oral health; Daily cleaning is essential to prevent bacterial buildup and unpleasant odors.

After each use, rinse the device thoroughly with lukewarm water. Avoid using hot water, as it could warp the material. A mild, non-abrasive soap can be used for a more thorough clean, but ensure all soap residue is completely rinsed away.

Use a soft-bristled toothbrush to gently scrub all surfaces of the device, paying particular attention to crevices where debris may accumulate. Avoid harsh chemicals, bleach, or abrasive cleaners, as these can damage the material.

Once cleaned, allow the SnoreMD to air dry completely before storing it. Store the device in its original case, away from direct sunlight and extreme temperatures. This protects it from damage and contamination.

Regularly inspect the device for any signs of wear and tear, such as cracks or discoloration. If damage is detected, discontinue use and consider replacing the device. Proper care ensures a hygienic and effective experience.

Following these steps will help extend the life of your SnoreMD.

SnoreMD and Sleep Positions

The effectiveness of SnoreMD can be influenced by your preferred sleep position. While the device is designed to work regardless of how you sleep, certain positions may yield better results than others.

Sleeping on your back often exacerbates snoring, as gravity causes the tongue and soft palate to collapse towards the back of the throat. SnoreMD is particularly effective in these cases, as it helps maintain an open airway.

Side sleepers may experience reduced snoring with SnoreMD, but the device’s effectiveness can vary depending on the degree of airway obstruction. Some users find that the device is less noticeable and more comfortable when sleeping on their side.

Stomach sleeping is generally not recommended, as it can put pressure on the jaw and potentially cause discomfort while using SnoreMD; It may also reduce the device’s effectiveness.

Experimenting with different sleep positions while using SnoreMD can help you determine what works best for you. The device is backed to deliver results, regardless of your sleep style, but awareness can optimize your experience;

Consider adjusting your pillow height for added comfort and support.

Is SnoreMD Suitable for All Sleepers?

SnoreMD is a widely used oral appliance designed to mitigate snoring, but it isn’t universally suitable for every sleeper. Several factors determine whether SnoreMD will be an effective solution for you.

Individuals with mild to moderate snoring generally experience the most significant benefits. However, those with severe obstructive sleep apnea (OSA) may require more comprehensive treatment, such as CPAP therapy. SnoreMD isn’t intended to treat OSA.

People with existing temporomandibular joint (TMJ) disorders or significant dental issues should consult their dentist before using SnoreMD, as it could potentially exacerbate these conditions. Discomfort or pain should be immediately addressed.

Those with loose teeth, gum disease, or poorly fitted dentures may find SnoreMD uncomfortable or ineffective. A stable dental foundation is crucial for proper device function.

SnoreMD is generally not recommended for individuals who breathe primarily through their mouth, as it requires a closed-mouth position to function correctly.

Ultimately, a consultation with a healthcare professional is recommended to determine if SnoreMD is the right choice for your specific needs and sleep patterns.

Warranty Information and Customer Support

SnoreMD offers a warranty designed to protect customers against manufacturing defects. The standard warranty period is typically one year from the date of purchase, covering issues like material flaws or improper device construction. This does not cover damage resulting from misuse, improper cleaning, or normal wear and tear.

To initiate a warranty claim, customers should contact SnoreMD’s customer support team with proof of purchase and a detailed description of the defect. The company may request photos or require the device to be returned for inspection.

SnoreMD provides customer support through multiple channels, including a dedicated email address, a phone hotline, and a comprehensive FAQ section on their website. Response times may vary depending on the volume of inquiries.

The customer support team can assist with fitting questions, troubleshooting common issues, and providing guidance on device maintenance. They can also clarify warranty terms and procedures.

Customers are encouraged to register their SnoreMD device online to ensure efficient warranty processing and receive updates on product information and special offers.

Detailed warranty information and contact details for customer support are readily available on the official SnoreMD website.

singer sew mate instruction manual

Singer Sew Mate Instruction Manual: A Comprehensive Guide

This guide provides detailed instructions for various Singer Sew Mate models‚ including the 5400‚ Fashion Mate 360‚ and Heavy Duty 4452. Download PDF manuals and access support resources for optimal sewing.

The Singer Sew Mate represents a long-standing tradition of quality and innovation in home sewing. These machines‚ encompassing models like the 5400‚ Fashion Mate 360‚ and Heavy Duty 4452‚ are designed for a wide range of users‚ from beginners taking their first stitches to experienced sewists tackling complex projects.

This series offers a blend of user-friendly features and robust performance. Whether you’re interested in basic alterations‚ crafting‚ or heavy-duty tasks like denim work‚ a Singer Sew Mate model likely suits your needs. Understanding your specific model is crucial‚ as features and capabilities vary.

This manual aims to provide a comprehensive overview of the Singer Sew Mate‚ covering everything from initial setup and threading to advanced techniques and troubleshooting. Accessing the correct PDF manual for your model is the first step towards unlocking its full potential. Explore the resources available on the official Singer website for additional support and guidance.

Understanding Your Sewing Machine Model

Identifying your specific Singer Sew Mate model is paramount for accessing the correct resources and maximizing its capabilities. The series includes diverse options like the 5400‚ known for its versatility‚ the Fashion Mate 360‚ geared towards fashion sewing‚ and the Heavy Duty 4452‚ built for tougher materials.

Each model boasts a unique set of features‚ stitch options‚ and performance characteristics. The Heavy Duty 4452‚ for instance‚ features a metal frame and higher sewing speed‚ ideal for denim and canvas. Conversely‚ the Fashion Mate 360 prioritizes ease of use for garment construction.

Locate the model number‚ typically found on a sticker on the machine’s body. Utilize this number to download the corresponding PDF manual from the Singer website. Familiarize yourself with the specific stitch patterns‚ presser feet‚ and adjustments available on your machine to unlock its full potential and ensure optimal sewing results.

Key Features of the Singer Sew Mate

Singer Sew Mate machines are celebrated for their blend of affordability and functionality. Common features across models include a selection of built-in stitches – ranging from basic straight and zigzag to decorative options – catering to diverse sewing projects. The Heavy Duty 4452 stands out with 32 built-in stitches‚ while others offer a substantial variety as well.

Many models incorporate adjustable stitch length and width‚ providing customization for different fabrics and techniques. Automatic needle threading‚ present in some advanced versions‚ simplifies setup and saves time. A heavy-duty metal frame‚ particularly in the 4452‚ ensures durability and stability during demanding tasks.

User-friendly controls and clear stitch selection dials contribute to ease of operation. Furthermore‚ compatibility with a range of optional presser feet expands the machine’s versatility‚ enabling specialized techniques like buttonholes and zipper insertion. These features combine to make the Singer Sew Mate a reliable choice for both beginners and experienced sewists.

Stitch Selection and Functions

Singer Sew Mate machines offer a diverse range of stitches‚ selected via dials or electronic controls depending on the model. Essential stitches include the straight stitch‚ ideal for seams and general construction‚ and the zigzag stitch‚ used for finishing raw edges and creating stretchable seams.

Decorative stitches add embellishment to projects‚ while buttonhole stitches automate the process of creating professional-looking buttonholes. The Heavy Duty 4452 boasts 32 built-in stitches‚ providing extensive options for various applications. Stitch functions are often adjustable‚ allowing users to modify stitch length and width to suit fabric type and desired effect.

Understanding each stitch’s purpose is crucial for achieving optimal results. Refer to your machine’s manual for detailed explanations and recommended settings. Experimentation with different stitches and settings unlocks creative possibilities and enhances sewing projects. Proper stitch selection ensures both functionality and aesthetic appeal.

Threading the Singer Sew Mate

Correct threading is vital for proper sewing machine operation. Begin by raising the presser foot‚ which opens the tension discs. Guide the thread from the spool‚ through the thread guide‚ and around the tension discs‚ ensuring it seats correctly. Next‚ thread the take-up lever‚ then down through the needle clamp.

Always thread with the presser foot up to maintain proper tension. Different models may have slightly varying threading paths; consult your specific machine’s manual for a diagram. Ensure the thread is securely inserted into the needle’s eye‚ from front to back.

Incorrect threading leads to skipped stitches or thread breakage. Regularly re-thread the machine‚ especially when changing thread colors or experiencing sewing issues. A well-threaded machine ensures smooth‚ consistent stitching and prevents frustrating interruptions during your sewing projects.

Winding the Bobbin

Properly winding the bobbin is crucial for consistent stitch quality; Place the thread spool on the spool pin and guide the thread through the thread guide. Then‚ wrap the thread several times around the bobbin‚ ensuring a secure start. Engage the bobbin winding mechanism – typically by pushing the bobbin spindle to the right.

Press the foot pedal gently to begin winding. The machine will automatically stop when the bobbin is full. Disengage the winding mechanism and remove the bobbin. Ensure the bobbin is wound evenly to prevent uneven stitching.

Using the correct bobbin type for your Singer Sew Mate is essential. Refer to your manual for the appropriate bobbin class. A fully and evenly wound bobbin guarantees smooth and reliable sewing performance‚ avoiding tension issues and thread nests.

Bobbin Insertion and Removal

Correct bobbin placement is vital for proper stitch formation. Locate the bobbin case – it’s usually a sliding compartment beneath the needle plate. Open the compartment and insert the wound bobbin‚ ensuring the thread unwinds in the correct direction‚ as indicated in your manual. Guide the thread through the tension spring of the bobbin case.

To remove the bobbin‚ gently pull up on the release lever or button (specific to your model). Lift out the bobbin case and then remove the bobbin. Always ensure the machine is turned off before handling the bobbin.

A properly inserted bobbin and correctly threaded bobbin case contribute to balanced tension and prevent skipped stitches. Regularly check the bobbin thread level during sewing to maintain consistent results.

Needle Installation and Types

Selecting the correct needle is crucial for fabric type and stitch quality. Turn off and unplug the sewing machine before changing the needle. Loosen the needle clamp screw using the screwdriver (usually included with the machine). Insert a new needle with the flat side facing the back of the machine. Ensure the needle is pushed up fully into the clamp.

Tighten the clamp screw securely. Common needle types include universal‚ ballpoint‚ and stretch needles. Universal needles work for woven fabrics‚ ballpoint for knits‚ and stretch for lycra/spandex. Needle sizes range from 80/12 (fine) to 110/18 (heavy).

A dull or damaged needle can cause skipped stitches or fabric damage. Replace the needle regularly‚ especially when working with thick or abrasive materials.

Adjusting Stitch Length and Width

Stitch length determines the distance between stitches‚ impacting seam strength and appearance. Use shorter stitch lengths for delicate fabrics and curves‚ and longer lengths for basting or heavier materials. Locate the stitch length dial‚ typically marked with numbers indicating millimeters. Adjust the dial to your desired length‚ testing on scrap fabric first.

Stitch width controls the zigzag’s breadth‚ influencing decorative effects and seam finishing. The width dial‚ often adjacent to the length dial‚ allows adjustment. Wider stitches are ideal for stretch fabrics or decorative applications‚ while narrower settings are suitable for reinforcing seams.

Experiment with different settings to achieve the desired look. Refer to your machine’s manual for specific recommendations based on fabric and stitch type.

Tension Adjustment

Proper tension is crucial for balanced stitches; imbalances cause looping or puckering. Upper tension controls the thread from the spool‚ while lower tension manages the bobbin thread. Begin by threading the machine correctly‚ as incorrect threading is a common cause of tension issues.

If stitches loop on the underside‚ increase upper tension. Conversely‚ if looping occurs on the top‚ decrease upper tension. Adjust the tension dial in small increments‚ testing each change on scrap fabric. A balanced stitch will have even thread distribution on both sides.

Consider fabric type; heavier fabrics often require higher tension. Always re-thread both needles if adjustments don’t resolve the problem. Consult your manual for specific tension guidelines for different fabrics and stitches.

Presser Foot Selection and Usage

Selecting the correct presser foot is vital for achieving optimal sewing results. The Singer Sew Mate comes with various feet for different applications. A standard foot is ideal for straight and zigzag stitching on woven fabrics.

A zipper foot allows close stitching along zippers. A buttonhole foot automates buttonhole creation‚ ensuring consistent size and shape. For free-motion quilting or darning‚ utilize the open-toe foot. Ensure the foot is securely attached before starting to sew.

Lower the presser foot lever before beginning; this engages the feed dogs. Different fabrics may benefit from specific feet – a walking foot aids in feeding multiple layers evenly. Refer to your manual for a detailed guide to each foot’s function and proper usage.

Basic Sewing Techniques

Mastering basic techniques unlocks the full potential of your Singer Sew Mate. Begin with practicing straight stitching on scrap fabric‚ maintaining a consistent seam allowance. Zigzag stitching offers versatility for finishing raw edges and creating decorative effects.

Buttonhole sewing‚ often automated on newer models‚ requires proper buttonhole foot attachment and fabric stabilization. Always test stitch settings before sewing on your final project. Backstitching at the beginning and end of seams secures the stitches‚ preventing unraveling.

Proper fabric handling is crucial; guide the fabric gently‚ avoiding pulling or pushing. Consistent sewing speed contributes to even stitch quality. Regular practice builds confidence and skill‚ allowing you to tackle more complex projects with ease.

Straight Stitching

Straight stitching is the foundation of most sewing projects with your Singer Sew Mate. Select the straight stitch option on your machine‚ typically indicated by a straight line symbol. Ensure the stitch length is appropriate for your fabric – shorter for delicate fabrics‚ longer for heavier materials.

Begin by lowering the presser foot and gently guiding the fabric under the needle. Maintain a consistent speed and seam allowance using the edge of the presser foot as a guide. Backstitch at the beginning and end of the seam to secure the stitches.

Practice on scrap fabric to achieve even‚ consistent lines. Adjust the stitch length if needed to prevent puckering or loose stitches. Proper tension is vital for a balanced stitch; refer to the tension adjustment section if experiencing issues.

Zigzag Stitching

Zigzag stitching offers versatility beyond straight seams on your Singer Sew Mate. Select the zigzag stitch setting‚ identified by the zigzag symbol‚ and adjust the stitch width and length according to your project needs. Wider stitches are ideal for finishing raw edges‚ preventing fraying‚ while narrower stitches are suitable for decorative applications.

Test the stitch on scrap fabric to confirm the desired appearance. Use zigzag stitching to reinforce buttonholes‚ attach elastic‚ or create decorative embellishments. Guide the fabric smoothly under the presser foot‚ maintaining a consistent speed.

Experiment with different width and length combinations to achieve varied effects. Ensure proper tension for a balanced stitch; adjust as needed. Zigzag is also useful for sewing knits‚ allowing the fabric to stretch with the seam.

Buttonhole Sewing

Buttonhole sewing on your Singer Sew Mate requires utilizing the designated buttonhole foot and stitch settings. Consult your machine’s manual for the specific buttonhole stitch selection‚ as it varies between models like the 5400 and Fashion Mate 360. Attach the buttonhole foot securely.

Measure the button size and adjust the buttonhole length accordingly using the machine’s controls. Test the buttonhole on scrap fabric first to ensure proper sizing. Place the fabric under the presser foot and begin sewing‚ following the marked guidelines on the needle plate.

The machine will typically sew a series of stitches‚ then prompt you to stop and reposition the fabric. Complete the buttonhole by following the machine’s instructions‚ often involving turning the fabric and continuing to sew. Carefully cut open the buttonhole without damaging the stitches.

Maintaining Your Singer Sew Mate

Regular maintenance is crucial for the longevity and performance of your Singer Sew Mate. Cleaning the machine after each use prevents lint and dust buildup‚ which can cause malfunctions. Remove the needle plate and brush away debris from the bobbin area and feed dogs.

Oiling the machine‚ particularly the moving parts‚ ensures smooth operation. Refer to your manual for specific oiling points and use only sewing machine oil. Avoid over-oiling‚ as this can attract more lint. Inspect the bobbin case and surrounding areas for any signs of wear or damage.

Periodically check the needle for bends or dullness‚ replacing it as needed. A clean and well-oiled machine will consistently deliver high-quality stitches and prevent frustrating issues. Proper care extends the life of your investment.

Cleaning and Oiling

Consistent cleaning is vital for a smoothly functioning Singer Sew Mate. Begin by disconnecting the power and removing the needle. Use a brush to remove lint and thread scraps from the bobbin area‚ feed dogs‚ and around the needle plate. A small vacuum cleaner attachment can also be helpful for reaching tight spaces.

Oiling ensures moving parts operate efficiently. Apply a few drops of sewing machine oil to the designated oiling points – typically found in your manual. Focus on the bobbin race‚ hook‚ and any areas with visible movement. Avoid over-oiling‚ which attracts dust.

Wipe away excess oil with a clean cloth. Regular cleaning and oiling prevent jams‚ skipped stitches‚ and extend the machine’s lifespan. Always refer to your specific model’s manual for detailed instructions and recommended oil types.

Troubleshooting Common Issues

Encountering problems with your Singer Sew Mate is common‚ but often easily resolved. Thread breakage frequently stems from incorrect threading‚ a dull needle‚ or improper tension. Skipped stitches can indicate a bent needle‚ incorrect needle size for the fabric‚ or timing issues.

Fabric feeding problems might be caused by incorrect presser foot pressure‚ tangled bobbin thread‚ or lint buildup around the feed dogs. Always re-thread the machine and check the bobbin if issues arise. Ensure the needle is correctly inserted and of the appropriate type for your material.

Consult your manual for specific troubleshooting steps related to your model. Singer’s website also offers extensive support resources and FAQs. If problems persist‚ consider contacting Singer customer support for assistance.

Dealing with Thread Breakage

Thread breakage is a frequent issue‚ often easily addressed. First‚ re-thread the entire machine‚ ensuring the presser foot is up‚ allowing proper thread flow. Inspect the thread path for any snags or obstructions. A dull or bent needle is a common culprit; replace it with a new‚ appropriate needle for your fabric type.

Check the bobbin winding – uneven winding can cause breaks. Adjust the thread tension; too tight or too loose tension can strain the thread. Ensure you’re using quality thread compatible with your machine. Incorrect threading of the upper or lower thread is a primary cause.

Finally‚ clean the machine‚ removing lint and debris that can interfere with thread movement. Refer to your manual for specific diagrams and guidance. Persistent breakage may indicate a more significant mechanical issue.

Fixing Skipped Stitches

Skipped stitches can be frustrating‚ but often have simple solutions. Begin by replacing the needle – a bent or dull needle is a common cause. Ensure the needle is correctly inserted‚ with the flat side facing the correct direction (refer to your manual). Check the thread type; using the wrong thread for your fabric can lead to skipped stitches.

Verify proper threading of both the upper and bobbin threads. Adjust the needle plate; a damaged or incorrect plate can cause issues. Inspect the bobbin case and ensure it’s clean and functioning smoothly. Correct tension is crucial; too loose tension can result in skipped stitches;

Finally‚ try a different fabric or adjust the sewing speed. Slow down for thicker or more challenging materials. Consistent skipped stitches suggest a mechanical problem requiring professional attention.

Addressing Fabric Feeding Problems

Fabric feeding issues often stem from a few key areas. First‚ check the presser foot – ensure it’s lowered correctly‚ as the machine won’t feed fabric when raised. Verify the feed dogs are engaged; some machines have a setting to drop them for free-motion sewing. Clean the feed dogs thoroughly‚ removing any lint or thread buildup.

Inspect the presser foot pressure; too much or too little pressure can hinder feeding. Ensure you’re using the correct presser foot for your fabric type. Check the bobbin area for tangled thread or debris‚ as this can create drag. Adjust the tension – incorrect tension can cause uneven feeding.

Finally‚ try a different fabric or needle. Delicate fabrics may require a walking foot for better control. Persistent problems may indicate a need for professional servicing.

Singer Sew Mate 5400 Specifics

The Singer Sew Mate 5400 is a popular model boasting 60 built-in stitches‚ offering versatility for various projects. It features an automatic needle threader‚ simplifying setup‚ and a one-step buttonhole function for consistent results. This machine includes adjustable stitch length and width controls‚ allowing for customization.

Users can access a free downloadable manual (PDF format) online for detailed guidance. The 5400 is designed for both beginners and experienced sewists‚ providing a balance of ease-of-use and advanced features. It’s important to regularly clean the machine to maintain optimal performance.

Common issues‚ like thread breakage‚ are often resolved by re-threading the machine correctly. Remember to consult the manual for specific troubleshooting steps related to the 5400 model.

Fashion Mate 360 Model Details

The Singer Fashion Mate 360 is designed with the fashion-conscious sewist in mind‚ offering a range of stitches for garment construction and creative projects. This model features 30 built-in stitches‚ including decorative options‚ and provides adjustable stitch length and width. A key feature is its ease of use‚ making it suitable for beginners.

The instruction manual‚ available for free download as a PDF‚ details threading procedures‚ bobbin winding‚ and stitch selection. Users will find guidance on basic sewing techniques and troubleshooting common issues. Regular maintenance‚ such as cleaning‚ is crucial for optimal performance.

The Fashion Mate 360 is known for its reliability and ability to handle a variety of fabrics. Consult the manual for specific needle recommendations based on fabric type.

Heavy Duty 4452 Model Overview

The SINGER Heavy Duty 4452 is a robust sewing machine built for tackling tougher projects‚ from denim to upholstery. Featuring a heavy-duty metal frame and a powerful motor‚ it offers increased sewing speed and durability. This model boasts 32 built-in stitches‚ providing versatility for various applications.

The user manual (available as a PDF download) provides comprehensive instructions on machine setup‚ threading‚ and stitch selection. It details how to utilize the machine’s features for optimal performance‚ including adjusting tension and stitch length. Troubleshooting guides assist with common issues like thread breakage.

The 4452 is designed for both beginners and experienced sewists seeking a reliable‚ high-performance machine. Regular cleaning and oiling‚ as outlined in the manual‚ are essential for maintaining its longevity.

Finding Additional Resources & Manuals

Numerous online resources offer support for your Singer Sew Mate. The official SINGER website is a primary source‚ providing downloadable PDF manuals for various models‚ including the 5400 and Fashion Mate 360. These manuals cover everything from basic operation to advanced techniques and troubleshooting.

Manualsbase and other online repositories also host Singer manuals‚ offering alternative download options. For direct assistance‚ Singer’s customer support team is available to answer questions and provide guidance. Online forums and communities dedicated to sewing often feature helpful tips and advice from fellow Singer Sew Mate owners.

Remember to specify your exact model number when searching for manuals or contacting support to ensure you receive the most relevant information. Accessing these resources will enhance your sewing experience;

Where to Download Singer Manuals (PDF)

Locating PDF manuals for your Singer Sew Mate is straightforward. The official Singer website (singer.com) provides a dedicated section for manual downloads. Simply search by model number – such as Sew Mate 5400‚ Fashion Mate 360‚ or Heavy Duty 4452 – to find the corresponding PDF file.

Alternatively‚ websites like Manualsbase offer a collection of Singer sewing machine manuals‚ including older models. A quick online search for “Singer Sew Mate [model number] manual PDF” will also yield numerous results. Ensure the website is reputable before downloading to avoid potential security risks.

Downloaded PDFs allow offline access to instructions‚ making them convenient for use during sewing sessions. These digital manuals often include detailed diagrams and troubleshooting guides‚ enhancing your sewing experience.

Contacting Singer Customer Support

For personalized assistance with your Singer Sew Mate‚ reaching out to Singer’s customer support is a valuable option. The official Singer website (singer.com) provides various contact methods‚ including a comprehensive FAQ section addressing common issues. You can often find solutions to your problems quickly through self-help resources.

If further assistance is needed‚ Singer offers phone support and online chat options. These channels allow direct communication with trained technicians who can guide you through troubleshooting steps or provide specific instructions for your model – be it the 5400‚ Fashion Mate 360‚ or Heavy Duty 4452.

When contacting support‚ have your machine’s model number and serial number readily available. This information helps the representative quickly identify your machine and provide accurate assistance. Expert support ensures a smooth and enjoyable sewing experience.

singer curvy instruction manual

Singer Curvy Instruction Manual: An Overview

This manual‚ inspired by Anne Peckham’s work‚ guides singers of all levels․ It focuses on exercises‚ vocal health‚ and techniques
to unlock vocal power and agility‚ emphasizing internal feel and control․

Understanding the “Curvy” Voice

The “curvy” voice acknowledges the natural transitions and breaks within a singer’s range․ Rather than forcing a uniform tone‚ this approach embraces the unique qualities of each vocal register․ It’s about identifying where your voice naturally shifts – the point where it feels less connected or consistent – and learning to navigate those areas smoothly․

Understanding these curves isn’t about eliminating them‚ but about controlling them․ As Reddit’s r/singing suggests‚ focusing on the feel inside allows for memorizing the correct technique‚ leading to controlled transitions and a healthier‚ more expressive sound․ This internal awareness is key․

The Importance of Vocal Health

Maintaining optimal vocal health is paramount for any singer‚ especially when exploring range and technique․ Anne Peckham’s comprehensive guide emphasizes this‚ recognizing that consistent practice demands a healthy instrument․ Ignoring vocal fatigue or pushing through hoarseness can lead to serious issues like nodules or polyps‚ potentially requiring professional intervention․

Prioritizing vocal hygiene – proper hydration‚ rest‚ and avoiding irritants – is crucial․ A healthy voice responds better to training‚ allowing for greater agility and a wider‚ more sustainable range without strain․

Vocal Warm-up Exercises

Prepare your voice with exercises like lip trills‚ tongue rolls‚ and humming․ These techniques‚ detailed in Peckham’s guide‚ enhance resonance and prepare for vocal agility․

Lip Trills and Tongue Rolls

Lip trills and tongue rolls are foundational warm-up exercises‚ promoting vocal cord flexibility and breath control․ These techniques gently activate the vocal mechanism‚ releasing tension and improving airflow․ Begin with relaxed lips‚ blowing air to create a “brrr” sound – a lip trill․ Similarly‚ a tongue roll involves vibrating the tongue while expelling air․

Focus on maintaining a consistent‚ even sound throughout your range․ These exercises‚ as advocated by vocal experts‚ are crucial for preparing the voice for more demanding tasks‚ ensuring a healthy and efficient vocal performance; They are a cornerstone of any effective vocal routine․

Humming Exercises for Resonance

Humming is a powerful tool for developing resonance and vocal placement․ By closing the mouth and humming on a comfortable pitch‚ singers can focus on feeling the vibrations in their chest‚ face‚ and head․ Experiment with different vowel shapes within the hum – “mmm-ee‚” “mmm-ah‚” “mmm-oo” – to explore various resonant spaces․

This technique‚ often recommended by vocal coaches like Anne Peckham‚ encourages efficient airflow and helps singers connect with the natural amplification of their vocal tract․ Consistent humming builds awareness of resonance‚ leading to a fuller‚ richer tone․

Sirens: Expanding Vocal Range

Siren exercises are crucial for smoothly expanding vocal range and bridging registers․ Begin with a comfortable pitch and glide upwards‚ then downwards‚ mimicking a siren’s wail․ Maintain consistent breath support throughout the exercise‚ avoiding tension in the jaw or neck․

Focus on a connected sound‚ minimizing breaks or flips․ As highlighted in resources for singers‚ consistent practice with sirens helps build vocal agility and control‚ ultimately allowing for easier access to higher and lower notes without strain․

Breathing Techniques for Singers

Mastering breath control is fundamental․ Diaphragmatic breathing provides essential support‚ enabling sustained tones and vocal agility‚ crucial for healthy and powerful singing․

Diaphragmatic Breathing Explained

Diaphragmatic breathing‚ often called “belly breathing‚” is the cornerstone of vocal technique․ Unlike shallow chest breathing‚ it utilizes the diaphragm – a large muscle below the lungs – to draw air deeply into the lungs․ Imagine filling your abdomen with air‚ allowing it to expand outwards as your lower ribs move laterally․

This technique maximizes lung capacity and provides a stable foundation for vocal support․ Focus on feeling your stomach expand on the inhale and gently contract on the exhale‚ maintaining a relaxed chest and shoulders․ Consistent practice builds strength and control‚ essential for sustained notes and dynamic phrasing․

Breath Support and Control

Effective breath support isn’t about holding your breath‚ but managing the exhale․ Once you’ve inhaled diaphragmatically‚ engage your core muscles to regulate the airflow․ Think of a gentle‚ consistent pressure‚ resisting the natural urge to release all the air at once․

This controlled exhale provides a steady stream of air to power your vocal cords‚ enabling longer phrases and consistent tone․ Exercises focusing on sustained tones and controlled release are crucial for developing this vital skill‚ leading to improved vocal stamina and expression․

Sustained Tone Exercises

These exercises build breath control and vocal stamina․ Begin with a comfortable pitch and sustain a vowel sound – “ah‚” “ee‚” “oo” – for as long as possible while maintaining consistent tone and avoiding strain․ Focus on diaphragmatic support‚ keeping your core engaged and your body relaxed․

Gradually increase the duration of the sustain‚ and explore different pitches․ Monitor for any wavering or loss of support‚ adjusting your technique as needed․ Consistent practice strengthens the muscles involved in breath control‚ leading to a more powerful and controlled voice․

Essential Vocal Skills

Mastering resonance‚ tone shaping‚ agility‚ and pitch accuracy is crucial․ These skills‚ honed through focused exercises‚ unlock vocal potential and expressive capabilities․

Resonance and Tone Shaping

Achieving optimal resonance and tone shaping is fundamental for a compelling vocal sound․ This involves understanding how sound vibrates within the vocal tract – the throat‚ mouth‚ and nasal cavities․ Exercises focusing on manipulating these spaces‚ as detailed in resources like Anne Peckham’s guide‚ help singers discover richer‚ fuller tones․

Experimenting with vowel modifications and consciously directing airflow can dramatically alter tone quality․ The goal isn’t simply loudness‚ but a balanced‚ resonant sound that projects effectively and carries emotional weight․ Developing this awareness requires consistent practice and a keen ear for subtle nuances․

Vocal Agility and Flexibility

Developing vocal agility allows for effortless navigation through melodic runs and ornamentation․ This isn’t about speed‚ but precise control and coordination of the vocal muscles․ Regular exercises‚ inspired by techniques found in comprehensive vocal training guides‚ are crucial for building this skill․

Focus on smooth transitions between notes‚ minimizing tension in the jaw and tongue․ Scales‚ arpeggios‚ and playful vocalizations help to increase flexibility․ Remember‚ the key is to prioritize healthy technique over attempting complex passages prematurely‚ as emphasized by experienced instructors․

Pitch Accuracy Training

Achieving consistent pitch accuracy is fundamental to compelling singing․ Begin with simple exercises like matching pitch with a piano or tuning fork‚ gradually increasing complexity․ Utilize interval training – accurately singing ascending and descending intervals – to strengthen your ear and vocal control․

Record yourself singing and critically listen for inaccuracies․ Focus on the feel of correct pitch‚ internalizing the sensation․ As a Reddit user noted‚ memorizing the internal sensation is key to consistent‚ healthy technique and ultimately‚ good sound․

Addressing Vocal Breaks

Vocal breaks are common‚ but manageable․ Identify the break point and utilize exercises to smooth transitions between registers‚ avoiding strain and improving vocal flow․

Identifying the Break Point

Pinpointing your vocal break is crucial for seamless singing․ This occurs where your voice shifts between chest and head voice‚ often sounding like a ‘crack’ or noticeable change in tone․

Slowly ascend and descend scales‚ paying close attention to where the transition feels unsteady or sounds disjointed․ Record yourself to objectively analyze the sound․

Understanding where this happens allows targeted exercises to bridge the gap‚ fostering a smoother‚ more connected vocal performance and preventing unwanted interruptions during songs․

Exercises to Smooth Vocal Transitions

Once identified‚ smooth transitions require focused practice․ Utilize lip trills and tongue rolls across your break point‚ maintaining consistent airflow․

Gradually narrow the range around the break‚ then expand it as control improves․

Sirens – gliding smoothly between low and high notes – also help connect registers․ Remember the Reddit advice: focus on the feel inside‚ memorizing the sensation of correct technique for consistent‚ healthy transitions․

Understanding Vocal Registers

Most singers experience a “break” between vocal registers – chest‚ mixed‚ and head voice․ Recognizing where this occurs is crucial for seamless transitions․

The break isn’t a flaw‚ but a natural shift in vocal production․

Exercises like sirens and gradual range extension‚ as highlighted by resources like Ramsey Voice Studio‚ help blend these registers․ Focus on the internal sensation‚ as suggested on Reddit‚ to gain control and eliminate strain during register changes․

Expanding Vocal Range

Range expansion utilizes techniques like the “bratty” exercise‚ carefully extending limits without strain‚ guided by internal feel and control for optimal results․

The “Bratty” Exercise for High Notes

The “bratty” exercise‚ a cornerstone for range expansion‚ involves intentionally creating a slightly nasal‚ forward tone – think of a playful‚ assertive child․ This technique encourages a lifting of the soft palate and a focused resonance‚ facilitating access to higher notes with reduced tension․

It’s crucial to approach this exercise with caution‚ avoiding excessive force or strain․ The goal isn’t to maintain the “bratty” sound‚ but to use it as a catalyst for unlocking higher frequencies․

Focus on the sensation of the sound‚ memorizing the internal feel‚ and gradually refining control․

Gradual Range Extension Techniques

Expanding vocal range isn’t about forcing notes; it’s a progressive journey․ Begin by identifying your comfortable range and incrementally extending it upwards and downwards․ Utilize scales‚ arpeggios‚ and glides‚ focusing on maintaining consistent breath support and relaxed vocal production․

Avoid pushing beyond your current limits‚ as this can lead to strain and injury․

Prioritize the “feel” of the technique‚ internalizing the sensations of proper resonance and support․ Consistent‚ patient practice yields sustainable results‚ unlocking new vocal possibilities․

Avoiding Vocal Strain

Protecting your voice is paramount․ Vocal strain arises from improper technique‚ overuse‚ or pushing beyond your current capabilities․ Prioritize consistent warm-ups and cool-downs‚ focusing on gentle exercises that prepare and recover your vocal cords․

Maintain excellent hydration and avoid irritants like smoke and excessive caffeine․

Listen to your body; if you experience discomfort‚ stop immediately․ Remember‚ gradual progression and mindful practice are key to sustainable vocal health and preventing injury․

Advanced Vocal Techniques

Mastering vibrato‚ belting (with caution)‚ and dynamics elevates performance․ These techniques‚ explored in resources like Peckham’s guide‚ demand control and vocal maturity․

Vibrato Control

Developing consistent vibrato is a hallmark of skilled singing․ It’s not simply “adding wobble‚” but a natural oscillation arising from relaxed technique and consistent breath support․ Focus on the “feel” inside‚ as emphasized by online communities like r/singing‚ memorizing the sensation rather than chasing a specific sound․

Begin by sustaining a tone and gently allowing the vibrato to emerge organically․ Avoid forcing it; tension hinders natural oscillation․ Experiment with varying speeds and depths‚ always prioritizing a relaxed and supported sound․ Consistent practice‚ guided by resources like Anne Peckham’s work‚ is key to achieving controlled and expressive vibrato․

Belting Techniques (with caution)

Belting‚ a powerful vocal technique‚ demands careful execution to avoid strain․ It involves bringing chest voice resonance higher in the range‚ requiring robust breath support and a relaxed larynx․ Prioritize proper technique over volume; forcing the sound can lead to vocal fatigue or even injury․

Anne Peckham’s resources emphasize healthy vocal production․ Begin with gentle exercises‚ gradually increasing intensity․ Focus on maintaining open vowels and a supported airflow․ Listen to your body and stop immediately if you experience any discomfort․ Belting should feel powerful‚ not painful․

Vocal Dynamics and Expression

Beyond technical skill‚ compelling singing requires emotional connection and dynamic control․ Vocal dynamics involve varying volume‚ tone‚ and intensity to convey meaning and engage the listener․ Explore subtle shifts in breath support and resonance to create nuanced phrasing․

Remember‚ internal focus—memorizing the “feel” of correct technique—is crucial․ As highlighted on Reddit’s r/singing‚ mastering internal control allows for expressive freedom․ Experiment with contrasting loud and soft passages‚ building crescendos and diminuendos‚ and imbuing each note with intention․

Common Vocal Problems & Solutions

Addressing issues like hoarseness‚ fatigue‚ nodules‚ or polyps is vital․ Prioritize vocal hygiene and seek professional help when needed‚ per resources available․

Hoarseness and Vocal Fatigue

Hoarseness and vocal fatigue signal overuse or improper technique․ Rest your voice immediately‚ avoiding speaking or singing․ Hydrate thoroughly‚ and consider steam inhalation to soothe irritated vocal cords․ Analyze your technique – are you pushing too hard‚ or lacking proper breath support?

Remember Anne Peckham’s emphasis on healthy technique․ Ignoring these symptoms can lead to more serious problems․ Prioritize vocal hygiene and listen to your body’s signals․ Consistent‚ mindful practice is key to preventing these issues․

Nodules and Polyps (Seeking Professional Help)

Nodules and polyps are growths on the vocal folds requiring immediate medical attention․ These often develop from chronic vocal abuse or improper technique‚ demanding intervention from an otolaryngologist (ENT doctor)․ Self-treatment is ineffective and can worsen the condition․

A professional diagnosis is crucial‚ potentially involving voice therapy alongside medical treatment․ Following a doctor’s orders is paramount for recovery‚ mirroring the importance of healthy technique emphasized by experts like Anne Peckham․

Maintaining Vocal Hygiene

Vocal hygiene encompasses habits protecting vocal fold health․ Hydration is key – drink plenty of water to lubricate the vocal cords‚ avoiding excessive caffeine and alcohol which can dehydrate․ Rest your voice when feeling fatigued‚ mirroring the importance of mindful practice․

Avoid irritants like smoke and allergens․ Steam inhalation can soothe irritated tissues‚ and a balanced diet supports overall vocal health‚ aligning with Anne Peckham’s holistic approach to vocal development․

The Role of Posture and Alignment

Optimal posture facilitates diaphragmatic breathing and resonance․ Body awareness and releasing tension are crucial for efficient vocal production‚ enhancing control and range․

Correct Posture for Optimal Breathing

Achieving correct posture is foundational for singers‚ directly impacting breath support and vocal freedom․ Imagine a string pulling you upwards from the crown of your head‚ lengthening the spine․ Shoulders should be relaxed and down‚ not tense or rounded forward․

Feet should be firmly planted on the ground‚ providing a stable base․ Avoid locking your knees; maintain a slight bend․ This alignment allows the diaphragm to descend fully during inhalation‚ maximizing lung capacity․ Proper posture isn’t rigid; it’s about balanced alignment‚ enabling efficient airflow and resonance․

Body Awareness and Tension Release

Cultivating body awareness is crucial; singers often unknowingly hold tension in their jaw‚ neck‚ and shoulders․ Regularly scan your body for tightness‚ consciously releasing it․ Gentle stretches and mindful movement can help․

Focus on feeling the sensations within – how your breath moves‚ how your muscles engage․ As a Reddit user noted‚ memorizing the feel of correct technique is paramount․ This internal focus‚ rather than solely on the sound‚ builds muscle memory and control‚ leading to healthier‚ more expressive singing․

Memorizing the “Feel” of Correct Technique

Prioritize internal sensations over sound․ Focus on memorizing how correct technique feels within your body‚ building muscle memory for consistent‚ healthy vocal control․

Internal Focus vs․ Sound Focus

Many singers‚ especially beginners‚ instinctively prioritize the sound of their voice‚ striving for a specific tone or pitch․ However‚ true vocal development hinges on shifting the focus inward․ Instead of chasing an external result‚ concentrate on the physical sensations – the feeling of breath support‚ resonance‚ and muscle engagement․

This internal awareness allows for greater control and consistency․ As highlighted in discussions‚ remembering the “feel” inside enables singers to manipulate technique at will‚ producing desired sounds healthily․ By prioritizing internal sensations‚ singers build a foundation for sustainable vocal growth and artistry․

Developing Muscle Memory

Consistent practice is paramount for building vocal muscle memory․ Repetition of correct techniques‚ like diaphragmatic breathing and proper posture‚ ingrains these movements into the body’s subconscious․ This allows singers to execute techniques effortlessly‚ freeing the mind to focus on artistry and expression․

As emphasized‚ paying attention to internal sensations during practice accelerates this process․ Over time‚ singers will “remember how it feels” to produce healthy‚ controlled sounds‚ enabling consistent performance and vocal agility․

Resources for Further Learning

Explore Anne Peckham’s “Vocal Workouts for the Contemporary Singer” and consider guidance from a qualified vocal coach for personalized instruction and progress․

Recommended Vocal Coaches

Finding the right vocal coach is crucial for personalized guidance․ Seek instructors experienced with contemporary techniques‚ focusing on healthy vocal production and range expansion․ Look for coaches affiliated with reputable institutions like Berklee College of Music‚ mirroring Anne Peckham’s expertise․
Prioritize those who emphasize internal awareness – the “feel” of correct technique – as highlighted on Reddit’s r/singing․ A good coach will help you memorize these sensations‚ enabling control and consistent‚ healthy sound production‚ ultimately unlocking your vocal potential․

Online Vocal Training Programs

Numerous online platforms offer supplemental vocal training․ Explore programs that build upon foundational exercises‚ like those detailed in Anne Peckham’s “Vocal Workouts for the Contemporary Singer․” Seek courses emphasizing breath support‚ resonance‚ and range extension․
Ramsey Voice Studio provides valuable video exercises․ Remember‚ online resources are best used in conjunction with personalized coaching‚ focusing on internal feel and memorizing correct technique‚ as discussed on r/singing‚ to avoid unhealthy habits․

Books and Publications (e․g․‚ Anne Peckham’s work)

Anne Peckham’s “Vocal Workouts for the Contemporary Singer” is a cornerstone resource․ This comprehensive guide‚ born from her Berklee College of Music expertise‚ provides a wealth of exercises and wisdom․ Supplement with texts exploring vocal anatomy and pedagogy․ Prioritize materials that emphasize the “feel” of correct technique‚ mirroring advice from r/singing‚ to build muscle memory and internal awareness․ Remember‚ knowledge empowers informed practice and healthy vocal development․

Putting it All Together: Practice Routine

A daily routine‚ incorporating warm-ups‚ breathing‚ and exercises‚ is key․ Consistent practice‚ focused on internal feel‚ fosters long-term vocal growth and control․

Daily Vocal Workout Schedule

Begin with 15 minutes of diaphragmatic breathing exercises to establish solid breath support․ Follow this with 10 minutes of lip trills and humming‚ focusing on resonance․ Dedicate 20 minutes to siren exercises‚ gradually expanding your range‚ and 15 minutes to sustained tone practice․

Prioritize internal awareness – memorize the feel of correct technique‚ not just the sound․ Incorporate exercises addressing vocal breaks‚ aiming for smooth transitions․ Consistency is paramount; even short‚ focused sessions yield significant results over time․ Remember vocal hygiene!

Long-Term Vocal Development

Consistent practice‚ guided by a coach if possible‚ is crucial․ Focus on building muscle memory through repeated‚ mindful exercises․ Gradually increase the difficulty of exercises‚ expanding range and agility over months‚ not days․

Prioritize vocal health – address fatigue promptly and seek professional help for nodules or polyps․ Continually refine technique‚ focusing on internal sensations and control․ Embrace lifelong learning through resources like Anne Peckham’s work․

Troubleshooting Common Issues

Address stage fright with preparation and focus on technique․ Overcome plateaus by revisiting fundamentals and seeking feedback‚ prioritizing healthy vocal habits consistently․

Dealing with Stage Fright

Stage fright is a common hurdle for singers‚ but manageable with preparation․ Thoroughly rehearse your material‚ focusing on internal sensations rather than solely on the sound produced․ Visualize a successful performance‚ concentrating on positive outcomes and confident delivery․

Remember that focusing on correct technique—diaphragmatic breathing and proper posture—can ground you in the present moment‚ diminishing anxiety․ Acknowledge the physical symptoms of fear‚ but don’t let them control you․

Ultimately‚ remember that the audience wants you to succeed; channel that energy into a captivating performance!

Overcoming Vocal Plateaus

Vocal plateaus are inevitable‚ signaling a need for adjusted practice․ Revisit fundamental exercises – lip trills‚ humming‚ and diaphragmatic breathing – to reinforce core technique․ Explore new vocal challenges‚ like expanding range gradually or refining vibrato control‚ inspired by Peckham’s methods․

Focus on the “feel” of correct technique‚ internalizing muscle memory․

Don’t simply “sing more”; analyze your weaknesses and target them specifically․ Consider seeking guidance from a vocal coach for personalized feedback and a fresh perspective․

mary oliver instructions for living a life

Mary Oliver’s Instructions for Living a Life: An Exploration

Mary Oliver’s core message, distilled into three powerful instructions – pay attention, be astonished, and tell about it – offers a pathway to a richer existence․

Her work encourages mindful engagement with the world, fostering wonder and the importance of sharing personal experiences through storytelling and expression;

The Core Message: Pay Attention, Be Astonished, Tell About It

Mary Oliver’s enduring legacy rests upon a deceptively simple, yet profoundly impactful, trio of instructions for navigating life: pay attention, be astonished, and tell about it․ These aren’t merely suggestions, but rather a call to a specific way of being in the world, one rooted in mindful observation and a deep appreciation for the everyday․

“Pay attention” urges a deliberate slowing down, a conscious effort to notice the details often overlooked in the rush of modern existence․ “Be astonished” isn’t about seeking grand spectacles, but cultivating a sense of wonder at the inherent beauty and mystery present in even the smallest things․ Finally, “tell about it” emphasizes the vital role of storytelling – sharing our experiences, both joyful and sorrowful – as a means of connection, understanding, and ultimately, meaning-making․

These instructions, frequently cited and deeply resonant, represent a poetic and embodied approach to life, inviting us to actively participate in, and articulate, our unique experience․

The Significance of “Instructions for Living a Life”

The power of Mary Oliver’s “Instructions for Living a Life” lies in its accessibility and universality․ These aren’t complex philosophical tenets, but rather practical guidance applicable to anyone seeking a more meaningful existence․ The phrase itself has become a touchstone, widely shared and often invoked as a personal mantra․

Its significance stems from a growing desire for authenticity and connection in a world often characterized by distraction and superficiality․ Oliver’s instructions offer a counter-narrative, urging us to prioritize presence, wonder, and honest expression․ They resonate deeply because they acknowledge the inherent challenges of life – including darkness and suffering – while simultaneously affirming the possibility of joy and beauty․

The enduring appeal suggests a collective yearning for a simpler, more intentional way of being, guided by observation, gratitude, and the courage to share our stories․

Understanding Mary Oliver’s Philosophy

Mary Oliver’s philosophy centers on deeply connecting with the natural world, embracing observation, and acknowledging impermanence as integral parts of a fulfilling life․

Oliver’s Connection to the Natural World

Mary Oliver’s poetry is profoundly rooted in her intimate relationship with nature․ She wasn’t merely observing the natural world; she was actively participating in it, finding solace, instruction, and spiritual resonance within its rhythms․

Her poems frequently feature detailed depictions of landscapes, birds, and other creatures, not as subjects of scientific study, but as sources of wonder and revelation․ This connection wasn’t simply aesthetic; it was fundamental to her understanding of life and mortality․

Oliver saw the natural world as a teacher, offering lessons in acceptance, resilience, and the beauty of impermanence․ She believed that paying attention to the details of nature could unlock deeper truths about ourselves and our place in the universe, directly informing her “instructions” for living․

This deep immersion allowed her to marvel at the world with an “unsentimental acceptance” of its temporary nature, a key element of her poetic vision․

The Importance of Observation and Detail

Central to Mary Oliver’s “instructions for living a life” is the imperative to “pay attention․” This isn’t passive noticing, but a deliberate, focused observation of the world around us, particularly its minute details․

Oliver’s poetry demonstrates a remarkable ability to find significance in seemingly ordinary things – a single bird, a wildflower, a patch of sunlight․ She believed that true understanding, and therefore joy, arises from a willingness to truly see what is present, rather than rushing through life on autopilot․

This emphasis on detail isn’t merely about descriptive accuracy; it’s about cultivating a mindful presence․ By focusing on the specific, we can break free from abstract thought and connect with the immediacy of experience․

Her work suggests that the universe reveals its secrets to those who are willing to look closely, and that even in darkness, gifts can be found through careful observation․

Acceptance of Impermanence and Mortality

Mary Oliver’s poetry frequently grapples with the themes of impermanence and mortality, not with despair, but with a quiet acceptance․ She understood that all things, including ourselves, are temporary, and this awareness profoundly shaped her worldview․

This isn’t a morbid preoccupation, but rather a call to fully inhabit the present moment․ Recognizing the fleeting nature of life encourages us to appreciate its beauty and fragility, and to live with greater intention․

Oliver’s ability to marvel at the world stemmed, in part, from her “unsentimental acceptance” of its transient nature․ She didn’t shy away from acknowledging suffering or loss, but instead integrated them into a broader understanding of the natural cycle․

Ultimately, her work suggests that embracing impermanence isn’t about denying the pain of loss, but about finding peace within its inevitability․

Delving into the “Instructions”

Mary Oliver’s “Instructions for Living a Life” are not commands, but invitations to engage deeply with existence, embracing mindfulness, wonder, and authentic expression․

Pay Attention: Cultivating Mindfulness

Mary Oliver repeatedly emphasizes the necessity of “paying attention” as the foundational step towards a meaningful life․ This isn’t merely noticing surroundings, but a deliberate, focused awareness of the present moment․ It’s about observing the natural world – a leaf falling, a bird’s song – with the same intensity we might apply to a significant event․

Oliver’s poetry demonstrates this practice; she meticulously details the small wonders often overlooked․ Cultivating this mindfulness allows us to move beyond automatic reactions and truly see the beauty and complexity around us․ It’s a call to be present, to fully inhabit our lives, and to resist the distractions that pull us away from genuine experience․

This focused attention isn’t passive; it requires effort and a willingness to slow down, to quiet the internal chatter, and to simply be with what is; It’s a practice that unlocks astonishment and provides the raw material for storytelling․

Be Astonished: Embracing Wonder

Following “pay attention,” Mary Oliver urges us to “be astonished․” This isn’t about seeking grand, spectacular events, but cultivating a childlike sense of wonder at the everyday miracles unfolding around us․ It’s recognizing the extraordinary within the ordinary – the intricate patterns on a seashell, the resilience of a wildflower pushing through concrete, the sheer improbability of existence․

Oliver’s poetry is imbued with this astonishment; she doesn’t simply describe nature, she celebrates its inherent magic․ Embracing wonder requires a willingness to relinquish cynicism and open ourselves to the possibility of beauty and awe․ It’s a conscious choice to see the world with fresh eyes, as if for the first time․

This astonishment isn’t merely an emotional response; it’s a pathway to deeper understanding and connection with the natural world and our place within it․

Tell About It: The Power of Storytelling and Expression

Mary Oliver’s final instruction – “tell about it” – emphasizes the vital role of sharing our experiences and observations․ It’s not enough to simply feel wonder or gain insight; we must articulate it, give it voice, and connect with others through storytelling․ This act of expression isn’t about ego or self-promotion, but about honoring the beauty we’ve witnessed and contributing to a collective understanding of the world․

For Oliver, poetry was the telling․ However, “telling” can take many forms – conversation, art, music, or simply a heartfelt sharing with a loved one․ It’s about transforming personal experience into something meaningful and relatable․

By sharing our stories, we not only deepen our own understanding but also inspire others to pay attention and be astonished in their own lives, creating a ripple effect of wonder and connection․

Applying Oliver’s Wisdom to Daily Life

Mary Oliver’s guidance invites us to find joy in simplicity, navigate darkness with acceptance, and recognize the transformative power within life’s challenges․

Finding Joy in Simple Things

Mary Oliver’s poetry consistently reveals a profound ability to discover wonder in the everyday․ She encourages a deliberate shift in perspective, urging readers to truly see the natural world – a dewdrop on a leaf, the flight of a bird, the changing seasons․ This isn’t about ignoring hardship, but rather about balancing it with an active appreciation for the small beauties that surround us constantly․

Her “instructions” – pay attention, be astonished, tell about it – directly support this practice․ By paying attention, we open ourselves to noticing these simple joys․ Astonishment arises from truly seeing them, and sharing these observations, “telling about it,” amplifies the joy and connects us to something larger than ourselves․ Oliver’s work suggests that a fulfilling life isn’t necessarily about grand adventures, but about cultivating a mindful awareness of the present moment and finding grace in the ordinary․

She demonstrates that even in moments of darkness, the potential for joy remains, waiting to be discovered in the smallest of things․

Overcoming Darkness and Suffering

Mary Oliver doesn’t shy away from acknowledging the presence of pain and sorrow in life․ In fact, her work often confronts these difficult emotions head-on, recognizing them as integral parts of the human experience․ She doesn’t offer easy answers or platitudes, but rather a perspective rooted in acceptance and resilience․

The quote, “Someone I loved once gave me a box full of darkness․ It took me years to understand that this too, was a gift,” exemplifies this․ Oliver suggests that even suffering can hold value, offering opportunities for growth and deeper understanding․ Her “instructions” – pay attention, be astonished, tell about it – become even more crucial during challenging times․

Paying attention allows us to acknowledge our pain, astonishment can arise from recognizing our own strength in navigating it, and telling about it fosters connection and healing․ Oliver’s poetry doesn’t promise an absence of darkness, but a way to live with it, finding light even within the shadows․

The Gift of Difficult Experiences

Mary Oliver’s perspective reframes hardship not as a punishment, but as a potential source of profound learning and growth․ She believed that even painful experiences could be “a gift,” offering opportunities for self-discovery and a deeper appreciation for life’s fragility․ This isn’t about seeking out suffering, but about recognizing its inherent value when it arrives․

Her poetry encourages us to examine these experiences with curiosity and openness, applying her “instructions” as a guide․ Paying attention to the nuances of our pain, being astonished by our capacity to endure, and telling our stories can transform suffering into something meaningful․

Oliver’s acceptance of impermanence – acknowledging that all things, including joy and sorrow, are temporary – allows for a more compassionate understanding of life’s complexities․ Difficulties, then, become not obstacles to overcome, but integral parts of the “wild and precious life” she urges us to embrace fully․

Oliver’s Poetic Style and Influence

Mary Oliver’s accessible, plainspoken language and focus on nature resonated deeply with readers, establishing her as a significant voice in contemporary poetry and thought․

Plainspoken Language and Accessibility

Mary Oliver’s poetry stands apart due to its remarkable accessibility, achieved through deliberately simple and direct language․ She eschewed complex metaphors and academic jargon, opting instead for a clear, unadorned style that invited a broad readership․ This wasn’t a compromise of depth, but a conscious choice to connect with readers on a visceral level, mirroring the straightforward beauty of the natural world she so often depicted․

Her poems rarely demanded extensive literary knowledge; instead, they offered immediate emotional resonance․ This accessibility allowed her work to transcend traditional poetic boundaries, appealing to those who might not typically engage with poetry․ Oliver believed in the power of poetry to offer solace and insight to everyone, and her linguistic choices reflected this democratic impulse․ She aimed to dazzle with observation, not obfuscate with complexity, making her a beloved and widely read poet․

Themes of Nature, Spirituality, and Self-Discovery

Mary Oliver’s poetry consistently explores the interwoven themes of nature, spirituality, and the human journey of self-discovery․ The natural world isn’t merely a backdrop in her work; it’s a source of profound spiritual insight and a catalyst for introspection․ Through keen observation of flora and fauna, she reveals deeper truths about existence, impermanence, and our place within the larger ecosystem․

Her poems often present nature as a teacher, offering lessons in humility, acceptance, and the beauty of the present moment․ This connection to nature frequently leads to a sense of the sacred, though not necessarily within a traditional religious framework․ Ultimately, Oliver’s work guides readers toward a deeper understanding of themselves, encouraging authenticity and a mindful appreciation for the “wild and precious life” available to all․

Impact on Contemporary Poetry and Thought

Mary Oliver’s influence on contemporary poetry and broader thought is substantial, stemming from her accessible yet profound exploration of universal themes․ Her plainspoken language, eschewing complex academic jargon, resonated with a wide audience, democratizing poetry and making it feel relevant to everyday life․ She demonstrated that powerful insights could be conveyed through simple, direct observation of the natural world․

Oliver’s emphasis on mindfulness, wonder, and the importance of paying attention has seeped into contemporary wellness practices and philosophical discussions․ Her work encourages a slower, more deliberate approach to living, prompting readers to find joy in simple things and embrace vulnerability․ She inspired a generation of poets to look inward and outward, fostering a renewed appreciation for both personal experience and the environment․

The “Wild and Precious Life”

Mary Oliver challenges us to contemplate life’s purpose, urging authentic living and full embrace of vulnerability․ She asks what we will do with our singular, fleeting existence․

This call to action inspires connection and a courageous pursuit of a meaningful, deeply felt life․

Reflecting on Life’s Purpose

Mary Oliver’s poetry consistently circles back to the fundamental question of how we choose to spend our “one wild and precious life․” This isn’t a grand, sweeping inquiry into cosmic destiny, but a deeply personal reckoning with the everyday․ She doesn’t offer prescriptive answers, but rather, provides a framework for discovering purpose through attentive observation of the natural world and honest self-reflection․

Her “instructions” – pay attention, be astonished, tell about it – are, at their core, about cultivating a receptive awareness․ By truly seeing the beauty and fragility around us, we begin to understand the inherent value of existence․ This awareness, in turn, fuels a sense of responsibility, not to achieve greatness, but to live fully and authentically․

Oliver suggests that purpose isn’t something to be found, but something to be created through mindful engagement with life’s experiences, both joyful and sorrowful․ It’s about recognizing the gift inherent in even the “darkness,” and allowing that recognition to shape our actions and our stories․

Living Authentically and Fully

Mary Oliver’s call to live “wild and precious” isn’t an endorsement of recklessness, but a plea for genuine self-expression․ Authenticity, in her view, stems from a willingness to embrace vulnerability and connect deeply with both the external world and our inner selves․ It requires shedding societal expectations and embracing the unique contours of our own experience․

To live fully, according to Oliver, means to resist the numbing effects of routine and to actively seek out wonder․ This involves cultivating a childlike curiosity, allowing ourselves to be astonished by the simple beauty of a leaf, a bird’s song, or a sunset․ It’s about being present in each moment, rather than lost in anxieties about the future or regrets about the past․

Her work champions a life lived in alignment with one’s true nature, a life where observation and storytelling become acts of self-discovery and a celebration of existence itself․

Embracing Vulnerability and Connection

Mary Oliver’s poetry frequently touches upon the acceptance of darkness and suffering, suggesting that these experiences are integral to a fully lived life․ Embracing vulnerability isn’t about seeking out pain, but about acknowledging its inevitability and allowing ourselves to feel it fully, recognizing it as a potential catalyst for growth․

Connection, for Oliver, extends beyond human relationships to encompass a profound kinship with the natural world․ She demonstrates that observing nature allows us to understand our own place within the larger ecosystem of life․ This interconnectedness fosters empathy and a sense of belonging․

Her work implies that true strength lies not in shielding ourselves from vulnerability, but in opening ourselves to it, and in forging genuine connections with others and the world around us, even amidst hardship․

Mary Oliver’s Legacy

Mary Oliver’s enduring relevance stems from her ability to articulate universal experiences with simplicity and grace, continuing to inspire both readers and writers alike․

Her timeless message—pay attention, be astonished, tell about it—resonates deeply in our modern world, offering solace and guidance․

Her Enduring Relevance in a Modern World

Mary Oliver’s poetry maintains a powerful resonance today, perhaps even more so, amidst the relentless pace and distractions of contemporary life․ Her “Instructions for Living a Life” – pay attention, be astonished, tell about it – offer a vital antidote to the numbing effects of technology and societal pressures․

In a world often focused on achievement and material gain, Oliver’s work gently redirects our gaze towards the simple, often overlooked wonders of the natural world and the richness of inner experience․ Her plainspoken language and accessibility make her poetry inviting to a broad audience, offering a pathway to mindfulness and a deeper connection to oneself and the environment․

The call to “pay attention” feels particularly urgent in an age of information overload, while the invitation to “be astonished” challenges us to rediscover a sense of childlike wonder․ Ultimately, Oliver’s legacy lies in her ability to remind us of the beauty and fragility of life, and the importance of bearing witness to it․

Continuing to Inspire Readers and Writers

Mary Oliver’s influence extends far beyond the realm of poetry, continuing to inspire both readers and writers seeking authenticity and connection․ Her “Instructions for Living a Life” resonate deeply with those yearning for a more meaningful existence, prompting introspection and a renewed appreciation for the everyday․

Writers are drawn to her masterful use of observation and detail, her ability to find the extraordinary within the ordinary․ Oliver’s work demonstrates the power of plainspoken language to convey profound truths, encouraging a similar simplicity and directness in others’ writing․

For readers, her poems offer solace, guidance, and a gentle invitation to embrace vulnerability and find joy in the natural world․ She empowers individuals to live “a wild and precious life,” fostering a sense of wonder and encouraging them to share their own stories with the world, echoing her core instruction: “Tell about it․”

The Timelessness of Her Message

The enduring appeal of Mary Oliver’s work, particularly her “Instructions for Living a Life,” lies in its universal and timeless quality․ Her call to “pay attention,” “be astonished,” and “tell about it” transcends generations, offering guidance relevant to any era or circumstance․

In a world often characterized by complexity and distraction, Oliver’s simplicity is a refreshing and vital reminder to reconnect with the natural world and our own inner selves․ Her acceptance of impermanence and mortality, rather than being a source of despair, becomes a catalyst for appreciating the present moment․

The message isn’t tied to specific events or ideologies; it’s a fundamental human need – to observe, to marvel, and to share our experiences․ This inherent universality ensures that Oliver’s poetry will continue to resonate with readers long into the future, offering a beacon of hope and inspiration․

nutribullet rice cooker instructions

NutriBullet’s EveryGrain Cooker expertly prepares various grains‚ delivering perfectly cooked results consistently․ This versatile appliance simplifies grain preparation‚ offering convenience and precision․

It lives up to its name‚ cooking grains to tender perfection‚ with presets for white rice‚ brown rice‚ and more․

What is the NutriBullet EveryGrain Cooker?

The NutriBullet EveryGrain Cooker is a multi-functional kitchen appliance designed to simplify the process of cooking a wide variety of grains․ Beyond just rice‚ it expertly handles quinoa‚ oats‚ and other grains‚ ensuring consistently tender and flavorful results․

This innovative cooker boasts preset programs tailored to specific grains – including dedicated settings for white and brown rice – eliminating guesswork․ It features a 10-cup cooking pot‚ capable of handling up to 5 dry scoops of grains‚ and includes a steaming basket for added versatility; It’s designed for perfect grains‚ every time․

Key Features and Benefits

The NutriBullet EveryGrain Cooker offers multiple grain settings – Brown Rice‚ White Rice‚ Oats‚ Quinoa‚ and a versatile ‘Grains’ preset – ensuring optimal cooking for each type․ A dedicated Steam program allows for simultaneous vegetable preparation․

Its user-friendly control panel simplifies operation‚ with illuminated buttons indicating the selected program․ The 10-cup capacity is ideal for families‚ and the included steaming basket enhances functionality․ Enjoy perfectly cooked grains with minimal effort‚ and benefit from the convenient ‘Keep Warm’ function․

Unboxing and Component Overview

The NutriBullet EveryGrain Cooker package includes the cooker itself‚ a 10-cup cooking pot‚ and a practical steaming basket for versatile meal preparation․

What’s Included in the Box?

Upon unboxing your NutriBullet EveryGrain Cooker‚ you’ll discover several key components designed for optimal performance․ The package contains the main cooker unit‚ housing all the internal mechanisms and control panel․ A generously sized 10-cup cooking pot is included‚ capable of handling 5 dry scoops of rice or grains․

Furthermore‚ a dedicated steaming basket allows for simultaneous cooking of grains and vegetables․ You’ll also find the power cord‚ and importantly‚ the user manual‚ providing detailed instructions and recipes to get you started․ These components work together to deliver perfectly cooked grains every time․

Identifying the Parts: Cooking Pot‚ Steaming Basket‚ etc․

The NutriBullet EveryGrain Cooker features several easily identifiable parts․ The cooking pot‚ a non-stick vessel‚ sits securely within the cooker base․ Above it rests the steaming basket‚ designed for vegetables or other foods cooked via steam․ The control panel‚ located on the front‚ houses the program buttons – White Rice‚ Brown Rice‚ Oats‚ Quinoa‚ and Grains․

Locate the power cord connection at the rear․ Familiarize yourself with these components before first use‚ referencing the user manual for detailed diagrams and instructions․ Understanding each part ensures safe and efficient operation․

Getting Started: Initial Setup

Before the first use‚ thoroughly clean all removable parts of your NutriBullet EveryGrain Cooker․ This ensures a hygienic cooking experience and removes any potential residue․

Cleaning Before First Use

Before utilizing your NutriBullet EveryGrain Cooker for the very first time‚ a meticulous cleaning process is essential․ Remove the cooking pot‚ steaming basket‚ and any other detachable components․ Wash these parts with warm‚ soapy water‚ ensuring all surfaces are thoroughly cleaned․

Rinse them completely to eliminate any soap residue․ Wipe down the exterior of the cooker with a damp cloth․ This initial cleaning step guarantees a hygienic cooking environment and prevents any unwanted flavors from affecting your first meal․

Allow all parts to air dry completely before reassembling and using the appliance․

Understanding the Control Panel

The NutriBullet EveryGrain Cooker features an intuitive control panel for effortless operation․ Distinct buttons correspond to specific programs: White Rice‚ Brown Rice‚ Oats‚ Quinoa‚ and a versatile Grains preset․ A dedicated Steam button activates the steaming functionality․

To select a program‚ simply press the corresponding button; it will illuminate fully‚ confirming your choice․ The control panel also includes a ‘Keep Warm’ function‚ automatically activating after cooking․ Understanding these controls ensures optimal performance and customized cooking․

Cooking Rice: A Step-by-Step Guide

Perfect rice is easily achievable with the NutriBullet EveryGrain Cooker! Simply measure rice and water‚ select the White Rice setting‚ and press start for fluffy results․

Measuring Rice and Water Ratios

Accurate measurements are crucial for optimal rice cooking․ The NutriBullet EveryGrain Cooker’s capacity is 5 rice cups (raw) and yields 10 cups (cooked)․

While specific ratios depend on rice type‚ a general guideline is a 1:1 ratio for white rice – one cup of rice to one cup of water․

For best results‚ use the included measuring cup․ Adjust water slightly based on desired texture; less water yields firmer rice‚ more yields softer rice․ Experiment to find your preference!

Remember to consult the included manual for detailed ratio recommendations․

Using the White Rice Setting

To utilize the White Rice setting‚ ensure the cooking pot is properly placed within the NutriBullet EveryGrain Cooker․ After adding measured rice and water‚ simply press the “White Rice” button․

The button will illuminate‚ indicating the program is active․ The cooker will automatically adjust cooking time and temperature for fluffy‚ perfectly cooked white rice․

Avoid lifting the lid during the cooking cycle to maintain consistent temperature․ Once complete‚ the cooker will automatically switch to the “Keep Warm” function․

Cooking Different Types of White Rice

The NutriBullet EveryGrain Cooker excels with various white rice types․ While the “White Rice” preset works well for long-grain‚ adjustments may optimize results․ For Jasmine rice‚ slightly reduce the water ratio for a fragrant‚ less sticky texture․

Short-grain rice‚ like sushi rice‚ benefits from a touch more water for optimal stickiness․ Experiment with minor water adjustments – a tablespoon at a time – to achieve your preferred consistency․

Remember to always refer to the rice package instructions as a starting point․

Cooking Brown Rice

NutriBullet’s EveryGrain Cooker features a dedicated “Brown Rice” preset‚ ensuring perfectly cooked‚ nutritious brown rice with minimal effort and consistent results․

Brown Rice Water Ratio

Determining the correct water ratio is crucial for fluffy‚ well-cooked brown rice when using your NutriBullet EveryGrain Cooker․ Generally‚ a 1:1․5 ratio of brown rice to water is recommended as a starting point․

This translates to one cup of raw brown rice requiring 1․5 cups of water․ However‚ slight adjustments may be necessary based on the specific type of brown rice used – short‚ medium‚ or long grain․

For best results‚ consult the packaging instructions of your brown rice․ Experimenting with small adjustments to the water ratio will help you achieve your preferred texture․

Utilizing the Brown Rice Preset

The NutriBullet EveryGrain Cooker simplifies brown rice preparation with its dedicated preset program․ After measuring your rice and water using the recommended ratio‚ ensure the cooking pot is securely placed inside the cooker․

Press the “Brown Rice” button on the control panel; the button will illuminate‚ indicating the program is activated․ The cooker will automatically adjust the cooking time and temperature for optimal results․

Avoid lifting the lid during the cooking cycle to maintain consistent temperature and steam․ Once the cycle completes‚ allow the rice to rest for 10 minutes before fluffing and serving․

Cooking Other Grains

The NutriBullet EveryGrain Cooker features presets for oats‚ quinoa‚ and a general “Grains” setting‚ expanding your cooking possibilities beyond just rice․

Quinoa Cooking Instructions

Cooking quinoa in your NutriBullet EveryGrain Cooker is remarkably simple․ Begin by rinsing one cup of quinoa thoroughly under cold water to remove any saponins‚ which can impart a bitter taste․ Add the rinsed quinoa and 1․5 cups of water to the cooking pot․

Select the “Quinoa” preset program on the control panel․ Press the button‚ and the indicator light will illuminate‚ confirming your selection․ The cooker will automatically adjust the cooking time and temperature for optimal results․ Once the cycle is complete‚ allow the quinoa to stand‚ covered‚ for 10 minutes before fluffing with a fork․

Enjoy this nutritious and versatile grain as a side dish or incorporate it into salads and bowls!

Oats Cooking Instructions

Preparing delicious‚ perfectly cooked oats is effortless with the NutriBullet EveryGrain Cooker․ Begin by adding one cup of rolled oats and three cups of water to the cooking pot․ For steel-cut oats‚ increase the water to four cups and consider extending the cooking time slightly․

Select the “Oats” preset program on the control panel․ Press the button to activate the setting‚ and the corresponding light will illuminate․ The cooker will automatically manage the cooking process․ Once finished‚ let the oats rest‚ covered‚ for five minutes before serving․

Customize with your favorite toppings like fruit‚ nuts‚ or a drizzle of honey!

Grains Preset: Exploring Other Options

The “Grains” preset on your NutriBullet EveryGrain Cooker unlocks a world of culinary possibilities beyond rice and oats․ This versatile setting allows for customized cooking of grains like farro‚ barley‚ and freekeh․ Experiment with water ratios – generally‚ use 2․5 to 3 cups of water per 1 cup of grain․

Start with the default cooking time and adjust as needed based on your preferred texture․ Monitor the grain’s tenderness during the final minutes․ The “Grains” preset offers flexibility‚ letting you enjoy a diverse range of wholesome‚ perfectly cooked grains․

Steam Functionality

Utilize the included steaming basket to effortlessly steam vegetables alongside your grains‚ creating complete and nutritious meals with your NutriBullet․

Using the Steaming Basket

NutriBullet’s EveryGrain Cooker includes a convenient steaming basket‚ allowing you to prepare healthy side dishes simultaneously with your grains․ Simply place the basket inside the cooking pot before adding water and your grains․

Ensure the water level doesn’t touch the basket’s bottom to prevent overcooking․ The basket provides ample space for various vegetables‚ offering a versatile steaming solution․ It’s perfect for broccoli‚ carrots‚ or asparagus‚ complementing your rice or quinoa beautifully․ Remember to check for doneness during the steaming process․

Vegetable Steaming Guide

When steaming vegetables in your NutriBullet EveryGrain Cooker‚ consider cooking times for optimal texture and flavor․ Broccoli and cauliflower typically require 8-10 minutes‚ while carrots and sweet potatoes need 12-15 minutes․

Leafy greens‚ like spinach or kale‚ steam quickly – around 5-7 minutes․ For best results‚ cut vegetables into uniform sizes to ensure even cooking․ Add about one cup of water to the cooking pot before steaming․ Regularly check for desired tenderness‚ adjusting time as needed․

Customizing Cooking Programs

NutriBullet’s EveryGrain Cooker allows adjustments to cooking time for personalized results․ Utilize the ‘Keep Warm’ function to maintain temperature after cooking is complete․

Adjusting Cooking Time

NutriBullet’s EveryGrain Cooker offers flexibility beyond preset programs․ While the pre-programmed settings are optimized for common grains‚ you can fine-tune the cooking duration to suit your preferences or specific grain varieties․

To adjust‚ manually select a program and then use the “+” and “-” buttons on the control panel to increase or decrease the cooking time in minute increments․ This is particularly useful when experimenting with less common grains or achieving a desired texture․ Remember to note your adjustments for future use!

Always monitor the cooking process initially when customizing‚ ensuring the grains are cooked to your liking․

Understanding the Keep Warm Function

The NutriBullet EveryGrain Cooker features an automatic “Keep Warm” function‚ activating once the cooking cycle is complete․ This maintains the grains at an optimal serving temperature for extended periods without overcooking or drying them out․

The Keep Warm function operates for up to 12 hours‚ providing convenience for meal preparation and serving․ It’s ideal for situations where immediate consumption isn’t possible․ To deactivate the Keep Warm function‚ simply unplug the cooker or press the ‘Stop/Cancel’ button․

Avoid leaving cooked grains on Keep Warm for excessively long durations‚ as quality may diminish over time․

Cleaning and Maintenance

NutriBullet EveryGrain Cooker parts are designed for easy cleaning; many components are dishwasher safe for added convenience and efficient upkeep․

Regular cleaning ensures optimal performance and longevity of your appliance․

Dishwasher Safe Parts

NutriBullet prioritizes user convenience‚ and several components of the EveryGrain Cooker are designed to be safely cleaned in the dishwasher․ Specifically‚ the inner cooking pot‚ the steaming basket‚ and the measuring cup are all top-rack dishwasher safe․

However‚ it’s crucial to avoid using harsh detergents or abrasive cleaners‚ as these could potentially damage the non-stick coating of the cooking pot․ The exterior housing and control panel should never be submerged in water or placed in the dishwasher; wipe them clean with a damp cloth instead․

Always ensure parts are thoroughly dried before reassembling․

Proper Cleaning Procedures

To maintain optimal performance‚ clean your NutriBullet EveryGrain Cooker after each use․ Begin by unplugging the unit and allowing it to cool completely․ Remove the cooking pot and steaming basket‚ washing them with warm‚ soapy water․ Avoid abrasive sponges or scouring pads to protect the non-stick surface․

Wipe the exterior housing with a damp cloth․ Never immerse the base unit in water․ For stubborn residue‚ a mild degreaser can be used on the pot‚ ensuring a thorough rinse afterward․ Regular cleaning prevents buildup and ensures longevity․

Troubleshooting Common Issues

If rice is mushy‚ reduce water slightly next time․ Undercooked rice needs more water or a longer cooking cycle․ Ensure the cooker is plugged in!

Rice is Too Mushy

Experiencing mushy rice with your NutriBullet EveryGrain Cooker? This commonly occurs due to an excess of water used during the cooking process․ For future batches‚ slightly reduce the amount of water added to the cooking pot․

Begin by decreasing the water by a tablespoon or two․ Remember to note the adjustments made for consistent results․ Also‚ ensure you are using the correct rice-to-water ratio for the specific type of rice being cooked – white rice requires less water than brown rice․

Finally‚ avoid lifting the lid during the cooking cycle‚ as this releases steam and can affect the final texture․

Rice is Under Cooked

If your rice is consistently undercooked when using the NutriBullet EveryGrain Cooker‚ the issue likely stems from insufficient water․ Increase the water amount incrementally – start by adding one or two tablespoons to the next batch․

Ensure you’re using the appropriate water ratio for the rice type; brown rice generally needs more water than white rice․ Also‚ verify the cooker is properly sealed‚ allowing sufficient steam to build up during the cooking cycle․

Avoid interrupting the cooking process by lifting the lid prematurely․

Cooker Not Turning On

If your NutriBullet EveryGrain Cooker fails to power on‚ first confirm the power cord is securely plugged into both the cooker and a functioning electrical outlet․ Test the outlet with another appliance to rule out an electrical issue․

Ensure the inner cooking pot is correctly positioned within the cooker base; a proper connection is crucial for operation․

Check for any error messages displayed on the control panel‚ and consult the user manual for specific troubleshooting steps related to those codes․

Safety Precautions

Always read all instructions before operating your NutriBullet․ Avoid electrical hazards by ensuring the cord is secure and the appliance is properly grounded․

Important Safety Warnings

Before using your NutriBullet EveryGrain Cooker‚ carefully review all provided instructions to minimize the risk of injury․ Never immerse the appliance base in water or other liquids․ Always unplug the cooker when not in use and before cleaning․

Do not operate the appliance with a damaged cord or plug․ Avoid touching hot surfaces; use handles or knobs․ Keep the cooker away from flammable materials during operation․ Ensure proper ventilation and never block steam vents․ This appliance is intended for household use only․

Avoiding Electrical Hazards

To prevent electrical shock‚ never operate the NutriBullet EveryGrain Cooker with wet hands or near water sources․ Ensure the voltage of your outlet matches the appliance’s specifications․ Do not attempt to repair the cooker yourself; contact qualified service personnel for assistance․

Always unplug the appliance before cleaning or performing maintenance․ Avoid using extension cords if possible; if necessary‚ use a heavy-duty cord rated for the cooker’s power consumption․ Inspect the power cord regularly for damage and discontinue use if any are found․

Recipes for the NutriBullet EveryGrain Cooker

Explore diverse culinary possibilities with your NutriBullet! From simple rice dishes to flavorful grain bowls‚ this cooker unlocks a world of easy and delicious recipes․

Simple Rice Recipes

Classic White Rice: For fluffy white rice‚ combine 1 cup of rinsed white rice with 1․25 cups of water in the NutriBullet EveryGrain Cooker․ Select the “White Rice” preset and press start․ Enjoy perfectly cooked rice in under 30 minutes!

Lemon Herb Rice: Add 1 tablespoon of lemon juice‚ 1 teaspoon of olive oil‚ and a sprinkle of your favorite herbs (parsley‚ dill‚ or thyme) to the rice and water mixture before cooking․ This adds a vibrant flavor!

Coconut Rice: Substitute water with coconut milk for a creamy‚ aromatic side dish․ Use the same 1:1․25 rice-to-liquid ratio and the “White Rice” setting․ A delightful accompaniment to Asian-inspired meals․

Grain Bowl Ideas

Mediterranean Quinoa Bowl: Combine cooked quinoa (using the “Quinoa” preset) with chopped cucumbers‚ tomatoes‚ olives‚ feta cheese‚ and a lemon-herb vinaigrette․ A fresh and flavorful meal!

Spicy Brown Rice Bowl: Pair brown rice (cooked with the “Brown Rice” setting) with black beans‚ corn‚ avocado‚ salsa‚ and a dollop of Greek yogurt․ Add a dash of hot sauce for extra kick․

Teriyaki Salmon & Rice Bowl: Serve teriyaki-glazed salmon over a bed of fluffy white rice․ Add steamed broccoli (using the steaming basket!) and a sprinkle of sesame seeds for a complete and satisfying bowl․

NutriBullet EveryGrain Cooker Specifications

The NutriBullet EveryGrain Cooker features a 5-cup raw/10-cup cooked grain capacity and utilizes standard power consumption for efficient operation․

Cooking Pot Capacity

The NutriBullet EveryGrain Cooker is equipped with a generously sized‚ non-stick cooking pot designed for optimal grain preparation․ This pot boasts a capacity of 5 rice cups when measuring raw grains‚ translating to an impressive 10 rice cups of cooked grains․

This ample space allows you to efficiently cook larger portions‚ perfect for families or meal prepping․ The 10-cup capacity ensures you can prepare enough grains to accompany various dishes‚ minimizing cooking time and maximizing convenience․ It’s ideal for both everyday meals and larger gatherings․

Power Consumption

The NutriBullet EveryGrain Cooker is designed with energy efficiency in mind‚ balancing powerful performance with responsible power usage․ While specific wattage may vary slightly depending on the model and cooking program selected‚ the cooker generally operates within a standard household electrical range․

This allows for convenient use without significant energy impact․ The appliance is engineered to deliver consistent cooking results while minimizing electricity consumption‚ making it an eco-friendly addition to your kitchen․

Warranty Information

NutriBullet offers a warranty on the EveryGrain Cooker‚ protecting against manufacturing defects․ Register your product for streamlined support and access to customer service․

Registering Your Product

Registering your NutriBullet EveryGrain Cooker is a simple process that unlocks several benefits․ It validates your purchase and activates the product warranty‚ ensuring peace of mind․ Registration allows NutriBullet to keep you informed about important updates‚ new features‚ and exclusive promotions tailored to your appliance․

Visit the official NutriBullet website and locate the product registration section․ You’ll typically need your model number‚ serial number (found on the appliance)‚ and proof of purchase․ Completing this quick step ensures you receive optimal support throughout your ownership experience․

Contacting Customer Support

Should you encounter any issues or have questions regarding your NutriBullet EveryGrain Cooker‚ NutriBullet’s dedicated customer support team is readily available to assist․ Visit the official NutriBullet website to access their comprehensive support resources‚ including FAQs and troubleshooting guides․

For direct assistance‚ you can typically find contact information – such as a phone number or email address – on their website․ Be prepared to provide your model number and a detailed description of your concern to expedite the support process․

char-broil big easy instructions manual

Welcome to the comprehensive user manual for your Char-Broil Big Easy! This guide unlocks the fryer’s potential, offering detailed instructions and ensuring a delightful cooking experience.

What is the Char-Broil Big Easy?

The Char-Broil Big Easy is an oil-less liquid propane turkey fryer designed for convenient and healthier outdoor cooking. It roasts up to 11kg of poultry without needing oil, utilizing adjustable racks and a cooking basket for optimal results. This appliance simplifies the turkey frying process, offering a safer alternative to traditional deep-frying methods. It’s a versatile cooker, perfect for families seeking delicious and healthier meals, as described in available manuals and guides.

Key Features and Benefits

The Char-Broil Big Easy boasts oil-less cooking, promoting healthier meals and eliminating messy oil disposal. Its adjustable rack positions accommodate various food sizes, while the included cooking basket ensures even cooking. The fryer offers precise temperature control, guaranteeing perfectly cooked results every time. Compatibility with the Char-Broil Smart Thermometer further enhances convenience, allowing for remote monitoring and precise doneness checks, as detailed in the product manual.

Unboxing and Assembly

Carefully unpack your Char-Broil Big Easy, referencing the package contents checklist. Follow the step-by-step assembly instructions for a secure and proper setup, as outlined.

Package Contents Checklist

Before beginning assembly, verify all components are present. The package should include the Big Easy fryer unit itself, a cooking basket, adjustable rack positions, and essential 10-24×1/2 screws (quantity four). Ensure the top lid is present, alongside the detailed instruction manual for guidance. Inspect for any shipping damage. Missing parts? Contact Char-Broil support immediately. Proper inventory ensures a smooth assembly process and optimal performance of your new oil-less turkey fryer. Retain the packaging for potential returns or warranty claims.

Step-by-Step Assembly Instructions

Begin by opening the top lid and removing all accessories from within the unit. Carefully attach the cooking basket and adjustable racks, securing them with the provided 10-24×1/2 screws. Ensure a snug fit, but avoid over-tightening. Refer to the detailed diagrams in the manual for correct placement. Double-check all connections for stability. Once assembled, inspect the unit for any loose parts before proceeding to the safety precautions and initial burn-in procedure. Proper assembly is crucial for safe and efficient operation.

Safety Precautions

Always connect the LP cylinder as described in the manual. Keep new cylinders stored outdoors, away from heat, and follow proper ventilation guidelines for safe operation.

LP Cylinder Connection

Proper LP cylinder connection is crucial for safe operation. Ensure the cylinder is securely connected, following all instructions detailed within this manual. Regularly inspect the connection for leaks using a soapy water solution – bubbles indicate a problem. Never attempt to connect a damaged cylinder. Always keep the cylinder upright and away from direct heat sources. Disconnect the cylinder when not in use, and store it outdoors in a well-ventilated area, adhering to local regulations.

Proper Ventilation Requirements

The Char-Broil Big Easy must be used outdoors in a well-ventilated area, away from structures and flammable materials. Ensure ample space around the unit for proper airflow. Never operate it inside a garage, shed, or enclosed space, as this poses a serious carbon monoxide risk. Maintain a minimum clearance of several feet from walls and overhead obstructions for safe and efficient operation, as detailed in this manual.

Safe Operating Temperatures

The Char-Broil Big Easy operates at high temperatures; exercise extreme caution. Avoid touching the unit during and immediately after use to prevent burns. Monitor the temperature closely using a reliable thermometer, ensuring food reaches a safe internal temperature. Never leave the fryer unattended while in operation, and always keep children and pets at a safe distance. Adhering to these guidelines ensures a safe and enjoyable cooking experience.

Operating Instructions

Begin with the initial burn-in, then carefully light the burner. Utilize the temperature control settings for precise cooking, ensuring optimal results every time.

Initial Burn-In Procedure

Before your first culinary adventure, perform a crucial initial burn-in. Connect the LP cylinder securely and open the valve. Ignite the burner, setting it to the highest temperature for approximately fifteen to twenty minutes. This process eliminates any residual manufacturing oils or odors, preparing the unit for safe and flavorful cooking.

Allow the unit to cool completely before proceeding. This initial burn-in is vital for optimal performance and ensures a clean, oil-free cooking environment with your Big Easy.

Lighting the Burner

To ignite the burner, ensure the burner tube is clean and properly aligned. Turn the control knob to the “High” position and simultaneously press the igniter button. You should hear a distinct clicking sound and see the burner flame ignite. If it doesn’t light within a few attempts, turn off the gas and wait five minutes before trying again.

Always observe the flame; a strong, blue flame indicates proper operation. If the flame is yellow or weak, check the gas connection and burner tube for obstructions.

Temperature Control Settings

The Char-Broil Big Easy features simple temperature control via the adjustable burner knob. Turning the knob clockwise increases the heat, while counterclockwise decreases it. There aren’t specific temperature markings; instead, rely on visual cues and a food thermometer for accuracy.

Start with a lower setting and gradually increase until the desired cooking temperature is reached. Consistent monitoring with a thermometer is crucial for optimal results and food safety.

Cooking with the Big Easy

The Big Easy excels at oil-less cooking, utilizing a basket and adjustable racks for versatile food preparation and healthier, delicious results every time.

Using the Cooking Basket

The included cooking basket is central to the Big Easy’s oil-less cooking method. Ensure food is placed in a single layer within the basket to promote even cooking and optimal crisping. Avoid overcrowding, as this can lead to steaming instead of roasting. The basket’s perforations allow for heat circulation, delivering consistently cooked results. Remember to periodically rotate the basket during the cooking process for uniform browning and doneness. Proper basket usage is key to achieving the signature Big Easy flavor and texture.

Adjustable Rack Positions

The Char-Broil Big Easy features adjustable rack positions, offering versatility for various food sizes and cooking preferences. Lower rack positions are ideal for larger items, maximizing cooking space, while higher positions suit smaller portions or delicate foods. Adjusting the rack height influences proximity to the burner, impacting cooking speed and intensity. Experiment with different positions to achieve desired results, ensuring even heat distribution and preventing burning. Utilize the provided guides for recommended rack settings based on food type.

Recommended Cooking Temperatures

For optimal results with your Char-Broil Big Easy, adhere to recommended cooking temperatures. Poultry should reach an internal temperature of 165°F (74°C). Chicken pieces typically require 325°F (163°C), while a whole turkey benefits from 350°F (177°C). Always verify doneness with a reliable food thermometer inserted into the thickest part of the meat, avoiding bone contact. Adjust cooking times based on weight and desired level of crispness.

Turkey Frying Guide

Prepare for a delicious, oil-less turkey! This guide details preparation, cooking times based on weight, and crucial thermometer use for perfectly cooked results.

Preparing the Turkey

Before cooking, completely thaw the turkey, ensuring no ice crystals remain inside the cavity. Remove the giblets and neck from both the body and neck cavities. Pat the turkey dry with paper towels – this promotes crispy skin during the oil-less cooking process. Season generously, inside and out, with your preferred turkey rub or seasonings.

Consider injecting a marinade for enhanced flavor and moisture. Do not stuff the turkey, as this can hinder even cooking. Ensure the turkey fits comfortably within the cooking basket without touching the burner.

Cooking Time Based on Weight

Cooking time varies depending on the turkey’s weight. For a turkey weighing 8-10 pounds, estimate approximately 3-3.5 hours of cooking time. A 10-12 pound turkey will require around 3;5-4 hours. Larger turkeys, 12-14 pounds, may take 4-4.5 hours. These are estimates; always verify doneness with a meat thermometer.

Remember to account for initial preheating time. Consistent temperature monitoring is crucial for safe and delicious results. Adjust cooking time slightly based on ambient temperature and wind conditions.

Checking for Doneness (Thermometer Use)

Ensure your turkey reaches a safe internal temperature for consumption. Insert a meat thermometer into the thickest part of the thigh, avoiding the bone. The turkey is done when the thigh registers 165°F (74°C). Consider using a digital thermometer for precise readings.

Check multiple spots to confirm even cooking. The breast should also reach 165°F. Utilizing the Char-Broil Smart Thermometer provides convenient monitoring and alerts when the target temperature is achieved.

Oil-less Cooking Techniques

The Big Easy excels at oil-less cooking, delivering healthier meals without sacrificing flavor or crispness, making it ideal for various foods and recipes.

Benefits of Oil-less Cooking

Embrace a healthier cooking style with the Char-Broil Big Easy’s oil-less technology! This method significantly reduces fat intake, promoting well-being without compromising on taste. Enjoy crispy results similar to traditional frying, but with fewer calories and a cleaner cooking process.

Oil-less cooking minimizes oil splatter and simplifies cleanup, offering a convenient and safer experience. It’s a fantastic way to prepare flavorful meals for the entire family, aligning with a more conscious lifestyle.

Suitable Foods for Oil-less Cooking

The Char-Broil Big Easy excels at cooking a diverse range of foods without oil! Poultry, particularly turkey and chicken, achieves remarkable crispiness and tenderness. Vegetables like potatoes, carrots, and Brussels sprouts become beautifully roasted.

Consider seafood options such as fish fillets and shrimp for a light and healthy meal. Even smaller cuts of pork and beef can be cooked to perfection. Experiment with marinades and seasonings to enhance flavor profiles – the possibilities are endless!

Achieving Crispy Results

To maximize crispiness with the Char-Broil Big Easy’s oil-less cooking, proper technique is key. Ensure food isn’t overcrowded within the basket, allowing for even heat circulation. Utilizing the adjustable rack positions elevates food, promoting all-around browning.

Preheating the unit thoroughly is crucial. Consider a dry rub with seasonings like paprika or garlic powder. Consistent monitoring and occasional rotation during cooking further enhance the crispy exterior!

Cleaning and Maintenance

Regular cleaning extends your Big Easy’s life! Thoroughly clean the basket and racks after each use, and inspect the burner tube for optimal performance.

Cleaning the Cooking Basket and Racks

After each use, allow the cooking basket and racks to cool completely before cleaning. Remove any food residue with warm, soapy water and a non-abrasive sponge or brush. For stubborn deposits, a brief soak can be beneficial. Ensure all soap is rinsed away thoroughly to prevent flavor contamination during subsequent cooking sessions. Dishwasher use is generally acceptable, but hand washing preserves the finish. Regular cleaning prevents buildup and ensures optimal cooking performance, extending the lifespan of these essential components.

Burner Tube Inspection and Cleaning

Periodically inspect the burner tube for obstructions, such as debris or insect nests, which can impede proper gas flow. Carefully disconnect the propane tank before inspecting. Use a pipe cleaner or small wire to gently clear any blockages in the burner ports. Avoid enlarging the ports, as this alters the flame pattern. A clean burner ensures efficient heating and consistent cooking temperatures. Regular maintenance prevents uneven cooking and potential safety hazards, maximizing the Big Easy’s performance.

LP Cylinder Storage

Store the LP cylinder outdoors in a well-ventilated area, away from heat sources, direct sunlight, and ignition sources. Never store a spare LP cylinder in or near the cooking area. Ensure the cylinder valve is tightly closed and a protective cap is securely in place. Always store cylinders upright to prevent gas leakage. Follow all local and national regulations regarding propane storage for optimal safety and compliance.

Troubleshooting

This section provides solutions for common issues, like burner ignition problems or temperature fluctuations, ensuring a smooth cooking process with your Big Easy fryer.

Common Issues and Solutions

Encountering problems? The Char-Broil Big Easy, while reliable, can sometimes present minor challenges. If your unit fails to heat, double-check the LP cylinder connection and ensure adequate propane remains. For uneven cooking, adjust rack positions or rotate the cooking basket. Temperature inconsistencies might stem from wind exposure – position the fryer strategically.

Always refer to the full manual for detailed troubleshooting steps and safety precautions before attempting any repairs. Ignoring safety guidelines could void your warranty and create hazardous situations.

Burner Won’t Light

If the burner fails to ignite, first verify the LP cylinder is securely connected and contains sufficient propane. Next, inspect the burner tube for any obstructions – debris or insect nests can prevent ignition. Ensure the igniter is clean and dry; a weak spark won’t light the gas.

If issues persist, consult the full manual for detailed instructions on burner cleaning and potential replacement. Never attempt repairs while the unit is connected to the propane source.

Temperature Fluctuations

Experiencing temperature swings? Ensure proper ventilation, as wind can significantly impact performance. Confirm the LP cylinder maintains adequate pressure – low propane levels cause instability. Avoid overcrowding the cooking basket, which hinders consistent heat distribution.

Regularly check the burner for cleanliness; buildup affects temperature control. Refer to the manual for optimal cooking temperatures and troubleshooting tips to maintain consistent results.

Recipe Ideas

Explore diverse culinary possibilities! From succulent turkey and flavorful chicken to delightful side dishes, the Big Easy unlocks a world of delicious, oil-less recipes.

Turkey Recipes

The Char-Broil Big Easy truly shines with turkey! Discover recipes for a perfectly cooked, juicy bird, boasting crispy skin without the need for deep frying in oil. Explore classic herb-roasted turkey variations, or venture into bolder flavors with Cajun spice rubs.

Experiment with marinades for enhanced tenderness and taste. Remember to utilize a meat thermometer – a crucial tool for ensuring safe and delicious results. The included guide offers specific cooking times based on turkey weight, guaranteeing a memorable feast for your family and friends!

Chicken Recipes

The Char-Broil Big Easy isn’t just for turkey; it excels at cooking incredibly flavorful chicken! Explore recipes ranging from simple lemon-herb roasted chicken to spicy Cajun-seasoned delights. The oil-less cooking method yields remarkably juicy and tender results, with beautifully browned skin.

Experiment with different rubs and marinades to customize your chicken. Utilize the adjustable rack positions for optimal heat circulation; Always confirm doneness with a meat thermometer for a safe and satisfying meal – a perfect weeknight dinner or weekend barbecue centerpiece!

Side Dish Suggestions

Complement your Big Easy creations with delightful side dishes! Roasted vegetables, like potatoes, carrots, and Brussels sprouts, pair wonderfully with the fryer’s output. Consider classic Southern sides such as creamy coleslaw, mac and cheese, or cornbread for a truly satisfying meal;

For lighter options, explore fresh salads or grilled asparagus. Don’t forget flavorful dips and sauces to enhance the overall dining experience. The Big Easy simplifies the main course, leaving you time to focus on creating memorable sides!

Understanding the Smart Thermometer Compatibility

The Big Easy works seamlessly with the Char-Broil Smart Thermometer, offering precise temperature monitoring and alerts for perfectly cooked food every time.

Connecting to the Char-Broil Smart Thermometer

To connect, download the Char-Broil app and create an account; Ensure Bluetooth is enabled on your smart device. Within the app, follow the on-screen prompts to pair with the thermometer. The app will guide you through the simple connection process, establishing a reliable link for real-time temperature data. Once connected, the app displays current temperatures and allows for customized alerts, ensuring your food reaches optimal doneness. Proper pairing is crucial for utilizing the smart thermometer’s full functionality.

Utilizing Smart Thermometer Features

The Char-Broil Smart Thermometer offers remote monitoring via the app, displaying real-time internal food temperatures. Set custom alerts to notify you when your desired temperature is reached, preventing overcooking. Utilize preset programs for various meats, or create custom profiles. Track cooking progress graphically and access helpful cooking tips within the app. This enhances precision, ensuring perfectly cooked results every time, and elevates your Big Easy experience.

Warranty Information

This section details the warranty coverage for your Char-Broil Big Easy, outlining claim procedures and providing essential information regarding parts and labor protection.

Warranty Coverage Details

The Char-Broil Big Easy is warranted against defects in materials and workmanship for a specified period from the date of original purchase. This warranty covers components like the burner, cooking basket, and racks, protecting against malfunctions during normal residential use. However, it doesn’t cover damage from misuse, accidents, or lack of maintenance. Proof of purchase is crucial for any warranty claim. Modifications or repairs performed by unauthorized personnel will void the warranty, ensuring quality control and product integrity.

How to Make a Warranty Claim

To initiate a warranty claim for your Char-Broil Big Easy, retain your original proof of purchase. Contact Char-Broil’s customer service department, providing details about the defect and your purchase information. You may be asked to submit photos or return the defective part for inspection. Char-Broil will, at their discretion, repair or replace the faulty component. Shipping costs for returns may apply, and the warranty process aims for efficient resolution.

Technical Specifications

The Char-Broil Big Easy boasts specific dimensions, weight, and BTU output. It also has a defined propane consumption rate for efficient, oil-less cooking performance.

Dimensions and Weight

Understanding the physical characteristics of your Char-Broil Big Easy is crucial for proper setup and storage. While specific dimensions can vary slightly between models, expect a substantial unit designed for outdoor use. The fryer generally stands at a considerable height, accommodating large turkeys or roasts.

Its weight, when fully assembled, is also significant, often exceeding 60 pounds, necessitating a stable and level surface. Careful consideration of these factors ensures safe and efficient operation, preventing accidental tipping or instability during cooking.

BTU Output

The Char-Broil Big Easy boasts a powerful BTU output, typically ranging from 18,000 to 22,000 BTU per hour. This substantial heat generation is key to its oil-less cooking capabilities, ensuring rapid and even heating for perfectly cooked results. The high BTU rating allows for efficient roasting, frying, and baking without the need for immersion in oil.

Understanding this output helps optimize cooking times and temperatures, delivering consistently delicious meals. It’s a core element of the Big Easy’s performance.

Propane Consumption Rate

The Char-Broil Big Easy’s propane consumption rate varies depending on the BTU setting used during operation. Generally, expect a consumption rate of approximately 0.8 to 1.0 pounds of propane per hour on a high setting. Lower settings will naturally reduce propane usage, extending cylinder life.

Monitoring propane levels is crucial for uninterrupted cooking; a full 20lb tank provides substantial runtime, but always check before starting.

craftsman pressure washer instruction manual

Craftsman Pressure Washer Instruction Manual: A Comprehensive Guide

Welcome! This comprehensive guide details operation, maintenance, and troubleshooting for your Craftsman pressure washer, ensuring optimal performance and longevity.

Congratulations on purchasing a Craftsman pressure washer! This manual is designed to familiarize you with your new cleaning tool, ensuring safe and effective operation. Before first use, carefully review this guide to understand its features, capabilities, and limitations. Your Craftsman pressure washer is a powerful device intended for a variety of outdoor cleaning tasks, from decks and siding to driveways and vehicles.

Proper use and maintenance, as outlined within, will maximize its lifespan and performance. Remember to always prioritize safety and follow all provided warnings and precautions. This manual covers everything from assembly to troubleshooting, empowering you to tackle cleaning projects with confidence.

Safety Precautions & Warnings

Important! Pressure washers operate with high-pressure water, posing potential risks. Always wear safety glasses or goggles to protect your eyes from debris. Never point the wand at yourself or others. Keep children and pets away from the operating area. Avoid contact with electrical sources when using an electric model.

Ensure proper ventilation when operating a gas-powered unit to prevent carbon monoxide poisoning. Do not modify the pressure washer in any way. Disconnect the power source before performing any maintenance. Read and understand all warning labels affixed to the machine before operation. Failure to follow these precautions could result in serious injury.

Understanding the Components

Familiarize yourself! Your Craftsman pressure washer consists of several key components working in unison. These include the engine or motor providing power, a high-pressure pump generating water force, and a spray gun with interchangeable nozzles controlling spray patterns. The hose delivers water from the pump to the gun, while the detergent tank (if equipped) allows for cleaning solution application.

Understanding each part’s function is crucial for safe and effective operation. Proper component interaction ensures optimal cleaning performance and extends the lifespan of your pressure washer. Refer to the parts diagram for visual identification.

Identifying Key Parts

Locate essential elements! Key parts include the high-pressure pump, responsible for water pressurization; the engine/motor, providing the power source; the spray gun, controlling water flow and pattern; and the pressure hose, connecting pump to gun.

Also identify the nozzle (interchangeable for various cleaning tasks), the detergent tank (if present), and the water inlet for connection to a water source. Familiarity with these components aids in assembly, operation, and maintenance, ensuring efficient cleaning and preventing potential issues.

Nozzle Types and Their Uses

Select the right nozzle! 0-degree nozzles deliver a concentrated stream for stubborn dirt, use cautiously. 15-degree nozzles are effective for general cleaning tasks on durable surfaces. 25-degree nozzles offer a wider spray pattern for less aggressive cleaning.

40-degree nozzles are ideal for delicate surfaces like painted wood. Soap nozzles create a low-pressure foam for detergent application. Always refer to surface material guidelines to prevent damage and achieve optimal cleaning results with each nozzle type.

Hose Connections and Management

Secure connections are vital! Always ensure the high-pressure hose is firmly connected to both the pressure washer and the spray gun. Inspect connections before each use for cracks or damage. Avoid kinking or sharply bending the hose, as this can restrict water flow and damage the internal lining.

Proper storage extends life! When not in use, coil the hose loosely and store it away from direct sunlight and extreme temperatures. Never drag the hose across abrasive surfaces to prevent wear and tear.

Assembly Instructions

Before first use, careful assembly is key! Begin by unpacking all components and verifying everything listed in the parts diagram is present. This process ensures a smooth start. Next, securely attaching the hose to both the pump and spray gun is crucial, followed by connecting the nozzle – ensuring it clicks firmly into place.

For detergent models, adding detergent involves filling the designated tank with a compatible cleaning solution. Refer to the ‘Detergent Usage Guidelines’ section for proper mixing ratios. Double-check all connections before operation.

Attaching the Hose

Securely connecting the high-pressure hose is paramount for safe and effective operation. First, locate the hose inlet on the pump and the outlet on the spray gun. Ensure both connections are free of debris. Hand-tighten the hose fittings onto each port, followed by a quarter-turn with a wrench for a secure fit.

Avoid cross-threading! Inspect the connections for leaks before proceeding. A properly attached hose will withstand high pressure without kinking or detaching during use. Always refer to the parts diagram for correct hose placement.

Connecting the Nozzle

Selecting and attaching the correct nozzle is crucial for achieving desired cleaning results. Locate the nozzle holder on the spray gun. Align the nozzle with the holder and firmly push it into place until it clicks, ensuring a secure connection.

Different nozzles offer varying spray patterns – from wide-angle for gentle cleaning to narrow-angle for concentrated power. Always test the nozzle on an inconspicuous area first. Never attempt to modify or remove safety features from the nozzle.

Adding Detergent (If Applicable)

If your Craftsman pressure washer features a detergent tank, carefully remove the cap and pour in the recommended detergent. Always refer to the detergent usage guidelines for proper mixing ratios to avoid damage or reduced cleaning effectiveness. Ensure the detergent is specifically formulated for pressure washers.

Some models utilize a siphon tube; verify its proper placement within the detergent container. Avoid overfilling the tank. After adding detergent, securely replace the cap before operation.

Operating Instructions

Before starting, ensure all connections are secure and the water supply is fully connected and turned on. For gas-powered models, follow the starting procedure outlined in the manual, including checking the oil level and engaging the choke. Electric models simply require plugging into a grounded outlet and pressing the power button.

Always begin with the lowest pressure setting and gradually increase as needed. Maintain a safe distance from the surface being cleaned and use proper spraying techniques for optimal results.

Starting the Engine (Gas Powered)

Prior to starting, verify the oil level is correct and the fuel tank contains fresh gasoline. Turn the fuel valve to the ‘ON’ position and set the choke to ‘START’ – this enriches the fuel mixture for cold starts. Gently pull the starter cord with a smooth, controlled motion. Avoid rapid pulls, which can damage the mechanism.

Once the engine sputters, gradually move the choke to the ‘RUN’ position. Continue pulling until the engine starts and runs steadily. Allow the engine to warm up before applying full pressure.

Starting the Motor (Electric Powered)

Before operation, ensure the power cord is connected to a grounded outlet with the correct voltage. Verify the power switch is in the ‘OFF’ position. Press the power button to initiate the motor. Some models feature a safety lock-out button that must be engaged first.

Listen for the motor to engage; it should start smoothly. If the motor fails to start, check the circuit breaker and ensure the power cord isn’t damaged. Never operate with a frayed or damaged cord.

Adjusting Pressure Settings

Your Craftsman pressure washer features adjustable pressure settings to suit various cleaning tasks. Locate the pressure control knob or dial, typically found near the trigger gun. Turning the knob clockwise generally increases pressure, while counterclockwise decreases it.

Start with a lower pressure setting and gradually increase it until you achieve the desired cleaning power. Always test on an inconspicuous area first to avoid damage. Be mindful of the surface you are cleaning and adjust accordingly.

Proper Spraying Techniques

Maintain a consistent distance from the surface – typically 8-12 inches – for optimal cleaning. Use sweeping motions, overlapping each pass slightly, to avoid streaking. Avoid holding the nozzle too close, as this can damage the surface. Angle the spray slightly downwards to prevent water from getting under siding or into sensitive areas.

Work from top to bottom, allowing gravity to assist with rinsing. Keep the nozzle moving continuously to distribute pressure evenly. Always wear safety glasses and appropriate clothing.

Maintenance & Care

Regular maintenance extends your Craftsman pressure washer’s life and ensures peak performance. After each use, disconnect the water supply and nozzle. Flush the detergent tank (if used) with clean water. Inspect the hose for kinks, cuts, or bulges, replacing it if damaged. Clean the nozzle regularly to prevent clogging, using a nozzle cleaning tool or a thin wire.

Periodically check oil levels (gas models) and change the oil according to the schedule. Store the unit in a clean, dry place, protected from freezing temperatures.

Cleaning the Nozzle

A clogged nozzle significantly reduces pressure and cleaning effectiveness. To clean, first disconnect the nozzle from the wand. Inspect the nozzle orifice for debris buildup. Use a nozzle cleaning tool, a thin wire, or even a straightened paperclip to carefully remove obstructions. Avoid enlarging the orifice, as this alters spray patterns.

For stubborn clogs, soak the nozzle in vinegar or a commercial nozzle cleaner. Always wear safety glasses during cleaning. Regular cleaning maintains optimal performance and prevents damage to the nozzle.

Checking the Hose for Damage

Regularly inspect the high-pressure hose for cracks, bulges, or abrasions. Pay close attention to areas near connections and where the hose bends. Kinks and twists can weaken the hose over time, leading to leaks or bursts. Before each use, visually examine the entire length of the hose.

If damage is detected, immediately discontinue use and replace the hose. Do not attempt repairs, as this can compromise safety. A damaged hose poses a serious risk of injury. Proper hose maintenance ensures safe and efficient operation.

Oil Changes (Gas Powered Models)

Regular oil changes are crucial for maintaining the engine’s performance and extending its lifespan. Consult your specific model’s engine manual for recommended oil type and change intervals. Typically, an oil change is needed after the first 25 hours of operation, then every 50-100 hours.

Ensure the engine is warm before draining the old oil. Dispose of used oil responsibly at a designated recycling center. Always check the oil level before each use, adding oil as needed to maintain proper lubrication.

Winterizing Your Pressure Washer

Proper winterization prevents damage from freezing temperatures. First, disconnect the water supply and drain all remaining water from the pump, hose, and wand. Add pump protector to the pump intake to lubricate internal components. For gas models, stabilize the fuel or drain the tank and carburetor to prevent gumming.

Store the unit in a dry, protected area. Consider covering the pressure washer to shield it from dust and debris. Regular maintenance ensures easy start-up next spring!

Troubleshooting Common Issues

Encountering problems? This section addresses frequent issues. If the engine won’t start (gas), check fuel levels, spark plug, and air filter. For electric models that fail to start, inspect the power cord, circuit breaker, and motor brushes. Low pressure often indicates a clogged nozzle or kinked hose.

Leaking water suggests loose connections or damaged seals. Always disconnect the power source before inspecting or repairing. Refer to the full manual for detailed diagnostics and solutions.

Engine Won’t Start (Gas)

Troubleshooting a non-starting gas engine: First, verify sufficient fuel in the tank and ensure the fuel shut-off valve is open. Next, inspect the spark plug – clean or replace if fouled. Check the air filter for obstructions; a dirty filter restricts airflow. Confirm the choke is properly engaged for cold starts, and disengaged once running.

Also, examine the recoil starter for damage. If issues persist, consult a qualified technician. Never attempt repairs without disconnecting the spark plug wire.

Motor Won’t Start (Electric)

Addressing an electric motor that fails to start: Begin by verifying the power source – ensure the outlet is functioning correctly with another device. Inspect the power cord for any visible damage, such as cuts or fraying. Check the circuit breaker or fuse box; a tripped breaker or blown fuse will prevent operation.

Furthermore, examine the motor’s on/off switch for proper functionality. If problems continue, a professional electrician should be consulted. Always disconnect the power cord before any inspection.

Low Pressure Output

Experiencing reduced pressure? First, confirm the water supply is fully turned on and provides adequate volume. Inspect the inlet filter for clogs – debris can significantly restrict water flow. Verify the nozzle isn’t blocked; a partially obstructed nozzle drastically lowers pressure.

Additionally, check the high-pressure hose for kinks or damage, as these impede water delivery. Ensure the pressure settings are appropriately adjusted for the task. If issues persist, the pump may require professional servicing.

Leaking Water

Noticing water leaks? Begin by inspecting all hose connections – ensure they are tightly secured. Examine the high-pressure hose itself for any cracks or punctures; replace if damaged. Check around the pump and engine/motor for visible leaks, indicating potential seal failures.

Also, verify the nozzle connection is snug and undamaged. If leaks continue, the pump may have internal issues requiring professional attention. Do not operate the pressure washer with significant leaks, as this can cause further damage or injury.

Detergent Usage Guidelines

Enhance cleaning power with detergents specifically designed for pressure washers! Always refer to the detergent manufacturer’s instructions for proper dilution ratios – typically a low-concentration mix is best. Utilize the onboard detergent tank (if equipped), ensuring it’s filled and the valve is open during application.

Avoid using household cleaners, as they can damage the pump. Rinse thoroughly after detergent use to prevent residue buildup. Consider environmental factors and choose biodegradable detergents when possible for responsible cleaning practices.

Recommended Detergents

Craftsman recommends detergents formulated specifically for pressure washers to maximize cleaning effectiveness and protect your equipment. Look for options designed for various surfaces – concrete, siding, vehicles – to achieve optimal results. Consider biodegradable formulas for environmentally conscious cleaning.

Popular choices include those targeting oil stains, mildew, and general grime. Always check detergent compatibility with your pressure washer model. Avoid abrasive cleaners or those containing chlorine bleach, as they can cause damage. Refer to the detergent label for specific application instructions.

Mixing Ratios

Proper detergent dilution is crucial for effective cleaning and preventing damage to your pressure washer. Always refer to the detergent manufacturer’s instructions for specific mixing ratios, as concentrations vary. Generally, a common ratio is 2-3 ounces of detergent per gallon of water.

Craftsman pressure washers with built-in detergent tanks often have marked levels indicating appropriate mixtures. Never exceed the recommended concentration, as this can lead to excessive foaming or residue. Use warm water for better detergent solubility and cleaning power. Test the mixture on an inconspicuous area first.

Detergent Tank Operation

Locate the detergent tank on your Craftsman pressure washer – typically a translucent container. Ensure the unit is turned off before filling. Carefully pour the pre-mixed detergent solution into the tank, avoiding overfilling. Most models feature a suction tube; verify it’s properly connected.

Select the detergent application setting on the pressure washer, if applicable. Adjust the detergent flow rate using the control knob to achieve the desired concentration. Monitor the solution level during operation and refill as needed. Rinse the tank thoroughly after each use to prevent clogging.

Storage Instructions

Proper storage extends the life of your Craftsman pressure washer. Before long-term storage, thoroughly drain all water from the pump, hose, and detergent tank to prevent freezing and corrosion. Disconnect the power source (cord or fuel line). Store the unit in a clean, dry location, protected from extreme temperatures and direct sunlight.

For freezing temperatures, winterize the unit following the maintenance section. Cover the pressure washer to protect it from dust and debris. Periodically check the unit during storage for any signs of damage or deterioration.

Long-Term Storage

Preparing your Craftsman pressure washer for extended periods of inactivity requires careful attention. Begin by completely draining the pump, hose, and detergent tank to avoid freeze damage and internal corrosion. Disconnect and store the battery, if applicable. Add fuel stabilizer to the gasoline tank (gas models) before final operation to prevent fuel degradation.

Clean the exterior surfaces and cover the unit with a breathable tarp. Store in a dry, climate-controlled environment, away from direct sunlight and extreme temperatures. Regularly inspect the stored unit for any signs of deterioration.

Protecting from Freezing Temperatures

Crucially, freezing temperatures can severely damage your Craftsman pressure washer. Before the first frost, completely drain all water from the pump, hose, and any attached accessories. Utilize a pump saver kit, if available, to coat internal components with antifreeze. Disconnect the hose and store it indoors, ensuring it’s completely dry.

For gas-powered models, stabilize the fuel or drain the tank. Remove the battery and store it in a warm location. Cover the unit with a waterproof cover and store it in a sheltered area, preventing exposure to the elements.

Warranty Information

Your Craftsman pressure washer is covered by a limited warranty against defects in materials and workmanship for a specified period. This warranty typically begins on the date of purchase and varies depending on the model. Coverage generally includes parts and labor for repairs or replacement, but excludes items damaged by misuse, abuse, or normal wear and tear.

To make a warranty claim, retain your original proof of purchase and contact Craftsman customer support. Detailed warranty terms and conditions are available in the separate warranty document included with your product or online at Craftsman’s official website.

Frequently Asked Questions (FAQ)

Q: My pressure washer isn’t building pressure. A: Check the water supply, nozzle for clogs, and ensure the hose isn’t kinked. Q: What type of detergent can I use? A: Use detergents specifically designed for pressure washers to avoid damage. Q: How often should I change the oil (gas models)? A: Refer to the maintenance schedule in this manual for oil change intervals.

Q: How do I winterize my unit? A: Drain all water, add fuel stabilizer, and store in a dry location. For further assistance, consult the troubleshooting section or contact Craftsman support.

Technical Specifications

Model Numbers: Craftsman pressure washers range from 01450-0 to newer series, each with unique features. GPM Ratings: Available models offer varying gallons per minute (GPM) – typically 2.5 to 4.0 GPM – influencing cleaning power. Engine/Motor Details: Gas-powered units utilize Honda engines, while electric models feature powerful motors with specific voltage requirements.

Pressure (PSI): PSI ratings vary, generally between 2000-3000 PSI. Always check your specific model’s label for accurate specifications. Refer to the included parts diagrams for detailed component information.

Model Numbers and GPM Ratings

Craftsman Model Identification: Identifying your specific model number (e.g., 01450-0) is crucial for accessing correct parts and support. GPM Explained: GPM, or gallons per minute, directly impacts cleaning efficiency; higher GPM means faster cleaning.

Typical GPM Ranges: Craftsman offers models ranging from 2.5 GPM for lighter tasks to 4.0 GPM for heavy-duty cleaning. Matching GPM to Tasks: Select a GPM rating appropriate for your needs – lower for cars, higher for decks and driveways.

Engine/Motor Details

Gas-Powered Engines: Many Craftsman pressure washers utilize Honda engines, known for reliability. These typically require regular oil changes and fuel stabilization for storage. Electric Motor Specifications: Electric models boast varying voltage and amperage ratings, impacting power output.

Horsepower & CCs: Gas engine power is often measured in horsepower (HP) and cubic centimeters (CCs). Motor Wattage: Electric motors are rated in watts, indicating energy consumption and performance. Always verify compatibility with your power supply.

Parts Diagrams & Replacement

Locating Diagrams: Detailed exploded views of your Craftsman pressure washer are crucial for repairs. These diagrams illustrate component placement and assembly. Finding Replacement Parts: Craftsman offers a wide range of replacement parts through their website and authorized service centers.

Model-Specific Parts: Always use your specific model number when ordering parts to ensure compatibility. Online Resources: Several online retailers also stock Craftsman pressure washer parts. Prioritize genuine Craftsman parts for optimal performance and warranty validity.

Contacting Craftsman Support

Need Assistance? Craftsman provides multiple avenues for customer support regarding your pressure washer. Website Support: Visit the official Craftsman website for FAQs, troubleshooting guides, and online chat options. Phone Support: A dedicated customer service hotline is available during business hours to address your concerns directly.

Email Support: Submit inquiries via email for non-urgent issues. Local Service Centers: Locate authorized Craftsman service centers for in-person repairs and assistance. Keep your model number handy when contacting support for faster service.

decal instructions

Decal Instructions: A Comprehensive Guide

This guide details applying decals, from preparation to finishing, covering waterslide, dry transfers, and self-adhesive types. It includes techniques for curved surfaces and using tools like Cricut.

Understanding Decals

Decals are essentially images or designs transferred from a backing paper to a surface, enhancing its appearance with detail and personalization. They’ve become incredibly popular across diverse applications, ranging from model building and customizing tumblers to automotive detailing and even intricate miniature work like adorning Space Marine miniatures.

The core principle involves adhesion – getting the design to stick firmly and smoothly to the target surface. However, the method of achieving this adhesion varies significantly depending on the type of decal. Understanding these differences is crucial for successful application. Factors like the surface material, the decal’s composition, and the desired finish all influence the best approach.

Proper decal application isn’t simply sticking something on; it’s a process that requires preparation, careful execution, and often, the use of specialized products like decal fixers and setters to ensure a professional, bubble-free, and long-lasting result. Mastering these techniques unlocks a world of creative possibilities.

Types of Decals Available

The decal world offers a variety of options, each suited to different projects and skill levels. Waterslide decals are arguably the most common, favored by modelers for their intricate detail and ability to conform to curved surfaces after soaking and sliding into position. They require careful handling and often benefit from decal softener.

Dry transfer decals, conversely, apply directly to the surface with pressure, leaving the design behind as the backing is removed. These are often used for smaller, simpler designs and demand precise placement as repositioning is difficult. Self-adhesive decals, similar to stickers, are the easiest to apply, making them ideal for beginners and quick projects.

Beyond these core types, decals can also be created using machines like Cricut, allowing for custom designs cut from vinyl. The choice depends on the complexity of the design, the surface being decorated, and the desired level of durability and finish.

Waterslide Decals: The Most Common Type

Waterslide decals dominate the modeling and customization world due to their versatility and detail. These decals feature a design printed on a soluble backing. The process begins by carefully cutting excess material around the design, minimizing handling difficulties. Soaking the decal in lukewarm water for a specified time releases the design from its backing.

A crucial step involves using decal softener, like GSW Decal Fixer, applied to the model’s surface before and sometimes after application. This helps the decal conform to contours and reduces silvering – the appearance of air bubbles trapped beneath the decal. Gently sliding the decal from the backing onto the surface requires patience.

Removing excess water with a soft cloth and addressing any remaining air bubbles completes the initial application. Proper sealing with a decal fixer ensures long-lasting adhesion and protects the design.

Dry Transfer Decals

Dry transfer decals, unlike waterslide versions, don’t require water. Instead, they utilize a sticky carrier sheet. These decals are applied by firmly rubbing the design onto the target surface, transferring the image directly. This method is favored for its precision and minimal risk of wrinkling or silvering, common issues with waterslide decals.

However, dry transfers are less forgiving. Positioning is critical, as repositioning can be difficult or impossible. Careful alignment is essential before applying pressure. They are often used for smaller details or markings where absolute accuracy is paramount, like shoulder pad details on miniature models.

While they don’t need softening solutions, ensuring a perfectly clean and smooth surface is vital for optimal adhesion. Removing the backing sheet slowly and evenly aids in a clean transfer, avoiding tearing or incomplete application.

Self-Adhesive Decals

Self-adhesive decals are the simplest to apply, resembling stickers. They feature a pre-applied adhesive backing, eliminating the need for water or transfer agents. These decals are widely used for various applications, including tumblers and general crafting projects, due to their ease of use and versatility.

Application involves peeling the backing and carefully positioning the decal onto the surface. Using transfer tape can be beneficial for intricate designs or larger decals, ensuring accurate placement and preventing tearing. Smooth out any air bubbles with a squeegee or a soft cloth, working from the center outwards.

While convenient, self-adhesive decals may not conform as well to complex curves compared to waterslide options. Surface preparation remains crucial; a clean, smooth surface guarantees strong adhesion and a professional finish. Cricut machines are frequently used to create custom self-adhesive decals.

Preparing for Decal Application

Proper preparation is key! This involves cleaning, smoothing the surface, carefully cutting excess decal material, and potentially soaking the decal for optimal adhesion.

Surface Preparation: Cleaning and Smoothing

Before applying any decal, meticulous surface preparation is absolutely crucial for a flawless finish. Begin by thoroughly cleaning the intended surface to remove any dust, mold release agents, fingerprints, or oils. A mild soap and water solution works well, followed by a complete rinse and drying. For plastic models, a plastic cleaner can be beneficial.

Smoothing the surface is equally important. Any imperfections – scratches, blemishes, or uneven textures – will be visible through the decal. Use fine-grit sandpaper (typically 600 grit or higher) to gently smooth out any irregularities. Be careful not to over-sand, as this can alter the surface detail. After sanding, clean the surface again to remove any sanding dust.

A smooth, clean surface ensures the decal adheres properly and conforms to the shape of the object, minimizing the risk of bubbles or wrinkles. Remember, the decal will only look as good as the surface it’s applied to, so invest time in this critical step!

Cutting Excess Decal Material

Once the decal is soaked and separated from its backing paper, trimming away excess material is a vital step for easier handling and a cleaner application. Carefully use a sharp hobby knife or small scissors to cut closely around the design, removing as much of the clear carrier film as possible without damaging the decal itself.

Reducing the amount of carrier film minimizes the visible edge around the decal after application and simplifies the process of sliding it into position. A large excess can make maneuvering the decal difficult, increasing the chance of wrinkles or misplacement. The decal itself is already large, so less to work with is better.

Take your time during this process; precision is key. A well-trimmed decal will blend seamlessly with the surface, creating a professional-looking result; Remember to discard the trimmed pieces responsibly.

Soaking the Decal

Proper soaking is crucial for waterslide decals to release from their backing paper. Gently place the cut decal into a small dish of lukewarm (not hot!) water. Allow it to soak for the recommended time – this varies depending on the decal type, but generally ranges from 30 seconds to a few minutes. Observe the decal closely; the carrier film will begin to soften and appear translucent.

Avoid prolonged soaking, as this can damage the decal and make it fragile. Once the decal appears fully softened, carefully test a corner to see if it slides easily. If it doesn’t, give it a few more seconds. Before applying it to the model, ensure the decal has soaked long enough.

A properly soaked decal will glide smoothly onto the surface, conforming to contours and minimizing the risk of air bubbles.

Using Decal Softener

Decal softener is a vital tool for achieving a professional finish, especially when applying decals to complex or curved surfaces. Before applying the decal to the model, apply a small amount of decal softener – like GSW Decal Fixer – to the surface where the decal will be placed. This creates a slightly tacky base, aiding adhesion and helping the decal conform to details.

After sliding the decal into position and removing excess water, apply another coat of softener over the decal itself. This further softens the decal film, allowing it to mold tightly around curves, rivets, and panel lines. Be cautious not to over-saturate, as excessive softener can dissolve the decal.

Allow the softener to work for the recommended time, then gently blot away any excess with a soft cloth. This process minimizes silvering and ensures a seamless, realistic appearance.

Applying the Decal

Carefully position, slide, and secure the decal, removing excess water. Address any air bubbles immediately for a smooth, professional application, ensuring proper adhesion and a flawless finish.

Positioning the Decal

Precise decal positioning is crucial for a professional result. Before fully sliding the decal from its backing, carefully consider its intended location on the model or surface. Utilize reference images or markings to ensure accurate placement, especially with intricate designs or multiple decals.

Gently nudge the decal into the approximate position while it’s still on the backing paper. This allows for minor adjustments before the adhesive fully engages. Avoid pressing down firmly at this stage, as it will make repositioning difficult. For complex curves or angles, consider cutting the decal into smaller, more manageable sections for easier manipulation.

Take your time and double-check the alignment from multiple angles. A slightly off-center or crooked decal can detract from the overall appearance. Remember that once the decal is fully applied, making significant adjustments can be challenging, potentially leading to tearing or damage. Proper initial positioning saves time and frustration later in the process.

Sliding the Decal into Place

Once positioned, gently slide the decal off the backing paper. Applying a small amount of decal softener to the surface beforehand can aid this process, allowing the decal to conform to contours. Use a soft brush, a cotton swab, or even your finger to encourage the decal to release from the backing, working from the center outwards.

Maintain gentle, consistent pressure to avoid wrinkles or creases. If the decal resists sliding, apply a bit more decal softener and allow it to sit for a few more seconds. Avoid excessive force, as this can tear the delicate decal; The goal is a smooth, controlled transfer, not a rushed one.

As the decal slides, continue to monitor its alignment and make minor adjustments as needed. Remember that the softener provides a window of opportunity for repositioning, but it’s limited. Once the decal is fully in place, proceed to the next step – removing excess water – to secure its position.

Removing Excess Water

After sliding the decal into its desired location, carefully remove the excess water surrounding it. A soft, clean cloth or a slightly dampened cotton swab works best for this task. Gently blot the area, avoiding any rubbing or sliding motions that could disrupt the decal’s placement. The aim is to absorb the water without disturbing the delicate film.

Pay particular attention to the edges of the decal, ensuring all water is removed from underneath. This helps the adhesive bond properly to the surface. Continue blotting until the surface appears relatively dry, but don’t worry about removing every single drop at this stage. A slight residue is acceptable.

Be patient and methodical during this process. Rushing can lead to air bubbles or a poorly adhered decal. Once the bulk of the water is removed, allow the decal to dry partially before addressing any remaining bubbles or imperfections.

Dealing with Air Bubbles

Air bubbles are a common issue during decal application, but they’re usually manageable. Immediately after positioning and removing excess water, inspect the decal for any trapped air. Small bubbles can often be coaxed out gently using a soft brush, like a clean toothbrush, or a cotton swab. Apply light pressure and work from the center of the bubble towards the edge.

For more stubborn bubbles, a tiny pinprick can be made with a needle, allowing the air to escape. However, exercise extreme caution to avoid damaging the decal itself. After pricking, gently press the area to smooth it out. Decal softener, applied sparingly, can also help reduce the appearance of bubbles by allowing the decal to conform more closely to the surface.

Remember, patience is key. Don’t aggressively poke or prod at the decal, as this can cause tearing or distortion. Allow sufficient drying time for the decal to settle and any remaining minor bubbles to dissipate.

Finishing Touches & Advanced Techniques

Explore advanced methods like applying decal fixers, sealing for durability, and tackling curved surfaces, tumblers, or miniature models for professional results.

Applying Decal Fixer/Setter

Decal fixer, or setting solution, is a crucial step after positioning your waterslide decal. Applying a small amount of GSW Decal Fixer to the model’s surface before sliding the decal helps it conform to surface details and reduces silvering – that undesirable shiny film under the decal.

This solution essentially softens the decal film, allowing it to hug contours and imperfections. It’s recommended to apply it sparingly, as excessive amounts can damage the decal or the underlying paint. Allow the fixer to dry completely before proceeding.

After the decal is in place, another coat of fixer can be applied over the decal itself. This further enhances adhesion and helps to “melt” the decal into the surface, making it appear as though it’s painted on. Patience is key; allow each coat to fully dry before adding another. Multiple light coats are preferable to one heavy application.

Sealing the Decal

Sealing the decal is the final protective layer, safeguarding your meticulous work against scratches, wear, and potential damage from handling. This step isn’t always strictly necessary, but it significantly extends the decal’s lifespan and maintains its vibrant appearance, especially on frequently touched items like tumblers or miniatures.

Various sealants are available, including matte, satin, and gloss finishes. The choice depends on the desired look and the surface material. Apply the sealant in thin, even coats, allowing each coat to dry completely before applying the next. Avoid heavy applications, which can cause runs or cloudiness.

For miniatures, a spray-on varnish is often preferred for uniform coverage. On tumblers, epoxy resin provides a durable, waterproof seal. Ensure the sealant is compatible with both the decal and the underlying surface to prevent any adverse reactions or peeling. Proper sealing ensures your decal remains pristine for years to come.

Applying Decals to Curved Surfaces

Applying decals to curved surfaces, like tumblers or vehicle bodies, presents unique challenges due to the potential for wrinkling and distortion. Careful preparation and technique are crucial for a seamless finish. Begin by ensuring the surface is exceptionally clean and smooth. Warming the surface slightly with a hairdryer can increase its flexibility, aiding decal adhesion.

When sliding the decal, work slowly and deliberately, gently coaxing it to conform to the curve. Use a soft brush or decal application tool to smooth out any air bubbles or wrinkles as you go. Decal softener is particularly helpful here, allowing the decal to stretch and mold to the shape.

For tight curves, consider slicing the decal into smaller sections before applying. This allows for greater control and reduces the risk of tearing. Patience is key; take your time and work methodically for professional-looking results on even the most challenging curves.

Decal Application on Tumblers

Applying decals to tumblers requires a specific approach to ensure a smooth, lasting finish on the curved surface. Begin with a meticulously cleaned tumbler, free of oils or residue. Precise cutting around the decal design minimizes excess material and simplifies application. Soaking the waterslide decal thoroughly is vital, allowing it to separate cleanly from the backing paper.

Positioning is critical; carefully align the decal before sliding it into place. Utilize a soft brush or squeegee to gently remove air bubbles and excess water, working from the center outwards. Decal softener is highly recommended, enabling the decal to conform to the tumbler’s curves without wrinkling.

After application, allow ample drying time before sealing with a tumbler-specific epoxy or sealant. This protects the decal from scratches and ensures it remains vibrant and intact through repeated use and washing.

Decal Application to Miniature Models (Space Marines)

Applying decals to Space Marine miniatures demands precision, particularly on contoured surfaces like shoulder pads. Begin by carefully cutting around the decal, reducing excess material for easier handling and a cleaner look. A thorough soaking is crucial, allowing the decal to release fully from its backing sheet.

Utilize decal softener liberally; this is key to conforming the decal to the miniature’s curves and preventing silvering – that undesirable trapped air bubble effect. Gently position the decal using tweezers or a fine brush, then slide it into place. Remove excess water with a clean cotton swab, being careful not to disturb the decal’s alignment.

Finally, apply a decal fixer to seal the decal and protect it from chipping during handling and gameplay. Patience and a steady hand are essential for achieving professional-looking results on these detailed models.

Using Decals with Cricut Machines

Cricut machines offer a streamlined approach to decal creation and application, particularly for custom designs. Begin by designing your decal in Cricut Design Space, ensuring precise cuts for clean edges. Utilize appropriate vinyl material – permanent for durable applications, removable for temporary ones.

After cutting, carefully weed away the excess vinyl, leaving only your desired decal design. Transfer tape is essential; apply it smoothly over the decal, ensuring full adhesion. Gently lift the decal from its backing using the transfer tape, maintaining the design’s integrity.

Position the decal onto your target surface, applying even pressure to ensure a secure bond. Slowly peel away the transfer tape, leaving the decal flawlessly adhered. For complex designs, use a brayer to eliminate air bubbles and achieve a professional finish.

Contrasting Striping for Visual Impact

Employing contrasting striping alongside decals dramatically enhances a vehicle or model’s aesthetic appeal, drawing the eye and creating a more dynamic appearance. Strategic placement of stripes, differing significantly in color from the base surface, generates visual interest and highlights key design elements.

Consider the overall design scheme when selecting stripe colors; complementary or analogous colors can create harmonious effects, while bold contrasts deliver a more aggressive look. Stripe width and orientation also play crucial roles – wider stripes command more attention, while angled stripes convey a sense of motion.

When applying stripes in conjunction with decals, ensure seamless integration. Align stripes to complement decal shapes or create visual pathways leading to focal points. Proper masking and precise application are vital for achieving clean, professional-looking results, maximizing the impact of both elements.

Decal Application in Autodesk VRED

Within Autodesk VRED, applying decals is a streamlined process utilizing texture mapping capabilities. The workflow begins by dragging a desired texture file directly onto the geometry within the VRED viewport. This action automatically initiates a wizard designed to facilitate precise decal assignment.

The wizard guides users through crucial settings, including decal scale, rotation, and position. Users can adjust these parameters in real-time, previewing the changes directly on the model. Accurate positioning is paramount, ensuring the decal aligns correctly with the intended surface contours and design elements.

VRED offers advanced features like projection mapping, allowing decals to conform to complex shapes. Furthermore, material properties can be adjusted to control decal transparency, reflectivity, and bump mapping, enhancing realism. This method provides a non-destructive workflow, enabling iterative design and refinement.