
Craftsman Pressure Washer Instruction Manual: A Comprehensive Guide
Welcome! This comprehensive guide details operation, maintenance, and troubleshooting for your Craftsman pressure washer, ensuring optimal performance and longevity.

Congratulations on purchasing a Craftsman pressure washer! This manual is designed to familiarize you with your new cleaning tool, ensuring safe and effective operation. Before first use, carefully review this guide to understand its features, capabilities, and limitations. Your Craftsman pressure washer is a powerful device intended for a variety of outdoor cleaning tasks, from decks and siding to driveways and vehicles.
Proper use and maintenance, as outlined within, will maximize its lifespan and performance. Remember to always prioritize safety and follow all provided warnings and precautions. This manual covers everything from assembly to troubleshooting, empowering you to tackle cleaning projects with confidence.
Safety Precautions & Warnings
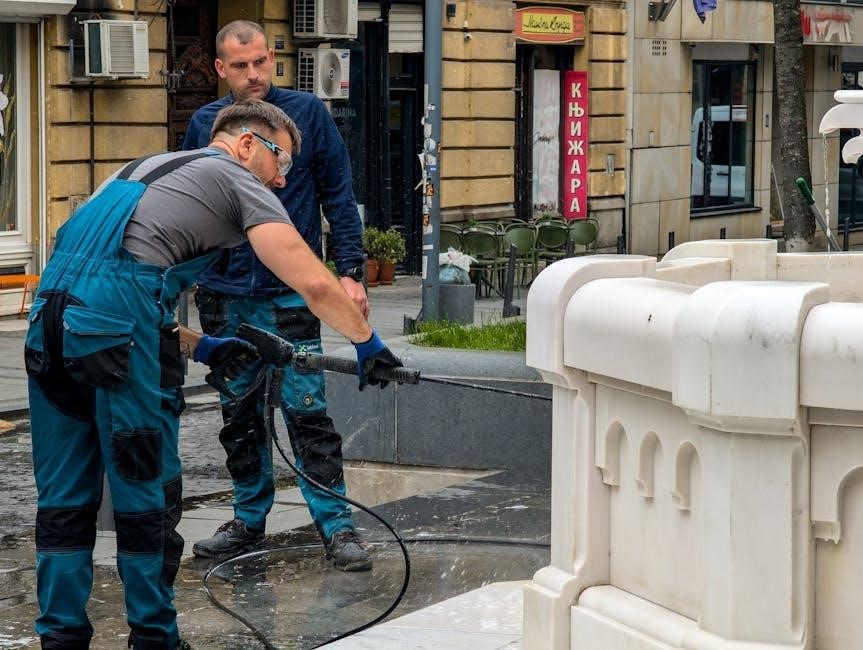
Important! Pressure washers operate with high-pressure water, posing potential risks. Always wear safety glasses or goggles to protect your eyes from debris. Never point the wand at yourself or others. Keep children and pets away from the operating area. Avoid contact with electrical sources when using an electric model.
Ensure proper ventilation when operating a gas-powered unit to prevent carbon monoxide poisoning. Do not modify the pressure washer in any way. Disconnect the power source before performing any maintenance. Read and understand all warning labels affixed to the machine before operation. Failure to follow these precautions could result in serious injury.
Understanding the Components
Familiarize yourself! Your Craftsman pressure washer consists of several key components working in unison. These include the engine or motor providing power, a high-pressure pump generating water force, and a spray gun with interchangeable nozzles controlling spray patterns. The hose delivers water from the pump to the gun, while the detergent tank (if equipped) allows for cleaning solution application.
Understanding each part’s function is crucial for safe and effective operation. Proper component interaction ensures optimal cleaning performance and extends the lifespan of your pressure washer. Refer to the parts diagram for visual identification.
Identifying Key Parts
Locate essential elements! Key parts include the high-pressure pump, responsible for water pressurization; the engine/motor, providing the power source; the spray gun, controlling water flow and pattern; and the pressure hose, connecting pump to gun.
Also identify the nozzle (interchangeable for various cleaning tasks), the detergent tank (if present), and the water inlet for connection to a water source. Familiarity with these components aids in assembly, operation, and maintenance, ensuring efficient cleaning and preventing potential issues.
Nozzle Types and Their Uses
Select the right nozzle! 0-degree nozzles deliver a concentrated stream for stubborn dirt, use cautiously. 15-degree nozzles are effective for general cleaning tasks on durable surfaces. 25-degree nozzles offer a wider spray pattern for less aggressive cleaning.
40-degree nozzles are ideal for delicate surfaces like painted wood. Soap nozzles create a low-pressure foam for detergent application. Always refer to surface material guidelines to prevent damage and achieve optimal cleaning results with each nozzle type.
Hose Connections and Management
Secure connections are vital! Always ensure the high-pressure hose is firmly connected to both the pressure washer and the spray gun. Inspect connections before each use for cracks or damage. Avoid kinking or sharply bending the hose, as this can restrict water flow and damage the internal lining.
Proper storage extends life! When not in use, coil the hose loosely and store it away from direct sunlight and extreme temperatures. Never drag the hose across abrasive surfaces to prevent wear and tear.
Assembly Instructions
Before first use, careful assembly is key! Begin by unpacking all components and verifying everything listed in the parts diagram is present. This process ensures a smooth start. Next, securely attaching the hose to both the pump and spray gun is crucial, followed by connecting the nozzle – ensuring it clicks firmly into place.
For detergent models, adding detergent involves filling the designated tank with a compatible cleaning solution. Refer to the ‘Detergent Usage Guidelines’ section for proper mixing ratios. Double-check all connections before operation.
Attaching the Hose
Securely connecting the high-pressure hose is paramount for safe and effective operation. First, locate the hose inlet on the pump and the outlet on the spray gun. Ensure both connections are free of debris. Hand-tighten the hose fittings onto each port, followed by a quarter-turn with a wrench for a secure fit.
Avoid cross-threading! Inspect the connections for leaks before proceeding. A properly attached hose will withstand high pressure without kinking or detaching during use. Always refer to the parts diagram for correct hose placement.
Connecting the Nozzle
Selecting and attaching the correct nozzle is crucial for achieving desired cleaning results. Locate the nozzle holder on the spray gun. Align the nozzle with the holder and firmly push it into place until it clicks, ensuring a secure connection.
Different nozzles offer varying spray patterns – from wide-angle for gentle cleaning to narrow-angle for concentrated power. Always test the nozzle on an inconspicuous area first. Never attempt to modify or remove safety features from the nozzle.
Adding Detergent (If Applicable)
If your Craftsman pressure washer features a detergent tank, carefully remove the cap and pour in the recommended detergent. Always refer to the detergent usage guidelines for proper mixing ratios to avoid damage or reduced cleaning effectiveness. Ensure the detergent is specifically formulated for pressure washers.
Some models utilize a siphon tube; verify its proper placement within the detergent container. Avoid overfilling the tank. After adding detergent, securely replace the cap before operation.
Operating Instructions
Before starting, ensure all connections are secure and the water supply is fully connected and turned on. For gas-powered models, follow the starting procedure outlined in the manual, including checking the oil level and engaging the choke. Electric models simply require plugging into a grounded outlet and pressing the power button.
Always begin with the lowest pressure setting and gradually increase as needed. Maintain a safe distance from the surface being cleaned and use proper spraying techniques for optimal results.
Starting the Engine (Gas Powered)
Prior to starting, verify the oil level is correct and the fuel tank contains fresh gasoline. Turn the fuel valve to the ‘ON’ position and set the choke to ‘START’ – this enriches the fuel mixture for cold starts. Gently pull the starter cord with a smooth, controlled motion. Avoid rapid pulls, which can damage the mechanism.
Once the engine sputters, gradually move the choke to the ‘RUN’ position. Continue pulling until the engine starts and runs steadily. Allow the engine to warm up before applying full pressure.
Starting the Motor (Electric Powered)
Before operation, ensure the power cord is connected to a grounded outlet with the correct voltage. Verify the power switch is in the ‘OFF’ position. Press the power button to initiate the motor. Some models feature a safety lock-out button that must be engaged first.
Listen for the motor to engage; it should start smoothly. If the motor fails to start, check the circuit breaker and ensure the power cord isn’t damaged. Never operate with a frayed or damaged cord.
Adjusting Pressure Settings
Your Craftsman pressure washer features adjustable pressure settings to suit various cleaning tasks. Locate the pressure control knob or dial, typically found near the trigger gun. Turning the knob clockwise generally increases pressure, while counterclockwise decreases it.
Start with a lower pressure setting and gradually increase it until you achieve the desired cleaning power. Always test on an inconspicuous area first to avoid damage. Be mindful of the surface you are cleaning and adjust accordingly.
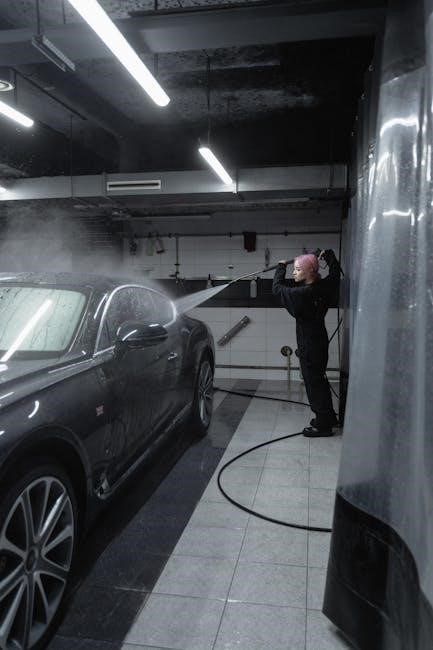
Proper Spraying Techniques
Maintain a consistent distance from the surface – typically 8-12 inches – for optimal cleaning. Use sweeping motions, overlapping each pass slightly, to avoid streaking. Avoid holding the nozzle too close, as this can damage the surface. Angle the spray slightly downwards to prevent water from getting under siding or into sensitive areas.
Work from top to bottom, allowing gravity to assist with rinsing. Keep the nozzle moving continuously to distribute pressure evenly. Always wear safety glasses and appropriate clothing.
Maintenance & Care

Regular maintenance extends your Craftsman pressure washer’s life and ensures peak performance. After each use, disconnect the water supply and nozzle. Flush the detergent tank (if used) with clean water. Inspect the hose for kinks, cuts, or bulges, replacing it if damaged. Clean the nozzle regularly to prevent clogging, using a nozzle cleaning tool or a thin wire.
Periodically check oil levels (gas models) and change the oil according to the schedule. Store the unit in a clean, dry place, protected from freezing temperatures.
Cleaning the Nozzle
A clogged nozzle significantly reduces pressure and cleaning effectiveness. To clean, first disconnect the nozzle from the wand. Inspect the nozzle orifice for debris buildup. Use a nozzle cleaning tool, a thin wire, or even a straightened paperclip to carefully remove obstructions. Avoid enlarging the orifice, as this alters spray patterns.
For stubborn clogs, soak the nozzle in vinegar or a commercial nozzle cleaner. Always wear safety glasses during cleaning. Regular cleaning maintains optimal performance and prevents damage to the nozzle.
Checking the Hose for Damage

Regularly inspect the high-pressure hose for cracks, bulges, or abrasions. Pay close attention to areas near connections and where the hose bends. Kinks and twists can weaken the hose over time, leading to leaks or bursts. Before each use, visually examine the entire length of the hose.
If damage is detected, immediately discontinue use and replace the hose. Do not attempt repairs, as this can compromise safety. A damaged hose poses a serious risk of injury. Proper hose maintenance ensures safe and efficient operation.
Oil Changes (Gas Powered Models)
Regular oil changes are crucial for maintaining the engine’s performance and extending its lifespan. Consult your specific model’s engine manual for recommended oil type and change intervals. Typically, an oil change is needed after the first 25 hours of operation, then every 50-100 hours.

Ensure the engine is warm before draining the old oil. Dispose of used oil responsibly at a designated recycling center. Always check the oil level before each use, adding oil as needed to maintain proper lubrication.
Winterizing Your Pressure Washer
Proper winterization prevents damage from freezing temperatures. First, disconnect the water supply and drain all remaining water from the pump, hose, and wand. Add pump protector to the pump intake to lubricate internal components. For gas models, stabilize the fuel or drain the tank and carburetor to prevent gumming.
Store the unit in a dry, protected area. Consider covering the pressure washer to shield it from dust and debris. Regular maintenance ensures easy start-up next spring!
Troubleshooting Common Issues
Encountering problems? This section addresses frequent issues. If the engine won’t start (gas), check fuel levels, spark plug, and air filter. For electric models that fail to start, inspect the power cord, circuit breaker, and motor brushes. Low pressure often indicates a clogged nozzle or kinked hose.
Leaking water suggests loose connections or damaged seals. Always disconnect the power source before inspecting or repairing. Refer to the full manual for detailed diagnostics and solutions.
Engine Won’t Start (Gas)
Troubleshooting a non-starting gas engine: First, verify sufficient fuel in the tank and ensure the fuel shut-off valve is open. Next, inspect the spark plug – clean or replace if fouled. Check the air filter for obstructions; a dirty filter restricts airflow. Confirm the choke is properly engaged for cold starts, and disengaged once running.
Also, examine the recoil starter for damage. If issues persist, consult a qualified technician. Never attempt repairs without disconnecting the spark plug wire.
Motor Won’t Start (Electric)
Addressing an electric motor that fails to start: Begin by verifying the power source – ensure the outlet is functioning correctly with another device. Inspect the power cord for any visible damage, such as cuts or fraying. Check the circuit breaker or fuse box; a tripped breaker or blown fuse will prevent operation.
Furthermore, examine the motor’s on/off switch for proper functionality. If problems continue, a professional electrician should be consulted. Always disconnect the power cord before any inspection.
Low Pressure Output
Experiencing reduced pressure? First, confirm the water supply is fully turned on and provides adequate volume. Inspect the inlet filter for clogs – debris can significantly restrict water flow. Verify the nozzle isn’t blocked; a partially obstructed nozzle drastically lowers pressure.
Additionally, check the high-pressure hose for kinks or damage, as these impede water delivery. Ensure the pressure settings are appropriately adjusted for the task. If issues persist, the pump may require professional servicing.
Leaking Water
Noticing water leaks? Begin by inspecting all hose connections – ensure they are tightly secured. Examine the high-pressure hose itself for any cracks or punctures; replace if damaged. Check around the pump and engine/motor for visible leaks, indicating potential seal failures.
Also, verify the nozzle connection is snug and undamaged. If leaks continue, the pump may have internal issues requiring professional attention. Do not operate the pressure washer with significant leaks, as this can cause further damage or injury.
Detergent Usage Guidelines
Enhance cleaning power with detergents specifically designed for pressure washers! Always refer to the detergent manufacturer’s instructions for proper dilution ratios – typically a low-concentration mix is best. Utilize the onboard detergent tank (if equipped), ensuring it’s filled and the valve is open during application.
Avoid using household cleaners, as they can damage the pump. Rinse thoroughly after detergent use to prevent residue buildup. Consider environmental factors and choose biodegradable detergents when possible for responsible cleaning practices.
Recommended Detergents
Craftsman recommends detergents formulated specifically for pressure washers to maximize cleaning effectiveness and protect your equipment. Look for options designed for various surfaces – concrete, siding, vehicles – to achieve optimal results. Consider biodegradable formulas for environmentally conscious cleaning.
Popular choices include those targeting oil stains, mildew, and general grime. Always check detergent compatibility with your pressure washer model. Avoid abrasive cleaners or those containing chlorine bleach, as they can cause damage. Refer to the detergent label for specific application instructions.

Mixing Ratios
Proper detergent dilution is crucial for effective cleaning and preventing damage to your pressure washer. Always refer to the detergent manufacturer’s instructions for specific mixing ratios, as concentrations vary. Generally, a common ratio is 2-3 ounces of detergent per gallon of water.
Craftsman pressure washers with built-in detergent tanks often have marked levels indicating appropriate mixtures. Never exceed the recommended concentration, as this can lead to excessive foaming or residue. Use warm water for better detergent solubility and cleaning power. Test the mixture on an inconspicuous area first.
Detergent Tank Operation
Locate the detergent tank on your Craftsman pressure washer – typically a translucent container. Ensure the unit is turned off before filling. Carefully pour the pre-mixed detergent solution into the tank, avoiding overfilling. Most models feature a suction tube; verify it’s properly connected.
Select the detergent application setting on the pressure washer, if applicable. Adjust the detergent flow rate using the control knob to achieve the desired concentration. Monitor the solution level during operation and refill as needed. Rinse the tank thoroughly after each use to prevent clogging.
Storage Instructions
Proper storage extends the life of your Craftsman pressure washer. Before long-term storage, thoroughly drain all water from the pump, hose, and detergent tank to prevent freezing and corrosion. Disconnect the power source (cord or fuel line). Store the unit in a clean, dry location, protected from extreme temperatures and direct sunlight.
For freezing temperatures, winterize the unit following the maintenance section. Cover the pressure washer to protect it from dust and debris. Periodically check the unit during storage for any signs of damage or deterioration.
Long-Term Storage
Preparing your Craftsman pressure washer for extended periods of inactivity requires careful attention. Begin by completely draining the pump, hose, and detergent tank to avoid freeze damage and internal corrosion. Disconnect and store the battery, if applicable. Add fuel stabilizer to the gasoline tank (gas models) before final operation to prevent fuel degradation.
Clean the exterior surfaces and cover the unit with a breathable tarp. Store in a dry, climate-controlled environment, away from direct sunlight and extreme temperatures. Regularly inspect the stored unit for any signs of deterioration.
Protecting from Freezing Temperatures
Crucially, freezing temperatures can severely damage your Craftsman pressure washer. Before the first frost, completely drain all water from the pump, hose, and any attached accessories. Utilize a pump saver kit, if available, to coat internal components with antifreeze. Disconnect the hose and store it indoors, ensuring it’s completely dry.
For gas-powered models, stabilize the fuel or drain the tank. Remove the battery and store it in a warm location. Cover the unit with a waterproof cover and store it in a sheltered area, preventing exposure to the elements.
Warranty Information
Your Craftsman pressure washer is covered by a limited warranty against defects in materials and workmanship for a specified period. This warranty typically begins on the date of purchase and varies depending on the model. Coverage generally includes parts and labor for repairs or replacement, but excludes items damaged by misuse, abuse, or normal wear and tear.
To make a warranty claim, retain your original proof of purchase and contact Craftsman customer support. Detailed warranty terms and conditions are available in the separate warranty document included with your product or online at Craftsman’s official website.
Frequently Asked Questions (FAQ)
Q: My pressure washer isn’t building pressure. A: Check the water supply, nozzle for clogs, and ensure the hose isn’t kinked. Q: What type of detergent can I use? A: Use detergents specifically designed for pressure washers to avoid damage. Q: How often should I change the oil (gas models)? A: Refer to the maintenance schedule in this manual for oil change intervals.
Q: How do I winterize my unit? A: Drain all water, add fuel stabilizer, and store in a dry location. For further assistance, consult the troubleshooting section or contact Craftsman support.
Technical Specifications
Model Numbers: Craftsman pressure washers range from 01450-0 to newer series, each with unique features. GPM Ratings: Available models offer varying gallons per minute (GPM) – typically 2.5 to 4.0 GPM – influencing cleaning power. Engine/Motor Details: Gas-powered units utilize Honda engines, while electric models feature powerful motors with specific voltage requirements.
Pressure (PSI): PSI ratings vary, generally between 2000-3000 PSI. Always check your specific model’s label for accurate specifications. Refer to the included parts diagrams for detailed component information.
Model Numbers and GPM Ratings
Craftsman Model Identification: Identifying your specific model number (e.g., 01450-0) is crucial for accessing correct parts and support. GPM Explained: GPM, or gallons per minute, directly impacts cleaning efficiency; higher GPM means faster cleaning.
Typical GPM Ranges: Craftsman offers models ranging from 2.5 GPM for lighter tasks to 4.0 GPM for heavy-duty cleaning. Matching GPM to Tasks: Select a GPM rating appropriate for your needs – lower for cars, higher for decks and driveways.
Engine/Motor Details
Gas-Powered Engines: Many Craftsman pressure washers utilize Honda engines, known for reliability. These typically require regular oil changes and fuel stabilization for storage. Electric Motor Specifications: Electric models boast varying voltage and amperage ratings, impacting power output.
Horsepower & CCs: Gas engine power is often measured in horsepower (HP) and cubic centimeters (CCs). Motor Wattage: Electric motors are rated in watts, indicating energy consumption and performance. Always verify compatibility with your power supply.
Parts Diagrams & Replacement
Locating Diagrams: Detailed exploded views of your Craftsman pressure washer are crucial for repairs. These diagrams illustrate component placement and assembly. Finding Replacement Parts: Craftsman offers a wide range of replacement parts through their website and authorized service centers.
Model-Specific Parts: Always use your specific model number when ordering parts to ensure compatibility. Online Resources: Several online retailers also stock Craftsman pressure washer parts. Prioritize genuine Craftsman parts for optimal performance and warranty validity.
Contacting Craftsman Support
Need Assistance? Craftsman provides multiple avenues for customer support regarding your pressure washer. Website Support: Visit the official Craftsman website for FAQs, troubleshooting guides, and online chat options. Phone Support: A dedicated customer service hotline is available during business hours to address your concerns directly.
Email Support: Submit inquiries via email for non-urgent issues. Local Service Centers: Locate authorized Craftsman service centers for in-person repairs and assistance. Keep your model number handy when contacting support for faster service.