GE Window Air Conditioner Owners Manual: An Overview
This manual provides essential guidance for safe operation, installation, and maintenance of your GE window AC unit․ It covers controls, cleaning, troubleshooting, and safety precautions․
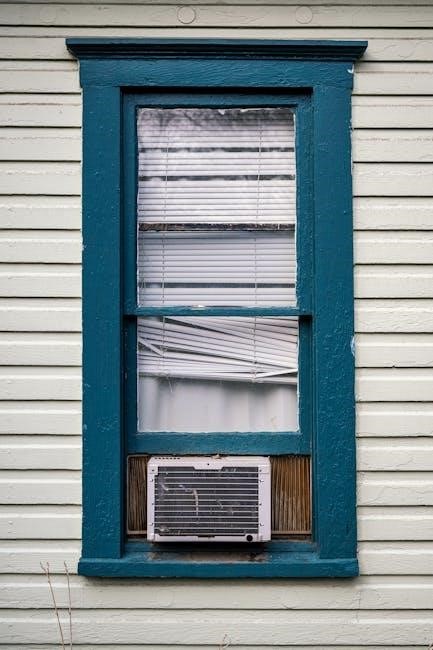
Welcome to the world of efficient and reliable cooling with your new GE window air conditioner! These units are designed to provide comfortable climate control for individual rooms, offering a convenient alternative to central air systems․ Before you begin, carefully review this owner’s manual to ensure proper installation, operation, and maintenance․
GE window AC units combine innovative technology with user-friendly features, delivering optimal performance and energy efficiency․ Understanding your specific model and its capabilities is key to maximizing its benefits․ This manual details everything from preparing your window for installation to utilizing the various cooling and fan modes․ Remember, safe operation is paramount; always adhere to the provided safety precautions․
Understanding Your Model Number
Your GE window air conditioner’s model number is crucial for identifying specific features, specifications, and accessing relevant support resources․ This alphanumeric code, typically found on the unit’s label, provides vital information about its cooling capacity (BTU), energy efficiency rating, and other key characteristics․
When contacting customer support or ordering replacement parts, having your model number readily available ensures accurate assistance․ It allows GE representatives to quickly pinpoint your unit’s details and provide tailored solutions․ The model number also helps determine compatibility with accessories like installation kits (RAK65A1, RAK690) and ensures you’re referencing the correct documentation․ Refer to the unit itself for this important identifier․

Installation Guide
Proper installation is key for optimal performance․ This section details preparing the window, mounting bracket installation, and securely positioning the AC unit within the frame․
Preparing the Window for Installation
Before beginning, ensure the window frame is strong and stable enough to support the air conditioner’s weight․ Carefully inspect the window sill and frame for any signs of rot or damage; repairs should be made before proceeding․ The window opening should align with the dimensions specified for your particular GE model – consult your unit’s specifications․
Remove the window screen and any existing hardware that might interfere with installation․ Clean the window sill thoroughly to provide a stable and level surface for the mounting brackets․ Depending on the window type, you may need to install a support bracket for added security, especially for larger units․ Ensure adequate clearance around the unit for proper airflow and operation, avoiding obstructions like curtains or blinds․
Consider using weather stripping to seal any gaps around the air conditioner, improving energy efficiency and preventing air leaks․
Installing the Mounting Brackets
Begin by attaching the mounting brackets to the window sill using the screws provided․ Ensure the brackets are level and securely fastened – this is crucial for safe and stable operation․ Refer to the diagrams in your GE manual for correct bracket orientation and placement, as this varies by model․
Some models may require additional support brackets, particularly for heavier units or wider window openings․ Double-check that the brackets are firmly anchored and can withstand the weight of the air conditioner․
Proper bracket installation prevents vibration and reduces noise during operation․ Use a screwdriver to tighten the screws firmly, but avoid over-tightening, which could damage the window frame or brackets․ Verify bracket stability before proceeding to the next step․
Securing the Air Conditioner in the Window
Carefully lift the air conditioner and position it onto the installed mounting brackets, ensuring it sits securely․ Slide the unit into place, aligning the chassis with the bracket supports․ Some models utilize side curtains or panels to fill gaps and improve insulation – install these now, following the manual’s instructions․
Next, secure the air conditioner to the brackets using the provided screws or locking mechanisms․ Tighten these firmly, but avoid over-tightening․ Check for any wobble or instability; if present, re-tighten the screws or adjust the bracket positioning․
Properly securing the unit prevents accidental falls and ensures efficient operation․ A secure installation minimizes noise and vibration, contributing to a more comfortable environment․

Operating Instructions
This section details how to effectively use your GE window air conditioner, covering control panel functions, cooling modes, fan settings, and energy-saving features․
Control Panel Explained
The control panel is your central hub for operating the GE window air conditioner․ Depending on your model, you’ll find either control knobs or touch pads․ Knobs typically manage power, cooling, fan speed, and mode selection․ Touch pads offer similar functionality with a digital interface․
Key features often include a power button, temperature adjustment controls, fan-only settings, cooling mode options (like cool, auto, or dry), and an energy saver function․ Some advanced models incorporate a sleep mode for overnight comfort and programmable timers for automated operation․ Understanding each button or knob’s purpose is crucial for optimal performance and personalized climate control․ Refer to the diagrams within this manual for specific button layouts and functions related to your particular GE model․
Using the Control Knobs/Touch Pads
To power on your GE window AC, rotate the power knob clockwise or press the power button on touch pad models․ Adjust the temperature using the temperature control knob or touch pad arrows – lower numbers mean cooler air․ Select your desired fan speed (low, medium, high) using the fan speed control․
For cooling, choose the ‘Cool’ mode․ ‘Fan Only’ circulates air without cooling․ The ‘Energy Saver’ mode optimizes energy use․ On touch pad models, simply tap the corresponding icons․ Familiarize yourself with the indicator lights; they display the current settings and operational status․ Always allow a few minutes for the unit to respond to adjustments․ Refer to the detailed diagrams for precise knob/pad locations and functions․
Cooling Mode Operation
When selecting Cooling Mode, the compressor activates to lower the room temperature․ Adjust the temperature setting using the control knobs or touch pad – a lower setting increases cooling․ Ensure the fan speed is appropriately set for desired airflow; higher speeds maximize cooling but consume more energy․
The unit will cycle on and off to maintain the set temperature․ During operation, condensation will form; this is normal․ Avoid blocking the air vents for optimal performance․ For efficient cooling, keep doors and windows closed․ The ‘Energy Saver’ mode can be used in conjunction with Cooling Mode to reduce energy consumption while maintaining comfort․ Monitor the unit for proper operation and adjust settings as needed․
Fan-Only Mode Operation

In Fan-Only Mode, the compressor remains off, and only the fan operates․ This setting circulates air within the room without providing cooling․ Utilize this mode for gentle air movement or to help distribute heat evenly․ Adjust the fan speed using the control panel to select Low, Medium, or High․
Fan-Only Mode is ideal for days when cooling isn’t required but air circulation is desired․ It consumes less energy than Cooling Mode․ Ensure the air vents are unobstructed for optimal airflow․ This mode can also be used after cooling to help dry condensation that may have formed․ Regularly check the fan’s operation to ensure smooth and quiet performance․
Energy Saver Mode
Energy Saver Mode automatically adjusts cooling operation to maximize efficiency and reduce energy consumption․ When activated, the fan cycles on and off, and the compressor operates intermittently, maintaining a comfortable temperature while minimizing power usage․ This mode is particularly effective during moderate weather conditions․
The unit intelligently manages cooling cycles, preventing excessive cooling and saving energy․ While in Energy Saver Mode, you may notice slight temperature fluctuations․ This is normal operation․ To activate, locate the “Energy Saver” button on the control panel and press it․ This feature helps lower electricity bills and reduces the environmental impact of your air conditioner․
Maintenance and Care
Regular cleaning of the air filter, grille, and exterior ensures optimal performance and extends the lifespan of your GE window air conditioner․
Air Filter Cleaning
Maintaining a clean air filter is crucial for efficient cooling and air quality․ The filter should be checked at least monthly, or more frequently during heavy use․ To clean, gently remove the filter from its housing – consult your model’s specific instructions for location and removal․ Wash the filter with mild soap and water, ensuring all dirt and debris are removed․

Rinse thoroughly and allow the filter to completely dry before reinstalling․ A clogged filter restricts airflow, reducing cooling performance and potentially damaging the unit․ Some models may have reusable filters, while others require replacement․ Refer to your owner’s manual for filter type and replacement frequency․ Never operate the air conditioner without a filter installed, as this can lead to internal damage and void the warranty․
Cleaning the Grille and Exterior
Regular cleaning of the grille and exterior surfaces ensures optimal performance and extends the lifespan of your GE window air conditioner․ Before cleaning, always disconnect the unit from the power source to prevent electrical shock․ Use a soft, damp cloth with mild detergent to wipe down the exterior cabinet and grille․ Avoid abrasive cleaners or solvents, as they can damage the finish․
For stubborn dirt, a slightly stronger cleaning solution may be used, but test it on an inconspicuous area first․ Ensure the grille fins are not bent or damaged during cleaning, as this can restrict airflow․ Do not immerse the unit in water․ After cleaning, wipe dry with a clean cloth․ A well-maintained exterior contributes to the unit’s aesthetic appeal and operational efficiency․
Winter Storage Instructions
Proper winter storage is crucial for preserving your GE window air conditioner’s functionality and longevity․ Before storing, thoroughly clean the unit, including the air filter and exterior, as detailed in the manual․ Remove the mounting brackets and any accessories․ Carefully package the air conditioner in its original box or a suitable protective covering to prevent dust accumulation and damage․
Store the unit in a cool, dry place, protected from extreme temperatures and humidity․ Avoid storing it in direct sunlight․ Ensure the unit is completely dry before storage to prevent mold or mildew growth․ Periodically check the stored unit for any signs of damage or deterioration․ Following these steps will ensure your air conditioner is ready for use when warmer weather returns․

Troubleshooting Common Issues
This section details solutions for typical problems like cooling failures, leaks, and unusual noises, helping you quickly resolve issues with your GE unit․
Air Conditioner Not Cooling
If your GE window air conditioner isn’t cooling effectively, first verify the unit is properly plugged in and the circuit breaker hasn’t tripped․ A dirty air filter significantly restricts airflow, reducing cooling capacity – clean or replace it immediately․ Ensure the front grille isn’t obstructed and that curtains aren’t blocking air intake or exhaust․
Check if the cooling mode is selected and the temperature setting is sufficiently low․ Confirm the window is sealed correctly to prevent warm air from entering․ If icing occurs on the cooling coils, turn the unit off and allow it to defrost before restarting․ For persistent issues, consult a qualified technician, as refrigerant problems require professional attention․
Water Leaking from Unit
If you notice water leaking from your GE window air conditioner, several factors could be responsible․ Improper installation, causing the unit to tilt outwards, is a common cause – ensure it’s level and properly secured in the window․ Check the drain hole at the back of the unit for blockage; clear any debris to allow condensation to drain effectively․
High humidity levels can also lead to increased condensation․ Ensure the room is adequately ventilated․ If the leak persists, inspect the base pan for cracks or damage․ Avoid operating the unit in extremely humid conditions for extended periods․ Contact a qualified technician if the issue continues, as internal component damage might be present․
Unit Making Unusual Noises
If your GE window air conditioner is producing unusual noises, a systematic check is necessary․ Rattling sounds often indicate loose panels or components; carefully inspect and tighten any screws or parts․ A buzzing noise could stem from the fan hitting an obstruction – ensure nothing is blocking the fan blades․
Clicking sounds might be normal during start-up or shut-down, but persistent clicking warrants investigation․ If you hear a grinding noise, the compressor might be failing, requiring professional attention․ Always disconnect power before inspecting internal components․ If the noise persists after checking these areas, contact a qualified technician for diagnosis and repair․

Safety Information
Prioritize safety by following all precautions outlined in this manual․ Proper electrical grounding and avoiding water exposure are crucial for safe operation of your GE unit․
Important Safety Precautions
To ensure your safety and prevent damage to the unit, carefully read and adhere to these precautions․ Always unplug the air conditioner before cleaning or performing any maintenance․ Never operate the unit with a damaged cord or plug, and avoid using extension cords․
Ensure the air conditioner is securely installed within the window to prevent accidental falls․ Do not insert any objects through the air vents, as this could cause damage or injury․ Maintain adequate ventilation, especially when using the unit in conjunction with other appliances․
Avoid operating the unit in extremely humid conditions or near flammable materials․ Regularly check the power cord for any signs of wear or damage․ If the unit malfunctions, immediately discontinue use and contact a qualified technician for repair․ This appliance is not intended for use by persons (including children) with reduced physical, sensory or mental capabilities․
Electrical Requirements
Proper electrical connection is crucial for safe and efficient operation of your GE window air conditioner․ This unit typically requires a standard 115/120V, 60Hz electrical supply․ A dedicated circuit is highly recommended to avoid overloading existing circuits with other appliances․
Ensure the wall outlet is properly grounded to prevent electrical shock․ Do not use adapters or extension cords, as they may not be rated for the unit’s power consumption․ Verify the outlet’s voltage matches the air conditioner’s specifications, found on the unit’s nameplate․
If you are unsure about your electrical system’s compatibility, consult a qualified electrician before installation․ Improper wiring can lead to fire hazards or damage to the air conditioner․ Always disconnect the power before inspecting or cleaning the electrical components․