Hotpoint Cooker Manual: A Comprehensive Guide
Navigating this manual ensures optimal performance and safety with your Hotpoint cooker, offering detailed instructions for installation, operation, and maintenance procedures.
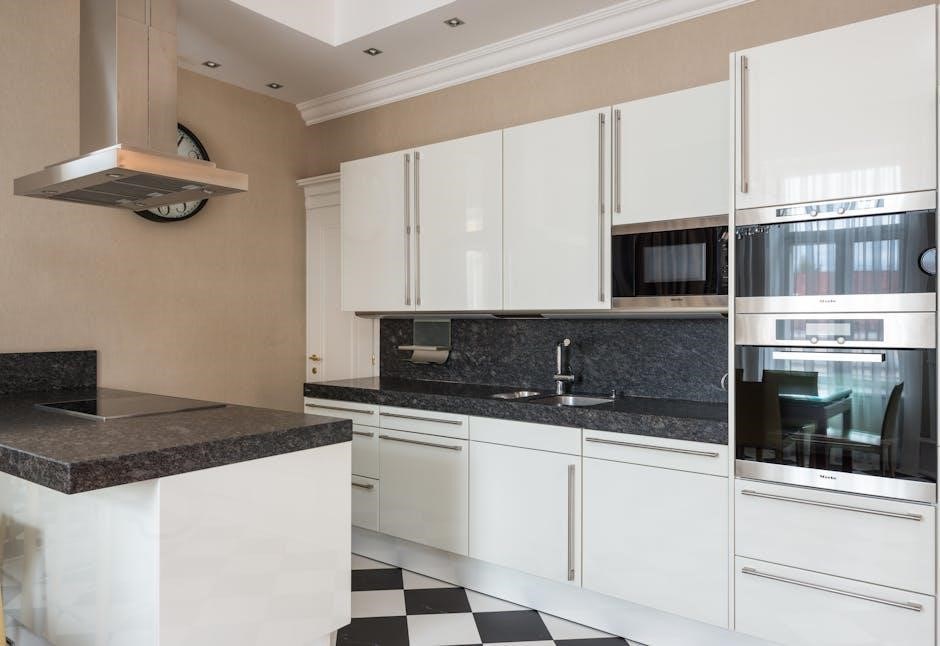
Understanding Your Hotpoint Cooker
Your Hotpoint cooker is a sophisticated kitchen appliance designed for efficient and versatile cooking. This section provides a foundational understanding of its capabilities. Familiarize yourself with the different cooking zones – the hob (cooktop) for quick searing and boiling, and the oven for baking, roasting, and grilling.
Hotpoint cookers come in various models, including gas, electric, and induction. Understanding your specific model is crucial. Refer to the model number located on the appliance’s data plate (usually found around the oven door frame) for accurate information.
Modern Hotpoint cookers often feature advanced technologies like fan-assisted cooking for even heat distribution, programmable timers for convenient meal preparation, and self-cleaning functions for effortless maintenance. This manual will guide you through utilizing these features effectively, ensuring optimal cooking results and a long-lasting appliance.
Safety Precautions
Prioritizing safety is paramount when operating your Hotpoint cooker. Always ensure adequate ventilation during use, especially with gas models, to prevent carbon monoxide buildup. Never leave the cooker unattended while in operation. Keep flammable materials away from the hob and oven to avoid fire hazards.
Exercise extreme caution when handling hot cookware and oven racks; use oven gloves or protective mitts. Supervise children closely around the cooker, and teach them about its potential dangers. Regularly inspect the power cord for damage, and do not use the appliance if it is faulty.
For gas cookers, ensure the gas supply is properly installed and maintained by a qualified technician. Never attempt to repair the cooker yourself; contact a certified service engineer for any repairs. Disconnect the cooker from the power supply before cleaning or performing maintenance.
Cooker Components & Overview
Your Hotpoint cooker comprises several key components designed for efficient cooking. The hob, or cooktop, features burners or heating elements for surface cooking, controlled by intuitive knobs or a touch panel. The oven provides a spacious cavity for baking, roasting, and grilling, with various functions selectable via the control panel.
A control panel manages oven temperature, cooking modes, and timer settings. Many models include a grill compartment for direct heat cooking. A cooling fan ensures safe operation by dissipating heat. The door is designed with a viewing window and secure locking mechanism.
Depending on the model, additional features may include a programmable timer, self-cleaning function, and fan-assisted cooking. Familiarize yourself with the location and function of each component for optimal usage and maintenance.

Installation & Setup
Proper installation is crucial for safe and efficient operation; carefully unpack, inspect for damage, and connect to the appropriate power or gas supply.
Unpacking and Initial Inspection
Upon delivery, carefully unpack your Hotpoint cooker, retaining all packaging materials until you’ve confirmed complete functionality and satisfaction. Inspect the appliance thoroughly for any signs of shipping damage – dents, scratches, or broken components.
Compare the contents against the included parts list to ensure everything is present, including shelves, racks, and any specialized accessories. Note any discrepancies immediately and contact the retailer or Hotpoint customer support.
Remove all protective films and transit restraints from both the oven cavity and the hob surface. Check that the door seals are intact and properly aligned. Before proceeding, verify the cooker’s voltage matches your household supply. A damaged cooker should not be installed; report it to the delivery company and the retailer.
Connecting to Power Supply
Before connecting your Hotpoint cooker to the power supply, ensure the voltage indicated on the appliance’s rating plate matches your home’s electrical system. This is crucial to prevent damage and ensure safe operation. The cooker must be earthed for safety; never bypass the earth connection.
Installation should ideally be performed by a qualified electrician, adhering to all local and national electrical codes. Use a dedicated circuit breaker of the appropriate amperage for the cooker, as specified in the technical specifications section of this manual.
Do not use extension cords or adapters. The power cable should be routed away from heat sources and sharp edges. Verify the connection is secure and that the cooker is properly grounded before switching on the power. A loose connection can create a fire hazard.
Gas Connection (If Applicable)
If your Hotpoint cooker utilizes gas, connection must be performed by a qualified and registered gas engineer, strictly adhering to local gas safety regulations. Never attempt to connect the gas supply yourself. Ensure the gas supply pressure is compatible with the cooker’s requirements, as detailed on the rating plate.
Before connection, thoroughly inspect the gas supply pipe and fittings for any leaks using a suitable leak detection solution. A gas leak is extremely dangerous and requires immediate attention. The gas connection point must be easily accessible for future maintenance and inspection.
After connection, the gas engineer should perform a full safety check, including a burner flame assessment to ensure correct combustion. Regularly check the gas hose for cracks or damage and replace it if necessary. Proper ventilation is essential when using a gas cooker.

Operating Your Hotpoint Cooker
Familiarize yourself with the control panel, oven functions, and hob operation for efficient cooking; always refer to the detailed settings guide provided within.
Control Panel Explained
The Hotpoint cooker’s control panel is designed for intuitive operation, featuring a clear display and easily accessible controls. Typically, you’ll find dedicated knobs or touch-sensitive buttons for oven temperature, cooking functions (bake, broil, convection), and timer settings. Digital models often include a clock and a minute minder. Understanding the symbols is crucial; a flame icon usually represents gas ignition, while varying temperature levels are indicated numerically or with low, medium, and high settings.
For electric cookers, power level indicators are common, allowing precise heat control. The timer function can be set for automatic shut-off, ensuring meals are cooked to perfection without constant monitoring. Some advanced models incorporate pre-programmed settings for specific dishes, simplifying the cooking process. Always consult the detailed diagrams within this manual to identify each control’s specific function and ensure safe, efficient operation of your Hotpoint cooker.
Oven Functions & Settings
Hotpoint cookers offer a variety of oven functions to cater to diverse cooking needs. Conventional baking utilizes heat from the bottom element, ideal for cakes and pastries. Fan-assisted cooking, employing a rear fan, distributes heat evenly, reducing cooking times and ensuring consistent results for roasts and multiple dishes. Grilling provides intense top-down heat, perfect for browning and crisping.
Convection baking combines fan assistance with a higher temperature, accelerating cooking and creating a golden-brown finish. Specialized settings like defrost and slow cook offer added versatility. Temperature settings range from low (150°F) to high (550°F), allowing precise control. Always preheat the oven according to recipe instructions. Refer to the function guide within this manual for optimal settings for various food types, maximizing your Hotpoint cooker’s performance.
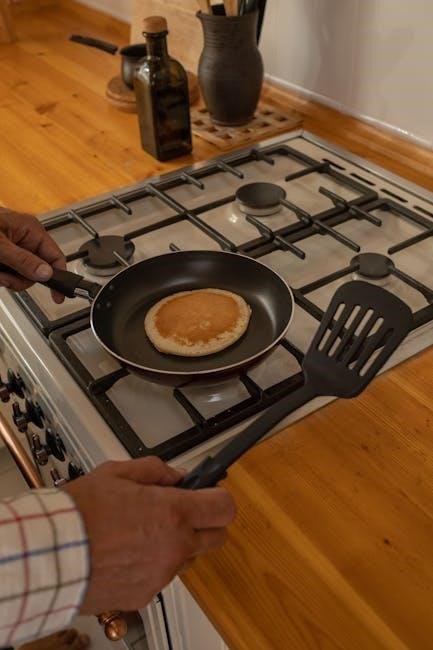
Hob/Cooktop Operation
Your Hotpoint cooker’s hob/cooktop features various zones designed for different cookware sizes and heating requirements. Electric hobs utilize radiant heating elements, while induction hobs generate heat directly within the cookware, offering faster and more efficient cooking. Each zone has adjustable power levels, typically ranging from low to high, controlled via intuitive dials or touch controls.
Ensure cookware is suitable for the hob type – induction hobs require magnetic-based pots and pans. Always match the pan size to the zone size for optimal heat transfer. Avoid placing empty cookware on a hot zone. Residual heat indicators illuminate when a zone is still hot, preventing accidental burns. Regular cleaning is essential to maintain performance and prevent damage. Consult the detailed zone guide within this manual for specific usage instructions and safety precautions.

Cleaning & Maintenance
Regular cleaning preserves your Hotpoint cooker’s performance and longevity; follow the outlined procedures for daily upkeep, oven cycles, and hob care.
Daily Cleaning Procedures
Maintaining a clean Hotpoint cooker daily prevents buildup and ensures optimal performance. After each use, allow all surfaces to cool completely before cleaning. For the hob, wipe down spills immediately with a damp cloth and mild detergent. Avoid abrasive cleaners, as they can damage the surface.
The cooker’s exterior can be cleaned with a soft cloth and warm, soapy water. Pay attention to control panels, wiping gently to avoid damaging the markings. For stainless steel surfaces, use a dedicated stainless steel cleaner for a streak-free finish. Regularly check and empty the crumb tray located at the bottom of the oven to prevent odors and potential fire hazards.
Remember to disconnect the cooker from the power supply before undertaking any thorough cleaning. Consistent daily cleaning minimizes the need for more intensive cleaning procedures later on, extending the life of your appliance.
Oven Cleaning – Self-Cleaning Cycles
Many Hotpoint cookers feature self-cleaning cycles, utilizing high temperatures to burn off food residue. Before initiating a self-cleaning cycle, remove all racks, baking stones, and thermometers from the oven interior. Ensure the oven door is securely locked, as it will automatically lock during the cycle due to extreme heat.
Select the appropriate self-cleaning cycle duration based on the level of soiling – options typically range from 2 to 4 hours. A strong odor may be emitted during the cycle, so ensure adequate ventilation by opening windows. Once the cycle completes and the oven cools, wipe away any remaining ash with a damp cloth.
Avoid interrupting the self-cleaning cycle, and never manually unlock the door during operation; Regular use of self-cleaning cycles minimizes manual scrubbing and keeps your oven in pristine condition.
Hob/Cooktop Cleaning & Care
Maintaining a clean hob/cooktop is crucial for optimal performance and longevity. After each use, allow the surface to cool completely before cleaning. For everyday spills, use a soft cloth dampened with warm, soapy water. Avoid abrasive cleaners or scouring pads, as they can scratch the surface.
For stubborn, burnt-on food residue, apply a specialized cooktop cleaner and follow the manufacturer’s instructions. Ceramic hobs benefit from a glass scraper to gently remove stuck-on particles. Regularly polish stainless steel hobs with a stainless steel cleaner to prevent staining and maintain shine.
Ensure all burners and heating elements are completely dry before resuming operation. Prompt cleaning prevents buildup and ensures efficient heat distribution.

Troubleshooting Common Issues
This section provides solutions for frequently encountered problems, guiding you through diagnosing and resolving issues with your Hotpoint cooker efficiently and safely.
Oven Not Heating
If your Hotpoint oven isn’t heating, first verify the power supply and ensure the cooker is correctly connected. Check the control panel to confirm the oven function is activated and the desired temperature is set. A common issue is a tripped circuit breaker or blown fuse – reset or replace as needed.
Examine the oven’s heating elements; a visible break indicates a need for replacement by a qualified technician. Also, inspect the oven’s thermostat – a faulty thermostat can prevent the oven from reaching temperature. If using self-cleaning cycles, ensure the oven has fully cooled before attempting to use it.
For gas cookers, confirm the gas supply is on and the igniter is functioning correctly. If the problem persists, do not attempt self-repair; contact a certified Hotpoint service engineer for assistance to avoid potential hazards and ensure proper diagnosis and repair.
Hob Not Working
Should your Hotpoint hob cease to function, begin by checking the power supply and ensuring the cooker is properly plugged in. Verify that the correct burner is selected and the control knob is turned to the desired setting. A common cause is a tripped circuit breaker, so check your electrical panel and reset if necessary.
For electric hobs, inspect the heating elements for any visible damage or breaks. If using an induction hob, ensure your cookware is compatible with induction technology. Gas hob issues often stem from a blocked burner port or a faulty igniter – carefully clean the burner ports and test the igniter spark.
If the problem continues, avoid attempting self-repair and contact a qualified Hotpoint service technician. They can accurately diagnose the issue and perform the necessary repairs safely and effectively, preventing further damage or potential hazards.
Error Codes & Their Meanings
Hotpoint cookers utilize error codes to signal specific malfunctions, aiding in diagnosis and repair. A flashing ‘E1’ often indicates a temperature sensor fault within the oven, requiring professional attention. ‘E2’ typically signals a heating element failure, while ‘E3’ suggests an issue with the cooker’s control board – do not attempt to fix this yourself.
For gas cookers, error codes related to gas supply or ignition may appear. ‘F01’ could mean a flame failure, prompting a safety shut-off. Always consult the full error code list in your cooker’s manual for precise definitions. Ignoring error codes can lead to further damage or unsafe operation.
Record the error code before contacting Hotpoint customer support; this will expedite the troubleshooting process. Remember, attempting repairs without proper knowledge can void your warranty and pose safety risks.

Advanced Features & Settings
Explore sophisticated options like precise timer functions, versatile grill modes, and fan-assisted cooking for optimal results and customized culinary experiences.
Timer Functions
Hotpoint cookers boast intuitive timer functionalities designed to enhance cooking convenience and precision. The primary timer allows you to set a delayed start, enabling you to prepare meals in advance and have them ready when you are.
A secondary timer functions as a minute minder, ideal for tracking cooking times for specific dishes or components of a meal. Many models feature a ‘duration’ timer, calculating automatic switch-off based on the set cooking time.
To utilize the timer, simply access the control panel and navigate to the timer settings. Input the desired time using the numerical buttons, and select the appropriate timer mode (delay start, minute minder, or duration). The cooker will automatically execute the programmed function, providing audible alerts upon completion.
Remember to consult your specific model’s manual for detailed instructions and advanced timer options.

Grill Operation
The Hotpoint cooker’s grill function provides a rapid, high-heat cooking method, perfect for browning, toasting, and finishing dishes. Before operation, ensure the grill pan is correctly positioned and that all accessories are heat-resistant.
Select the grill setting on the control panel – options typically include a full grill (using both elements) and a half grill (using a single element for smaller items). Preheating is crucial for optimal results; allow several minutes for the grill to reach the desired temperature.
Position food on the grill pan, maintaining a safe distance from the heating element to prevent burning. Monitor cooking closely, as grilling is a fast process. For best results, turn food halfway through the cooking time.
Always exercise caution when using the grill, as surfaces become extremely hot.
Fan Assisted Cooking
Hotpoint cookers often feature fan-assisted oven technology, designed to distribute heat evenly throughout the oven cavity. This results in faster cooking times and more consistent results, particularly when cooking multiple dishes simultaneously.
To utilize this function, select the fan-assisted setting on the control panel, often indicated by a symbol depicting a fan. The fan circulates hot air, reducing hot spots and ensuring food cooks uniformly on all shelves.
Reduce cooking temperatures by approximately 20°C (68°F) compared to conventional oven settings when using fan assistance. This prevents over-browning and ensures food remains moist.
Fan-assisted cooking is ideal for roasting meats, baking pastries, and cooking large quantities of food.
Technical Specifications
This section details crucial cooker parameters, including energy consumption rates, precise dimensions, overall weight, and comprehensive warranty coverage details for your Hotpoint model.
Energy Consumption
Understanding your Hotpoint cooker’s energy usage is vital for efficient operation and cost savings. This appliance is categorized with an energy efficiency class, typically ranging from A+++ (most efficient) to G (least efficient), as indicated on the energy label affixed to the cooker.
The label also displays annual energy consumption estimates for both the oven and hob, calculated based on standard usage patterns. Actual consumption will vary depending on cooking habits and frequency. For electric cookers, power consumption during operation is measured in kilowatts (kW), while gas cookers utilize gas volume (cubic meters or feet).
To minimize energy waste, preheat the oven only when necessary, utilize appropriately sized cookware, and ensure proper ventilation around the appliance. Regularly cleaning the oven and hob also contributes to improved energy efficiency. Refer to the energy label and the full product specifications for precise energy consumption data related to your specific Hotpoint cooker model.
Dimensions & Weight
Accurate dimensions and weight specifications are crucial for proper installation and ensuring the cooker fits seamlessly into your kitchen space. Hotpoint cookers are available in various sizes, typically ranging from standard 60cm width to larger 90cm or 70cm models; Height generally falls between 85cm and 90cm, while depth varies depending on the features and design.
Detailed dimensional diagrams, including overall height, width, and depth, as well as specific measurements for hob and oven cavities, are provided in the installation guide. The weight of the cooker, which can range from 50kg to over 80kg depending on the model, is also specified for safe handling and floor load considerations.
Always verify these measurements before purchasing and during installation to avoid any compatibility issues; Ensure sufficient space around the cooker for ventilation and safe operation, as outlined in the installation instructions. Refer to your cooker’s specific product sheet for precise dimensions and weight details.
Warranty Information
Your Hotpoint cooker is covered by a manufacturer’s warranty, providing peace of mind and protection against defects in materials and workmanship. The standard warranty period typically lasts for one year from the date of purchase, covering parts and labor for repairs performed by authorized service technicians.
Extended warranty options may be available for purchase, offering additional coverage beyond the standard period. The warranty does not cover damage caused by misuse, improper installation, accidental damage, or normal wear and tear.
To make a warranty claim, retain your proof of purchase and contact Hotpoint’s customer support team. Detailed warranty terms and conditions are included in the documentation provided with your cooker. Registering your appliance online can streamline the warranty process. Always adhere to the recommended maintenance schedule to maintain warranty validity.