caldera spa control panel instructions

Caldera Spa Control Panel Instructions: A Comprehensive Guide

Navigating your Caldera spa’s features requires understanding the control panel; this guide offers troubleshooting advice, resetting procedures, and safety checks for optimal enjoyment.

Understanding Your Caldera Spa Control Panel

Caldera spa control panels are the central hub for managing your hot tub experience, offering intuitive control over jets, temperature, and system functions. Familiarizing yourself with its layout is crucial for seamless operation and efficient troubleshooting. The panel displays vital information, including water temperature, filter cycle status, and any active error codes.

Different Caldera models may feature slightly varying panel designs, but core functionalities remain consistent. Key components typically include buttons for adjusting temperature, activating jets (Pump 1 & 2), initiating the clean cycle, and navigating the menu settings. Understanding the purpose of each button and the information displayed will empower you to customize your spa experience and address minor issues independently; Regular inspection of the control board for damage is also recommended.

Remember to always disconnect power before inspecting any electrical components, prioritizing safety.

Control Panel Overview & Key Functions

Caldera spa control panels feature a user-friendly interface designed for easy operation. Core functions include precise temperature adjustment, controlling Jet Pump 1 & 2 for customized hydrotherapy, and activating the Clean Cycle for water circulation and filtration. The display clearly shows the current water temperature and cycle status.

Key buttons allow you to increase or decrease temperature settings, switch between jet pump operations, and initiate the ten-minute Clean Cycle. Some models offer programmable features accessible through menu navigation. Understanding these functions allows for personalized spa sessions. If the control panel isn’t responding, initial checks like a GFCI breaker reset are vital.

Regularly inspecting the circuit board for corrosion or damage ensures optimal performance. Remember to always disconnect power before any inspection or maintenance.

Navigating the Display Interface

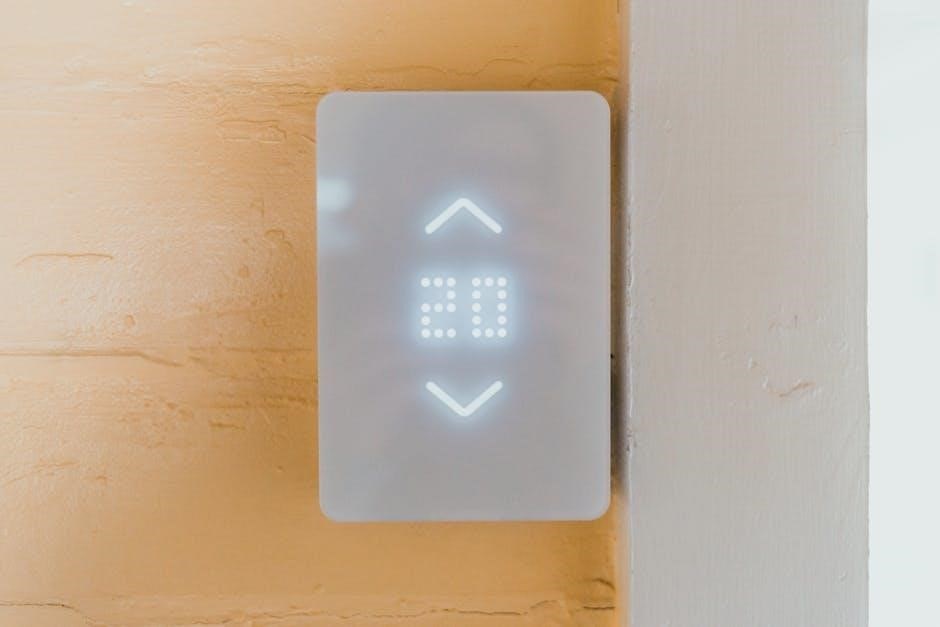
The Caldera spa control panel display presents information clearly, showing current water temperature, active cycles (jet pump operation, clean cycle), and any error codes. Use the up and down arrow buttons to adjust the temperature to your desired level. Pressing the ‘Jet 1’ or ‘Jet 2’ buttons activates the corresponding pump, offering varied massage experiences.

The ‘Clean’ button initiates the filtration cycle, running Jet Pump 1 for ten minutes to circulate water. Menu navigation, if available, allows access to programmable features. If the display freezes or shows errors, a system reset – unplugging the spa – might be necessary. Inspecting the control board for loose wiring is also crucial.

Familiarize yourself with the icons and their meanings for efficient operation. A malfunctioning display often indicates a deeper issue requiring professional attention.

Troubleshooting Common Control Panel Issues

Addressing unresponsive panels, deciphering error codes, and performing system resets are vital for maintaining your Caldera spa; safety first, disconnect power!

Control Panel Not Responding: Initial Checks

When your Caldera spa’s control panel fails to respond, begin with the simplest solutions. First, and most importantly, disconnect the spa from its power source – unplug it to initiate a complete system reset. This often resolves minor glitches within the control system.

Next, carefully inspect the control panel itself for any visible signs of damage, such as cracked displays or loose wiring connections. Gently check all cable connections at the back of the panel, ensuring they are secure. If possible, access the spa’s control box and visually examine the circuit board for any burnt components or corrosion.

Before restoring power, reset the GFCI (Ground Fault Circuit Interrupter) breaker, as a tripped breaker is a common cause of control panel failures. If the panel remains unresponsive after these checks, further investigation or professional assistance may be required to diagnose more complex issues.

Error Codes and Their Meanings

Caldera spa control panels utilize error codes to signal specific issues, aiding in diagnosis and repair. While code variations exist depending on the panel model, understanding common alerts is crucial. A “Low Flow” error typically indicates insufficient water flow to the heater, potentially due to clogged filters or closed valves.

“Sensor” errors often point to problems with temperature sensors, requiring inspection and possible replacement. “Heater” errors suggest a malfunction within the heating element or its associated circuitry. A “Freeze Protection” alert signifies the water temperature is nearing freezing, activating protective measures.

Consult your Caldera spa’s specific owner’s manual for a comprehensive list of error codes and their corresponding solutions. Ignoring error codes can lead to more significant damage, so prompt attention is vital. Documenting the code before attempting any repairs can also assist a service technician if professional help is needed.

Resetting the Control Panel System

When facing minor control panel glitches, a system reset is often the first troubleshooting step. Begin by completely disconnecting power to the spa at the GFCI breaker – this ensures a full system shutdown. Allow several minutes for all residual power to dissipate before proceeding.

Next, carefully inspect the control panel itself for any loose wiring connections or visible damage to the circuit board. Reconnect the power, and observe if the panel initializes correctly. If the issue persists, a more thorough reset might be necessary, involving disconnecting the panel entirely and re-establishing the connections.

Remember to consult your Caldera spa’s manual for specific reset procedures tailored to your model. Improper resetting can potentially cause further complications, so caution and adherence to instructions are paramount. If unsure, seeking professional assistance is always recommended.

Jet Control & Circulation

Utilize the control panel to manage Jet Pump 1 & 2, and activate the Clean Cycle for ten minutes, ensuring thorough water circulation within your spa.

Controlling Jet Pump 1 & 2

Caldera spas typically feature two jet pumps, offering versatile hydrotherapy experiences. Jet Pump 1 is often associated with the primary jets, delivering a robust massage, while Jet Pump 2 usually powers dedicated therapy jets for targeted relief. Accessing jet control is generally straightforward via the control panel.

Locate the jet control buttons – these may be labeled simply as “Jets 1” and “Jets 2,” or with icons representing their function. Pressing these buttons activates the corresponding pump. Some models offer variable speed control, allowing you to adjust the jet intensity to your preference. Experiment with different combinations of pumps and speeds to discover your ideal settings.

Remember that running both pumps simultaneously will maximize the hydrotherapy benefits, but also increase energy consumption. Consider alternating between pumps or using lower speeds to conserve energy. If a jet pump isn’t responding, consult the troubleshooting section for potential solutions, such as checking for error codes or verifying power supply.

Using the Clean Cycle Function

Caldera spas incorporate a “Clean Cycle” function designed to circulate water and flush out debris from the plumbing, ensuring optimal hygiene and water quality. This feature utilizes Jet Pump 1 (often labeled “Jets 1”) to run for a predetermined period, typically ten minutes, without the heater activating.

To initiate the Clean Cycle, locate the dedicated “Clean” button on your spa’s control panel. Pressing this button will start the circulation process. During the cycle, you may notice water movement and some noise from the pump – this is normal. It’s recommended to use the Clean Cycle regularly, ideally once a week or before and after spa use, to maintain cleanliness.

Ensure all jets are open during the Clean Cycle to maximize circulation. Avoid using the spa while the cycle is running. The Clean Cycle is a preventative measure and doesn’t replace regular water testing and chemical balancing, which are crucial for maintaining a safe and enjoyable spa experience.

Troubleshooting Jets Not Working

If your Caldera spa jets aren’t functioning, several factors could be at play. First, verify the power supply to the spa and ensure the GFCI breaker hasn’t tripped. Check the control panel to confirm the jets are activated – sometimes a simple button press is all that’s needed.

If the jets still don’t work, inspect the jet nozzles themselves for blockages caused by debris or mineral buildup. Clean them individually if necessary. Next, examine the pump(s) responsible for jet operation. Listen for unusual noises, which could indicate a pump issue.

A malfunctioning control panel or a tripped breaker dedicated to the jet pump could also be the culprit. For more complex issues, such as a faulty pump motor or wiring problems, professional assistance from a qualified spa technician is recommended. Remember to always disconnect power before attempting any repairs.

Temperature Control & Settings

Adjusting water temperature via the control panel is straightforward, but understanding sensor functionality and troubleshooting heater issues are crucial for consistent spa enjoyment.

Adjusting Water Temperature

Your Caldera spa’s control panel allows for precise water temperature adjustments, ensuring a comfortable and relaxing experience. Typically, you’ll find up and down arrow buttons dedicated to temperature control. Pressing these buttons incrementally increases or decreases the set temperature, displayed prominently on the panel’s screen.

Remember that the spa’s heating system requires time to reach the newly set temperature, especially with significant adjustments. Avoid making drastic changes, as this can strain the heater. It’s best to adjust in smaller increments and allow the system to stabilize.

Some models feature programmable schedules, allowing you to pre-set temperatures for different times of the day. Explore your control panel’s menu options to discover if this feature is available. Consistent monitoring of the water temperature is recommended to maintain optimal comfort and energy efficiency. Always prioritize safety and consult your owner’s manual for specific instructions related to your Caldera spa model.

Understanding Temperature Sensors

Caldera spas rely on temperature sensors to accurately monitor water temperature and communicate this information to the control panel. These sensors are crucial for maintaining consistent heat and preventing overheating. Typically, a primary sensor measures water temperature, while a high-limit sensor acts as a safety backup, preventing the heater from exceeding a safe threshold.

If the control panel displays error codes related to temperature, it often indicates a faulty sensor. Troubleshooting involves disconnecting power and visually inspecting the sensors and their wiring for damage or corrosion. A multimeter can be used to test the sensor’s resistance, confirming its functionality.

Replacing a faulty temperature sensor requires careful attention to detail and adherence to safety precautions. Always disconnect power before working with electrical components. Consult your spa’s wiring diagram and owner’s manual for specific instructions. Proper sensor function is vital for efficient operation and longevity of your Caldera spa.

Heater & High-Limit Thermostat Troubleshooting

When your Caldera spa isn’t heating, the heater element and high-limit thermostat are prime suspects. Begin by disconnecting power to the spa before any inspection. A faulty heater element won’t generate heat, while a malfunctioning high-limit thermostat might prematurely shut down the heater, even if the water isn’t at the set temperature.

To troubleshoot, visually inspect the heater for signs of corrosion or damage. Use a multimeter to test the heater’s resistance; an open circuit indicates a failed element. The high-limit thermostat should be tested for continuity – no continuity suggests a faulty thermostat.

Replacing these components requires careful attention to wiring diagrams and safety protocols. Ensure the new parts are compatible with your spa model. Always re-connect power only after verifying all connections are secure and correct. Proper heater and thermostat function are essential for maintaining comfortable spa temperatures.

Electrical Considerations & Safety

Prioritize safety by inspecting the circuit board, resetting the GFCI breaker, and verifying proper voltage; these steps ensure reliable operation and prevent electrical hazards.

GFCI Breaker Resetting Procedures

Ground Fault Circuit Interrupter (GFCI) breakers are crucial safety devices protecting against electrical shock near water. If your Caldera spa’s control panel isn’t responding, the GFCI breaker is often the first component to check. Locate the GFCI breaker, typically found near the spa’s electrical connection.

To reset, firmly press the “Reset” button. If it doesn’t hold, or trips immediately again, do not continue attempting resets. This indicates a potential electrical issue requiring professional attention. Before resetting, ensure the spa is completely dry and no one is in or near the water.

Disconnect the panel to further investigate. Repeated tripping suggests a ground fault – a dangerous condition. Contact a qualified electrician to diagnose and repair the problem. Never bypass or disable the GFCI breaker, as it’s a vital safety feature. Always prioritize safety when dealing with electrical components.

Inspecting the Circuit Board for Damage

A thorough visual inspection of the spa’s circuit board is essential when troubleshooting control panel issues. Always disconnect power to the spa before attempting this step to prevent electrical shock. Carefully remove the control panel cover to access the board.

Look for any signs of physical damage, such as burnt components, discolored areas, or corrosion. Pay close attention to any capacitors that appear swollen or leaking. Check for loose wiring connections or any wires that may have become disconnected.

If you observe any of these issues, the circuit board likely needs replacement. Attempting to repair it yourself is generally not recommended unless you have extensive electronics experience. Document any findings with photos before contacting a qualified spa technician for repair or replacement options. Prioritize safety and professional assistance.

Voltage Checks & Power Supply Issues

Confirming adequate power delivery is crucial when diagnosing control panel problems. Begin by verifying the GFCI breaker is properly reset and functioning. Use a multimeter to check the voltage at the spa’s terminal block, ensuring it matches the spa’s voltage requirement (typically 240V).

Low voltage can indicate a problem with the power supply, wiring, or the breaker itself. Inspect the wiring for any damage or loose connections. If the voltage is consistently low, contact a qualified electrician to investigate the power supply further.

Ensure the spa is receiving a dedicated circuit and isn’t sharing power with other appliances. Fluctuations in voltage can also damage the control panel, so stable power is essential. Prioritize electrical safety and professional evaluation if needed.

ecolab chemical dispenser manual

Ecolab Chemical Dispenser Manual: A Comprehensive Guide

This manual details Ecolab’s dispensing systems, including Facilipro Ultra and Nexa Classic, offering precision for membrane cleaning and hygiene solutions.

Ecolab’s dispensing systems represent a significant advancement in chemical management, offering precise control and enhanced safety for a variety of applications. These systems, like the Facilipro Ultra Concentrated Dispensing System (ECO92022030), are designed to optimize chemical usage, reduce waste, and improve operational efficiency.

From touch-free hand hygiene solutions with the Nexa Classic dispensers to automated precision dispensing for membrane cleaning chemistries, Ecolab provides tailored solutions for diverse industrial needs. These systems aren’t merely about delivering chemicals; they’re about delivering consistent, accurate results while minimizing environmental impact and ensuring worker safety. The integration of separate dispensing modules for acid and alkaline chemistries further exemplifies this commitment to safety and precision.

Understanding these systems is crucial for maximizing their benefits, and this guide will provide a comprehensive overview of their components, installation, operation, and maintenance.

Understanding Facilipro Ultra Concentrated Dispensing System (ECO92022030)

The Ecolab 92022030 Facilipro Ultra Concentrated Dispensing System is a robust solution for accurately diluting and dispensing concentrated chemicals. Measuring 8-1/2″L x 13″W x 20-1/4″H, this system is designed for efficient chemical management in various industrial settings. It’s a key component in optimizing cleaning and sanitation processes, reducing waste, and improving overall operational costs.

This system excels at handling ultra-concentrated formulations, ensuring precise dilutions for optimal performance. Its design prioritizes safety and ease of use, simplifying chemical handling procedures. The Facilipro system is often utilized with HILL and MARKES chemical dispensing systems, demonstrating its compatibility and versatility.

Proper understanding of its features and functionalities is essential for maximizing its benefits and ensuring consistent, reliable results.

Nexa Classic Touch-Free Hand Hygiene Dispensers

Ecolab’s Nexa Classic Touch-Free Hand Hygiene Dispensers represent a modern approach to hygiene, specifically designed for environments like hospitals where efficiency and infection control are paramount. This technology minimizes contact, reducing the spread of germs and promoting a cleaner environment. The system offers flexible options to meet diverse needs, improving workflow and user experience.

A key feature is the availability of both large and small bottle sizes. The larger bottles extend the time between refills, reducing maintenance frequency. Simultaneously, the smaller bottle option ensures compatibility with the Classic dispenser unit, offering versatility in application.

Nexa Classic’s design focuses on reliability and ease of use, contributing to improved hand hygiene compliance.

Key Features of Ecolab Chemical Dispensers

Ecolab chemical dispensers boast several key features designed for optimal performance and safety. The Facilipro Ultra Concentrated Dispensing System (ECO92022030) exemplifies this, offering precise control over concentrated chemical usage. Automated precision dispensing systems are available, particularly beneficial for membrane cleaning applications, allowing for dosing across multiple systems simultaneously.

Separate dispensing modules for acid and alkaline chemistries prevent incompatible chemical interactions, enhancing safety and maintaining solution integrity. These systems are engineered for reliability, minimizing downtime and ensuring consistent results.

Furthermore, Ecolab provides comprehensive parts and manuals support, ensuring easy maintenance and repair. These features collectively contribute to efficient, safe, and cost-effective chemical management.

Concentrated Chemical Dispensing Benefits

Utilizing concentrated chemicals with Ecolab dispensers offers significant advantages. Primarily, it drastically reduces plastic waste compared to pre-mixed solutions, aligning with sustainability goals. Concentrates minimize storage space requirements, freeing up valuable facility area. The Facilipro system, for example, allows for efficient dilution on-site, ensuring fresh, potent solutions when needed.

Precise dispensing control minimizes chemical overuse, leading to cost savings and reduced environmental impact. This accuracy is crucial for maintaining optimal cleaning and hygiene standards. Furthermore, concentrated formats often lower transportation costs due to reduced volume and weight.

Ecolab’s systems ensure safe handling and dilution, mitigating risks associated with concentrated chemicals.

Automated Precision Dispensing Systems for Membrane Cleaning

Ecolab’s automated dispensing systems revolutionize membrane cleaning processes, offering unparalleled accuracy and control. These systems feature separate modules for both acid and alkaline chemistries, preventing incompatible chemical interactions – a critical safety feature. A single unit can effectively manage cleaning for up to five membrane systems within a plant, streamlining operations and reducing labor costs.

Automated dosing ensures consistent chemical concentrations, maximizing cleaning effectiveness and extending membrane lifespan. This precision minimizes the risk of damage caused by improper chemical ratios. The systems integrate seamlessly into existing plant infrastructure, providing real-time monitoring and data logging capabilities.

This technology optimizes cleaning cycles and reduces downtime.

Dispenser Components and Identification

Ecolab chemical dispensers comprise several key components essential for proper functionality. These include the dispensing unit itself, housing the internal mechanisms for accurate chemical delivery. Crucially, there are dedicated dispensing modules for both acidic and alkaline solutions, preventing cross-contamination. Hoses and connections facilitate the transfer of chemicals from supply containers to the cleaning or hygiene application points.

Identifying each component is vital for maintenance and repair. The Facilipro Ultra Concentrated Dispensing System (ECO92022030) features a specific layout. Understanding the function of each part – from the calibration valves to the flow meters – ensures efficient operation. Refer to detailed diagrams within the manual for precise component locations and part numbers.

Proper identification aids in ordering replacement parts.

Hoses and Connections

The integrity of hoses and connections is paramount for safe and effective chemical dispensing. Ecolab systems utilize specialized hoses designed to withstand the corrosive nature of concentrated chemicals. Regular inspection for cracks, leaks, or deterioration is crucial. Connections must be secure to prevent accidental spills or exposure.

Different hose types are used for varying chemical concentrations and applications. Ensure compatibility between the hose material and the dispensed chemical. Proper connection techniques, often involving specific fittings and clamps, are outlined in the installation section of this manual.

Always verify that all connections are tightened appropriately, but avoid over-tightening, which can damage the fittings. Replacement hoses and connections are readily available through Ecolab Parts & Manuals resources.

Dispensing Modules (Acid & Alkaline)

Ecolab’s advanced systems feature dedicated dispensing modules for both acid and alkaline chemistries. This separation is critical to prevent potentially dangerous chemical interactions and maintain the efficacy of each solution. These modules precisely control dilution ratios, ensuring consistent and accurate chemical concentrations for optimal cleaning and sanitation.

The independent modules allow for flexible programming, accommodating various cleaning protocols and application requirements. Each module includes calibrated pumps and flow meters for reliable dispensing. Regular calibration, as detailed in the operation section, is essential for maintaining accuracy.

These modules are designed for easy access and maintenance, simplifying component replacement and cleaning procedures. Utilizing separate modules enhances safety and extends the lifespan of the dispensing system.

Installation Procedures

Proper installation is crucial for optimal performance and longevity of your Ecolab dispensing system. Begin by carefully unpacking all components and verifying against the parts list. Select a suitable mounting location, ensuring adequate space for operation and maintenance, as well as proximity to chemical supply lines and power sources.

Mounting the dispenser securely is paramount; follow the guidelines in the ‘Mounting the Dispenser Unit’ section. Subsequently, connect the chemical supply lines, ensuring tight seals to prevent leaks. Initial system calibration, detailed later, is vital before operational use.

Always adhere to local plumbing codes and electrical regulations during installation. Incorrect installation can void warranties and compromise system functionality.

Mounting the Dispenser Unit

Secure mounting ensures stable operation and prevents accidental damage to the Ecolab dispenser. Select a solid, level surface capable of supporting the unit’s weight, considering future access for maintenance. Utilize appropriate mounting hardware – screws and anchors – suitable for the wall material.

The dispenser, often 8-1/2” x 13” x 20-1/4”, requires sufficient clearance around it for hose connections and operation. Ensure the mounting height allows for easy access to the control panel and visual inspection of chemical levels.

Double-check the unit is firmly attached before connecting any chemical lines or electrical power. Improper mounting can lead to system malfunction and potential safety hazards.

Connecting Chemical Supply Lines

Properly connecting chemical supply lines is crucial for accurate dispensing and preventing contamination. Before connecting, verify compatibility between the lines, fittings, and the concentrated chemicals being used. Ensure all connections are tight and leak-proof to avoid spills and maintain system integrity.

For systems with separate dispensing modules – like those for acid and alkaline chemistries – carefully identify and connect each line to the correct inlet. Use only Ecolab-approved hoses and fittings designed for concentrated chemical applications.

Flush the lines with the appropriate chemical before initial calibration to remove any air or debris. Regularly inspect lines for wear and tear, replacing them as needed.

Initial System Calibration

Accurate calibration is essential for ensuring the Ecolab dispensing system delivers the correct chemical dosage. Begin by verifying all chemical supply lines are securely connected and free of leaks. Refer to the dispenser’s control panel or interface to access the calibration settings.

Follow the on-screen prompts to initiate the calibration process, typically involving dispensing a measured volume of chemical into a calibrated container. Adjust the settings until the dispensed volume matches the programmed dosage.

Repeat the calibration process for each chemical and dosage level. Document the calibration results for future reference and to track system performance.

Operation and Usage

Proper operation ensures consistent and effective chemical dispensing. Familiarize yourself with the dispenser’s control panel, understanding the functions of each button and display indicator. To initiate dispensing, select the desired chemical and dosage level using the interface.

Verify the selected settings before pressing the dispense button. Monitor the dispensing process to ensure accurate delivery and identify any potential issues. Regularly check chemical levels and refill as needed, following safety guidelines for handling concentrated chemicals.

Record chemical usage to track consumption and optimize dispensing parameters.

Setting Dosage Levels

Accurate dosage is crucial for optimal cleaning and hygiene results. The Ecolab dispenser allows for precise adjustment of chemical concentrations. Navigate to the dosage settings menu on the control panel. Input the desired dosage level, typically expressed as a percentage or parts per million (ppm), based on your specific application requirements.

Consider factors like water hardness, soil level, and surface type when determining the appropriate dosage. Start with the manufacturer’s recommended settings and adjust as needed based on performance monitoring.

Always verify the selected dosage before initiating dispensing to prevent over or under-application.

Monitoring Chemical Consumption

Regularly tracking chemical usage is vital for cost control and operational efficiency. Ecolab dispensers often feature built-in monitoring capabilities, displaying consumption data on the control panel or through connected software. Review these readings frequently to identify trends and potential issues.

Compare actual consumption against expected levels based on usage patterns. Significant deviations may indicate leaks, incorrect dosage settings, or inefficient cleaning procedures. Implement corrective actions promptly to address any discrepancies.

Maintaining accurate records of chemical consumption aids in inventory management and budget forecasting, optimizing resource allocation.

Troubleshooting Common Issues

Dispenser malfunctions can disrupt operations. Common problems include inaccurate dosing, system alarms, and complete failure to dispense. First, verify power connections and chemical supply lines are secure and unobstructed. Check for error codes on the display panel and consult the manual for specific meanings.

If dosing is inaccurate, recalibrate the system following the outlined procedures. For alarms, investigate the indicated issue – low chemical levels, blocked lines, or sensor failures. If the dispenser fails to operate, inspect fuses and electrical components.

Document all troubleshooting steps and resolutions for future reference.

Maintenance and Cleaning

Regular maintenance ensures optimal performance and longevity of your Ecolab dispenser. Implement a preventative schedule including weekly external cleaning with a mild detergent and water, avoiding abrasive cleaners. Monthly, inspect hoses and connections for leaks or damage, replacing as needed.

Quarterly, flush dispensing lines to remove residue buildup. Annually, a professional inspection is recommended to verify calibration and component functionality. Replace worn dispenser components promptly to prevent system failures.

Always disconnect power before performing any maintenance. Keep detailed records of all maintenance activities, including dates and parts replaced.

Regular Cleaning Procedures

Consistent cleaning is vital for dispenser hygiene and accurate chemical delivery. Weekly, wipe down the exterior housing with a damp cloth and mild, non-abrasive detergent. Avoid harsh chemicals that could damage the unit. Monthly, inspect and clean the dispensing nozzles to prevent clogging, using a soft brush or appropriate cleaning solution.

Flush the system with water after each chemical changeover to eliminate residue. Periodically, disassemble and clean the check valves to ensure proper function. Always refer to the specific chemical’s safety data sheet (SDS) for recommended cleaning procedures.

Document all cleaning activities for tracking and compliance.

Replacing Dispenser Components

Component replacement ensures optimal performance and longevity of your Ecolab dispenser. Regularly inspect hoses for cracks or leaks, replacing them as needed. Dispensing nozzles should be replaced if they become worn or clogged, impacting accuracy. Check valves require periodic replacement to maintain proper chemical flow.

When replacing parts, always disconnect the power supply and chemical lines first. Use genuine Ecolab replacement parts to guarantee compatibility and performance. Refer to the dispenser’s parts diagram for correct identification and installation.

Properly dispose of old components according to local regulations. Document all replacements for maintenance records.

Preventative Maintenance Schedule

A consistent schedule maximizes dispenser lifespan and minimizes downtime. Daily: Visually inspect for leaks and ensure proper operation. Weekly: Clean the exterior surfaces and check hose connections for tightness. Monthly: Flush dispensing lines to remove residue and verify calibration accuracy.

Quarterly: Inspect and replace worn components like nozzles and check valves. Annually: Perform a comprehensive system check, including calibration and a thorough cleaning of all internal parts.

Maintain detailed records of all maintenance activities; Adhering to this schedule prevents costly repairs and ensures consistent, reliable chemical dispensing.

Safety Precautions

Always wear appropriate personal protective equipment (PPE), including gloves, eye protection, and protective clothing, when handling concentrated chemicals. Ensure adequate ventilation in the work area to avoid inhaling fumes. Never mix different chemicals, as this can create hazardous reactions.

Familiarize yourself with the Safety Data Sheets (SDS) for all chemicals used. In case of skin or eye contact, immediately flush with copious amounts of water and seek medical attention. Store chemicals in a secure, well-ventilated area, away from incompatible substances.

Follow all emergency procedures outlined in this manual and the SDS.

Handling Concentrated Chemicals

Concentrated chemicals require extreme caution. Always use designated containers and avoid spills. When diluting chemicals, always add chemical to water, never water to chemical, to prevent splashing and heat generation. Ensure proper labeling of all diluted solutions with the chemical name, concentration, and date.

Avoid direct contact with skin and eyes; use appropriate PPE at all times. Store concentrated chemicals in a cool, dry, and well-ventilated area, separate from incompatible substances. Regularly inspect containers for leaks or damage.

Dispose of empty containers responsibly, following local regulations.

Emergency Procedures

In case of a chemical spill, immediately evacuate the area and notify designated personnel. Contain the spill using absorbent materials, preventing it from entering drains or waterways. For skin or eye contact, flush the affected area with copious amounts of water for at least 15 minutes and seek medical attention.

If chemicals are ingested, do not induce vomiting unless directed by medical professionals. Immediately contact the Poison Control Center or emergency services. Ensure readily available access to safety data sheets (SDS) for all chemicals used.

Regularly review and practice emergency response procedures with all personnel.

Ecolab Parts and Manuals Resources

Accessing Ecolab’s comprehensive resources is crucial for maintaining your dispensing system. Parts Town offers a variety of in-stock replacement parts, including hoses and modules, ensuring minimal downtime. Online documentation, including detailed manuals for systems like the Facilipro Ultra (ECO92022030), is readily available through Ecolab’s official website.

These resources provide detailed diagrams, troubleshooting guides, and installation instructions. For specific part numbers or assistance locating documentation, contacting Ecolab support directly is recommended. Regularly check for updated manuals and parts lists to ensure compatibility and optimal performance of your equipment.

Accessing Online Documentation

Ecolab provides extensive online documentation to support its chemical dispensing systems. Users can find detailed manuals, quick start guides, and troubleshooting resources through the official Ecolab website. Specifically, documentation for the Facilipro Ultra Concentrated Dispensing System (ECO92022030) is available for download.

These digital resources cover installation procedures, operation instructions, and maintenance schedules. Accessing these materials ensures proper system calibration and safe handling of concentrated chemicals. Furthermore, online resources often include updated information regarding parts and compatibility. Regularly checking the Ecolab website guarantees access to the most current documentation for optimal system performance.

Contacting Ecolab Support

For personalized assistance with your Ecolab chemical dispenser, direct contact with their support team is readily available. Ecolab offers multiple channels for reaching their experts, including a dedicated phone line and online support portals. When contacting support, have your dispenser model number (e.g., ECO92022030) and any relevant error codes prepared.

Their knowledgeable representatives can assist with troubleshooting, parts ordering, and complex system issues. Additionally, Ecolab provides access to a network of authorized service technicians for on-site repairs and maintenance. Promptly addressing any concerns through Ecolab support ensures continued operational efficiency and safety. Utilizing these resources maximizes the lifespan and performance of your dispensing system.

Dividend Growth and Stock Performance (ECL)

While seemingly unrelated to the direct operation of Ecolab chemical dispensers, understanding Ecolab Inc.’s (NYSE:ECL) financial health provides context. ECL is recognized as a Dividend Growth Stock, specifically a “Dividend Aristocrat,” indicating a consistent history of increasing dividends. Recent analyst activity shows Erste Group downgraded the stock to ‘Hold’ on January 23rd.

Market analysis suggests current pricing implies a valuation assessment, following a period of strong stock performance; Ecolab’s Life Sciences membership also demonstrates industry commitment. Shares experienced a rise on February 9, 2026, closing at 290.33, mirroring broader market gains. This financial stability supports continued investment in product development and support services.

ge window air conditioner owner’s manual

GE Window Air Conditioner Owners Manual: An Overview

This manual provides essential guidance for safe operation, installation, and maintenance of your GE window AC unit․ It covers controls, cleaning, troubleshooting, and safety precautions․

Welcome to the world of efficient and reliable cooling with your new GE window air conditioner! These units are designed to provide comfortable climate control for individual rooms, offering a convenient alternative to central air systems․ Before you begin, carefully review this owner’s manual to ensure proper installation, operation, and maintenance․

GE window AC units combine innovative technology with user-friendly features, delivering optimal performance and energy efficiency․ Understanding your specific model and its capabilities is key to maximizing its benefits․ This manual details everything from preparing your window for installation to utilizing the various cooling and fan modes․ Remember, safe operation is paramount; always adhere to the provided safety precautions․

Understanding Your Model Number

Your GE window air conditioner’s model number is crucial for identifying specific features, specifications, and accessing relevant support resources․ This alphanumeric code, typically found on the unit’s label, provides vital information about its cooling capacity (BTU), energy efficiency rating, and other key characteristics․

When contacting customer support or ordering replacement parts, having your model number readily available ensures accurate assistance․ It allows GE representatives to quickly pinpoint your unit’s details and provide tailored solutions․ The model number also helps determine compatibility with accessories like installation kits (RAK65A1, RAK690) and ensures you’re referencing the correct documentation․ Refer to the unit itself for this important identifier․

Installation Guide

Proper installation is key for optimal performance․ This section details preparing the window, mounting bracket installation, and securely positioning the AC unit within the frame․

Preparing the Window for Installation

Before beginning, ensure the window frame is strong and stable enough to support the air conditioner’s weight․ Carefully inspect the window sill and frame for any signs of rot or damage; repairs should be made before proceeding․ The window opening should align with the dimensions specified for your particular GE model – consult your unit’s specifications․

Remove the window screen and any existing hardware that might interfere with installation․ Clean the window sill thoroughly to provide a stable and level surface for the mounting brackets․ Depending on the window type, you may need to install a support bracket for added security, especially for larger units․ Ensure adequate clearance around the unit for proper airflow and operation, avoiding obstructions like curtains or blinds․

Consider using weather stripping to seal any gaps around the air conditioner, improving energy efficiency and preventing air leaks․

Installing the Mounting Brackets

Begin by attaching the mounting brackets to the window sill using the screws provided․ Ensure the brackets are level and securely fastened – this is crucial for safe and stable operation․ Refer to the diagrams in your GE manual for correct bracket orientation and placement, as this varies by model․

Some models may require additional support brackets, particularly for heavier units or wider window openings․ Double-check that the brackets are firmly anchored and can withstand the weight of the air conditioner․

Proper bracket installation prevents vibration and reduces noise during operation․ Use a screwdriver to tighten the screws firmly, but avoid over-tightening, which could damage the window frame or brackets․ Verify bracket stability before proceeding to the next step․

Securing the Air Conditioner in the Window

Carefully lift the air conditioner and position it onto the installed mounting brackets, ensuring it sits securely․ Slide the unit into place, aligning the chassis with the bracket supports․ Some models utilize side curtains or panels to fill gaps and improve insulation – install these now, following the manual’s instructions․

Next, secure the air conditioner to the brackets using the provided screws or locking mechanisms․ Tighten these firmly, but avoid over-tightening․ Check for any wobble or instability; if present, re-tighten the screws or adjust the bracket positioning․

Properly securing the unit prevents accidental falls and ensures efficient operation․ A secure installation minimizes noise and vibration, contributing to a more comfortable environment․

Operating Instructions

This section details how to effectively use your GE window air conditioner, covering control panel functions, cooling modes, fan settings, and energy-saving features․

Control Panel Explained

The control panel is your central hub for operating the GE window air conditioner․ Depending on your model, you’ll find either control knobs or touch pads․ Knobs typically manage power, cooling, fan speed, and mode selection․ Touch pads offer similar functionality with a digital interface․

Key features often include a power button, temperature adjustment controls, fan-only settings, cooling mode options (like cool, auto, or dry), and an energy saver function․ Some advanced models incorporate a sleep mode for overnight comfort and programmable timers for automated operation․ Understanding each button or knob’s purpose is crucial for optimal performance and personalized climate control․ Refer to the diagrams within this manual for specific button layouts and functions related to your particular GE model․

Using the Control Knobs/Touch Pads

To power on your GE window AC, rotate the power knob clockwise or press the power button on touch pad models․ Adjust the temperature using the temperature control knob or touch pad arrows – lower numbers mean cooler air․ Select your desired fan speed (low, medium, high) using the fan speed control․

For cooling, choose the ‘Cool’ mode․ ‘Fan Only’ circulates air without cooling․ The ‘Energy Saver’ mode optimizes energy use․ On touch pad models, simply tap the corresponding icons․ Familiarize yourself with the indicator lights; they display the current settings and operational status․ Always allow a few minutes for the unit to respond to adjustments․ Refer to the detailed diagrams for precise knob/pad locations and functions․

Cooling Mode Operation

When selecting Cooling Mode, the compressor activates to lower the room temperature․ Adjust the temperature setting using the control knobs or touch pad – a lower setting increases cooling․ Ensure the fan speed is appropriately set for desired airflow; higher speeds maximize cooling but consume more energy․

The unit will cycle on and off to maintain the set temperature․ During operation, condensation will form; this is normal․ Avoid blocking the air vents for optimal performance․ For efficient cooling, keep doors and windows closed․ The ‘Energy Saver’ mode can be used in conjunction with Cooling Mode to reduce energy consumption while maintaining comfort․ Monitor the unit for proper operation and adjust settings as needed․

Fan-Only Mode Operation

In Fan-Only Mode, the compressor remains off, and only the fan operates․ This setting circulates air within the room without providing cooling․ Utilize this mode for gentle air movement or to help distribute heat evenly․ Adjust the fan speed using the control panel to select Low, Medium, or High․

Fan-Only Mode is ideal for days when cooling isn’t required but air circulation is desired․ It consumes less energy than Cooling Mode․ Ensure the air vents are unobstructed for optimal airflow․ This mode can also be used after cooling to help dry condensation that may have formed․ Regularly check the fan’s operation to ensure smooth and quiet performance․

Energy Saver Mode

Energy Saver Mode automatically adjusts cooling operation to maximize efficiency and reduce energy consumption․ When activated, the fan cycles on and off, and the compressor operates intermittently, maintaining a comfortable temperature while minimizing power usage․ This mode is particularly effective during moderate weather conditions․

The unit intelligently manages cooling cycles, preventing excessive cooling and saving energy․ While in Energy Saver Mode, you may notice slight temperature fluctuations․ This is normal operation․ To activate, locate the “Energy Saver” button on the control panel and press it․ This feature helps lower electricity bills and reduces the environmental impact of your air conditioner․

Maintenance and Care

Regular cleaning of the air filter, grille, and exterior ensures optimal performance and extends the lifespan of your GE window air conditioner․

Air Filter Cleaning

Maintaining a clean air filter is crucial for efficient cooling and air quality․ The filter should be checked at least monthly, or more frequently during heavy use․ To clean, gently remove the filter from its housing – consult your model’s specific instructions for location and removal․ Wash the filter with mild soap and water, ensuring all dirt and debris are removed․

Rinse thoroughly and allow the filter to completely dry before reinstalling․ A clogged filter restricts airflow, reducing cooling performance and potentially damaging the unit․ Some models may have reusable filters, while others require replacement․ Refer to your owner’s manual for filter type and replacement frequency․ Never operate the air conditioner without a filter installed, as this can lead to internal damage and void the warranty․

Cleaning the Grille and Exterior

Regular cleaning of the grille and exterior surfaces ensures optimal performance and extends the lifespan of your GE window air conditioner․ Before cleaning, always disconnect the unit from the power source to prevent electrical shock․ Use a soft, damp cloth with mild detergent to wipe down the exterior cabinet and grille․ Avoid abrasive cleaners or solvents, as they can damage the finish․

For stubborn dirt, a slightly stronger cleaning solution may be used, but test it on an inconspicuous area first․ Ensure the grille fins are not bent or damaged during cleaning, as this can restrict airflow․ Do not immerse the unit in water․ After cleaning, wipe dry with a clean cloth․ A well-maintained exterior contributes to the unit’s aesthetic appeal and operational efficiency․

Winter Storage Instructions

Proper winter storage is crucial for preserving your GE window air conditioner’s functionality and longevity․ Before storing, thoroughly clean the unit, including the air filter and exterior, as detailed in the manual․ Remove the mounting brackets and any accessories․ Carefully package the air conditioner in its original box or a suitable protective covering to prevent dust accumulation and damage․

Store the unit in a cool, dry place, protected from extreme temperatures and humidity․ Avoid storing it in direct sunlight․ Ensure the unit is completely dry before storage to prevent mold or mildew growth․ Periodically check the stored unit for any signs of damage or deterioration․ Following these steps will ensure your air conditioner is ready for use when warmer weather returns․

Troubleshooting Common Issues

This section details solutions for typical problems like cooling failures, leaks, and unusual noises, helping you quickly resolve issues with your GE unit․

Air Conditioner Not Cooling

If your GE window air conditioner isn’t cooling effectively, first verify the unit is properly plugged in and the circuit breaker hasn’t tripped․ A dirty air filter significantly restricts airflow, reducing cooling capacity – clean or replace it immediately․ Ensure the front grille isn’t obstructed and that curtains aren’t blocking air intake or exhaust․

Check if the cooling mode is selected and the temperature setting is sufficiently low․ Confirm the window is sealed correctly to prevent warm air from entering․ If icing occurs on the cooling coils, turn the unit off and allow it to defrost before restarting․ For persistent issues, consult a qualified technician, as refrigerant problems require professional attention․

Water Leaking from Unit

If you notice water leaking from your GE window air conditioner, several factors could be responsible․ Improper installation, causing the unit to tilt outwards, is a common cause – ensure it’s level and properly secured in the window․ Check the drain hole at the back of the unit for blockage; clear any debris to allow condensation to drain effectively․

High humidity levels can also lead to increased condensation․ Ensure the room is adequately ventilated․ If the leak persists, inspect the base pan for cracks or damage․ Avoid operating the unit in extremely humid conditions for extended periods․ Contact a qualified technician if the issue continues, as internal component damage might be present․

Unit Making Unusual Noises

If your GE window air conditioner is producing unusual noises, a systematic check is necessary․ Rattling sounds often indicate loose panels or components; carefully inspect and tighten any screws or parts․ A buzzing noise could stem from the fan hitting an obstruction – ensure nothing is blocking the fan blades․

Clicking sounds might be normal during start-up or shut-down, but persistent clicking warrants investigation․ If you hear a grinding noise, the compressor might be failing, requiring professional attention․ Always disconnect power before inspecting internal components․ If the noise persists after checking these areas, contact a qualified technician for diagnosis and repair․

Safety Information

Prioritize safety by following all precautions outlined in this manual․ Proper electrical grounding and avoiding water exposure are crucial for safe operation of your GE unit․

Important Safety Precautions

To ensure your safety and prevent damage to the unit, carefully read and adhere to these precautions․ Always unplug the air conditioner before cleaning or performing any maintenance․ Never operate the unit with a damaged cord or plug, and avoid using extension cords․

Ensure the air conditioner is securely installed within the window to prevent accidental falls․ Do not insert any objects through the air vents, as this could cause damage or injury․ Maintain adequate ventilation, especially when using the unit in conjunction with other appliances․

Avoid operating the unit in extremely humid conditions or near flammable materials․ Regularly check the power cord for any signs of wear or damage․ If the unit malfunctions, immediately discontinue use and contact a qualified technician for repair․ This appliance is not intended for use by persons (including children) with reduced physical, sensory or mental capabilities․

Electrical Requirements

Proper electrical connection is crucial for safe and efficient operation of your GE window air conditioner․ This unit typically requires a standard 115/120V, 60Hz electrical supply․ A dedicated circuit is highly recommended to avoid overloading existing circuits with other appliances․

Ensure the wall outlet is properly grounded to prevent electrical shock․ Do not use adapters or extension cords, as they may not be rated for the unit’s power consumption․ Verify the outlet’s voltage matches the air conditioner’s specifications, found on the unit’s nameplate․

If you are unsure about your electrical system’s compatibility, consult a qualified electrician before installation․ Improper wiring can lead to fire hazards or damage to the air conditioner․ Always disconnect the power before inspecting or cleaning the electrical components․

dnd campaign pdf

D&D Campaign PDFs: A Comprehensive Guide (Updated 02/07/2026)

D&D campaign PDFs offer ready-to-play adventures, often free, for Dungeon Masters and players. These downloadable files provide complete campaigns, maps, and stat blocks,
enhancing tabletop RPG experiences.

What are D&D Campaign PDFs?

D&D Campaign PDFs are digital documents, typically in the Portable Document Format (PDF), containing pre-written adventures for the Dungeons & Dragons tabletop role-playing game. They represent a convenient and often cost-effective way for Dungeon Masters (DMs) to access and run complete campaigns without the need to create all content from scratch.

These PDFs encompass a wide range of materials, including detailed storylines, character non-player characters (NPCs), maps of locations, encounter designs, and sometimes even pre-generated character sheets. They are designed for various levels of play, from beginner-friendly adventures for levels 1-5 to epic quests for experienced characters at levels 17-20. Resources like Terror Goat Homebrew provide extensive free content, including adventures and stat blocks.

Essentially, a D&D campaign PDF is a ready-made package that streamlines the game preparation process, allowing DMs to focus on storytelling and player interaction.

Benefits of Using Pre-Written Campaigns

Utilizing pre-written D&D campaigns offers numerous advantages for Dungeon Masters. Primarily, they significantly reduce preparation time, eliminating the need to construct entire worlds, plots, and encounters independently. This is especially valuable for busy DMs or those new to the role.

These campaigns often boast professionally designed content, ensuring balanced challenges and engaging narratives. They can inspire creativity, providing a solid foundation for customization and adaptation to fit a DM’s unique style. Resources like free PDFs from sites such as Terror Goat Homebrew offer a wealth of content without financial investment.

Furthermore, pre-written campaigns can help maintain campaign consistency and provide a structured experience for players, particularly beneficial for longer-term adventures. They also offer a fantastic learning opportunity for aspiring DMs, showcasing effective storytelling and game design techniques.

Where to Find Free D&D Campaign PDFs

Locating free D&D campaign PDFs requires exploring various online resources. A prominent source is Terror Goat Homebrew, offering a substantial library of 12 full adventures, totaling over 50 hours of content, alongside maps and mechanics ideas – all completely free. The site welcomes support but emphasizes no obligation.

Dedicated websites and online communities frequently curate lists of free adventures, categorized by tier of play. Dungeon Masters Guild, while often featuring pay-what-you-want options, also hosts free content. Regularly checking these platforms and joining D&D-focused forums can uncover hidden gems.

Newsletters, like the one offering monthly free 5e content, are excellent for staying updated on new releases. Remember to verify the source’s legitimacy and ensure the PDFs are safe to download before accessing them. A good starting point is a collated list of every free adventure available online.

Terror Goat Homebrew: A Unique Resource

Terror Goat Homebrew stands out as an exceptional resource for Dungeons & Dragons players and Dungeon Masters seeking free, high-quality content. This platform boasts an impressive collection of 12 full adventures, providing over 50 hours of gameplay. Beyond complete campaigns, it offers a wealth of supporting materials, including detailed maps, innovative story ideas, and unique mechanical concepts.

A particularly intriguing feature is the availability of DND 5e stat blocks for various goats, adding a whimsical and unexpected element to your games. The site operates on a voluntary support basis, ensuring all content remains accessible without financial barriers.

Terror Goat Homebrew is committed to providing a comprehensive and enriching experience, making it a go-to destination for those looking to expand their D&D horizons with freely available, creatively designed adventures.

Categorizing Campaigns by Tier of Play

D&D campaign PDFs are most effectively utilized when categorized by the tier of play they are designed for. This ensures a balanced and appropriately challenging experience for players of all levels. Typically, campaigns are grouped into four main tiers, corresponding to character levels.

These tiers include Level 1-5 (Beginner Adventures), Level 6-10 (Expanding the Adventure), Level 11-16 (High-Level Challenges), and Level 17-20 (Epic Quests). Organizing campaigns in this manner allows Dungeon Masters to quickly identify suitable adventures based on their party’s current power and experience.

Furthermore, many resources, like those compiling free adventures, explicitly state the recommended level range alongside each campaign link, simplifying the selection process and promoting a smoother, more enjoyable gameplay experience for everyone involved.

Level 1-5 Campaigns: Beginner Adventures

Level 1-5 campaigns are ideal for introducing new players to the world of Dungeons & Dragons, focusing on foundational skills and character development. These adventures typically feature simpler storylines, manageable challenges, and a strong emphasis on exploration and roleplaying.

A prime example is Lost Mine of Phandelver, often included in the D&D Starter Set. It’s designed as an entry-level adventure, geared towards younger players and utilizing the free basic 5e rules. These campaigns often involve investigating local mysteries, battling low-level monsters, and uncovering hidden treasures.

They serve as excellent opportunities for Dungeon Masters to learn the ropes and for players to experiment with different character classes and abilities. The focus is on building a solid understanding of the game mechanics and fostering a collaborative storytelling experience.

Lost Mine of Phandelver (Starter Set)

Lost Mine of Phandelver is a highly recommended starting point for both new players and Dungeon Masters. Included in the Dungeons & Dragons Starter Set, this adventure provides a complete and streamlined experience, designed to teach the fundamentals of the game.

The campaign centers around a quest to deliver supplies to the town of Phandalin, which quickly escalates into a thrilling investigation of a lost mine and a sinister plot by a goblinoid horde. It’s specifically crafted using the free basic 5e rules, making it accessible without requiring additional purchases.

Players will navigate a vibrant world, encounter memorable NPCs, and overcome a series of challenges that gradually increase in complexity. Lost Mine of Phandelver excels at introducing core D&D concepts in a digestible and engaging manner, fostering a love for the game.

Level 6-10 Campaigns: Expanding the Adventure

As characters progress beyond level 5, D&D campaign PDFs offer more complex narratives and challenging encounters. This tier allows for deeper exploration of established settings and introduces morally grey areas, demanding strategic thinking from players.

The Sunless Citadel, a classic adventure, exemplifies this level range. It presents a compelling mystery involving a missing prospecting team and a sinister presence within an ancient dwarven fortress. These campaigns often feature intricate dungeons, political intrigue, and opportunities for character development.

Players can expect to face formidable monsters, unravel complex plots, and make impactful decisions that shape the world around them. These adventures bridge the gap between introductory quests and epic, high-level storylines, providing a satisfying progression for seasoned adventurers.

The Sunless Citadel

The Sunless Citadel is a fantastic D&D campaign PDF ideal for levels 6-10, offering a classic dungeon crawl experience with a compelling narrative. It centers around a missing prospecting team and a mysterious fortress overrun by dark creatures.

This adventure provides a well-balanced mix of exploration, combat, and roleplaying opportunities. Players will delve into the depths of the citadel, uncovering its secrets and confronting the sinister forces that dwell within; Expect intricate maps, challenging encounters, and memorable NPCs.

The Sunless Citadel is praised for its engaging storyline and scalability, making it suitable for both experienced and novice Dungeon Masters. It’s a perfect stepping stone for players transitioning from beginner adventures to more complex campaigns, offering a satisfying challenge and rewarding experience.

Level 11-16 Campaigns: High-Level Challenges

D&D campaign PDFs for levels 11-16 introduce significant challenges, demanding strategic thinking and powerful character abilities. These adventures often feature complex plots, formidable adversaries, and expansive world-building, pushing players to their limits.

Expect encounters requiring careful coordination and resource management, as enemies possess advanced tactics and devastating attacks. Campaigns at this tier frequently involve political intrigue, moral dilemmas, and epic quests with far-reaching consequences.

These PDFs are designed for experienced groups comfortable with intricate rules and extended campaigns. They offer opportunities for character growth, exploration of mature themes, and unforgettable heroic moments. Prepare for battles against powerful monsters and the unraveling of ancient mysteries!

Out of the Abyss

Out of the Abyss, available as a D&D campaign PDF, plunges players into the perilous Underdark, a subterranean realm of darkness and danger. This adventure challenges characters of levels 1-15, presenting a unique survival experience against a backdrop of bizarre creatures and oppressive environments.

The campaign begins with player characters captured by drow and forced to navigate the treacherous Underdark, forging alliances with unlikely allies and battling monstrous foes. Expect encounters with mind flayers, demons, and other denizens of the deep, testing the party’s resilience and resourcefulness.

PDF versions offer a convenient way to access this epic adventure, complete with detailed maps, compelling NPCs, and a captivating storyline. Prepare for a descent into madness and a desperate struggle for survival in the heart of the earth!

Level 17-20 Campaigns: Epic Quests

D&D campaign PDFs for levels 17-20 represent the pinnacle of adventure, offering epic quests designed to challenge the most seasoned characters. These campaigns typically involve world-altering stakes, powerful adversaries, and complex narratives demanding strategic thinking and collaborative gameplay.

Expect to confront ancient evils, unravel cosmic mysteries, and engage in battles that will determine the fate of realms. These high-level adventures often require players to utilize their accumulated skills and resources to overcome seemingly insurmountable obstacles.

Accessing these campaigns via PDF format provides flexibility and convenience, allowing Dungeon Masters to easily prepare and run these grand narratives. Prepare for a climactic finale to your campaign, filled with heroic deeds and unforgettable moments!

Storm King’s Thunder

Storm King’s Thunder, available as a D&D campaign PDF, plunges players into a world ravaged by the return of the giants. This epic adventure sees the ancient giants marching to war, threatening to shatter the realms and claim dominion over the land. Characters level 5-11 will navigate a landscape of chaos and destruction, seeking to understand the giants’ motives and ultimately thwart their plans.

The PDF provides a detailed campaign setting, compelling NPCs, and challenging encounters, all designed to immerse players in a world on the brink of collapse. Expect to engage in thrilling battles against giantkin, explore forgotten ruins, and forge alliances with unlikely allies.

This campaign offers a blend of exploration, combat, and political intrigue, making it a rewarding experience for both players and Dungeon Masters;

Utilizing Campaign PDFs in Your Game

D&D campaign PDFs are incredibly versatile tools for Dungeon Masters. They offer a pre-structured narrative, saving significant preparation time, and provide a foundation for immersive storytelling. However, simply running a PDF “as is” isn’t always the best approach.

Effective utilization involves understanding the campaign’s core themes and adapting them to your players’ preferences and existing campaign world. Consider how the PDF’s plot points can integrate with established lore or character backstories. Don’t hesitate to modify encounters, NPCs, or even entire sections to better suit your group’s playstyle.

These PDFs serve as excellent starting points, offering a wealth of content that can be customized and expanded upon, creating a truly unique and memorable gaming experience.

Adapting Pre-Written Content

D&D campaign PDFs aren’t meant to be rigid scripts; adaptation is key to a successful game. Begin by identifying elements that resonate with your players and campaign setting, while noting areas needing adjustment. Consider altering NPC motivations, scaling encounters to match your party’s strength, or even changing the campaign’s ultimate goal.

Don’t be afraid to replace locations with your own creations or weave in elements from previous adventures. A pre-written campaign provides a framework, but your creativity should fill in the details. Remember, the goal is to create a compelling story for your group.

Utilize the PDF as a springboard, not a constraint. Embrace improvisation and allow player choices to shape the narrative, making the adventure truly their own.

Integrating PDFs into Existing Campaigns

D&D campaign PDFs can seamlessly blend into ongoing campaigns, offering refreshing diversions or expanding the narrative. Treat the PDF content as a “side quest” or a new region discovered by your players. Carefully consider how the PDF’s storyline intersects with your established world and characters.

Introduce NPCs from the PDF as travelers or refugees, or link the PDF’s central conflict to a pre-existing threat. Modify key plot points to align with your campaign’s lore and overarching themes. A well-integrated PDF feels like a natural extension of your world, not a jarring interruption.

Focus on adapting elements, not wholesale adoption. Use the PDF as a source of inspiration, borrowing encounters, locations, or even individual monsters to enrich your existing game.

Monthly Free Content & Newsletters

D&D campaign PDFs aren’t always a one-time find! Many creators offer ongoing free content through monthly newsletters. Subscribing keeps you updated on new releases, ensuring you never miss out on exciting adventures and resources for your tabletop roleplaying game.

These newsletters often deliver exclusive PDF adventures, supplemental materials like stat blocks, or previews of upcoming paid content. It’s a fantastic way to continually expand your library of adventures without spending a fortune. Don’t worry about spam; these are typically once-a-month updates.

Remember to check for expiration dates on free content, as some offers are time-limited. Newsletters are a valuable tool for discovering hidden gems and staying connected to the D&D community!

Printable Adventures & One-Shots

D&D campaign PDFs frequently include readily available, printable adventures and concise one-shot modules. These are perfect for Dungeon Masters needing a quick quest or a self-contained storyline to integrate into an existing campaign. They offer intriguing plots, detailed NPCs, and immersive locations, all conveniently packaged in PDF format.

One-shots are especially useful for introducing new players to the game or for filling gaps between larger campaign arcs. Printable adventures provide a complete experience, with encounters and challenges easily scalable to suit your party’s level.

These modules are designed for easy implementation, saving you valuable preparation time. Download, print, and play – it’s that simple! Explore a diverse range of adventures and enhance your D&D sessions with these convenient resources.

Resources for D&D Stat Blocks

D&D campaign PDFs often require readily available stat blocks for monsters, NPCs, and unique creatures. Fortunately, numerous online resources provide these essential game elements. Terror Goat Homebrew is a standout example, offering a 100% free PDF specifically dedicated to D&D 5e stat blocks – even including various goat statistics for whimsical encounters!

These resources save Dungeon Masters significant preparation time, allowing them to focus on storytelling and improvisation. Accessing pre-made stat blocks ensures accuracy and consistency within your game. Beyond Terror Goat, many websites collate free adventures and link to associated stat block resources.

Utilize these tools to populate your campaigns with compelling characters and challenging adversaries, enhancing the overall gaming experience. A well-stocked stat block library is crucial for any D&D campaign.

nursing roles and responsibilities pdf

Nursing Roles and Responsibilities: A Comprehensive Overview (2026)

The nursing profession‚ comprising over 29.8 million professionals globally (2018-2023)‚ is central to healthcare delivery‚ especially in Europe.

Nurses‚ predominantly female (over 80%)‚ face shortages despite their critical role‚ prompting initiatives like Nursing Action‚ an EU-funded project.

The 2025 State of the World’s Nursing report provides a comprehensive analysis‚ highlighting disparities and the impact of events like COVID-19.

The global nursing landscape is a complex and dynamic environment‚ currently supporting a workforce exceeding 29.8 million professionals worldwide as of 2023‚ a rise from 27.9 million in 2018. This vast network forms the backbone of healthcare systems across the globe‚ yet significant disparities in availability persist between regions and countries.

A striking characteristic of this profession is its strong female representation; over 80% of the world’s nurses operate within nations housing half of the global population. This demographic dominance shapes the cultural and operational dynamics within nursing teams‚ influencing approaches to patient care and professional development.

Recent events‚ most notably the COVID-19 pandemic‚ have dramatically underscored the pivotal role nurses play in public health and crisis management. They constitute the majority of healthcare professionals in Europe‚ demonstrating their essential contribution to successful healthcare delivery. The 2025 State of the World’s Nursing report offers the most current and comprehensive analysis of this vital workforce‚ identifying critical areas for improvement and future investment.

Addressing the projected global nursing shortage is paramount‚ especially as populations continue to grow and age. Initiatives like Nursing Action‚ a landmark EU-funded project‚ aim to strengthen nursing capacity within the WHO European Region‚ focusing on retention strategies and improved working conditions. Understanding this landscape is crucial for shaping effective policies and ensuring equitable access to quality healthcare for all.

The State of the World’s Nursing Reports (2025 & Beyond)

The State of the World’s Nursing (SoWN) reports are foundational resources for understanding the global nursing workforce. The 2025 edition‚ launched on May 12th‚ 2025‚ provides the most comprehensive and up-to-date analysis available‚ building upon previous assessments and establishing a benchmark for future monitoring.

This latest report introduces new indicators focused on critical areas within the profession‚ allowing for a more nuanced understanding of challenges and opportunities. It highlights the growth of the global nursing workforce‚ now exceeding 29.8 million‚ while simultaneously acknowledging the persistent and significant disparities in nurse availability across different regions and countries.

The SoWN reports are instrumental in informing policy decisions and resource allocation‚ guiding initiatives aimed at strengthening nursing capacity worldwide. They emphasize the crucial role nurses play‚ particularly in Europe where they comprise the majority of healthcare professionals‚ and underscore the impact of global events like the COVID-19 pandemic on the profession.

Future iterations of the SoWN reports will continue to evolve‚ incorporating emerging data and addressing new challenges. These reports remain vital for tracking progress towards achieving universal health coverage and ensuring a sustainable‚ well-supported nursing workforce for years to come.

Global Nursing Workforce Statistics (2018-2023)

Between 2018 and 2023‚ the global nursing workforce experienced notable growth‚ increasing from 27.9 million to 29.8 million professionals. This expansion‚ however‚ is unevenly distributed‚ revealing significant disparities in nurse availability worldwide. A substantial portion of the global nursing population – over 80% – is concentrated in countries that collectively house half of the world’s population‚ indicating a critical need for resource allocation adjustments.

Despite this overall increase‚ a global nursing shortage persists and is projected to worsen as populations age and healthcare demands rise. This shortage is particularly acute in certain regions‚ hindering access to essential healthcare services. The statistics underscore the vital role nurses play‚ especially within Europe‚ where they constitute the majority of healthcare providers.

Data from this period also highlights the predominantly female composition of the nursing profession. Understanding these demographic trends is crucial for developing targeted retention strategies and addressing gender-related challenges within the field. The State of the World’s Nursing 2025 report provides a detailed analysis of these statistics‚ informing policy and initiatives.

Geographical Disparities in Nursing Availability

Significant inequalities exist in the distribution of nursing professionals globally. While some regions boast adequate nurse-to-population ratios‚ others grapple with critical shortages‚ severely limiting access to healthcare. Over 80% of the world’s nurses are located in countries representing just half of the global population‚ demonstrating a concentrated distribution.

These disparities are often linked to socioeconomic factors‚ healthcare infrastructure‚ and national policies. Developed nations generally have higher nursing densities‚ while low- and middle-income countries struggle to attract and retain qualified personnel. This imbalance exacerbates existing health inequities and hinders progress towards universal health coverage.

The State of the World’s Nursing 2025 report emphasizes the urgent need to address these geographical imbalances. Initiatives like Nursing Action‚ funded by the EU‚ aim to strengthen nursing workforces within the European Region‚ but a broader global strategy is essential. Addressing migration patterns and investing in nursing education in underserved areas are crucial steps towards achieving equitable healthcare access for all.

Nursing and Midwifery: A Female-Dominated Profession

Historically‚ and continuing today‚ nursing and midwifery are overwhelmingly female-dominated professions. Current statistics reveal that more than 80% of the world’s nurses are women‚ a trend deeply rooted in societal norms and historical perceptions of caregiving roles. While this representation reflects a nurturing and compassionate workforce‚ it also presents challenges related to gender equity and professional diversity.

The predominance of women in nursing can contribute to wage gaps and limited opportunities for career advancement compared to male-dominated healthcare fields. Addressing these imbalances requires proactive measures to promote gender equality‚ including equal pay for equal work‚ mentorship programs‚ and leadership development initiatives specifically targeting female nurses.

Encouraging greater male participation in nursing and midwifery is also vital. Diversifying the profession not only fosters a more inclusive environment but also brings a broader range of perspectives and skills to patient care. Recognizing and valuing the contributions of all genders is essential for strengthening the global nursing workforce and improving healthcare outcomes.

The Impact of COVID-19 on Nursing Roles

The COVID-19 pandemic dramatically reshaped nursing roles and responsibilities globally‚ placing unprecedented demands on healthcare professionals. Nurses found themselves on the front lines‚ providing direct patient care in overwhelmed hospitals‚ often facing shortages of personal protective equipment (PPE) and grappling with immense emotional and physical strain.

Beyond traditional bedside care‚ nurses expanded their roles to include rapid testing‚ contact tracing‚ vaccine administration‚ and public health education. They adapted to new technologies‚ such as telehealth‚ to maintain patient access during lockdowns and social distancing measures. The pandemic also highlighted the critical importance of nurses in critical care settings‚ requiring specialized training and expertise.

The experience underscored existing workforce shortages and the need for increased investment in nursing education and retention strategies. Furthermore‚ the pandemic brought attention to the psychological toll on nurses‚ emphasizing the importance of mental health support and resources. The long-term impact of COVID-19 will continue to influence nursing practice and healthcare systems worldwide.

Nursing Action: An EU-Funded Initiative

Nursing Action represents a landmark European Union (EU)-funded initiative designed to strengthen the nursing workforce across the WHO European Region. Launched in January 2025‚ in partnership with the European Commission and the Polish EU Presidency‚ this project directly addresses the critical nursing shortages impacting healthcare systems.

The core objective of Nursing Action is to improve nurse retention rates within Member States. Recognizing that nurses comprise the majority of healthcare professionals in Europe‚ the initiative focuses on enhancing working conditions‚ providing professional development opportunities‚ and fostering supportive leadership structures.

This multifaceted approach includes data collection and analysis to identify key challenges‚ the development of evidence-based best practices‚ and the dissemination of knowledge to policymakers and healthcare organizations. Ultimately‚ Nursing Action aims to ensure sustainable‚ high-quality nursing care for all European citizens‚ bolstering the resilience of healthcare systems against future crises.

Nurse Retention Strategies in the WHO European Region

Retaining experienced nurses is paramount within the WHO European Region‚ given the existing and projected workforce shortages. The Nursing Action initiative directly addresses this‚ recognizing that high turnover rates negatively impact patient care and strain healthcare systems.

Effective retention strategies encompass several key areas. Improving working conditions is crucial‚ including manageable workloads‚ adequate staffing levels‚ and a supportive work environment. Investment in professional development – offering opportunities for advanced training and specialization – demonstrates value and fosters career growth.

Furthermore‚ strong leadership plays a vital role in creating a positive workplace culture. Recognizing and rewarding nurses’ contributions‚ promoting work-life balance‚ and ensuring their voices are heard are essential components. Data-driven approaches‚ identifying the specific reasons for nurse attrition within individual countries‚ allow for targeted interventions and maximize the effectiveness of retention efforts. Ultimately‚ a holistic strategy is needed to safeguard this vital workforce.

Addressing the Global Nursing Shortage

The worldwide shortage of nurses represents a significant threat to global health security‚ exacerbated by an aging population and increasing healthcare demands. Despite a global nursing workforce growth – from 27.9 million in 2018 to 29.8 million in 2023 – substantial regional disparities persist‚ demanding urgent attention.

Strategies to mitigate this shortage require a multi-faceted approach. Increasing investment in nursing education and training is fundamental‚ alongside efforts to improve recruitment and retention rates. Addressing the factors contributing to nurse burnout – such as heavy workloads and inadequate support – is equally critical.

Furthermore‚ optimizing the scope of practice for nurses‚ allowing them to operate to their full potential‚ can alleviate pressure on physicians and enhance healthcare access. International collaboration‚ facilitated by organizations like the WHO‚ is essential for sharing best practices and coordinating global efforts to strengthen the nursing workforce and ensure equitable distribution.

Expanding Healthcare Access Through Nursing

Nurses are pivotal in expanding healthcare access‚ particularly in underserved communities and regions facing critical workforce shortages. Their roles extend beyond traditional clinical settings‚ encompassing preventative care‚ health promotion‚ and community-based interventions.

Optimizing nurses’ scope of practice is crucial. Allowing advanced practice nurses to perform tasks traditionally reserved for physicians can significantly increase access to care‚ especially in areas with limited specialist availability. This requires addressing contentious issues surrounding scope of practice definitions and regulatory frameworks.

Initiatives like Nursing Action‚ an EU-funded project‚ aim to strengthen nursing workforces and improve healthcare delivery across Europe. The global nursing workforce‚ now exceeding 29.8 million‚ plays a vital role‚ with over 80% working in countries housing half the world’s population. Strategic investments in nursing education and retention are essential to ensure equitable access to quality healthcare for all.

Scope of Practice: A Contentious Issue

Defining the scope of practice for nurses remains a significantly contentious area within healthcare‚ often sparking debate between professions with varying levels of authority. Historically‚ physicians have maintained broader scopes‚ leading to friction with advanced practice nurses seeking expanded responsibilities.

Optimizing scope of practice is vital for improving healthcare access‚ particularly in underserved areas. Allowing nurses to perform tasks traditionally reserved for doctors – within their competence and training – can alleviate burdens on physicians and enhance patient care. However‚ resistance from some medical groups persists.

The 2025 State of the World’s Nursing report implicitly acknowledges this challenge‚ highlighting the need for clear regulatory frameworks. The global nursing workforce‚ exceeding 29.8 million‚ is capable of more‚ but legal and institutional barriers often restrict their full potential. Resolving these conflicts is crucial for maximizing the effectiveness of the healthcare system and ensuring equitable access to care.

The Role of WHO in Strengthening Nursing and Midwifery

The World Health Organization (WHO) plays a pivotal role in bolstering the global nursing and midwifery workforce‚ recognizing its fundamental importance to universal health coverage. WHO’s efforts are multifaceted‚ encompassing data collection‚ policy guidance‚ and advocacy for improved working conditions.

Central to WHO’s strategy is the “State of the World’s Nursing” report‚ with the 2025 edition offering the most current and comprehensive analysis of the profession. This report informs policy decisions and highlights critical areas needing investment‚ such as nurse retention and education.

Furthermore‚ WHO actively supports initiatives like “Nursing Action‚” an EU-funded project aimed at strengthening nursing within the European Region. The “Global Strategic Directions for Nursing and Midwifery 2016-2020” provide a framework for collaborative action. With a workforce exceeding 29.8 million globally‚ WHO’s leadership is essential for addressing shortages and ensuring equitable access to quality healthcare for all.

Global Strategic Directions for Nursing and Midwifery (2016-2020)

The “Global Strategic Directions for Strengthening Nursing and Midwifery 2016-2020” served as a crucial framework for WHO and its partners to collaboratively enhance the nursing and midwifery workforce worldwide. This strategic plan focused on bolstering education‚ practice‚ and leadership within the professions.

A key objective was to increase the number of nurses and midwives‚ particularly in regions facing critical shortages‚ while simultaneously improving their quality of training and ensuring equitable distribution. The directions emphasized the importance of strengthening regulatory frameworks and recognizing the full scope of practice for these professionals.

With a global workforce exceeding 27.9 million in 2018‚ growing to 29;8 million by 2023‚ the strategic directions aimed to address disparities in availability and support initiatives like “Nursing Action” within the WHO European Region. Ultimately‚ the plan sought to empower nurses and midwives to deliver essential healthcare services and achieve universal health coverage.

Nursing Roles in Europe: A Key Healthcare Component

Nurses and midwives constitute the majority of healthcare professionals across Europe‚ playing a pivotal role in the successful delivery of health services to a diverse population. Their responsibilities encompass a broad spectrum of care‚ from preventative health measures and acute medical interventions to chronic disease management and palliative care.

The nursing workforce in Europe‚ largely female-dominated (over 80% globally)‚ is facing increasing demands due to aging populations and the rising prevalence of chronic conditions. This necessitates ongoing investment in nursing education‚ recruitment‚ and retention strategies‚ as highlighted by initiatives like “Nursing Action‚” an EU-funded project.

Despite their critical contribution‚ nurses often grapple with workforce shortages and scope of practice limitations. Addressing these challenges is paramount to ensuring sustainable and equitable healthcare access for all European citizens. The 2025 State of the World’s Nursing report provides vital data for informed policy decisions.

Advanced Nursing Practice and Scope of Practice Debates

The delineation of “scope of practice” – defining who can perform what healthcare tasks – remains a contentious issue globally‚ and particularly impacts advanced nursing roles. Historically‚ there’s been friction between professions with broader scopes‚ like physicians‚ and those with more limited parameters‚ such as advanced practice nurses.

Expanding the scope of practice for nurses‚ allowing them to take on greater responsibility in areas like diagnosis‚ treatment‚ and prescription‚ is seen by many as a crucial step in addressing global nursing shortages and improving healthcare access. However‚ this expansion often encounters resistance from other healthcare providers.

The debate centers on ensuring patient safety‚ maintaining quality of care‚ and optimizing the utilization of healthcare resources. The 2025 State of the World’s Nursing report underscores the need for clear‚ evidence-based guidelines regarding advanced nursing practice‚ alongside robust education and training programs to support expanded roles.

The Importance of Nursing in Population Health

Nurses are foundational to achieving positive population health outcomes‚ extending far beyond traditional clinical settings. With a global workforce exceeding 29.8 million (2018-2023)‚ they represent the largest segment of healthcare professionals‚ particularly in Europe‚ where they are key to successful healthcare delivery.

Their roles encompass preventative care‚ health promotion‚ disease management‚ and addressing social determinants of health – factors like poverty‚ education‚ and access to resources that significantly impact well-being. The COVID-19 pandemic vividly demonstrated nurses’ critical role in public health emergencies‚ requiring adaptability and resilience.

Initiatives like Nursing Action‚ an EU-funded project‚ recognize the importance of retaining nurses to strengthen population health. The 2025 State of the World’s Nursing report highlights the need to address geographical disparities in nursing availability to ensure equitable access to care for all populations‚ fostering healthier communities worldwide.

Challenges Facing the Nursing Profession Today

The nursing profession‚ while vital – comprising over 29.8 million globally (2018-2023) – currently faces significant challenges. A critical global nursing shortage is projected to worsen with population growth‚ demanding urgent attention and innovative solutions.

Retention remains a major hurdle‚ particularly within the WHO European Region‚ addressed by initiatives like Nursing Action‚ an EU-funded project. Scope of practice debates‚ often contentious between professions like nursing and medicine‚ limit nurses’ ability to fully utilize their skills.

Geographical disparities in nursing availability exacerbate inequities in healthcare access. The predominantly female workforce (over 80%) also faces unique challenges related to gender equity and work-life balance. The 2025 State of the World’s Nursing report underscores the need for strengthened nursing and midwifery to navigate these complex issues and ensure sustainable‚ high-quality care.

Future Trends and Innovations in Nursing Roles

Addressing the global nursing shortage‚ currently impacting over 29.8 million professionals worldwide (2018-2023)‚ necessitates embracing future trends and innovations. Expanding healthcare access will rely heavily on optimizing nursing roles and scopes of practice.

Advancements in technology‚ including telehealth and artificial intelligence‚ will reshape nursing responsibilities‚ demanding continuous professional development. Resolving contentious scope of practice issues – often debated between nursing and physician roles – is crucial for maximizing efficiency.

The WHO’s strategic directions for strengthening nursing and midwifery (2016-2020) provide a framework for adaptation. Initiatives like Nursing Action‚ an EU-funded project‚ aim to bolster retention and attract new talent. The 2025 State of the World’s Nursing report will likely highlight emerging models of care and the evolving skillset required for nurses to thrive in a dynamic healthcare landscape.

girls guide to growing up page 5

Navigating the Transition: A Girl’s Guide to Growing Up ⎼ Page 5

Today, February 7th, 2026, marks a pivotal moment. Ivanovo’s textile history shaped generations of women, while balancing life’s demands, like touring schedules and family time, is crucial for growth.

Understanding Changing Bodies

As you navigate these years, your body will undergo remarkable transformations – a natural and beautiful process called puberty. It’s essential to remember that everyone experiences these changes at their own pace; there’s no “right” or “wrong” timeline. These shifts aren’t something to fear, but rather to understand and embrace as a sign of growing into the amazing young woman you are destined to become.

Think about Ivanovo, a city historically shaped by the industriousness of women. Their strength and resilience mirror the changes you’re experiencing. Just as the textile industry evolved, so too will your body. These changes can include growth spurts, the development of breasts, and the start of menstruation. It’s also a time when your skin might change, potentially leading to breakouts – a common experience that can be managed with a good skincare routine.

Remember Liz, who balanced a touring career with motherhood? Her story highlights the importance of adapting to life’s demands. Your body is adapting too, and learning to listen to its signals is key. Understanding these changes empowers you to take care of yourself and navigate this exciting new chapter with confidence.

The Onset of Puberty: A Detailed Timeline

Puberty typically begins between ages 8 and 13, though the exact timing varies greatly. The first sign is often the start of breast development, followed by the growth of pubic hair. These changes are triggered by hormones, which also lead to a growth spurt – you might find yourself suddenly taller! Remember, like the evolving textile industry in Ivanovo, these changes unfold over time.

Around age 10-14, you’ll likely experience the start of your menstrual cycle, also known as your period. This marks the ability to become pregnant, though it’s important to understand responsible sexual health. Skin changes, like increased oil production and potential acne, are also common during this period.

Consider Liz’s experience balancing work and family; her life demonstrates adapting to changing phases. Emotional changes are also part of puberty, with mood swings becoming more frequent. These shifts are normal, driven by hormonal fluctuations. Throughout this process, remember that seeking information and support from trusted adults is crucial. This timeline is a guide, not a rigid rule – your journey is unique!

Managing Menstrual Cycles

Understanding your menstrual cycle is a key part of growing up. Cycles typically last between 21 and 35 days, but irregularity is common, especially in the first few years after menstruation begins. Tracking your cycle – noting the start and end dates – can help you predict when your period will arrive. This knowledge empowers you to feel more prepared and in control.

Various products are available to manage menstrual flow, including pads, tampons, and menstrual cups. Experiment to find what feels most comfortable and suits your lifestyle. Remember to change these products regularly to maintain hygiene. Like the female workers in Ivanovo’s textile industry, managing your cycle allows you to continue daily activities confidently.

Painful periods (dysmenorrhea) are also common. Over-the-counter pain relievers, a warm compress, or gentle exercise can provide relief. If pain is severe or interferes with your daily life, consult a healthcare professional. Prioritizing self-care, similar to balancing work and family as Liz did, is vital during this time.

Skin Changes and Skincare Routines

As you grow, your skin undergoes significant changes due to hormonal fluctuations. Increased oil production can lead to breakouts, while skin may become more sensitive. Establishing a simple skincare routine is crucial for maintaining healthy skin. Start with a gentle cleanser to wash your face twice daily – morning and night. Avoid harsh scrubs that can irritate your skin.

Moisturizing is essential, even if your skin feels oily. Choose a lightweight, non-comedogenic moisturizer that won’t clog pores. Sunscreen is non-negotiable! Protect your skin from harmful UV rays by applying a broad-spectrum sunscreen with an SPF of 30 or higher every day, even on cloudy days. Like the historical focus on industry in Ivanovo, consistency is key.

If you experience persistent acne, consider consulting a dermatologist. They can recommend personalized treatments. Remember, skincare is self-care. Taking time for your skin can boost your confidence, much like finding balance between personal life and commitments, as Liz experienced.

Emotional and Mental Wellbeing

Navigating change requires self-awareness. Like stories from Shanghai Dawn, understanding your feelings is vital. Prioritize mental health, balancing commitments with personal needs for overall wellbeing.

Dealing with Mood Swings

Mood swings are a completely normal part of growing up, driven by hormonal changes and evolving emotions. It’s like the fluctuating narratives found in publications like Shanghai Dawn – life isn’t always a consistent story! One moment you might feel incredibly happy, and the next, unexpectedly sad or irritable. This isn’t a sign of weakness, but rather an indication that your body and mind are adapting to significant transformations.

Recognizing your triggers is a powerful first step. Are mood swings linked to specific times of the month, stressful events, or even lack of sleep? Keeping a journal can help you identify patterns. Remember, self-care is essential. Prioritize activities that bring you joy and relaxation, whether it’s listening to music, spending time in nature, or pursuing a hobby.

Don’t hesitate to talk to someone you trust – a parent, teacher, counselor, or friend. Sharing your feelings can provide valuable support and perspective. Just as balancing touring with family life requires communication, openly expressing your emotions is crucial for maintaining emotional equilibrium. It’s okay to not be okay, and seeking help is a sign of strength, not weakness.

Building Self-Esteem and Confidence

Developing strong self-esteem and confidence is a journey, not a destination. It’s about recognizing your inherent worth, independent of external validation. Think of the women of Ivanovo, historically empowered by their work in the textile industry – they found strength in their skills and contributions. You, too, possess unique talents and qualities that deserve celebration.

Focus on your strengths and accomplishments, no matter how small they may seem. Challenge negative self-talk and replace it with positive affirmations. Remember, everyone makes mistakes; they are opportunities for growth and learning. Embrace imperfections – they make you, you! Like navigating complex narratives, such as those explored in films during the Cold War, self-discovery requires courage and resilience.

Surround yourself with supportive people who uplift and encourage you. Avoid those who bring you down or make you feel insecure. Explore your interests and passions – pursuing activities you enjoy will boost your confidence and sense of purpose. Remember, self-care is not selfish; it’s essential for nurturing your well-being and building a strong foundation of self-worth.

Navigating Friendships and Social Dynamics

Friendships evolve as you grow, and navigating these changes can be tricky. Just as communities like those documented in LiveJournal blogs shift and adapt, so too will your social circles. It’s normal to drift apart from some friends while forging new connections. The key is to prioritize relationships built on mutual respect, trust, and genuine connection.

Social dynamics can be complex. Be mindful of peer pressure and learn to assert yourself. It’s okay to say “no” to things that make you uncomfortable or go against your values. Remember the stories from Shanghai Dawn – navigating different cultural landscapes requires self-awareness and courage. Healthy friendships involve open communication, empathy, and a willingness to compromise.

Be a good listener and offer support to your friends. Address conflicts constructively and avoid gossip or drama. Recognize that not everyone will like you, and that’s perfectly fine. Focus on nurturing the relationships that bring you joy and positivity. Like balancing work and family, as Liz experienced, maintaining healthy friendships requires effort and dedication.

Recognizing and Addressing Anxiety

Growing up brings new challenges, and feeling anxious is a common experience. Just as the films of the Cold War reflected societal anxieties, your own worries are valid and deserve attention. Recognizing the signs of anxiety – like excessive worry, restlessness, or difficulty concentrating – is the first step.

Understand that anxiety isn’t a sign of weakness. It’s a natural response to stress. Explore healthy coping mechanisms, such as deep breathing exercises, mindfulness, or spending time in nature. Connecting with others, like the communities found on platforms like LiveJournal, can also provide support and reduce feelings of isolation.

Don’t hesitate to talk to a trusted adult – a parent, teacher, or counselor – if your anxiety is interfering with your daily life. Seeking help is a sign of strength, not weakness. Remember, just as navigating social dynamics requires self-awareness, managing anxiety requires understanding your own triggers and developing effective strategies. Prioritize self-care and be kind to yourself.

Relationships and Boundaries

Like the historical context of Ivanovo’s “city of brides,” relationships evolve. Establishing healthy connections requires respect, consent, and clear boundaries – vital for personal wellbeing and growth.

Healthy Relationships: What They Look Like

Healthy relationships, whether with friends, family, or romantic partners, are built on a foundation of mutual respect, trust, and open communication. They aren’t always easy, but they consistently feel safe and supportive. Think about the historical context of communities like Ivanovo, where strong female networks likely formed amidst shared experiences – those bonds were likely rooted in mutual support.

A key component is equality. Both individuals feel valued and have their opinions heard. There’s a balance of give and take, and decisions are made collaboratively, not through control or manipulation. Healthy relationships allow for individual growth; you shouldn’t feel pressured to change who you are to fit someone else’s mold.

Boundaries are also essential. These are the limits you set to protect your emotional, physical, and mental wellbeing. It’s okay to say “no” without feeling guilty, and a healthy partner will respect that. Like balancing personal life with professional commitments – as Liz did with her touring – healthy relationships require mindful effort and prioritization. Conflict is inevitable, but it’s handled constructively, with a focus on understanding and resolution, not blame.

Ultimately, a healthy relationship enhances your life, leaving you feeling empowered, cherished, and secure.

Understanding Consent and Respect

Consent is a cornerstone of any healthy interaction, and it’s absolutely crucial to understand what it means. It’s not just about saying “yes”; it’s an enthusiastic, informed, and ongoing agreement. Silence or lack of resistance doesn’t equal consent. It must be freely given, without pressure, manipulation, or coercion.

Respect goes hand-in-hand with consent. It means valuing another person’s boundaries, feelings, and autonomy. Consider the historical context – communities like Ivanovo, built on the labor of many women, highlight the importance of respecting individual agency and rights.

Understanding that you have the right to say “no” at any time is paramount. Your body, your choices. This applies to all interactions, not just romantic ones. Respecting someone also means listening to their “no” without argument or guilt-tripping.

Healthy relationships, like those requiring balance between work and family – as seen with Liz and her touring – demand constant communication and a willingness to honor each other’s boundaries. Learning to recognize and articulate your own boundaries is equally important. Consent and respect are not just rules; they are fundamental to building safe and fulfilling connections.

Setting Personal Boundaries

Establishing personal boundaries is a vital skill during this time of growth. Boundaries define what you are comfortable with – physically, emotionally, and mentally. They’re not about building walls, but about protecting your wellbeing and ensuring your needs are met.

Think about what makes you feel uncomfortable, unsafe, or pressured. It could be anything from unwanted physical touch to being asked to do something you don’t want to do. Recognizing these feelings is the first step.

Communicating your boundaries clearly and assertively is key. You have the right to say “no” without explanation or apology. Like balancing a career with family life, as Liz experienced, setting boundaries requires conscious effort and consistent reinforcement.

Remember, boundaries aren’t static; they can change over time. What feels okay today might not feel okay tomorrow, and that’s perfectly alright. Just as Ivanovo’s textile industry evolved, so too will your understanding of yourself and your needs. Don’t be afraid to adjust your boundaries as you grow and learn. Prioritizing self-respect is paramount.

Dealing with Peer Pressure

Navigating friendships often involves peer pressure – the feeling of being pushed to do things you might not want to do to fit in. It’s a common experience, but learning to handle it effectively is crucial for maintaining your self-respect and making healthy choices.

Recognize that giving in to peer pressure doesn’t demonstrate friendship; true friends respect your decisions, even if they differ from their own. Just as individuals seek financial security through mindful choices, you must safeguard your values.

Develop strategies for saying “no” confidently and assertively. A simple “No, thank you” is often enough. You don’t need to offer lengthy explanations or apologies. Practice these responses with a trusted friend or family member.

Surround yourself with friends who support your values and encourage you to be yourself. Like the women of Ivanovo’s textile industry, strength lies in solidarity with those who uplift you. Remember, resisting pressure can be challenging, but prioritizing your wellbeing is always worth it. Don’t compromise your integrity for acceptance.

Future Planning and Personal Growth

Exploring passions, like the bloggers on LiveJournal, and setting goals are vital. Financial literacy, balancing work and family (like Liz), and self-care are key components.

Exploring Interests and Passions

As you navigate this exciting phase of growth, discovering what truly sparks your interest is incredibly important. Think beyond what’s expected and delve into activities that genuinely excite you. Just as the bloggers on LiveJournal find fulfillment in sharing their thoughts and experiences – serge_malov, viktoriiako, radio42, and bbb – you too can find joy in expressing yourself.

Don’t be afraid to try new things! Perhaps you’re drawn to creative pursuits like writing, painting, or music. Maybe you have a knack for science, technology, engineering, or math. Or perhaps you’re passionate about social justice, environmental issues, or helping others. The possibilities are endless.

Consider the historical context of Ivanovo, the “city of brides,” where women found purpose and community through the textile industry. While your path may differ, the spirit of finding meaning in your work and passions remains the same. Remember Liz, who balanced a touring career with family life – finding ways to integrate your interests into your overall life is key.

Exploring your passions isn’t just about finding a hobby; it’s about discovering who you are and what makes you unique. It’s about building confidence, fostering creativity, and setting yourself up for a fulfilling future. Embrace the journey of self-discovery and allow your passions to guide you.

Setting Goals for the Future

Now is the perfect time to start thinking about your future and setting goals, both big and small. Just as filmmakers responded to the Cold War’s anxieties with their art, you can proactively shape your own narrative. Consider what truly matters to you – what kind of life do you envision for yourself? What impact do you want to make on the world?

Start by brainstorming your interests and passions (as discussed previously!). Then, translate those into concrete goals. These could be academic goals, career aspirations, personal development objectives, or anything else that excites you. Break down larger goals into smaller, manageable steps. This makes them less daunting and more achievable.

Remember the women of Ivanovo, who built a community and livelihood through the textile industry. Their resilience and determination serve as an inspiration. Like Liz, balancing career and family, you may need to adjust your goals along the way – and that’s okay!

Don’t be afraid to dream big, but also be realistic. Setting achievable goals builds confidence and momentum. Regularly review and revise your goals as you grow and evolve. The key is to stay focused, motivated, and committed to creating the future you desire.

Financial Literacy Basics

Understanding money is a crucial life skill, empowering you to make informed decisions and secure your future. It’s about more than just saving; it’s about understanding how money works and using it wisely. As highlighted today, February 7th, 2026, financial security isn’t just for individuals – it impacts communities.

Start with the basics: budgeting. Track your income and expenses to see where your money is going. Differentiate between needs and wants. Saving is essential – even small amounts add up over time; Explore different savings options, like bank accounts and investment opportunities (with guidance from a trusted adult, of course!).

Consider the principle of choosing experiences over material possessions, as suggested by financial experts. Spending money on others can also bring fulfillment. Be mindful of debt and avoid unnecessary borrowing. Learning about credit and interest rates is vital.

Just as the women of Ivanovo built their lives around the textile industry, understanding financial systems allows you to build your life. Financial literacy isn’t just about numbers; it’s about freedom, independence, and achieving your goals. It’s a skill that will serve you well throughout your life.

The Importance of Self-Care

Growing up involves navigating a whirlwind of changes – emotional, physical, and social. Amidst this, prioritizing self-care isn’t selfish; it’s essential. Today, February 7th, 2026, remember that taking care of yourself allows you to better navigate life’s challenges, much like balancing work and family, as Liz experienced with her touring schedule.

Self-care encompasses anything you do to nurture your well-being. This could include getting enough sleep, eating nutritious foods, and engaging in regular physical activity. But it extends beyond the physical. It’s about emotional and mental health too.

Make time for activities you enjoy – reading, listening to music, spending time in nature, or pursuing hobbies. Practice mindfulness and learn to manage stress. Don’t be afraid to ask for help when you need it. Connecting with supportive friends and family is crucial.

Remember, just as the women of Ivanovo adapted to changing industries, you too must adapt and prioritize your needs. Self-care isn’t a luxury; it’s a necessity. It’s about recognizing your worth and investing in your overall well-being, allowing you to thrive.

manual sweeper

Manual sweepers represent a cost-effective and efficient cleaning solution, praised for their efficiency and ease of use.

These devices offer a practical alternative to electric vacuums, particularly for quick cleanups and smaller debris.

1.1 What is a Manual Sweeper?

A manual sweeper is a mechanical cleaning device propelled by human power, designed to collect debris from floors and surfaces. Unlike electric vacuum cleaners that rely on suction, manual sweepers utilize rotating brushes to sweep dirt, dust, and small particles into an internal collection bin.

These sweepers are often lauded for their simplicity and lack of reliance on electricity, making them a convenient option for quick cleanups or areas without easy access to power outlets. They are frequently referred to as “silent models” due to their quiet operation, a significant contrast to the noise produced by many vacuum cleaners.

Modern manual sweepers, like the Bissell type, are effective for crumbs and small pieces of dirt, though they may struggle with finer particles like dust, fibers, or pet hair, potentially requiring supplemental vacuuming.

1.2 Historical Overview of Manual Sweepers

The concept of mechanical sweeping dates back centuries, evolving from simple brooms to more sophisticated, human-powered devices. Early iterations of manual sweepers emerged as a labor-saving alternative to traditional sweeping methods, gaining popularity in the late 19th and early 20th centuries.

Vintage models, often cherished by modern vacuum enthusiasts, showcased ingenious mechanical designs relying on brush rotation and clever dust collection systems. These early sweepers provided a significant improvement in cleaning efficiency compared to solely using a broom.

Over time, manual sweepers have undergone refinements in materials and design, leading to lighter, more maneuverable, and effective models. While largely superseded by electric vacuums, they’ve maintained a niche appeal for their simplicity, quiet operation, and cost-effectiveness, experiencing a resurgence as a practical cleaning tool.

How Manual Sweepers Work

Manual sweepers utilize rotating brushes, powered by the user’s push, to effectively gather dirt and debris from floors.

These brushes then deposit collected particles into an internal dustbin for easy disposal.

2.1 The Mechanics of Brush Rotation

The core of a manual sweeper’s operation lies in its brush rotation system. As the sweeper is pushed forward, a mechanical linkage connects the wheels to one or more cylindrical brushes located beneath the unit. This linkage is ingeniously designed; the wheel rotation directly translates into brush spinning, requiring no external power source.

The brushes themselves are typically constructed with durable bristles, arranged to effectively agitate and sweep debris from the floor surface. Different brush designs cater to various floor types – some with softer bristles for hardwood, and others with stiffer bristles for carpets or rougher surfaces. The speed of rotation is directly proportional to the pushing speed, allowing the user to control the intensity of the cleaning action. This simple yet effective mechanism is what allows manual sweepers to function efficiently and reliably.

2.2 Dust Collection Systems in Manual Sweepers

Manual sweepers employ surprisingly effective, albeit simple, dust collection systems. As the rotating brushes sweep debris, it’s channeled towards a central collection chamber, often referred to as a dustbin or dirt cup. This chamber is typically located within the sweeper’s body, accessible for easy emptying.

The design relies on physical separation; the brushes direct the dirt and debris into the chamber, while the airflow created by the sweeping action helps to guide finer particles. However, it’s important to note that these dustbins are often quite small, requiring frequent emptying – a common drawback noted by users. The capacity is significantly less than that of electric vacuums. Despite this limitation, the system provides a convenient way to contain and dispose of collected dirt without the need for bags or filters.

Advantages of Using a Manual Sweeper

Manual sweepers offer cost-effectiveness, quiet operation, and exceptional ease of use, making them ideal for quick cleanups and smaller spaces.

3.1 Cost-Effectiveness Compared to Vacuum Cleaners

Manual sweepers present a significantly more affordable cleaning option when contrasted with electric vacuum cleaners. The initial purchase price of a manual sweeper is generally much lower, often a fraction of the cost of even a basic vacuum model.

Beyond the upfront cost, the long-term expenses associated with manual sweepers are minimal. Unlike vacuums, they require no electricity to operate, eliminating energy consumption and associated utility bills. Furthermore, manual sweepers typically have fewer parts that are prone to breakage, reducing the need for costly repairs or replacements.

This inherent cost-effectiveness makes them an attractive choice for budget-conscious consumers, those seeking a secondary cleaning tool for quick touch-ups, or individuals living in smaller spaces where a full-sized vacuum may be unnecessary. The simplicity of the design also contributes to its affordability and longevity.

3.2 Quiet Operation – The “Silent” Sweeper

Manual sweepers are often lauded for their remarkably quiet operation, earning them the nickname “silent sweepers.” This is a substantial advantage over electric vacuum cleaners, which can generate considerable noise during operation, potentially disrupting household members or neighbors.

The absence of a motor is the key to this quiet performance. Relying solely on mechanical action – the user’s pushing force to rotate the brushes – eliminates the loud humming or roaring sounds associated with vacuum motors. This makes manual sweepers ideal for use in noise-sensitive environments, such as apartments, libraries, or even while someone is sleeping.

While some sources note that vacuums can have a lower decibel rating than manual sweepers, the general consensus is that manual sweepers offer a significantly quieter cleaning experience, contributing to a more peaceful home environment.

3.3 Ease of Use and Maneuverability

Manual sweepers excel in their simplicity and user-friendliness. Requiring no electricity or complex setup, they are ready to use immediately, making them a convenient cleaning option for quick tidy-ups. Their lightweight design and straightforward mechanics contribute to effortless operation for users of varying ages and physical abilities.

Furthermore, manual sweepers boast exceptional maneuverability. Their compact size and swivel steering allow for easy navigation around furniture, under tables, and into tight corners – areas where bulky vacuum cleaners may struggle to reach. This agility makes them particularly well-suited for cleaning smaller spaces or tackling spot cleaning tasks efficiently.

Users consistently praise the ease of use, highlighting their intuitive operation and minimal physical exertion required for effective cleaning.

Disadvantages of Manual Sweepers

Manual sweepers struggle with fine dust and hair, and possess small dust capacity, demanding frequent emptying. They aren’t ideal for deep carpet cleaning.

4.1 Limited Cleaning Power for Fine Dust and Hair

Manual sweepers, while effective on larger debris like crumbs and small pieces of dirt, often fall short when it comes to tackling finer particles. A significant drawback is their limited ability to capture dust, fibers, and especially pet hair.

Users have noted that these sweepers work well for crumbs but aren’t as proficient at removing these more challenging elements. This limitation means that even after using a manual sweeper, a vacuum cleaner might still be necessary to achieve a truly thorough clean, particularly in homes with pets or individuals sensitive to dust.

The mechanical action of the brushes isn’t always sufficient to lift and collect these finer particles, leaving them behind on the floor surface. Therefore, relying solely on a manual sweeper may not be adequate for maintaining a completely dust-free environment;

4.2 Small Dust Capacity – Frequent Emptying Required

A common complaint regarding manual sweepers centers around their remarkably small dustbin capacity. This necessitates frequent emptying, often interrupting the cleaning process. Users have expressed surprise at just how tiny the dirt cup can be, especially considering the sweeper’s overall size and intended function.

The limited capacity is particularly noticeable in households with pets, where the accumulation of hair and dander quickly fills the dustbin. This frequent need to empty the container can be inconvenient and time-consuming, diminishing the overall efficiency of the cleaning experience.

Compared to the larger dust containers found in electric vacuums, the manual sweeper’s small capacity means more frequent maintenance and less continuous cleaning time.

4.3 Not Ideal for Deep Cleaning Carpets

Manual sweepers, while effective on hard floors, generally fall short when it comes to deep cleaning carpets. Their mechanical action primarily focuses on surface-level debris, struggling to lift embedded dirt, dust, and allergens from carpet fibers. The brush systems, designed for sweeping, lack the suction power necessary for a thorough carpet clean.

Users have noted that while manual sweepers can collect some surface crumbs, they are not well-suited for tackling dust, fibers, or pet hair ingrained within the carpet pile. In such cases, a vacuum cleaner remains the more effective option.

Therefore, relying solely on a manual sweeper for carpet cleaning may necessitate supplemental vacuuming to achieve a truly clean and hygienic result.

Manual Sweepers vs. Electric Vacuum Cleaners

Electric vacuums offer superior cleaning performance and larger dust collection, but can be heavier and louder than manual sweepers.

Both have unique advantages.

5.1 Performance Comparison: Dirt and Debris Removal

When evaluating dirt and debris removal, a clear distinction emerges between manual sweepers and electric vacuum cleaners. Manual sweepers excel at collecting larger particles like crumbs and small pieces of dirt, proving quite effective for surface-level cleaning. However, their capabilities diminish significantly when confronted with finer dust, fibers, or pet hair.

In contrast, electric vacuums, leveraging suction power, demonstrate a superior ability to lift and capture a wider range of debris, including deeply embedded particles. This suction is a key advantage, ensuring a more thorough clean. While manual sweepers offer a quick solution for visible messes, vacuums provide a more comprehensive cleaning experience, particularly for homes with carpets or pets. Ultimately, the choice depends on the specific cleaning needs and the type of debris commonly encountered.

5.2 Weight and Ergonomics: Manual vs. Electric

Weight and ergonomics present a notable contrast between manual sweepers and electric vacuum cleaners. Manual sweepers are generally lightweight and require only pushing force, making them easy to maneuver and suitable for users of varying strengths. However, unless they are handheld models, electric vacuums can be considerably heavier, potentially causing strain during extended use;

This weight difference impacts usability, especially when cleaning large areas or navigating stairs. While some vacuums offer ergonomic designs to mitigate weight concerns, manual sweepers inherently offer a simpler, lighter experience. The ease of use associated with manual sweepers can be particularly beneficial for individuals seeking a less physically demanding cleaning method. Ultimately, the ideal choice depends on physical capabilities and the size of the cleaning area.

5.3 Noise Levels: A Key Difference

Noise levels represent a significant differentiating factor between manual sweepers and electric vacuum cleaners. Manual sweepers are often referred to as “silent” models, offering a remarkably quiet cleaning experience. This is due to their purely mechanical operation, relying on brush rotation without a motor.

Conversely, electric vacuums, even those marketed as quiet, typically generate considerably higher decibel levels. The motor and suction system inherently produce noise, which can be disruptive to household members or neighbors. For individuals sensitive to noise, or those cleaning during quiet hours, a manual sweeper provides a discreet alternative. While some vacuums may have lower decibel ratings than others, manual sweepers consistently offer a quieter operation, making them ideal for noise-sensitive environments.

Types of Manual Sweepers

Manual sweepers come in diverse forms, including traditional push sweepers, specialized carpet sweepers, and models designed for larger spaces like garages.

6.1 Traditional Push Sweepers

Traditional push sweepers embody the classic design of manual floor cleaning, relying entirely on human power to operate. These sweepers typically feature rotating brushes housed within a rectangular body, propelled forward by the user’s pushing motion. They are remarkably simple in construction, often lacking any electrical components, which contributes to their affordability and reliability.

The mechanics involve brushes that sweep debris into an internal dustpan. Users then easily empty the collected dirt. These are particularly well-suited for hard floors like hardwood, tile, and laminate, effectively capturing crumbs, dust, and small particles. While not ideal for deep carpet cleaning, they excel at quick, everyday surface tidying.

Their lightweight nature and straightforward operation make them accessible to users of all ages and physical abilities. They represent a sustainable cleaning option, eliminating the need for electricity and reducing environmental impact.

6.2 Carpet Sweepers

Carpet sweepers are specifically engineered for effective cleaning on carpets and rugs, differing from traditional push sweepers in their brush design and functionality. They utilize multiple rows of rotating brushes that agitate carpet fibers, loosening and collecting embedded dirt, dust, and pet hair. These brushes are often designed with varying bristle stiffness to accommodate different carpet pile heights.

A key feature is their ability to mechanically lift and capture debris without relying on suction. However, it’s noted that they work well for crumbs or small pieces of dirt but not great for dust, fibers, or hair, often requiring vacuuming for a thorough clean.

Despite a TINY dirt cup that fills quickly, especially in homes with pets, carpet sweepers offer a convenient and quiet alternative for maintaining carpets between deeper vacuuming sessions. They are lightweight and easy to maneuver, making them ideal for quick touch-ups.

6.3 Specialized Sweepers (e.g., for garages)

Specialized manual sweepers cater to unique cleaning challenges beyond typical household floors, notably in spaces like garages, workshops, and outdoor patios. These often feature wider sweeping paths and more robust brush systems designed to tackle larger debris – think leaves, sawdust, gravel, and metal shavings.

Their construction prioritizes durability, utilizing heavy-duty materials to withstand abrasive surfaces and frequent use. Some models incorporate larger dustbins to minimize emptying frequency, a crucial feature for expansive areas.

Interestingly, a manual carpet sweeper could even find utility in a garage for cleaning a car’s interior, demonstrating the adaptability of these tools. While not as powerful as industrial vacuums, specialized sweepers provide a practical, cost-effective solution for maintaining these often-neglected spaces, offering efficiency without the need for electricity.

Choosing the Right Manual Sweeper

Selecting the ideal manual sweeper requires considering your floor type and desired features, such as brush type and dustbin size for optimal cleaning.

7.1 Floor Type Considerations (Hardwood, Tile, Carpet)

Floor surfaces significantly impact manual sweeper performance. For hardwood and tile floors, sweepers excel at collecting crumbs and surface debris without causing scratches, offering a gentle cleaning solution. However, their effectiveness diminishes on carpets.

Carpet sweepers, a specialized type, are designed with brushes that agitate carpet fibers to loosen dirt, but they generally lack the deep-cleaning power of vacuums. Traditional push sweepers struggle with carpet, proving less efficient at removing embedded particles.

Consider the pile height of your carpet; lower piles are more manageable for manual sweepers than thicker, plusher carpets. Ultimately, a manual sweeper is best suited for quick cleanups on hard floors, while carpets may require a vacuum for thorough cleaning. Prioritize a sweeper with adjustable brush height for versatility across different floor types.

7.2 Features to Look For (Brush Type, Dustbin Size)

Key features determine a manual sweeper’s efficiency. Brush type is crucial; rotating brushes effectively gather debris, while side brushes reach edges and corners. Consider brush material – some are better suited for pet hair or delicate surfaces. A dustbin size directly impacts cleaning frequency;

Smaller dustbins, like those found in some carpet sweepers, require frequent emptying, potentially interrupting your cleaning flow. Larger capacity dustbins offer convenience, reducing the need for constant disposal.

Look for sweepers with easily removable dustbins for hygienic emptying. Ergonomic handles and lightweight designs enhance usability. Adjustable brush height is also beneficial, adapting to various floor types. Prioritize build quality for durability and long-term performance, ensuring a worthwhile investment.