aprilaire 400 humidifier installation manual

Aprilaire 400 Humidifier Installation Manual: A Comprehensive Plan

This manual details installing Aprilaire 400, 500, and 600 models, emphasizing professional HVAC installation for optimal performance and system longevity․

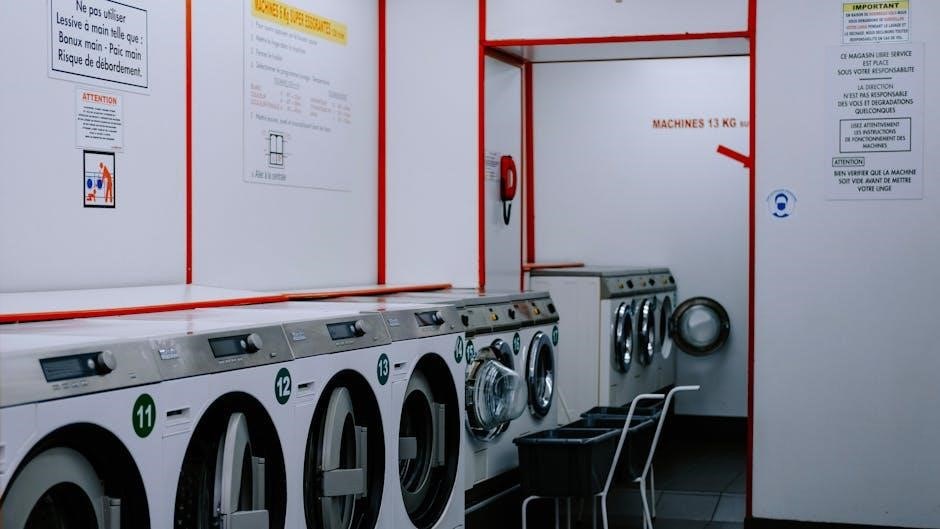
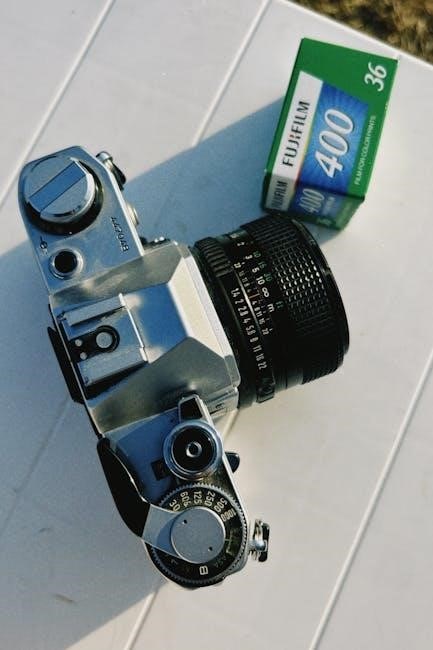
The Aprilaire 400 humidifier is a whole-house evaporative humidifier designed to add essential moisture to your home’s air during dry heating seasons․ This unit effectively combats the discomforts of dry air, such as static electricity, dry skin, and irritated sinuses․ It’s engineered for easy integration with your existing forced-air heating and cooling system, offering a comfortable and healthy indoor environment․

This installation manual provides a step-by-step guide for installing the Aprilaire 400, 400A, and 400M models․ While designed for straightforward installation, professional HVAC installation is always recommended to ensure proper functionality and adherence to local codes․ Proper installation maximizes the humidifier’s efficiency and longevity, delivering consistent humidity control throughout your home․

Safety Precautions & Warnings

Prior to installation, disconnect power to your heating/cooling system at the breaker panel to prevent electrical shock․ Always wear appropriate safety glasses and gloves during the installation process․ Improper installation can lead to water damage, electrical hazards, or system malfunction․ Ensure the water supply line is properly shut off before making any connections to avoid flooding․

This humidifier contains components with moving parts; keep hands and clothing clear during operation and maintenance․ Do not attempt to modify the unit in any way․ If you are uncomfortable with any aspect of the installation, consult a qualified HVAC professional․ Failure to follow these safety guidelines could result in personal injury or property damage․ Always adhere to local plumbing and electrical codes․

Tools and Materials Required for Installation

Essential tools include a screwdriver set (Phillips and flathead), adjustable wrench, pipe cutter, Teflon tape, drill with appropriate bits, and wire strippers/crimpers․ Materials needed are a saddle valve (if applicable), copper or PEX tubing for the water supply line, drain tubing, electrical connectors, and mounting hardware․

You’ll also require a level to ensure proper unit alignment, a measuring tape for accurate ductwork and tubing lengths, and potentially a hole saw depending on the installation location․ Don’t forget the Aprilaire 400 humidifier kit itself, including the unit, evaporator pad, and control panel․ Having these readily available streamlines the installation process․

Understanding the Aprilaire 400 Components

The Aprilaire 400 consists of several key parts: the humidifier unit housing, an evaporator pad for moisture absorption, a water supply valve controlling water flow, and a drain outlet for excess water․ The control panel manages humidity settings and operation․

Essential connection components include the water supply line (copper or PEX) and the drain line, typically PVC․ Understanding how these components interact is crucial for successful installation․ The unit’s fan motor distributes humidified air into the ductwork․ Familiarizing yourself with each part before starting ensures a smoother, more efficient installation process and future maintenance․

4․1 Humidifier Unit Overview

The Aprilaire 400 humidifier unit is designed for whole-house humidity control, featuring a durable cabinet housing the core components․ It’s engineered to integrate seamlessly with your existing HVAC system․ The unit’s internal structure includes an evaporator pad, responsible for absorbing water and releasing moisture into the airflow․

A powerful fan motor draws air through the moistened pad, distributing humidified air throughout your home․ The unit also incorporates a water control valve and a drain system to manage water supply and disposal․ Proper understanding of this overview is vital before proceeding with installation, ensuring correct placement and connection․

4․2 Water Supply Connection Components

Essential components for the water supply include a saddle valve or a direct connection to a cold water pipe․ The saddle valve, if used, pierces the existing copper or PEX pipe to provide a water source, while a direct connection requires a tee fitting․ A flexible water supply line connects the valve to the humidifier’s water inlet․

A shut-off valve is crucial for isolating the humidifier during maintenance or emergencies․ Ensure all connections are leak-proof using Teflon tape․ Proper selection and installation of these components are vital for a reliable and trouble-free water supply to the Aprilaire 400 humidifier․

Pre-Installation Checklist

Before beginning, verify the Aprilaire 400 model is suitable for your HVAC system and ductwork dimensions․ Confirm access to both a cold water supply line and a suitable drain location․ Gather all necessary tools and materials, including the humidifier unit, water supply connectors, drain tubing, electrical wiring, and mounting hardware․

Review the local plumbing and electrical codes to ensure compliance․ Turn off power to the HVAC system at the breaker box․ Inspect the intended installation location for obstructions and ensure adequate space for maintenance․ Completing this checklist ensures a smooth and safe installation process․

Determining Optimal Humidifier Location

Select a location within the return air ductwork, ideally as close to the furnace as possible, ensuring sufficient space for installation and future maintenance․ Avoid areas prone to freezing temperatures, as this can damage the unit and water lines․ The chosen location should allow for proper airflow across the evaporator pad for efficient humidification․

Consider accessibility for filter changes and routine servicing․ Ensure the ductwork is structurally sound to support the humidifier’s weight․ Proper placement maximizes humidity distribution throughout the home, enhancing comfort and preventing localized moisture issues․ Evaluate potential condensation points and address them proactively․

Installing the Humidifier Unit to Ductwork

Begin by preparing the ductwork, ensuring it’s clean and free of obstructions․ Carefully cut the necessary opening in the duct, referencing the unit’s dimensions for a precise fit․ Securely attach the humidifier housing to the ductwork using sheet metal screws, ensuring a tight seal to prevent air leaks․

Utilize appropriate gaskets or duct sealant around all connections for optimal performance․ Verify the unit is level and properly aligned with the airflow․ Double-check all fasteners for tightness․ Proper installation minimizes noise and maximizes humidification efficiency․ A stable and secure mount prevents vibration and potential damage during operation․

7․1 Ductwork Preparation

Prior to humidifier installation, thoroughly inspect the chosen ductwork section․ Ensure it’s structurally sound, clean, and free from any debris, dust, or insulation that could obstruct airflow or compromise air quality․ Carefully measure and mark the area for the humidifier opening, adhering to the unit’s specified dimensions․

Use appropriate cutting tools to create a precise opening, avoiding any jagged edges․ Smooth any rough cuts with a file to prevent damage to the humidifier housing or ductwork․ Confirm sufficient space exists around the installation point for maintenance and filter access․ Proper preparation guarantees a secure and efficient installation․

7․2 Securing the Humidifier to Ductwork

Once the ductwork is prepared, carefully position the Aprilaire 400 humidifier, aligning it with the pre-cut opening․ Utilize the provided mounting hardware – typically screws or brackets – to firmly secure the unit to the ductwork․ Ensure the humidifier is level and properly supported to prevent vibrations or strain on the ductwork․

Tighten all fasteners securely, but avoid over-tightening, which could damage the ductwork or the humidifier housing․ Double-check the stability of the installation, confirming there is no movement or play․ A robust and secure attachment is crucial for optimal performance and long-term reliability․

Water Supply Line Connection

Connecting the Aprilaire 400 to a cold water supply is essential for operation․ Locate a suitable cold water pipe, ideally within a few feet of the humidifier․ Options include direct connection or utilizing a saddle valve․ Direct connection provides a more reliable water supply, requiring a dedicated tap․

If using a saddle valve, ensure it’s installed correctly, piercing the pipe cleanly․ Always check for leaks after connecting the water supply line, tightening fittings as needed․ Use appropriate tubing – typically flexible copper or PEX – and ensure it’s securely connected to both the humidifier and the water source․

8․1 Connecting to Cold Water Supply

Establishing a reliable cold water connection is crucial for the Aprilaire 400’s functionality․ Identify a nearby cold water pipe – typically ½ inch copper – accessible for installation․ A dedicated tap is preferred for consistent water pressure and minimal risk of contamination․ Shut off the water supply before beginning any connections․

Use a compression fitting or solder to connect the water supply line to the chosen tap․ Ensure the connection is watertight, applying Teflon tape to threaded fittings․ Carefully route the tubing to the humidifier, avoiding kinks or sharp bends․ Double-check all connections for leaks after restoring water pressure․

8․2 Installing the Saddle Valve (if applicable)

If a direct tap isn’t feasible, a saddle valve offers an alternative for connecting to the cold water supply․ Select a smooth, unobstructed section of the copper pipe․ Thoroughly clean the area before installation․ Carefully drill a hole, sized appropriately for the saddle valve, ensuring not to penetrate the pipe completely․

Attach the saddle valve, securing it tightly with the provided hardware․ Ensure the valve’s piercing mechanism creates a watertight seal․ Connect the water supply tubing to the valve’s outlet․ Slowly turn on the water supply, checking for leaks around the valve and connection points․ Monitor for any drips or signs of water damage․

Drain Line Installation

Proper drain line installation is crucial to prevent water damage and ensure efficient operation․ Route the drain line from the humidifier to a suitable drain location – a floor drain, standpipe, or laundry tub․ Avoid routing the line where it could freeze or become kinked, hindering drainage․

Use appropriately sized tubing, ensuring a continuous downward slope to facilitate gravity-fed drainage․ Secure the drain line with clamps or supports to prevent sagging․ Connect the line firmly to the humidifier’s drain outlet and the designated drain location․ Test the connection by slowly running water through the humidifier, verifying a clear and unobstructed flow․

Electrical Wiring & Connections

Electrical work must comply with local codes and be performed by a qualified electrician․ Before commencing, disconnect power to the furnace at the breaker box․ Identify the appropriate wiring terminals on the humidifier and the furnace control board․ Typically, this involves a 24V connection for power and a signal wire for activation․

Carefully connect the wires, ensuring secure connections and proper polarity․ Use wire connectors approved for low-voltage applications․ Double-check all connections before restoring power․ Improper wiring can damage the humidifier or furnace, creating a safety hazard․ Refer to the wiring diagram included with the unit for specific instructions․

Initial System Startup & Testing

After completing installation, restore power to the furnace and verify the humidifier receives 24V power․ Observe the humidifier during a normal heating cycle to confirm proper operation․ Check the water supply connection for leaks, and ensure the drain line is functioning correctly, allowing water to flow freely․

Monitor the humidity levels in your home using a separate hygrometer to confirm the humidifier is effectively increasing moisture․ Adjust the humidity setting on the control panel as needed․ Inspect all connections again after initial operation․ Address any issues immediately to prevent potential damage or discomfort;

Aprilaire 400 Humidifier Operation

The Aprilaire 400 operates by adding moisture to your home’s air during heating cycles․ Water flows through the evaporator pad, where it’s absorbed into the airflow, increasing humidity․ The system automatically adjusts output based on the set humidity level and indoor conditions․ Regular operation helps maintain comfortable humidity levels, reducing dry skin, static electricity, and potential damage to wood furnishings․

Consistent monitoring and adjustment of the control panel are key to optimal performance․ Ensure the water supply remains active and the drain line is unobstructed for continuous, efficient operation․ Proper function relies on a clean filter and a correctly set humidity target․

Understanding the Control Panel

The Aprilaire 400’s control panel is the central hub for managing humidity levels․ It typically features digital displays indicating current humidity and setpoints․ Buttons allow for adjusting desired humidity, often ranging from 30% to 60%․ Some models include a manual override function for continuous operation or complete shutdown․ Familiarize yourself with the panel’s indicators, which may signal low water levels, filter replacement needs, or system malfunctions․

Understanding these functions ensures precise control over your home’s humidity․ Refer to the full installation manual for detailed explanations of each button and display element, maximizing system efficiency and comfort․

Setting Humidity Levels

Adjusting humidity on the Aprilaire 400 is crucial for comfort and health․ Begin by selecting a desired humidity level using the control panel’s up and down arrows, typically between 30% and 60%․ A recommended starting point is 40-45%, adjusting based on personal preference and seasonal changes․ Lower humidity prevents condensation, while higher levels alleviate dry skin and static electricity․

Monitor indoor humidity with a separate hygrometer to verify accuracy․ Avoid excessively high settings, potentially leading to mold growth․ The control panel allows fine-tuning for optimal balance, ensuring a comfortable and healthy indoor environment throughout the year․

Filter Replacement & Maintenance

Regular filter replacement is vital for maintaining Aprilaire 400 performance and air quality․ Utilize Aprilaire-approved filter types, ensuring proper fit and function․ Replacement frequency depends on usage and water quality, generally every 6-12 months, but more often with hard water․ Inspect filters quarterly for excessive mineral buildup or debris․

Beyond filters, annual cleaning of the humidifier unit is recommended․ This includes flushing the water panel and cleaning the solenoid valve․ Proper maintenance extends the humidifier’s lifespan and prevents scale buildup, ensuring efficient and healthy operation․ Refer to the manual for detailed cleaning instructions․

15․1 Filter Types & Selection

The Aprilaire 400 humidifier utilizes specific filter types to ensure optimal performance and water evaporation․ Standard replacement filters are readily available, designed to trap minerals and sediment from the water supply․ Consider the water hardness in your area when selecting a filter; harder water necessitates more frequent changes․

Aprilaire also offers enhanced filters with additional antimicrobial properties, inhibiting bacterial growth within the humidifier․ These are beneficial for households with sensitivities or concerns about indoor air quality․ Always verify the filter dimensions match your Aprilaire 400 model for a secure fit and efficient operation․ Using incorrect filters can reduce performance․

15․2 Filter Replacement Frequency

Regular filter replacement is crucial for maintaining the Aprilaire 400’s efficiency and preventing scale buildup․ Generally, filters should be replaced every 6-12 months, but this timeframe varies based on water quality and humidifier usage․ Hard water areas require more frequent changes, potentially every 3-6 months․

Inspect the filter monthly for visible mineral deposits or discoloration․ A heavily soiled filter restricts water flow, reducing humidification capacity and potentially damaging the unit․ Ignoring filter replacement can lead to decreased performance and increased maintenance costs․ Keep a record of replacement dates to establish a consistent schedule and ensure optimal operation․

Troubleshooting Common Issues

If the Aprilaire 400 isn’t humidifying adequately, check the water supply connection and ensure the saddle valve (if used) is fully open․ Verify the filter isn’t clogged, as restricted flow hinders performance․ For no water flow, inspect the water panel for mineral buildup and clean if necessary․ Electrical issues, like a non-responsive control panel, require checking the power supply and wiring connections․

Excessive water dripping may indicate a faulty solenoid valve or a cracked humidifier tank․ If the unit makes unusual noises, inspect for loose components․ Always disconnect power before any internal inspection or repair․ Consulting a qualified HVAC technician is recommended for complex issues․

Pressure Drop Table & Performance Data

The Aprilaire 400’s performance is directly related to airflow and ductwork configuration․ Understanding the pressure drop across the humidifier is crucial for optimal HVAC system efficiency․ Data indicates pressure drop increases with higher airflow rates, typically ranging from 0․05 to 0․20 inches of water column (in․ w․c․)․

Performance charts detail humidification capacity at various temperatures and humidity levels․ These tables show the amount of moisture added per hour, influenced by water temperature and airflow․ Proper sizing and installation, adhering to the provided specifications, ensures the unit delivers its rated performance․ Refer to the detailed technical data for specific values․

Technical Specifications of the Aprilaire 400

The Aprilaire 400 operates on standard 120V AC power, requiring a dedicated electrical connection․ Its maximum water consumption is approximately 3․5 gallons per day, dependent on humidity settings and airflow․ The unit accommodates a 3/8-inch or 1/2-inch saddle valve or direct water line connection․

Dimensions are critical for installation; the unit’s housing measures approximately 24 x 16 x 12 inches․ The humidifier is designed for ductwork with airflow ranging from 200 to 400 CFM․ It features a built-in evaporator pad and a solenoid valve for automatic water control, ensuring efficient and reliable operation․ Refer to the detailed documentation for complete specifications․

Dimensions and Physical Characteristics

The Aprilaire 400 humidifier housing measures approximately 24 inches in height, 16 inches in width, and 12 inches in depth․ These dimensions are crucial for ensuring proper fit within your existing ductwork system․ The unit’s weight, when fully assembled, is around 20 pounds, requiring secure mounting to prevent vibration and noise․

Its construction utilizes durable materials designed to withstand typical basement or furnace room environments․ The water panel is sized to maximize evaporation efficiency within the specified airflow range․ Precise measurements are vital during installation to avoid obstructions and maintain optimal airflow․ Detailed diagrams are available in the installation manual․

Warranty Information & Support

Aprilaire provides a comprehensive warranty on the 400 humidifier, typically covering manufacturing defects for a period of five years from the date of purchase․ This warranty protects against faulty workmanship and materials, ensuring long-term reliability․ Registration of your product is often required to activate the full warranty benefits․

For technical support, troubleshooting assistance, or warranty claims, customers can contact Aprilaire’s dedicated customer service team via phone or through their official website․ Access to online resources, including FAQs and installation guides, is also readily available․ Maintaining proof of purchase is essential for any warranty-related inquiries․

Frequently Asked Questions (FAQ)

Q: Can I install the Aprilaire 400 myself? A: While DIY installation is possible, professional HVAC installation is strongly recommended for optimal performance and to avoid voiding the warranty․ Q: What water supply is needed? A: A cold water supply line is required, and a saddle valve can be used if a direct connection isn’t feasible․

Q: How often should the filter be replaced? A: Filter replacement frequency depends on water quality, but generally, every 1-3 months is advised․ Q: What if my humidifier isn’t producing enough humidity? A: Check the water supply, filter condition, and fan speed settings․ Contact support if issues persist․

tv guide cocoa fl

Cocoa Beach, FL TV Guide: A Comprehensive Overview (Updated 02/07/2026)

Discover comprehensive TV listings for Cocoa Beach, Florida, including ABC, NBC, CBS, and FOX channels, alongside digital options and streaming services available today!

Local Television Stations in Cocoa Beach

Cocoa Beach and the surrounding areas of Florida are served by a variety of local television stations, offering residents access to major network programming, local news, and diverse entertainment options. Viewers can receive signals over-the-air using digital antennas, through cable and satellite providers, or increasingly, via streaming services. Identifying station ownership, call signs, and digital frequencies is crucial for optimizing viewing experiences.

The area benefits from affiliations with ABC, NBC, CBS, and FOX, ensuring access to national broadcasts. Beyond these major networks, several independent stations contribute to the local media landscape. TVTV.us provides a valuable resource for discovering what’s currently airing on local channels. Understanding these stations and their offerings empowers Cocoa Beach residents to stay informed and entertained, tailoring their viewing schedules to their preferences. Accessing a current TV guide is essential for maximizing enjoyment of local television.

Major Network Affiliates

Cocoa Beach residents enjoy comprehensive coverage from the major television networks – ABC, NBC, CBS, and FOX – providing a wide array of programming, from national news and sports to popular entertainment series. Each network maintains affiliations with local stations, ensuring consistent broadcast quality and familiar content. Accessing schedules for these affiliates is key to planning your viewing.

Finding the specific channel numbers for each network depends on your television service provider (cable, satellite, or over-the-air). TVTV.us assists in locating these channels based on your zip code (32931). Staying updated with network schedules allows viewers to catch live events, premiere episodes, and their favorite regularly scheduled shows. These networks form the backbone of television viewing in Cocoa Beach, offering something for every audience.

ABC Stations in Cocoa Beach, FL

Accessing ABC programming in Cocoa Beach, Florida, requires identifying the local affiliate and its corresponding channel number. While specific details depend on your television provider – be it cable, satellite, or over-the-air reception – resources like TVTV.us can pinpoint the correct channel for your area (zip code 32931). ABC consistently delivers popular dramas, comedies, reality television, and live sports coverage, including Monday Night Football.

Staying informed about ABC’s schedule ensures you don’t miss new episodes of hit shows or important news broadcasts. The network’s website and TV listings guides provide detailed program information. Remember to check for potential schedule changes due to special events or breaking news. Enjoy the diverse entertainment options offered by ABC in Cocoa Beach!

NBC Stations in Cocoa Beach, FL

For NBC viewers in Cocoa Beach, Florida, finding the local station is key to enjoying their favorite programs. Utilizing resources like TVTV.us, tailored to zip code 32931, will reveal the precise channel number based on your TV service provider – cable, satellite, or antenna. NBC is renowned for its compelling dramas, insightful comedies, high-profile sporting events like the Olympics and Sunday Night Football, and breaking news coverage.

To maximize your viewing experience, consult NBC’s official website or a comprehensive TV guide for the most up-to-date schedule. Be aware that programming can shift due to live events or unforeseen circumstances. Don’t miss out on NBC’s award-winning shows and captivating content – stay tuned and informed!

CBS Stations in Cocoa Beach, FL

CBS programming in Cocoa Beach, Florida, offers a diverse lineup, from gripping dramas and hilarious sitcoms to compelling reality shows and live sports broadcasts, including NFL football. To pinpoint the exact CBS channel number for your location, utilize a local TV guide specifically designed for the 32931 zip code, such as TVTV.us. This ensures you’re tuned into the correct frequency whether you’re using an over-the-air antenna, cable, or satellite service.

Stay informed about schedule changes and special programming events by checking the official CBS website or a regularly updated TV listings resource. Don’t miss out on primetime favorites and breaking news – stay connected to CBS in Cocoa Beach!

FOX Stations in Cocoa Beach, FL

FOX Broadcasting Company in Cocoa Beach delivers a dynamic mix of entertainment, including popular scripted dramas, captivating comedies, thrilling reality competitions like The Masked Singer, and live sporting events, notably NFL and NASCAR coverage. Finding the precise FOX channel number requires a localized TV guide; resources like TVTV.us cater specifically to the 32931 zip code, ensuring accurate tuning for over-the-air, cable, or satellite viewers.

To remain current with program schedules and any last-minute alterations, consult the official FOX website or a dependable TV listings service. Don’t miss out on primetime shows and breaking news – stay tuned to FOX in Cocoa Beach for a consistently engaging viewing experience!

Digital Television Transition & Frequency Information

The digital television (DTV) transition, completed years ago, significantly altered how broadcasts are received in Cocoa Beach, FL. Analog signals were discontinued, requiring viewers to utilize digital tuners or converter boxes. Local stations now transmit using digital frequencies, offering improved picture and sound quality, and enabling the addition of multiple channels through multicasting.

Understanding these frequencies is crucial for optimal over-the-air reception. Resources detailing Cocoa Beach TV station call signs also provide their corresponding digital frequencies. Regularly rescanning your TV is recommended to ensure it picks up all available channels. Staying informed about potential future changes in broadcast technology will guarantee continued access to local programming.

Over-the-Air TV Listings for Cocoa, FL

For Cocoa, FL residents preferring free, over-the-air television, accessing current listings requires understanding available channels and utilizing online resources. TVTV.us provides a dedicated section for broadcast TV listings, allowing viewers to select Cocoa, FL, and view schedules for local stations. These listings detail program times, titles, and networks, offering a comprehensive guide to what’s currently airing.

Optimal reception depends on antenna placement and signal strength. Websites detailing local TV stations also often include coverage maps. Remember to rescan your TV periodically to discover newly added channels or changes in existing broadcasts. Enjoying local news, entertainment, and sports is readily accessible with a quality antenna and reliable listing information.

Cable TV Listings in Cocoa Beach

Cocoa Beach cable subscribers access TV listings through their provider’s on-screen guide, website, or mobile app. These guides typically offer interactive program schedules, allowing viewers to browse by channel, time, or program title. Popular providers may include options for personalized recommendations and recording features, enhancing the viewing experience.

To find specific program information, consult your provider’s official listing source. TVTV.us also allows users to select their cable provider to view tailored schedules. Remember that cable listings can vary based on your specific package and location within Cocoa Beach. Exploring your provider’s resources ensures you stay informed about your favorite shows and upcoming events.

Streaming Services & Local Channels

Streaming services are increasingly popular alternatives to traditional cable, offering access to local channels in Cocoa Beach. Many platforms now include live TV options, mirroring the experience of broadcast and cable television. However, availability of local channels can vary depending on the service and your geographic location.

YouTube TV, Hulu + Live TV, and Sling TV are examples of services that may carry local Cocoa Beach affiliates. Checking each provider’s channel lineup is crucial to confirm availability. Utilizing streaming services provides flexibility and convenience, allowing viewers to watch on multiple devices. Combining streaming with an over-the-air antenna can maximize local channel access and viewing options.

YouTube as a TV Viewing Platform

YouTube has evolved beyond user-generated content, becoming a significant platform for TV viewing, particularly with its dedicated channels like the UK Spotlight. This channel curates trending videos, offering a glimpse into popular culture and internet phenomena. The official YouTube app, available on iOS and Android, provides access to a vast library of content, including live streams and on-demand videos.

For Cocoa Beach residents, YouTube serves as a supplementary source of entertainment and information. While not a direct replacement for traditional TV guides, it offers a diverse range of viewing options. Exploring YouTube’s trending section can uncover new content, and subscribing to channels ensures viewers stay updated on their favorite programs and creators. It’s a dynamic platform complementing traditional TV viewing.

YouTube Trending Videos ⎼ UK Spotlight

While focused on the United Kingdom, YouTube’s Trending Videos – UK Spotlight offers a fascinating window into current online culture, showcasing what’s captivating audiences across the Atlantic. Though geographically specific, observing these trends can provide insight into broader internet phenomena influencing global viewing habits. This channel serves as a daily digest of popular music videos, gaming content, fashion, beauty tutorials, news segments, and educational resources.

For Cocoa Beach viewers seeking diverse entertainment options beyond traditional TV listings, the UK Spotlight channel presents a unique alternative. It’s a way to discover viral sensations and emerging creators, expanding viewing horizons. While not directly related to local Cocoa Beach programming, it demonstrates YouTube’s power as a content aggregator and trendsetter, influencing what people watch worldwide.

The Official YouTube App (iOS & Android)

The official YouTube app, available for both iOS and Android devices, represents a significant shift in how viewers access content, moving beyond traditional TV guide schedules and broadcast limitations. It provides access to a vast library of videos, ranging from professionally produced content to user-generated creations, offering a personalized viewing experience tailored to individual preferences.

For Cocoa Beach residents, the app isn’t a replacement for local TV listings but a complementary platform. Users can subscribe to channels they enjoy, create their own content, and share videos with friends. The app’s portability allows viewing on any device, offering flexibility beyond the confines of a living room television. It’s a gateway to global entertainment, alongside local broadcast options.

TVTV.us: Local TV Guide & Schedule

TVTV.us serves as a valuable resource for Cocoa Beach, Florida residents seeking detailed, up-to-date local television listings and schedules. This online platform aggregates programming information from various sources, allowing users to easily find out “what’s on TV tonight in America,” specifically tailored to the 32931 zip code and the Cocoa Beach area.

The site’s functionality extends to accommodating different television service providers – cable, satellite, broadcast, and internet-based options – ensuring a comprehensive overview for all viewers. TVTV.us simplifies the process of navigating the diverse landscape of television programming, offering a centralized location to discover shows, movies, and events airing on local channels. It’s a convenient tool for planning viewing schedules and staying informed about local broadcasts.

Finding TV Listings by Provider

Cocoa Beach residents have multiple avenues for accessing TV listings, but the most effective method involves specifying their television service provider. TVTV.us streamlines this process, allowing users to select from a range of options including cable, satellite, broadcast (over-the-air), and internet-based streaming services.

This provider-specific filtering ensures that the displayed listings accurately reflect the channels and programming available to each viewer. Without this customization, listings may include channels not accessible through a particular service. Choosing your provider delivers a personalized TV schedule, eliminating confusion and maximizing viewing convenience. This targeted approach is crucial for a seamless television experience in Cocoa Beach, Florida, ensuring you never miss a favorite show.

Understanding TV Station Call Signs

TV station call signs are unique identifiers assigned by the Federal Communications Commission (FCC) to each broadcasting outlet. These seemingly random strings of letters – often four letters beginning with K or W – are crucial for identifying stations and understanding their location and ownership within the Cocoa Beach, FL, area.

For example, knowing a station’s call sign allows viewers to pinpoint its digital frequency for over-the-air reception. Furthermore, call signs help differentiate between multiple network affiliates in a single market. Investigating a station’s call sign can reveal details about its history, ownership structure, and technical specifications. This knowledge empowers viewers to navigate the local television landscape effectively and access detailed information about their preferred channels.

Local Channel Guides & Digital Signals

Accessing local channel guides in Cocoa Beach, FL, requires understanding the transition to digital signals. While traditional analog broadcasts have ceased, digital television (DTV) offers improved picture and sound quality. Viewers can utilize resources like TVTV.us to find comprehensive schedules tailored to their specific provider – cable, satellite, or over-the-air.

For those relying on antennas, knowing the digital frequency associated with each channel is essential. Local stations broadcast on specific frequencies, allowing compatible TVs to tune in. These frequencies differ from the old channel numbers. Exploring online resources and station websites provides this crucial information. Embracing digital signals unlocks a wider range of channels and enhanced viewing experiences within the Cocoa Beach area.

Omega TV 30.07.2025 ⎼ Internet & Television Packages

Omega TV, as of July 30, 2025, presents bundled internet and television packages potentially available to residents near Cocoa Beach, Florida, though primarily focused on service within Ukraine – specifically, areas like Boryspil, Hliboke, and Holovuriv. These offerings include unlimited internet access combined with a diverse selection of television channels.

While geographically distant from Cocoa Beach, the mention highlights the evolving landscape of entertainment options. Consumers increasingly seek integrated solutions for connectivity and content. Investigating local Cocoa Beach providers – cable companies, satellite services, and streaming platforms – remains the primary route for accessing tailored TV listings and packages. Omega TV’s promotion serves as a reminder of the global shift towards comprehensive digital entertainment bundles.

Boryspil.net: Internet Provider in Ukraine (Relevance Note)

The inclusion of Boryspil.net, an internet provider based in Ukraine serving locations like Boryspil, Hliboke, and Voronkiv, within a Cocoa Beach, Florida TV guide overview appears as an anomaly. This likely stems from a data aggregation issue or a cross-referencing error during information compilation. While Omega TV, associated with Boryspil.net, offers bundled internet and television services, its direct relevance to Cocoa Beach residents is minimal.

Focusing on local options is crucial for Cocoa Beach viewers. Cable providers, satellite television services, and increasingly, streaming platforms, are the primary sources for TV listings and channel access. The presence of a Ukrainian internet provider underscores the importance of verifying information sources and prioritizing locally available entertainment options when seeking a comprehensive TV guide.

Zip Code 32931 TV Listings

For residents within the 32931 zip code – encompassing Cocoa Beach, Florida – accessing accurate and up-to-date TV listings is paramount. TVTV.us provides a dedicated platform to “find out what’s on TV Tonight in America,” allowing users to filter by their specific television service provider. This includes options for cable, satellite, broadcast, and internet-based TV services.

Utilizing the zip code ensures listings reflect the local channel lineup and broadcast signals available in the Cocoa Beach area. Viewers can explore over-the-air options, cable TV schedules, and increasingly, integrate streaming services into their viewing plans. Remember to select your provider for a personalized schedule, maximizing your entertainment experience within the 32931 region.

What’s On TV Tonight in America

Determining “What’s On TV Tonight in America,” and specifically in Cocoa Beach, Florida, requires a resourceful approach. TVTV.us emerges as a key platform, enabling viewers to pinpoint current broadcasts across various providers. This includes traditional cable and satellite services, as well as over-the-air television options for those utilizing digital antennas.

Beyond conventional TV, the landscape is evolving with streaming services. While direct local channel listings on these platforms vary, understanding tonight’s broadcast schedule provides context for potential on-demand availability. Checking provider-specific guides, alongside resources like TVTV.us, ensures Cocoa Beach residents don’t miss their favorite programs or breaking news events unfolding across the nation this evening.

Broadcast TV Listings — Cocoa, FL

For Cocoa, FL residents relying on over-the-air signals, accessing broadcast TV listings is crucial. These listings detail programming available via digital antennas, bypassing cable or satellite subscriptions. Resources like TVTV.us provide schedules specifically tailored for the Cocoa area, outlining what’s airing on local ABC, NBC, CBS, and FOX affiliates.

Understanding digital frequencies is key for optimal reception. Local TV station information, including call signs and channel numbers, helps viewers fine-tune their antennas. Regularly checking these listings ensures you’re aware of schedule changes and can maximize your free, over-the-air viewing experience. This method offers a cost-effective alternative to paid television services, delivering local news, entertainment, and sports directly to your television.

Accessing TV Listings Online

Cocoa Beach residents have numerous online avenues for discovering what’s on TV. Websites like TVTV.us centralize schedules, allowing users to filter by provider – be it cable, satellite, or broadcast – for personalized listings. These platforms offer comprehensive guides, detailing show times, channels, and program descriptions, ensuring you never miss a favorite program.

Beyond dedicated TV listing sites, providers themselves often feature online schedules. Furthermore, exploring the official websites of major networks (ABC, NBC, CBS, FOX) provides previews of upcoming shows and detailed episode guides. The convenience of online access allows for easy planning and discovery, adapting to the evolving landscape of television viewing in Cocoa, FL, and beyond.

Future of TV Viewing in Cocoa Beach

The future of television in Cocoa Beach is undeniably shifting towards streaming and on-demand content, yet traditional over-the-air and cable options remain relevant. The integration of platforms like YouTube, offering both trending videos and a growing library of free content, presents a compelling alternative to conventional TV. Expect increased personalization, with algorithms tailoring recommendations to individual viewing habits.

Omega TV’s internet and television packages signal a trend towards bundled services. As technology advances, expect seamless transitions between broadcast, cable, and streaming, potentially accessed through a unified interface. The availability of local channels via streaming will become increasingly crucial, ensuring Cocoa Beach residents stay connected to community programming and local news, despite evolving viewing habits.

canon 6d mark ii manual

This manual provides comprehensive instructions for the Canon EOS 6D Mark II, detailing features and functions for optimal use and photographic success.

What is the Canon 6D Mark II?

The Canon EOS 6D Mark II is a full-frame digital SLR camera renowned for its exceptional image quality and versatile performance. It boasts a 26.2-megapixel sensor, enabling stunning detail and low-light capabilities. This camera is designed for both amateur and professional photographers seeking a balance between portability and advanced features.

It offers a robust autofocus system, high-speed continuous shooting, and full HD video recording. The 6D Mark II’s connectivity options, including Bluetooth and Wi-Fi, enhance usability and image sharing, making it a powerful tool for modern photography.

Importance of the User Manual

The Canon 6D Mark II user manual is crucial for unlocking the camera’s full potential. It provides detailed guidance on every function, from basic operations to advanced customization. Understanding the manual ensures optimal image quality, proper settings for various shooting scenarios, and efficient use of the camera’s features.

It also offers troubleshooting advice, helping users resolve common issues. Accessing the latest version online guarantees up-to-date information regarding firmware updates and expanded functionalities, maximizing the photographic experience.

Getting Started with Your Camera

Begin your journey with the Canon 6D Mark II by carefully unboxing, charging the battery, and inserting a formatted memory card for immediate use.

Unboxing and Initial Setup

Carefully unpack your Canon EOS 6D Mark II, ensuring all included accessories are present – camera body, battery, battery charger, strap, and manuals. Before first use, inspect the camera for any physical damage. Attach the strap securely for safe handling. Initial setup involves selecting your language, date, and time settings via the camera’s menu system. Register your camera on Canon’s website to access support and updates; Familiarize yourself with the button layout and basic operations as outlined in the provided documentation. This initial configuration prepares your camera for optimal performance.

Charging the Battery

To charge the Canon 6D Mark II’s battery, connect the battery charger to a suitable power outlet using the provided cable. Insert the battery into the charger, ensuring correct polarity. The charging indicator light will illuminate, typically red while charging and turning green when complete. A full charge typically takes several hours. Canon recommends using only the supplied charger to avoid damage. Do not interrupt the charging process. Always remove the battery from the charger once fully charged to prolong its lifespan and prevent overcharging.

Inserting and Formatting Memory Cards

The Canon 6D Mark II supports SD, SDHC, and SDXC memory cards. Locate the memory card slot, usually on the side of the camera, and insert the card until it clicks into place. To format a card, navigate to the menu, select ‘Format,’ and choose the card. Formatting erases all data, so back up important files beforehand. Canon recommends formatting cards in the camera for optimal performance. Regularly formatting ensures compatibility and prevents potential errors during shooting. Always eject the card safely before removing it.

Understanding the Camera Interface

The 6D Mark II features intuitive controls, an LCD screen for menu navigation, and a viewfinder providing essential shooting information for a seamless experience.

Buttons and Dials Explained

The Canon 6D Mark II boasts a thoughtfully designed control layout. The main dial adjusts shooting modes, while the quick control dial modifies settings like aperture and shutter speed. A dedicated AF-ON button enables independent autofocus activation, and the multi-controller allows precise focus point selection. Buttons provide direct access to essential functions like ISO, white balance, and picture style. The menu button navigates the camera’s extensive settings. Understanding each control’s function is crucial for efficient operation and customizing the camera to your shooting preferences, ultimately enhancing your photographic workflow and creative control.

LCD Screen and Menu Navigation

The 6D Mark II’s LCD screen offers a clear view for composing shots and reviewing images. Menu navigation is intuitive, organized into tabs for shooting, AF, setup, and more. Utilize the directional buttons and SET button to navigate and confirm selections. The ‘Q’ button provides quick access to frequently used settings. The screen displays vital shooting information, including exposure settings and battery life. Familiarizing yourself with the menu structure and LCD display is essential for efficiently customizing camera settings and accessing important information during shooting sessions.

Viewfinder Information

The Canon 6D Mark II’s optical viewfinder provides a bright, clear view of the scene. It displays crucial shooting information, including focus points, exposure settings (aperture, shutter speed, ISO), and metering mode. A focus confirmation indicator illuminates when the subject is in focus. The viewfinder also shows the selected AF mode and number of active focus points. Utilizing the viewfinder allows for precise composition and monitoring of shooting parameters, offering a direct visual connection to the subject and enhancing the overall shooting experience.

Shooting Modes and Settings

The 6D Mark II offers diverse shooting modes, from fully automatic options for beginners to advanced manual controls for experienced photographers’ creative vision.

Auto Modes for Beginners

For those new to photography, the Canon 6D Mark II provides several convenient Auto modes. These intelligently analyze the scene and automatically select optimal settings for exposure, focus, and white balance. Scene Intelligent Auto mode recognizes various shooting situations – portrait, landscape, sports, and more – adjusting settings accordingly. The Flash Auto mode manages the built-in flash for appropriate illumination. Creative Auto allows some user control over depth of field (blurring the background) while still automating other settings. These modes are perfect for quickly capturing quality images without needing to understand complex camera settings, enabling beginners to confidently explore their photographic creativity and learn at their own pace.

Aperture Priority (Av) Mode

Aperture Priority (Av) mode grants you control over the lens aperture, directly influencing depth of field. A wider aperture (lower f-number) creates a shallow depth of field, ideal for portraits with blurred backgrounds. Conversely, a narrower aperture (higher f-number) maximizes depth of field, suitable for landscapes where sharpness throughout the scene is desired. The camera automatically sets the shutter speed to achieve proper exposure based on your chosen aperture and the lighting conditions. This mode allows creative control over image aesthetics while simplifying exposure management, offering a balance between automation and manual adjustment.

Shutter Priority (Tv) Mode

Shutter Priority (Tv) mode empowers you to dictate the shutter speed, controlling motion blur and freezing action. Faster shutter speeds (e.g., 1/1000s) halt movement, perfect for sports or wildlife photography. Slower shutter speeds (e.g., 1/30s) introduce motion blur, conveying a sense of speed or creating artistic effects like silky water. The camera automatically adjusts the aperture to maintain correct exposure, based on your selected shutter speed and ambient light. This mode is invaluable when prioritizing either capturing sharp details or artistically representing movement within your images.

Manual Mode (M) – Full Control

Manual Mode (M) grants complete creative authority over both aperture and shutter speed, allowing precise exposure control. This mode is ideal for challenging lighting conditions or when a specific aesthetic is desired. You independently set the aperture to manage depth of field – shallow for blurred backgrounds, deep for sharp landscapes. Simultaneously, you control shutter speed to freeze or blur motion. Utilizing the camera’s light meter is crucial in ‘M’ mode, ensuring proper exposure. Mastering Manual Mode unlocks your full photographic potential, offering unparalleled artistic freedom.

Focusing and Image Quality

Explore autofocus options, focus point selection, and image quality settings like RAW versus JPEG to achieve sharp, detailed photographs with your Canon 6D Mark II.

Autofocus Modes and Selection

The Canon 6D Mark II offers a variety of autofocus (AF) modes to suit different shooting scenarios. One-Shot AF is ideal for stationary subjects, locking focus when the shutter button is half-pressed. Continuous AF (AI Servo) tracks moving subjects, continuously adjusting focus as they move. AI Focus AF intelligently switches between One-Shot and AI Servo. Manual Focus is also available for precise control.

Selecting the appropriate AF mode is crucial for sharp images. Consider the subject’s movement and your desired outcome. Experiment with different modes to understand their behavior and optimize your results. Proper AF mode selection significantly impacts image clarity and overall photographic quality.

Focus Points and Area Selection

The Canon 6D Mark II features 45 focus points, offering versatile coverage across the frame. You can select individual focus points for precise targeting, or utilize AF point expansion for tracking moving subjects. Area selection modes include Single-point AF, Zone AF (allowing selection of a zone of focus points), and Large Zone AF for wider coverage.

Choosing the right area selection mode depends on the subject and composition. Single-point AF is best for static subjects, while Zone AF is useful for subjects within a defined area. Understanding these options allows for greater control over focus and ensures sharp, well-defined images.

Image Quality Settings (RAW vs. JPEG)

The Canon 6D Mark II offers choices between RAW and JPEG image formats. JPEG files are compressed, smaller in size, and ready for immediate use, but offer limited editing flexibility. RAW files, conversely, contain all image data captured by the sensor, providing maximum editing latitude in post-processing.

Selecting RAW is ideal for serious photographers who wish to fine-tune exposure, white balance, and other parameters. JPEG is suitable for casual shooting or when file size is a concern. Consider your workflow and editing needs when choosing the appropriate image quality setting.

Connectivity and Wireless Features

The Canon 6D Mark II boasts Bluetooth and Wi-Fi capabilities, enabling seamless smartphone pairing for image transfer and remote camera control functionality.

Bluetooth Functionality and Pairing

Bluetooth connectivity on the EOS 6D Mark II establishes a low-power, constant connection with compatible mobile devices. This allows for continuous communication, facilitating features like image browsing and remote shutter release. Pairing involves navigating to the camera’s Bluetooth menu and selecting your smartphone or tablet from the available devices.

Once paired, the Canon Camera Connect app enables wireless image transfer directly to your device, simplifying sharing and backup processes. The stable connection ensures reliable operation, even in challenging environments. Remember to enable Bluetooth on both the camera and your mobile device for successful pairing and functionality.

Wi-Fi Connectivity and Canon Camera Connect App

Wi-Fi connectivity on the Canon EOS 6D Mark II unlocks a range of wireless capabilities, primarily accessed through the Canon Camera Connect app. This app, available for both iOS and Android, allows for seamless image transfer to smartphones and tablets, as well as remote camera control. To connect, select the Wi-Fi network from the camera’s settings and enter the password if prompted.

The app provides features like live view monitoring, remote shutter release, and easy sharing to social media platforms. Ensure your camera and mobile device are on the same Wi-Fi network for optimal performance and a stable connection.

Remote Control via Smartphone

Utilizing the Canon Camera Connect app, the EOS 6D Mark II offers comprehensive remote control functionality via your smartphone. This allows photographers to trigger the shutter remotely, adjust camera settings like aperture, shutter speed, and ISO, and even preview the image directly on their mobile device’s screen.

This feature is incredibly useful for self-portraits, group photos, or situations where physically touching the camera might cause unwanted movement. The app provides a live view feed, ensuring precise composition and focus before capturing the shot, enhancing creative control and convenience.

Advanced Features and Customization

Explore personalized settings like Custom Functions, My Menu, Picture Style options, and white balance adjustments to tailor the 6D Mark II to your preferences.

Custom Functions and My Menu

The Canon 6D Mark II offers extensive customization through its Custom Functions. These allow photographers to personalize camera operations, assigning specific controls to buttons and dials for quicker access to frequently used settings.

My Menu is a powerful feature enabling users to create a personalized menu tab containing their most-used settings. This streamlines workflow by eliminating the need to navigate through multiple menu screens.

Both features significantly enhance efficiency, allowing photographers to adapt the camera to their individual shooting style and preferences, ultimately improving responsiveness and creative control during critical moments.

Picture Style Settings

Canon’s Picture Style settings are pre-defined image processing parameters that influence the look of your JPEG images directly from the camera. Options include Standard, Portrait, Landscape, Neutral, Faithful, and Monochrome, each tailored for specific shooting scenarios.

These styles adjust sharpness, contrast, color saturation, and tone to achieve desired aesthetic results. Users can also customize these presets or create entirely new Picture Styles to match their unique vision.

RAW images are unaffected by Picture Style, preserving maximum data for post-processing flexibility, but Picture Styles offer convenient in-camera adjustments for JPEGs.

White Balance Adjustment

Accurate white balance ensures colors are rendered naturally, regardless of the light source. The Canon 6D Mark II offers Auto White Balance (AWB), which generally performs well, alongside presets for Daylight, Cloudy, Shade, Tungsten, and Fluorescent lighting conditions.

For precise control, Custom White Balance allows you to manually set white balance using a white or gray card. This is crucial for consistent color in challenging lighting.

White Balance Correction further refines color temperature and tint, offering fine-tuning options for perfect image coloration, especially when shooting in RAW format.

Troubleshooting Common Issues

This section addresses frequent problems like error messages, battery life concerns, and connectivity difficulties, offering solutions for a smooth shooting experience.

Error Messages and Solutions

Encountering error messages on your Canon 6D Mark II can be frustrating, but often easily resolved. Common errors include card errors (check card compatibility and formatting), lens communication issues (ensure proper connection and cleaning), and internal camera errors. The camera’s display will usually provide an error code; consult the full manual for a detailed explanation of each code.

For card errors, try a different card or reformat the existing one within the camera. Lens errors may require cleaning the contacts on both the lens and camera body. Internal errors sometimes resolve with a camera reset or, in rare cases, may indicate a need for professional service. Always back up your images regularly to prevent data loss.

Battery Life Problems

Reduced battery life on your Canon 6D Mark II can stem from several factors. Frequent use of Live View, recording video, and wireless features (Bluetooth and Wi-Fi) significantly drain power. Cold weather also impacts battery performance. Ensure the battery is fully charged before use and consider carrying a spare, especially during extended shoots.

To maximize battery life, disable unnecessary features, shorten auto-off timer settings, and use the optical viewfinder instead of Live View whenever possible; Avoid extreme temperatures. If the battery still drains quickly, it may be nearing the end of its lifespan and require replacement.

Connectivity Issues

Experiencing trouble connecting your Canon 6D Mark II via Bluetooth or Wi-Fi? First, verify Bluetooth is enabled on both the camera and your smartphone. Ensure the Canon Camera Connect app is up-to-date. For Wi-Fi, confirm you’ve entered the correct password and are within range of the network.

If pairing fails, try resetting the camera’s Wi-Fi settings and re-attempting the connection process. Interference from other wireless devices can also cause issues. Restarting both the camera and your mobile device often resolves connectivity problems. Check Canon’s website for firmware updates.

Resources and Support

Canon’s official website offers manuals, drivers, FAQs, and support forums for the 6D Mark II, providing extensive assistance and troubleshooting guidance.

Canon’s Official Website for Manuals and Drivers

For the most up-to-date resources regarding your Canon EOS 6D Mark II, Canon’s official website is the primary destination; Here, you can directly download the complete user manual in PDF format, ensuring you have the latest guidance at your fingertips.

Furthermore, the website hosts essential drivers and software updates crucial for optimal camera performance and compatibility with your computer. Access to firmware updates is also provided, enhancing camera functionality and addressing potential issues.

Canon also provides online technical support and troubleshooting resources, assisting users with any challenges they may encounter. This centralized hub ensures users have everything needed to maximize their 6D Mark II experience.

Frequently Asked Questions (FAQs)

Many common queries regarding the Canon EOS 6D Mark II are addressed in a dedicated Frequently Asked Questions section. These FAQs cover a wide range of topics, from basic operation and setup to more advanced features and troubleshooting steps.

Users can quickly find answers to frequently encountered problems, such as memory card compatibility, Wi-Fi connectivity issues, and autofocus performance. Canon’s FAQ resource aims to provide swift solutions to common user concerns.

Exploring these FAQs can often resolve issues without needing to consult the full manual or contact support, saving time and ensuring a smoother shooting experience with your camera.

Canon Support Forums and Communities

Canon fosters vibrant online communities and support forums where 6D Mark II users can connect, share knowledge, and seek assistance. These platforms offer a valuable resource for troubleshooting, learning new techniques, and discussing camera-related topics.

Experienced users and Canon representatives actively participate, providing guidance and solutions to common problems. Forums allow users to post questions, share images, and benefit from collective expertise.

Engaging with these communities can significantly enhance your understanding of the camera and unlock its full potential, fostering a collaborative learning environment for all Canon enthusiasts.

the poisoner’s handbook pdf

The Poisoner’s Handbook: A Comprehensive Overview

Milwaukee V-Twin, a prominent Harley-Davidson forum, boasts over 30,000 members and 1․7 million posts, offering extensive discussions and resources for enthusiasts since 2003․

Historical Context of the Handbook

Milwaukee V-Twin, established in 2003, quickly became the central online hub for Harley-Davidson aficionados across Germany, Austria, and Switzerland․ With a vibrant community exceeding 30,000 members and a massive archive of over 1․7 million contributions, the forum provides a space for sharing knowledge and experiences․

Discussions range from classic Evolution and Twin Cam models to the latest Milwaukee-Eight engines, including dedicated sections for Dyna, FXR, Softail, and Touring bikes․ The forum’s active user base regularly shares images, asks questions, and offers assistance, fostering a strong sense of camaraderie․ It’s a valuable resource for both seasoned riders and newcomers alike․

The Authors: Alexander Gettler and Rudolph Witthaus

Milwaukee V-Twin’s forum structure is meticulously organized, featuring dedicated boards for various model lines – Evolution, Twin Cam, Milwaukee-Eight, Dyna, FXR, Sportster, and Touring․ Users can easily navigate to relevant sections and participate in focused discussions․ The “Alles, was sonst noch so auf der Seele brennt” (Everything that burns on the soul) board caters to off-topic conversations․

Regularly updated with Harley-Davidson news and featuring a comprehensive FAQ section, the forum ensures members stay informed․ A user map visually represents the community’s geographical spread, and a robust search function facilitates quick access to past discussions․ Registration is required to fully participate, fostering a secure and engaged environment․

The Rise of Forensic Toxicology in the Early 20th Century

Milwaukee V-Twin’s forum actively encourages members to share images of their Dynas, fostering a visual gallery of customized bikes; The LiveWire (Revelation) section caters to discussions surrounding Harley-Davidson’s electric motorcycle line, reflecting the brand’s evolving technology․ Established in 2003, the forum has become a central hub for German, Austrian, and Swiss Harley enthusiasts․

The platform’s longevity and substantial member base demonstrate its enduring relevance․ Frequent updates and a commitment to community engagement contribute to its continued success․ The forum’s rules and moderation ensure a respectful and informative environment for all participants, promoting constructive dialogue․

Key Poisons Detailed in the Handbook

Harley-News within Milwaukee V-Twin provides updates, while the user map facilitates connections among members across Germany, Austria, and Switzerland․

Arsenic: Detection and Symptoms

Milwaukee V-Twin serves as a central hub for Harley-Davidson aficionados, fostering a vibrant community with dedicated forums for various model lines – Evolution, Twin Cam, and Milwaukee-Eight․ The platform’s extensive archive, exceeding 1․7 million posts, showcases a wealth of knowledge accumulated since its inception in 2003․

Users actively engage in discussions ranging from technical repairs and modifications to sharing personal experiences and imagery of their bikes․ Specific boards cater to Dyna, FXR, Softail, and Touring models, ensuring focused conversations․ The forum also features sections for general Harley-Davidson news, a user map for networking, and essential resources like FAQs and forum rules, promoting a collaborative and informative environment for all members․

Cyanide: Rapid Action and Forensic Challenges

Milwaukee V-Twin’s forum structure is meticulously organized, allowing users to quickly navigate to relevant discussions․ Dedicated sections exist for specific model years, like the 2026 models, and a general area for topics that don’t fit neatly into existing categories․ Registered members can actively participate, while guests are welcome to browse and observe the community’s interactions․

The platform’s longevity – operating since 2003 – has cultivated a deep repository of information, making it an invaluable resource for both novice and experienced Harley-Davidson owners․ Regular updates and active moderation ensure the forum remains a dynamic and helpful space for enthusiasts across Germany, Austria, and Switzerland․

Strychnine: Identifying the Bitter Taste of Death

Milwaukee V-Twin fosters a vibrant community centered around Harley-Davidson’s Sportster Evolution models․ Within the forum, dedicated threads allow members to share images of their bikes, discuss modifications, and troubleshoot common issues․ The Touring section, focusing on Grand American Touring models, provides a space for long-distance riders to exchange advice and plan routes;

The forum’s user map feature visually represents the geographical distribution of its members, highlighting the widespread appeal of Harley-Davidson․ A comprehensive FAQ section addresses common questions, while clearly defined rules ensure a respectful and productive environment for all participants․ New users are encouraged to register and join the conversation;

Thallium: The “Poisoner’s Poison” and its Subtle Effects

Milwaukee V-Twin’s forum structure organizes discussions by model line, including Evolution, Twin Cam, and Milwaukee-Eight engines․ A dedicated area caters to Dyna and FXR models, offering specialized support and information․ The “Alles, was sonst noch so auf der Seele brennt” section – translating to “Everything that burns on the soul” – serves as a catch-all for off-topic discussions․

Registered users can mark boards as read, ensuring they don’t miss new posts․ The forum actively encourages members to start new threads and contribute to existing conversations․ Regular updates and Harley-Davidson news keep the community informed about the latest developments in the motorcycle world․

Analytical Techniques Described

Milwaukee V-Twin facilitates user registration and provides a searchable FAQ section, alongside forum rules, fostering a helpful community for Harley-Davidson owners․

Marsh Test for Arsenic Detection

Milwaukee V-Twin’s forum structure is meticulously organized, featuring dedicated sections for Evolution, Twin Cam, and Milwaukee-Eight models, alongside specific boards for Dyna and FXR bikes․ The platform encourages members to share images of their Dynas, fostering a visual gallery of customized motorcycles․

Furthermore, a dedicated space exists for the LiveWire (Revelation) model, acknowledging the shift towards electric motorcycles within the Harley-Davidson lineup․ The forum’s user map visually represents member locations, enhancing community connection․ Regular updates include Harley-Davidson news, ensuring members stay informed about the latest developments․

The site’s robust search functionality and comprehensive FAQ section aid navigation, while clearly defined rules maintain a respectful and productive environment for all participants․

Colorimetric Tests for Cyanide Identification

Milwaukee V-Twin’s forum actively supports discussions surrounding the Softail series, where classic design meets modern engineering, allowing members to showcase their bikes and experiences․ A dedicated section caters to enthusiasts of Harley-Davidson Sportster Evolution models, fostering a specialized community․ The forum’s “Modelle 2026” board serves as a hub for all things related to the newest Harley-Davidson releases․

Members can freely discuss topics that don’t fit neatly into existing categories within the “Alles, was sonst noch so auf der Seele brennt” section․ The platform’s registration process is straightforward, encouraging new members to join and contribute to the vibrant community․

The forum’s consistent activity, evidenced by posts dating back to January 17, 2026, demonstrates its ongoing relevance․

Spot Tests for Common Poisons

Milwaukee V-Twin’s forum provides a comprehensive user map, aiding navigation and connection within the extensive community․ The FAQ section addresses common queries, while clearly defined rules ensure a respectful and productive environment․ The forum’s structure, categorized under “Modelllinien,” facilitates focused discussions on specific Harley-Davidson models, including Evolution, Twin Cam, and Milwaukee-Eight engines․

Dedicated boards exist for Dyna and FXR models, allowing owners to share images and experiences․ The LiveWire (Revelation) section caters to the electric motorcycle enthusiasts․ Regular updates, like the Harley-News section from March 6, 2025, keep members informed․

The forum’s active nature is highlighted by recent posts from July 12, 2022, and January 17, 2026․

Spectroscopic Methods Emerging in the Era

Milwaukee V-Twin’s forum fosters a vibrant community where members can explore the Softail series, sharing classic and modern experiences alongside captivating imagery․ Discussions extend to Harley-Davidson Sportster Evolution models, providing a dedicated space for enthusiasts to connect and exchange knowledge․ The forum’s registration process is straightforward, welcoming new members to join the conversation․

The “Modelllinien” section offers a structured approach to navigating discussions, categorized by model type․ A “Board als gelesen markieren” function helps users stay updated, while the option to create new topics encourages active participation․

Recent activity, noted on January 17, 2026, demonstrates the forum’s ongoing engagement․

Case Studies Highlighted in the Book

Harley-News updates are regularly posted on Milwaukee V-Twin, keeping members informed about the latest developments within the Harley-Davidson world and community․

The Eva Tildesley Case: A Landmark Arsenic Trial

Milwaukee V-Twin serves as a central hub for Harley-Davidson owners across Germany, Austria, and Switzerland, fostering a vibrant community spirit․ The forum’s structure is meticulously organized, featuring dedicated sections for various model lines – Evolution, Twin Cam, Milwaukee-Eight, Dyna, FXR, and even the innovative LiveWire․

Users can readily explore specific topics, from general discussions to detailed image galleries showcasing their bikes․ A robust search function and FAQ section further enhance the user experience, ensuring members can quickly find the information they need․ The platform’s active moderation team maintains a respectful and informative environment, making it a valuable resource for both novice and experienced riders․

The Hall-Mills Murder: A Complex Cyanide Investigation

Milwaukee V-Twin’s forum boasts a dedicated space for Touring and Grand American Touring models, catering to enthusiasts of long-distance riding and classic Harley-Davidson aesthetics․ The platform’s January 2026 updates highlight ongoing discussions about the 2026 model year, providing a space for speculation and information sharing․

Members actively participate in threads covering everything from technical issues to customization ideas, creating a collaborative environment․ The “Alles, was sonst noch so auf der Seele brennt” section offers a catch-all for topics that don’t fit neatly into existing categories, demonstrating the forum’s commitment to inclusivity and open discussion․

Other Notable Poisoning Cases Analyzed

Milwaukee V-Twin facilitates exploration of the Softail series, where classic design meets modern engineering, allowing members to share images and experiences․ Discussions center around Harley-Davidson Sportster Evolution models, fostering a community for dedicated enthusiasts․ The forum, established in 2003, provides a platform for over 30,000 members to contribute to more than 1․7 million posts․

Regular updates, like those from January 17, 2026, keep the community informed about new threads and topics․ The forum’s structure, including marked boards and dedicated sections, ensures easy navigation and focused discussions for all Harley-Davidson aficionados․

The Handbook’s Impact on Legal History

Milwaukee V-Twin’s forum structure, with marked boards and dedicated sections, streamlines navigation for Harley-Davidson enthusiasts seeking focused discussions and community engagement․

Establishing Forensic Toxicology as Court Evidence

Milwaukee V-Twin serves as a vibrant online hub for Harley-Davidson aficionados across Germany, Austria, and Switzerland, fostering a strong sense of community․ The forum’s detailed categorization, encompassing Evolution, Twin Cam, and Milwaukee-Eight models, allows users to pinpoint relevant discussions effortlessly․ Dedicated spaces for specific models like Dyna, FXR, and Sportster further enhance the user experience․

The platform’s active participation, evidenced by over 1․7 million contributions, demonstrates its value as a resource for troubleshooting, sharing modifications, and simply connecting with fellow riders․ New members are welcomed, and a comprehensive FAQ section assists newcomers in navigating the forum’s features and guidelines․ Regular updates and Harley-Davidson news keep the community informed․

Shifting the Burden of Proof in Poisoning Cases

Milwaukee V-Twin’s forum structure facilitates focused discussions on Touring and Grand American Touring models, catering to enthusiasts of long-distance riding․ The “Models 2026” section indicates a forward-looking approach, anticipating and addressing queries related to the latest Harley-Davidson releases․ A dedicated space for general topics ensures that any off-topic discussions find a suitable home, maintaining forum organization․

The platform’s user map feature visually represents the geographical distribution of its members, highlighting the widespread appeal of Harley-Davidson within the DACH region․ Registered users benefit from access to exclusive content and the ability to participate actively in forum discussions, contributing to the collective knowledge base․

Influence on Modern Forensic Science Practices

Milwaukee V-Twin’s forum provides a platform for sharing images of Dynas, showcasing the customization and individuality inherent in the Harley-Davidson community․ The LiveWire (Revelation) section demonstrates the forum’s embrace of electric motorcycle technology, acknowledging the evolving landscape of the industry․ Regular updates, like the “Harley-News” section from March 6, 2025, keep members informed about the latest developments․

The forum’s FAQ and rules sections ensure a positive and constructive environment for all users․ The ability to mark boards as read streamlines navigation, allowing members to quickly identify new posts and discussions relevant to their interests․ This fosters a sense of community and encourages active participation․

Accessing “The Poisoner’s Handbook” PDF

Milwaukee V-Twin, established in 2003, serves German, Austrian, and Swiss Harley-Davidson enthusiasts with over 1․7 million contributions from 30,000 members․

Availability of Digital Copies Online

Milwaukee V-Twin, a thriving online community since 2003, provides a dedicated space for Harley-Davidson aficionados across Germany, Austria, and Switzerland․ With over 30,000 registered members and an impressive archive exceeding 1․7 million posts, the forum serves as a central hub for information exchange and passionate discussion․

The platform features specialized boards catering to various Harley-Davidson model lines, including Evolution, Twin Cam, and Milwaukee-Eight engines․ Users actively share images, experiences, and technical insights within these dedicated sections․ Recent forum activity, as of January 17, 2026, indicates ongoing conversations about 2026 models and general Harley-Davidson related topics․ The forum also includes sections for Softail and Sportster models, fostering a comprehensive community experience․

Legality and Copyright Considerations

Milwaukee V-Twin’s forum structure is meticulously organized, featuring dedicated sections for Touring, Grand American Touring, and general model discussions․ The platform encourages active participation, evidenced by the “Board as read” function and options to start new threads․ A user map and FAQ section enhance the user experience, alongside clearly defined forum rules ensuring a respectful environment․

Registered since 2003, the forum’s longevity demonstrates its commitment to the Harley-Davidson community․ Discussions span from classic Evolution models to the latest Milwaukee-Eight engines, with a specific area for LiveWire (Revelation) enthusiasts․ The forum’s consistent activity, including posts from March 6, 2025, and July 12, 2022, highlights its enduring relevance․

Reliable Sources for PDF Downloads

Milwaukee V-Twin’s forum actively supports members seeking information on various Harley-Davidson models, including Dyna, FXR, and Sportster Evolution․ The platform’s structure facilitates focused discussions, allowing enthusiasts to share images and experiences within specific model categories․ The forum’s January 17, 2026, activity indicates ongoing engagement and a continuous flow of information․

The “Alles, was sonst noch so auf der Seele brennt” section caters to broader discussions, fostering a sense of community beyond specific model lines․ The forum’s emphasis on user registration and a comprehensive FAQ section underscores its dedication to providing a helpful and organized resource for Harley-Davidson owners and fans․

a mind spread out on the ground pdf

Article Plan: “A Mind Spread Out on the Ground” PDF

This article explores Leanne Betasamosake Simpson’s impactful work, examining themes of colonialism, trauma, and racism, alongside its reception and contemporary relevance․

BOOKEY offers summaries, while the text itself, available as a PDF, demands patience and a deep engagement with challenging subject matter․

The plan details the book’s structure, key concepts like Nishnaabeg worldview, and the intersection of colonialism with mental health, referencing Hemer’s (2018) work․

Leanne Betasamosake Simpson’s “A Mind Spread Out on the Ground” is a profoundly impactful work, quickly establishing itself as a national bestseller in Canada and gaining recognition within the United States․ This book isn’t a conventional narrative; it’s described as a bold meditation on deeply challenging themes – trauma, the enduring legacy of colonialism, systemic oppression, and the pervasive nature of racism in North America․

Readers should prepare for a demanding, yet rewarding, experience․ The writing style is unique, often described as creative and requiring patience․ Accessing the text as a PDF allows for focused study, though resources like BOOKEY offer summaries for those seeking a quicker overview․ The book’s power lies in its unflinching examination of difficult truths, prompting introspection and a deeper understanding of Indigenous experiences․

It’s a work that invites contemplation, encouraging readers to navigate complex ideas surrounding historical injustices and their ongoing consequences․

Author Biography: Leanne Betasamosake Simpson

Leanne Betasamosake Simpson is an award-winning Michi Saagiig Nishnaabeg scholar, writer, and artist․ Her multifaceted work spans poetry, fiction, essays, and traditional Anishinaabe teachings․ She holds a Ph․D․ from the University of Western Ontario and is widely recognized for her commitment to Indigenous knowledge and decolonial thought․

Simpson’s writing consistently centers Indigenous perspectives, challenging dominant narratives and advocating for social justice․ “A Mind Spread Out on the Ground” exemplifies her dedication to exploring the complexities of Indigenous trauma, resilience, and the ongoing impacts of colonialism․ Her work isn’t simply academic; it’s deeply rooted in lived experience and community engagement․

She is a vital voice in contemporary literature, and her book, available as a PDF, reflects her profound understanding of history, culture, and the urgent need for reconciliation․ Resources like BOOKEY can offer introductory insights into her broader body of work․

Core Themes of the Book

“A Mind Spread Out on the Ground” profoundly explores the interconnected themes of legacy, oppression, and racism within North America․ The book serves as a bold meditation on trauma, examining its intergenerational effects on Indigenous communities․ It doesn’t shy away from confronting the harsh realities of colonial violence and its lasting consequences․

Central to the work is an investigation into how historical injustices continue to shape present-day experiences․ The PDF version allows for close reading of Simpson’s nuanced arguments․ The text requires patience, but rewards readers with a deeper understanding of these complex issues․

Furthermore, the book delves into the psychological and emotional toll of systemic discrimination, offering a powerful critique of societal structures․ BOOKEY summaries can provide a starting point, but the full text offers a richer, more immersive experience․

Colonialism and its Impact

“A Mind Spread Out on the Ground,” available as a PDF, meticulously dissects the pervasive impact of colonialism on Indigenous peoples․ The book doesn’t present colonialism as a distant historical event, but as a continuing force shaping contemporary realities․ It highlights how colonial structures have systematically dismantled Indigenous ways of life, fostering trauma and dispossession․

Simpson’s work reveals how colonialism has exacerbated mental health issues within Indigenous communities, a crucial point explored in dedicated chapters․ The text demonstrates a clear link between historical oppression and present-day struggles․

The book’s exploration extends to the insidious justifications for colonial violence, even referencing Thomas Jefferson’s adoption of genocidal rationales․ BOOKEY can offer a brief overview, but the PDF provides the full weight of Simpson’s analysis․

Indigenous Trauma and Healing

“A Mind Spread Out on the Ground,” in its complete PDF form, offers a profound meditation on intergenerational trauma within Indigenous communities․ Simpson doesn’t shy away from the painful realities of oppression and racism, acknowledging their lasting psychological and emotional scars․

However, the book is not solely focused on trauma; it also explores pathways toward healing․ While acknowledging the depth of the wounds, Simpson subtly weaves in elements of resilience and the enduring strength of Indigenous knowledge systems․

The text suggests that true healing requires a reckoning with the past and a commitment to dismantling colonial structures․ BOOKEY summaries may touch upon this, but the PDF allows for a nuanced understanding of Simpson’s complex approach to trauma and recovery․

Legacy of Oppression and Racism

“A Mind Spread Out on the Ground,” as experienced through the complete PDF version, powerfully illustrates the enduring legacy of oppression and systemic racism in North America․ The book doesn’t present these as historical events, but as ongoing forces shaping contemporary Indigenous experiences․

Simpson meticulously details how colonial policies and attitudes continue to manifest in various forms of social injustice, impacting mental health, community well-being, and cultural survival․ The text reveals a disturbing pattern of justification for harmful actions, even reaching figures like Thomas Jefferson․

Exploring specific chapters reveals how these legacies are deeply embedded within family histories and collective memory․ While BOOKEY might offer a condensed overview, the PDF provides the necessary depth to fully grasp the scope of this historical and present-day reality․

The Book’s Structure and Style

“A Mind Spread Out on the Ground,” in its complete PDF form, defies conventional narrative structures․ It’s not a linear story, but rather a collection of fragmented thoughts, poems, and essays, mirroring the fractured experience of trauma and displacement․

The style is deliberately non-traditional, employing a stream-of-consciousness approach that demands active engagement from the reader․ This stylistic choice isn’t accidental; it reflects a Nishnaabeg worldview that prioritizes relationality and interconnectedness over rigid categorization․

While apps like BOOKEY can provide summaries, they struggle to capture the nuance of Simpson’s prose․ The PDF allows for a slower, more contemplative reading, essential for appreciating the book’s poetic language and challenging form․ It’s a work of creativity, a masterpiece in its own right․

Key Concepts Explored in the Text

The “A Mind Spread Out on the Ground” PDF deeply explores foundational Indigenous concepts, central to understanding its powerful message․ Nishnaabeg worldview, emphasizing interconnectedness and the land, is paramount, shaping the book’s fragmented structure and poetic language․

Anishinaabe kinship systems, often overlooked in Western thought, are presented as vital for healing and resisting colonial structures․ The text challenges readers to reconsider traditional notions of family and community․

Understanding these concepts is crucial; summaries, even those offered by apps like BOOKEY, can’t fully convey their depth․ The PDF allows for a direct encounter with Simpson’s articulation of these ideas, revealing their profound implications for addressing trauma and oppression․

Nishnaabeg Worldview

The Nishnaabeg worldview, central to “A Mind Spread Out on the Ground” PDF, fundamentally differs from Western perspectives․ It emphasizes a deep, reciprocal relationship with the land, viewing all living things as interconnected and possessing inherent value․ This isn’t merely an environmental ethic, but a foundational principle shaping all aspects of life․

Simpson’s work embodies this worldview through its fragmented, non-linear structure, mirroring the cyclical nature of life and the interconnectedness of stories․ The PDF format allows readers to fully immerse themselves in this perspective, experiencing the text as a living entity rather than a static object․

Understanding this perspective is vital for interpreting the book’s exploration of trauma and healing, as it offers an alternative framework for understanding well-being beyond colonial definitions․

Anishinaabe Kinship Systems

“A Mind Spread Out on the Ground” PDF intricately portrays Anishinaabe kinship systems, extending beyond immediate family to encompass all living beings and the natural world․ These systems aren’t simply about biological relation, but about reciprocal responsibility and interconnectedness – a web of obligations and support;

The book demonstrates how colonial disruption of these kinship structures has profoundly impacted Indigenous communities, contributing to trauma and loss of identity․ Accessing the PDF allows for a deeper understanding of these complex relationships, presented not as abstract concepts, but as lived realities․

Simpson’s narrative highlights how restoring and revitalizing kinship is crucial for healing and resisting ongoing colonialism, offering a pathway towards collective well-being․

Intersection of Colonialism and Mental Health

“A Mind Spread Out on the Ground” PDF powerfully illustrates the devastating intersection of colonialism and Indigenous mental health․ The text reveals how colonial policies and ongoing systemic oppression have directly contributed to intergenerational trauma, grief, and increased rates of mental health challenges within Anishinaabe communities․

The book doesn’t present mental health issues as individual pathologies, but as logical responses to historical and ongoing violence․ Scanning to download reveals a nuanced exploration of this connection, emphasizing the need for culturally-informed healing approaches․

Understanding this intersection, as presented in the PDF, is vital for dismantling colonial structures and fostering genuine reconciliation․

The Role of Storytelling and Oral Tradition

“A Mind Spread Out on the Ground” PDF deeply values storytelling and oral tradition as central to Anishinaabe knowledge, healing, and resistance․ The book itself embodies this tradition, moving beyond linear narratives to embrace a more fluid, cyclical, and relational approach to conveying complex truths․

The text demonstrates how stories aren’t simply recounting events, but actively shaping reality and maintaining cultural continuity in the face of colonial disruption․ BOOKEY summaries may offer outlines, but cannot replicate the power of Simpson’s stylistic choices․

Accessing the PDF reveals a profound commitment to reclaiming and revitalizing Indigenous ways of knowing through the enduring power of narrative․

Analysis of Specific Chapters (Based on Available Information)

Analyzing “A Mind Spread Out on the Ground” PDF reveals chapters deeply engaged with the lasting impact of historical trauma and systemic oppression․ While detailed chapter breakdowns are limited in readily available information, the overall structure suggests a deliberate exploration of legacy and its manifestations․

The text confronts racism and its pervasive influence, likely through personal narratives and reflections on collective experiences․ BOOKEY apps can provide summaries, but lack the nuance of Simpson’s prose․

The book’s power lies in its ability to connect individual struggles to broader patterns of colonial violence, demanding a reckoning with uncomfortable truths․ The PDF format allows for close reading and deeper engagement with these complex themes․

Examination of Chapters Dealing with Legacy

Chapters focusing on legacy within “A Mind Spread Out on the Ground” PDF delve into the intergenerational transmission of trauma stemming from colonialism and historical injustices․ The book, a national bestseller, meticulously unpacks how past oppressions continue to shape present realities for Indigenous communities․

These sections likely explore the weight of ancestral experiences, the disruption of cultural practices, and the enduring effects of racism․ BOOKEY summaries offer a glimpse, but cannot fully capture the emotional depth and complexity of Simpson’s writing․

The examination of legacy isn’t simply about recounting the past; it’s about understanding how it actively informs identity, relationships, and the ongoing struggle for healing and self-determination․

Chapters Focusing on Oppression and Racism

Within “A Mind Spread Out on the Ground” PDF, chapters dedicated to oppression and racism confront the systemic injustices faced by Indigenous peoples in North America․ The text, described as a profound meditation, doesn’t shy away from detailing the historical and contemporary manifestations of these forces․

These sections likely dissect the ways in which colonial structures perpetuate inequality, marginalization, and violence․ BOOKEY app summaries can provide an overview, but the book’s nuanced exploration requires a direct engagement with Simpson’s prose․

The narrative likely examines the psychological and emotional toll of racism, alongside the resilience and resistance of Indigenous communities in the face of ongoing adversity․ It’s a challenging, yet crucial, examination of a painful history․

Reception and Critical Acclaim

“A Mind Spread Out on the Ground” PDF has garnered significant recognition, notably as a national bestseller in Canada․ This acclaim speaks to the book’s powerful resonance with readers and its importance in contemporary discourse․ Critics have lauded Simpson’s work as a bold and profound exploration of trauma, legacy, oppression, and racism․

The book’s impact extends beyond sales figures, sparking conversations about Indigenous experiences and the ongoing effects of colonialism․ BOOKEY app summaries highlight its accessibility, but the full depth of the work is best experienced through direct reading․

Its success demonstrates a growing appetite for Indigenous voices and perspectives, and a willingness to confront difficult truths about North American history and society․ The book’s enduring appeal solidifies its place as a significant literary achievement․

“A Mind Spread Out on the Ground” as a National Bestseller

Achieving national bestseller status in Canada, “A Mind Spread Out on the Ground” PDF signifies a remarkable reception for Leanne Betasamosake Simpson’s work․ This success isn’t merely a matter of sales; it represents a cultural moment, indicating a broad readership eager to engage with challenging narratives about colonialism and its lasting impacts․

The book’s popularity suggests a growing awareness and demand for Indigenous voices and perspectives within the literary landscape․ BOOKEY provides summaries, but the book’s bestseller status highlights the desire for the complete, nuanced experience offered by the original text․

This achievement underscores the book’s power to resonate with a wide audience, prompting reflection on legacy, oppression, and racism in North America, and solidifying its importance in contemporary Canadian literature․

The Book’s Relevance in Contemporary Society

“A Mind Spread Out on the Ground” PDF remains profoundly relevant in today’s world, as conversations surrounding social justice, decolonization, and Indigenous rights continue to gain prominence․ The book’s exploration of trauma, legacy, and systemic oppression directly addresses ongoing issues faced by Indigenous communities․

Its insights into the intersection of colonialism and mental health are particularly crucial, given the persistent disparities in mental healthcare access and outcomes․ BOOKEY offers condensed versions, but the full text provides a deeper understanding of these complex issues․

The book challenges readers to confront uncomfortable truths about historical and ongoing injustices, fostering empathy and promoting a more informed and equitable society․ It serves as a vital resource for education and advocacy․

Availability and Accessing the PDF Version

Locating the “A Mind Spread Out on the Ground” PDF requires diligent searching, as direct links aren’t consistently provided․ Various online platforms and academic databases may host the text, often requiring institutional access or purchase․ BOOKEY provides summaries as an alternative access point․

Readers can explore university libraries, digital archives, and online booksellers for potential PDF availability․ Be mindful of copyright restrictions and ensure legitimate sourcing․ The text was accessed on June 22, 2015, according to cited references․

While a free download isn’t always guaranteed, persistent searching and utilizing academic resources can yield results․ Consider supporting the author and publisher by purchasing a physical or ebook copy when possible․

Book Summaries and Related Apps (e․g․, BOOKEY)

For those seeking a quicker understanding of “A Mind Spread Out on the Ground,” book summary apps like BOOKEY offer condensed versions of the text․ BOOKEY boasts “1000 Book Summaries to empower your mind” and “1M Quotes to motivate your soul,” providing accessible insights․

These apps are particularly useful for initial exploration or when time is limited, though they cannot replace the depth of reading the full work․ They offer a starting point for engaging with Simpson’s complex themes of colonialism, trauma, and racism․

However, remember that summaries inherently simplify nuanced arguments․ To fully appreciate the book’s artistry and intellectual weight, a direct engagement with the PDF or physical copy is highly recommended․

Academic Citations and References (Hemer, S․R․ 2018)

Scholarly engagement with “A Mind Spread Out on the Ground” necessitates proper citation and referencing․ While direct academic sources specifically analyzing Simpson’s work are emerging, related research provides contextual frameworks․

Hemer, S․R․ (2018), in “Preparing for death: Care, anticipatory grief and social death in Lihir, Papua New Guinea,” published in Mortality, 23, offers insights into the broader themes of grief, loss, and societal impact – relevant when considering Indigenous trauma explored in Simpson’s writing․

Further research will undoubtedly build upon this foundation, directly addressing the book’s unique contributions․ Proper referencing, including the PDF version’s access date (e․g․, June 22, 2015, as noted), is crucial for academic integrity and building upon existing scholarship․

Historical Context: Jefferson and Justification of Genocide

Understanding the historical roots of oppression is vital when engaging with “A Mind Spread Out on the Ground․” The text reveals a disturbing connection to past justifications for violence against Indigenous peoples․

Specifically, the book highlights how even figures like U․S; Secretary of State Thomas Jefferson adopted rationalizations – a “tantalizing, seemingly guilt-free justification for genocide” – that enabled colonial expansion and dispossession․ This historical precedent deeply informs the legacy of trauma explored within the PDF․

This context underscores the enduring impact of colonial ideologies and the systemic nature of racism, themes central to Simpson’s work and critical for a nuanced understanding of its power and relevance․

The Enduring Significance of Simpson’s Work

“A Mind Spread Out on the Ground,” whether accessed through the PDF or summarized via platforms like BOOKEY, remains a profoundly important contribution to contemporary literature and Indigenous scholarship․

Simpson’s work offers a bold meditation on trauma, legacy, oppression, and racism in North America, prompting critical reflection on the ongoing effects of colonialism․ Its national bestseller status speaks to a growing public desire to engage with these difficult truths․

The book’s enduring significance lies in its ability to challenge conventional narratives and offer a pathway towards healing and understanding, making it essential reading for anyone seeking a deeper comprehension of Indigenous experiences․

saxon math 4 5 pdf

Saxon Math 4/5 PDF: A Comprehensive Overview (Updated 02/07/2026)

Saxon Math 4/5, including Intermediate 4 and 5/4 editions, is readily available as a PDF․ Resources like the Internet Archive offer free download and streaming options․

The 3rd Edition Homeschool Kit (9781591413479) emphasizes a spiral approach, incrementally building skills and continuously reviewing concepts․ A Solutions Manual (9781591413257) is also available․

This curriculum focuses on algebraic reasoning and geometric concepts, utilizing Power Up activities to build foundational skills and a strong mental math focus․

What is Saxon Math 4/5?

Saxon Math 4/5 represents a comprehensive mathematics program designed for students typically in the 4th and 5th grade, though its adaptable nature allows for use with students at varying levels․ It’s structured around the principle of incremental learning, introducing new concepts in small, manageable steps; This approach, coupled with continuous review, aims to solidify understanding and prevent skill gaps․ The program is available in various formats, including the widely sought-after PDF versions, making it accessible for homeschoolers and educators alike․

Specifically, Saxon Math 5/4 and Intermediate 4 are key components․ Intermediate 4 serves as a bridge, preparing students for more advanced mathematical concepts․ The 3rd Edition Homeschool Kit (9781591413479) is a popular choice, offering a complete curriculum package․ Digital access through platforms like the Internet Archive provides convenient download and streaming options for the Student Edition․ The program’s strength lies in its consistent practice and reinforcement of previously learned material, ensuring long-term retention․ It’s a robust system designed to build a strong mathematical foundation․

The Spiral Approach in Saxon Math

The defining characteristic of Saxon Math 4/5 is its innovative spiral approach to learning․ Unlike traditional curricula that introduce a topic, complete it, and move on, Saxon revisits concepts repeatedly throughout the year․ This isn’t simply rote memorization; rather, each revisit builds upon prior knowledge, deepening understanding and strengthening retention․ The PDF versions of Saxon Math 5/4 and Intermediate 4 faithfully implement this method․

New material is introduced incrementally, in small steps, and then interwoven with ongoing review of previously taught concepts․ This continuous cycle ensures students aren’t forgetting earlier lessons while progressing․ The 3rd Edition Homeschool Kit (9781591413479) is specifically designed to facilitate this spiral learning․ Accessing materials as a download from resources like the Internet Archive doesn’t diminish the effectiveness of this approach․ The Solutions Manual (9781591413257) supports this by providing answers for consistent practice․ This method fosters a more robust and lasting grasp of mathematical principles․

Key Features of the 3rd Edition Homeschool Kit (9781591413479)

The Saxon Math 4/5 3rd Edition Homeschool Kit (9781591413479) is a comprehensive resource designed for effective home instruction․ A core feature is its adherence to the spiral approach, ensuring continuous review alongside new concepts․ The kit isn’t just a textbook; it’s a complete system, supporting both student learning and parental guidance․ While available as a PDF, the physical kit provides a structured learning experience․

It emphasizes algebraic reasoning and geometric concepts, building a strong foundation for future math studies․ Power Up activities are integrated to develop foundational skills, and a strong focus on mental math is maintained throughout․ The kit includes a student textbook, tests, and a Solutions Manual (9781591413257) for answer keys․ Resources like the Internet Archive offer access to supplemental materials, but the kit itself provides a cohesive and well-organized curriculum․ The Intermediate 4 adaptations are also supported within this framework․

Saxon Math 5/4 Student Edition Availability

The Saxon Math 5/4 Student Edition is accessible through various channels, including physical bookstores and online retailers․ However, a significant advantage for many users is its availability as a PDF․ The Internet Archive provides free download, borrowing, and streaming options, identified by urn:oclc:record:1036849188․ This digital format offers convenience and portability, allowing students to access the material on multiple devices․

While the 3rd Edition Homeschool Kit (9781591413479) is a popular choice, individual components like the Student Edition can be purchased separately․ The curriculum’s spiral approach, emphasizing incremental learning and continuous review, remains consistent across formats․ Users seeking the PDF version benefit from instant access and the ability to search for specific topics․ The Solutions Manual (9781591413257) complements the Student Edition, providing answers for practice problems and assessments․ Intermediate 4 resources also contribute to a comprehensive learning experience․

The Role of the Solutions Manual (9781591413257)

The Saxon Math 5/4 Solutions Manual (9781591413257) is an indispensable resource for both students and educators utilizing the Saxon curriculum․ Available through platforms like Amazon․com, it provides detailed solutions to all practice problems, investigations, and tests within the Student Edition․ This allows for self-checking, independent learning, and a deeper understanding of the concepts presented․

Whether accessing the material in physical form or as a PDF, the Solutions Manual clarifies challenging problems and reinforces correct methodologies․ It’s particularly valuable when working with the spiral approach, enabling students to review previously taught concepts effectively․ The manual supports the incremental development of new material, ensuring a solid foundation․ Resources like the Internet Archive may offer access to related materials, including adaptations for Intermediate 4․ Understanding the solutions isn’t simply about getting the right answer; it’s about grasping the underlying principles and strengthening problem-solving skills․

Intermediate 4 Adaptations and Resources

Saxon Math Intermediate 4 represents a crucial stepping stone within the Saxon Math 4/5 sequence․ Recognizing diverse learning needs, adaptations and supplementary resources are available to enhance the educational experience․ The Internet Archive hosts Saxon Math Adaptations Intermediate 4, offering alternative approaches and support materials in accessible formats, potentially including PDF versions․

These adaptations often cater to students requiring additional practice, differentiated instruction, or alternative explanations of core concepts․ Utilizing these resources alongside the core Student Edition and Solutions Manual (9781591413257) can significantly improve comprehension and retention․ The focus remains on the spiral approach, continuously reinforcing previously learned skills while introducing new challenges․ Exploring these resources allows educators and parents to tailor the curriculum to individual student needs, ensuring a solid foundation in mathematical principles; Accessing these materials, often available as downloadable PDFs, empowers a more personalized learning journey․

Understanding Lesson Structure: Pairs of Lines and Angles

Saxon Math 4/5, particularly within Intermediate 5, systematically introduces geometric concepts like pairs of lines and angles․ Lesson 31, as highlighted in available resources, specifically addresses this topic, building upon previously established foundations․ The curriculum’s structure emphasizes incremental learning, presenting new information in manageable steps․ A typical lesson incorporates a Power Up section for foundational skill reinforcement, followed by explicit instruction on the day’s concept․

Students learn to identify and classify different angle pairs formed by intersecting lines – complementary, supplementary, vertical, and adjacent angles․ Practice problems, often found within the Student Edition (available via resources like the Internet Archive as a PDF), allow for immediate application of learned concepts․ The Solutions Manual (9781591413257) provides detailed step-by-step solutions, aiding both students and educators․ This structured approach, characteristic of Saxon Math, ensures a thorough understanding of geometric relationships․

Power Up Activities: Building Foundational Skills

Saxon Math 4/5 integrates “Power Up” activities into each lesson to reinforce essential, foundational skills․ These brief, focused exercises are designed to build fluency in areas critical for mathematical success, complementing the core lesson content․ As seen in Intermediate 5, Lesson 31, Power Up includes activities like counting aloud – for example, by 12s and 5s – and rapid recall of basic facts․

These activities aren’t isolated drills; they are strategically linked to the lesson’s concepts․ Power Up also incorporates “mental math” problems, encouraging students to solve calculations in their heads, enhancing number sense․ Accessing the Saxon Math 4/5 PDF versions, often available through platforms like the Internet Archive, allows for easy review of these exercises․ The Solutions Manual (9781591413257) doesn’t typically detail Power Up solutions, as the emphasis is on quick recall and mental agility․ These activities are a cornerstone of the Saxon method, promoting automaticity and confidence․

Mental Math Focus in Saxon Math 4/5

Saxon Math 4/5 places a significant emphasis on developing strong mental math skills․ Integrated within each lesson, particularly evident in resources like the Intermediate 5 PDF, are dedicated “mental math” problems․ These aren’t simply calculations; they are designed to foster number sense and efficient problem-solving strategies․ For instance, Lesson 31 in Intermediate 5 includes questions like determining the quantity represented by “2 dozen” or “3 dozen,” prompting students to recall multiplication facts quickly․

The curriculum’s spiral approach continually reinforces these skills, ensuring long-term retention․ Accessing the Saxon Math 4/5 PDF materials, often available via the Internet Archive, allows students to practice these exercises independently․ While the Solutions Manual (9781591413257) provides answers to the core lesson problems, it generally doesn’t offer detailed solutions for the mental math section, encouraging students to rely on their internalized strategies․ This focus on mental agility is a key differentiator of the Saxon methodology․

Number Sense Development: Dozens as an Example

Saxon Math 4/5 actively cultivates number sense, and the concept of “dozens” serves as a prime example, frequently appearing in the Intermediate 5 PDF lessons․ Lesson 31 specifically utilizes dozens to prompt students to quickly recall multiplication facts – “How many is 2 dozen? ․ ․ ․ 3 dozen? ․ ․ ․ 4 dozen?” This isn’t merely rote memorization; it’s about building a flexible understanding of quantity and relationships between numbers․

The spiral approach inherent in Saxon Math ensures repeated exposure to these concepts, solidifying understanding over time․ Accessing the curriculum through a Saxon Math 4/5 PDF, potentially sourced from platforms like the Internet Archive, allows for focused practice․ The Solutions Manual (9781591413257) confirms correct answers, but the emphasis remains on students developing their own mental strategies․ Using dozens as a unit encourages students to think multiplicatively and strengthens their overall numerical fluency, a cornerstone of mathematical proficiency․

Algebraic Reasoning and Geometric Concepts

Saxon Math 4/5, accessible through a PDF version of the 3rd Edition Homeschool Kit (9781591413479), strategically integrates both algebraic reasoning and geometric concepts․ This isn’t presented as separate entities, but woven throughout the curriculum’s spiral approach․ Students aren’t simply memorizing formulas; they’re developing a foundational understanding of mathematical relationships․

The curriculum’s design emphasizes incremental learning, building upon previously taught concepts․ A Saxon Math 5/4 Student Edition, available for download and streaming via the Internet Archive, showcases this progression․ While the Solutions Manual (9781591413257) aids in verifying answers, the core focus is on students applying logical thinking to solve problems․ Intermediate 4 adaptations further refine these skills․ This approach prepares students for more advanced mathematical studies by fostering a strong conceptual base in both algebra and geometry․

Incremental Development of New Material

Saxon Math 4/5, readily available as a PDF, is fundamentally built upon the principle of incremental development․ The 3rd Edition Homeschool Kit (9781591413479) doesn’t introduce large blocks of new information at once․ Instead, concepts are broken down into smaller, manageable steps․ This approach, central to the spiral approach, ensures students aren’t overwhelmed․

Each lesson builds upon the previous one, gradually increasing complexity․ Accessing the Saxon Math 5/4 Student Edition through resources like the Internet Archive demonstrates this carefully sequenced progression․ The Solutions Manual (9781591413257) supports this learning process, allowing students to check their work and solidify understanding․ Even Intermediate 4 adaptations adhere to this principle․ This method fosters a deeper, more lasting comprehension than traditional methods, preventing gaps in knowledge and building confidence․

Continuous Review of Previously Taught Concepts

A cornerstone of Saxon Math 4/5, accessible in PDF format, is its dedication to continuous review․ Unlike curricula that move linearly, Saxon consistently revisits previously taught concepts throughout each lesson and across the entire year․ This isn’t simply repetition; it’s strategic integration․ The 3rd Edition Homeschool Kit (9781591413479) is designed with this in mind, ensuring skills aren’t forgotten․

This ongoing review is a key component of the spiral approach․ Students encounter familiar material in new contexts, reinforcing understanding and solidifying retention․ Resources like the Internet Archive, offering the Saxon Math 5/4 Student Edition, showcase this consistent practice․ The Solutions Manual (9781591413257) aids in identifying areas needing further attention, even within Intermediate 4 adaptations․ This method combats the “forgetting curve” and builds long-term mathematical proficiency․

Accessing Saxon Math 4/5 Materials Online

Fortunately, obtaining Saxon Math 4/5 resources, including PDF versions, is increasingly convenient online․ The Internet Archive stands out as a valuable repository, offering free download and streaming access to materials like the Saxon Math 5/4 Student Edition (urn:oclc:record:1036849188)․ This provides a cost-effective alternative to purchasing physical copies․

While official Saxon Publishers resources may require purchase, the Internet Archive’s availability expands access․ Users can also find adaptations, such as Saxon Math Adaptations Intermediate 4 (urn:lcp:saxonmathadaptat0000unse), offering alternative approaches․ The Solutions Manual (9781591413257) is available for purchase through retailers like Amazon, though PDF accessibility may vary․

Remember to verify the legitimacy of any PDF download source to ensure you’re receiving a safe and accurate version of the curriculum․ Exploring these online avenues provides flexible learning options for students utilizing the 3rd Edition Homeschool Kit (9781591413479)․

Free Download and Streaming Options (Internet Archive)

The Internet Archive presents a significant opportunity for accessing Saxon Math 4/5 materials without cost․ Specifically, the Saxon Math 5/4 Student Edition is available for both free download and convenient streaming (urn:oclc:record:1036849188)․ This resource is particularly beneficial for those seeking a digital version of the textbook, eliminating the need for a physical purchase․

Beyond the core student edition, the Internet Archive also hosts Saxon Math Adaptations Intermediate 4 (urn:lcp:saxonmathadaptat0000unse), offering supplementary materials and alternative learning approaches․ These resources are accessible through a user-friendly interface, allowing for easy navigation and retrieval of desired content․

While the official Solutions Manual (9781591413257) isn’t directly available for free download, the Internet Archive provides a valuable platform for accessing the core curriculum components of Saxon Math 4/5, including the 3rd Edition Homeschool Kit materials, fostering accessible education․

Saxon Math Intermediate 4 Solutions Manual: User Guide

The Saxon Math Intermediate 4 Solutions Manual (9781591413257) serves as an essential companion to the student textbook, offering detailed step-by-step solutions to all practice problems and investigations․ This guide is designed to support both students and parents in understanding the Saxon Math methodology and reinforcing key concepts;

Upon opening the manual, users will find a clear and organized layout mirroring the lesson structure of the student edition․ Each lesson’s solutions are presented in a logical sequence, enabling easy tracking of problem-solving techniques․ The manual isn’t merely a collection of answers; it demonstrates the how and why behind each solution․

This user guide introduces unique features and functionalities, aiding in effective utilization․ It’s a valuable tool for identifying areas where students may struggle and providing targeted support․ While a free PDF isn’t directly available on the Internet Archive, purchasing this manual unlocks a deeper understanding of the Saxon Math 4/5 curriculum․

The Historical Context of “Saxon” in Mathematics

The name “Saxon” in Saxon Math isn’t a random choice; it carries a rich historical weight rooted in the Anglo-Saxon period of British history․ The term originates from the Angles and Saxons, Germanic tribes who settled in Britain starting in the 5th century AD․ These groups, along with others, shaped the early English language and culture․

However, the connection to mathematics isn’t directly tied to mathematical achievements of the Anglo-Saxons themselves․ Rather, Arthur Saxon, the founder of the curriculum, chose the name to evoke a sense of tradition, discipline, and a strong work ethic – qualities he believed were essential for successful learning․ He aimed to create a rigorous and systematic approach to mathematics education․

Interestingly, the term “Anglo-Saxon” was rarely used within Britain itself historically, with “English” becoming the dominant identifier․ Despite this, the name “Saxon Math” persists, representing a commitment to a structured, incremental learning process, and a nod to a foundational period in English history, even if a direct mathematical link is absent․ Accessing a PDF of the materials doesn’t diminish this historical resonance․

Anglo-Saxon Origins and Relevance to the Name

The selection of “Saxon” for Saxon Math isn’t accidental; it deliberately references the Anglo-Saxon people – the Angles and Saxons – who migrated to Britain centuries ago․ These Germanic tribes significantly influenced the development of English language, culture, and societal structures․ While not renowned for advanced mathematical discoveries, they represent a period of foundational building and strong communal values․

Arthur Saxon, the creator of the math program, strategically chose the name to symbolize a robust, disciplined, and systematic approach to learning․ He envisioned a curriculum that mirrored the Anglo-Saxon emphasis on hard work and incremental progress․ The name aims to instill a sense of historical depth and enduring quality within the educational materials․

Despite the historical Anglo-Saxons not being primarily known for mathematical prowess, the name serves as a metaphorical representation of a solid, step-by-step learning journey․ Whether accessing the curriculum as a physical textbook or a convenient PDF, the “Saxon” moniker remains a constant reminder of its core principles․

little hippo alarm clock manual

Little Hippo Mella Alarm Clock Manual: A Comprehensive Guide

This manual provides detailed instructions for the LittleHippo Mella‚ a versatile device functioning as a sleep trainer‚ night light‚ sound machine‚ and alarm clock for children.

The LittleHippo Mella is designed to revolutionize your child’s sleep schedule‚ offering a multi-functional approach to bedtime routines. More than just a simple alarm clock‚ it’s a comprehensive sleep training system. This innovative device gently guides children towards independent sleep habits through visual cues and soothing sounds.

It combines the functionality of a sleep trainer‚ a calming night light‚ a relaxing sound machine‚ and a reliable alarm clock – all in one adorable package. The Mella aims to help kids understand when it’s time to sleep and when it’s okay to wake up‚ reducing early morning disruptions for the whole family.

What is the Little Hippo Mella Clock?

The LittleHippo Mella is a uniquely designed children’s alarm clock and sleep training aid. It’s a multifunctional device created to establish healthy sleep routines for kids of all ages. Unlike traditional alarm clocks‚ Mella utilizes a color-changing system – sun‚ moon‚ and stars – to visually communicate sleep and wake times.

Beyond sleep training‚ it functions as a comforting night light with adjustable brightness and a versatile sound machine offering white noise and lullabies. It’s a complete bedside companion designed to promote restful sleep and independence‚ helping both children and parents enjoy peaceful nights.

Key Features and Benefits

The LittleHippo Mella boasts several key features‚ including its intuitive sleep trainer function utilizing sun‚ moon‚ and star icons to signal sleep/wake times. It offers a customizable night light with adjustable colors and brightness‚ promoting a soothing bedtime environment. A built-in sound machine provides a variety of calming sounds‚ like white noise and lullabies.

Benefits include improved sleep routines‚ increased independence for children‚ and reduced early morning wake-ups for parents. Mella also functions as a standard alarm clock‚ and its user-friendly design makes it easy to operate and customize.

Setting Up Your Mella Clock

Initial setup involves unboxing‚ inspecting components‚ and powering on the device to begin navigating the Mella clock’s various functions and settings.

Unboxing and Initial Inspection

Carefully unpack your LittleHippo Mella clock and verify all components are present. The box should contain the Mella unit itself‚ and potentially a USB power cable. Inspect the clock for any visible damage sustained during shipping‚ such as cracks or dents. Ensure the buttons are intact and responsive to a gentle press.

Before first use‚ remove any protective films or packaging materials. Familiarize yourself with the clock’s layout‚ noting the button placements for easy access. Retain the original packaging for potential future returns or warranty claims. A quick visual check ensures you have a fully functional Mella ready for setup.

Powering On and Basic Navigation

To power on your LittleHippo Mella‚ connect the provided USB cable to a power source. The clock will automatically illuminate‚ displaying the current time. Navigation is primarily achieved through the buttons located on the bottom and rear of the device. Pressing these buttons cycles through various functions like alarm settings‚ sleep trainer modes‚ and sound options.

Familiarize yourself with each button’s function by gently pressing and observing the screen changes. The display is intuitive‚ showing icons representing different modes. A long press may access advanced settings. Refer to the manual for specific button combinations and their corresponding actions.

Setting the Time and Date

To set the time and date on your LittleHippo Mella‚ press and hold the “Set” button until the hour display flashes. Use the up and down buttons to adjust the hour‚ then press “Set” again to move to the minutes. Repeat this process for the year‚ month‚ and day. Ensure you select the correct AM/PM designation.

Confirm your settings by pressing “Set” one final time. The clock will then display the accurately set time and date. If adjustments are needed‚ repeat the process. Accurate timekeeping is crucial for the alarm and sleep trainer functions to operate correctly.

Using the Sleep Trainer Function

The sleep trainer utilizes sun‚ moon‚ and stars to visually signal when it’s time to sleep‚ stay in bed‚ or wake up‚ fostering healthy routines.

Understanding Sleep Phases (Sun‚ Moon‚ Stars)

The Mella clock employs a clever sleep training system represented by three distinct phases: Sun‚ Moon‚ and Stars. The Sun indicates it’s time to wake up and start the day‚ displaying a bright yellow icon. When the Moon is visible‚ children should remain quietly in bed‚ understanding it’s still nighttime. Finally‚ the Stars signal bedtime‚ prompting children to close their eyes and drift off to sleep.

These visual cues help children learn to associate each icon with a specific behavior‚ promoting independence and a consistent sleep schedule. Parents can customize the duration of each phase to align with their child’s individual sleep needs‚ creating a personalized sleep routine.

Customizing Sleep Phase Durations

The Mella clock allows parents to tailor each sleep phase – Sun‚ Moon‚ and Stars – to their child’s unique sleep patterns. Access the settings menu to adjust the length of time each icon remains illuminated. For example‚ a longer ‘Stars’ phase might be beneficial for children who require more time to fall asleep;

Similarly‚ the ‘Moon’ phase duration can be modified to encourage extended quiet time in bed. Experimenting with different timings helps establish a routine that best supports your child’s sleep needs‚ fostering healthy sleep habits and a smoother wake-up process.

Adjusting Brightness and Sound Levels

The Mella clock offers customizable brightness for both the display and night light functions. Navigate to the settings menu to select from various brightness levels‚ ensuring comfortable illumination for your child without disrupting sleep. Sound levels for lullabies‚ white noise‚ and alarm tones are also adjustable.

Parents can fine-tune the volume to a soothing level appropriate for their child’s sensitivity. Lower volumes are recommended for younger children‚ while slightly higher levels may be suitable for older kids. These adjustments promote a peaceful sleep environment tailored to individual preferences.

Alarm Clock Functionality

The Mella clock features a kid-friendly alarm‚ teaching time recognition and independence. Easily set alarm times and choose from pleasant wake-up sounds for a gentle start.

Setting the Alarm Time

To set the alarm time on your LittleHippo Mella‚ begin by pressing the alarm/sleep trainer/nap timer button. This activates the alarm function‚ displaying an alarm icon on the screen. Use the up and down buttons to adjust the hour‚ then press the center button to confirm. Repeat this process to set the desired minute.

Ensure you’ve correctly selected AM or PM. The clock utilizes a 12-hour format. Once the time is set‚ press the alarm button again to save your settings. Remember to toggle the alarm on or off as needed using the same button; the icon indicates its status. Proper configuration ensures a timely and gentle wake-up experience for your child.

Choosing Alarm Sounds

The LittleHippo Mella offers a selection of pleasant alarm sounds designed to gently wake your child. To cycle through the available options‚ press and hold the alarm button while in alarm setting mode. Sounds may include gentle melodies‚ nature sounds‚ or upbeat tunes.

Listen to a preview of each sound before selecting the one that best suits your child’s preferences. Consider a sound that is encouraging rather than jarring. The volume level can be adjusted separately to ensure it’s audible but not overly startling. Experiment to find the perfect wake-up call!

Snooze Function Details

The Mella features a convenient snooze function‚ allowing your child a few extra minutes of rest. When the alarm sounds‚ pressing any button activates the snooze. The snooze duration is pre-set and cannot be customized. The alarm will reactivate after the snooze period‚ gently encouraging your child to wake up.

Repeatedly snoozing may defeat the purpose of establishing a consistent wake-up routine. Encourage your child to resist the urge to snooze and start their day promptly. The snooze function is intended as a brief reprieve‚ not an extension of sleep time.

Night Light Features

The Mella offers customizable color options for its night light‚ alongside adjustable brightness levels‚ providing a comforting glow and functioning as a reading light.

Color Options and Customization

The LittleHippo Mella boasts a spectrum of color choices for its integrated night light‚ allowing parents to tailor the ambiance to their child’s preferences. Users can cycle through various hues‚ creating a soothing and personalized bedtime environment. Beyond simple color selection‚ the Mella enables customization of the night light’s display mode.

It can operate in a static color‚ gently illuminating the room with a consistent tone‚ or it can transition through a rainbow of colors‚ offering a dynamic and visually engaging experience. This feature is particularly useful for children who respond well to visual stimulation‚ promoting relaxation and easing the transition to sleep. The color settings are easily adjustable through the device’s intuitive interface.

Brightness Control for Night Light

The LittleHippo Mella understands that optimal night light brightness varies based on a child’s age and sensitivity. Therefore‚ it features adjustable brightness levels‚ ensuring a comfortable and non-disruptive sleep environment. Parents can easily dim the light to a subtle glow for younger children or increase the intensity for older kids who prefer a bit more illumination.

Multiple brightness settings are accessible through the device’s controls‚ allowing for precise customization. This feature is crucial for creating a soothing atmosphere without interfering with sleep quality. Adjusting the brightness also conserves battery life when using the Mella in night light mode‚ extending its usability.

Using the Night Light as a Reading Light

The LittleHippo Mella’s night light isn’t solely for soothing darkness; it can also function effectively as a gentle reading light. By increasing the brightness to its maximum setting‚ the Mella provides sufficient illumination for bedtime stories or quiet reading before sleep. This eliminates the need for harsh overhead lights‚ preserving a calming atmosphere.

Positioning the Mella close to the reading material ensures optimal visibility without straining a child’s eyes. The soft glow is less disruptive than brighter lamps‚ promoting relaxation and preparing them for sleep. It’s a convenient‚ multi-functional feature for bedtime routines.

Sound Machine Capabilities

The Mella offers diverse sound options‚ including white noise and lullabies‚ to create a soothing sleep environment for children‚ aiding peaceful rest.

Available Sound Options (White Noise‚ Lullabies‚ etc.)

The LittleHippo Mella boasts a rich selection of sounds designed to promote restful sleep for your child. Beyond classic white noise options‚ which effectively mask disruptive ambient sounds‚ the clock features a variety of calming lullabies. These gentle melodies are carefully chosen to soothe and relax little ones‚ preparing them for bedtime.

Furthermore‚ the Mella includes nature sounds like gentle rain or ocean waves‚ offering diverse auditory experiences. Parents can explore these options to discover which sounds best resonate with their child’s preferences‚ creating a personalized and comforting sleep environment. The variety ensures a tailored experience for optimal sleep quality.

Volume Control for Sound Machine

The LittleHippo Mella offers precise volume control for its integrated sound machine‚ allowing parents to customize the auditory experience to suit their child’s needs and the surrounding environment. Adjustments are easily made using dedicated buttons on the device‚ providing incremental control from a barely audible whisper to a more substantial sound level;

This feature is crucial for ensuring the sound doesn’t become disruptive‚ especially during lighter sleep phases. Parents can also set a comfortable volume that effectively masks background noise without being overly stimulating. The intuitive controls make it simple to find the perfect balance for a peaceful night’s sleep.

Creating Custom Soundscapes

The LittleHippo Mella doesn’t explicitly offer the ability to create entirely custom soundscapes in the traditional sense of uploading audio. However‚ users can effectively build personalized auditory environments by layering the pre-programmed sound options. Combining white noise with a gentle lullaby‚ for example‚ can produce a unique and soothing atmosphere tailored to a child’s preferences.

Experimenting with different combinations allows parents to discover what best promotes relaxation and sleep. While not fully customizable‚ this layering functionality provides a degree of personalization‚ enhancing the sound machine’s effectiveness.

Troubleshooting Common Issues

Common problems include the clock not displaying time‚ the alarm failing to sound‚ or unresponsive buttons; solutions are detailed within this section for optimal performance.

Clock Not Displaying Time

If the Mella clock’s display is blank‚ first ensure it’s properly powered. Check the power adapter connection and try a different outlet to rule out power source issues.

Next‚ verify the battery backup. Low batteries can prevent the clock from displaying the time‚ even when plugged in. Replace the batteries with fresh ones. If the issue persists‚ attempt a factory reset – consult the ‘Advanced Settings’ section for instructions.

Sometimes‚ a simple restart can resolve the problem; unplug the clock for 30 seconds‚ then plug it back in. If none of these steps work‚ contact customer support for further assistance.

Alarm Not Sounding

If the alarm fails to activate‚ confirm it’s correctly enabled. Press the alarm/sleep trainer/nap timer button to ensure the alarm icon is visible on the display. Double-check the set alarm time; an incorrect time will naturally prevent it from sounding.

Verify the volume level isn’t set to minimum or muted. Test different alarm sounds to rule out a specific sound malfunction. Ensure the clock isn’t in ‘snooze’ mode‚ as this temporarily silences the alarm. A factory reset‚ detailed in ‘Advanced Settings’‚ might resolve persistent issues.

Button Responsiveness Problems

If buttons aren’t responding‚ first ensure your fingers are dry and applying firm‚ direct pressure. Avoid using excessive force‚ which could damage the clock. Try restarting the Mella by disconnecting and reconnecting the power source. Low battery levels can sometimes cause sluggish responsiveness; replace or recharge as needed.

A factory reset‚ found within ‘Advanced Settings’‚ can often resolve software glitches affecting button functionality. If the issue persists‚ contact customer support‚ as it may indicate a hardware malfunction requiring professional attention;

Advanced Settings and Customization

Explore options like factory resets‚ firmware updates‚ and parental controls within the Mella’s settings to personalize the device and optimize its functionality.

Factory Reset Instructions

Performing a factory reset on your LittleHippo Mella will restore the clock to its original settings‚ erasing all personalized configurations. This is useful for troubleshooting persistent issues or preparing the device for a new user. To initiate a reset‚ locate the small reset button – often found on the underside or back of the clock.

Using a pin or similar small object‚ press and hold the reset button for approximately 10-15 seconds. The screen will likely flash or display a reset confirmation message. Once complete‚ you’ll need to reconfigure the time‚ date‚ alarm settings‚ and any preferred sleep trainer or sound machine preferences. Remember to save these instructions for future reference.

Updating the Clock’s Firmware

Keeping your LittleHippo Mella’s firmware updated ensures optimal performance and access to the latest features and bug fixes. Currently‚ the Mella clock does not support over-the-air (OTA) firmware updates. Checking for updates typically requires contacting LittleHippo customer support directly. They will provide instructions if an update is available.

The process may involve downloading a firmware file to a computer and then following specific steps to transfer it to the clock‚ potentially using a USB connection. Always follow the provided instructions carefully to avoid damaging the device. Regular checks with LittleHippo’s support team are recommended.

Parental Control Options

The LittleHippo Mella offers limited‚ but useful‚ parental control features designed to manage your child’s sleep environment; Brightness levels for the night light are adjustable‚ allowing you to create a calming atmosphere without excessive illumination. Sound volume can be controlled‚ ensuring it’s soothing and not disruptive.

Alarm sounds are also selectable‚ letting you choose a gentle wake-up tone. While there isn’t extensive customization‚ these settings allow parents to tailor the Mella to their child’s needs. Regularly reviewing these settings ensures a consistent and beneficial sleep routine.

Safety Information and Precautions

Always read all instructions before use to reduce the risk of fire‚ electric shock‚ or injury. Save these instructions for future reference.

Battery Safety Guidelines

When inserting or replacing batteries‚ ensure correct polarity (+ and -) as indicated. Only use batteries of the same type and do not mix old and new batteries. Remove batteries if the device will not be used for an extended period to prevent leakage and corrosion. Dispose of used batteries properly‚ following local regulations for battery recycling.

Do not attempt to recharge non-rechargeable batteries. Keep batteries out of reach of children to prevent ingestion. Swallowing a battery can cause serious internal injuries. If a battery is swallowed‚ seek immediate medical attention. Never short-circuit the batteries‚ and avoid exposing them to extreme heat or fire.

Cleaning and Maintenance

To maintain your LittleHippo Mella clock‚ regularly wipe the exterior with a soft‚ dry cloth. Avoid using abrasive cleaners or solvents‚ as they may damage the surface. For stubborn stains‚ lightly dampen the cloth with water and gently wipe the affected area‚ ensuring the clock is dry afterward.

Do not immerse the clock in water or any other liquid. Ensure the battery compartment is securely closed to prevent moisture or debris from entering. Periodically check the buttons and ports for dust accumulation and gently remove it with a soft brush. Proper cleaning will ensure the longevity and optimal performance of your Mella clock.

Important Warnings and Disclaimers

Please read all instructions before using the LittleHippo Mella clock to reduce the risk of injury or damage. This device is not intended for use by children without adult supervision. Do not disassemble or attempt to repair the clock yourself; contact customer support for assistance.

Avoid exposing the clock to extreme temperatures or humidity. The manufacturer is not responsible for damage resulting from misuse or failure to follow these instructions. Battery safety guidelines must be followed to prevent leakage or hazards. This device complies with safety standards‚ but responsible use is crucial.

Downloading the Instruction Manual

Access the Version 2.0 instruction manual for the LittleHippo Mella‚ available for download in English and French‚ offering comprehensive guidance.

Accessing Version 2.0 Instruction Manual

To obtain the most current and comprehensive guidance for your LittleHippo Mella‚ downloading Version 2.0 of the instruction manual is highly recommended. This updated manual includes detailed explanations of all features‚ troubleshooting tips‚ and safety information. You can easily find the downloadable file on the official LittleHippo website‚ typically located within the support or FAQ section.

The manual is presented as a PDF document‚ ensuring compatibility across various devices. It’s designed to be user-friendly‚ with clear diagrams and step-by-step instructions. Ensure you download the correct version for your specific Mella model to guarantee accurate information. Regularly checking for updates is also advisable‚ as LittleHippo may release revised manuals with further enhancements.

Available Languages (English‚ French‚ etc.)

LittleHippo understands the importance of accessibility and caters to a diverse user base by offering the Mella instruction manual in multiple languages. Currently‚ the Version 2.0 instruction manual is readily available in both English and French. This ensures that users from various linguistic backgrounds can easily understand and utilize all the features of the sleep trainer.

LittleHippo is committed to expanding language support in the future‚ potentially including Spanish‚ German‚ and other widely spoken languages. Checking the official website’s support section will provide the most up-to-date information regarding available language options for the Mella manual.

Finding Additional Support Resources

LittleHippo provides several avenues for users seeking further assistance beyond the downloadable instruction manual. The official LittleHippo website features a comprehensive FAQ section addressing common questions and troubleshooting tips. Additionally‚ their dedicated customer support team is available to assist with more complex issues via email or online chat.

YouTube channels like DIY Life Tech offer helpful demo videos and reviews of the Mella clock. Engaging with online parenting communities and forums can also provide valuable peer-to-peer support and shared experiences. Always refer to the official LittleHippo website for the most accurate and current support information.

drive cruiser 3 wheelchair user manual

Drive Medical’s Cruiser III offers a readily available, lightweight, and foldable wheelchair solution, detailed within its comprehensive manual for optimal user experience.

This guide assists users in understanding the wheelchair’s features, safe operation, and essential maintenance procedures, as outlined in the drive cruiser iii 3 wheelchair wheel chair pdf.

What is the Drive Cruiser 3?

The Drive Cruiser 3 is a popular, manually propelled wheelchair designed for individuals needing mobility assistance. As detailed in the Cruiser III wheelchair manual by Drive Medical, it’s recognized for its blend of affordability, durability, and portability. This wheelchair is constructed with a lightweight yet sturdy frame, making it easy to transport and maneuver.

The manual highlights its foldable design, a key feature for storage and travel. It’s intended for indoor and outdoor use on relatively smooth surfaces. The drive cruiser iii 3 wheelchair wheel chair pdf provides comprehensive information on its specifications, including dimensions and weight capacity. It’s a versatile option for short-term or long-term mobility needs, offering a balance of functionality and convenience.

Intended Use and User Profile

The Drive Cruiser 3, as outlined in its manual, is primarily intended for individuals with limited mobility who require assistance with ambulation. It’s suitable for both temporary and long-term use, aiding those recovering from surgery, managing chronic conditions, or experiencing age-related mobility decline.

The user profile typically includes individuals who can self-propel or are assisted by a caregiver. The drive cruiser iii 3 wheelchair wheel chair pdf details weight capacity limitations, making it crucial to select a model appropriate for the user’s size. It’s designed for use on smooth, level surfaces, both indoors and outdoors, and isn’t intended for strenuous activities or rough terrain. Proper assessment and fitting, guided by the manual, are essential for safe and effective use.

Important Safety Precautions

The Drive Cruiser 3 wheelchair manual emphasizes several critical safety precautions. Always inspect the wheelchair before each use, checking for loose parts or damage, as detailed in the drive cruiser iii 3 wheelchair wheel chair pdf. Ensure brakes are functioning correctly before transferring or moving.

Users should avoid slopes exceeding the manufacturer’s recommendations and exercise extreme caution on inclines. Never attempt to navigate obstacles larger than the wheels. The manual stresses the importance of proper seating and positioning to prevent pressure sores. Regularly review weight capacity limits and never exceed them. Caregivers must be properly trained in safe transfer techniques and wheelchair operation, referencing the manual for guidance.

Wheelchair Components & Features

Drive’s Cruiser III boasts a foldable frame, adjustable armrests and footrests, and a durable nylon seat, all thoroughly explained within the wheelchair manual.

Frame and Dimensions

The Drive Cruiser III features a robust and lightweight frame constructed for durability and ease of transport; According to the manual, the overall width of the wheelchair is 25.5 inches, providing ample space while remaining maneuverable in various environments.

The seat width is available in multiple sizes – 16, 18, and 20 inches – to accommodate different user needs, as detailed in the drive cruiser iii 3 wheelchair wheel chair documentation. The seat depth measures 18 inches, offering comfortable support. The front-to-back dimension, or seat-to-back height, is approximately 34 inches.

The folded width of the Cruiser III is a compact 12 inches, facilitating convenient storage and transportation. The wheelchair’s weight, varying slightly by model, typically ranges around 31-33 pounds, making it relatively easy to lift and carry. Refer to the manual for precise specifications related to your specific model.

Seat and Backrest

The Drive Cruiser III’s seat is constructed from durable nylon upholstery, providing a comfortable and supportive surface for extended use, as detailed in the manual. The seat features a standard depth of 18 inches, though variations may exist depending on the chosen model size.

The backrest is also made of nylon and is designed to offer adequate lumbar support. It’s typically a fixed-height backrest, meaning its height isn’t adjustable. The drive cruiser iii 3 wheelchair wheel chair pdf outlines the standard backrest height as approximately 16 inches.

For enhanced comfort, consider optional seat cushions, recommended in the manual for users requiring additional pressure relief. The seat frame is designed to withstand regular use, but proper care and cleaning, as described in the manual, are essential for longevity.

Armrests – Types and Adjustment

The Drive Cruiser III typically features standard, height-adjustable armrests, as detailed within the manual. These armrests are constructed from durable, black plastic and are designed to provide support and aid in transfers. The drive cruiser iii 3 wheelchair wheel chair pdf illustrates the adjustment mechanism.

Height adjustment is achieved through a series of push-button releases located on the armrest posts. Pressing these buttons allows for incremental height changes to accommodate individual user needs and preferences. The manual emphasizes ensuring all four buttons are securely locked after adjustment.

While standard armrests are common, optional features like flip-back armrests may be available. Refer to the manual for specific details regarding available armrest options and their corresponding adjustment procedures. Regular inspection of the armrests for stability is recommended.

Footrests – Types and Adjustment

The Drive Cruiser III wheelchair generally includes standard, swing-away footrests, as described in the manual. These footrests are designed to provide comfortable leg support and facilitate easy transfers. The drive cruiser iii 3 wheelchair wheel chair pdf provides visual guidance on their operation.

Swing-away functionality allows the footrests to be easily moved out of the way, enhancing transfer accessibility. This is achieved through a lever or button mechanism located near the footrest mounting point. The manual stresses confirming the footrests are securely locked into position before use.

Height adjustment may be possible on some models, detailed within the manual. Regularly check the footrest locking mechanisms for proper function. Optional elevating leg rests might be available; consult the manual for compatibility and adjustment instructions.

Assembly and Initial Setup

Drive Cruiser III setup, per the manual, involves unboxing, verifying components, and attaching footrests and armrests, ensuring secure connections before initial use.

Unboxing and Inventory

Carefully unpack the Drive Cruiser III wheelchair from its shipping container, referencing the manual for guidance. Begin by inspecting the carton for any visible damage sustained during transit. Once opened, meticulously inventory all components against the parts list provided within the manual or packaging.

This crucial step ensures all necessary parts are present before proceeding with assembly. Key components typically include the wheelchair frame, seat, backrest, armrests, footrests, wheels, and any accompanying hardware like screws or bolts. Note any discrepancies or missing parts immediately and contact Drive Medical customer support for assistance. Retain the packaging materials until assembly is complete and you’ve confirmed all parts are accounted for and in good condition.

Attaching Footrests

Refer to the Drive Cruiser III wheelchair manual for detailed instructions on footrest attachment. Typically, footrests slide into receivers located on either side of the wheelchair frame. Ensure the footrest orientation is correct – often indicated by ‘L’ for left and ‘R’ for right.

Align the footrest posts with the receivers and firmly push until they click securely into place. Verify a stable connection by gently attempting to lift each footrest. Some models may utilize a quick-release mechanism or require tightening a screw to secure the footrests. Regularly check the footrest attachment to prevent loosening during use, as detailed in the manual. Proper footrest installation is vital for user comfort and safety.

Attaching Armrests

Consult the Drive Cruiser III wheelchair manual for specific armrest attachment procedures. Generally, armrests slide downwards into designated sockets on the wheelchair frame sides. Align the armrest posts with the sockets, ensuring correct orientation – typically marked ‘L’ and ‘R’ for left and right sides.

Push firmly until the armrests click into a locked position. Some models feature height-adjustable armrests secured with buttons or levers; ensure these are properly engaged. Periodically inspect armrest stability, as outlined in the manual, to prevent loosening during operation. Securely attached armrests provide essential support and contribute to user safety and comfort. Verify a snug fit before each use.

Adjusting Seat Height

Refer to the Drive Cruiser III wheelchair manual for detailed seat height adjustment instructions. Typically, this involves accessing adjustment pins located on the wheelchair frame, often near the rear wheels. Remove the pins, then reposition them to the desired height setting – higher or lower – ensuring both sides are adjusted symmetrically for stability.

Reinsert the pins securely, verifying they are fully engaged. Proper seat height is crucial for comfortable positioning, footrest contact, and efficient propulsion. Regularly check pin security, as detailed in the manual, to prevent accidental height changes. Adjustments should be made with the wheelchair on a level surface and with the user’s assistance, if possible.

Operating the Wheelchair

Drive Cruiser III operation, as detailed in the manual, involves understanding steering, braking, and propulsion techniques for safe and efficient mobility.

Powering On/Off (If applicable ⎻ Power Models)

To power on a powered Cruiser III, locate the power switch, typically situated on the control panel. Ensure the battery is adequately charged, as detailed in the battery care section of the manual. Turn the key or toggle the switch to the ‘ON’ position. The control panel will illuminate, indicating the wheelchair is active.

To power off, reverse this process. Turn the key to the ‘OFF’ position or toggle the switch. Confirm the control panel is no longer illuminated. Always power off the wheelchair when not in use to conserve battery life and prevent accidental operation, as emphasized in the safety guidelines within the manual.

Steering and Maneuvering

The Drive Cruiser 3 wheelchair, as detailed in its manual, is steered by pushing on the handrims of the rear wheels. Practice is essential for smooth and controlled maneuvering. Applying force to one handrim while braking the other facilitates turning. Refer to the drive cruiser iii 3 wheelchair wheel chair manual for detailed illustrations.

For tighter turns, a combination of handrim propulsion and body weight shifting is recommended. Avoid abrupt or jerky movements, especially on inclines or uneven surfaces. The manual emphasizes maintaining a balanced posture for optimal control. Familiarize yourself with the wheelchair’s turning radius in a safe, open space before navigating confined areas.

Consistent practice, guided by the manual’s instructions, will enhance steering precision and overall maneuverability.

Braking System – Operation and Maintenance

The Drive Cruiser 3 wheelchair features lever-activated brakes located on each handle. As outlined in the manual, squeezing these levers engages the brakes on the rear wheels, bringing the wheelchair to a stop. Ensure both brakes are applied equally for balanced stopping power. The drive cruiser iii 3 wheelchair wheel chair manual provides visual guidance.

Regular inspection of the brake cables and levers is crucial. Check for fraying, kinks, or looseness. The manual details how to adjust brake tension if needed. Periodically clean the brake levers and cables to remove dirt and debris, ensuring smooth operation.

If brakes feel spongy or unresponsive, consult the manual or a qualified technician for assistance. Proper brake maintenance, as described in the manual, is vital for safety.

Speed Control (If applicable ⎻ Power Models)

Please note: the standard Drive Cruiser 3 is a manual wheelchair and does not have electronic speed control. This section applies only to power models, if applicable. Refer to your specific model’s manual for details. The drive cruiser iii 3 wheelchair wheel chair manual will detail the specifics.

Power models typically utilize a joystick or directional control to manage speed. Gentle movements control acceleration and deceleration. The manual illustrates the control layout and provides guidance on achieving smooth starts and stops. Maximum speed is often limited for safety.

The manual will explain how to check battery levels, as reduced power impacts speed. Always adhere to the speed limitations outlined in the manual and be mindful of surroundings.

Maintenance and Care

Drive Cruiser 3 longevity relies on regular care, detailed in the manual; cleaning, tire checks, and lubrication are key, ensuring smooth operation.

Cleaning Procedures

Regular cleaning, as detailed in the Drive Cruiser 3 wheelchair manual, is crucial for maintaining hygiene and extending the wheelchair’s lifespan. Use a mild detergent and warm water solution to wipe down the frame, seat, and backrest. Avoid abrasive cleaners, as they can damage the finish.

For vinyl or fabric upholstery, a soft cloth and gentle cleaning solution are recommended. Ensure the upholstery is thoroughly dried to prevent mildew. Pay close attention to areas prone to dirt accumulation, such as armrests and footrests. Inspect the wheelchair regularly for any signs of damage or wear, addressing them promptly to prevent further issues.

Always disconnect the power source (if applicable) before cleaning any electrical components. Refer to the manual for specific cleaning instructions related to the power system.

Tire Inflation and Inspection

Maintaining proper tire inflation, as outlined in the Drive Cruiser 3 wheelchair manual, is vital for smooth operation and maneuverability. Regularly check tire pressure – the recommended PSI is typically indicated on the tire sidewall. Use a standard tire pressure gauge for accurate readings.

Under-inflated tires increase rolling resistance, making the wheelchair harder to propel, while over-inflated tires can lead to an uncomfortable ride. Inspect tires for wear and tear, including cuts, bulges, or punctures. Replace damaged tires immediately to ensure safety.

The manual also details how to properly inspect the wheels for any loose spokes or damage. Consistent tire maintenance contributes to a longer wheelchair lifespan.

Battery Care and Charging (If applicable ⎻ Power Models)

For Drive Cruiser 3 power models, proper battery care, detailed in the wheelchair manual, is crucial for optimal performance and longevity. Always use the charger specifically designed for your wheelchair’s battery type. Avoid using aftermarket chargers, as they can damage the battery.

Charge the battery fully before the first use. Subsequent charging should occur after each use, or at least once a week if the wheelchair is not used frequently. Avoid completely discharging the battery, as this can shorten its lifespan.

Store the wheelchair in a cool, dry place, and disconnect the charger when not in use. Refer to the manual for specific charging times and battery maintenance guidelines.

Lubrication of Moving Parts

Regular lubrication, as detailed in the Drive Cruiser 3 wheelchair manual, ensures smooth operation and prevents premature wear of moving components. Focus on wheel bearings, axles, and folding mechanisms. Use a lightweight oil or silicone-based lubricant – avoid heavy greases which can attract dirt.

Apply lubricant sparingly to the designated points, wiping away any excess. Inspect the wheels and axles for any signs of corrosion or damage during lubrication. The manual provides specific diagrams indicating lubrication points.

Periodic lubrication, alongside other maintenance tasks, contributes to the wheelchair’s longevity and user safety. Consistent care, following the manual’s guidance, is essential.

Troubleshooting Common Issues

Drive Cruiser 3’s manual offers solutions for typical problems like immobility, brake failures, or flat tires, ensuring continued safe and effective wheelchair operation.

Wheelchair Won’t Move

If your Drive Cruiser 3 wheelchair isn’t moving, first, verify the brakes aren’t engaged; ensure the brake levers are fully disengaged on both sides. Consult the user manual for specific brake lever operation instructions.

Next, for power models, check the battery indicator and confirm the battery is adequately charged. A depleted battery is a common cause. If the battery appears charged, inspect the power cord and charging port for damage.

For manual wheelchairs, examine the rear wheels for obstructions like debris or tangled clothing. Ensure the axles are securely fastened and the wheels spin freely. If the problem persists, a mechanical issue may require professional servicing – refer to the manual for authorized service locations.

Brakes Not Engaging

If the brakes on your Drive Cruiser 3 aren’t engaging, initial troubleshooting involves visually inspecting the brake cables and levers for any obvious damage or disconnection. The user manual details the brake system’s components and their proper function.

Ensure the brake levers are fully extending when pressed. If they feel loose or spongy, the brake cables may require adjustment. Refer to the manual for specific cable adjustment procedures; improper adjustment can compromise safety.

Check for debris or obstructions around the wheels and brake calipers. If the issue persists, a professional inspection is recommended, as brake failure can be dangerous. Do not operate the wheelchair with malfunctioning brakes – consult the manual for service contact information.

Battery Issues (If applicable ― Power Models)

If experiencing battery issues with your Drive Cruiser 3 power model, first verify the charging process is complete, as detailed in the user manual. A faulty charger or power outlet can prevent proper charging. Check the charger’s indicator light for confirmation.

Low battery life may indicate the need for replacement; the manual specifies the correct battery type and voltage. Avoid deep discharging, as it can shorten battery lifespan; Ensure battery terminals are clean and free of corrosion.

If the wheelchair doesn’t power on despite a full charge, consult the manual’s troubleshooting section for fuse checks or potential wiring issues. Contact a qualified technician for complex battery problems.

Flat Tires

Dealing with flat tires on your Drive Cruiser 3, refer to the user manual for specific tire replacement instructions. Ensure the wheelchair is stable and brakes are engaged before attempting any repairs. Identify the tire size, as specified in the manual, when purchasing a replacement.

You’ll need tire levers to safely remove the tire from the rim. Inspect the inner tube for punctures and replace if necessary. Ensure the tire is properly seated on the rim before inflating to the recommended pressure, found in the manual.

Regular tire inflation, as outlined in the maintenance section of the manual, helps prevent flats. If unsure about the repair process, consult a qualified wheelchair technician.

Safety Guidelines & Warnings

The Drive Cruiser 3 manual emphasizes weight capacity limits, slope restrictions, and proper transportation techniques to prevent tip-overs and ensure user safety.

Slope and Incline Limitations

The Drive Cruiser 3 wheelchair manual strongly advises users to exercise extreme caution when navigating slopes or inclines. Attempting to ascend or descend excessively steep gradients significantly increases the risk of tipping, potentially causing serious injury.

The manual doesn’t specify exact degree limitations, but emphasizes assessing the slope’s steepness and surface condition before proceeding. A smooth, dry surface is crucial for maintaining traction.

Power wheelchair users should utilize the lowest speed setting when on inclines. Manual wheelchair users require a capable assistant for safe navigation; Always maintain a slow and controlled pace, avoiding sudden movements or abrupt stops. Regularly inspect the braking system to ensure optimal functionality, especially before tackling any incline. Prioritize safety and avoid slopes if unsure.

Weight Capacity

The Drive Cruiser 3 wheelchair manual clearly states the maximum weight capacity of the wheelchair is 250 pounds (113 kilograms). Exceeding this limit compromises the wheelchair’s structural integrity and operational safety, potentially leading to component failure and increasing the risk of accidents.

The manual emphasizes that this weight limit includes the user’s body weight plus any additional items carried, such as bags, groceries, or medical equipment. Regularly verify that the combined weight remains within the specified limit.

Operating the wheelchair with a load exceeding 250 pounds voids the warranty and significantly increases the risk of tipping or mechanical breakdown. Prioritize safety by adhering strictly to the stated weight capacity guidelines outlined in the drive cruiser iii 3 wheelchair wheel chair documentation.

Transportation and Storage

The Drive Cruiser 3 wheelchair manual details proper procedures for safe transportation and storage. When transporting, ensure the wheelchair is secured to prevent movement and damage, utilizing appropriate tie-down straps in vehicles.

For storage, the manual recommends a clean, dry environment, away from extreme temperatures and direct sunlight. Folding the wheelchair correctly, as illustrated in the drive cruiser iii 3 wheelchair wheel chair guide, minimizes storage space requirements.

Regularly inspect the wheelchair for any damage incurred during transportation or storage. Avoid stacking heavy objects on top of the wheelchair, as this could cause deformation or component failure. Proper care extends the lifespan and maintains the wheelchair’s functionality.

Preventing Tip-Overs

The Drive Cruiser 3 wheelchair manual emphasizes safety, particularly regarding tip-over prevention. Avoid sudden or sharp turns, especially at higher speeds, as detailed in the drive cruiser iii 3 wheelchair wheel chair pdf.

When navigating inclines, always approach them straight on and avoid attempting to turn while ascending or descending. Be mindful of uneven surfaces and obstacles that could destabilize the wheelchair.

The manual stresses the importance of maintaining a balanced posture while seated. Avoid leaning excessively to one side or reaching for objects beyond the wheelchair’s base of support; Regularly inspect the tires for proper inflation, as this contributes to stability.

aqua oasis humidifier manual

Aqua Oasis Humidifier Manual: A Comprehensive Guide

Welcome! This manual provides essential guidance for your Aqua Oasis AO-101 humidifier, ensuring optimal performance and longevity․ Explore features and safety precautions․

Congratulations on choosing the Aqua Oasis humidifier! This device is designed to enhance your indoor air quality, providing soothing relief from dryness, especially during colder months․ The AO-101 model, rigorously tested by Consumer Reports, utilizes advanced cool mist technology to deliver a comfortable and healthy environment․

This manual serves as a comprehensive guide, detailing everything from initial setup and operation to maintenance and troubleshooting․ We understand the importance of a reliable and efficient humidifier, and we’ve crafted this resource to ensure you experience the full benefits of your Aqua Oasis product․ No more struggling with leaky or flimsy humidifiers – enjoy consistent, quiet operation!

Understanding Your Model: AO-101

The Aqua Oasis AO-101 is a cool mist humidifier engineered for bedrooms and larger rooms, boasting a generous 2․2L water tank capacity․ Its ultrasonic technology ensures quiet operation, creating a peaceful atmosphere․ A key feature is the adjustable 360° rotation nozzle, allowing you to direct mist precisely where needed․

Identifying your model is crucial for support and parts replacement; locate the model number (AO-101) on the product label․ This humidifier has undergone testing, demonstrating its performance capabilities․ Remember to reference this number when contacting customer support or ordering replacement filters, ensuring a perfect match for your Aqua Oasis device․

Key Features and Benefits

The Aqua Oasis humidifier offers several advantages for enhanced comfort․ Cool Mist Technology provides soothing, non-heated relief from dry air, ideal for sensitive individuals․ The substantial 2․2L Water Tank Capacity minimizes frequent refills, allowing for extended operation—perfect for overnight use․

Furthermore, the Adjustable 360° Rotation Nozzle directs mist precisely where you need it, optimizing humidity distribution throughout the room․ This model avoids the issues of flimsy or leaky designs common in cheaper humidifiers, offering reliable performance․ Enjoy a quieter, more comfortable environment with the AO-101’s efficient and user-friendly design․

Cool Mist Technology

The Aqua Oasis humidifier utilizes advanced cool mist technology, offering a safe and comfortable alternative to warm mist humidifiers․ This method preserves the beneficial properties of essential oils, should you choose to use them, without degradation from heat․ Cool mist is particularly beneficial for those sensitive to warm air or seeking relief from congestion without increased room temperature․

Unlike heated models, cool mist poses no burn risk, making it ideal for households with children or pets․ The ultrasonic operation ensures a virtually silent experience, promoting restful sleep and a peaceful environment․ Enjoy the benefits of increased humidity without compromising safety or tranquility․

2․2L Water Tank Capacity

Your Aqua Oasis humidifier features a generous 2․2-liter (approximately 0․58 gallons) water tank, designed for extended operation without frequent refills․ This substantial capacity allows for up to 24 hours of continuous cool mist output on the lowest setting, providing consistent humidity throughout the night or during long workdays․

The large tank minimizes the need for constant monitoring and refilling, offering convenience and uninterrupted comfort․ While the runtime varies based on mist level selection, the 2․2L capacity ensures prolonged use․ Regularly check the water level indicator to prevent operation without sufficient water․

Adjustable 360° Rotation Nozzle

The Aqua Oasis humidifier is equipped with an adjustable 360-degree rotation nozzle, allowing you to direct the cool mist precisely where it’s needed most․ This feature ensures optimal humidity distribution throughout your room, whether you prefer a wide, encompassing mist or a focused stream․

Simply rotate the nozzle to customize the mist direction, targeting specific areas or avoiding sensitive electronics․ This flexibility enhances the humidifier’s effectiveness and provides personalized comfort․ Experiment with different angles to find the ideal mist flow for your space, maximizing the benefits of increased humidity․

Setting Up Your Aqua Oasis Humidifier

Before first use, carefully unpack your Aqua Oasis AO-101 humidifier and ensure all components are present․ Choose a stable, level surface for placement, avoiding direct sunlight or heat sources․ Ensure adequate space around the unit for proper ventilation․

Proper placement is crucial for efficient operation and longevity; Avoid areas prone to spills or excessive dust․ Once positioned, you’re ready to fill the water tank – a simple process detailed in the following section․ Remember to always unplug the humidifier before filling or cleaning․ Initial setup takes only minutes, preparing you for refreshing, moisturized air!

Initial Setup and Placement

Upon unboxing your Aqua Oasis AO-101, inspect for any damage․ Select a firm, flat surface, minimizing the risk of tipping․ Maintain at least two feet of clear space around the humidifier for optimal airflow and to prevent obstructions to the 360° nozzle rotation․

Avoid placing the unit directly on wooden furniture without protection, as moisture may cause damage․ Do not position near electronics sensitive to humidity․ Proper placement ensures efficient mist distribution and prevents potential issues․ Prioritize a location that maximizes comfort and accessibility for operation and maintenance․

Filling the Water Tank

To fill the 2․2L water tank, first ensure the humidifier is powered off․ Gently remove the tank from the base․ Locate the water tank opening and slowly pour clean, cool water into the tank – distilled or purified water is recommended to minimize mineral buildup․

Do not exceed the maximum water level indicated on the tank․ Securely replace the tank onto the base, ensuring a proper seal․ Improper seating can prevent operation․ Avoid adding essential oils directly into the water tank, as this may cause damage․ Always handle the tank with care to prevent spills․

Operating Instructions

After filling the water tank and securely placing it on the base, you’re ready to operate your Aqua Oasis humidifier․ To power on, locate the power button – a single press activates the unit․ The humidifier will initially operate at the default mist level․

Adjust the mist output using the designated control․ Higher settings provide increased humidity, while lower settings conserve water․ Utilize the 360° rotation nozzle to direct the mist precisely where needed․ Regularly monitor the water level and refill as necessary for continuous operation․ Always unplug the unit before cleaning or maintenance․

Powering On/Off

Operating your Aqua Oasis humidifier is straightforward․ To power on the unit, firmly press the clearly marked power button located on the front panel․ A gentle indicator light will illuminate, confirming activation․ To power off, simply press the same button again․

Ensure the water tank is properly seated before attempting to power on the device; otherwise, it may not function․ The humidifier features automatic shut-off when the water level is critically low, preventing damage․ Always unplug the unit from the power source before performing any maintenance or cleaning procedures for safety․

Mist Level Adjustment

The Aqua Oasis AO-101 humidifier offers adjustable mist output to cater to your comfort preferences․ A dedicated control knob allows you to select from multiple mist levels – low, medium, and high․ Rotating the knob clockwise increases the mist intensity, while rotating it counter-clockwise decreases it․

Begin with the low setting and gradually increase as needed to achieve your desired humidity level․ Consider room size and personal sensitivity when adjusting․ Higher mist levels consume water more rapidly․ Monitor the water tank level frequently to avoid automatic shut-off due to low water․

Maintenance and Cleaning

Regular maintenance ensures optimal performance and extends the lifespan of your Aqua Oasis humidifier․ Consistent cleaning prevents mineral buildup and bacterial growth․ Always disconnect the humidifier from the power source before any maintenance․ Empty the water tank daily and rinse it thoroughly with clean water․ Wipe down the exterior with a soft, damp cloth․

Avoid using harsh chemicals or abrasive cleaners, as they can damage the unit․ A weekly deep clean is recommended, detailed in the following section․ Proper care guarantees fresh, clean mist and efficient operation, contributing to a healthier indoor environment․

Daily Cleaning Procedures

To maintain peak performance, implement these daily cleaning steps․ First, disconnect the Aqua Oasis humidifier from its power source․ Next, carefully empty any remaining water from the tank and base․ Rinse the tank and base thoroughly with fresh, clean water, ensuring all residue is removed․ Use a soft cloth to wipe down the exterior surfaces, preventing dust accumulation․

Pay close attention to the nozzle, gently cleaning it to remove any mineral deposits․ This simple routine prevents buildup and ensures consistently fresh, clean mist․ Consistent daily care extends the humidifier’s life and maintains optimal functionality․

Deep Cleaning (Weekly)

For a thorough cleanse, perform a weekly deep cleaning of your Aqua Oasis humidifier․ Begin by disconnecting the unit and emptying the water tank․ Fill the tank with a mixture of equal parts white vinegar and water․ Allow this solution to sit for at least 30 minutes to loosen mineral buildup․

After soaking, scrub the tank and base with a soft brush, paying attention to hard-to-reach areas․ Rinse thoroughly with clean water until the vinegar scent is gone․ Wipe down all exterior surfaces․ This weekly routine prevents mold and bacteria growth, ensuring healthy and efficient operation․

Troubleshooting Common Issues

Encountering problems with your Aqua Oasis humidifier? Here’s a quick guide․ If the unit doesn’t power on, ensure it’s properly plugged in and the power outlet is functioning․ For low mist output, check the water level – it must be above the minimum line․ Also, verify the nozzle isn’t clogged; gently clean it with a soft brush․

Mineral buildup can also reduce mist․ Regular cleaning, as detailed in the maintenance section, is crucial․ If issues persist, consult the FAQ or contact customer support, providing your AO-101 model number for efficient assistance․

Humidifier Not Turning On

If your Aqua Oasis AO-101 humidifier fails to power on, begin with the simplest checks․ First, confirm the unit is securely plugged into a working electrical outlet․ Test the outlet with another device to rule out a power supply issue․ Next, inspect the power cord for any visible damage, such as cuts or fraying․

Ensure the water tank is correctly seated on the base; a proper connection is essential for operation․ If these steps don’t resolve the issue, consult the warranty information or contact customer support, providing your model number for assistance․

Low Mist Output

Experiencing reduced mist output from your Aqua Oasis AO-101? Several factors could contribute to this․ First, verify the water tank is adequately filled – the humidifier requires sufficient water to generate optimal mist․ Next, check the nozzle for any obstructions or mineral buildup; a clogged nozzle restricts airflow․

Ensure the surrounding air isn’t excessively dry, as extremely low humidity can limit visible mist․ Finally, consider the water quality; using distilled or purified water minimizes mineral deposits․ If the problem persists, a thorough cleaning, as outlined in the maintenance section, is recommended․

Water Type Recommendations

To maximize the lifespan and performance of your Aqua Oasis humidifier, specifically the AO-101 model, using the correct water type is crucial․ We strongly recommend utilizing distilled or purified water․ Tap water often contains minerals that can accumulate within the humidifier, leading to reduced mist output and potential damage over time․

These mineral deposits can also promote bacterial growth․ While filtered tap water is better than untreated, distilled or purified water remains the optimal choice․ Regularly cleaning your humidifier, even with appropriate water, is still essential for maintaining hygiene and efficiency․ Always refer to your model number for specific guidance․

Safety Precautions

Prioritize safety when operating your Aqua Oasis humidifier, model AO-101․ Always unplug the unit before cleaning or filling the water tank․ Never immerse the base in water, as this poses an electrical hazard․ Keep the humidifier out of reach of children and pets to prevent accidental tipping or ingestion of water․

Do not operate the humidifier in a room with open flames or flammable materials․ Ensure proper ventilation and avoid placing the unit directly on wooden furniture without protection, as moisture may cause damage․ Regularly inspect the power cord for any signs of wear or damage, and discontinue use if found․

Understanding the Indicator Lights

Your Aqua Oasis AO-101 humidifier utilizes indicator lights to communicate its operational status․ A solid blue light typically signifies normal operation, indicating the unit is powered on and misting․ A flashing blue light may signal low water levels, prompting you to refill the 2․2L tank․

If the light turns red, it could indicate an issue requiring attention, such as a potential malfunction or the need for cleaning․ Refer to the troubleshooting section for further guidance․ Pay close attention to these visual cues to ensure optimal performance and address any concerns promptly․

Replacing Parts

Maintaining your Aqua Oasis AO-101 humidifier involves periodic part replacement to ensure optimal functionality․ While the AO-101 may or may not include a replaceable filter (check your specific model details), regular cleaning is crucial․ If a filter is present, replace it every 3-6 months, depending on water quality and usage․

For other components, such as the ultrasonic transducer, contact customer support for guidance․ Always use genuine Aqua Oasis replacement parts to avoid damaging your humidifier and maintain warranty validity․ Refer to the warranty information for details on covered replacements and procedures․

Filter Replacement (If Applicable)

If your Aqua Oasis AO-101 model includes a filter, replacement is vital for maintaining air quality and humidifier performance․ Begin by ensuring the unit is powered off and unplugged․ Locate the filter access panel, typically on the base or rear of the humidifier; Gently remove the old filter, noting its orientation for correct installation of the new one․

Rinse the filter compartment to remove any debris․ Insert the new Aqua Oasis filter, ensuring a snug fit․ Replace the access panel․ A fresh filter improves mist output and reduces mineral buildup․ Replace every 3-6 months, or more frequently with hard water․

Warranty Information

Your Aqua Oasis AO-101 humidifier is covered by a one-year limited warranty against defects in materials and workmanship from the date of original purchase․ This warranty does not cover damage resulting from misuse, abuse, accidents, or unauthorized modifications․ Proof of purchase is required for all warranty claims․

To initiate a warranty claim, please contact Aqua Oasis Customer Support with your model number (AO-101) and a detailed description of the issue․ We will provide instructions for returning the unit or arranging for repair․ This warranty gives you specific legal rights, and you may have other rights which vary by location․

Frequently Asked Questions (FAQ)

Q: What water type should I use? A: We recommend using distilled or purified water to minimize mineral buildup and prolong the humidifier’s lifespan․ Tap water can leave residue․

Q: How often should I clean the humidifier? A: Daily rinsing of the water tank is recommended․ A thorough deep clean should be performed weekly to prevent mold and bacteria growth․

Q: My humidifier isn’t producing mist․ What should I do? A: Ensure the water tank is properly filled and the unit is powered on․ Check the nozzle for obstructions․ Refer to the Troubleshooting section․

Contacting Customer Support

Need assistance with your Aqua Oasis humidifier? Our dedicated customer support team is here to help! Please have your model number (AO-101) readily available for faster service․

Email: support@aquaoasis․com – Expect a response within 24-48 business hours;

Phone: 1-800-AQUA-OASIS (1-800-278-2627) – Available Monday-Friday, 9 AM to 5 PM EST․

Website: www․aquaoasis․com/support – Access our online knowledge base, troubleshooting guides, and live chat feature․ We strive to provide excellent support and resolve any issues promptly․

amana dryer instruction manual

Amana Dryer Instruction Manual: A Comprehensive Guide

Welcome! This manual provides essential guidance for your Amana dryer, covering model specifics, safety, operation, maintenance, and troubleshooting. Discover Amana’s 80+ years of innovation!

Understanding Your Amana Dryer Model

Identifying your specific Amana dryer model is crucial for accessing the correct support, parts, and instructions. Amana dryers come in various configurations, including front-load and top-load designs, each with unique features and operational nuances. Knowing your model number allows you to pinpoint precise details regarding drying cycles, control panel functions, and maintenance procedures.

Locating the model number is straightforward. For front-load dryers, it’s typically found horizontally on the shroud, inside the dryer door opening. This label contains vital information, including the model number and serial number. The serial number is important for warranty claims and service requests. Keep this information readily available for future reference.

Amana offers a range of dryers designed to fit diverse laundry needs. From basic models offering essential drying cycles to more advanced units with moisture sensors and specialized programs, understanding your model’s capabilities ensures optimal performance and longevity. Refer to the model number to access detailed specifications and features specific to your appliance on the Amana website. This will help you maximize its efficiency and enjoy years of reliable service.

Locating the Model Number

Finding your Amana dryer’s model number is the first step towards accessing specific support and documentation. This unique identifier unlocks a wealth of information, from detailed manuals to compatible replacement parts. The model number is essential when contacting Amana customer support or ordering repairs.

For Amana front-load dryers, the model number is conveniently located horizontally on the dryer shroud, situated inside the door opening. Carefully inspect this area; the label is usually prominently displayed. The serial number will also be on this label, which is vital for warranty verification and service history.

If you have a top-load Amana dryer, the location may vary slightly. Typically, you’ll find the model and serial number on a label affixed to the dryer’s cabinet, often on the inside of the door or on the back panel. You may need to gently move the dryer to access the rear label. Record both the model and serial numbers in a safe place for future reference. Having this information readily available streamlines any service or support interactions.

Safety Precautions

Your safety is paramount when operating your Amana dryer. Before initial use, and periodically thereafter, carefully review these crucial safety precautions. Failure to adhere to these guidelines could result in fire, electric shock, or personal injury. Always disconnect the dryer from the power supply before performing any maintenance or cleaning.

Never dry items that have been soaked in flammable liquids, such as gasoline, cleaning solvents, or oil. These substances pose a significant fire hazard, even after being washed. Ensure the dryer vent is unobstructed and cleaned regularly to prevent lint buildup, a leading cause of dryer fires.

Do not overload the dryer, as this can impede proper airflow and increase drying time, potentially leading to overheating. Keep the surrounding area clear of combustible materials. Supervise children closely when they are near the dryer. Never allow them to play with the controls or climb inside. If the dryer malfunctions, immediately discontinue use and contact Amana customer support for assistance.

Dryer Control Panel Overview

Familiarizing yourself with the Amana dryer’s control panel is key to efficient operation. The panel typically features a cycle selector dial, allowing you to choose from a variety of pre-programmed drying cycles tailored to different fabric types and needs. Common cycles include Normal, Delicate, Timed Dry, and Wrinkle Prevent.

Temperature settings, often indicated as High, Medium, or Low heat, are crucial for protecting your garments. A ‘Sensor Dry’ option automatically detects moisture levels and adjusts drying time accordingly, preventing over-drying and saving energy. Additional features may include options for wrinkle reduction, end-of-cycle signal, and control lock.

Digital displays, present on some models, provide cycle progress information and remaining drying time. Buttons allow for customization of cycles and settings. Refer to your specific model’s diagram (often located inside the dryer door) for precise button and dial functions. Understanding these controls ensures optimal drying performance and garment care.

Understanding Drying Cycles

Amana dryers offer a range of drying cycles designed for various fabric types and drying needs. The ‘Normal’ cycle is ideal for everyday cotton and linen items, utilizing medium-high heat for efficient drying. ‘Delicate’ cycles employ low heat, protecting sensitive fabrics like lingerie, silk, and synthetics from damage.

‘Timed Dry’ allows you to manually set the drying time, useful for small loads or items requiring specific drying durations. ‘Permanent Press’ cycles use medium heat and a cool-down phase to minimize wrinkles in synthetic blends. A ‘Heavy Duty’ cycle provides high heat for bulky items like towels and jeans.

‘Sensor Dry’ cycles automatically detect moisture levels, stopping the dryer when clothes are dry, preventing over-drying and saving energy. Some models include specialized cycles like ‘Bulky/Sheets’ or ‘Sanitize’ for specific needs. Always consult the garment care label before selecting a cycle to ensure proper fabric care and prevent damage.

Temperature Settings Explained

Amana dryers provide adjustable temperature settings to accommodate diverse fabric types and prevent damage. ‘High’ heat is suitable for sturdy cottons and towels, offering rapid drying. ‘Medium’ heat is ideal for most everyday laundry, including synthetics and blends, balancing drying speed with fabric protection.

‘Low’ heat is recommended for delicate items like lingerie, silk, and heat-sensitive fabrics, minimizing shrinkage and preventing damage. ‘Air Dry’ or ‘No Heat’ utilizes room temperature air to fluff items or dry heat-sensitive materials. Understanding these settings is crucial for optimal garment care.

Sensor Dry cycles often automatically adjust temperature based on moisture levels, ensuring efficient drying without overheating. Always check garment care labels for specific temperature recommendations. Incorrect temperature settings can lead to shrinkage, fading, or damage to your clothes. Utilizing the correct setting extends the life of your garments and maintains their quality.

Loading and Unloading the Dryer

Proper loading is essential for efficient drying and preventing wrinkles. Avoid overloading the dryer; items need space to tumble freely for even heat distribution. Separate heavier items like towels from lighter ones like shirts to ensure all garments dry effectively. Distribute the load evenly around the drum to maintain balance.

Before unloading, ensure the dryer has completely stopped. Carefully remove items, shaking them out to minimize wrinkles. Check pockets for any forgotten objects – tissues, coins, or lighters can cause significant damage or pose a fire hazard. Promptly remove clothes to prevent mildew growth.

Clean the lint filter after each load to maintain optimal airflow and drying performance. A clogged filter restricts airflow, increasing drying time and potentially creating a fire risk. Regularly inspect the dryer vent for obstructions as well. Following these guidelines ensures safe and effective dryer operation, preserving your clothes and appliance.

Proper Lint Filter Maintenance

Maintaining a clean lint filter is paramount for dryer safety and performance. The lint filter captures fabric fibers released during drying, preventing them from accumulating in the vent system. Always clean the filter after each and every load – this simple step significantly reduces drying time and energy consumption.

To clean the filter, simply remove it from its housing (usually located inside the dryer door or on top of the dryer). Roll the lint off with your fingers or use a lint brush. Avoid using water or chemical cleaners, as these can damage the filter material. Inspect the filter regularly for tears or damage; a damaged filter allows lint to pass through, increasing fire risk.

Periodically, wash the lint filter with mild detergent and warm water to remove any buildup from fabric softeners or dryer sheets. Ensure the filter is completely dry before reinstalling. A clogged lint filter is a leading cause of dryer fires, so diligent maintenance is crucial for protecting your home and family.

Cleaning the Dryer Drum

Regularly cleaning the dryer drum helps maintain optimal performance and prevents unpleasant odors. Over time, residue from detergents, fabric softeners, and transferred dyes can build up inside the drum. To clean, begin by unplugging the dryer to ensure safety. Prepare a solution of warm water and mild detergent – avoid abrasive cleaners, as they can damage the drum’s finish.

Dampen a soft cloth with the cleaning solution and wipe down the entire interior of the drum, paying attention to any visible residue. For stubborn stains, let the solution sit for a few minutes before wiping. After cleaning, use a separate damp cloth with clean water to rinse away any remaining detergent.

Leave the dryer door open to allow the drum to air dry completely before using it again. This prevents moisture buildup and potential mildew growth. Consider running an empty cycle on a low heat setting to further ensure dryness. Consistent drum cleaning contributes to efficient drying and prolongs the life of your Amana dryer.

Troubleshooting Common Issues: Dryer Won’t Start

If your Amana dryer fails to start, several potential issues could be the cause. First, verify the power supply – ensure the dryer is securely plugged into a functioning outlet. Check your home’s circuit breaker or fuse box to confirm the circuit hasn’t tripped or blown. A tripped breaker is a common culprit.

Next, examine the dryer door latch. The dryer won’t operate if the latch isn’t securely closed, activating the door switch. Ensure nothing obstructs the latch mechanism. Also, check the control panel for any error codes displayed, as these can provide valuable diagnostic information. Refer to the “Understanding Error Codes” section for details;

If these steps don’t resolve the issue, the problem might lie with the thermal fuse or the drive belt. These components require professional inspection and replacement. Do not attempt to repair these yourself. Contact Amana Customer Support for assistance or to schedule a service appointment. Safety first – always disconnect power before any inspection.

Troubleshooting Common Issues: Dryer Not Heating

If your Amana dryer isn’t producing heat, a few key areas need investigation. Begin by confirming proper venting. A clogged vent restricts airflow, causing overheating and triggering safety mechanisms that shut off the heating element. Ensure the vent is clear of lint and obstructions, both inside the dryer and externally.

Next, check the gas supply (for gas dryers). Verify the gas valve is fully open. For electric dryers, inspect the heating element and the thermal fuse. A blown thermal fuse is a common cause of no heat, often resulting from restricted airflow. These components require professional diagnosis and replacement.

Also, examine the igniter (gas dryers). A faulty igniter won’t light the burner. If you suspect an issue with the heating element, thermal fuse, or igniter, do not attempt self-repair. Contact Amana Customer Support or a qualified technician. Disconnect power before any inspection for safety. Refer to the warranty information for coverage details.

Troubleshooting Common Issues: Excessive Noise

Unusual noises from your Amana dryer can indicate several potential problems. A common culprit is foreign objects – coins, buttons, or small items – lodged in the dryer drum or lint filter housing. Thoroughly check these areas, disconnecting power first for safety;

Worn drum support rollers or glides can cause a rumbling or scraping sound, especially during rotation. These parts facilitate smooth drum movement and require replacement if damaged. A failing blower wheel often produces a whistling or squealing noise; Inspect the blower housing for obstructions as well.

The drive belt, if loose or worn, can slap against the dryer’s internal components, creating a slapping sound. Professional inspection is recommended for belt replacement or tension adjustment. If the noise persists after checking these areas, or if you’re uncomfortable disassembling the dryer, contact Amana Customer Support or a qualified appliance repair technician. Ignoring excessive noise can lead to further damage;

Understanding Error Codes

Amana dryers utilize error codes to diagnose internal malfunctions, displayed on the control panel. These codes provide valuable information for troubleshooting and often indicate specific component failures. While a comprehensive list varies by model, some common codes offer initial guidance.

An “E1” or “E2” code frequently signals a heating element issue, potentially a break in the circuit or a faulty element. “LE” indicates a moisture sensor problem, suggesting the dryer isn’t accurately detecting dryness. “OE” typically points to an over-heating situation, requiring immediate attention to prevent damage.

Consult your specific dryer’s manual for a complete error code directory. Record the exact code displayed before attempting any repairs. Disconnect the power before inspecting internal components. If you are uncomfortable interpreting or addressing error codes, contact Amana Customer Support or a certified appliance technician. Attempting repairs without proper knowledge can void your warranty and create safety hazards.

Amana Dryer Warranty Information

Your Amana dryer is protected by a limited warranty, safeguarding against manufacturing defects in materials and workmanship. The standard warranty typically covers parts and labor for one year from the original purchase date. However, specific coverage durations can vary based on the model and purchase location.

Extended warranties are often available for purchase, offering additional protection beyond the initial coverage period. These extended plans may cover components like the motor or electronic controls for several years. Carefully review your warranty documentation to understand the specific terms, conditions, and exclusions.

To make a warranty claim, retain your proof of purchase (receipt or invoice) and contact Amana Customer Support. Be prepared to provide the model number, serial number, and a detailed description of the issue. Warranty coverage is voided by misuse, improper installation, or unauthorized repairs; Registering your appliance online can streamline the claims process.

Amana Customer Support & Resources

Need assistance with your Amana dryer? Amana provides multiple avenues for support. Their dedicated customer service team is available to answer questions, troubleshoot issues, and facilitate warranty claims. You can reach them via phone, typically during standard business hours, or through their online support portal.

The Amana website (amana.com) is a valuable resource, offering a comprehensive FAQ section, downloadable manuals, and helpful how-to videos. You can also locate authorized service providers in your area for in-home repairs. For European dispute resolution, the European Commission provides an online platform: https://ec.europa.eu/consumers/odr.

Email support is also available; for example, joerg.ringelstein@amana-consulting.de can be contacted for specific inquiries. Don’t hesitate to utilize these resources to maximize your dryer’s performance and longevity. Amana is committed to providing excellent customer care and ensuring your satisfaction with their appliances.